Pipe
pipe란 요청 데이터 변환, 유효성 검사 등의 작업을 수행하는데 사용되는 midleware이다. 클라이언트의 요청이 pipe를 통해 가공되어 컨트롤러의 핸들러에 전달된다.
Pipe Binding
Handler-level
핸들러 단위에서 @UsePipes() 데코레이터를 이용하여 파이프를 사용한다. 이 파이프는 전달된 모든 파라미터에 대하여 적용된다.
@Post()
@UsePipes(pipe)
createBoard(@Body('title') title: string, @Body('description') description: string ) : Board{
    return this.boardService.createBoard(title, description);
}
Parameter-level
조금 더 좁게 파라미터 레벨에서 파이프를 사용하는 것도 가능하다. 특정한 파라미터에만 적용할 수 있도록 @Body() 파라미터 안에 파이프를 넣어준다.
@Post()
createBoard(@Body('title',titlePipes) title: string, @Body('description') description: string ) : Board{
    return this.boardService.createBoard(title, description);
}
Global-level
application 전역에 파이프를 적용하는 것도 가능하다. 이렇게 하면 모든 요청이 파이프를 통해서 전달된다. main.ts에서 useGlobalPipes() 함수를 사용해서 application에 적용할 수 있다.
async function bootstrap() {
  const app = await NestFactory.create(AppModule);
  app.useGlovalPipes(GlobalPipe);
  await app.listen(3000);
}
bootstrap();
Built-in Pipes
Nest.js에서는 기본적으로 6개의 파이프를 제공한다.
- ValidationPipe: DTO에 정의된 형식을 바탕으로 유효성을 검사
- ParseIntPipe: 문자열 파라미터에서 integer 파싱
- ParseBoolPipe: 문자열 파라미터에서 boolean 파싱
- ParseArrayPipe: 문자열 파라미터에서 배열 파싱
- ParseUUIDPipe: ParseIntPipe와 유사하나 UUID에 초점
- DefaultValuePipe: 파라미터에 그 값이 없을 때 디폴트 값을 제공
Validation Pipe
class-validator와 class-transformer 모듈을 사용하여 유효성 검사 파이프를 만들어 보자.
npm install class-validator class-transformer --save 앞서 생성한 createBoard API에서 title과description 값이 없는 경우 error를 리턴하도록 한다. CreateBoardDto를 사용하고 있으니 여기에 유효성 검사를 추가한다.
import { IsNotEmpty } from "class-validator";

export class CreateBoardDto {
    @IsNotEmpty() title: string;
    @IsNotEmpty() description: string;
}
이제 컨트롤러에서도 ValidationPipe를 핸들러 레벨로 적용한다.
    @Post() //Create new Board
    @UsePipes(ValidationPipe) //validate input
    createBoard(@Body() createBoardDto: CreateBoardDto) : Board{
        return this.boardService.createBoard(createBoardDto);
    }
postman으로 파이프가 제대로 적용되었는지 확인한다.
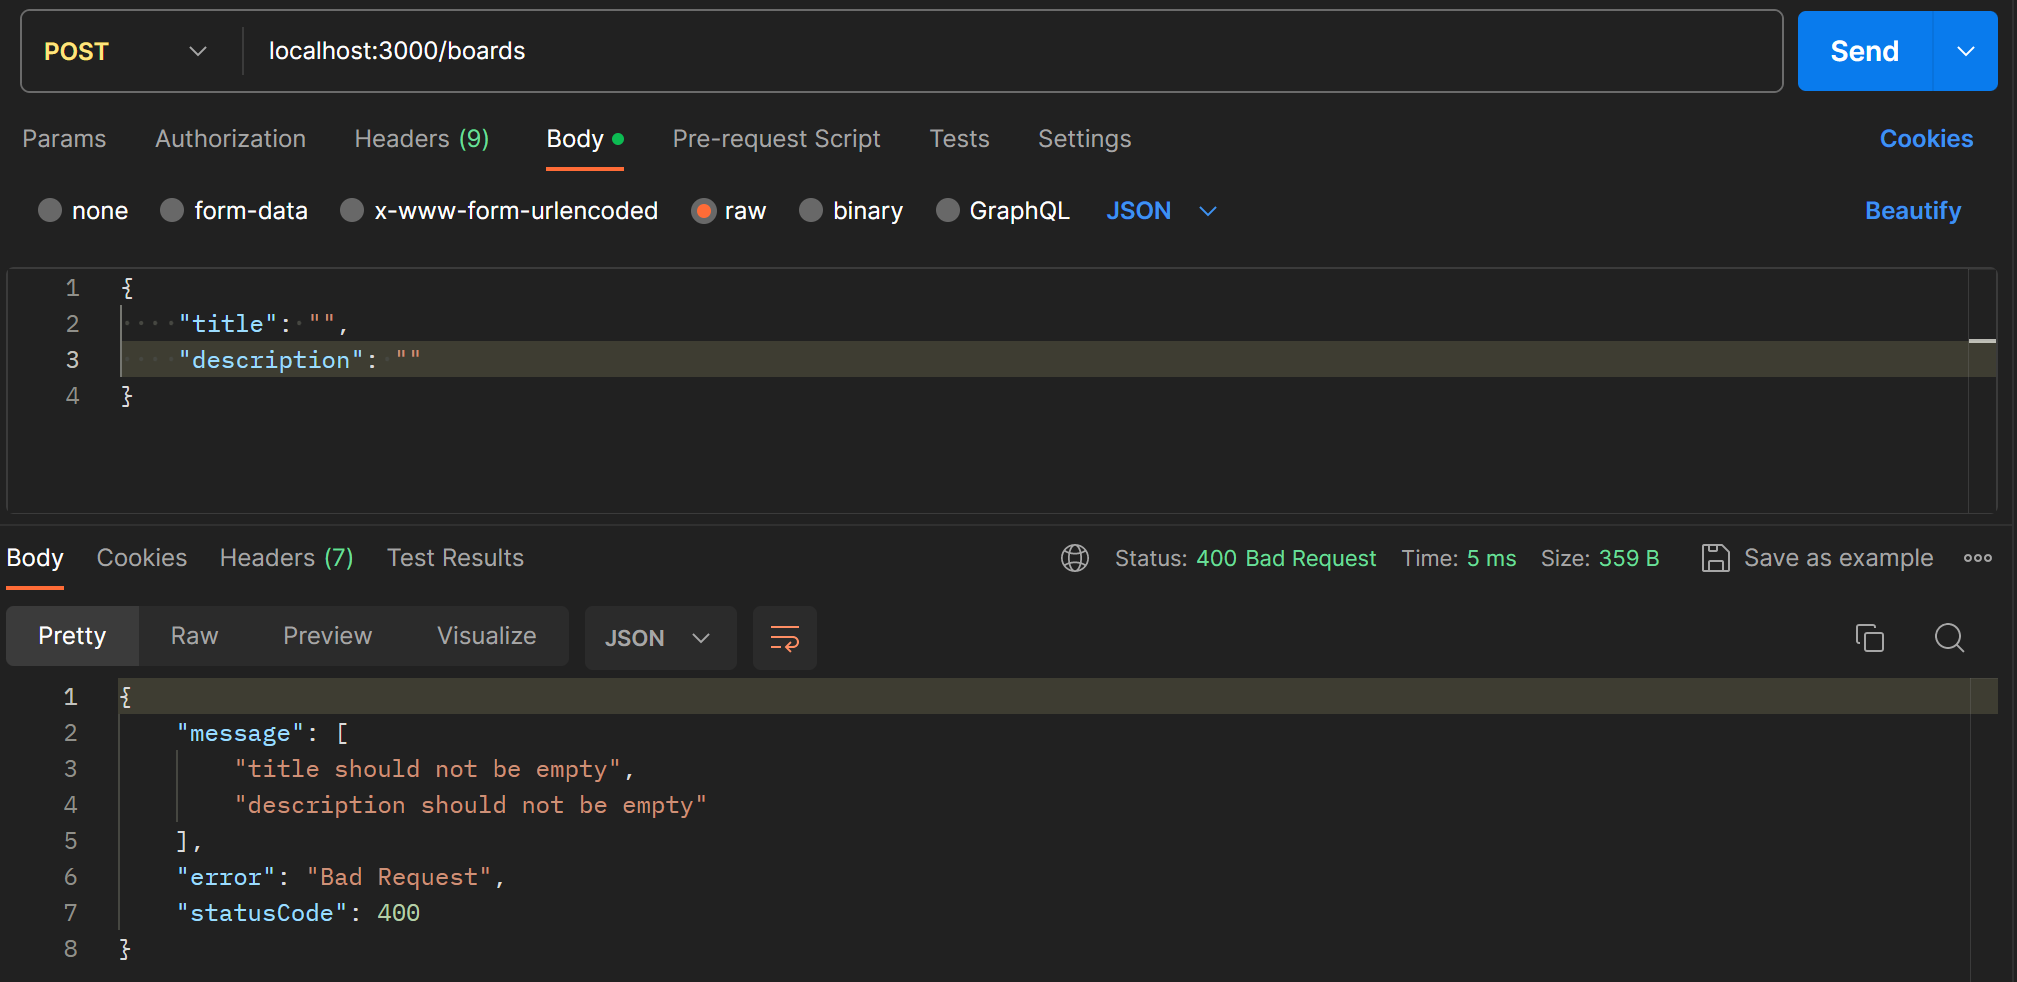
title과 description을 빈 문자열로 보내니 에러메시지가 자동으로 생성되어 전달된다.
Exception Handling
getBoardById에서 주어진 ID로 게시물이 없는 경우 오류를 반환하도록 해보자. 예외 처리를 위해 NotFoundException()을 선언해준다.
getBoardById(id:string): Board{
const found = this.boards.find((board) => board.id === id)
if(!found){
throw new NotFoundException
}
return found;
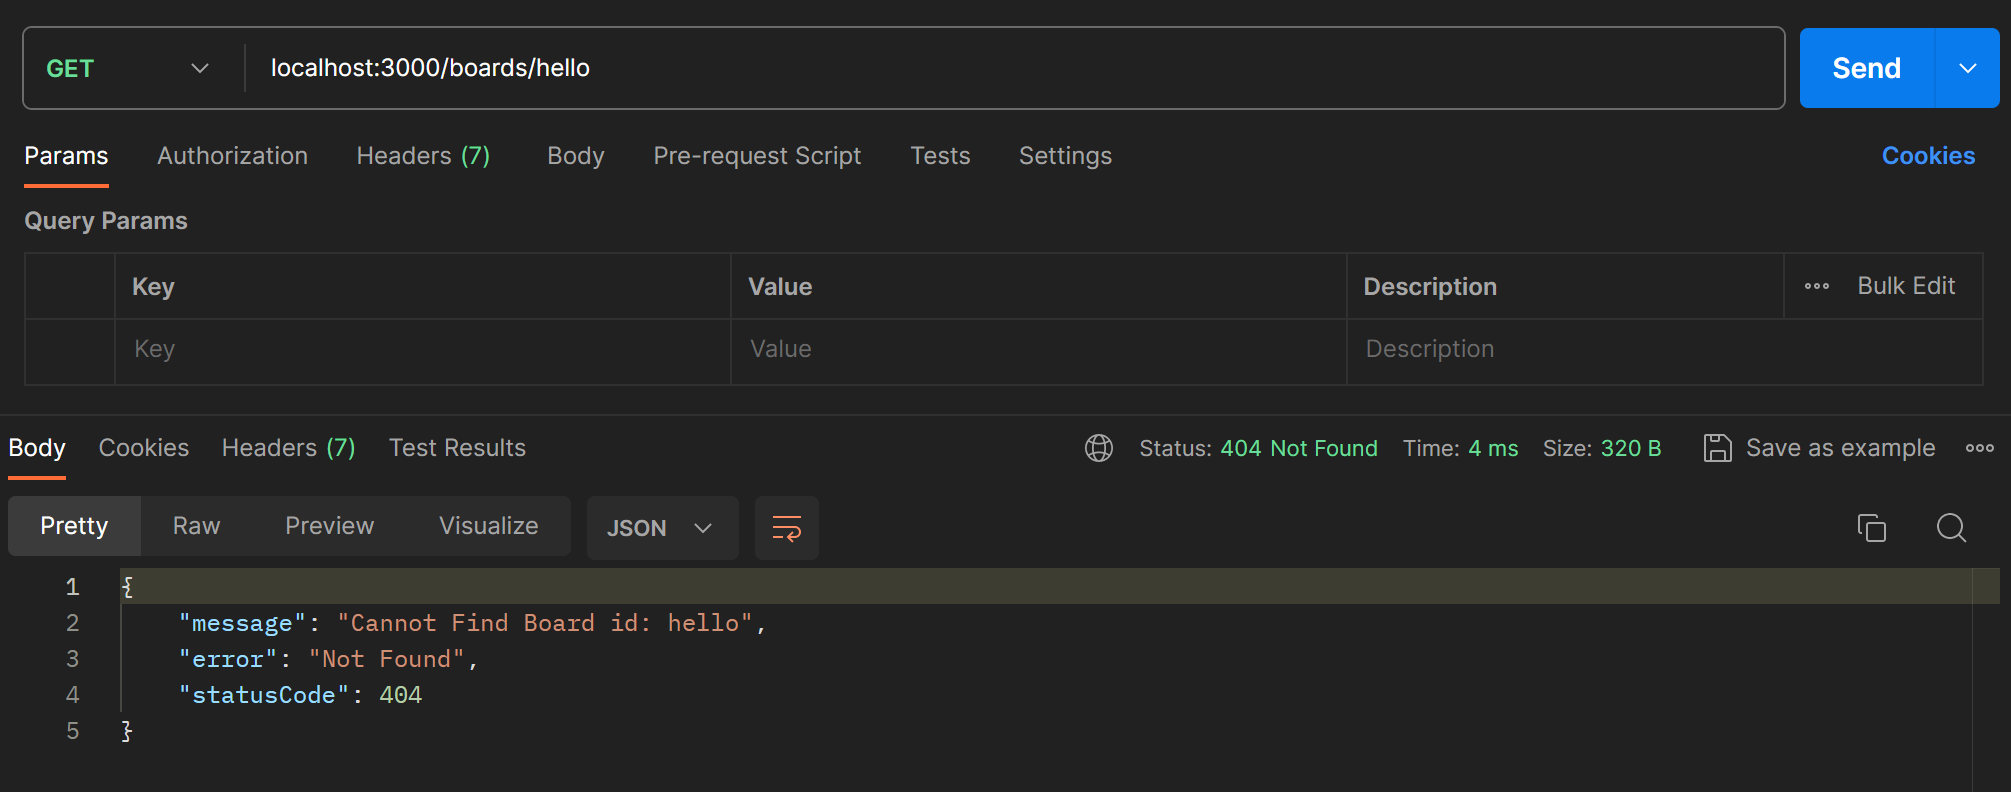
}error message를 직접 정의하고 싶다면 아래처럼 넣어준다.
getBoardById(id:string): Board{
     const found = this.boards.find((board) => board.id === id)

    if(!found){
        throw new NotFoundException(`Cannot Find Board Id: ${id}`)
    }

    return found;
}
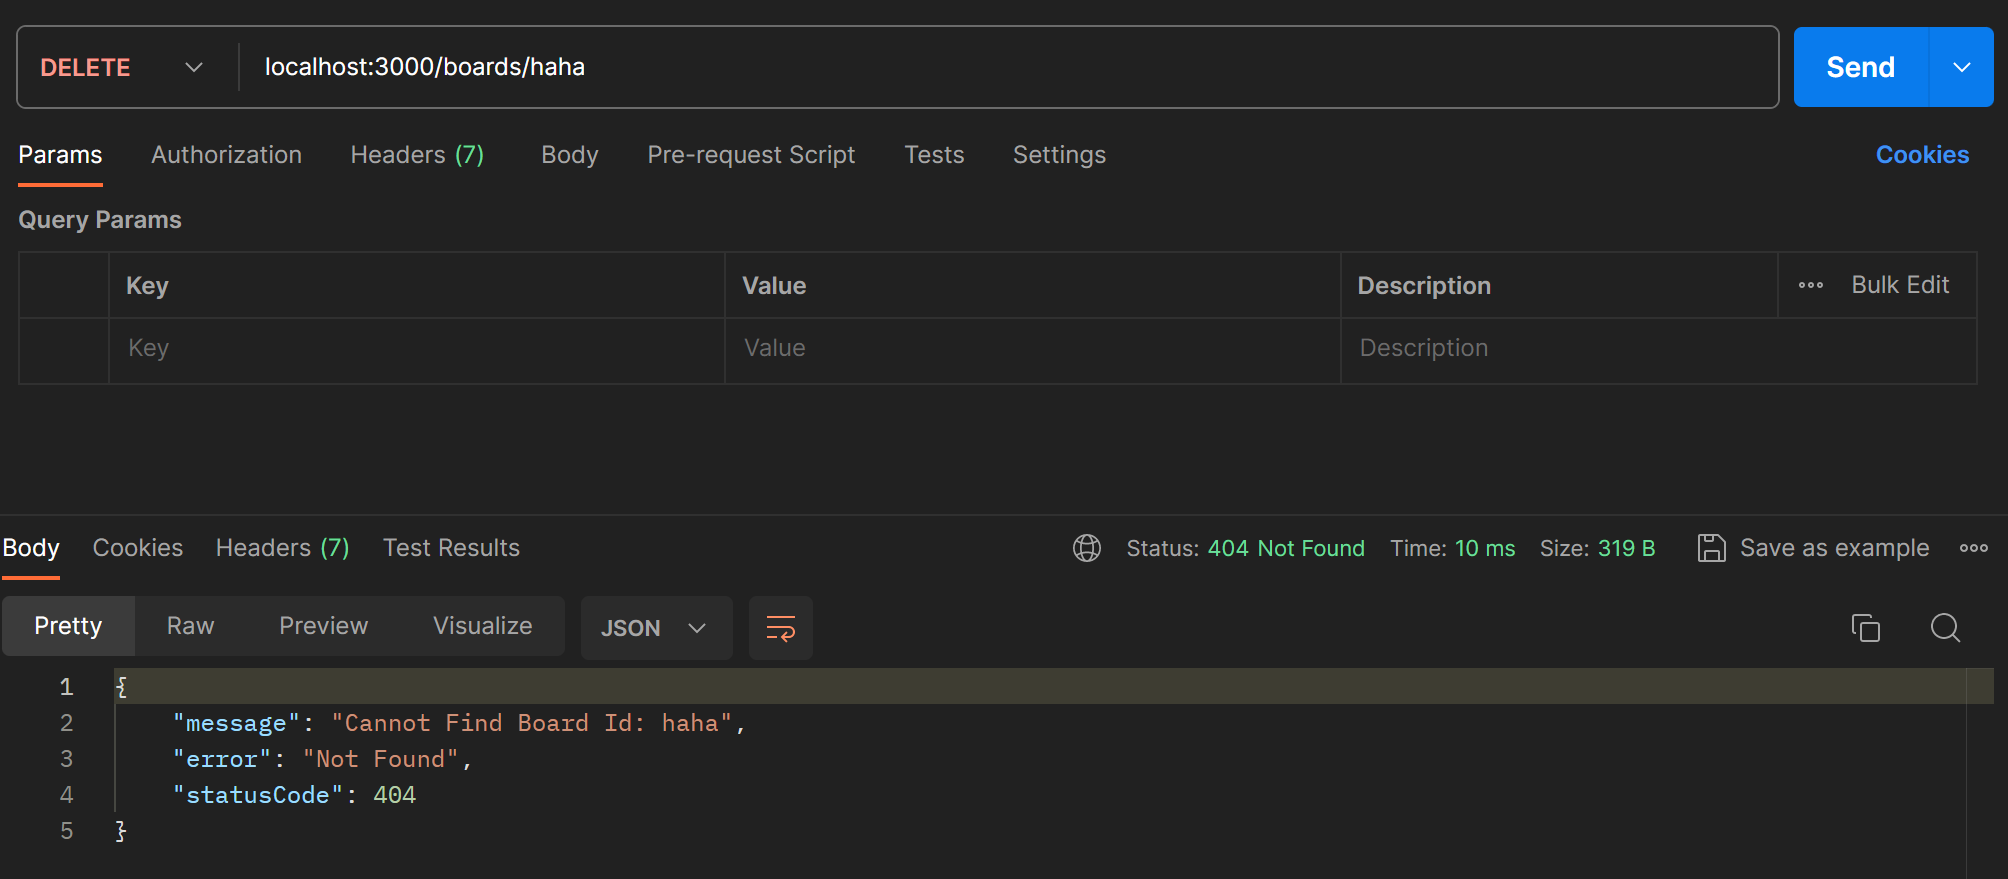
수정한 getBoardId 메서드를 이용해서 deleteBoard에서도 해당 id의 보드가 없는 경우 error message를 반환하도록 한다.
deleteBoard(id:string): void {
    const found = this.getBoardById(id)
    this.boards = this.boards.filter((board)=> board.id !==found.id);
}
Custom Pipe
PipeTransform 인터페이스를 구현하면 새로운 커스텀 파이프를 만들 수 있다. 모든 파이프는 transform 메서드가 정의되어야한다.
transform(value: any, metadata: ArgumentMetadata)transform에서 리턴된 값은 라우팅 핸들러로 전달되고 exception 발생시에는 바로 클라이언트로 반환된다.
커스텀 파라미터를 만들어서 board의 status를 업데이트할 때 status 값의 유효성을 검사해보자.
/boards/pipes/board-status-validation.pipe.ts를 생성하고 다음과 같이 파이프를 정의한다. 우선은 어떤 값이 value와 metadata로 전달되는지 보기 위해 로그를 찍어본다.
import { ArgumentMetadata, PipeTransform } from "@nestjs/common";

export class BoardStatusValidationPipe implements PipeTransform{
    transform(value: any, metadata: ArgumentMetadata) {
        console.log(value);
        console.log(metadata);

        return value
    }
}
컨트롤러의 알맞은 자리에 파이프를 적용한다.
@Patch('/:id/status') //Update status of a board by id
updateBoardStatus(@Param('id') id : string, @Body('status',BoardStatusValidationPipe) status : BoardStatus): Board {
    return this.boardService.updateBoardStatus(id,status)
}
포스트맨으로 요청을 전송하면 아래처럼 로그가 찍힌다.
PRIVATE
{ metatype: [Function: String], type: 'body', data: 'status' }
PRIVATE
{ metatype: [Function: String], type: 'body', data: 'status' }
즉 value는 파이프에 전달된 값이고 그 값의 metadata도 함께 전달된다. 이제 value 값이 유효한 status 값인 "PRIVATE", "PUBLIC"이 아니면 error message를 반환하도록 pipe를 작성한다.
export class BoardStatusValidationPipe implements PipeTransform{
    readonly StatusOption = [
        BoardStatus.PRIVATE,
        BoardStatus.PUBLIC
    ]

    private isStatusValid(status:any) :boolean {
        const index = this.StatusOption.indexOf(status)
        return index!==-1;
    }


    transform(value: any) {
        value = value.toUpperCase();

        if(!this.isStatusValid(value)){
            throw new BadRequestException(`${value} is Not a Status`)
        }

        return value
    }
}
readonly로 유효한 status의 option을 정의하고, isStatusValid 메서드를 정의하여 사용한다.
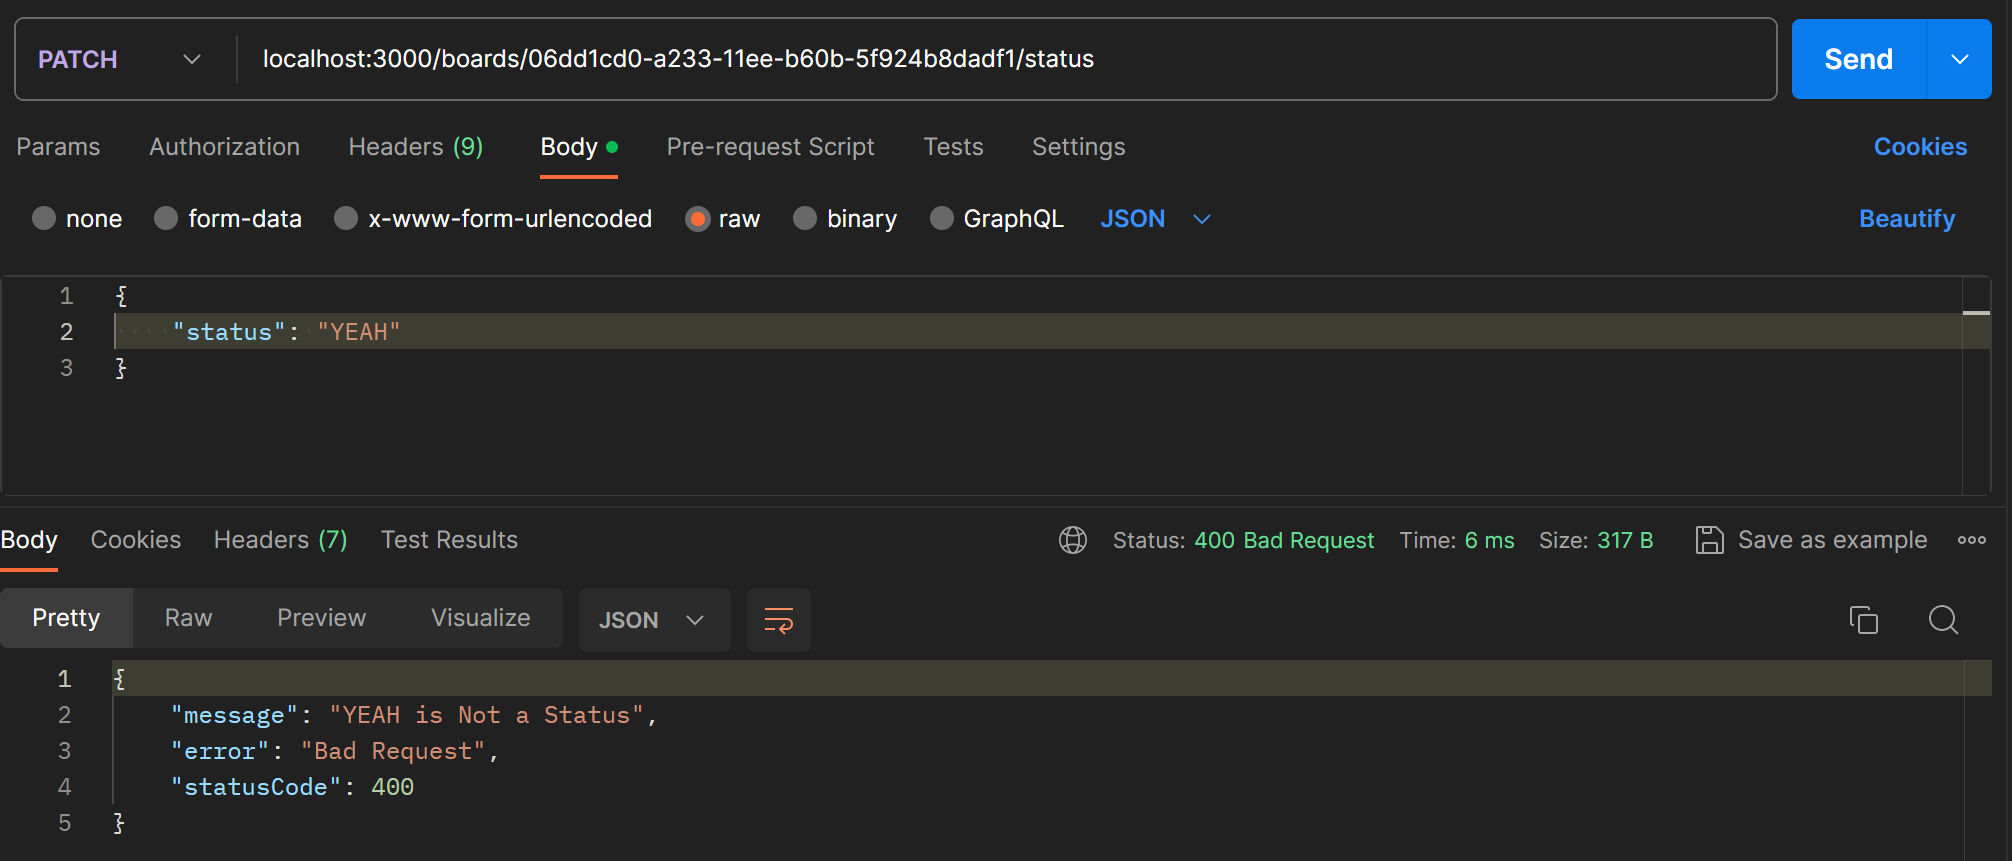
error message가 제대로 전달된다.