프로젝트를 진행하다보면 import를 할 때
../../../.....처럼 경로가 길어질 때가 있다.
상대 경로를 사용하기 때문인데, 다른 분들의 프로젝트를 보면@components/.....이런 식으로 매우 간단하게 작성하시는 경우가 있다.
어떻게 이게 가능한건지 알아보자!
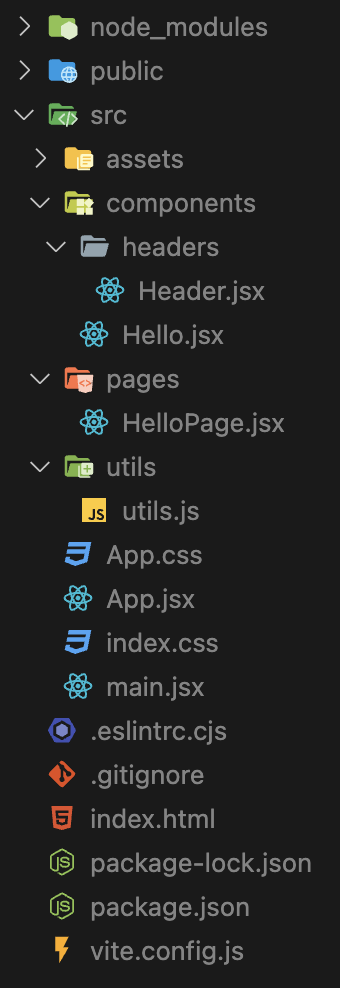
예시로 사용할 폴더 구조이다.
상대 경로와 절대 경로
// Header.jsx

import { headerForYou } from "../../utils/utils";

const Header = () => {
  const forHeader = headerForYou();
  console.log(forHeader);

  return (
    <div>
      <h1>This is Header!</h1>
    </div>
  );
};

export default Header;
상대 경로는 본인 위치에서부터 시작하기 때문에 때때로 ..이 엄청 많아진다.
utils 폴더에 있는 함수를 사용하기 위해 입력한 상대 경로가 길어지는 것이 보인다.
테스트용 프로젝트라서 구조가 간단하지만, 실제 프로젝트에서는 훨씬 깊어진다.
그러면 이를 절대 경로로 전환해보자.
상대 경로 : ../../utils/utils
절대 경로 : /src/utils/utils
폴더 구조가 더 깊어진다면 상대 경로보다 절대 경로가 가독성이 더 좋을 것 같다.
그러면...어떻게해야 이를 더 간단하게 사용할 수 있을까?
React 프로젝트에서 절대 경로 설정하기
필자는 CRA와 Vite를 사용해서 React 프로젝트를 진행했었다.
그래서 두 방법에 대해서 모두 살펴볼 예정이다.
방법이 약간 다른듯하다 :)
CRA + JS
CRA로 시작한 프로젝트에서의 방법은 아래와 같다.
절대 경로를 설정하기 위해서 jsconfig.json(혹은 tsconfig.json)을 루트 디렉토리에 생성한다.
// jsconfig.json

{
  "compilerOptions": {
    "baseUrl": "src", // 절대 경로를 사용하기 위한 Base 디렉토리를 설정한다.
    "paths": { // components 폴더를 절대 경로로 사용하기 위한 paths 설정
      "components/*": ["components/*"], // components로 시작하면 자동으로 src/components가 된다.
      "pages/*": ["pages/*"]
    }
  },
  "include": ["src"] // include에 포함된 디렉토리만 적용된다. include를 사용하지 않으면 모든 디렉토리에 적용된다.
}
설정을 완료하고 절대 경로를 적용해보면...
Before : import Hello from "../components/Hello";
After : import Hello from "components/Hello";

Before : import HelloPage from "./pages/HelloPage";
After : import HelloPage from "pages/HelloPage";
짠! 상대 경로가 아니라 절대 경로를 통해 더 간단하게 표현할 수 있게 되었다.
위 예시에서는 짧기 때문에 큰 효과가 없어보이지만,
조금이라도 깊어지게 되면 ..이 끝도없이 깊어지므로 유용하게 사용될 것 같다.
그런데, 다른 분들의 코드를 보면
import Header from "@components/headers/Header";위와 같이 @ 기호를 같이 사용하시는 분들이 계신다.
이건 뭐가 다른걸까?
...다른게 없다. 그냥 절대 경로 이름을 저렇게 설정한 것일 뿐이다.
그래서 jsconfig.json 파일을 아래와 같이 변경해보았다.
// jsconfig.json

{
  "compilerOptions": {
    "baseUrl": "src"
    "paths": {
      "@components/*": ["components/*"]
    }
  },
  "include": ["src"]
}
그러나, 에러가 발생한다.
Module not found: Error: Can't resolve '@components/Hello' in ...어째서일까?
왜 @가 붙는 상황에서만 안되는건지 원인을 찾아봤지만, 알맞은 설명을 해주는 곳이 없었다...
그나마 추측 가능한 이유는 webpack 설정을 eject해서 바꿔줘야하기 때문인데,
CRA에서 이를 진행하면 보일러 플레이트를 본인이 다시 작성하게 되어버리므로 배꼽이 더 커지는 상황이 된다고 한다.
물론, CRA가 버전 업 되면서 eject하지 않고 바꿀 수 있는 방법이 나왔고,
그게 현재 이 단락에서 설명하고 있는 방법이긴하다.
아무튼 @를 사용하는 방법에 대해서는 이 방법으로 해결할 수 없는 모양이다.
그래서 다른 방법을 찾아보았다!
craco를 사용하여 커스텀하기
찾아본 결과, craco 라이브러리를 사용해서 CRA 설정에 덮어 씌우는 것이 가능하다.
그런데! craco에서 CRA의 버전을 지원해주는지를 잘 봐야한다.
다른 분의 블로그에서 이를 확인하지 않았다가 큰 낭패를 보았다는 경험글을 볼 수 있었다.
필자는 현재 react-scripts의 v5.0.1를 사용하고 있고(CRA v5),
craco 공식 docs(23.07.20 기준, v7.1.0)에서도 이에 대해 주의할 것을 당부하고 있다.

일단 현재는 문제없이 사용할 수 있을 것 같다 :)
방법은 다음과 같다.
최상위 디렉토리에 craco.config.js를 설정하는 것이다. jsconfig.json 위치와 같다.
// craco.config.js

const path = require("path");

module.exports = {
  webpack: {
    alias: {
      "@": path.resolve(__dirname, "src/"),
      "@components": path.resolve(__dirname, "src/components/"),
      "@headers": path.resolve(__dirname, "src/components/headers/"),
      "@pages": path.resolve(__dirname, "src/pages/"),
    },
  },
};
webpack 설정을 override하여 절대 경로를 내가 원하는 key로 설정할 수 있다.
마지막으로 craco 사용을 위해 package.json의 scripts 부분을 수정해주자.
start, build, test만 고쳐주면 된다.
// package.json

// ... //
"scripts": {
  "start": "craco start",
  "build": "craco build",
  "test": "craco test",
  "eject": "react-scripts eject"
},

// ... //
이제 @ 기호를 사용하여 경로를 사용해보자!
Before : import Hello from "../components/Hello";
After : import Hello from "@components/Hello";

Before : import HelloPage from "./pages/HelloPage";
After : import HelloPage from "@pages/HelloPage";
After : import HelloPage from "@/pages/HelloPage";
된다...멋.지.다.
필자는 @ 기호를 사용했지만, webpack 공식 docs를 보면 본인이 커스텀하기 나름이다.
참고
craco.config.js를 설정했다면 jsconfig.json은 해줄 필요가 없다. 삭제해도 된다.
단, pages/HelloPage로 사용했던 것을 @pages/HelloPage로 바꿔야한다.
즉, jsconfig.json에 설정한 것으로 사용했던 부분을 craco.config.js에서 설정한 것으로 변경해줘야 한다는 것이다.
바꿔주지 않고 그대로 pages/HelloPage를 사용하면 에러가 발생할 것이다.
CRA + TS
지금까지 설명한 것은 전부 JS를 사용하는 프로젝트에서 설정 방법이다.
그런데, 현실은 TS를 기본으로 깔고 있고, 사용하지 않는 회사가 없기 때문에
TS를 사용할 때를 기준으로도 알아봐야한다.
앞서 TS를 사용한다면 jsconfig.json을 tsconfig.json으로 바꾸면 된다고 언급한 바 있다.
한번 해보자!
CRA + TS는 CRA + JS와는 다르게 기본적으로 보일러 템플레이트에 tsconfig.json이 있다.
// tsconfig.json

{
  "compilerOptions": {
    "target": "es5",
    "lib": ["dom", "dom.iterable", "esnext"],
    "allowJs": true,
    "skipLibCheck": true,
    "esModuleInterop": true,
    "allowSyntheticDefaultImports": true,
    "strict": true,
    "forceConsistentCasingInFileNames": true,
    "noFallthroughCasesInSwitch": true,
    "module": "esnext",
    "moduleResolution": "node",
    "resolveJsonModule": true,
    "isolatedModules": true,
    "noEmit": true,
    "jsx": "react-jsx"
  },
  "include": ["src"]
}
CRA 공식 docs에 따르면 TS에서도 compilerOptions에 baseUrl 설정을 넣어주면 된다고 하므로,
{
  "compilerOptions": {
    "baseUrl": "src"
  },
  "include": ["src"]
}
이 설정을 그대로 반영해보았다. paths도 설정해주었다.
하지만 결과는 에러! JS에서는 바로 잘 됐던 것에 반해 TS에서는 안된다..
이유를 찾아보니 아까와 마찬가지로 CRA에 감추고 있는 webpack 설정 때문이었다.
eject를 쓰는 것은 너무 리스크가 크기 때문에 이번에도 역시 craco를 사용하고자 한다.
craco를 사용하여 커스텀하기
이번에는 총 3개의 설정을 진행한다.
craco.config.jstsconfig.paths.jsontsconfig.json
하나씩 살펴보자!
// craco.config.js

const path = require("path");

module.exports = {
  webpack: {
    alias: {
      "@": path.resolve(__dirname, "src/"),
      "@components": path.resolve(__dirname, "src/components/"),
      "@headers": path.resolve(__dirname, "src/components/headers/"),
      "@pages": path.resolve(__dirname, "src/pages/"),
    },
  },
};
craco.config.js 부분은 CRA + JS와 다를 것이 없다!
다음으로는 tsconfig.paths.json이다.
사실 이 파일은 tsconfig.json 파일의 속성 값으로 바로 넣어도 되는데,
많은 분들이 파일 경로를 좀 더 분리해서 관리하고자 이런 식으로 분리하시는 듯 하다.
// tsconfig.paths.json

{
  "compilerOptions": {
    "baseUrl": ".",
    "paths": {
      "@/*": ["src/*"],
      "@components/*": ["src/components/*"],
      "@pages/*": ["src/pages/*"],
      "@headers/*": ["src/components/headers/*"]
    }
  }
}
필자가 여기서 엄청 헤맸는데, baseUrl 때문이었다.
처음에는 src를 입력해서 JS 때와 다를 것 없이 사용하려고 했는데(폴더 구조도 같으니까)
계속 에러가 발생했다.
Cannot find module '@pages/hi/HiPage' or its corresponding type declarations.baseUrl에 따라 달라지는 paths
해결 방법은 단순했다.
baseUrl에 src가 아니라, .을 써주는 것이었다.
baseUrl : Base directory to resolve non-relative module names.
- Visual Studio Code docs -
baseUrl은 비관련(관련없는) 모듈을 다루기 위한 base 디렉토리를 설정하는 프로퍼티라고한다.
즉, 컴파일러가 모듈을 찾을 때 기준이 되는 디렉토리를 지정하는 옵션이다.
보통은 src 폴더 내에서 코드를 작성하기 때문에 이 프로퍼티에 src를 입력했던 것이다.
프로퍼티를 사용할 때는 꼭 그 의미를 알고가자...
아니 그런데, 결국 왜 src는 안되는거고 .은 됐던걸까?
두 상황에 대해서 정상 작동하게 만들면 아래와 같이 차이가 발생한다.
// 1. baseUrl이 src인 경우
// tsconfig.paths.json

{
  "compilerOptions": {
    "baseUrl": "src", // src 폴더가 기준이 된다.
    "paths": {
      "@/*": ["*"],
      "@components/*": ["components/*"],
      "@pages/*": ["pages/*"],
      "@headers/*": ["components/headers/*"]
    }
  }
}
// 2. baseUrl이 .인 경우
// tsconfig.paths.json
{
"compilerOptions": {
"baseUrl": ".", // 루트 디렉토리(src, public 폴더 등이 있는 곳)가 기준이 된다.
"paths": {
"@/*": ["src/*"],
"@components/*": ["src/components/*"],
"@pages/*": ["src/pages/*"],
"@headers/*": ["src/components/headers/*"]
}
}
}이렇게 보니까 차이가 명확하다.
baseUrl과 paths를 통해 디렉토리를 매핑하는 것이기 때문에
src와 src/components/*를 같이 사용하면 src/src/components/*가 됐던 것이다.
다음으로는, tsconfig.paths.json을 tsconfig.json에 알려주는 것이다.
// tsconfig.json

{
  "compilerOptions": {
    // ... //
  },
  "include": ["src"],
  "extends": "./tsconfig.paths.json" // tsconfig.paths.json을 추가
}extends라는 프로퍼티를 사용하며, tsconfig.paths.json의 위치를 알려주면 된다.
이제 tsconfig.json이 tsconfig.paths.json을 이해할 수 있게 되었다 :)
마지막으로, craco를 사용하기 위해 package.json의 scripts를 변경하면 끝이다.
// package.json

// ... //
"scripts": {
  "start": "craco start",
  "build": "craco build",
  "test": "craco test",
  "eject": "react-scripts eject"
},

// ... //
이러한 과정을 거치면 다음과 같이 절대 경로를 사용할 수 있다!
Before : import HiPage from "./pages/hi/HiPage";
After : import HiPage from "@pages/hi/HiPage";

Before : import HelloPage from "./pages/HelloPage";
After : import HelloPage from "@pages/HelloPage";

Before : import Hello from "../components/Hello";
After : import Hello from "@/components/Hello";
After : import Hello from "@components/Hello";

Before : import Header from "../components/headers/Header";
After : import Header from "@headers/Header";
Vite + React + JS
이번에는 Vite + React + JS 상황에서의 절대 경로 설정을 알아보자.
vite.config.js 파일을 루트 디렉토리에 생성하여 설정을 진행한다.
// vite.config.js

import { defineConfig } from "vite";
import react from "@vitejs/plugin-react";

// https://vitejs.dev/config/
export default defineConfig({
  plugins: [react()],
  resolve: {
    alias: [
      { find: "@", replacement: "/src" },
      { find: "@components", replacement: "/src/components" },
      { find: "@headers", replacement: "/src/components/headers" },
      { find: "@pages", replacement: "/src/pages" },
    ],
  },
});
이렇게 설정해주면
Before : import HelloPage from "./pages/HelloPage";
After : import HelloPage from "@pages/HelloPage";

Before : import Hello from "../components/Hello";
After : import Hello from "@components/Hello";

Before : import Header from "../components/headers/Header";
After : import Header from "@components/headers/Header";
After : import Header from "@headers/Header";
위와 같이 절대 경로를 활용할 수 있다!!
Vite + React + TS
이번에는 TS를 사용하는 프로젝트에 대해서 설정을 진행해보자.
설정할 파일은 총 2개이다.
vite.config.tstsconfig.json
하나씩 살펴보자 :)
// vite.config.ts

import { defineConfig } from "vite";
import react from "@vitejs/plugin-react";

// https://vitejs.dev/config/
export default defineConfig({
  plugins: [react()],
  resolve: {
    alias: [
      { find: "@", replacement: "/src" },
      { find: "@components", replacement: "/src/components" },
      { find: "@headers", replacement: "/src/components/headers" },
      { find: "@pages", replacement: "/src/pages" },
      { find: "@common", replacement: "/src/common" },
    ],
  },
});
이 부분은 JS 때와 다른 것이 없다.
여기까지 설정하면 큰 문제없이 절대 경로 설정이 작동한다.
그러나
Could not find a declaration file for module '@pages/HelloPage'. '파일 경로' implicitly has an 'any' type.ts(7016)위와 같은 경고가 import문에 계속해서 따라 붙는다.
tsconfig.json에 절대 경로를 알려줘서 에러를 잡아주자.
// tsconfig.json

{
  "compilerOptions": {
	// ... //

    "baseUrl": "src",
    "paths": {
      "@/*": ["*"],
      "@components/*": ["components/*"],
      "@pages/*": ["pages/*"],
      "@headers/*": ["components/headers/*"],
      "@common/*": ["common/*"]
    }
  },

  // ... //
}
이제 절대 경로를 내가 원하는대로 사용할 수 있다!
Before : import Hello from "../components/Hello";
After : import Hello from "@components/Hello";

Before : import Header from "../components/headers/Header";
After : import Header from "@components/headers/Header";
After : import Header from "@headers/Header";
또 다른 방법으로는 vite-tsconfig-paths 라이브러리를 사용하는 방법이 있는데,
이를 사용하면 vite.config.ts 대신 tsconfig.json에 입력하는 것으로
절대 경로 설정을 마무리할 수 있는 듯 하다.
필자는 라이브러리를 최대한 안 쓰고 싶기 때문에 이 방법은 생략했다 :)
참고 자료
hunmok1027님 블로그
shape-coding님 블로그
nukw0n-dev님 블로그
kimsangyeon님 블로그
bybruno님 블로그
mingeesuh님 블로그
simian114님 블로그
hunmok1027님 블로그
real-bird님 블로그
yhko1992님 블로그
stackoverflow 질문글 1
stackoverflow 질문글 2
Create-React-App docs
craco docs
webpack docs
Visual Studio Code docs


우와..🫢