

이번 포스트에서 소개할 과제는, 그림과 같이 Hierarchical Transformation을 robot의 형태로 구현하는 것이 목표입니다. 여러 프레임의 관계 속에서 계층적인 변환을 이끌어내기 위해, linked tree 데이터 구조인 Scene graph를 활용합니다.
Pseudo code
matrixStack.initialize(inv(E));
	matrixStack.push(O);
		matrixStack.push(O’);
			draw(matrixStack.top(), cube); \\body
		matrixStack.pop(); \\O’
	matrixStack.push(A);
	    matrixStack.push(B);
			matrixStack.push(B’);
				draw(matrixStack.top(),sphere); \\upper arm
			matrixStack.pop(); \\B’
			matrixStack.push(C);
		        matrixStack.push(C’);
					draw(matrixStack.top(),sphere); \\lower arm
				matrixStack.pop(); \\C’
			matrixStack.pop(); \\C
		matrixStack.pop(); \\B
	matrixStack.pop(); \\A

\\ draw another arm
...
pseudo-code를 통해서도 이해할 수 있습니다. 인 model view matrix부터 시작하여, 차례대로 body frame, upper arm frame, lower arm frame을 탐색할 수 있습니다. 즉, rigid body matrix 를 활용하여 object frame과 sub-object frame(i.e. arm frames) 간의 변환 행렬을 표현할 수 있게 됩니다.
Notation
- w: world frame
- o: object frame
- s: sholder frame
- l: elbow frame
- 윗 첨자는 frame 표현으로 사용하였습니다. (Reference 책의 표기를 그대로 따랐습니다.)
world frame부터 object frame, 이후 sub-object frame의 변환 과정을 수식으로 표현하였습니다. world와 관련된 opeartor로는 각 변환 행렬을 모두 축적한 가 사용됩니다.
Scene Graph

문제 정의를 통해 만들어진 scene graph입니다. world를 중심으로 ground, robot1, robot2, sky 노드가 존재하며 각 robot 노드에는 sub-object node들이 존재합니다. 코드 내에서는 initScene() 함수에서 scene graph가 구성됩니다.
각 frame은Transform 노드와 Shape 노드가 존재합니다. Transform 노드는 parent frame과 관련된 RBT를 포함하고, Shape 노드는 geometry 조정에 사용되는 affine matrix를 포함합니다. Shape node의 행렬은 drawing 수행에 사용됩니다.
Scene Graph Traversal
Visitor 클래스는 scene graph를 탐색하는 데에 사용되며, visit() 함수와 postVisit() 함수로 이루어져 있습니다. 그래프 탐색은 accept() 함수를 통해 시작됩니다.
g_world->accept(drawer)visit() / postvisit()

현재 노드부터 visit() function이 실행되면, 자식 노드로 움직입니다. 만약 현재 노드가 리프 노드라면(=shape node) postvisit() 함수를 통해 부모 노드로 움직입니다. 이후 또다른 자식 노드(=transform node)로 이동하고, 위의 과정을 반복하여 그래프를 탐색합니다.
virtual bool visit(SgTransformNode& node) {
    if (rbtStack_.empty()) {
      rbtStack_.push_back(RigTForm());
    }
    rbtStack_.push_back(rbtStack_.back() * node.getRbt());

    if (node == target_) {
      found_ = true;
      return false;
    }

    return true;
  }
Accumulation visitor 내의 visit 함수입니다. 방문한 노드를 이전까지 축적하고 있던 rbtStack에 추가하는 부분입니다. (방문 전까지 accum되던 rbt에 현재 노드 rbt를 추가로 축적합니다.)
virtual bool postVisit(SgTransformNode& node) {
    rbtStack_.pop_back();
    return true;
  }
postvisit 구현은 간단합니다. pop_back으로 부모 노드로 움직이게 됩니다.
Drawer
virtual bool visit(SgShapeNode& shapeNode) {
    const Matrix4 MVM = rigTFormToMatrix(rbtStack_.back()) * shapeNode.getAffineMatrix();
    sendModelViewNormalMatrix(curSS_, MVM, normalMatrix(MVM));
    shapeNode.draw(curSS_);
    return true;
  }
그래프를 탐색하면서, shape node에 도달했을 때, drawer가 해당 노드 object를 scene에 그리는 역할을 합니다.
Part Picking
'p'를 입력하여 로봇의 일부분만 picking하도록 구현하는 파트입니다.
picker가 shape node를 방문했을 때, id++와 현재 id를 현재 노드에 매핑, id에 해당하는 color를 버퍼에 저장합니다.
탐색이 종료되면, glReadPixel() 함수로 picked pixel의 컬러 값을 얻을 수 있습니다. 최종적으로, main draw 파트에서 getRbtNodeAtXY() 함수로 선택된 노드의 컬러 값을 얻을 수 있게 됩니다.
Code
bool Picker::visit(SgShapeNode& node) {
  // TODO
  // a shape node, you increase the id counter,
  // find the SgRbtNode that is closest from the top of the stack (which should be the shape node¡¯s parent),
  // and add the association between the id counter and the SgRbtNode to the map.
  idCounter_++;
  addToMap(idCounter_, dynamic_pointer_cast<SgRbtNode>(nodeStack_.back()));
  Cvec3 color = idToColor(idCounter_);
  safe_glUniform3f(drawer_.getCurSS().h_uIdColor, color[0], color[1], color[2]);
  drawer_.visit(node);
  return true;
}
위의 과정을 코드로 구현한 부분입니다. SgNode를 dynamic_pointer_cast로 SgRbtNode로 변환하였고, 현재 노드의 id 값을 color로 변환하여 shader에 저장합니다. 이후 drawer로 해당 object를 렌더링합니다.
Transform any Part
위의 내용들을 RbtAccumVisitor에서 구현합니다. main 코드에 이를 사용할 때는, getPathAccumRbt() 함수를 통해 g_world부터 target frame 노드에 해당하는 accum 변환 matrix 를 반환합니다.
a = makeMixedFrame(getPathAccumRbt(g_world, g_currentPickedRbtNode), g_eyeRbt);
tmp = doMtoOwrtA(m, g_currentPickedRbtNode->getRbt(), inv(getPathAccumRbt(g_world, g_currentPickedRbtNode, 1)) * a);
g_currentPickedRbtNode->setRbt(tmp);
이후 pick한 frame에 해당하는 노드를 변환하는 코드의 일부입니다. auxiliary frame 를 구성하여 world frame에서 우리가 원하는 node의 center를 origin으로 갖는 프레임을 얻어야 합니다. 이때 object의 위치 정보, eye의 rotation 정보가 필요하므로, 을 계산하여 frame을 구할 수 있습니다.
- : elbow frame
- : eye frame
이때, 를 world에서 구할 필요 없이, 바로 윗 frame에서(elbow frame의 경우, shoulder frame에 해당) auxiliary frame 을 구할 수 있습니다. 는 shoulder frame의 accum Rbt인 의 역행렬로 구한 후, Modulation matrix 을 적용하면 됩니다.
- 해당 부분에 대한 설명은 아래 포스트에서 확인하실 수 있습니다.
- (https://velog.io/@rlaalsthf02/OpenGL#moving-the-object)
Results
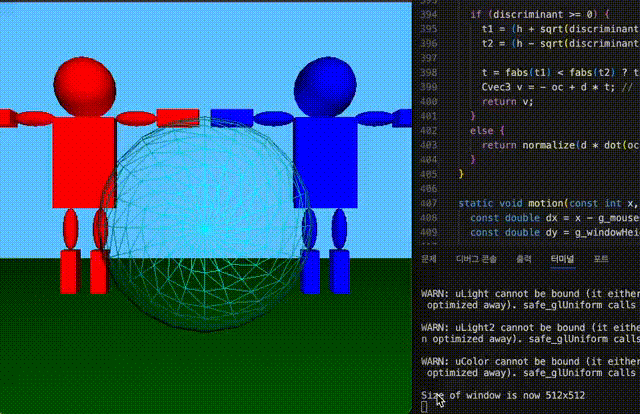

로봇의 일부를 picking하여 조작하는 과정을 영상으로 담았습니다. Hierarchial 변환을 위해 scene graph와 picker, drawer를 이해하는 과정에서 나아가, 이를 메인 코드에 적용하는 과정까지 공부하였습니다.
Reference
[1] Foundations of 3D Computer graphics, http://www.3dgraphicsfoundations.com/
[2] OpenGL, https://www.khronos.org/opengl/
[3] GLEW, https://glew.sourceforge.net/
[4] GLUT, https://www.transmissionzero.co.uk/software/freeglut-devel/
[5][https://mhsung.github.io/kaist-cs380-spring-2023/](https://mhsung.github.io/kaist-cs380-spring-2023/)
