🌐 CI/CD란?
-
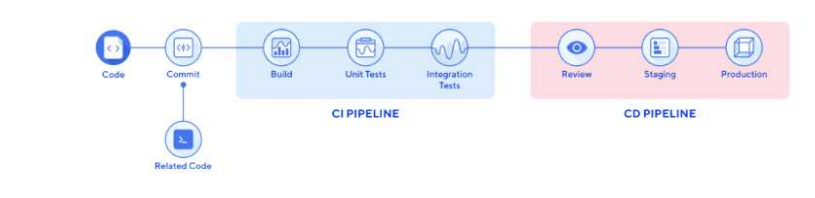
CI 란? 개발자를 위한 자동화 프로세스인 지속적인 통합 ( Continuous Integration )
어플리케이션의 새로운 코드 변경 사항이 정기적으로 빌드/ 테스트 되어 공유 Repository에
(ex. git,github) 통합하는것을 의미한다. 다수의 개발자가 작업할 경우 레포지토리에 쌓이는
commit들이 충돌하는 것을 자동화된 빌드와 테스트로 방지할수 있다. -
CD 란? 지속적인 배포 ( Continuous Deployment )“수동적"으로 배포하는것을 지속적인 제
공이라 하는데, 이것을“자동화”하는것이지속적인 배포 ( Continuous Deployment ) 이다.
어플리케이션 개발 단계 부터 배포 때 까지 모든 단계들을 자동화를 통해서 사용자에게 배
포 할수있도록 만드는 것 즉, CI/CD란 각각의 개발자들이 개발을 하는 개발환경을 사용자가
사용 가능한 서비스로 전달하는 모든 과정을 지속 가능한 형태로 또 가능하다면 자동으로 해
서 개발자와 사용자 사이의 격차를 없애는 것이다. 이러한 과정에는 코드를 빌드하고, 테스트
하고 배포하는 활동이 있다.
CI/CD 종류
가장 많이 사용되는 도구 5가지
- Jenkins
- CircleCI
- TravisCI
- Github Actions
- etc
🚩 프로젝트
GCP,Jenkins,ArgoCD를 사용하여 CI/CD 체계를 구축을 해보자
🤼프로젝트 환경 구성
- K8S(Google Kubernetes Engine(GKE))
- Jenkins-Pipeline
- ArcoCD
- GitHub
- DockerHub
- Spring boot
📁 깃허브 주소
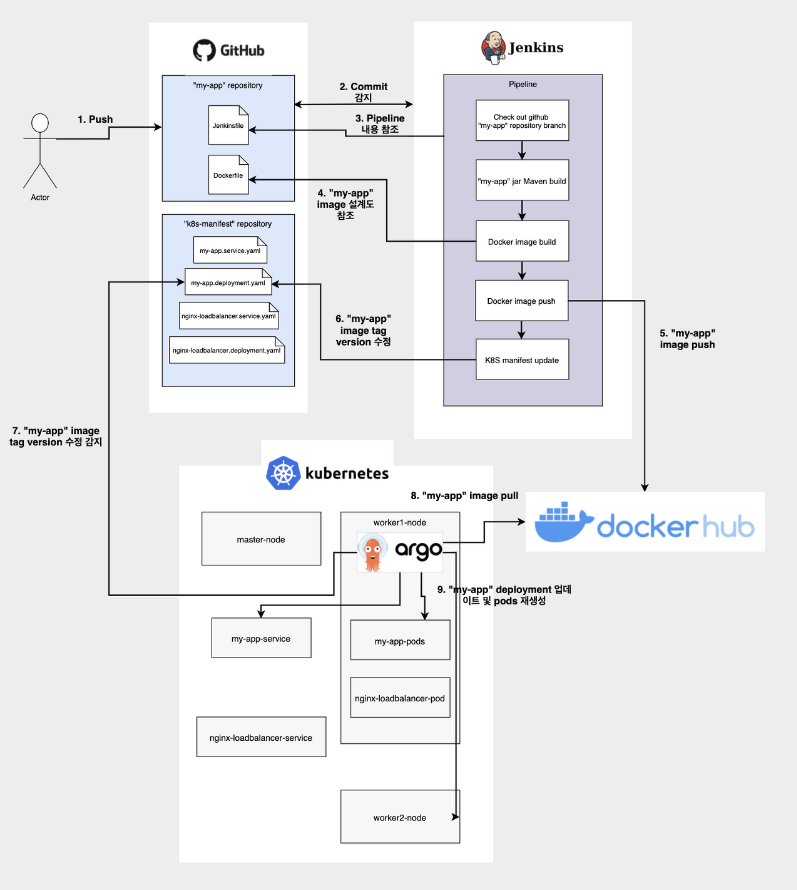
📌 CI/CD 체계 구성도
💆 CI/CD 체계 구축 개요
CI: GCP VM에 Jenkins 설치 -> github에 Jenkinsfile 생성 (단계별 코드 통합 과정 진행) -> Jenkins-Pipeline구축 -> 새로운 이미지 생성 및 태깅 -> Dockerhub Push -> 별도의 manifest repo안 deployment.yaml을 새로운 이미지 태그로 업데이트 -> github webhook를 jenkins에 연동
CD: GKE 활성화 및 클러스터 생성 -> ArgoCD 설치 -> ArgoCD 페이지에서 Repository 생성 -> ArgoCD 페이지
에서 Application 생성 -> 배포 자동화 확인
1 GKE 클러스터 구축
- API 사용 확인
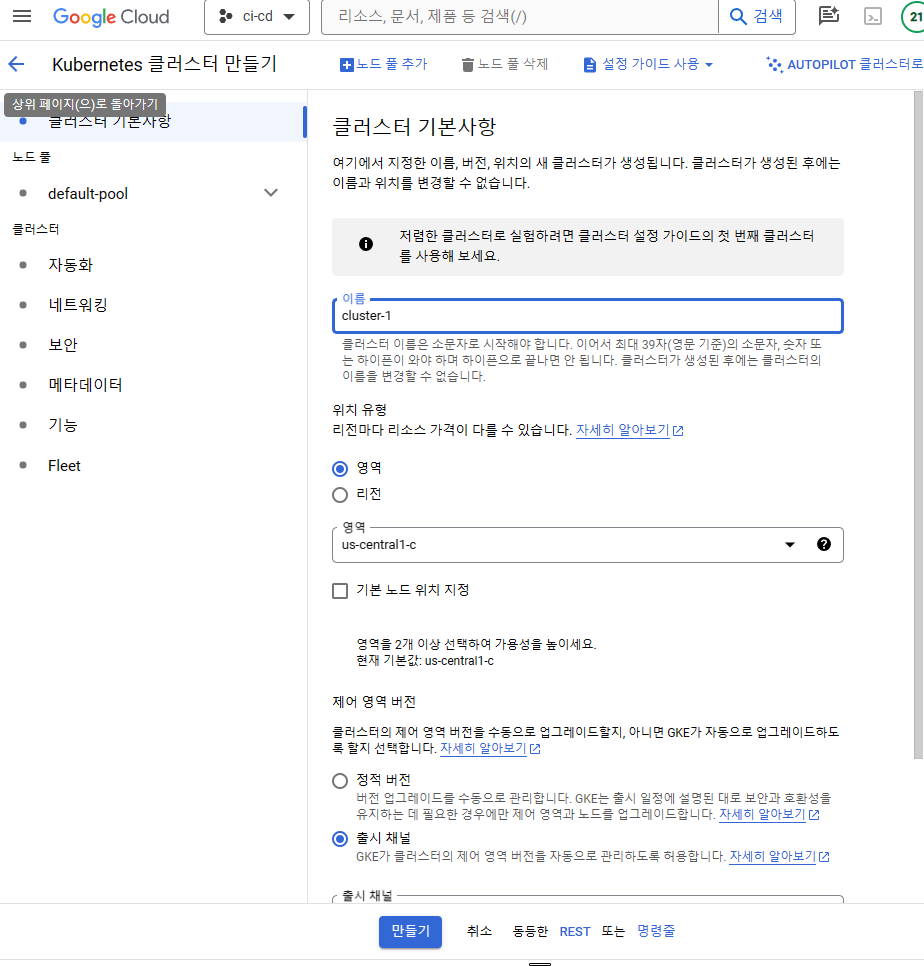
[v] Google Kubernetes Engine API(컴퓨팅 > Kubernetes Engine API)- GKE 클러스 만들기
-> 컴퓨팅 > Kubernetes Engine > 클러스터 > 만들기 > GKE Standard > 구성
1.1 cloud shell setting
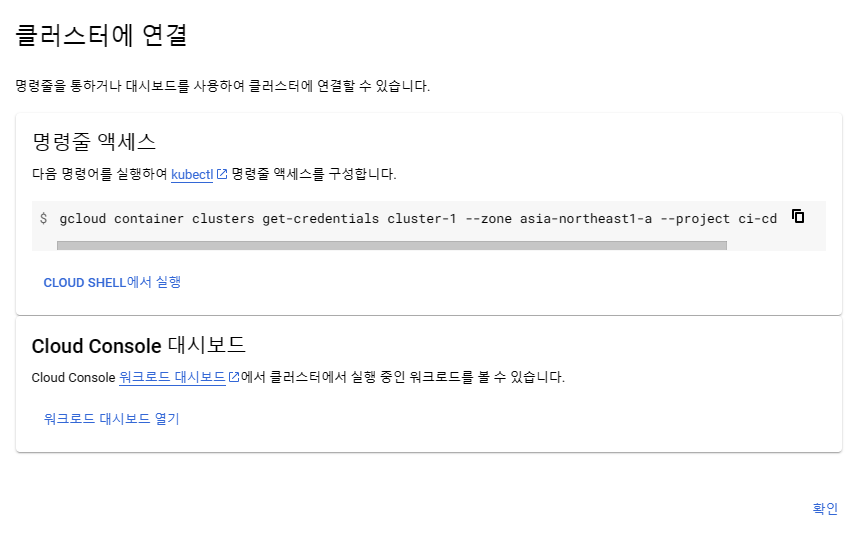
-> 주소 복사후 CLOUD SHEEL 붙여넣기
$ kubectl get nodes
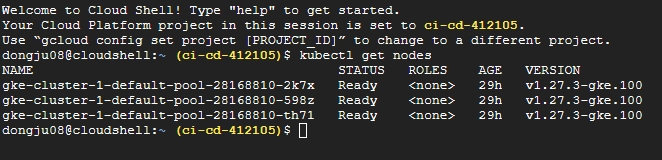
-> kubectl 활성화 확인
1.2 jenkins를 설치할 vm 생성
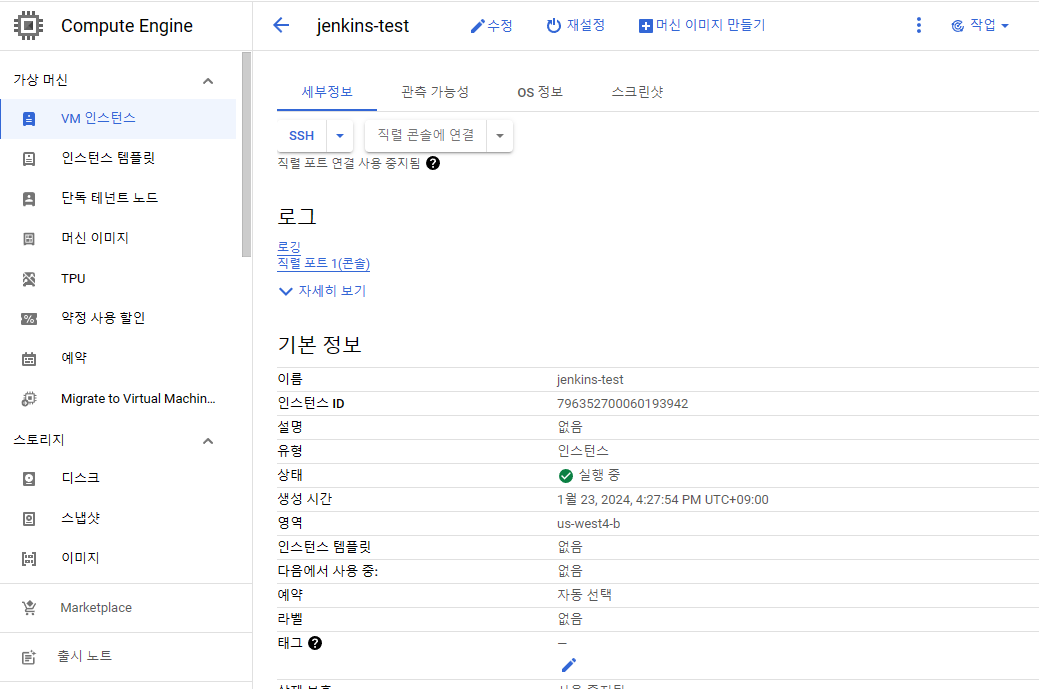
로컬에서 ssh연결을 해서 들어간다.
1.3 방화벽 설정
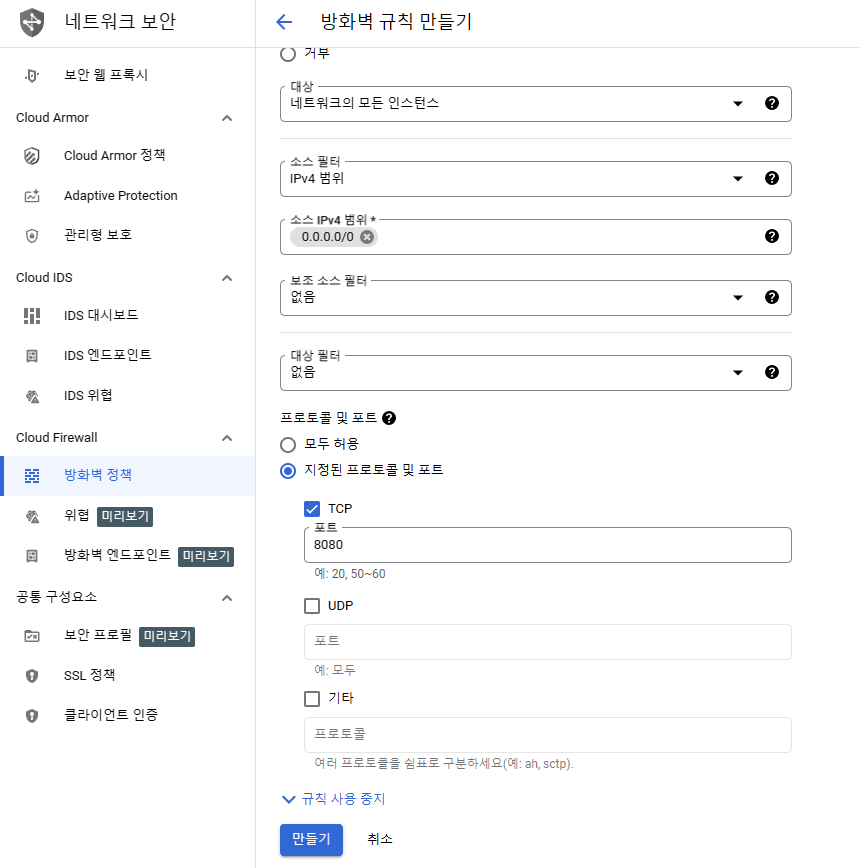
Jenkins설치를 하면 8080포트를 통해 로컬에서 들어가야하기 때문에 방화벽을 미리 설정해준다.
1.4 도커를 이용한 Jenkins 설치

도커를 os에 맞게 설치하고 jenkins를 설치해준다.
도커 다운로드 설명 링크
- 도커를 사용해 jenkins 구성 및 도커 소켓 공유
docker run -d -p 8080:8080 --name jenkins -v /home/jenkins:/var/jenkins_home -v /var/run/docker.sock:/var/run/docker.sock -u root jenkins/jenkins:lt- jenkins에도 docker 클라이언트가 필요하기때문에 같이 설치해준다.
docker exec jenkins apt update
docker exec jenkins apt install -y docker.io
1.5. 로컬에서 URL 접속
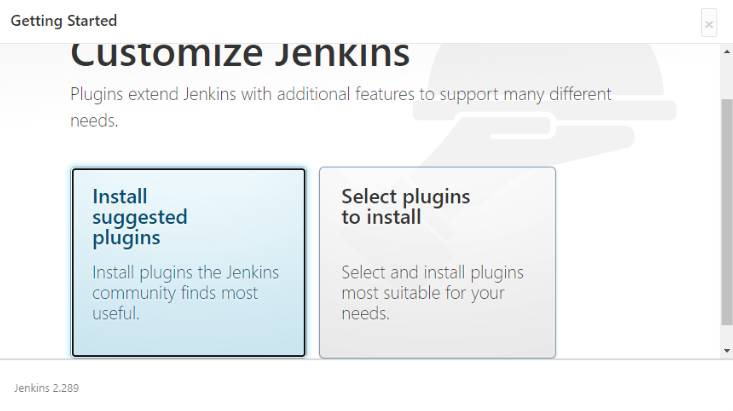
-
로컬 PC에서 VM의 외부 IP로 URL 접속 후 jenkins 설치 비밀번호 입력해준다.
-
jenkins 비밀번호를 까먹으신분은 jenkins docker log를 다시확인하여 비밀번호를 알 수 있다.
docker logs (jenkin-container-name)
2. docker-hub repository생성
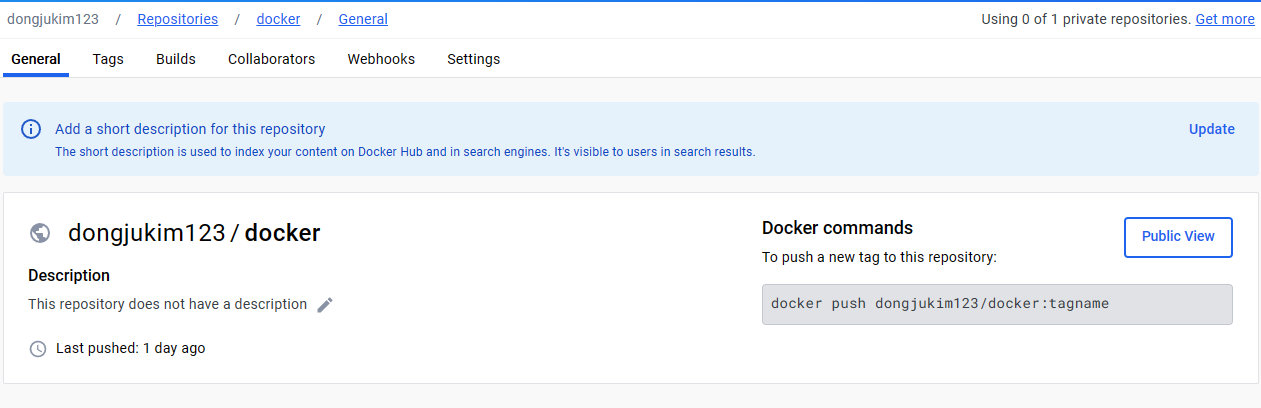
-Jenkins Pipeline을 통해 이미지를 빌드할 docker-hub repository를 생성해준다.
- 추후 사용하게 될 Jenkinsfile에 토큰이 필요하니 dockerhub token을 생성하고 잘 기록해둔다.
3. jenkins 파이프 라인 구성
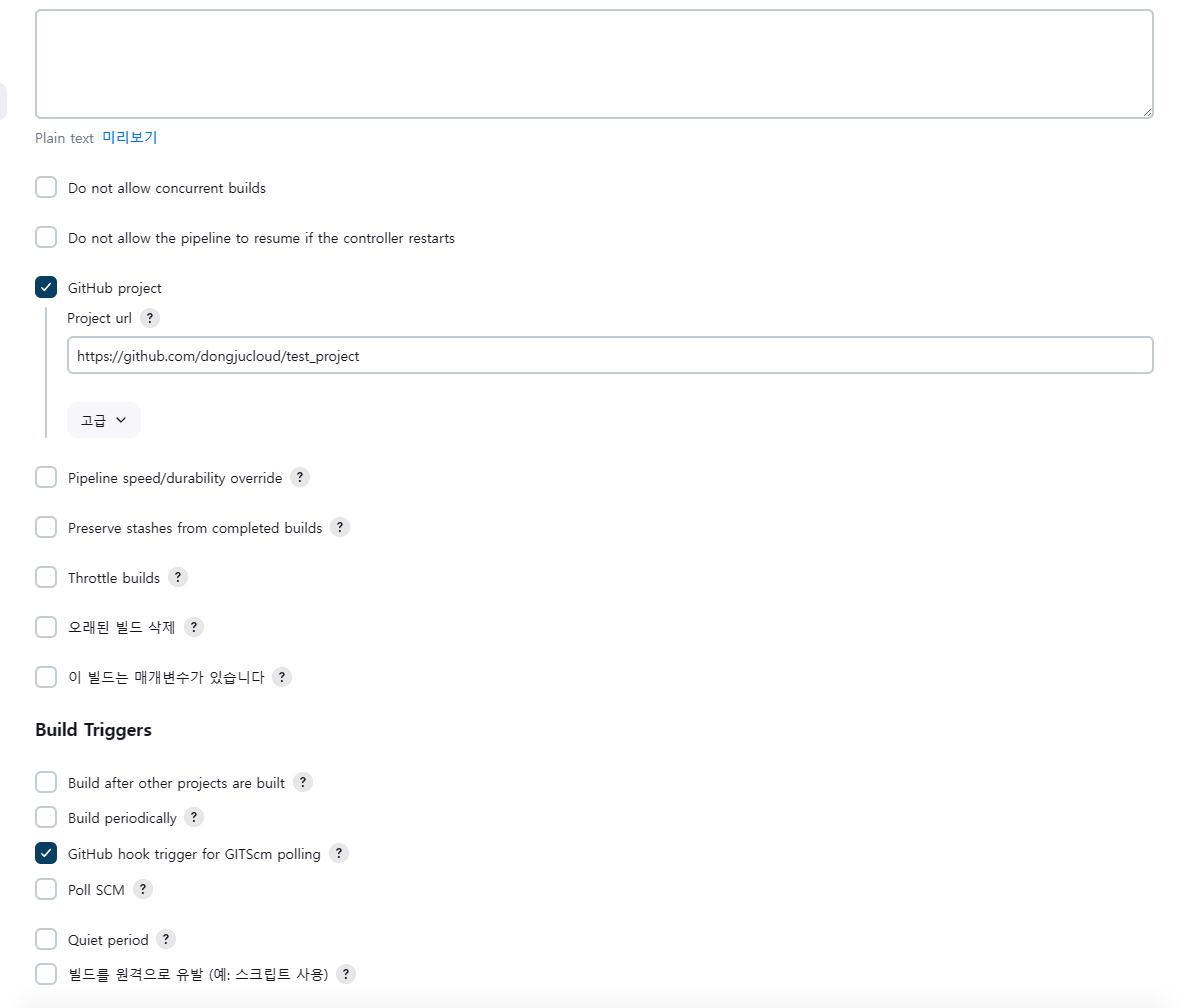
- 새로운 item -> 제목 입력후 -> 파이프라인 선택
- github porject -> jenkinfile을 만들어둔 자신의 Git Repository 입력
- GitHub hook trigger for GITScm polling 체크
-> 추후에 github webhook연동을 해야하므로 체크한다.
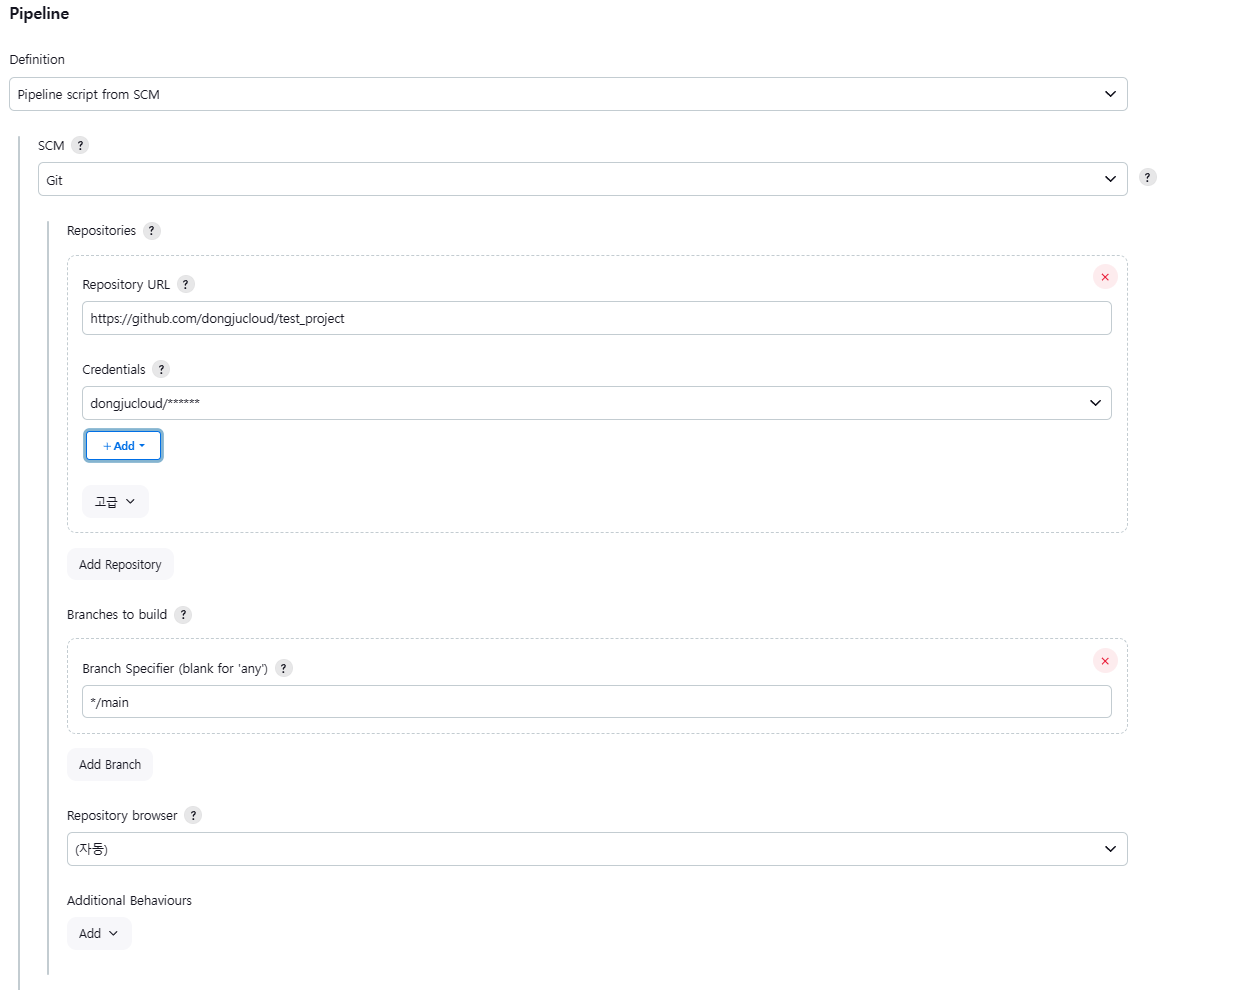
- Repository URL에 자신의 깃허브 주소를 입력한다
- 자신이 설정한 Branch로 변경해준다.
- *Add를 통해 깃허브 credentials를 입력해준다.
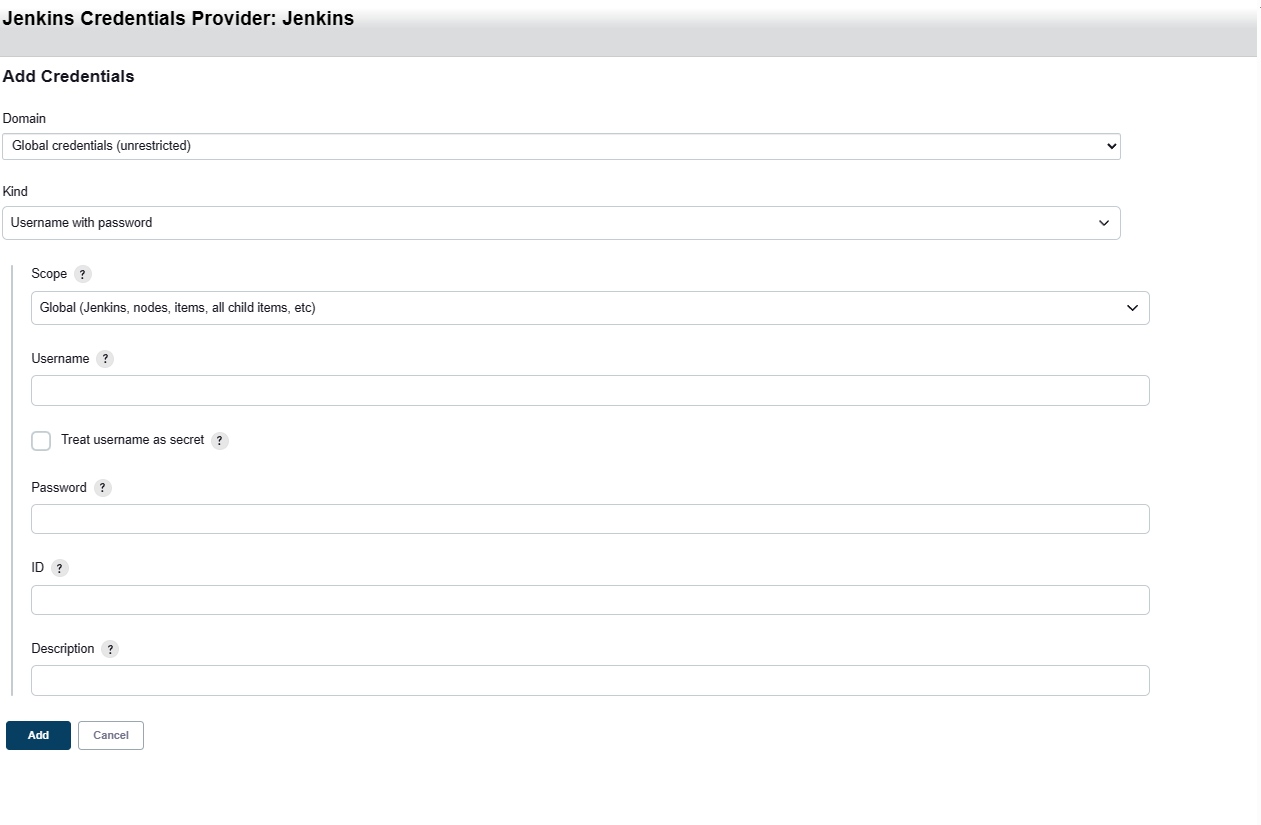
- Kind: git
- username: Git ID
- Git Password: Git Token
- ID: Jenkinsfile에 작성할 ID 작성
3.1 Jenkins에서 docker-pipeline 설치
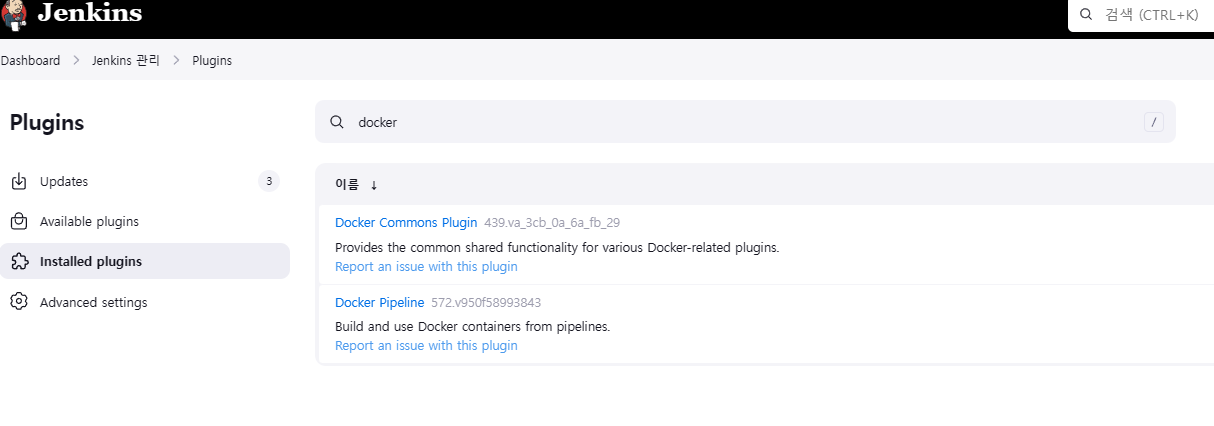
- Jenkins 관리 -> plugins -> Available plugins -> Docker Pipeline설치
- Jenkins Pipeline을 이용해 Docker hub에 이미지를 빌드하기 위해선 설치해야한다.
3.2 Jenkins에 Docker credentials 추가
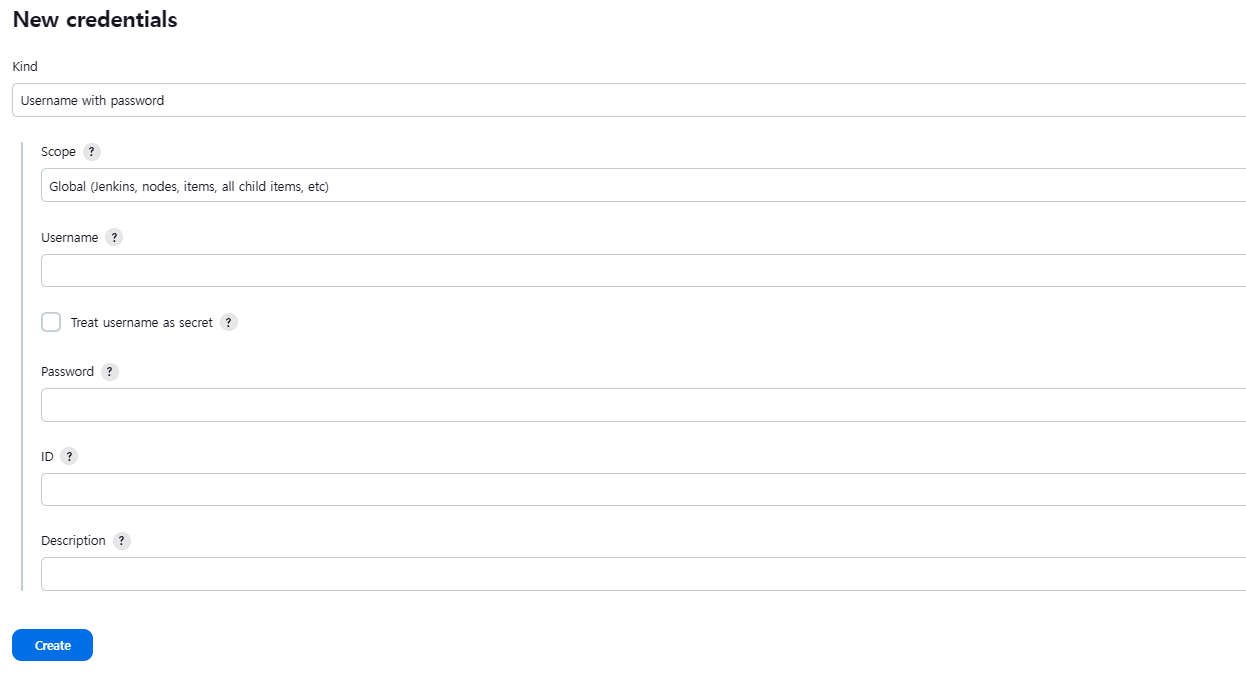

- 도커허브에 이미지가 푸쉬하기 위해 credential발급
- Dashboard -> Jenkins 관리 -> Credentials -> Global credentials -> add
- Username: Docker ID 입력
- Password: Docker Secret Token 값 입력
- ID: Jenkinsfile에 작성할 ID 작성
4. git-hub repository 생성
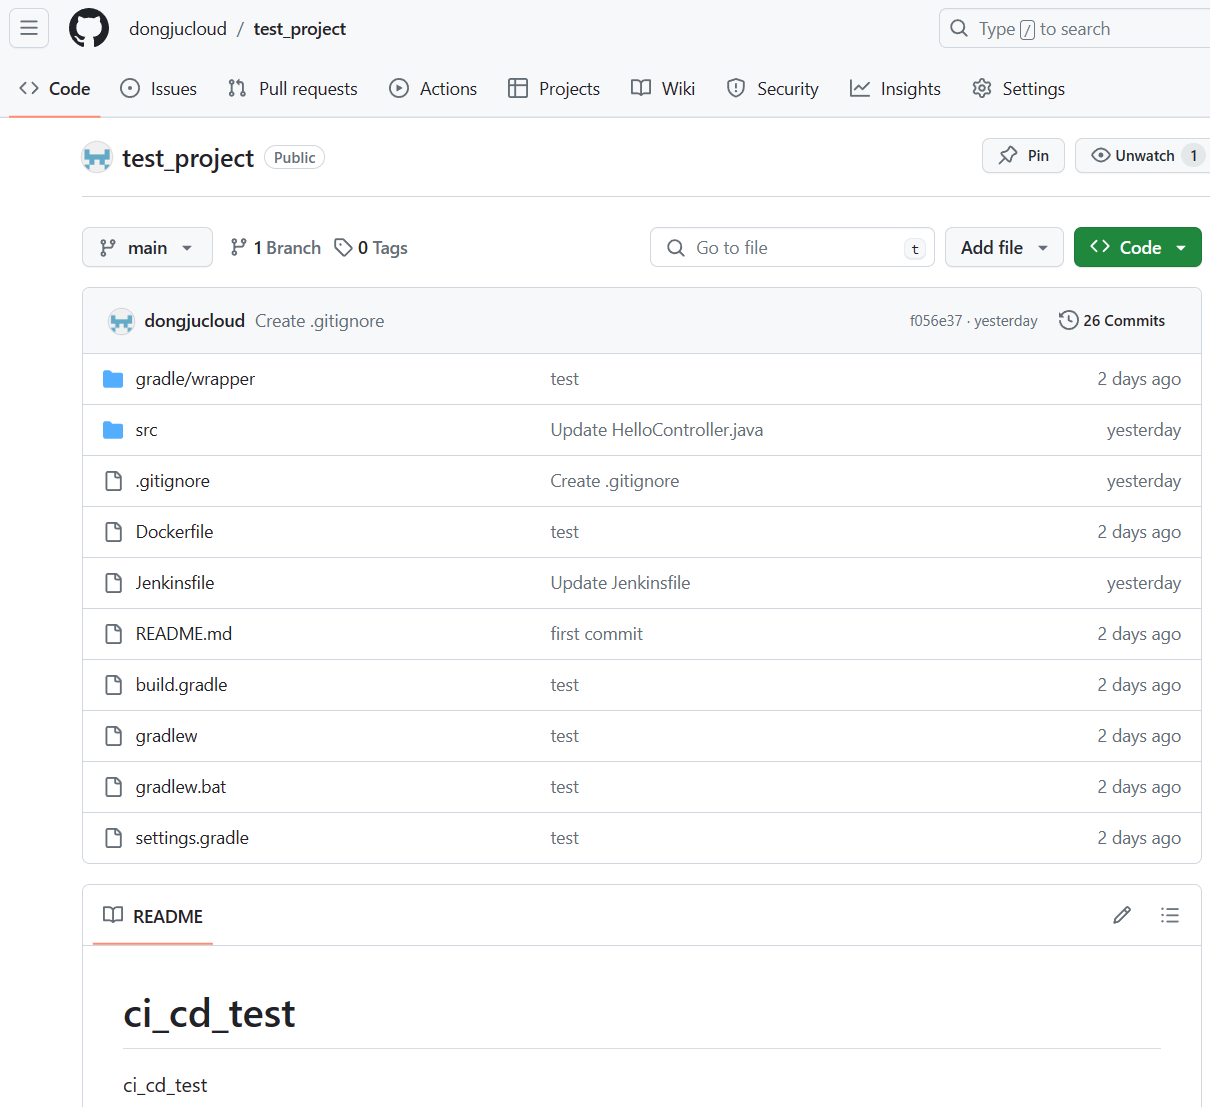
- 이미지를 생성할 도커파일 작성
# 첫 번째 단계: 애플리케이션 빌드
FROM openjdk:11-jdk AS builder
COPY gradlew .
COPY gradle gradle
COPY build.gradle .
COPY settings.gradle .
COPY src src
RUN chmod +x ./gradlew
RUN ./gradlew bootJar
# 두 번째 단계: 최종 실행 이미지 생성
FROM openjdk:11-slim

# 첫 번째 단계에서 생성된 JAR 파일을 최종 이미지로 복사
COPY --from=builder build/libs/*.jar springboot-sample-app.jar
VOLUME /tmp
EXPOSE 8080
# 애플리케이션 실행 명령 설정
ENTRYPOINT ["java", "-jar", "/springboot-sample-app.jar"]
위 Dockerfile은 Spring Boot 애플리케이션을 컨테이너화하고 배포하기 위한 파일이다.
- 배포 스크립트(Jenkinsfile) 생성
pipeline{
    agent any

    environment {
        dockerHubRegistry = 'dongjukim123/docker' // dockerHub에 repository 명
        dockerHubRegistryCredential = 'docker-hub' // Jenkins에서 생성한 dockerhub-credential-ID값
        githubCredential = 'github' // Jenkins에서 생성한 github-credential-ID값
    }
// 1. git repository 가 체크되는지 확인, 제대로 연동이 안될 경우, 이 단계(stage) 에서 fail 발생
    stages {
        stage('check out application git branch'){
            steps {
                checkout scm
            }
            post {
                failure {
                    echo 'repository checkout failure'
                }
                success {
                    echo 'repository checkout success'
                }
            }
        }
// 2. gradle 빌드 (springboot web 생성을 위한 선행과정)

        stage('build gradle') {
            steps {
                sh  './gradlew build'
                sh 'ls -al ./build'
            }
            post {
                success {
                    echo 'gradle build success'
                }
                failure {
                    echo 'gradle build failed'
                }
            }
        }
// 3. Dockefile build
        stage('docker image build'){
            steps{
                sh "docker build . -t ${dockerHubRegistry}:${currentBuild.number}"
                sh "docker build . -t ${dockerHubRegistry}:latest"
            }
            post {
                    failure {
                      echo 'Docker image build failure !'
                    }
                    success {
                      echo 'Docker image build success !'
                    }
            }
        }
 // 4. 빌드된 이미지 push
        stage('Docker Image Push') {
            steps {
                withDockerRegistry([ credentialsId: dockerHubRegistryCredential, url: "" ]) {
                    sh "docker push ${dockerHubRegistry}:${currentBuild.number}"
                    sh "docker push ${dockerHubRegistry}:latest"

                    sleep 10 /* Wait uploading */
                }
            }
            post {
                    failure {
                      echo 'Docker Image Push failure !'
                      sh "docker rmi ${dockerHubRegistry}:${currentBuild.number}"
                      sh "docker rmi ${dockerHubRegistry}:latest"
                    }
                    success {
                      echo 'Docker image push success !'
                      sh "docker rmi ${dockerHubRegistry}:${currentBuild.number}"
                      sh "docker rmi ${dockerHubRegistry}:latest"
                    }
            }
        }
 // 5. 쿠버네티스 배포 작업
        stage('K8S Manifest Update') {
            steps {
                sh "ls"
                sh 'mkdir -p gitOpsRepo'
                dir("gitOpsRepo")
                {
                    git branch: "main",
                    credentialsId: githubCredential,
                    url: 'https://github.com/dongjucloud/kube-manifests.git'
                    sh "git config --global user.email dongju08@naver.com"
                    sh "git config --global user.name dongjucloud"
                    // 배포될 때 마다 버전이 올라야 하므로 deployment.yaml 에서 ksw7734/docker:버전 을 sed
                    -i 로 ${currentBuild.number} 변수를 이용해 변경
                    sh "sed -i 's/docker:.*\$/docker:${currentBuild.number}/' deployment.yaml"
                    sh "git add deployment.yaml"
                    sh "git commit -m '[UPDATE] k8s ${currentBuild.number} image versioning'"

                    withCredentials([gitUsernamePassword(credentialsId: githubCredential,
                                     gitToolName: 'git-tool')]) {
                        sh "git remote set-url origin https://github.com/dongjucloud/kube-manifests"
                        sh "git push -u origin main"
                    }
                }
            }
            post {
                    failure {
                      echo 'K8S Manifest Update failure !'
                    }
                    success {
                      echo 'K8S Manifest Update success !'
                    }
            }
        }

    }
}
이 파이프라인을 통해 새로 푸쉬된 이미지 태그를 갈아끼운다 -> yaml수정
-
배포할 manifests 작성
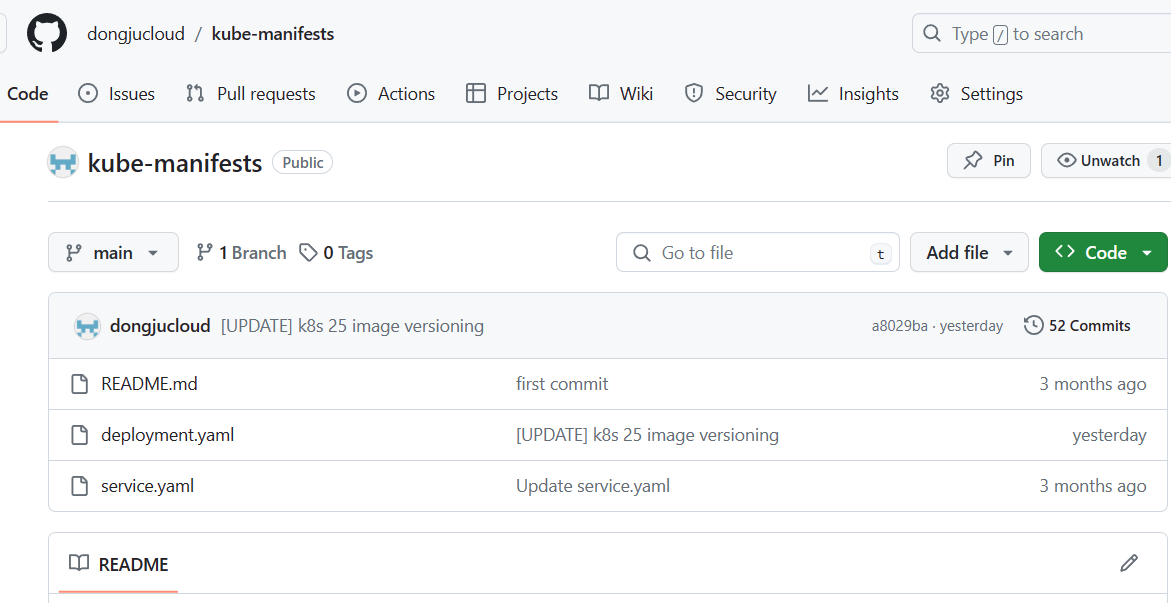
kubernetes 배포 작업을 위한 deplyment.yaml, service.yaml 파일 작성
-
service.yaml
apiVersion: v1
kind: Service
metadata:
  labels:
    app: k8s
  name: k8s
spec:
  type: LoadBalancer
  selector:
    app: k8s
  ports:
    - port: 8080
targetPort: 8080- deployment.yaml
apiVersion: apps/v1
kind: Deployment
metadata:
  labels:
    app: k8s
  name: k8s
spec:
  replicas: 3
  selector:
    matchLabels:
      app: k8s
  template:
    metadata:
      labels:
        app: k8s
    spec:
      containers:
      - name: k8s
        image: dongjukim123/docker:25
        ports:
          - containerPort: 8080
5. jenkins-pipeline test
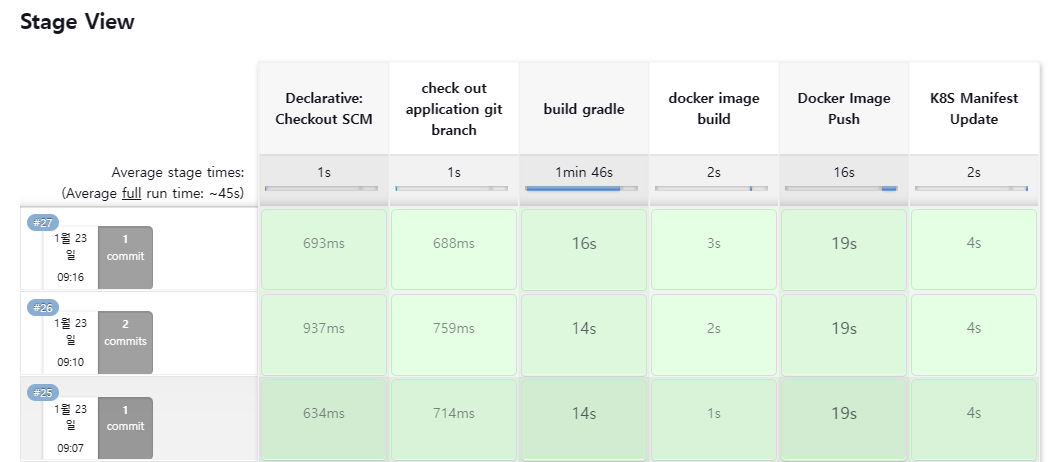
6. Webhook 연동
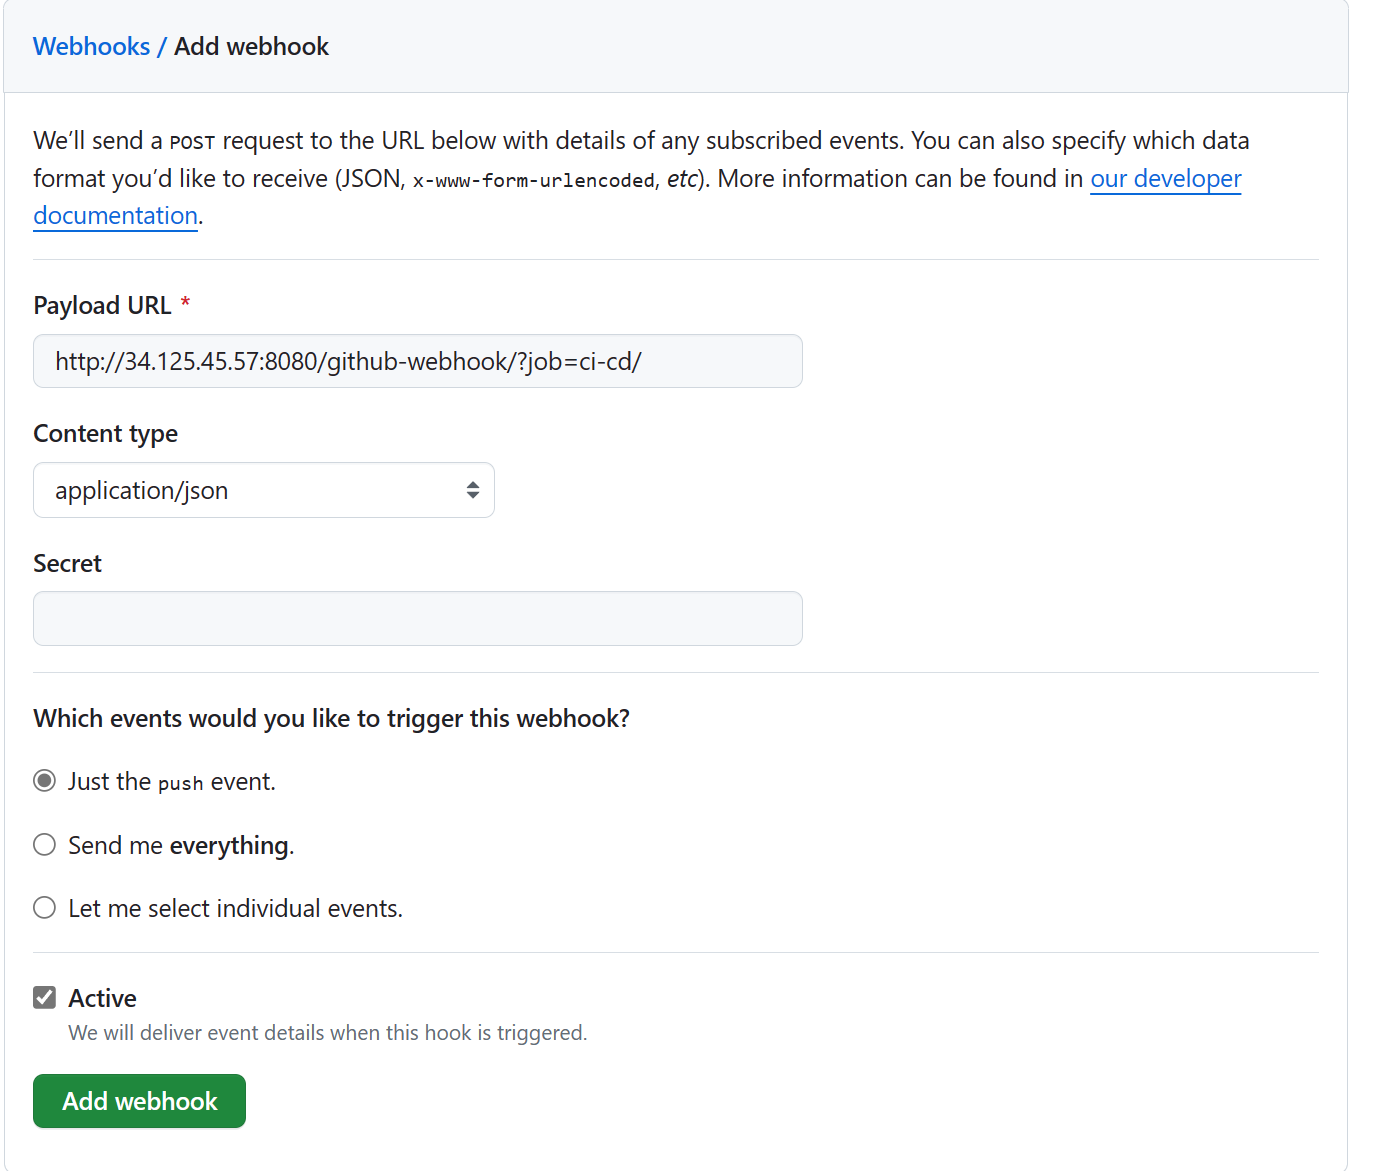
- git repository -> setting -> webhook
- Payload URL : http://(jenkins IP:Jenkins port)/github-webhook/?job=(파이프라인)
- Content Type : application/json
- Just the push event
6.1 Webhook 테스트
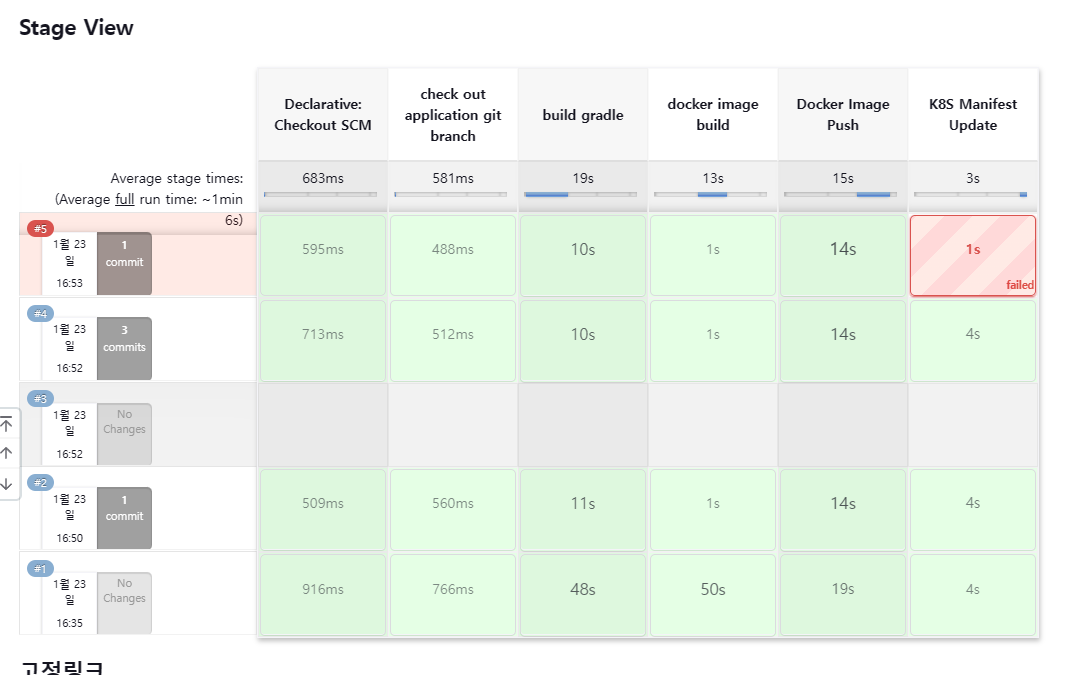
jenkinsfile에서 일부러 오류를 내보았더니 webhook이 변경된 소스를 인식해 자동으로 파이프라인이 작동하였다.
-> 잘못된 jenkinsfile 입력으로 실패한 모슴
7. ArgoCD를 통한 CD 체계 구성(설치)
- ArgoCD 설치
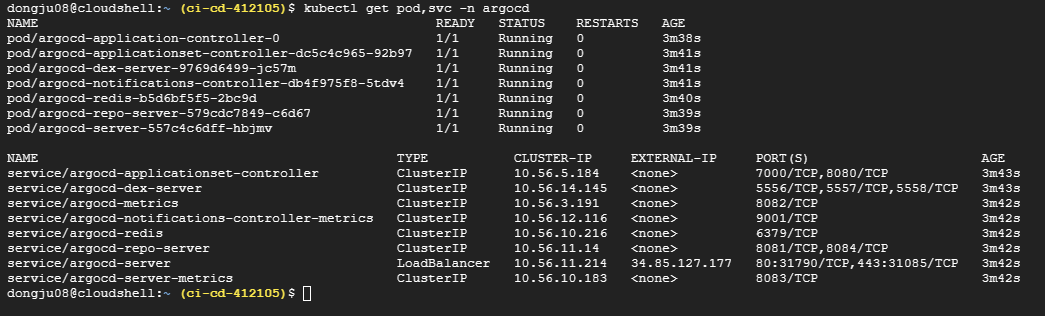
- 새로운 이미지 태그로 변경된 manifest를 통해 ArgoCD로 배포한다.
$ kubectl create namespace argocd
-> argocd 생성 및 적용을 위한 네임스페이스 생성
$ kubectl apply -n argocd -f https://raw.githubusercontent.com/argoproj/argo-cd/stable/manifests/install.yaml
$ kubectl patch svc argocd-server -n argocd -p '{"spec": {"type": "LoadBalancer"}}'
-> 외부에서 접근을 위해 argo server service의 ClusterIP를 LoadBalancer로 변경해준다.
$ kubectl get pod,svc –n argocd
-> argocd 가 위와 같이 구성 확인
- ArgoCD 로그인
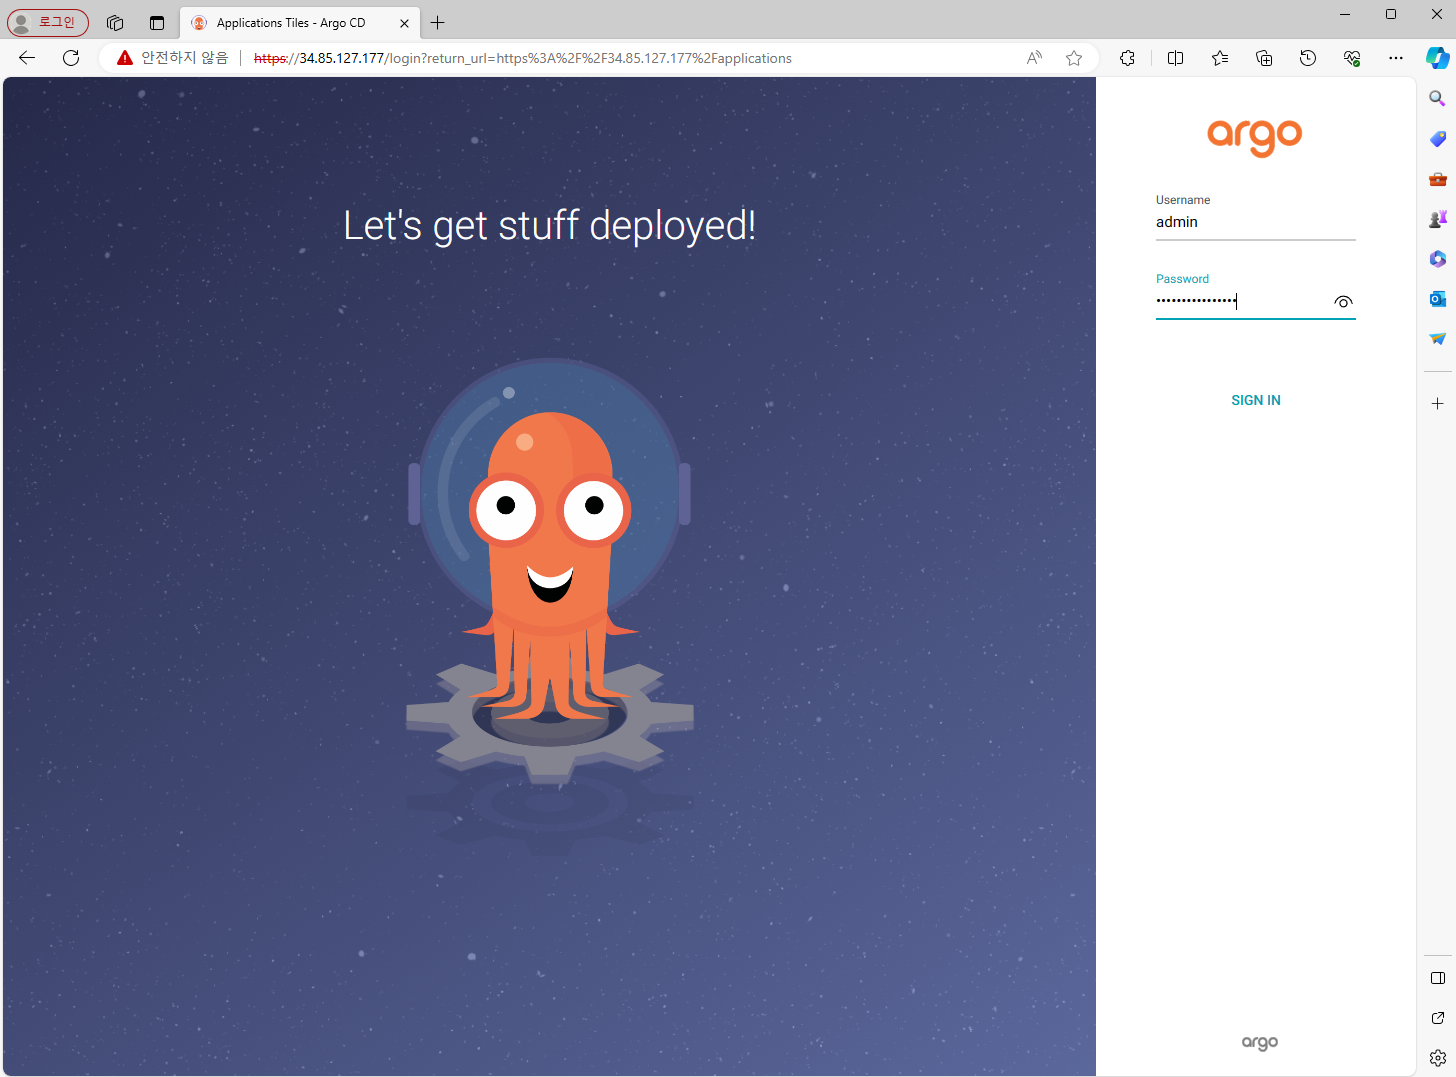
Username = admin
Password = ***
콘솔에서 패스워드 확인
$ kubectl -n argocd get secret argocd-initial-admin-secret -o jsonpath="{.data.password}"
| base64 –d
7.1 ArgoCD Repositories 설정
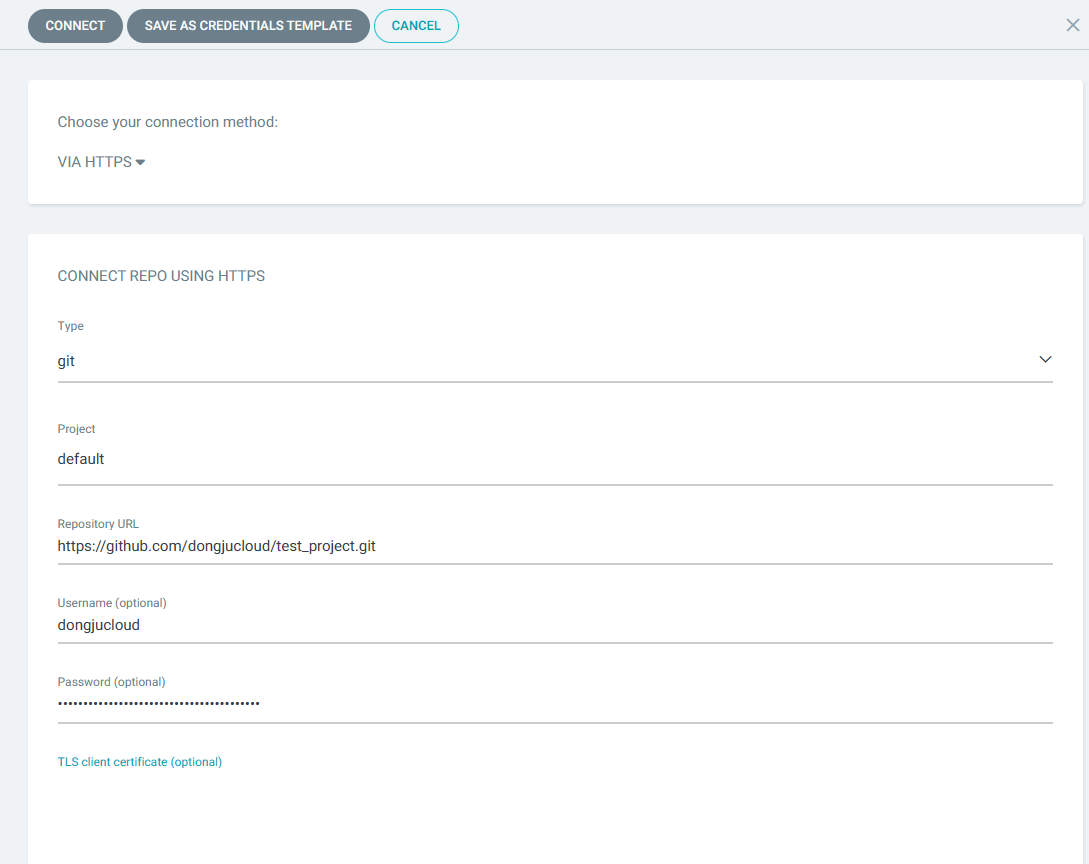
- 연결방식을 HTTPS로 설정
- Type: git
- Project: default
- Reopsitory URL: jenkinfile이 있는 자신의 github url
- Password: 자신의 Github token
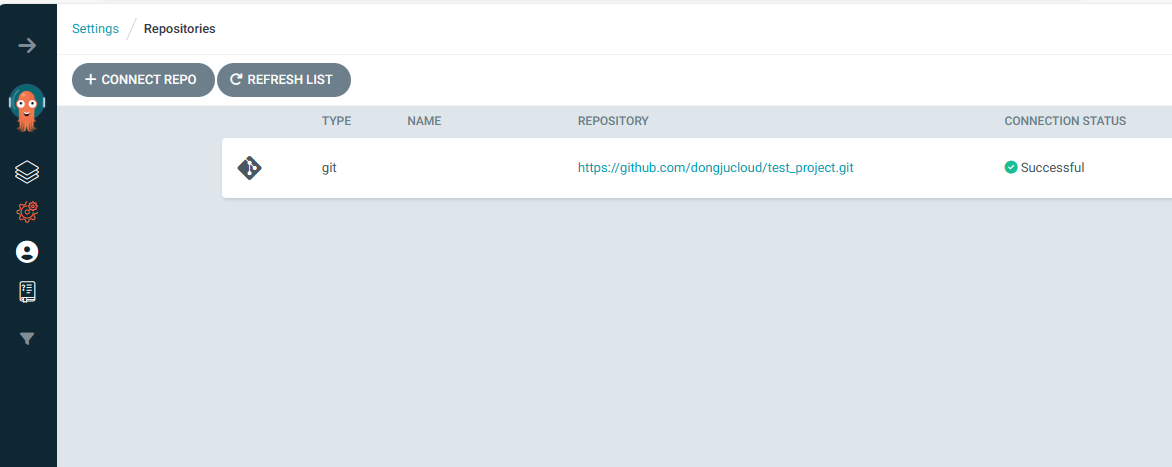
Connection Status 가 Successful 이면 성공
7.2 ArgoCD Application 설정
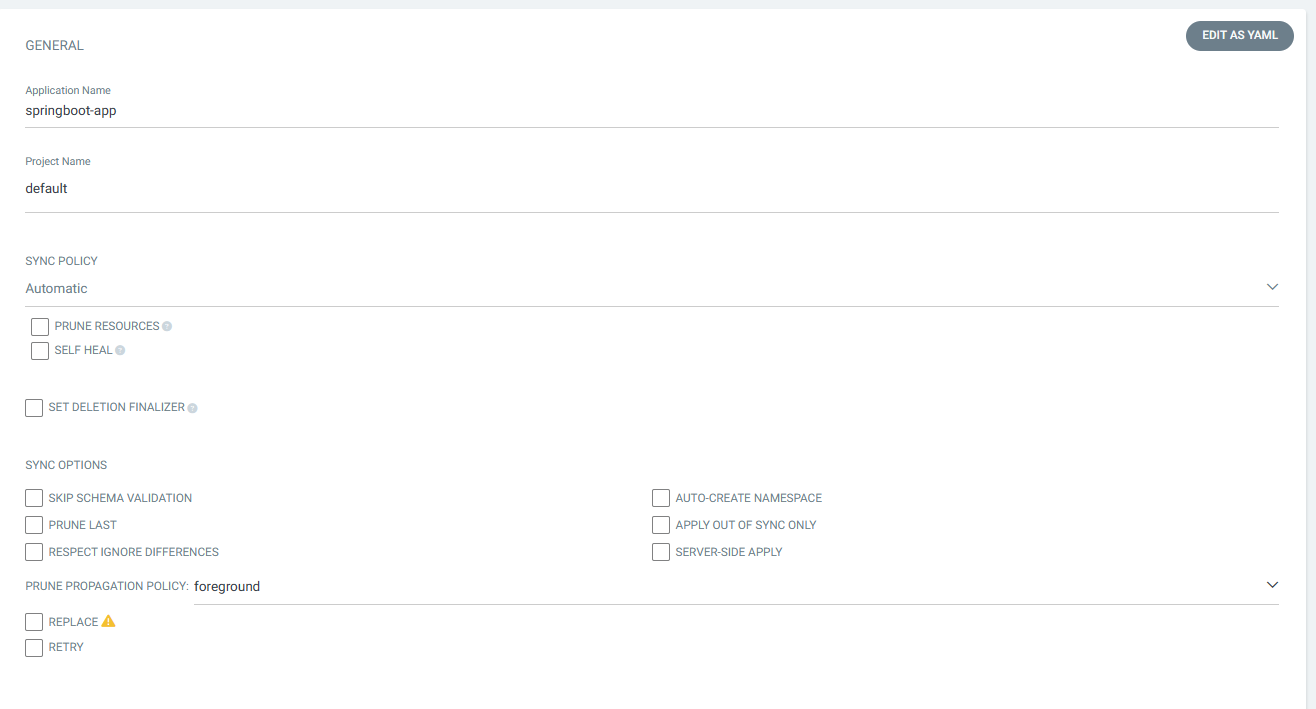
- Application Name: 배포할 Application명 입력
- Project Name: default
- SYNC 정책은 자동설정
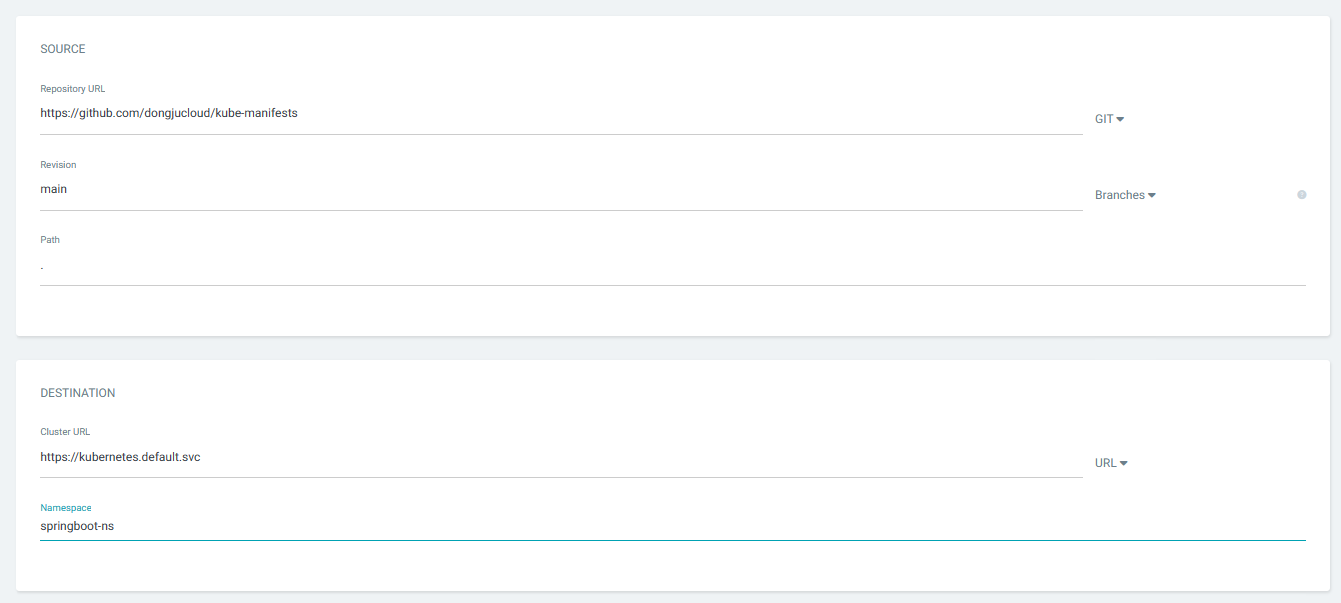
Repository URL: Gitgub Manifests URL
- Branch:maini
Path: manifests가 존재하는 경로 URL로 접속시, Manifests가 존재한다면 현재경로(".")- namespcae이름은 미리 cloudshell에서 새로 만들어 주도록 하자(springboot-ns 생성)
8.ArgoCD TEST
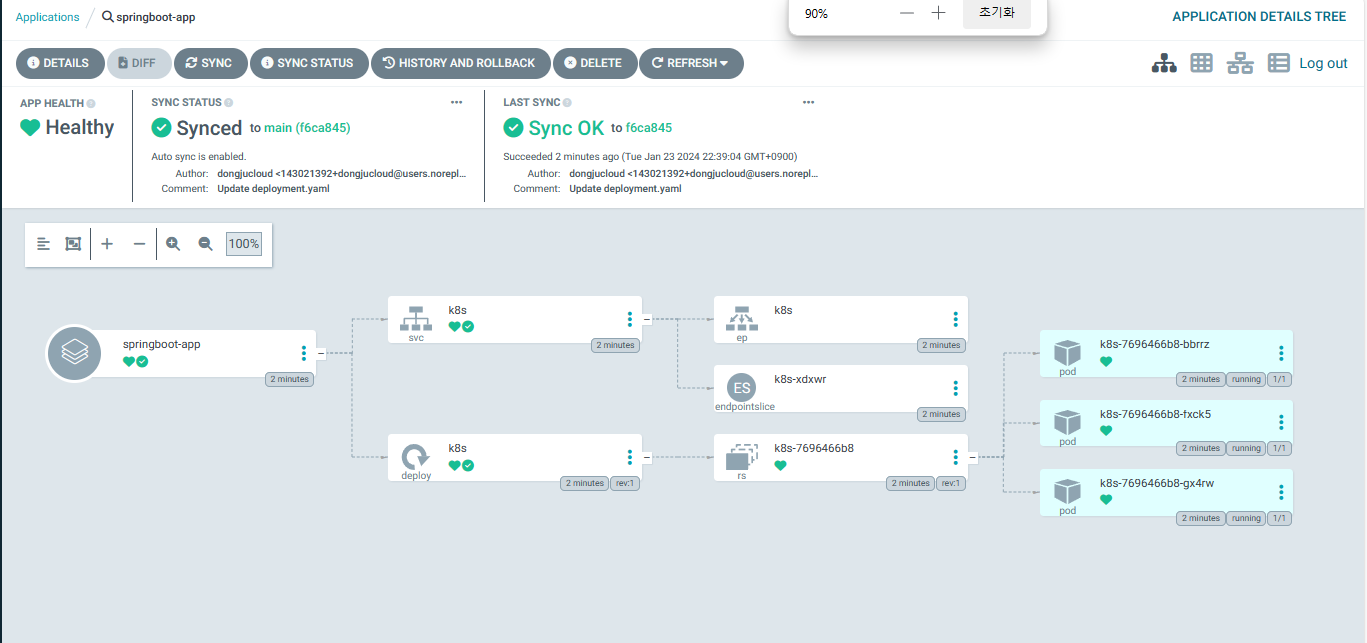
- 소스를 변경시키면 deplyment.yaml파일을 통해 자동으로 배포가 된다.
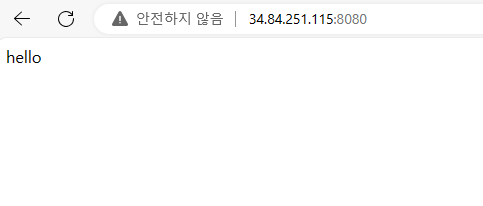
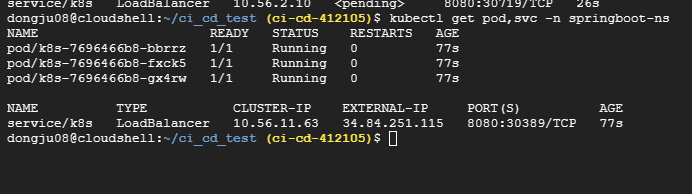
- 외부 IP접속을통해 배포가 잘되었는지 확인해주자.
- 서비스 확인