
사용자 입력을 검증하기 전에 이상, 이하, 초과, 미만을 영어로 표기하는데 헷갈려서 여기에서 정리한 것을 기반으로 사용자 입력을 검증했다. 사용자 입력에 대한 큰 틀은 아래 그림과 같다.
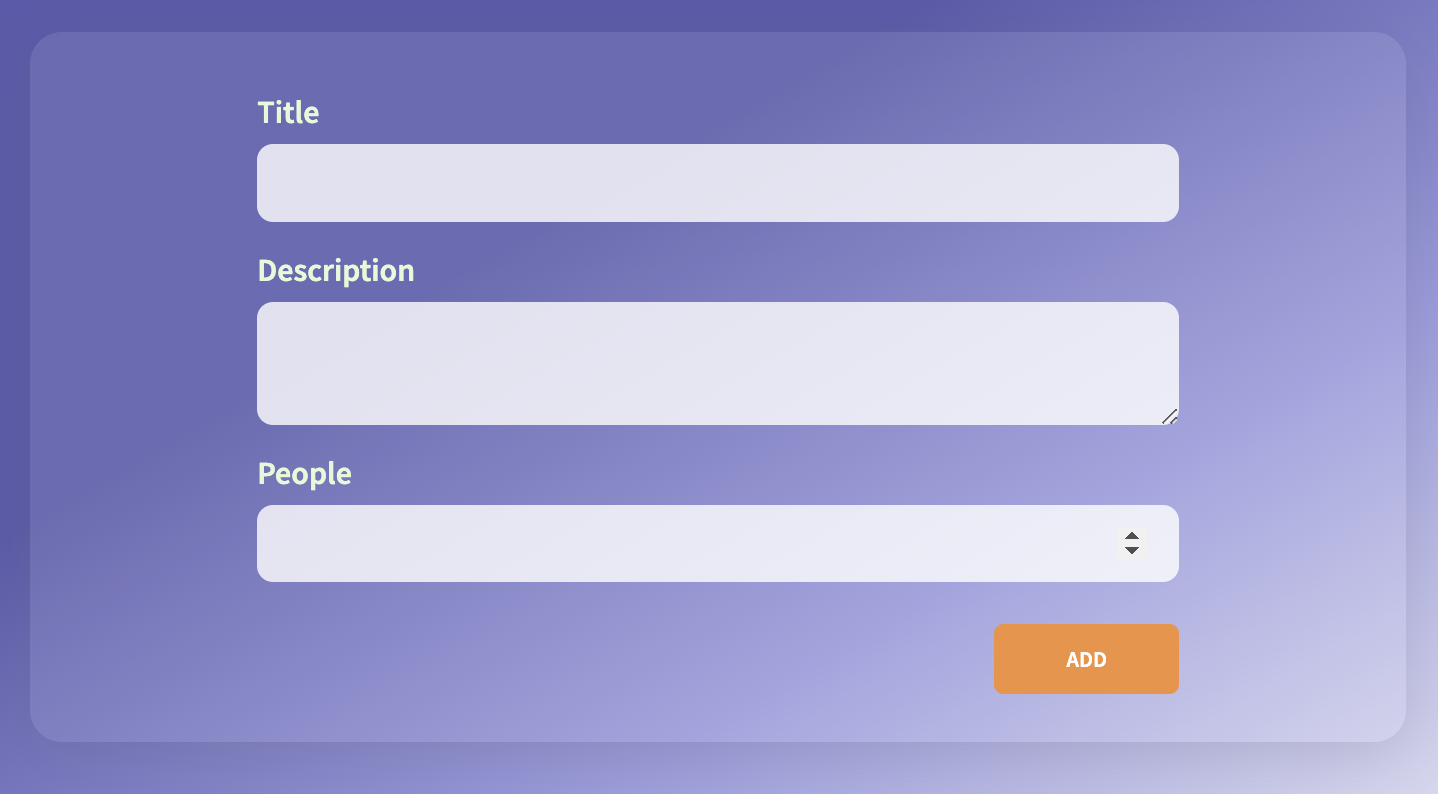
🍀 사용자 입력
1️⃣ 사용자 입력
- title: minLength = 5, maxLength = 30 ->
5 <= title <= 30 - description: minLength = 10, maxLength = 300 ->
10 <= title <= 300 - people: minPeople = 1, maxPeople = 10 ->
1 <= people <= 10
2️⃣ 사용자 입력 검증 형식
validator함수에 넘겨줄 정보를 어떻게 구성해야지 생각하다가 일단 6개의 옵션들이 생각났다.
value: string | number;  // 사용자 입력 값
requried?: boolean;      // 필수적으로 사용자 입력 값을 입력해야하는가?
minPeople?: number;      // 최소 사람 수
maxPeople?: number;      // 최대 사람 수
minLength?: number;      // 최소 문자열 길이
maxLength?: number;      // 최대 문자열 길이
이렇게 구성했다가 변수 이름을 이용하여 alert기능을 구현하고 싶어 varName이라는 옵션도 넣어봤다.
varName: "title" | "description" | "people" // 변수 이름일단, 생각해서 옵션들을 구성하긴 했는데 변수의 이름을 어떻게 추출할 지 몰라서 헤매다가 stackoverflow의 도움으로 1시간만에 해결할 수 있었다. 이에 관한 블로그는 여기에 정리해놨다.
3️⃣ 사용자 입력 interface 설정
src/interfaces/UserValidate.ts
export default interface UserValidate {
  value: string | number;
  varName: "title" | "description" | "people";
  required?: boolean;
  minPeople?: number;
  maxPeople?: number;
  minLength?: number;
  maxLength?: number;
}
이렇게
validator에 넘겨줄 사용자 입력에 대한 정보를 기준으로 검증을 구현했다.
🍀 검증 로직 구현
userInput은 총 title, description, people로 이루어져 있으며 submit Event가 발생시 1️⃣ gatherUserInput method가 호출 되어 각각의 사용자 입력에 대해 validate(검증)를 하고 유효한 값이 아니면 alert로 어떠한 값이 잘못되었는지 알려준다.
submitHandler
submitHandler(event: Event) {
    event.preventDefault();
    const userInput = this.gatherUserInputs();    // 1️⃣

    if (Array.isArray(userInput)) {   // 2️⃣
      const [title, description, numOfPeople] = userInput;
      this.clearUserInput();
    }
  }
gatherUserInputs
private gatherUserInputs(): [string, string, number] | void {
  const userTitle = this.titleInputElement.value;
  const userDescription = this.descriptionElement.value;
  const userNumOfPeople = +this.peopleElement.value;

  ...// call validator

  return [userTitle, userDescription, userNumOfPeople];
}
사용자 입력 검증을 마치면 [title, description, people]과 같은 형태로 전달하기 위해서 return type을 tuple인 [string, string, number]로 지정해 주었고 2️⃣에서 gatherUserInputs의 return 값이 유효하지 않을 시 undefined이므로 튜플인지 check해 주어 title, description, numOfPeople로 사용자 입력을 받는다.
validator
import UserValidate from "../interfaces/userValidate";

export default function validateUserInput(userInput: UserValidate) {
  let isValid = true;

  if (userInput.required) {
    isValid = userInput.value.toString().trim().length > 0;
    if (!isValid) return alert(`please enter the ${userInput.varName}`);
  }

  ...// title, description, people validation logic

  return isValid // validation logic을 다 통과한다면 유효한 값임을 보증

}
title, description, people을 검증하기에 앞서 요구되는 값인가 아닌가를 먼저 체크하는 분기점을 만들었다. 요구하는 값이라면 다른 검증 로직을 통하지 않고 좌우 공백을 제거하여 길이가 0이하라면 사용자에게 값을 요구해야하기 때문이다.
1️⃣ title 검증
gatherUserInputs title에 대한 정보
private gatherUserInputs(): [string, string, number] | void {
  ...//
  const titleValidateObj: UserValidate = {   // 1️⃣
    value: userTitle,
    varName: var2String({ userTitle })
      .replace("user", "")
        .toLowerCase() as "title",
    required: true,
    minLength: 5,
    maxLength: 30,
  };

  const isValid = validateUserInput(titleValidateObj) ...// 2️⃣

  return [userTitle, userDescription, userNumOfPeople];
}
validator
import UserValidate from "../interfaces/userValidate";

export default function validateUserInput(userInput: UserValidate) {
  ...// required 부분

  if (
    userInput.minLength !== undefined &&
    typeof userInput.value === "string"
  ) {
    isValid = userInput.minLength <= userInput.value.length;
    if (!isValid)
      return alert(
        `${userInput.varName} length should be more than ${userInput.minLength}`
      );
  }

  if (
    userInput.maxLength !== undefined &&
    typeof userInput.value === "string"
  ) {
    isValid = userInput.maxLength >= userInput.value.length;
    if (!isValid)
      return alert(
        `${userInput.varName} length should be not more than ${userInput.maxLength}`
      );
  }

  return isValid;
}
minLength와 maxLength를 검증하는 로직은 title과 description에 해당한다. 직관적으로 봤을 때 당연히 string type이 들어오겠지만 내가 생각치 못한 부분에서 type이 바뀔 수도 있다고 가정하에 string type인지도 check했으며, 변수의 이름(varName)을 template literal안에 넣어주어
title과 description 각각을 처리하는 분기점을 만들지 않았다. 나름 재사용성을 높이고 코드를 분리시키기 위해서 짠 코드이지만 맞는 코드인지는 모르겠다. 하지만 스스로를 믿고 갑니다 ㅜㅜ😭
확인
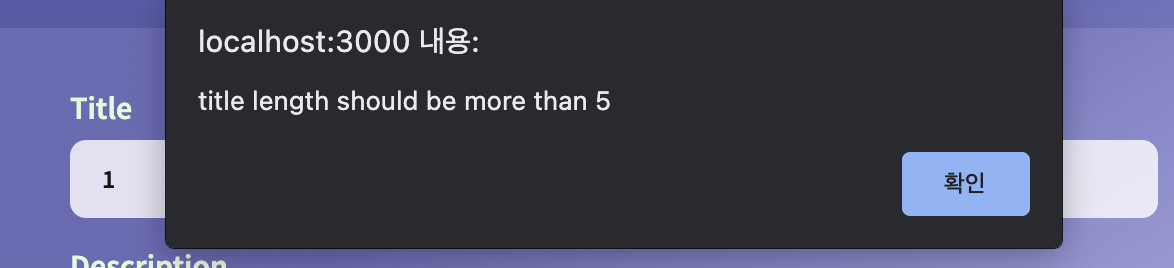
- 첫 번째 그림: 최소 값 검증 -> title길이는 5이상
- 두 번째 그림: 최대 값 검증 -> title길이는 30이하
잘 돌아간다🎉
2️⃣ description 검증
gatherUserInputs description에 대한 정보
private gatherUserInputs(): [string, string, number] | void {
  ...//

  const descriptionValidateObj: UserValidate = {
    value: userDescription,
    varName: var2String({ userDescription })
      .replace("user", "")
        .toLowerCase() as "description",
    required: true
    minLength: 10,
    maxLength: 300,
  };

  ...//

  const isValid =
    validateUserInput(titleValidateObj) &&                               validateUserInput(descriptionValidateObj) ...//

  return [userTitle, userDescription, userNumOfPeople];
}
description validator는 위의 title에서 걸리기 때문에 title validation logic과 같다.
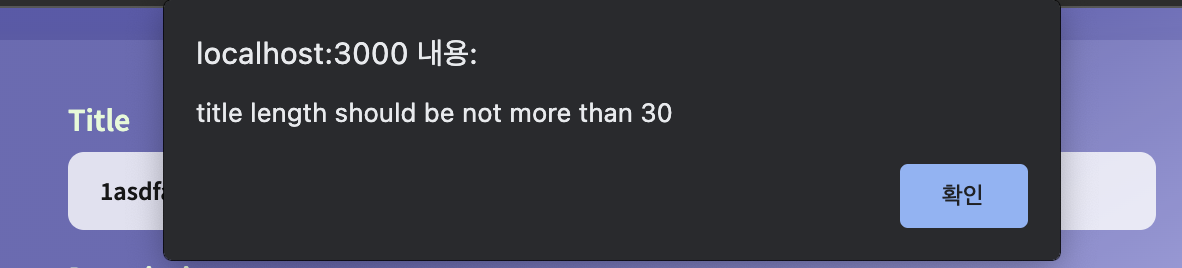
확인
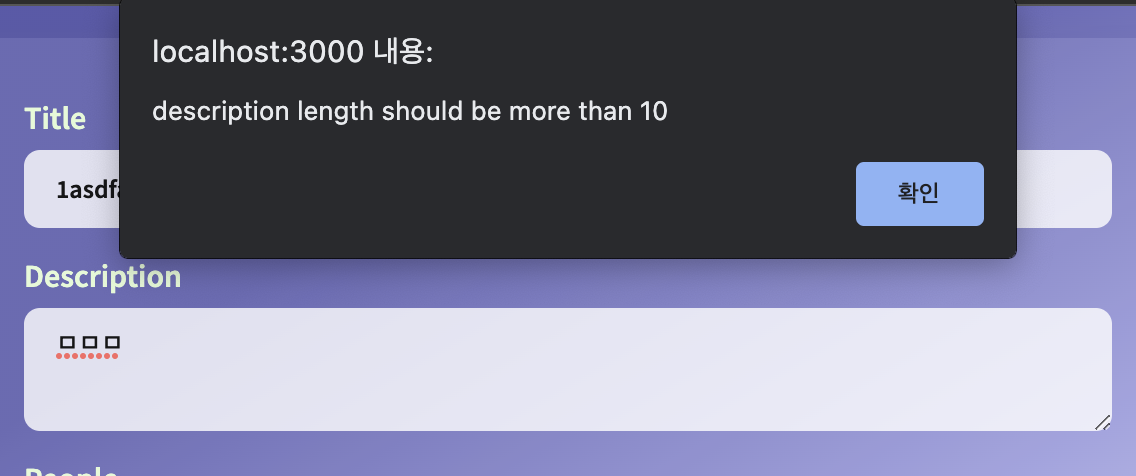
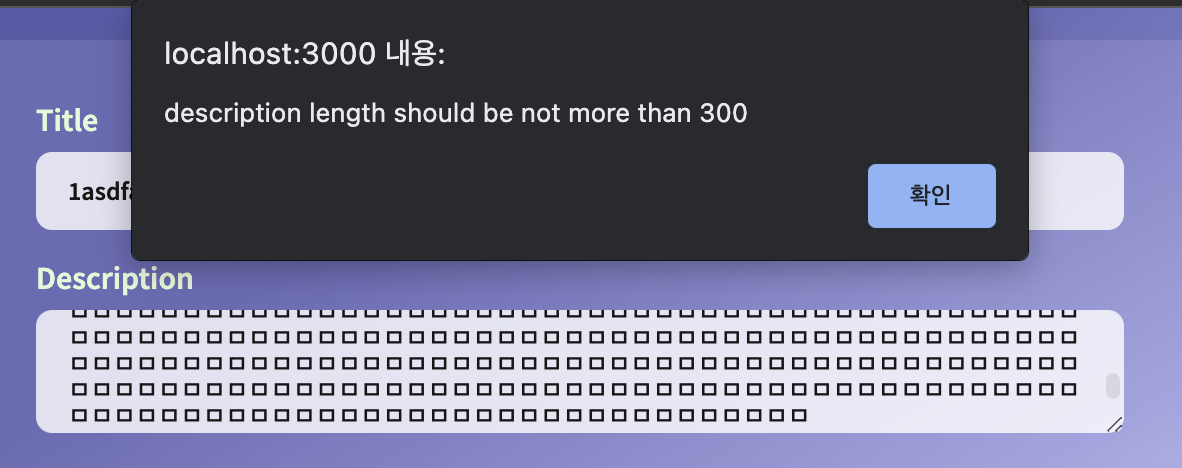
- 첫 번째 그림: description 길이는 10이상
- 두 번째 그림: description 길이는 300이하
3️⃣ people 검증
gatherUserInputs people에 대한 정보
private gatherUserInputs(): [string, string, number] | void {
  ...//

  const peopleValidateObj: UserValidate = {
    value: userNumOfPeople,
    varName: var2String({ userNumOfPeople })
      .replace("userNumOf", "")
        .toLowerCase() as "people",
    required: true,
    minPeople: 1,
    maxPeople: 10,
  };

  ...//

  const isValid =
    validateUserInput(titleValidateObj) &&
    validateUserInput(descriptionValidateObj) &&
    validateUserInput(peopleValidateObj)

  return [userTitle, userDescription, userNumOfPeople];
}
validator
import UserValidate from "../interfaces/userValidate";

export default function validateUserInput(userInput: UserValidate) {
  ...// required 부분

  if (
    userInput.minPeople !== undefined &&
    typeof userInput.value === "number"
  ) {
    isValid = userInput.minPeople <= userInput.value;
    if (!isValid)
      return alert(
        `please enter the people more than ${userInput.minPeople} people`
      );
  }

  if (
    userInput.maxPeople !== undefined &&
    typeof userInput.value === "number"
  ) {
    isValid = userInput.maxPeople >= userInput.value;
    if (!isValid)
      return alert(
        `please enter the people not more than ${userInput.maxPeople} people`
      );
  }

  return isValid;
}
확인


- 첫 번째 그림: 최소 값 -> 명수는 1명 이상
- 두 번째 그림: 최대 값 검증 -> 명수는 10명 이하
4️⃣ 전체 코드
submitHandler of app.ts
submitHandler(event: Event) {
  event.preventDefault();
  const userInput = this.gatherUserInputs();

  if (Array.isArray(userInput)) {
    const [title, description, numOfPeople] = userInput;
    this.clearUserInput();
  }else{
    throw new Error('Invalid userInput type check again!!')
  }
}
gatherUserInputs method of app.ts
// app.ts

private gatherUserInputs(): [string, string, number] | void {
    const userTitle = this.titleInputElement.value;
    const userDescription = this.descriptionElement.value;
    const userNumOfPeople = +this.peopleElement.value;

    const titleValidateObj: UserValidate = {
      value: userTitle,
      varName: var2String({ userTitle })
        .replace("user", "")
        .toLowerCase() as "title",
      minLength: 5,
      maxLength: 30,
    };
    const descriptionValidateObj: UserValidate = {
      value: userDescription,
      varName: var2String({ userDescription })
        .replace("user", "")
        .toLowerCase() as "description",
      minLength: 10,
      maxLength: 300,
    };
    const peopleValidateObj: UserValidate = {
      value: userNumOfPeople,
      varName: var2String({ userNumOfPeople })
        .replace("userNumOf", "")
        .toLowerCase() as "people",
      minPeople: 1,
      maxPeople: 10,
    };

    const isValid =
      validateUserInput(titleValidateObj) &&
      validateUserInput(descriptionValidateObj) &&
      validateUserInput(peopleValidateObj);

    if (!isValid) {
      // alert("please check again and enter valid value!!!");
      return;
    }

    return [userTitle, userDescription, userNumOfPeople];
}
userInputValidator.ts
import UserValidate from "../interfaces/userValidate";

export default function validateUserInput(userInput: UserValidate) {
  let isValid = true;

  if (userInput.required) {
    isValid = userInput.value.toString().trim().length > 0;
    if (!isValid) return alert(`please enter the ${userInput.varName}`);
  }

  if (userInput.minPeople != null && typeof userInput.value === "number") {
    isValid = userInput.minPeople <= userInput.value;
    if (!isValid)
      return alert(
        `please enter the people more than ${userInput.minPeople} people`
      );
  }

  if (userInput.maxPeople != null && typeof userInput.value === "number") {
    isValid = userInput.maxPeople >= userInput.value;
    if (!isValid)
      return alert(
        `please enter the people not more than ${userInput.maxPeople} people`
      );
  }

  if (userInput.minLength != null && typeof userInput.value === "string") {
    isValid = userInput.minLength <= userInput.value.length;
    if (!isValid)
      return alert(
        `${userInput.varName} length should be more than ${userInput.minLength}`
      );
  }

  if (userInput.maxLength != null && typeof userInput.value === "string") {
    isValid = userInput.maxLength >= userInput.value.length;
    if (!isValid)
      return alert(
        `${userInput.varName} length should be not more than ${userInput.maxLength}`
      );
  }

  return isValid;
}
마치며
정리하면서 스스로 코드리뷰를 해 봤는데 사용자 값이 없을 경우를 !== undefined로 처리했다. 하지만 null에 관해서는 생각을 못했기 때문에 전체코드에서는 userInput != null로 처리를 하여 undefined와 null을 모두 걸러내게 바꾸었다. 그리고 submitHandler의 코드 부분에서 tuple이지 않을 경우 처리를 error를 던짐으로써 나중에 생길지 모르는 논리적 오류를 대비하는 것이 좋다고 판단하여 이것 또한 전체코드에서 수정해주었다. 블로깅을 시작한지 얼마 안 됐지만, 스스로 코드리뷰를 꼼꼼하게 함으로써 자신의 결함을 찾을 수 있는 점이 좋은 것 같다!!😄(시간은 오래 걸리지만....🤣). 하지만, 다른 사람들의 코드 리뷰를 알고 싶은데 이는 코드리뷰를 해주는 사이트가 있는지 한 번 찾아봐야겠다. 아 그리고 validator를 구현하면서 다른 validator는 어떻게 구현되어있나 궁금해서 찾다가 발견한 것이 있는데 이는 아래 참고에 첨부했다. 검증을 할 때 아래 사이트의 코드를 참고하면 많이 도움될 것 같다.
참고