MongoDB 연결하기
회원가입 로그인 부분은 생략 하였습니다.
MongoDB 설정하기
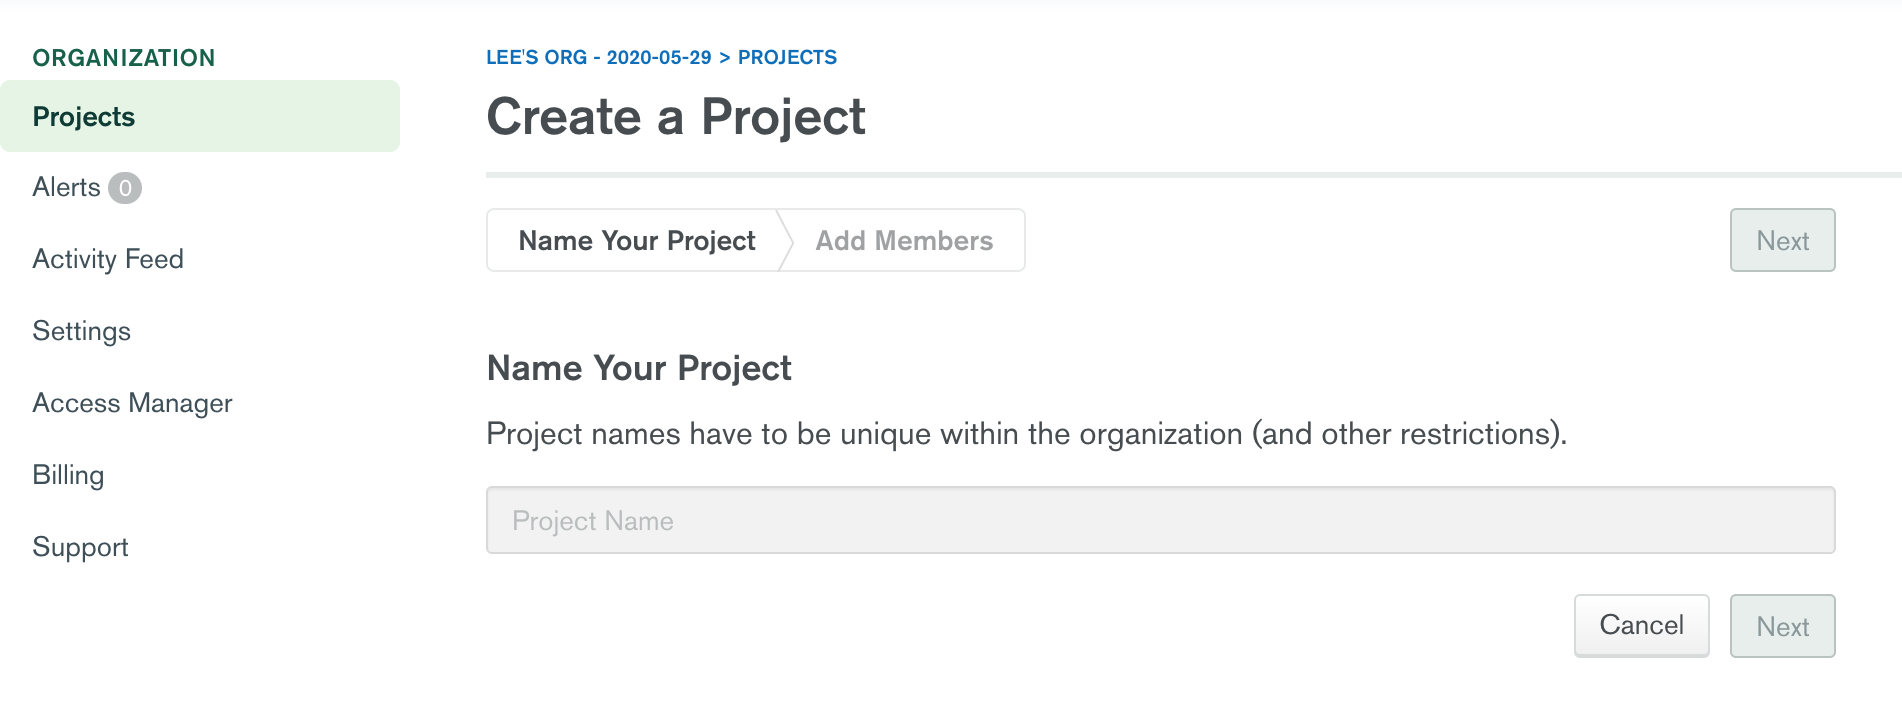
1. 로그인 후 Cloud - Atlas 경로에 들어와서 프로젝트를 생성해 줍니다.
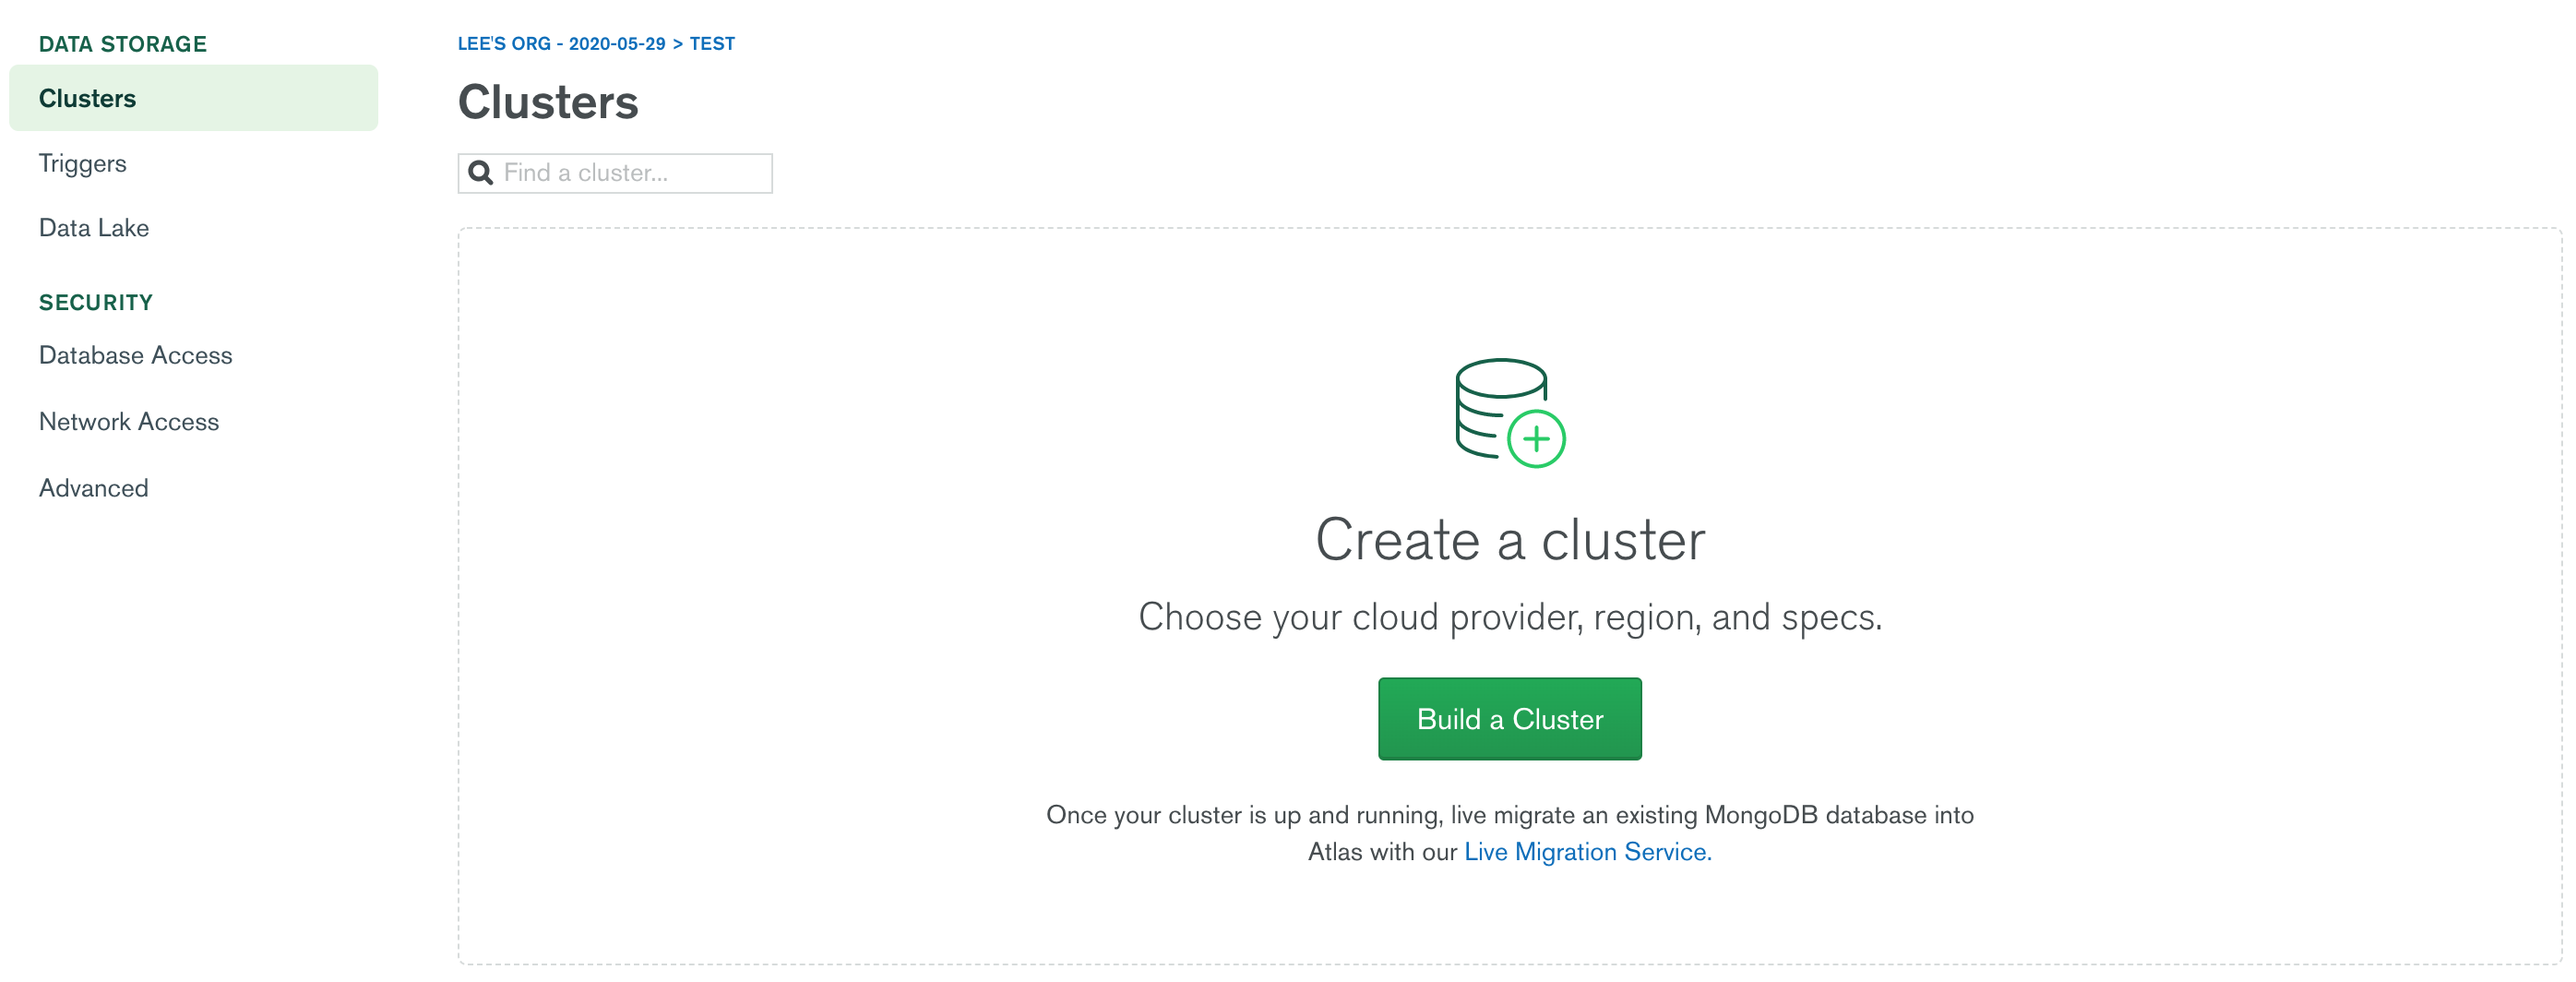
2. 화면과 같이 build a Cluster로 Cluster를 생성합니다.
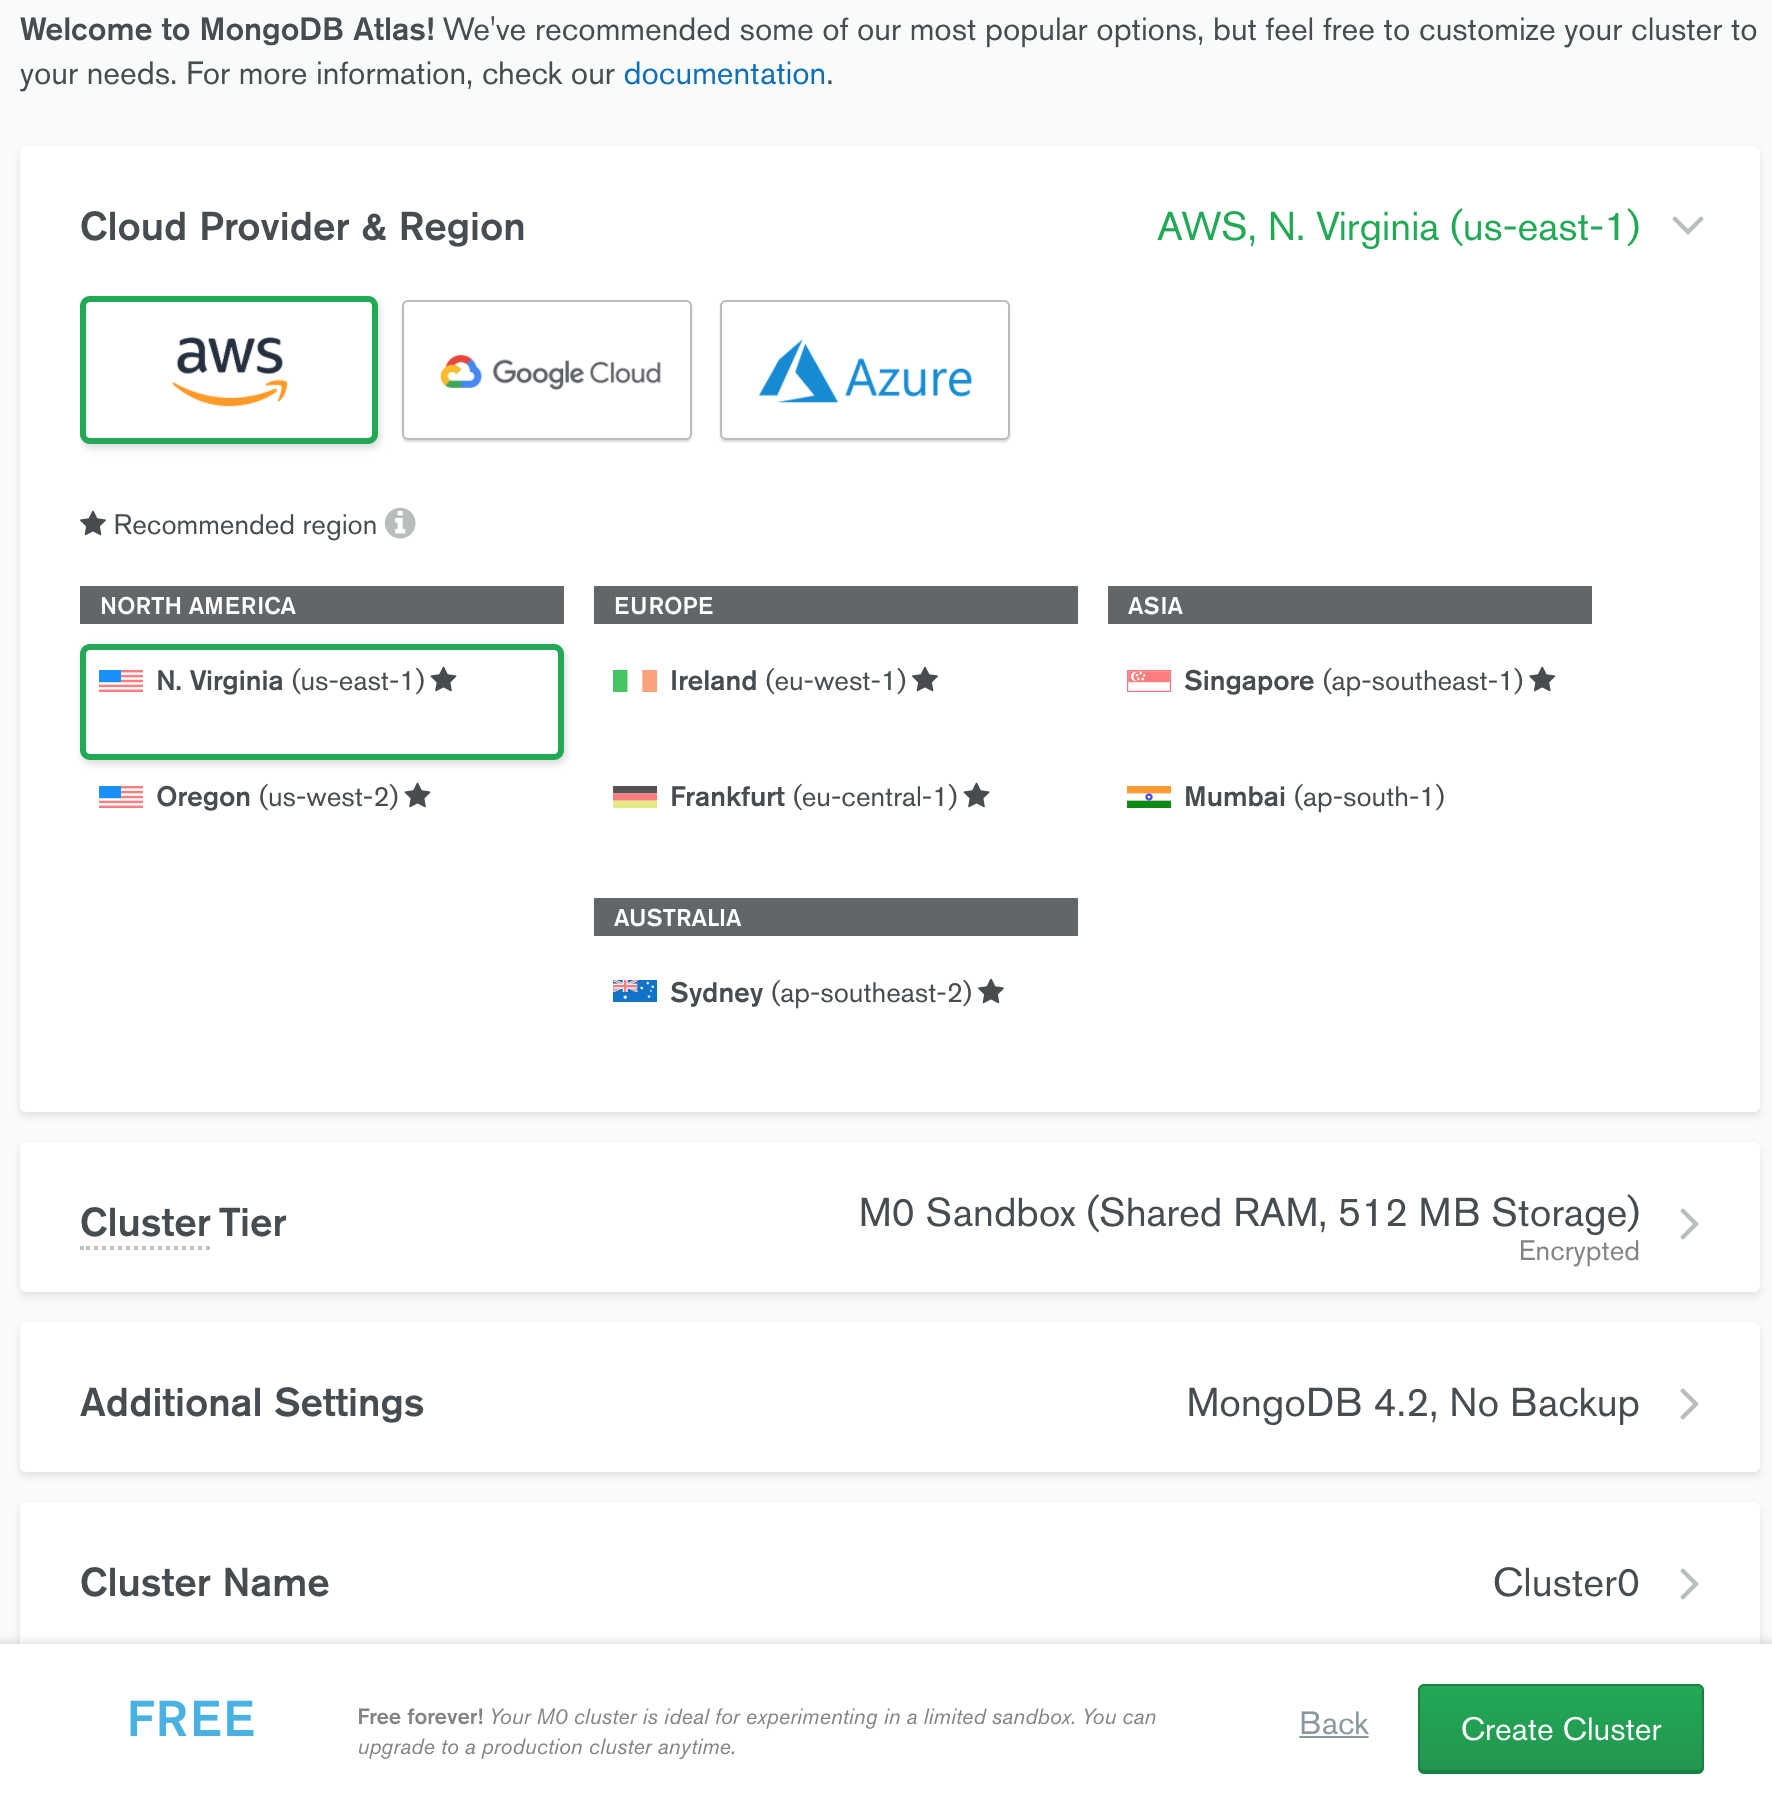
3. 아래의 화면 처럼 클러스터를 생성하기 전에 설정 화면이 나옵니다. 맨 하단에 Free 라고 적혀있는 상태로 생성합니다
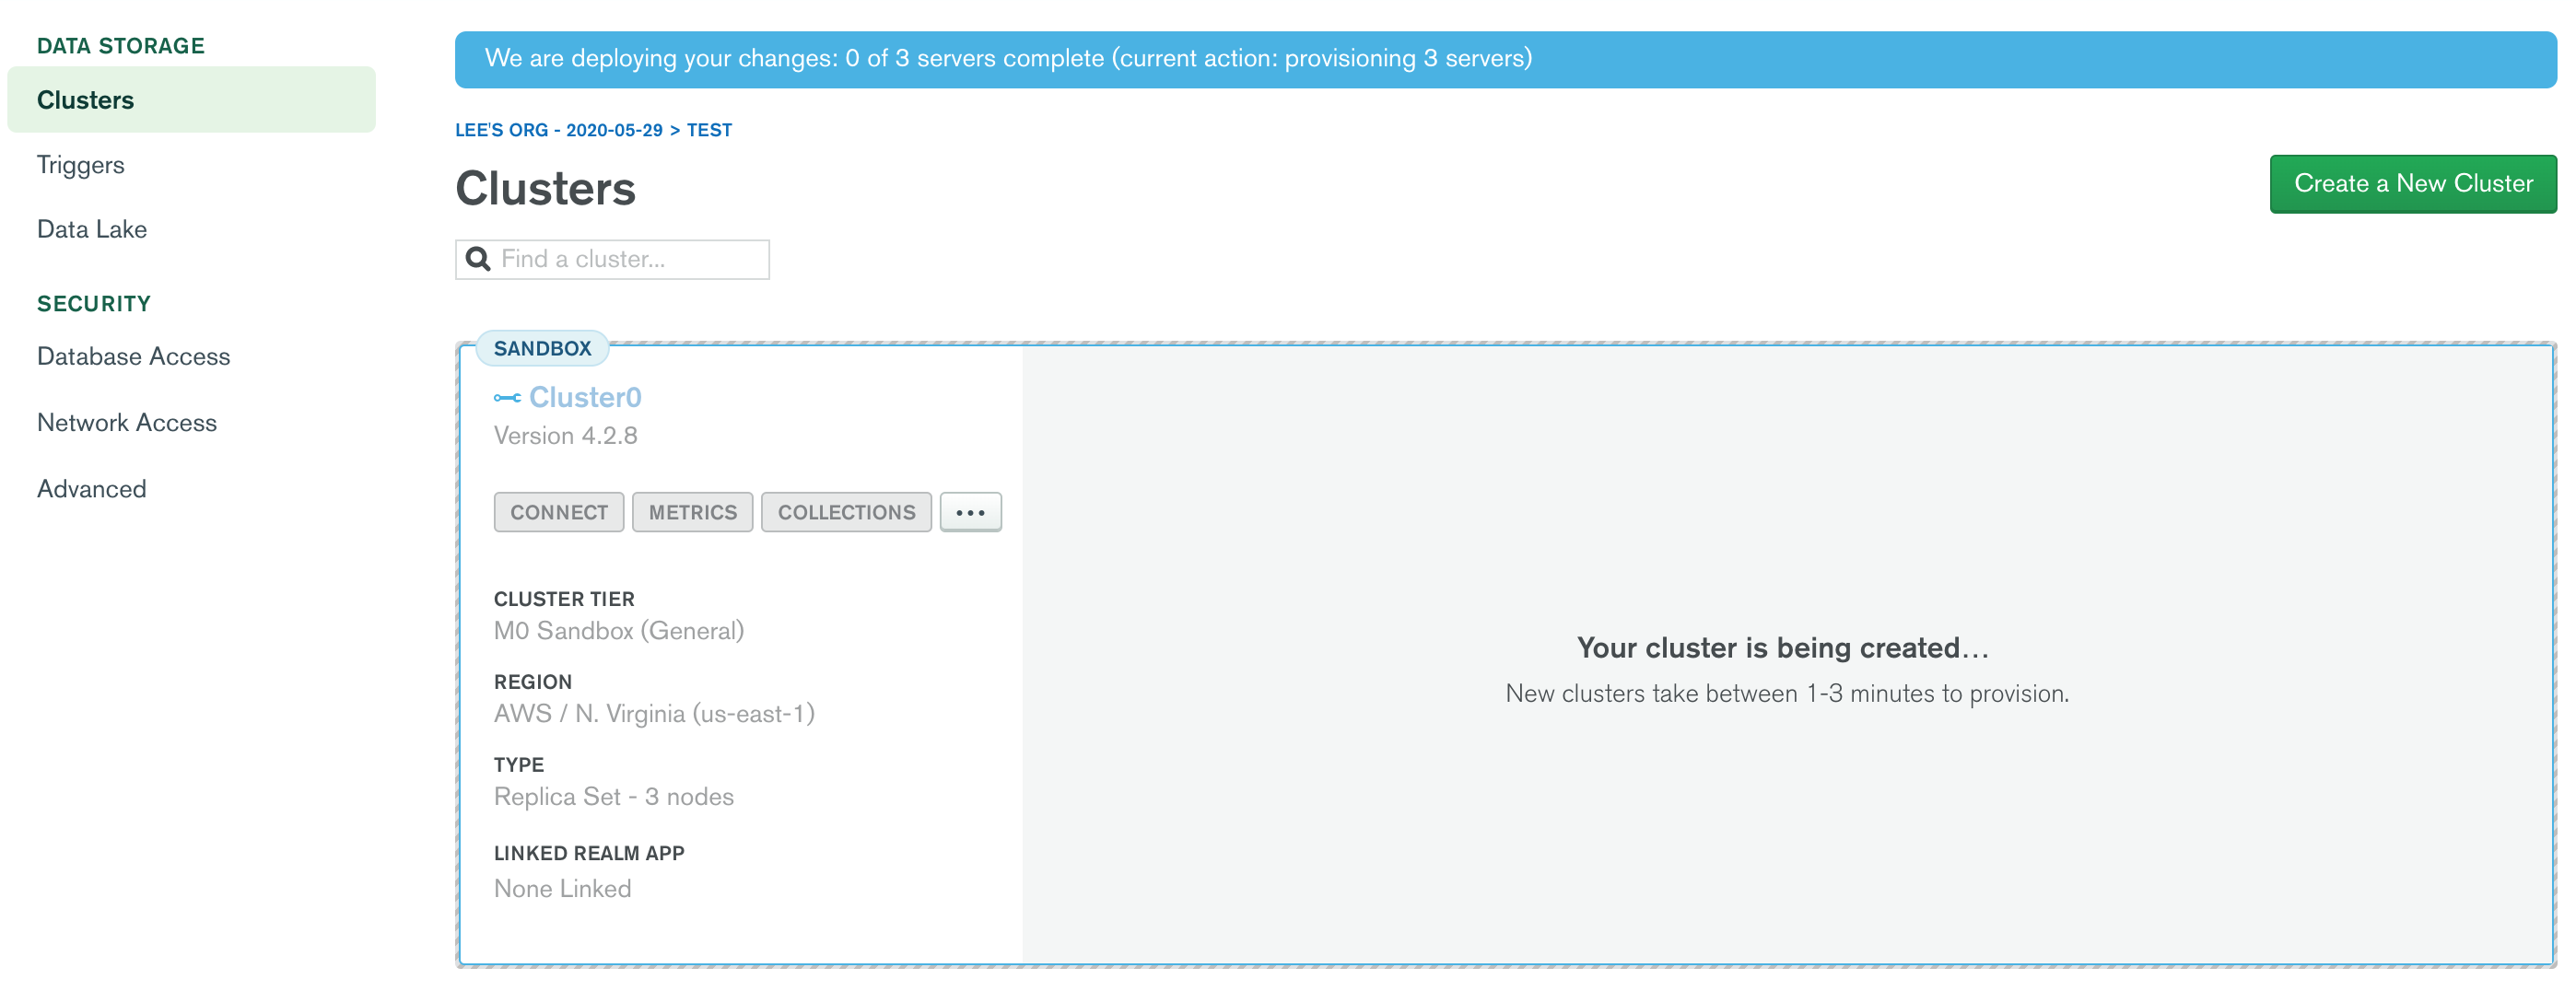
4. 아래와 같은 화면이 나오고 생성하는데 1-3 분정도 소요됩니다.
5. 클러스터 생성 완료 화면입니다.
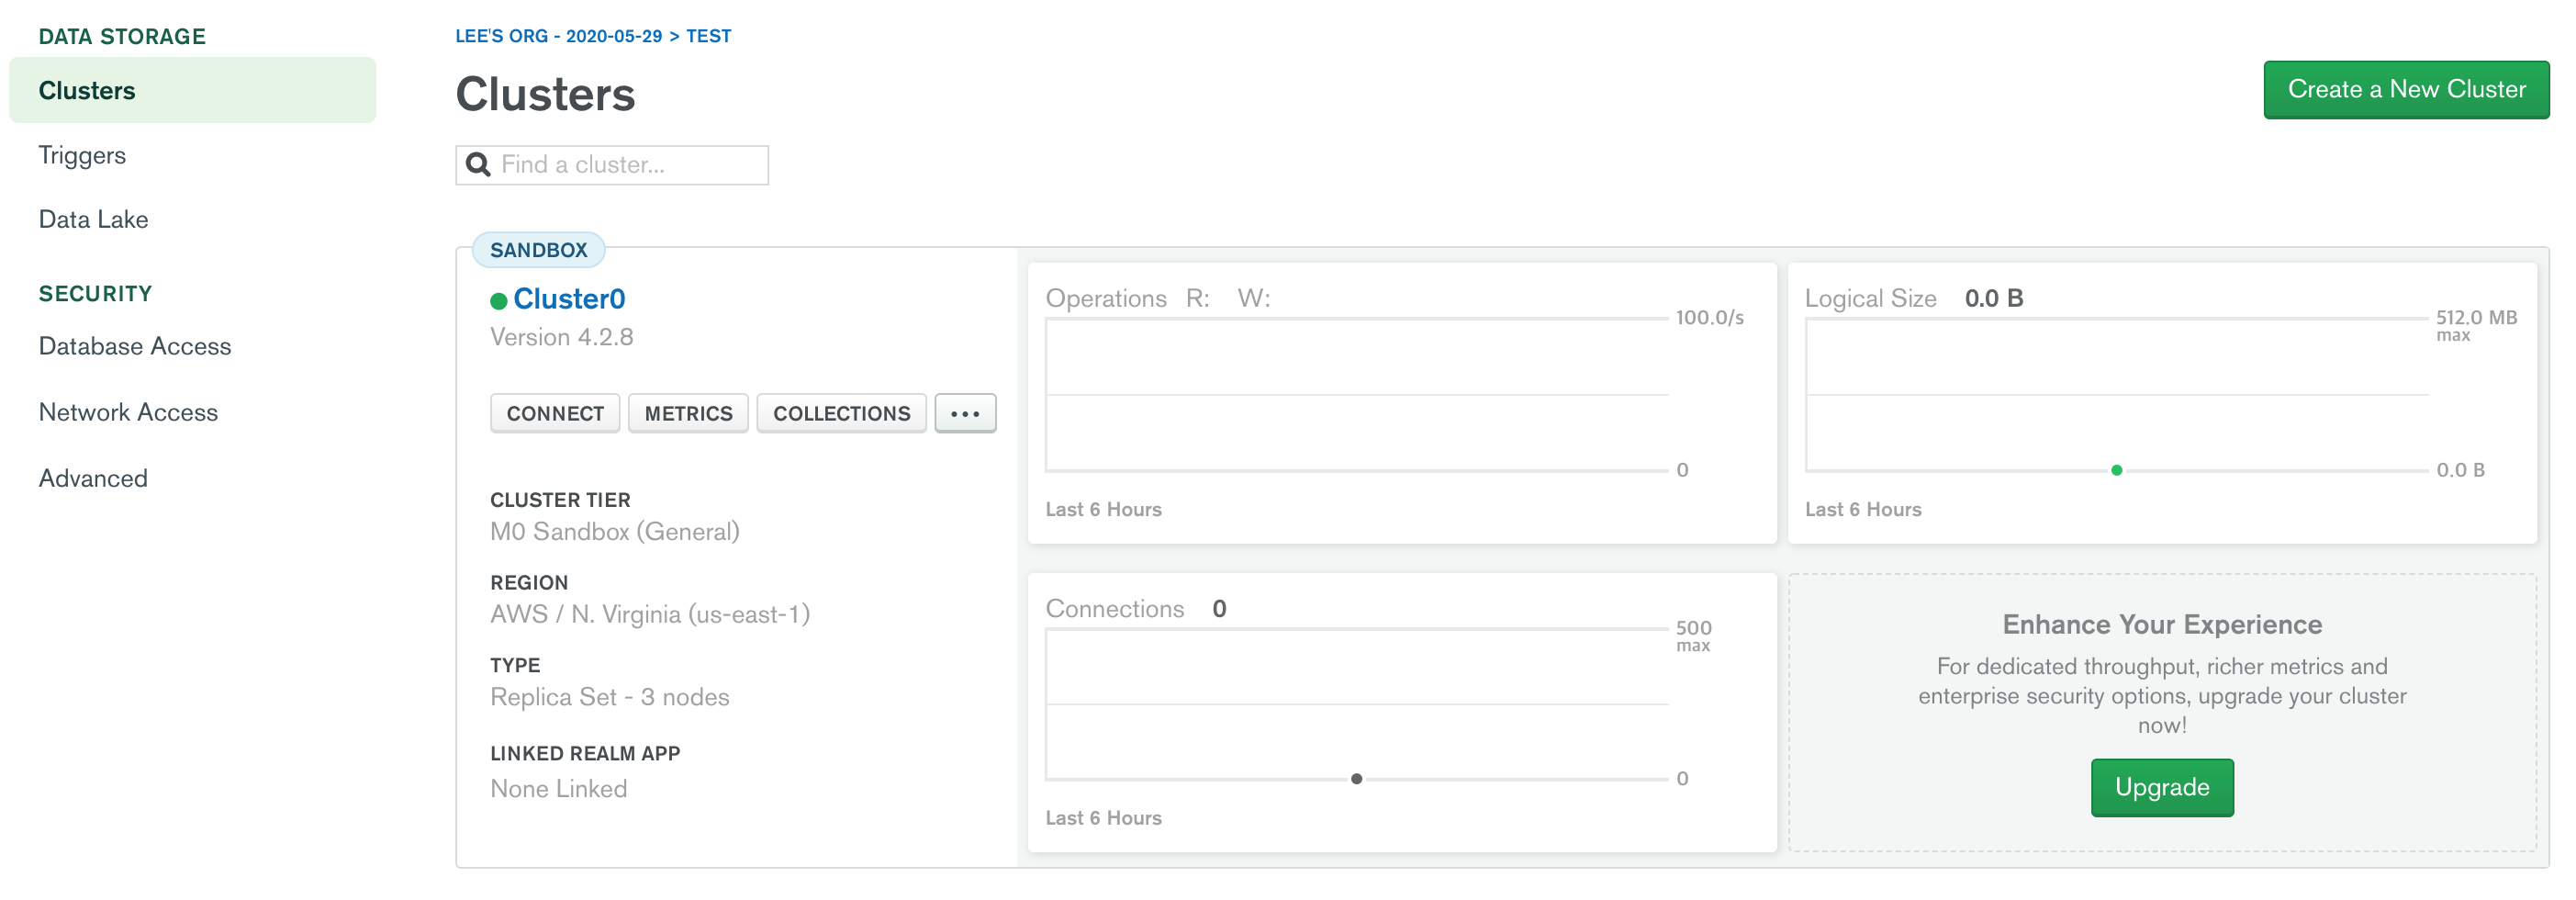
6. 이제 connect하기 위해 Connect를 눌러 whitelist IP 등록을 해줍니다
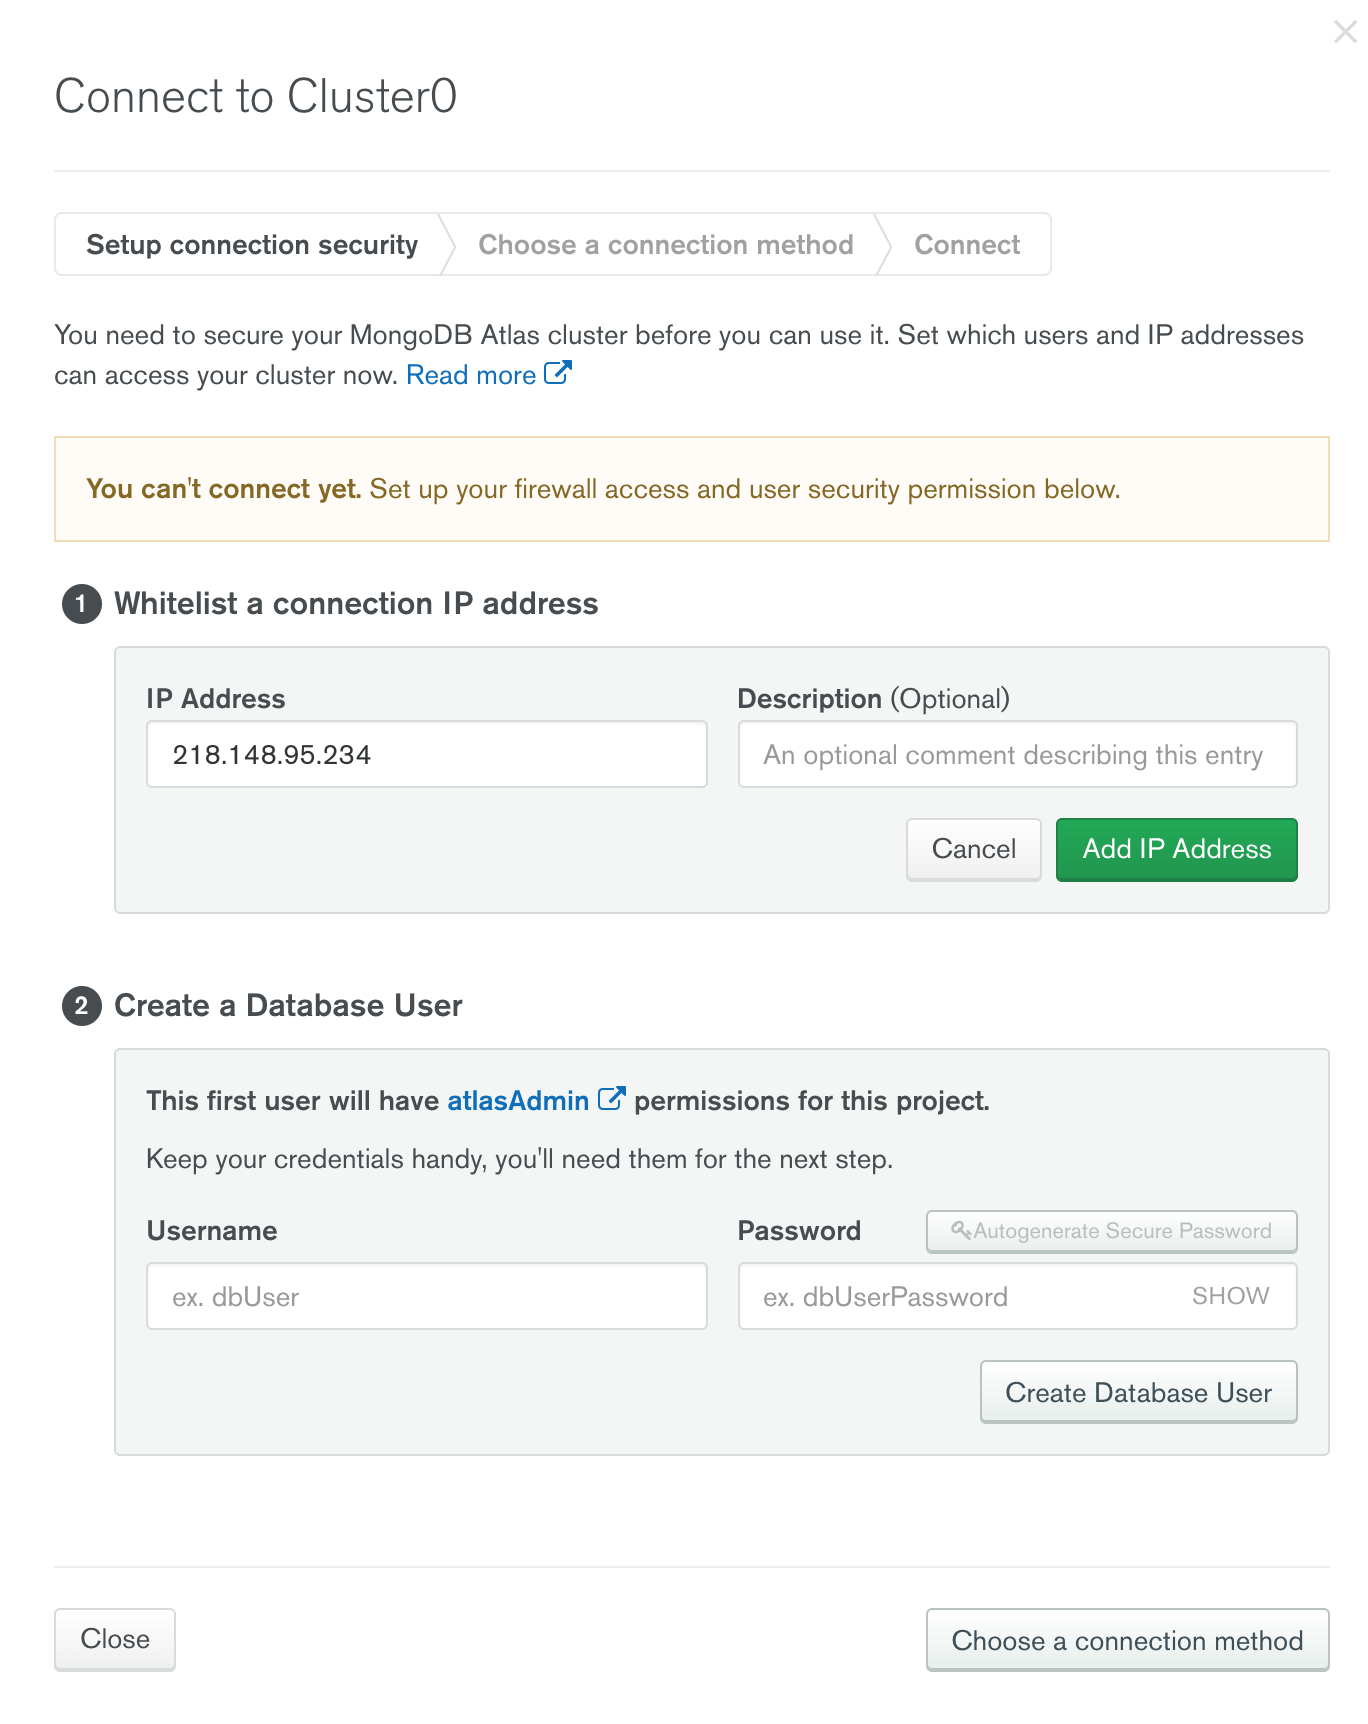
Whitelist IP 란 승인 된 컴퓨터 IP주소를 나열하여 현재 사용하는 컴퓨터와 상호 작용 할 수 있도록 필터링 하는 IP 입니다.
7. 이제 데이터 베이스에 접근 할 수 있는 사용자를 등록합니다.
Database Access 메뉴에 들어와 사용자를 생성을 해주면 됩니다.
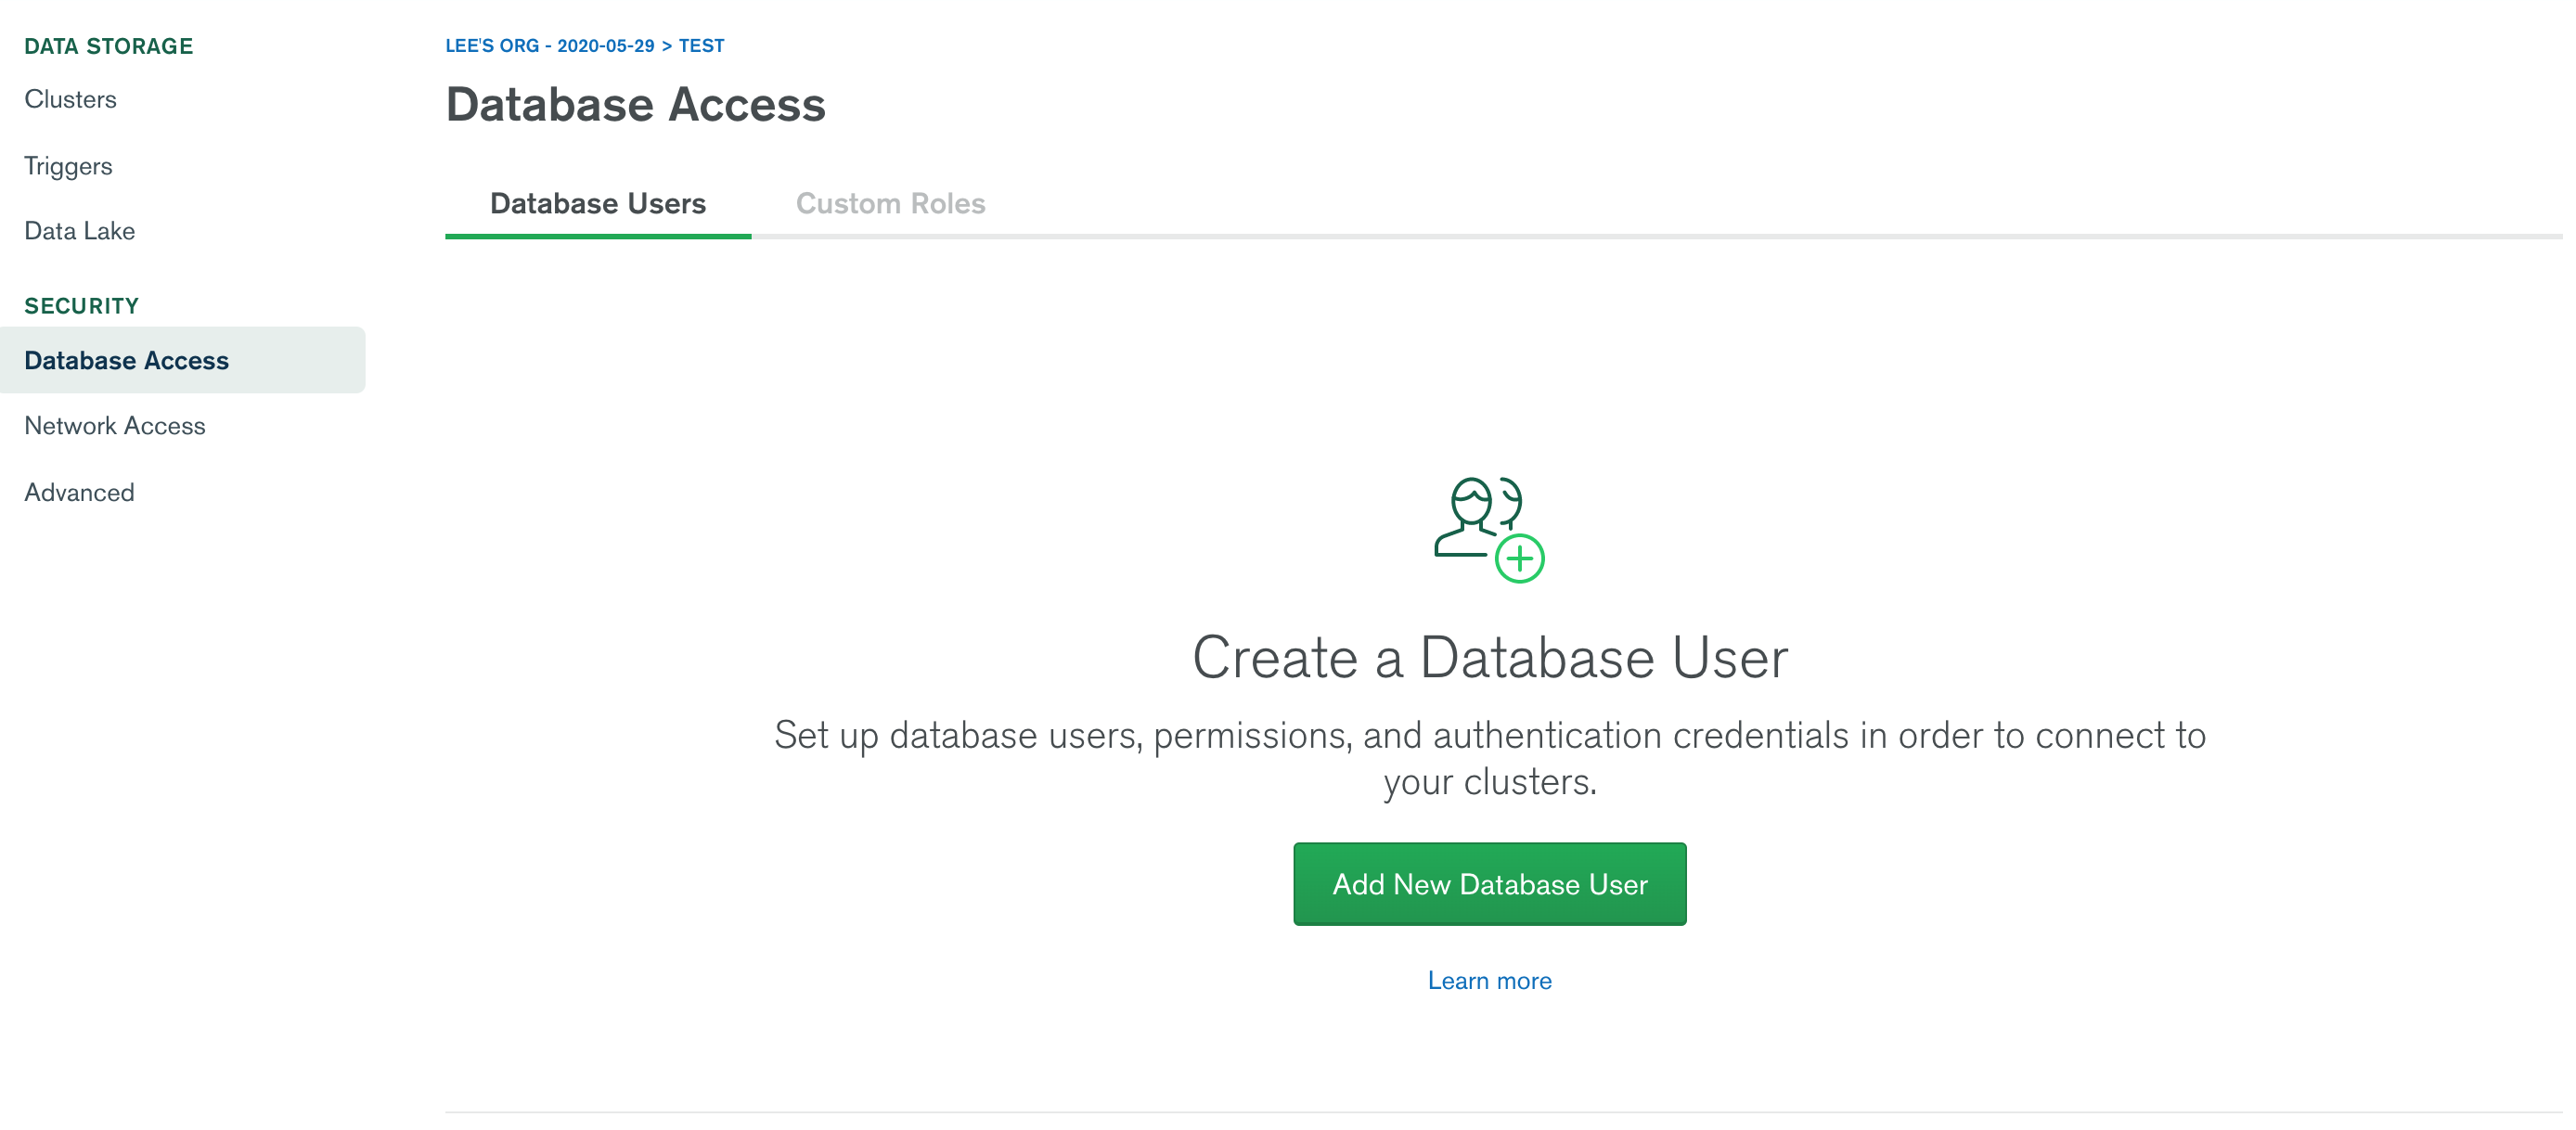
8. 아래의 이미지는 사용자를 생성하는 등록 화면 입니다.
저는 test 라고 하고 비밀번호를 설정하고 생성해 주었습니다.

node 환경을 통해 연결
Cluster 화면에서 Connect를 눌러 화면이 나오면 Connect your application 을 선택합니다.

connection code를 copy 해줍니다.
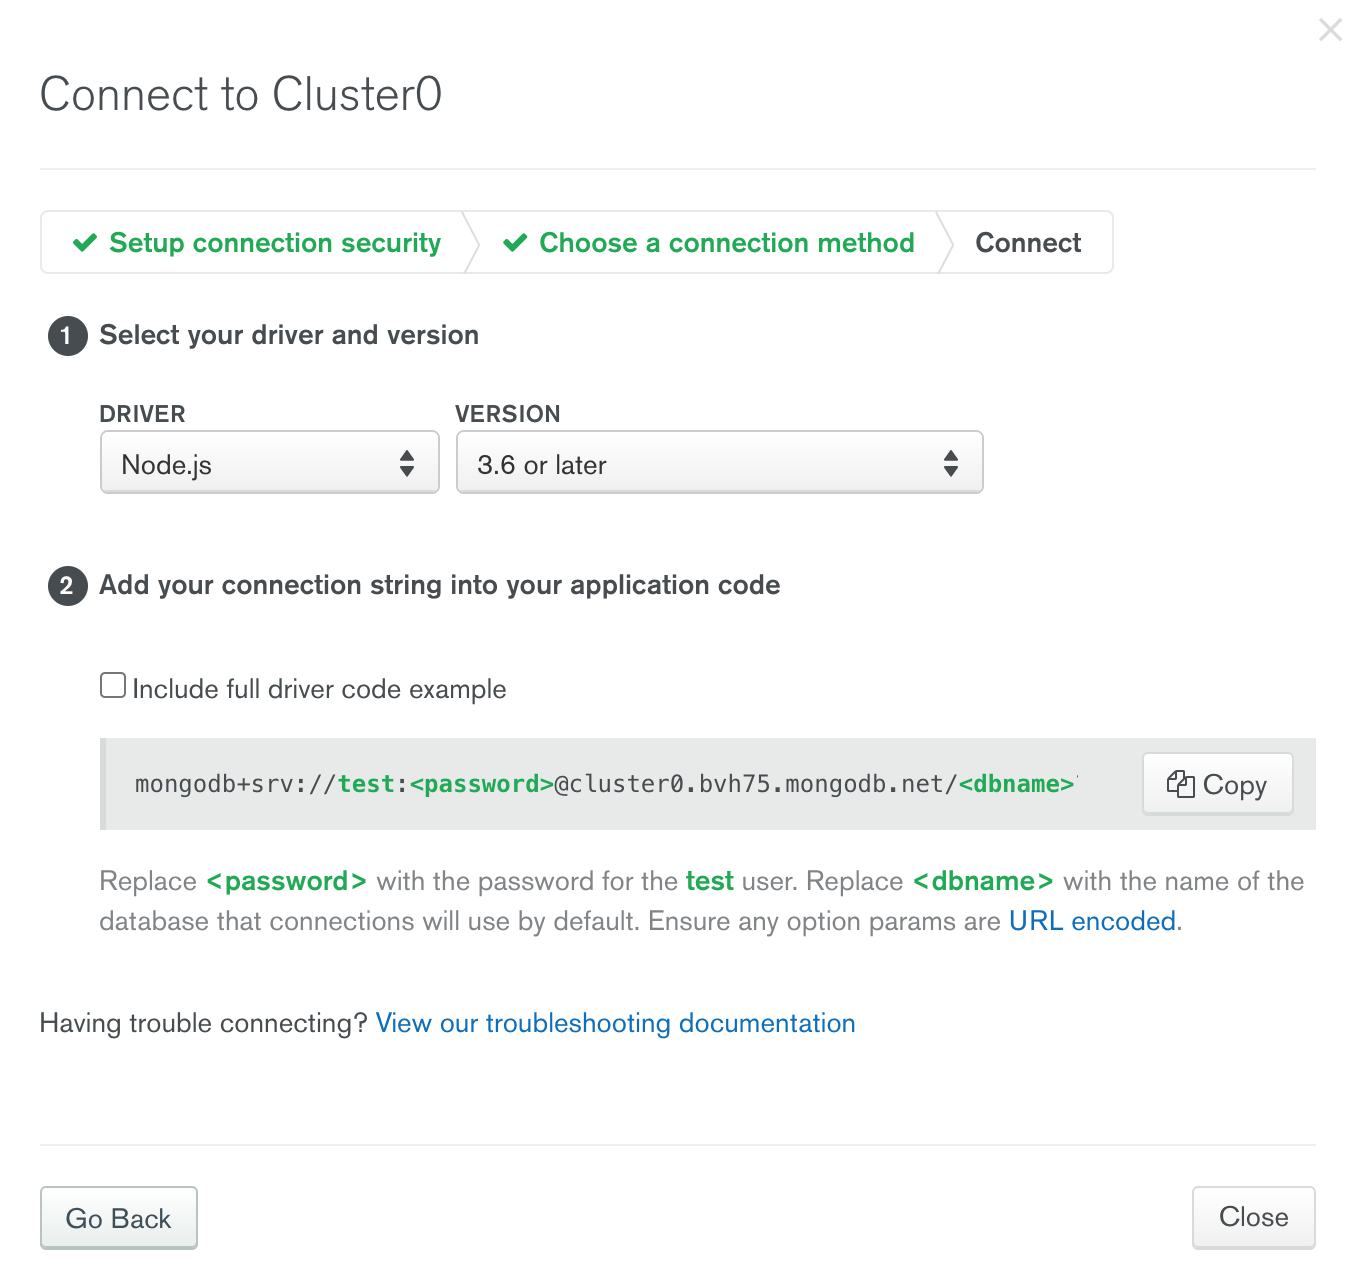
Node.js server에서 mongoDB 설정을 합니다.
const express = require("express"); // express 미들웨어
const cors = require("cors"); // cors 미들웨어
const mongoose = require("mongoose"); // mongoose
require("dotenv").config(); // 환경변수를 위한 dotenv

const app = express();
const port = process.env.PORT || 5000;

app.use(cors());
app.use(express.json());

const uri = process.env.ATLAS_URI; // mongoDB Connect 정보
mongoose.connect(uri, {
  useNewUrlParser: true,
  useCreateIndex: true,
  useUnifiedTopology: true,
});
const connection = mongoose.connection;
connection.once("open", () => {
  console.log("MongoDB database connection succes");
});

app.listen(port, () => {
  console.log(`Server is running on port ${port}`);
});
mongoose 모듈을 불러오고 mongoose.connect를 사용해 연결해줍니다.
uri는 dotenv를 설정해 두었기 때문에 .env 파일 안에 MongoDB Connect 할 수 있는 사용자 정보와 URI가 있습니다.
// .env
ATLAS_URI=mongodb+srv://test:<password>@cluster0.bvh75.mongodb.net/<dbname>?retryWrites=true&w=majority
여기 까지 연결과정 이었습니다.
다음 글에서 Schema를 생성해 MongoDB 클라우드에 저장,삭제 등의 데이터베이스 흐름을 알아보도록 하겠습니다.

Hello!
ATLAS_URI=mongodb+srv://test:@cluster0.bvh75.mongodb.net/?retryWrites=true&w=majority 이거 어디다 집어넣어야해요? const uri 위에 붙여놨더니 안됩니다...