이번 프로젝트에는 로그인을 할 때 JWT 인증을 해보기로 했습니다.
먼저, JWT에 관련된 용어를 알아보겠습니다!
용어
프로젝트를 위해 알아야할 용어는 다음과 같습니다.
JSON Web Token (JWT)
A string representing a set of claims as a JSON object that is
encoded in a JWS or JWE, enabling the claims to be digitally
signed or MACed and/or encrypted.
Claim
A piece of information asserted about a subject. A claim is represented as a name/value pair consisting of a Claim Name and a Claim Value.
JWS
JSON Web Signature (JWS) represents content secured with digital signatures or Message Authentication Codes (MACs) using JSON-based data structures.
JWE
JSON Web Encryption (JWE) represents encrypted content using JSON-based data structures.
해석을 해보자면,
(제가 개인적으로 이해한 내용이 들어있어 틀릴 수도 있습니다.)
JWT는 Json Web Token으로 Json object를 JWS나 JWE로 암호화된 문자열입니다. Json object는 claim 집합으로 되어 있고, 디지털 서명으로 사용될 수 있습니다. 구성으로는 header, payload, signature로 이루어져있습니다.
여기서 Claim은 정보입니다. 이걸 통해 전달하고자 하는 정보를 전달할 수 있습니다. Claim은 이미 등록이 되어있는 것과 custom claim이 있고, Claim name과 Claim value 쌍으로 나타내집니다. claim("name": "1234") 이런 식으로 claim을 추가할 수 있습니다.
JWS와 JWE는 암호화된 방식이 다른 걸로 생각할 수 있습니다.
이 글을 찾아오신 분들은 프로젝트를 만드시는게 급하실거라 생각해 JWT 관련된 자세한 내용은 다른 포스팅으로 적어보겠습니다.
바로 어떻게 쓰는지 알아보죠(가보자고~)
Spring boot에서는 java를 쓰기 때문에 java로 쓸 수 있는 jwt 라이브러리인 jjwt를 쓰도록 하겠습니다.
Code
Installation
- Gradle
dependencies {
    implementation 'io.jsonwebtoken:jjwt-api:0.12.3'
    runtimeOnly 'io.jsonwebtoken:jjwt-impl:0.12.3'
    runtimeOnly 'io.jsonwebtoken:jjwt-jackson:0.12.3' // or 'io.jsonwebtoken:jjwt-gson:0.12.3' for gson
    /*
      Uncomment this next dependency if you are using:
       - JDK 10 or earlier, and you want to use RSASSA-PSS (PS256, PS384, PS512) signature algorithms.
       - JDK 10 or earlier, and you want to use EdECDH (X25519 or X448) Elliptic Curve Diffie-Hellman encryption.
       - JDK 14 or earlier, and you want to use EdDSA (Ed25519 or Ed448) Elliptic Curve signature algorithms.
      It is unnecessary for these algorithms on JDK 15 or later.
    */
    // runtimeOnly 'org.bouncycastle:bcprov-jdk18on:1.76' // or bcprov-jdk15to18 on JDK 7
}
Quick Start
저는 Quick Start 부분의 코드를 사용했습니다.
이 코드는 jws를 사용했습니다.
import io.jsonwebtoken.Jwts;
import io.jsonwebtoken.security.Keys;
import java.security.Key;

// We need a signing key, so we'll create one just for this example. Usually
// the key would be read from your application configuration instead.
SecretKey key = Jwts.SIG.HS256.key().build();

String jws = Jwts.builder().subject("Joe").signWith(key).compact();
Payload에 custom 값 추가
payload에 이미 등록된 claim들이 존재합니다.
다음과 같은 claim이 이미 등록이 되어 있고, 각 claim에 대한 설명은 여기를 봐주세요: https://datatracker.ietf.org/doc/html/rfc7519#section-4.1.1
- issuer
- subject
- audience
- expiration
- notBefore
- issuedAt
- id
만약 등록되어 있는 claim 외에 내가 보내고 싶은 정보가 있다고 했을 때, 다음과 같이 만들 수 있습니다.
저는 로그인을 위해 다음과 같은 코드를 작성했습니다.
//JWT 토큰 발급
SecretKey key=Jwts.SIG.HS256.key().build();

String jwts = Jwts.builder()
        .subject("ryul")
        .claim("userId", user.getUserId())
        .claim("nick", user.getNick())
        .claim("email", user.getPassword())
        .signWith(key).compact();
로그인 jwt 인증 방식
- 클라이언트에서 로그인 api를 호출한다.
- 서버에서 유저 정보가 일치하면 jwt를 보낸다.
- 로그인이 필요한 api를 호출할 때, 클라이언트에서 서버에서 받은 jwt를 header의 Authorization 부분에 저장해서 보낸다.
Swagger JWT 설정
저는 swagger를 설정할 때, springdoc 라이브러리를 사용했습니다.
swagger를 설정한 방법을 보려면 여기 포스팅을 참고해주세요: https://velog.io/@ryulkim/Spring-boot-Swagger-%EC%A0%81%EC%9A%A9springdoc
JWT를 적용하려면 confugure에 JWT SecurityScheme이 필요합니다.
- SwaggerConfig
private SecurityScheme createAPIKeyScheme() {
    return new SecurityScheme().type(SecurityScheme.Type.HTTP)
        .bearerFormat("JWT")
        .scheme("bearer");
}
그리고 SwaggerConfig의 openAPI 함수에 security schemes를 추가해야 합니다.
- SwaggerConfig 수정 전
@Bean
    public OpenAPI openAPI(){
        return new OpenAPI()
                .info(new Info().title("How(HomeWork out) API")
                        .description("This is How API")
                        .version("v0.0.1"));
}- SwaggerConfig 수정 후
@Bean
    public OpenAPI openAPI(){
        return new OpenAPI().addSecurityItem(new SecurityRequirement().addList("JWT"))
                .components(new Components().addSecuritySchemes("JWT", createAPIKeyScheme()))
                .info(new Info().title("How(HomeWork out) API")
                        .description("This is How API")
                        .version("v0.0.1"));
    }
addList 부분과 addSecuritySchemes의 이름 부분은 변경이 가능하지만 둘 다 같은 이름이어야 합니다.
결과
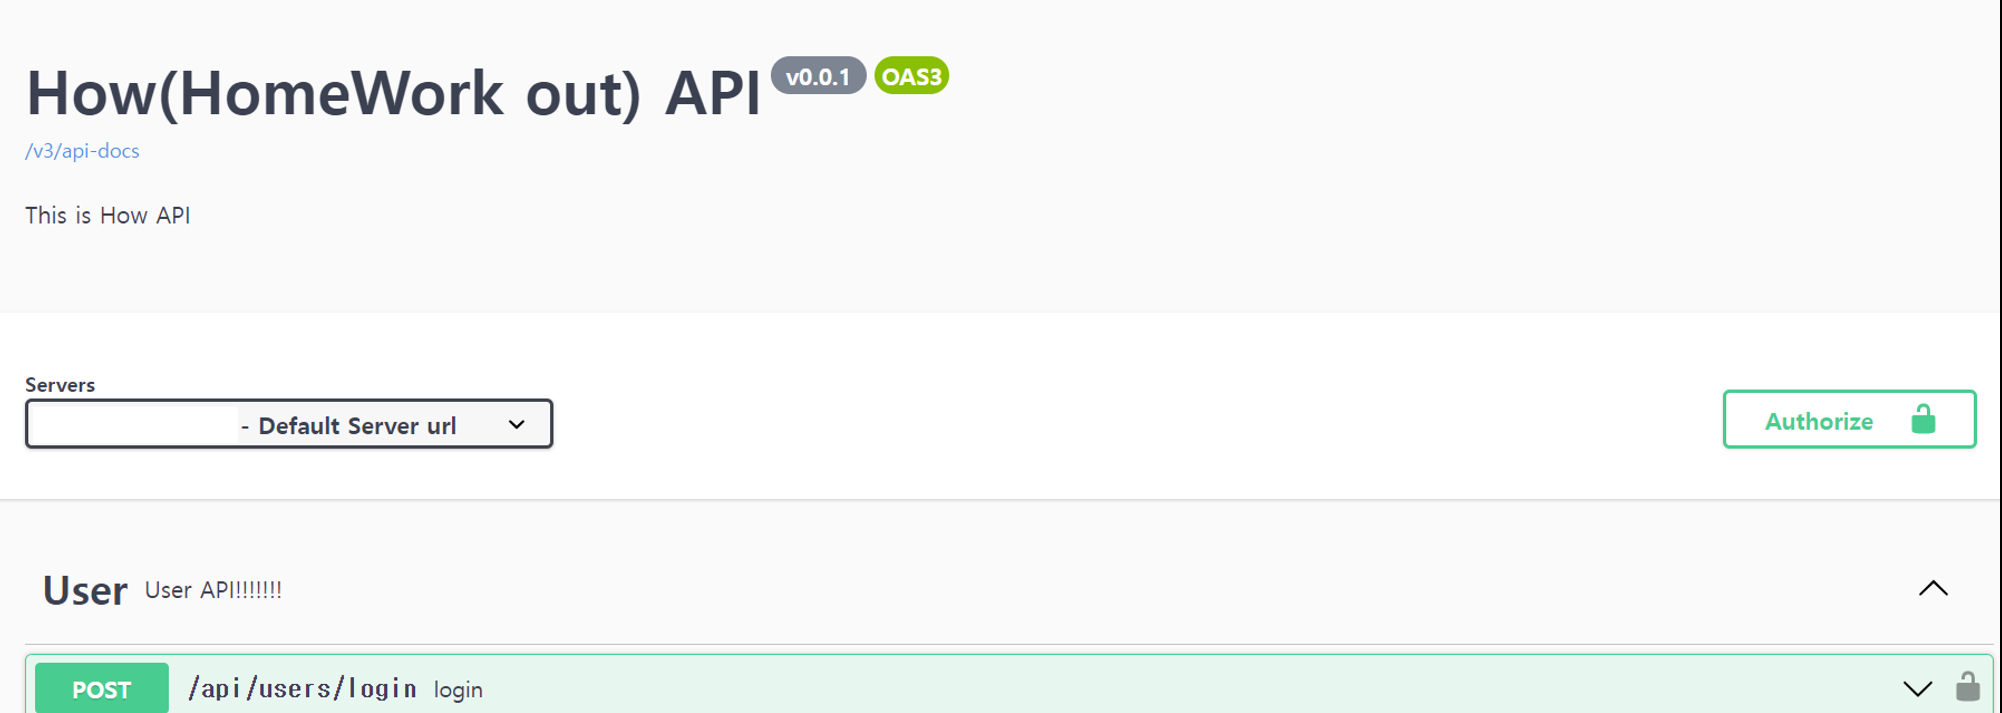
이렇게 Authorize 버튼과 함께 Api 명세 옆에 잠금 표시가 뜨게 됩니다.
- Authorize 안 했을 경우
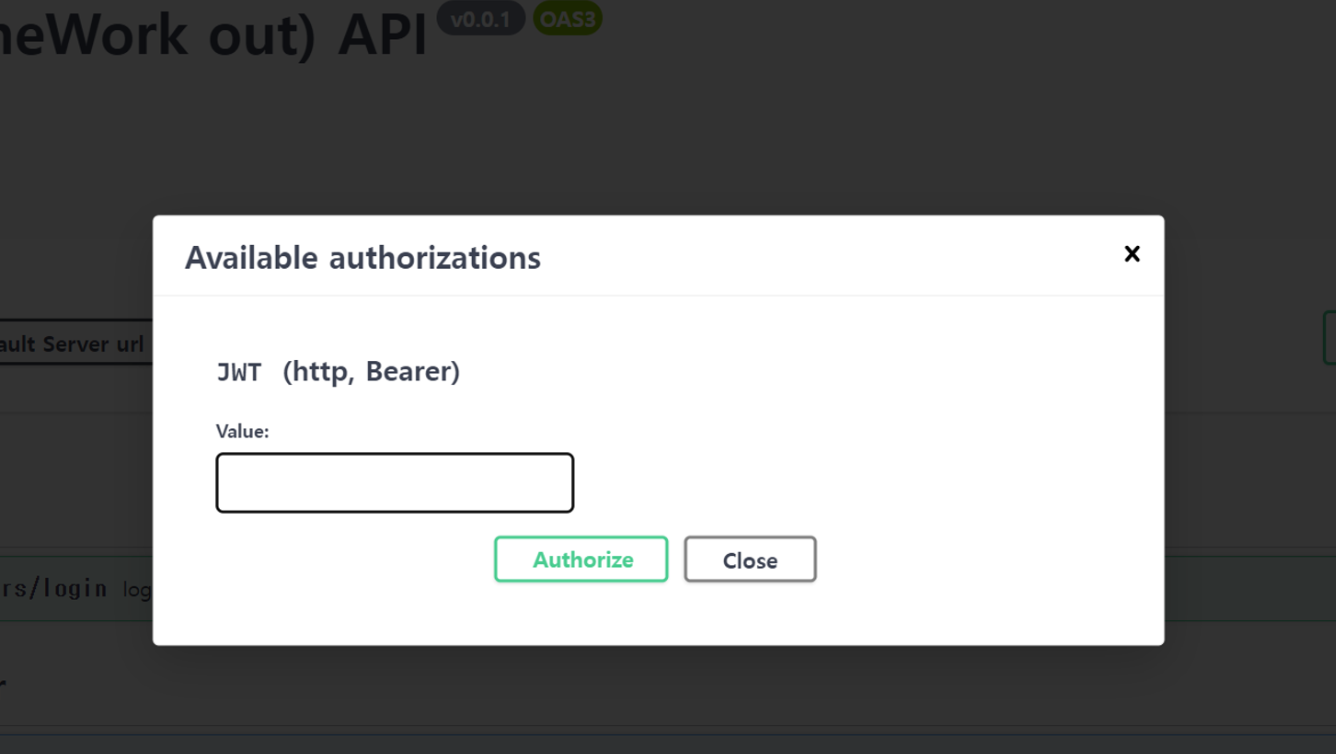
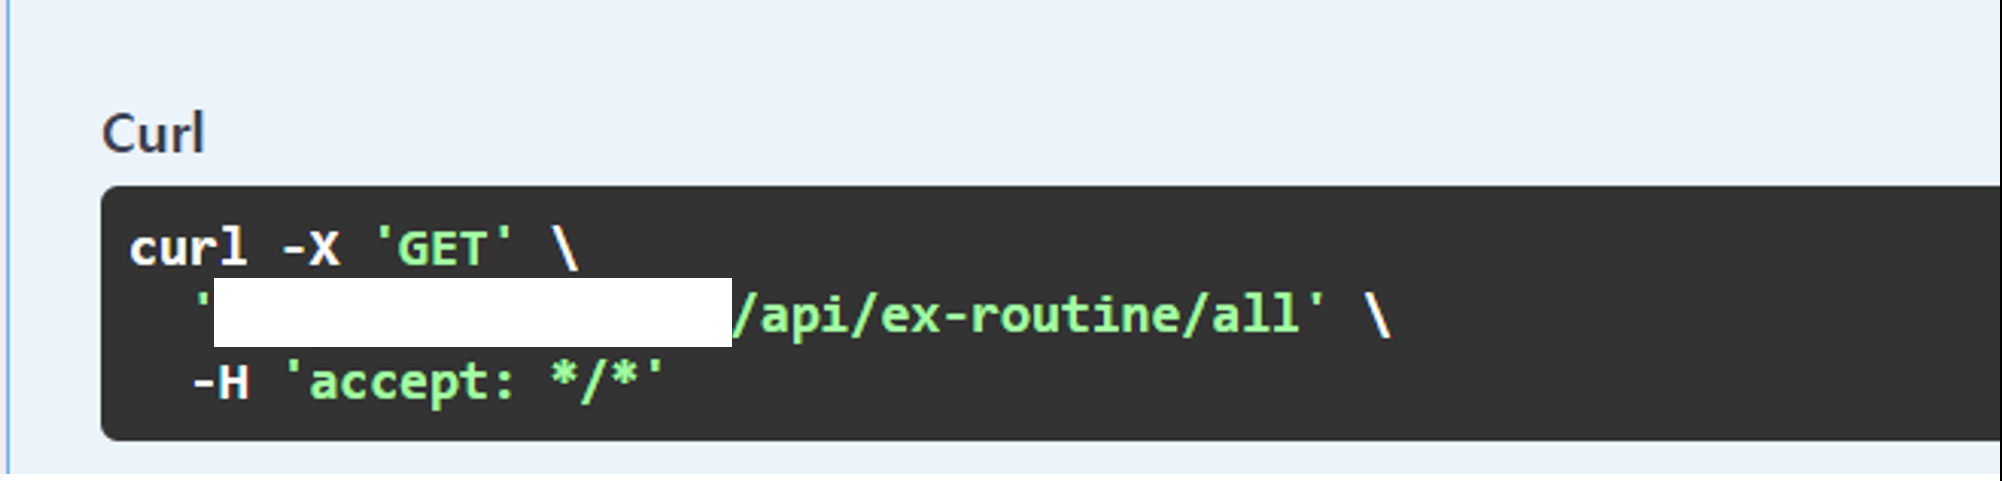
Authorize 버튼을 클릭하면 token 값을 입력하도록 창이 뜨고, api를 실행한 결과 값의 curl 부분에 Authorize 부분이 없습니다.
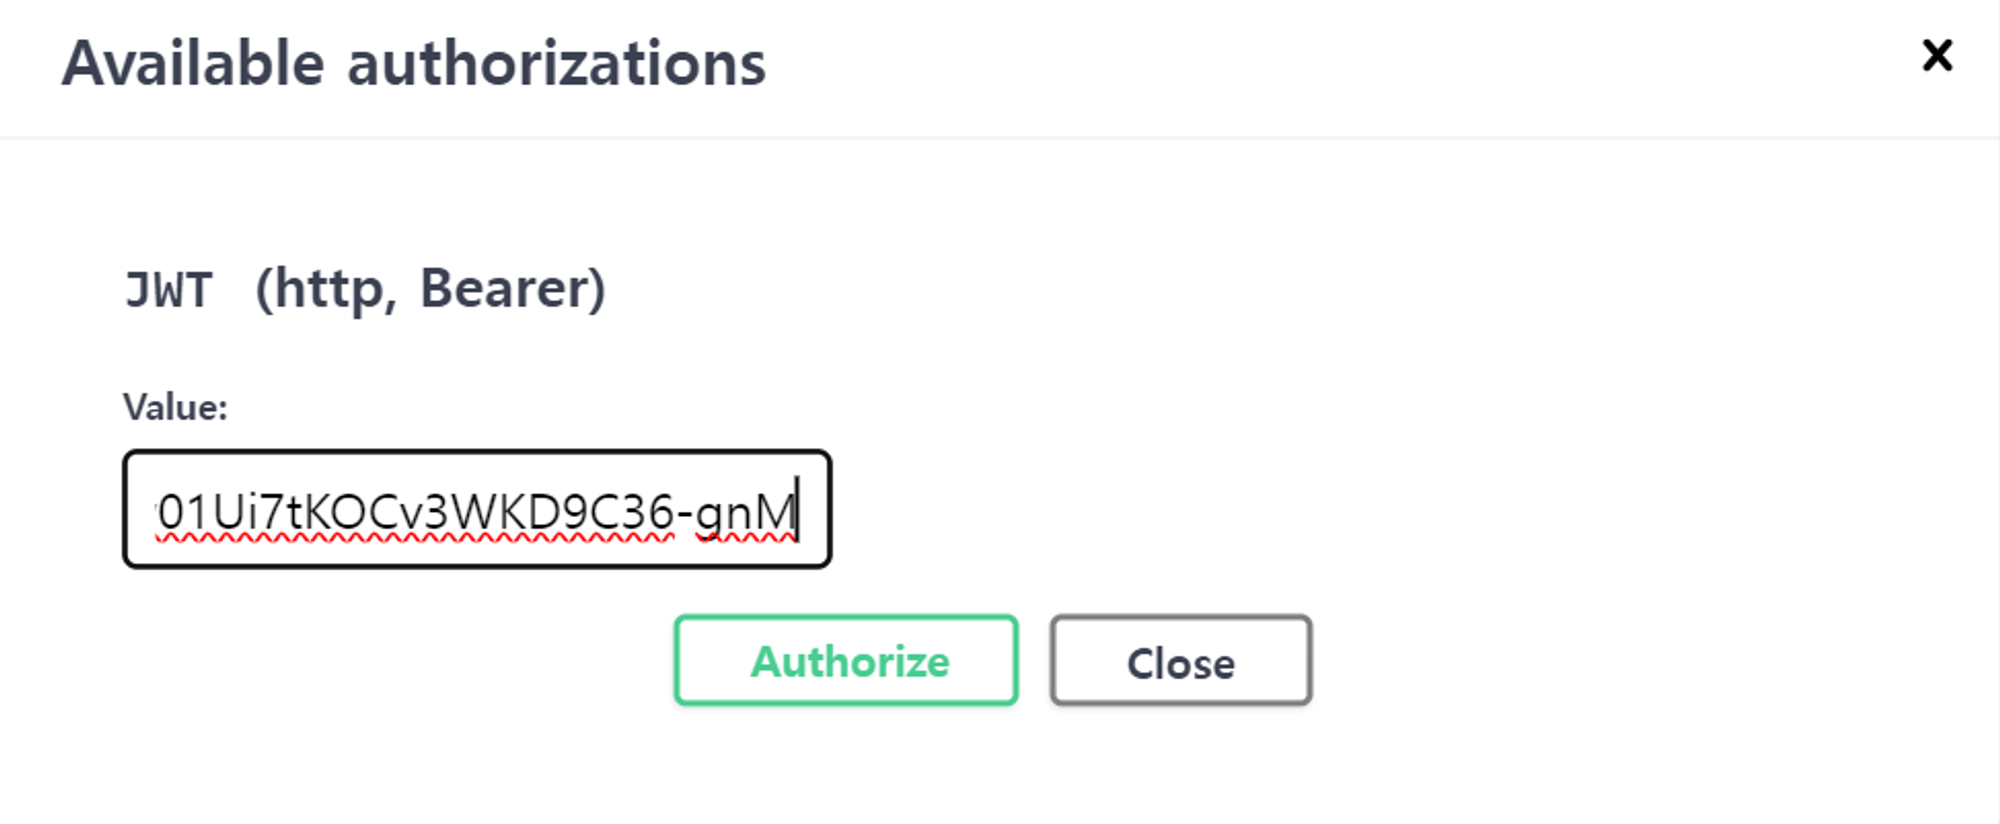
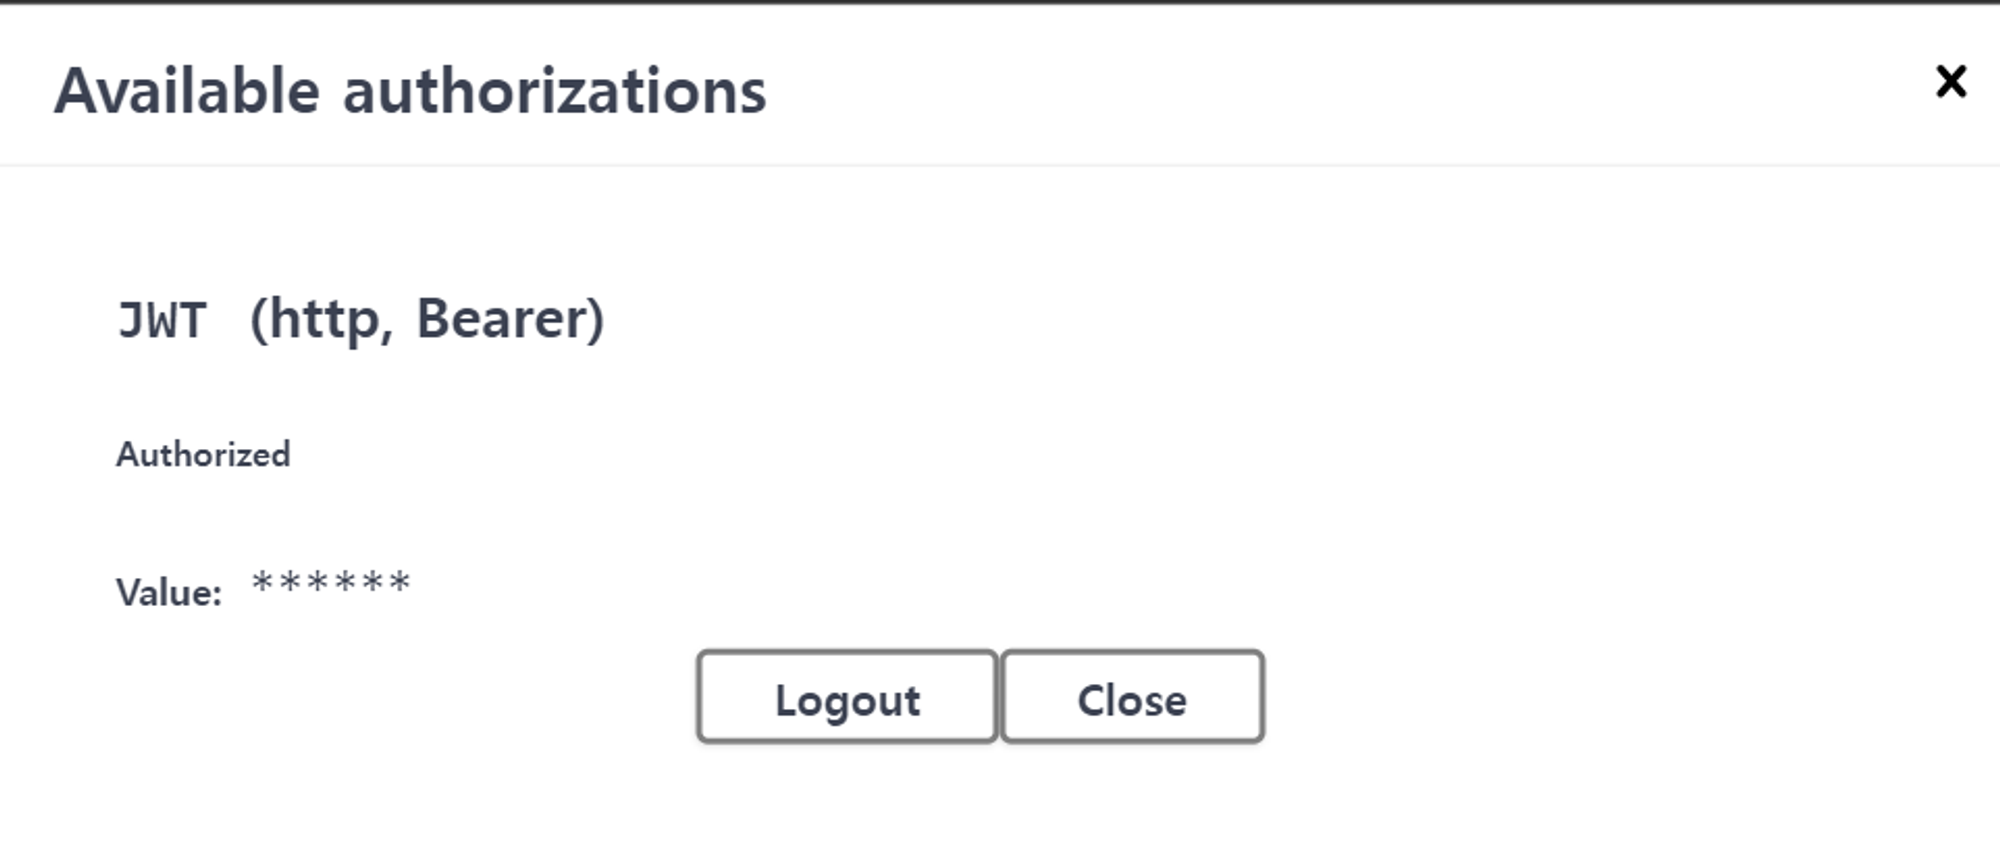
- Authorize 했을 경우

로그인을 해서 나온 token 값을 복사해 값을 넣어줬습니다.
그러면 이렇게 화면이 뜨게 되고,
다시 api를 실행했을 경우, 다음과 같이 JWT가 뜨는 걸 볼 수 있습니다.