
개요
iOS 와의 협업으로 인해 Spring Security 를 REST API 로 만들기 위해 공부하는 과정을 기록하고자합니다.
이 단계에서는 필터를 동작시켜 요청(request) 에서 JWT 토큰을 추출하고 디코딩하여 UserPrincipalAuthenticationToken 으로 변환 후 SecurityContextHolder 에 설정합니다. 이를 통해 각 요청에 대한 사용자 정보를 Spring Security에서 활용할 수 있도록 합니다.
공부중이므로 틀린 내용, 의견, 질문 있으시면 댓글 남겨주시면 감사하겠습니다.
전체 구조
Using JWT in requests
- Using Jwt in subsequence requests
- Authentication principle is not User
- 비유: User 는 Person, Authentication principle은 Id Card
- You pass through security with your ID card but it is different from you as a person
- Id Card를 통해 인증을 하지만, ID Card 와 User는 다름
- 인증은 사용자를 식별하고 확인하기 위한 과정이지만, 사용자 자체와는 분리된 것으로 간주됩니다.
1. UserPrincipal.java 생성
-
UserPrincipal은 Spring Security에서 사용되는 사용자 인증 및 권한 정보를 제공하는 데에 중점을 두고, UserEntity는 애플리케이션에서 사용되는 사용자 데이터를 나타냅니다. 보통은 인증과 권한 검사를 위해 UserPrincipal을 사용하고, 데이터베이스와의 상호 작용 등에서는 UserEntity를 활용합니다.
-
UserDetails를 구현하므로, Spring Security가 인증 및 권한 검사를 수행할 때 필요한 정보를 제공합니다.
1.1. 코드
package com.ward.ward_server.security;

import lombok.Builder;
import lombok.Getter;
import org.springframework.security.core.GrantedAuthority;
import org.springframework.security.core.userdetails.UserDetails;

import java.util.Collection;

@Getter
@Builder
public class UserPrincipal implements UserDetails {
    private final Long userId;
    private final String email;
    private final Collection<? extends GrantedAuthority> authorities;

    // 사용자에게 부여된 권한 목록을 반환한다.
    @Override
    public Collection<? extends GrantedAuthority> getAuthorities() {
        return authorities;
    }

    // 사용자의 비밀번호를 반환한다.
    @Override
    public String getPassword() {
        return null;
    }

    // 사용자의 이름(아이디)를 반환한다.
    @Override
    public String getUsername() {
        return email;
    }

    // 계정이 만료되지 않았는지?
    @Override
    public boolean isAccountNonExpired() {
        return true; // true: 만료되자 않았다.
    }
    // 계정이 잠겨있지 않은지?
    @Override
    public boolean isAccountNonLocked() {
        return true; // true: 잠겨있지 않다.
    }

    // 자격 증명이 만료되지 않았는지?
    @Override
    public boolean isCredentialsNonExpired() {
        return true; // 만료되지 않았다.
    }

    // 활성화되어 있는지?
    @Override
    public boolean isEnabled() {
        return true; // 활성화 되어있다
    }
}
1.2. 방법
- <중요> UserDetails를 implements 하고 Overide 하고, 꼭 아래에 메서드들의 false 들 true 로 바꿔어함!
- UserPrincipal을 JWT 토큰의 정보를 채워주기
- Spring 이 Userprincipal을 authentication token으로 wrap해준다.
- 우리가 만든 custom user principal 을 갖는 custom version의 token을 만든다.(?)
1.3. 코드 설명
-
getAuthorities() 메서드:
사용자에게 부여된 권한 목록을 반환합니다.
여기에서는 null을 반환하고 있으므로 사용자에게는 권한이 없는 것으로 간주됩니다. 이 메서드를 적절히 구현하여 사용자의 권한을 반환해야 합니다. -
getPassword() 및 getUsername() 메서드:
각각 사용자의 비밀번호와 사용자 이름(아이디)을 반환합니다.
현재 구현에서는 두 메서드 모두 null을 반환하고 있으므로, 이후에 이 정보를 설정하도록 구현이 필요합니다. -
isAccountNonExpired(), isAccountNonLocked(), isCredentialsNonExpired(), isEnabled() 메서드:
계정이 만료되지 않았는지, 잠겨 있지 않은지, 자격 증명이 만료되지 않았는지, 활성화되어 있는지를 나타내는 불리언 값을 반환합니다.
각각 true를 반환하고 있으므로, 기본적으로 계정은 만료되지 않았고, 잠겨 있지 않으며, 자격 증명이 만료되지 않았으며, 활성화되어 있는 것으로 처리됩니다.
2. UserPrincipalAuthenticationToken.java 생성
이 클래스는 사용자의 UserPrincipal을 기반으로 한 Spring Security의 인증 토큰을 나타냅니다. 주로 사용자의 권한 정보와 함께 사용되며, 실제 시스템에서는 사용자의 자격 증명을 가져오거나 검증하는 로직을 더 추가하여 사용될 것입니다.
2.1. 코드
package com.ward.ward_server.security;

import org.springframework.security.authentication.AbstractAuthenticationToken;
import org.springframework.security.core.GrantedAuthority;

import java.util.Collection;

public class UserPrincipalAuthenticationToken extends AbstractAuthenticationToken {
    /**
     * Creates a token with the supplied array of authorities.
     *
     * @param authorities the collection of <tt>GrantedAuthority</tt>s for the principal
     *                    represented by this authentication object.
     */
    public UserPrincipalAuthenticationToken(Collection<? extends GrantedAuthority> authorities) {
        super(authorities);
    }

    @Override
    public Object getCredentials() {
        return null;
    }

    @Override
    public Object getPrincipal() {
        return null;
    }
}
2.2. 방법
extends AbstractAuthenticationToken- @Overide 추가
- create constructor matching super
- remove java docs : 하려는 내용을 대표하지 않기 때문에
- UserPrincipalAuthenticationToken 내용 구체화
- getPrincipal() 메서드 반환값 구체화
2.3. 설명
-
AbstractAuthenticationToken 확장:
- AbstractAuthenticationToken: Spring Security에서 제공하는 추상 클래스로, Authentication의 기본 구현을 제공합니다. 사용자의 인증 상태를 표현하는 데 사용됩니다.
-
UserPrincipal 필드:
- principal: 사용자의 주요 정보를 담고 있는 UserPrincipal 객체입니다.
-
생성자:
- UserPrincipalAuthenticationToken(UserPrincipal principal): 주어진 UserPrincipal을 사용하여 인증 토큰을 생성합니다.
- super(principal.getAuthorities()): 부모 클래스인 AbstractAuthenticationToken의 생성자를 호출하면서, 권한 목록을 전달합니다.
- this.principal = principal;: 현재 클래스의 필드를 초기화합니다.
- setAuthenticated(true);: 토큰이 인증되었음을 표시합니다.
- UserPrincipalAuthenticationToken(UserPrincipal principal): 주어진 UserPrincipal을 사용하여 인증 토큰을 생성합니다.
-
`getCredentials() 메서드:
- getCredentials(): 자격 증명(비밀번호, 토큰 등)을 반환하는 메서드입니다. 여기에서는 null을 반환하고 있습니다.
-
`getPrincipal() 메서드:
- getPrincipal(): 사용자의 주요 정보(UserPrincipal)를 반환하는 메서드입니다.
3. JwtDecoder.java 생성
이 클래스는 JWT 토큰을 디코딩하는 역할을 수행하며, 시크릿 키를 사용하여 토큰이 유효한지 확인합니다. 주로 JWT 토큰을 검증하고 필요한 정보를 추출하기 위해 사용될 것입니다.
3.1. 코드
package com.ward.ward_server.security;

import com.auth0.jwt.JWT;
import com.auth0.jwt.algorithms.Algorithm;
import com.auth0.jwt.interfaces.DecodedJWT;
import lombok.RequiredArgsConstructor;
import org.springframework.stereotype.Component;

@Component
@RequiredArgsConstructor // @Bean 주입할거기때문에 @RequiredArgsConstructor 어노테이션 사용
public class JwtDecoder {
    private final JwtProperties properties;
    public DecodedJWT decode(String token) {
         return JWT.require(Algorithm.HMAC256(properties.getSecretKey()))
                 .build()
                 .verify(token);
    }
}
3.2. 방법
- 어노테이션 추가
@Component
@RequiredArgsConstructor // @Bean 주입할거기때문에 RequiredArgsConstructor 어노테이션 사용 - DecodeJWT 반환
- decode()구체화
.require, Algorithm~
private final JwtProperties properties;inject이 단계에선 안배우지만 require().withIssuer() / withClaim사용에 대해 공부해보면 좋을듯
3.3. 설명
-
@Component 어노테이션:
- @Component: Spring 컨텍스트에 이 클래스가 빈(Bean)으로 등록되도록 하는 어노테이션입니다. 이 클래스를 사용하는 곳에서는 주입을 통해 객체를 가져올 수 있습니다.
-
@RequiredArgsConstructor 어노테이션:
- @RequiredArgsConstructor: Lombok 어노테이션으로, 클래스의 모든 final 필드에 대한 생성자를 생성합니다. 주로 의존성 주입(Dependency Injection)을 위해 사용됩니다.
-
생성자
- JwtDecoder(JwtProperties properties): 주입받은 JwtProperties를 사용하여 JwtDecoder 인스턴스를 생성합니다.
-
decode 메서드:
- decode(String token): 주어진 JWT 토큰을 디코딩하는 메서드입니다.
- JWT.require(Algorithm.HMAC256(properties.getSecretKey())): 디코딩에 필요한 설정을 지정합니다. 여기서는 시크릿 키를 사용하여 HMAC256 알고리즘을 사용하도록 설정했습니다.
- .build(): 설정을 바탕으로 디코더를 생성합니다.
- .verify(token): 주어진 토큰을 검증하고 디코딩합니다.
- decode(String token): 주어진 JWT 토큰을 디코딩하는 메서드입니다.
4. JwtToPrincipalConverter.java 생성
이 클래스는 주로 JWT 토큰에서 사용자 관련 정보 및 권한을 추출하여 UserPrincipal 객체로 변환하는 데 사용될 것입니다.
4.1. 코드
package com.ward.ward_server.security;

import com.auth0.jwt.interfaces.DecodedJWT;
import org.springframework.security.core.authority.SimpleGrantedAuthority;
import org.springframework.stereotype.Component;

import java.util.List;

@Component
public class JwtToPrincipalConverter {
    public UserPrincipal convert(DecodedJWT jwt) {
        return UserPrincipal.builder()
                .userId(Long.valueOf(jwt.getSubject()))
                .email(jwt.getClaim("e").asString())
                .authorities(extractAuthoritiesFromClaim(jwt))
                .build();
    }

    private List<SimpleGrantedAuthority> extractAuthoritiesFromClaim(DecodedJWT jwt) {
        var claim = jwt.getClaim("a");
        if (claim.isNull() || claim.isMissing()) return List.of();
        return claim.asList(SimpleGrantedAuthority.class);
    }
}
4.2. 설명
- @Component 어노테이션:
- @Component: Spring 컨텍스트에 이 클래스가 빈(Bean)으로 등록되도록 하는 어노테이션입니다. 이 클래스를 사용하는 곳에서는 주입을 통해 객체를 가져올 수 있습니다.
- convert 메서드:
- convert(DecodedJWT jwt): 주어진 디코딩된 JWT 객체(DecodedJWT)를 기반으로 UserPrincipal 객체로 변환합니다.
- userId(Long.valueOf(jwt.getSubject())): JWT의 서브젝트(Subject)에서 사용자 ID를 추출하여 UserPrincipal의 userId에 설정합니다.
- email(jwt.getClaim("e").asString()): JWT의 클레임에서 이메일을 추출하여 UserPrincipal의 email에 설정합니다.
- authorities(extractAuthoritiesFromClaim(jwt)): extractAuthoritiesFromClaim 메서드를 사용하여 권한을 추출하고, 이를 UserPrincipal의 authorities에 설정합니다.
- build(): 최종적으로 UserPrincipal 객체를 생성합니다.
- extractAuthoritiesFromClaim 메서드:
- extractAuthoritiesFromClaim(DecodedJWT jwt): JWT의 클레임에서 권한을 추출하는 메서드입니다.
- var claim = jwt.getClaim("a");: JWT의 클레임 중 "a"라는 이름의 클레임을 가져옵니다.
- if (claim.isNull() || claim.isMissing()) return List.of();: 클레임이 비어있거나 존재하지 않으면 빈 권한 목록을 반환합니다.
- return claim.asList(SimpleGrantedAuthority.class);: 클레임이 존재하면 해당 클레임을 SimpleGrantedAuthority 객체의 목록으로 반환합니다.
5. JwtAuthenticationFilter.java 생성
-
extract the token from authorization header from our request
-
이 필터는 모든 HTTP 요청에서 JWT를 추출하고 디코딩하여 UserPrincipalAuthenticationToken으로 변환한 후, Spring Security의 SecurityContextHolder에 설정합니다. 이를 통해 각 요청에 대한 사용자 정보를 Spring Security에서 활용할 수 있도록 합니다.
-
이 코드는 Spring Security의 OncePerRequestFilter를 상속하여 JWT를 사용하여 인증을 처리하는 필터입니다. 여러 번 호출되는 것을 방지하는 OncePerRequestFilter를 상속하므로 각 HTTP 요청에 대해 한 번만 실행됩니다.
5.1. 코드
package com.ward.ward_server.security;

import jakarta.servlet.FilterChain;
import jakarta.servlet.ServletException;
import jakarta.servlet.http.HttpServletRequest;
import jakarta.servlet.http.HttpServletResponse;
import lombok.RequiredArgsConstructor;
import org.springframework.security.core.context.SecurityContextHolder;
import org.springframework.stereotype.Component;
import org.springframework.util.StringUtils;
import org.springframework.web.filter.OncePerRequestFilter;

import java.io.IOException;
import java.util.Optional;

@Component
@RequiredArgsConstructor
public class JwtAuthenticationFilter extends OncePerRequestFilter {
    private final JwtDecoder jwtDecoder;
    private final JwtToPrincipalConverter jwtToPrincipalConverter;

    @Override
    protected void doFilterInternal(HttpServletRequest request, HttpServletResponse response, FilterChain filterChain) throws ServletException, IOException {
        extractTokenFromRequest(request)
                .map(jwtDecoder::decode)
                .map(jwtToPrincipalConverter::convert)
                .map(UserPrincipalAuthenticationToken::new)
                        .ifPresent(authentication -> SecurityContextHolder.getContext().setAuthentication(authentication));

        filterChain.doFilter(request, response);
    }

    // Authorization: Bearer ey74823y58734.y34t897y34.y8934t8934 이런식이라서 substring 7 해서 ey 부분만 가져오기위해서
    private Optional<String> extractTokenFromRequest(HttpServletRequest request) {
        var token = request.getHeader("Authorization");
        if (StringUtils.hasText(token) && token.startsWith("Bearer ")) {
            return Optional.of(token.substring(7));
        }
        return Optional.empty();
    }
}
5.2. 방법
extends OncePerRequestFilter- implement method
filterChain.doFilter(request, response);추가 중요(많이 빼먹는 실수)- inject
jwtDecoder,jwtToPrincipalConverter - @ 어노테이션 추가
- extractTokenFromRequest() 메서드 추가 : request 에서 token 추출
- token 은 존재할 수도 , 비어있을 수도 있으니까 Optional 로
- 존재하면 teken
- 없으면 empty Optional
- .getHeader()
- header 있으면 String 반환
- 없으면 null
- StringUtils.hasText()
- String 있으면 true
- 없으면 false
- startsWith("Bearer "): 토큰이 그렇게 생김
- Bearer ey74823y58734.y34t897y34.y8934t8934
- token.substring(7)
* Bearer ey74823y58734.y34t897y34.y8934t8934 토큰이 이렇게 생겨서 Bearer 짜르고 ey부터 가져오기 위해서
7. 전체를 묶어주기
- token 은 존재할 수도 , 비어있을 수도 있으니까 Optional 로
- 추출-디코딩=변환-AuthenticationToken으로 wrap-~-WebSecurityConfig 에서 만든 Filter를 알도록 추가해줘야 돼.
- doFilterInternal() 작성
- .map(jwtDecoder::decode)
- .map(str -> jwtDecoder.decode(str)) 과 동일 intelliJ가 최적화해줌.
- .map(jwtDecoder::decode)
- doFilterInternal() 작성
5.3. 설명
-
doFilterInternal 메서드:
- doFilterInternal: OncePerRequestFilter 클래스를 상속받아 구현한 메서드로, 모든 HTTP 요청에 대해 한 번씩 호출됩니다.
- extractTokenFromRequest: HTTP 요청에서 JWT를 추출하는 메서드입니다. "Authorization" 헤더에서 "Bearer"로 시작하는 토큰 부분을 추출합니다.
- map(jwtDecoder::decode): 추출한 토큰을 해독하여 실제 데이터를 가져옵니다. (jwtDecoder는 JwtDecoder 인터페이스의 구현체일 것입니다.)
- map(jwtToPrincipalConverter::convert): JWT에서 추출한 정보를 사용자의 Principal 객체로 변환합니다. (jwtToPrincipalConverter는 JwtToPrincipalConverter 인터페이스의 구현체일 것입니다.)
- map(UserPrincipalAuthenticationToken::new): 변환된 Principal을 사용하여 UserPrincipalAuthenticationToken 객체를 생성합니다. UserPrincipalAuthenticationToken은 Spring Security의 Authentication을 구현한 커스텀 클래스입니다.
- .ifPresent(...): 앞에서 만들어진 UserPrincipalAuthenticationToken 객체가 존재하면, 즉 토큰 검증 및 사용자 인증이 성공했을 때 실행됩니다.
- SecurityContextHolder.getContext().setAuthentication(authentication): Spring Security의 SecurityContextHolder에 현재 스레드에 대한 인증 객체를 설정합니다. 이를 통해 애플리케이션 내에서 현재 사용자에 대한 정보를 쉽게 얻을 수 있게 됩니다.
-
extractTokenFromRequest 메서드: HTTP 헤더에서 JWT 토큰을 추출하는 메서드입니다. 주어진 요청의 "Authorization" 헤더에서 "Bearer"로 시작하는 부분을 찾아서 추출합니다.
- HttpServletRequest 객체를 매개변수로 받아들입니다.
- request.getHeader("Authorization") 를 호출하여 HTTP 요청 헤더에서 "Authorization" 헤더 값을 가져옵니다.
- 가져온 값이 null이거나 비어 있으면 (StringUtils.hasText(token)가 false인 경우) 빈 Optional을 반환합니다.
- 가져온 값이 "Bearer "로 시작하면, 실제 토큰 값은 "Bearer " 이후의 문자열입니다. token.substring(7) 을 호출하여 이 부분을 추출하고, 추출된 토큰 값을 Optional.of(...) 를 사용하여 Optional으로 감싸서 반환합니다.
-
JwtDecoder와 JwtToPrincipalConverter: 주입된 JwtDecoder는 JWT를 디코딩하는 데 사용되고, JwtToPrincipalConverter는 디코딩된 JWT에서 UserPrincipal 객체로 변환하는 데 사용됩니다.
종합하면, 이 필터는 모든 HTTP 요청에서 JWT를 추출하고 디코딩하여 UserPrincipalAuthenticationToken으로 변환한 후, Spring Security의 SecurityContextHolder에 설정합니다. 이를 통해 각 요청에 대한 사용자 정보를 Spring Security에서 활용할 수 있도록 합니다.
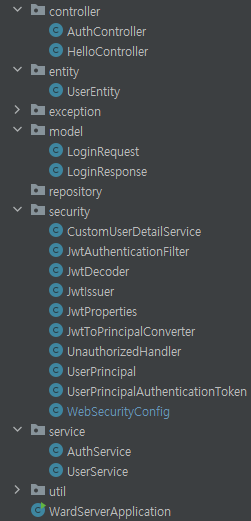
6. WebSecurityConfig 추가
만든 Filter에 대한 내용 추가
6.1. 코드
package com.ward.ward_server.security;

import lombok.RequiredArgsConstructor;
import org.springframework.context.annotation.Bean;
import org.springframework.context.annotation.Configuration;
import org.springframework.security.config.annotation.web.builders.HttpSecurity;
import org.springframework.security.config.annotation.web.configuration.EnableWebSecurity;
import org.springframework.security.config.annotation.web.configurers.AbstractHttpConfigurer;
import org.springframework.security.config.http.SessionCreationPolicy;
import org.springframework.security.web.SecurityFilterChain;
import org.springframework.security.web.authentication.UsernamePasswordAuthenticationFilter;

@Configuration
@EnableWebSecurity
@RequiredArgsConstructor
public class WebSecurityConfig {
    private final JwtAuthenticationFilter jwtAuthenticationFilter;

    @Bean
    public SecurityFilterChain applicationSecurity(HttpSecurity http) throws Exception {
        http.addFilterBefore(jwtAuthenticationFilter, UsernamePasswordAuthenticationFilter.class);

        http
                .cors(AbstractHttpConfigurer::disable)
                .csrf(AbstractHttpConfigurer::disable)
                .securityMatcher("/**") // map current config to given resource path
                .sessionManagement(sessionManagementConfigurer
                        -> sessionManagementConfigurer.sessionCreationPolicy(SessionCreationPolicy.STATELESS))
                .formLogin(AbstractHttpConfigurer::disable)
                .authorizeHttpRequests(registry -> registry // 요청에 대한 권한 설정 메서드
                        .requestMatchers("/").permitAll() // / 경로 요청에 대한 권한을 설정. permitAll() 모든 사용자, 인증되지않은 사용자에게 허용
                        .requestMatchers("/auth/login").permitAll()
                        .anyRequest().authenticated() // 다른 나머지 모든 요청에 대한 권한 설정, authenticated()는 인증된 사용자에게만 허용, 로그인해야만 접근 가능
                );

        return http.build();
    }
}
6.2. 방법
- @RequiredArrgsConstructor 추가
private final JwtAuthenticationFilter jwtAuthenticationFilter;추가http.addFilterBefore(jwtAuthenticationFilter, UsernamePasswordAuthenticationFilter.class);추가- 이제 HelloController 에서 아무 endpoint 정해서 security
- WebSecurityConfig에 설정하기를 "/","/auth/login" 말고는 권한 필요하게 해놨으니까.
6.3. 설명
-
http.addFilterBefore(jwtAuthenticationFilter, UsernamePasswordAuthenticationFilter.class); 코드는 Spring Security에서 사용되는 필터 체인에 커스텀한 JwtAuthenticationFilter를 추가하는 구문입니다.
-
여기서 addFilterBefore 메서드는 기존에 등록된 필터들 앞에 새로운 필터를 추가한다는 의미입니다. 즉, JwtAuthenticationFilter가 다른 기본적인 Spring Security 필터들보다 먼저 실행되도록 설정하는 역할을 합니다.
-
UsernamePasswordAuthenticationFilter.class는 Spring Security에서 제공하는 기본적인 인증 필터 중 하나입니다. 이 필터는 사용자의 아이디와 비밀번호를 이용한 폼 기반 로그인을 처리하는 역할을 합니다. 기본적으로 Spring Security는 사용자가 로그인할 때 UsernamePasswordAuthenticationFilter를 사용하여 아이디와 비밀번호를 확인하고, 성공 시 해당 사용자에게 인증을 부여합니다.
-
addFilterBefore 메서드를 통해 JwtAuthenticationFilter를 UsernamePasswordAuthenticationFilter 앞에 추가함으로써, HTTP 요청이 들어올 때 먼저 JWT*를 확인하고, 이를 기반으로 사용자를 인증하도록 설정합니다. 따라서 이 구문은 사용자가 JWT를 통한 인증을 시도하기 전에 수행되는 필터 체인에서 먼저 JwtAuthenticationFilter가 실행되도록 하는 역할을 합니다.
7. HelloController에 any endpoint 추가
7.1. 코드
package com.ward.ward_server.controller;

import lombok.RequiredArgsConstructor;
import org.springframework.web.bind.annotation.GetMapping;
import org.springframework.web.bind.annotation.RestController;

@RestController
@RequiredArgsConstructor
public class HelloController {

    @GetMapping("/")
    public String greeting(){
        return "Hello, World";
    }

    @GetMapping("/secured")
    public String secured() {
        return "If you see this, then you're logged in";
    }
}
7.2. 설명
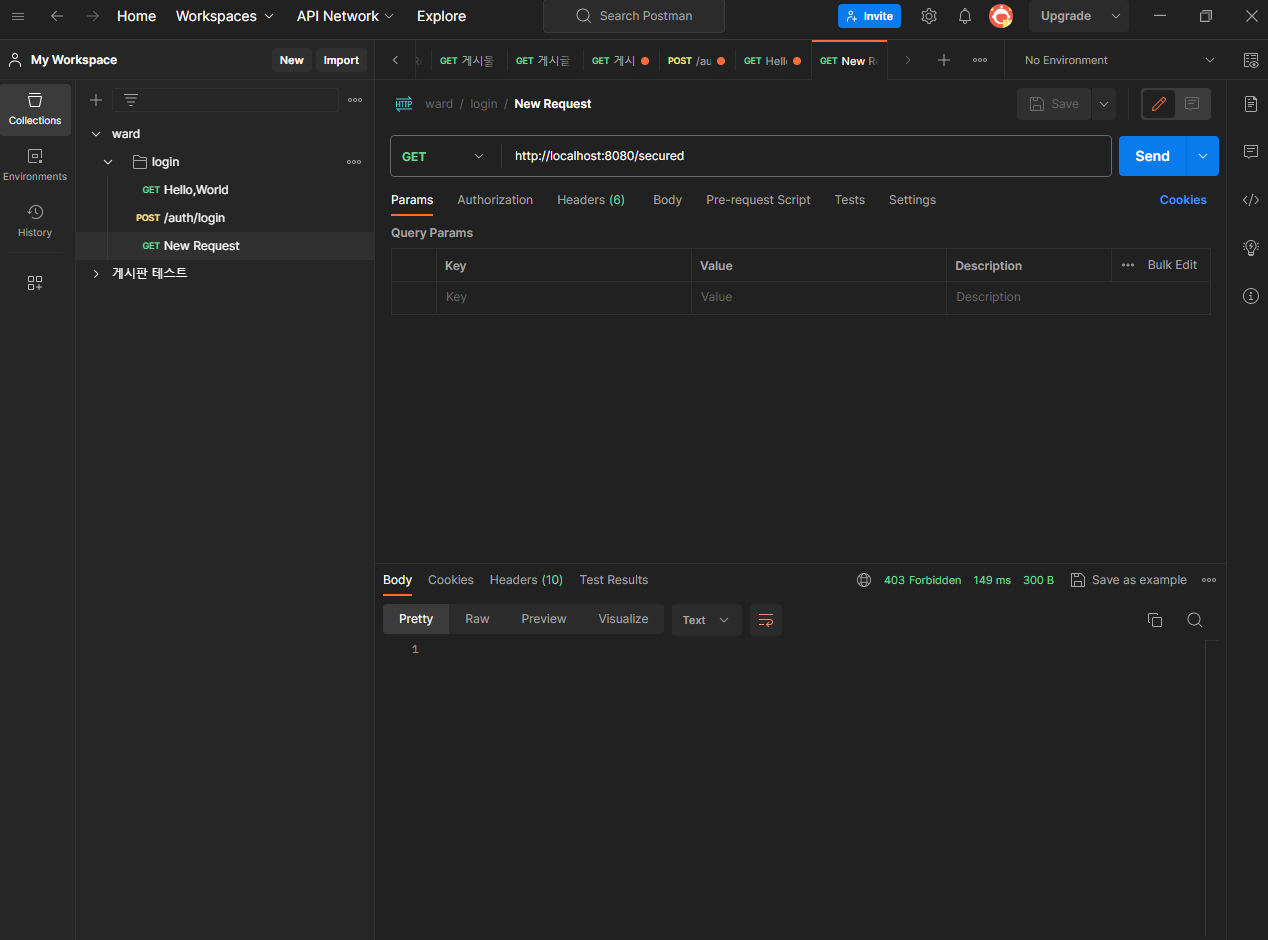
WebSecurityConfig에 .anyRequest().authenticated()라고 설정해놔서 설정한 endpoint 외에는 로그인 이 필요함. 위와같이 만들어서 테스트합니다. (postman 사용하여)
1. 그냥 실행하고 endpoint 입력하면 403 forbidden 이 뜹니다. 권한 외에는 시큐리티가 잘 동작함을 확인.
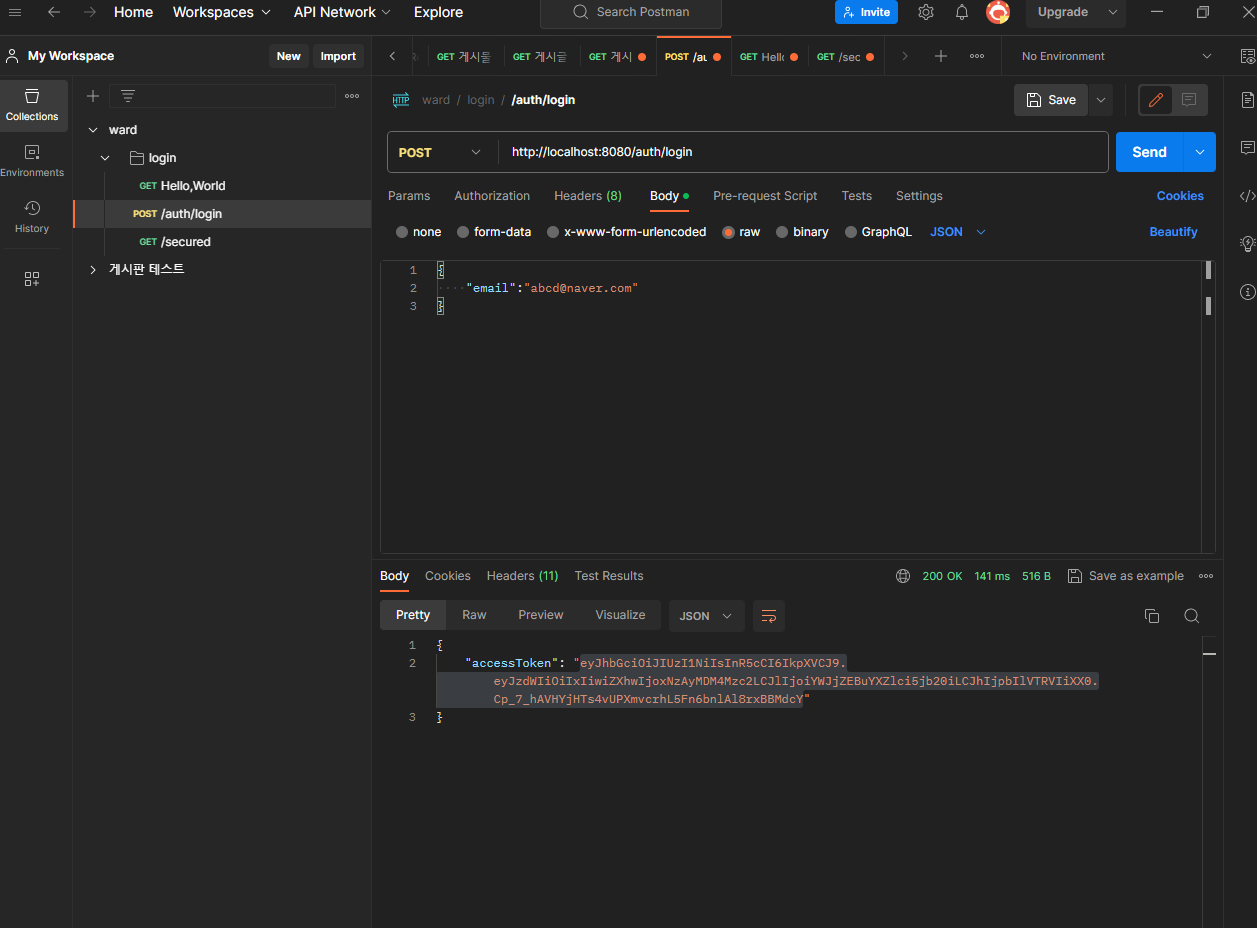
2. postman을 /login 통해 토큰 발행하고 다시 /secured 하면 원하는 결과가 나옵니다.
3. postman 에서 Get-Authorization-Type: Bearer Tokeen - Token 입력 후 send
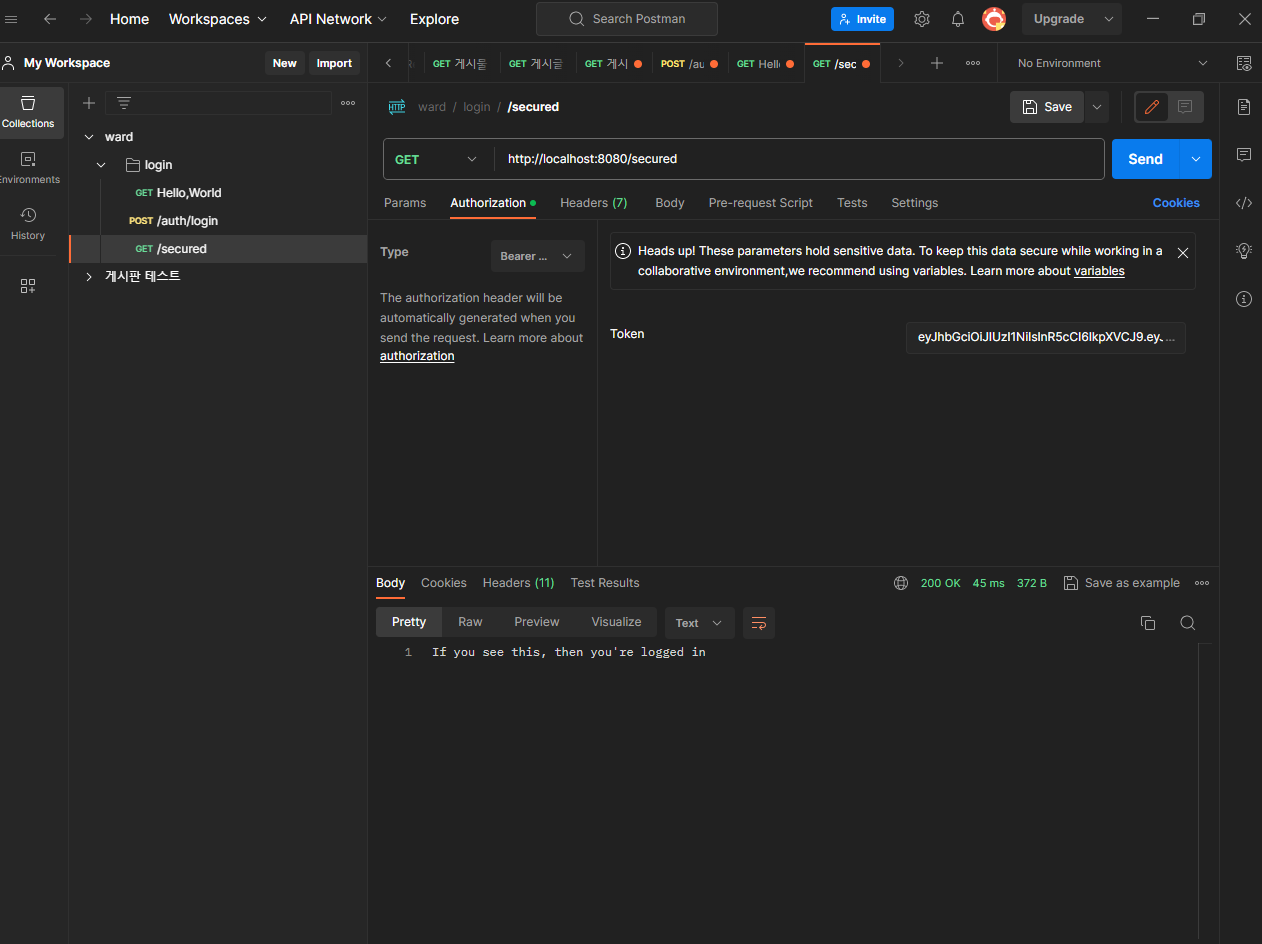
메세지가 뜨면 로그인이 된겁니다.
정리
프로젝트 시작을 위해서만 한거라면 여기까지만하고 코딩해도됩니다.
다음단계에서는 fake login 말고 real login 알아보겠습니다.
참고