- 샘플 코드 연습
타입
struct Emoji & enum Category (Emoji.swift)
struct Emoji: Hashable {

    enum Category: CaseIterable, CustomStringConvertible {
        case recents, smileys, nature, food, activities, travel, objects, symbols
    }

    let text: String
    let title: String
    let category: Category
    private let identifier = UUID()
}


extension Emoji.Category {
	var description: String {
    	// 생략
    }

    var emojis: [Emoji] {
    	// 생략
    }
}-
struct 안에 enum이 있어서 헷갈렸는데, 복잡하게 생각할 부분은 아닌 것 같다.
Category에 접근하려면Emoji에 먼저 접근해야 한다 정도로 이해하자 -
머리가 아픈 부분은
Category의 연산 프로퍼티가Emoji타입이다
생략된 부분에서[Emoji]타입을 리턴할 때 인스턴스를 매번 새로 생성하고, 그 때Emoji의Category타입은self로 잡는다case .smileys: return [ Emoji(text: "😀", title: "Happy", category: self), Emoji(text: "😂", title: "Laughing", category: self), Emoji(text: "🤣", title: "Rolling on the floor laughing", category: self) ]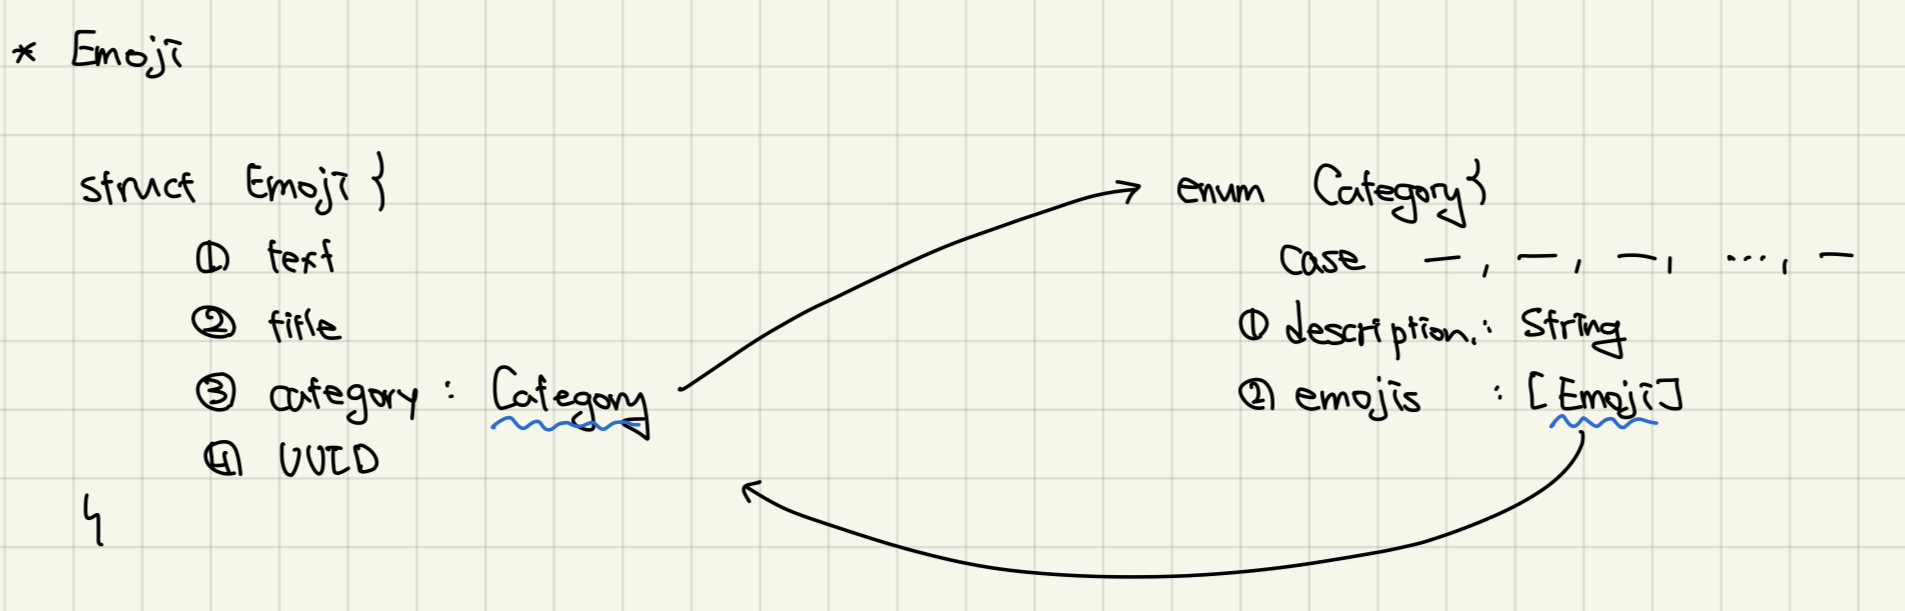
Section & Item (EmojiExplorerListVC)
typealias Section = Emoji.Category

struct Item: Hashable {
    let title: String
    let emoji: Emoji    // (struct. text, title, category)

    init(title: String, emoji: Emoji) {
        self.title = title
        self.emoji = emoji
    }

    private let identifier = UUID()
}Section은 컬렉션뷰의 섹션을 나눌 때 사용한다. 즉, 카테고리별로 섹션을 나눌 예정이다Item타입으로 데이터를 저장한다.Emoji타입의 프로퍼티로 갖고 있는 걸 확인할 수 있다.
나중에Emoji타입의 변수로Item타입의 변수를 생성한다
Layout
func createLayout() -> UICollectionViewLayout {
        let configuration = UICollectionLayoutListConfiguration(appearance: .insetGrouped)
        let layout = UICollectionViewCompositionalLayout.list(using: configuration)

        return layout
}

collectionView = UICollectionView(frame: view.bounds, collectionViewLayout: createLayout() )
cellRegistration + dataSource
var dataSource: UICollectionViewDiffableDataSource<Section, Item>!Section으로 섹션 나누고, 데이터는Item타입으로 갖는다
let cellRegistration = UICollectionView.CellRegistration<UICollectionViewListCell, Emoji> { cell, indexPath, itemIdentifier in
var content = UIListContentConfiguration.valueCell()
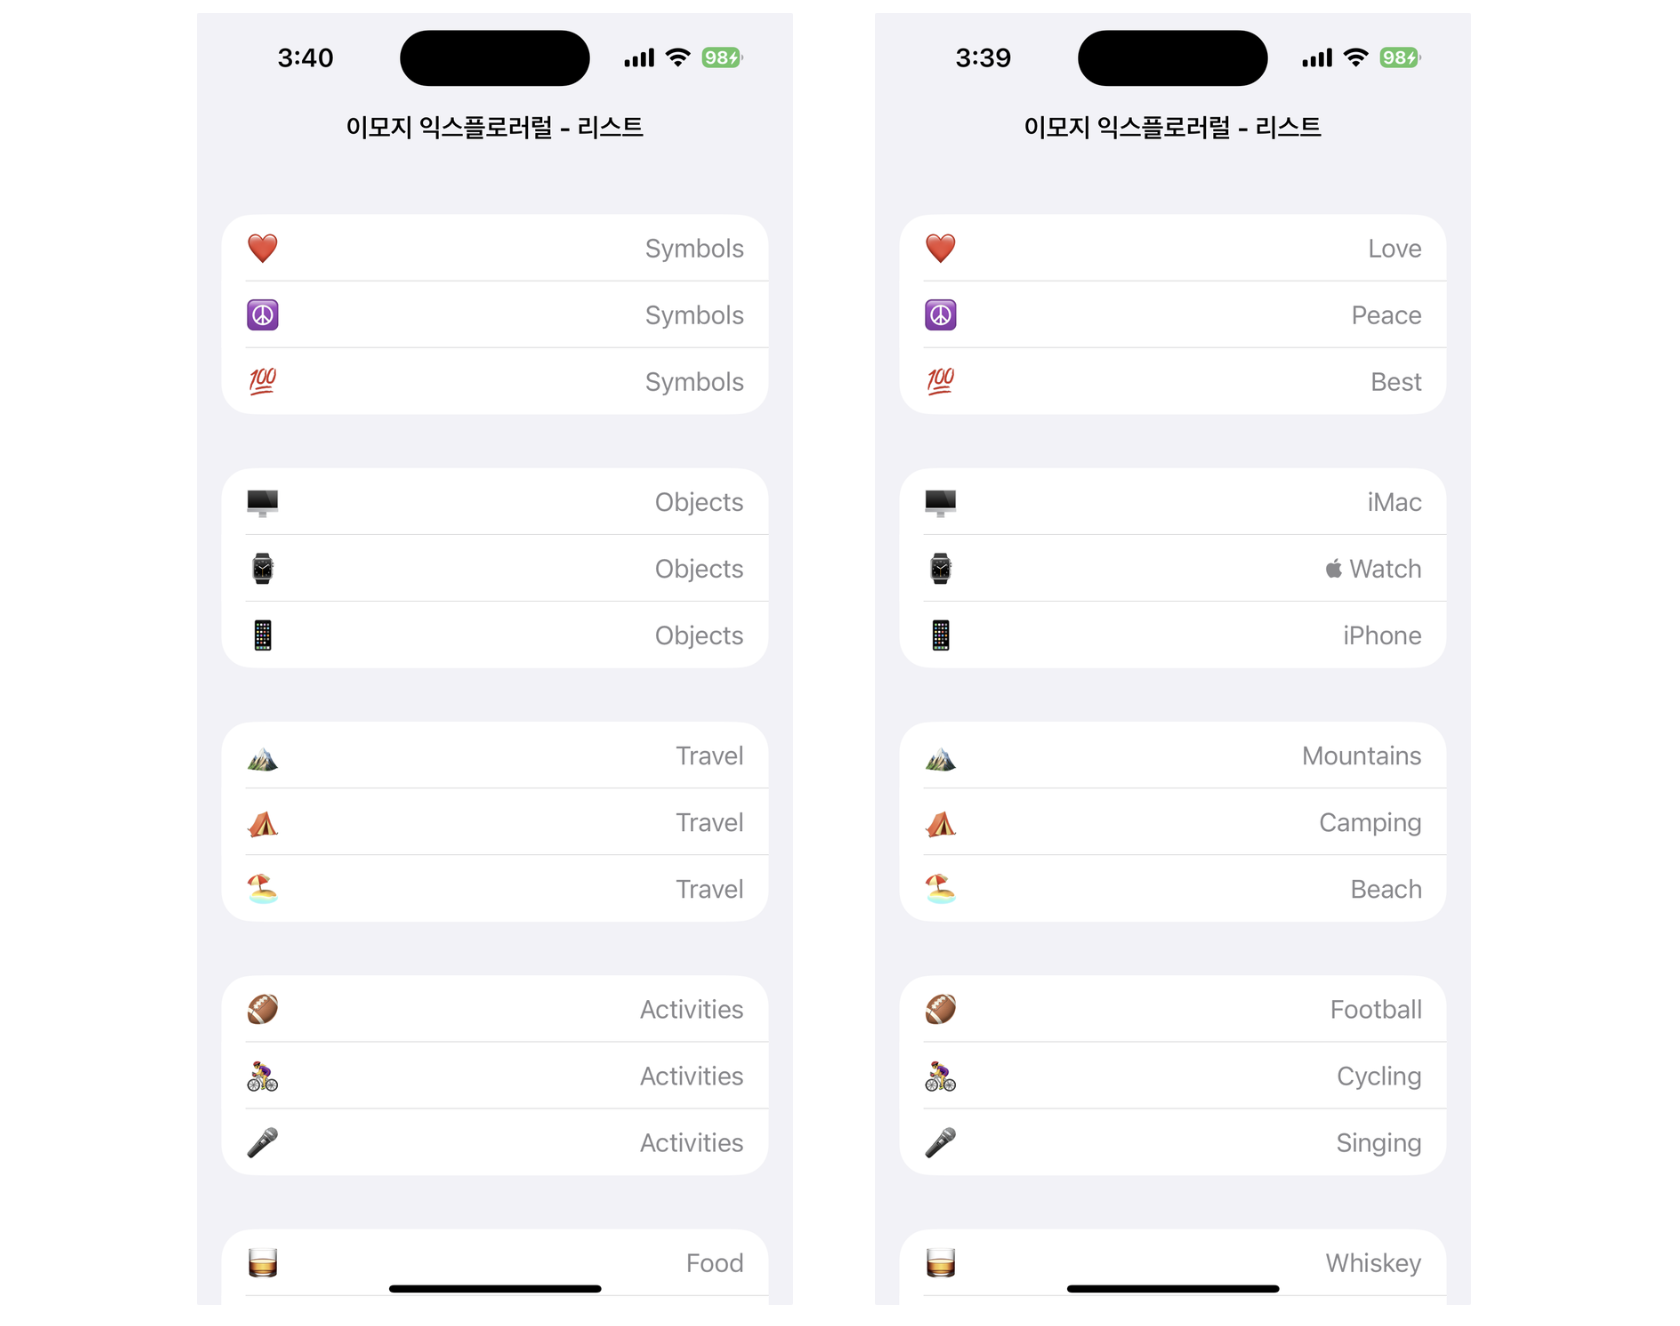
content.text = itemIdentifier.text
content.secondaryText = /*itemIdentifier.title*/String(describing: itemIdentifier.category)
var backgroundConfig = UIBackgroundConfiguration.listGroupedCell()
backgroundConfig.cornerRadius = 20
cell.contentConfiguration = content
cell.backgroundConfiguration = backgroundConfig
}- 수업 때는 보여주는 타입과 데이터의 타입이 같았는데, 여기선 다르다
- cellRegistration에 들어가는 타입은
Emoji이다. - 즉, 위 코드에서
itemIdentifier의 타입은Emoji이기 때문에,
content의 요소에 값을 넣어줄 때 주의해야 한다
dataSource = UICollectionViewDiffableDataSource<Section, Item>(
    collectionView: collectionView,
    cellProvider: { collectionView, indexPath, itemIdentifier in

        return collectionView.dequeueConfiguredReusableCell(
            using: cellRegistration,
            for: indexPath,
            item: itemIdentifier.emoji
        )
    }
)- 위에 선언했듯이, 데이터는
Item타입으로 갖는다 - 따라서 위 코드에서
itemIdentifier의 타입은Item이고,
셀에 넣어줄 때,itemIdentifier.emoji로 넣어주게 된다
Snapshot
- 수업 때 배운 방식과 약간 달랐다
수업 코드
var snapshot = NSDiffableDataSourceSnapshot<Section, User>()

snapshot.appendSections(Section.allCases)

snapshot.appendItems(list, toSection: Section.second)
snapshot.appendItems(list2, toSection: Section.first)

dataSource.apply(snapshot)- 섹션이 나뉘는 방식을 먼저 snapshot에 추가하고,
각 섹션 별 아이템을 snapshot에 추가한다 - 그럼 snapshot에 모든 섹션의 데이터가 들어있기 때문에
그대로 dataSource에 apply 해준다
applyInitialSnapshots()
for category in Emoji.Category.allCases.reversed() {    // 카테고리를 돌아.

    var sectionSnapshot = NSDiffableDataSourceSectionSnapshot<Item>()   // 섹션 스냅샷을 하나 만들어. 들어가는 타입은 Item

    // [Item] 타입으로 만드네

    // 카테고리를 돌면, 각각 case가 있고, 그 case의 emojis에 접근하면 [Emoji] 타입을 얻을 수 있고,
    // 그 배열을 돌면서 Emoji 타입을 통해 Item 타입을 만들고,
    // 그걸 map으로 빼서 배열을 만들어
    let items = category.emojis.map{ Item(title: /*$0.text*/String(describing: category), emoji: $0) }

    // 그럼 지금 [Item] 타입의 배열이 하나 있는데, 그걸 sectionSnapshot에다가 넣어
    sectionSnapshot.append(items)

    // 추가한 sectionSnapshot을 dataSource에 적용해
    dataSource.apply(sectionSnapshot, to: category, animatingDifferences: false)
}-
자
-
일단 섹션별로 따로따로 dataSource에 추가해주는 걸 확인할 수 있다
-
snapshot 변수의 타입도 다르다. 수업 때는 섹션과 아이템이 다 들어갔는데, 여기선 아이템 타입만 들어간다
-
처음부터 보면
-
일단
Category.allCases배열을 for문으로 돈다.
category의 타입은Emoji.Category이다
- snapshot 변수를 생성한다. section snapshot 으로 만든다
section snapshot은 컬렉션뷰의 'single section'에 대한 데이터를 나타낸다.
section snapshot을 통해, view의 각각의 section에 보여질 데이터의 초기 상태를 setup할 수 있고, 해당 데이터는 나중에 업데이트할 수 있다
전체 view의 데이터를 나타내는NSDiffableDataSourceSnapshot대신 사용할 수 있다
각 섹션 별로 데이터를 가져오는 source가 다른 경우에, 데이터에 대한 보다 정밀한 관리가 가능해진다
또한, an outliine with expandable items와 같은 hierarchical structure의 데이터를 나타낼 때도 유용하다
-
지금 돌고 있는
category.emoji의 타입은[Emoji]이기 때문에,
셀에 나타내기 위해서는 이걸[Item]타입으로 바꿔줘야 한다. -
map 을 이용해서
[Item]타입의 변수items를 만든다 -
요
items를 snapshot에 append한다 -
category로 섹션을 구분하므로 해당 snapshot을 고대로tocategory 해서 dataSource에apply해준다nonisolated func apply( _ snapshot: NSDiffableDataSourceSectionSnapshot<ItemIdentifierType>, to section: SectionIdentifierType, animatingDifferences: Bool = true, completion: (() -> Void)? = nil )Updates the section UI to reflect the state of the data in the specified snapshot, optionally animating the UI changes and executing a completion handler.
- 결과적으로 dataSource에 snapshot을 apply할 때, 섹션별로 snapshot을 넣는다는 점이 달랐다 (section snapshot)
