oAuth2에 대해서 알아보았으니 이제 직접 구현을 해보자
oAuth2를 구현하기 위해서는 먼저 카카오나 네이버 같은 플랫폼에 등록을 해주어야 한다.
여기서는 카카오를 기준으로 하겠다.
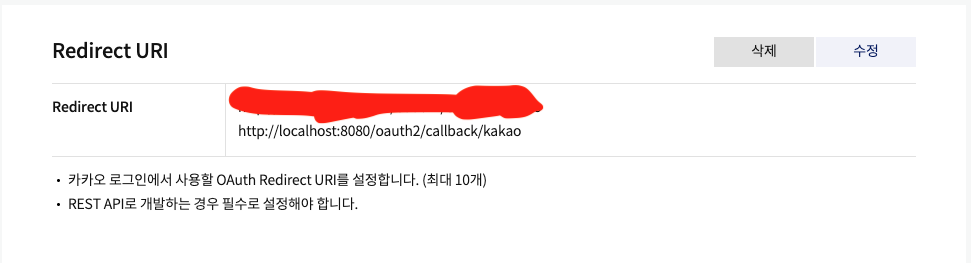
카카오 디벨로퍼에 들어가서 앱을 등록해준다. 그리고 카카오 로그인에서 redirect uri를 등록을 해준다.
그리고 원하는 서비스의 권한을 체크하는 동의항목에서 체크를 해준다.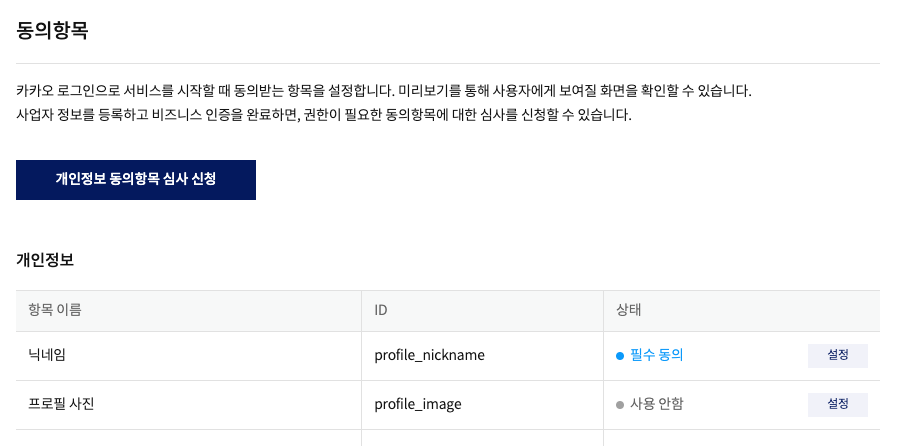
이제 프로젝트에서 yaml 파일을 설정을 해주어야 한다.
#Oauth2 설정
spring:
  security:
    oauth2:
      client:
        registration:
          kakao:
            client-id: {카카오디벨로퍼에서 확인}
            client-secret: {카카오디벨로퍼에서 확인}
            redirect-uri: http://${SOCIAL_LOGIN_URL}:8080/oauth2/callback/kakao
            authorization-grant-type: authorization_code
            client-authentication-method: client_secret_post
            scope:
              - profile_nickname
        provider:
          kakao:
            authorization-uri: https://kauth.kakao.com/oauth/authorize
            token-uri: https://kauth.kakao.com/oauth/token
            user-info-uri: https://kapi.kakao.com/v2/user/me
            user-name-attribute: id
이 설정을 통해서 카카오 로그인을 사용할 수 있는 셋팅을 해준다.
그리고 spring security에서 oAuth2를 사용할 수 있도록 설정을 해주어야 한다.
.oauth2Login(oauth -> oauth
                        .authorizationEndpoint(endpoint -> endpoint.baseUri("/api/v1/auth/oauth2"))
                        .redirectionEndpoint(endpoint -> endpoint.baseUri("/oauth2/callback/*"))
                        .userInfoEndpoint(endpoint -> endpoint.userService(customOAuth2UserService))
                        .successHandler(oAuth2SuccessHandler)
                )
spring security config에서 oAuth와 관련된 일부 코드를 가지고 왔다.
authorizationEndpoint를 통해서 요청을 보낸 uri를 커스텀을 해준다.
redirectionEndpoint를 통해서 redirectionUri를 설정을 해준다.
userService를 통해서 플래폼으로부터 받아온 정보를 사용하도록 한다.
마지막으로 로그인이 성공을 했을 때 oAuth2SuccessHandler가 실행이 되도록 한다.
package com.github.super_mall.service.oauth2UserService;

import com.fasterxml.jackson.databind.ObjectMapper;
import com.github.super_mall.entity.CustomoAuth2UserEntity.CustomOAuth2User;
import com.github.super_mall.entity.userEntity.User;
import com.github.super_mall.repository.userRepository.UserRepository;
import lombok.RequiredArgsConstructor;
import lombok.extern.slf4j.Slf4j;
import org.springframework.security.oauth2.client.userinfo.DefaultOAuth2UserService;
import org.springframework.security.oauth2.client.userinfo.OAuth2UserRequest;
import org.springframework.security.oauth2.core.OAuth2AuthenticationException;
import org.springframework.security.oauth2.core.user.OAuth2User;
import org.springframework.stereotype.Service;

import java.util.Map;

@Service
@RequiredArgsConstructor
@Slf4j
public class CustomOAuth2UserService extends DefaultOAuth2UserService {

    private final UserRepository userRepository;

    public OAuth2User loadUser(OAuth2UserRequest request) throws OAuth2AuthenticationException {

        // 카카오정보 가지고 오기
        OAuth2User oAuth2User = super.loadUser(request);
        // 카카오인지 구분하기 위해서
        // 클라이언트의 이름 가지고 오기
        String oauthClientName = request.getClientRegistration().getClientName();

        // 카카오정보를 가지고 User 엔티티 만들고 저장하기
        User user = null;
        String socialUserId = null;
        String email = "email@email.com";
        String userName = null;

        if (oauthClientName.equals("kakao")) {
            socialUserId = "kakao_" + oAuth2User.getAttributes().get("id");
            user = new User(socialUserId, oauthClientName, email, userName);
        }


        saveOrUpdate(user);
        // 토근을 발행하가 위해서 OAuth2User를 구현해준다.
        // 그리고 생성해서 반환한다.
        return new CustomOAuth2User(socialUserId, email);
    }

    private User saveOrUpdate(User user) {
        User findUser = userRepository.findByEmailAndSocialName(user.getEmail(), user.getSocialName())
                .map(m -> m.update(user.getSocialUserId(), user.getSocialName(), user.getEmail(), user.getUserName()))
                .orElse(user);

        log.info("findUser = {}" , findUser);

        return userRepository.save(findUser);
    }
}
DefaultOAuth2UserService를 상속을 받아서 구현을 해준다.
플랫폼으로부터 유저의 정보를 받아오고 User엔티티로 바꿔준다.
그리고 DB에 저장을 해준다.
package com.github.super_mall.config.oAuthConfig;

import com.github.super_mall.entity.CustomoAuth2UserEntity.CustomOAuth2User;
import com.github.super_mall.entity.refreshTokenEntity.RefreshToken;
import com.github.super_mall.entity.userEntity.User;
import com.github.super_mall.exceptions.LoginException;
import com.github.super_mall.repository.refreshTokenRepository.RefreshTokenRepository;
import com.github.super_mall.repository.userRepository.UserRepository;
import com.github.super_mall.util.Constants;
import com.github.super_mall.util.JwtTokenUtil;
import jakarta.servlet.http.HttpServletRequest;
import jakarta.servlet.http.HttpServletResponse;
import lombok.RequiredArgsConstructor;
import org.springframework.security.core.Authentication;
import org.springframework.security.web.authentication.SimpleUrlAuthenticationSuccessHandler;
import org.springframework.stereotype.Component;
import org.springframework.web.util.UriComponents;
import org.springframework.web.util.UriComponentsBuilder;

import java.io.IOException;
import java.util.Optional;

@Component
@RequiredArgsConstructor
public class OAuth2SuccessHandler extends SimpleUrlAuthenticationSuccessHandler {

    private final JwtTokenUtil jwtTokenUtil;
    private final RefreshTokenRepository refreshTokenRepository;
    private final UserRepository userRepository;

    // CustomOAuth2UserService에서 넘겨준 CustomOAuth2User를 onAuthenticationSuccess가 받아낸다.
    @Override
    public void onAuthenticationSuccess(
            HttpServletRequest request,
            HttpServletResponse response,
            Authentication authentication) throws IOException, SecurityException {

        CustomOAuth2User oAuth2User = (CustomOAuth2User) authentication.getPrincipal();
        String userId = oAuth2User.getName();
        String email = oAuth2User.getEmail();
        String accessToken = jwtTokenUtil.createAccessToken(email);
        String refreshToken = null;

        User user = userRepository.findByEmail(email).orElseThrow(
                () -> new LoginException("유저를 찾을 수 없습니다")
        );

        RefreshToken findRefreshToken = refreshTokenRepository.findByUserUserId(user.getUserId()).orElse(
                null
        );


        if (findRefreshToken == null) {
            refreshToken = jwtTokenUtil.createRefreshToken(email);
            RefreshToken refreshTokenEntity = RefreshToken.builder().refreshToken(refreshToken).user(user).build();
            refreshTokenRepository.save(refreshTokenEntity);
        } else {
            refreshToken = findRefreshToken.getRefreshToken();
        }

        UriComponents uriComponents = UriComponentsBuilder.newInstance()
                        .scheme("http")
                        .host("localhost:3000")
                        .query("accessToken={value1}")
                        .query("refreshToken={value2}")
                                .buildAndExpand(accessToken, refreshToken);

        response.sendRedirect(String.valueOf(uriComponents));

    }
}
CustomOAuth2UserServicer가 성공을 하게 되면 OAuth2SuccessHandler가 실행이 된다.
SimpleUrlAuthenticationSuccessHandler를 상속을 받아준다.
여기서는 accessToken과 refreshToken을 생성해서 uri에 쿼리에 담아서 프론트에게 전달한다.