File Directory
지난번 MyPass 디렉토리에 함수명을 출력하는 코드를 작성하였다.
이번에는 명령어의 수를 출력하는 Pass를 작성하려고 한다.
한 디렉토리에 하나의 라이브러리를 생성하는 것이 LLVM 공식 시스템 빌드의 원칙이다.
먼저 이전 디렉토리를 수정해 주었다.
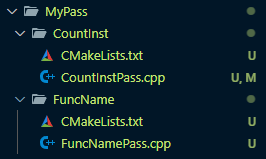
MyPass 안에 여러 Pass들을 적는 방식으로 진행해 주었다.
CountInst
이번에는 함수에서 사용하는 명령어의 수를 출력하는 Pass를 작성해 보았다.
CountInstPass.cpp
먼저 명령어 수를 count하는 cpp코드를 먼저 작성해 주었다.
// InstCountPass.cpp
#include "llvm/IR/PassManager.h"
#include "llvm/Passes/PassBuilder.h"
#include "llvm/Passes/PassPlugin.h"
#include "llvm/Support/raw_ostream.h"

using namespace llvm;

namespace {
struct CountInstPass : PassInfoMixin<CountInstPass> {
  PreservedAnalyses run(Function &F, FunctionAnalysisManager &) {
    unsigned instCount = 0;

    for (BasicBlock &BB : F) {
      instCount += BB.size();
    }

    errs() << "Instruction count for " << F.getName()
           << ": " << instCount << "\n";
    return PreservedAnalyses::all();
  }
};
}

extern "C" LLVM_ATTRIBUTE_WEAK PassPluginLibraryInfo llvmGetPassPluginInfo() {
  return {
      LLVM_PLUGIN_API_VERSION, "CountInstPass", LLVM_VERSION_STRING,
      [](PassBuilder &PB) {
        PB.registerPipelineParsingCallback(
            [](StringRef Name, FunctionPassManager &FPM,
               ArrayRef<PassBuilder::PipelineElement>) {
              if (Name == "countinst") {
                FPM.addPass(CountInstPass());
                return true;
              }
              return false;
            });
      }};
}
namespace
namespace 부분을 보면 &BB 는 함수이고 각 함수별 &BB 베이직 블럭의 크기를 모두 더한다. 마지막 errs() 를 통해 함수별 구한 베이직 블럭 크기의 총합(명령어 수) 를 출력하는 방식이다.
LLVM
#include <stdio.h>
int calc(int a, int b) {
        return a + b;
}
int main() {
        int a = 1, b = 2;
        printf("%d", calc(a, b));
        return 0;
}
이 C 코드를 중간언어 LLVM 으로 컴파일 하면
; Function Attrs: mustprogress nofree norecurse nosync nounwind willreturn memory(none) uwtable
define dso_local i32 @calc(i32 noundef %0, i32 noundef %1) local_unnamed_addr #0 {
  %3 = add nsw i32 %1, %0
  ret i32 %3
}

; Function Attrs: nofree nounwind uwtable
define dso_local noundef i32 @main() local_unnamed_addr #1 {
  %1 = tail call i32 (ptr, ...) @printf(ptr noundef nonnull dereferenceable(1) @.str, i32 noundef 3)
  ret i32 0
}
이와 같이 나오게 된다.(함수만 가져옴)
- calc : add, ret
- main : call , ret
이렇게 명령어를 사용한 것을 볼 수 있다.
Pass
extern "C" LLVM_ATTRIBUTE_WEAK PassPluginLibraryInfo llvmGetPassPluginInfo() {
  return {
      LLVM_PLUGIN_API_VERSION, "CountInstPass", LLVM_VERSION_STRING,
      [](PassBuilder &PB) {
        PB.registerPipelineParsingCallback(
            [](StringRef Name, FunctionPassManager &FPM,
               ArrayRef<PassBuilder::PipelineElement>) {
              if (Name == "countinst") {
                FPM.addPass(CountInstPass());
                return true;
              }
              return false;
            });
      }};
}
실행 명령어
/home/$(whoami)/llvm-project/build/bin/opt -load-pass-plugin=/home/$(whoami)/llvm-project/build/lib/CountInstPass.so -passes="countinst" test.ll -o test_inst.llopt실행 명령어에 보면 -passes="countinst" 이런식으로 실행을 하게 된다. pass 명을 countinst 로 하게 된다면 CountInstPass 를 실행하게 된다.
CMakeList.txt
llvm library 를 추가하기 위해 CMakeList.txt 를 작성해 준다.
add_llvm_library(CountInstPass MODULE
  CountInstPass.cpp
  PLUGIN_TOOL opt
)
이렇게 작성해 주면 된다.
그 다음은 Transforms 디렉토리 내에 있는 CmakeLists.txt 파일을 수정해 줘야 한다.

이런식으로 생성한 라이브러리의 디렉토리를 적어주면 된다.
script
위의 실행 opt 실행 명령어를 보면 매우 길다. 이전처럼 script 를 이용하여 손쉽게 실행하도록 하자
파일 경로는 ~/bin/ 에 작성하면 되고 실행하고 싶은 명령어 이름으로 파일명을 생성하면 된다. ex) llvm_inst.sh
#!/bin/bash
LLVM_BUILD=~/llvm-project/build
LLVM_PASS=$LLVM_BUILD/lib/CountInstPass.so

$LLVM_BUILD/bin/opt \
  -load-pass-plugin=$LLVM_PASS \
  -passes="countinst" \
  -S \
  "$1" \
  -o "${1%.ll}_inst.ll"
이전 코드와 다른 점이 있다. -S 옵션을 사용하여 bitcode 대신 사람이 읽을 수 있는 llvm 으로 변경할 수가 있다.
-o "${1%.ll}_inst.ll" 부분으로 ouput 파일 명을 변경할 수 있다.
정리
위 절차대로 진행 후 llvm-project/build/ 디렉토리로 이동 후 ninja 로 build 한 후

실행 결과를 보면 함수별 명령어가 2개씩 잘 나오는 것을 볼 수 있다.
주의
- .so 파일 명은 CmakeLists.txt 파일에서 정해지게 된다.
- pass 이름을
instcount로 할 경우 llvm 에 기본적으로 내장돼 있는 pass 명과 겹치게 되어 실행되지 않는다.

- CmakeLists.txt 파일을 변경 후에는 build(ninja) 를 실행해 주어야 한다.