
1. Spring Security
-
스프링의 보안을 위한 프레임워크. 간단한 설정을 통해 다양한 보안 기능을 추가할 수 있도록 제공한다
-
Maven에선 다음처럼 의존성을 추가할 수 있다
    <dependency>
      <groupId>org.springframework.boot</groupId>
      <artifactId>spring-boot-starter-security</artifactId>
    </dependency>
2. 웹 어플리케이션의 주요 보안 위협 요소
크게 4가지 위협 요소가 존재하고, Spring Security는 이를 해결하는 기능을 제공한다
2-1. 인증 절차 미비
- 인증 : 신원 확인하는 과정
- 익명 영역과 인증 영역으로 구분할 수 있다
- 인증 절차가 미비하면 신원이 확인되지 않은 사용자가 서비스에 접근할 수 있다
2-2. 인가 처리의 미비
- 인가 : 권한 부여 및 허용
- 인가 처리가 미비하면, 신원이 확인됐지만 권한이 없는 사용자가 서비스에 접근할 수 있다
2-3. 크레덴셜 보안
- 크레덴셜 : 비밀번호 같은 민감한 정보
- 민감정보 암호화를 하는 등을 통해 보호해야한다
2-4. 전송 레이어 보안
- 데이터의 전송 간 보안 문제를 해결해야한다
- 기본적으로 SSL을 사용하는, 즉 https 프로토콜 적용하는 것을 생각할 수 있다
3. Spring Security 설정하고 실행하기
3-1. 설정
- 필터 체인 설정과 보안 기능 설정 예시
@Configuration
@EnableWebSecurity
public class WebSecurityConfigure extends WebSecurityConfigurerAdapter {

    @Override
    // WebSecurity : 필터 체인 관련 전역 설정을 처리할 수 있는 API 제공
    public void configure(WebSecurity web) {
        // 매칭되는 uri가 필터 체인을 적용하지 않도록 설정
        web.ignoring().antMatchers("/assets/**");
    }

    @Override
    // HttpSecurity : 세부적인 보안기능 설정을 처리할 수 있는 API 제공
    protected void configure(HttpSecurity http) throws Exception {
        http
            // 공개 리소스 또는 보호받는 리소스에 대한 세부 설정
            .authorizeRequests()
                // USER 또는 ADMIN 역할이 있어야 html 파일로 이어짐
                // 역할이 없을 경우 로그인 페이지로 이동
                .antMatchers("/me").hasAnyRole("USER", "ADMIN")
                .anyRequest().permitAll()
                .and()
            // 로그인 폼 기능 세부설정
            .formLogin()
                .defaultSuccessUrl("/")
                .permitAll()
                .and()
        ;
    }

}- FilterChainProxy : 스프링 시큐리티의 진입점
- 요청이 들어왔을때 요청을 처리할 필터 체인을 구성하고 실행
- 필터 체인은 오버헤드가 있음
- 정적 리소스는 주로 끄는편
WebSecurity.ignoring()api를 통해 설정 가능
3-2. 실행
Spring Security실행 시 기본적으로user계정이 제공된다
- 이 계정으로 로그인하면 역할은 여전히 없기 때문에, 권한이 필요한 요청시 인가 오류가 난다
...Granted Authorities=[]...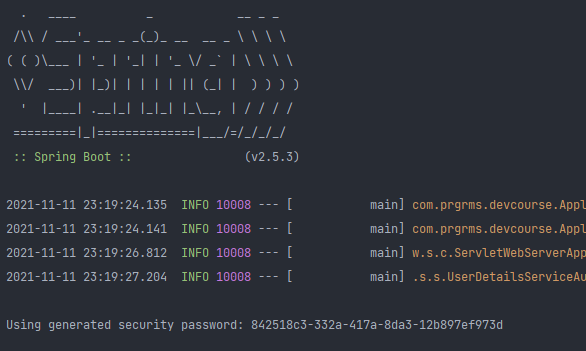
Failed to authorize filter invocation [GET /me] with attributes [hasAnyRole('ROLE_USER','ROLE_ADMIN')]- 스프링 부트의
spring-boot-starter-security는 기본적으로SecurityProperties.java의User클래스를 사용해 기본 유저를 만든다. 아래 코드처럼 유저를 생성하기 때문에 실행시마다 유저를 메모리에 생성하고 랜덤 생성된 비밀번호를 제공한다. 이를 고정하고 싶다면application.yaml에서 설정하면 된다
package org.springframework.boot.autoconfigure.security;

public class SecurityProperties {
    ...

    public static class User {
        private String name = "user";
        private String password = UUID.randomUUID().toString();
        ...

    ...
# application.yaml
spring:
security:
user:
name: user
password: 123!
roles: USER # 덤으로 역할 추가4. Spring Security와 Thymeleaf
thymeleaf-extras-springsecurity5라이브러리를 통해 Thymeleaf View에서 스프링 시큐리티 기능 쉽게 사용 가능하다
    <dependency>
      <groupId>org.thymeleaf.extras</groupId>
      <artifactId>thymeleaf-extras-springsecurity5</artifactId>
</dependency>- namespace 추가
<html xmlns:sec="http://www.thymeleaf.org/extras/spring-security">- 다음 같은 기능이 사용 가능하다
<div th:text="${#authentication.name}">
  The value of the "name" property of the authentication object should appear here.
</div>

<div th:if="${#authorization.expression('hasRole(''ROLE_ADMIN'')')}">
  This will only be displayed if authenticated user has role ROLE_ADMIN.
</div>

<div sec:authentication="name">
  The value of the "name" property of the authentication object should appear here.
</div>

<div sec:authorize="hasRole('ROLE_ADMIN')">
  This will only be displayed if authenticated user has role ROLE_ADMIN.
</div>
편하게 읽기 좋은 단위의 포스트를 추구하는 개발자입니다