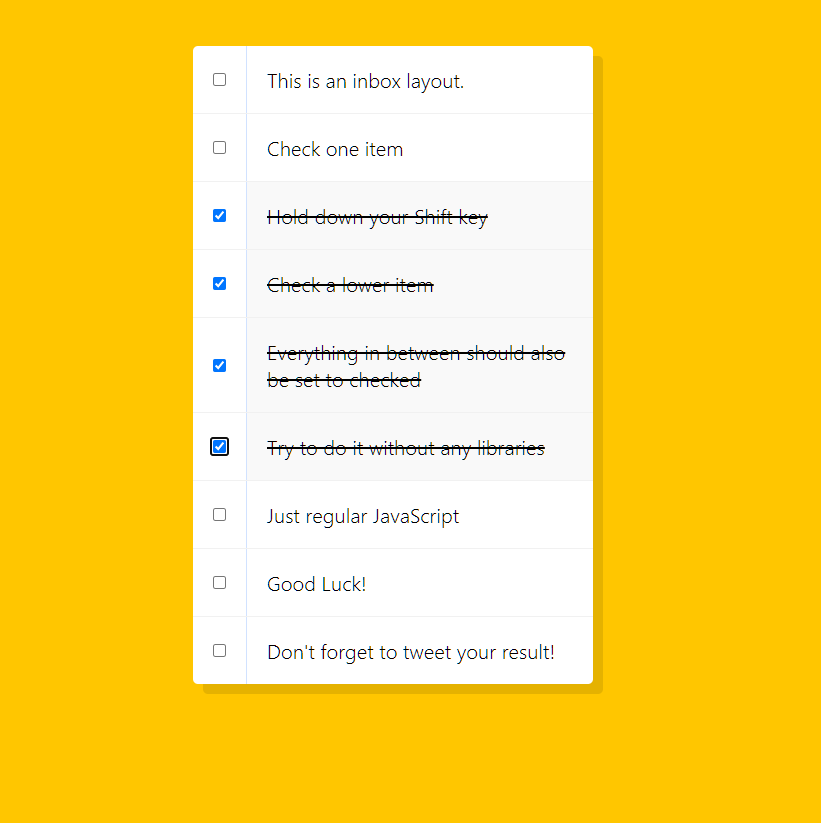
이번 chapter에서는 html의 input 태그를 이용해서 레이아웃을 구성하고,
shift를 누른채로 두개의 checkbox를 선택하면 그 사이에 존재하는 checkbox들을 다 선택된 상태로 만드는 기능을 구현해 보았다! 😎
Learning Point
- html input tag중 하나인 Checkbox에 대해 학습한다.
- javascript event의 shiftKey 프로퍼티에 대해 학습한다.
HTML Part
<!DOCTYPE html>
<html lang="en">
  <head>
    <meta charset="UTF-8" />
    <title>Hold Shift to Check Multiple Checkboxes</title>
    <script defer src="main.js"></script>
    <link rel="stylesheet" href="style.css" />
  </head>
  <body>
    <!--
   The following is a common layout you would see in an email client.
   When a user clicks a checkbox, holds Shift,
   and then clicks another checkbox a few rows down,
   all the checkboxes inbetween those two checkboxes should be checked.
  -->
    <div class="inbox">
      <div class="item">
        <input type="checkbox" />
        <p>This is an inbox layout.</p>
      </div>
      <div class="item">
        <input type="checkbox" />
        <p>Check one item</p>
      </div>
      <div class="item">
        <input type="checkbox" />
        <p>Hold down your Shift key</p>
      </div>
      <div class="item">
        <input type="checkbox" />
        <p>Check a lower item</p>
      </div>
      <div class="item">
        <input type="checkbox" />
        <p>Everything in between should also be set to checked</p>
      </div>
      <div class="item">
        <input type="checkbox" />
        <p>Try to do it without any libraries</p>
      </div>
      <div class="item">
        <input type="checkbox" />
        <p>Just regular JavaScript</p>
      </div>
      <div class="item">
        <input type="checkbox" />
        <p>Good Luck!</p>
      </div>
      <div class="item">
        <input type="checkbox" />
        <p>Don't forget to tweet your result!</p>
      </div>
    </div>
  </body>
</html>
CSS Part
html {
  font-family: sans-serif;
  background: #ffc600;
}

.inbox {
  max-width: 400px;
  margin: 50px auto;
  background: white;
  border-radius: 5px;
  box-shadow: 10px 10px 0 rgba(0, 0, 0, 0.1);
}

.item {
  display: flex;
  align-items: center;
  border-bottom: 1px solid #f1f1f1;
}

.item:last-child {
  border-bottom: 0;
}

input:checked + p {
  background: #f9f9f9;
  text-decoration: line-through;
}

input[type="checkbox"] {
  margin: 20px;
}

p {
  margin: 0;
  padding: 20px;
  transition: background 0.2s;
  flex: 1;
  font-family: "helvetica neue";
  font-size: 20px;
  font-weight: 200;
  border-left: 1px solid #d1e2ff;
}
Javascript Part
const checkboxes = document.querySelectorAll("input");

const doCheck = (e) => {
  if (!e.shiftKey) return;

  let first = -1;
  let last = -1;
  let count = 0;

  checkboxes.forEach((checkbox) => {
    if (checkbox.checked) {
      if (first === -1) first = count;
      last = count;
    }
    count += 1;
  });

  for (let i = first; i <= last; i++) {
    checkboxes[i].checked = true;
  }
};

checkboxes.forEach((checkbox) => {
  checkbox.addEventListener("click", doCheck);
});
정리
처음에 봤을때는 쉽다고 생각했는데, 생각보다 시간이 조금 걸렸다.
원래는 keydown event를 통해 shift key가 눌려있는지 여부를 판단했었는데, event에 shiftKey라는 프로퍼티가 있다는걸 알게됐다!😄
전체적인 로직은, checkbox에 click event를 등록하고, doCheck method 안에서 선택된 checkbox의 first와 last index를 구해 한번에 update해주는 방식으로 구현했다.