🗂️ Day37 프로젝트 : 습관 추적기
설정한 습관에 들인 시간에 따라 색깔로 표시하여 매일 기록하는 프로그램
❖ HTTP requests
requests 모듈은 인터넷을 통해 http를 요청
requests module documentation
4가지 요청 방식
- requests.get( url, params=None, **kwargs )
- 외부 시스템에 특정 데이터를 요청
- 외부 시스템이 응답으로 주는 데이터를 사용
- requests.post( url, data=None, json=None, **kwargs )
- 사용자가 외부 시스템에 특정 데이터를 제공
- 전송하려는 데이터가 JSON 형식일 경우 매개변수 json 사용
- post가 성공했는지, 실패했는지만 중요
(그 외 응답은 상관 없음)
- requests.put( url, data=None, **kwargs )
- 외부 시스템에서 기존 데이터를 업데이트(값 변경)
- requests.delete( url, **kwargs )
- 외부 서비스에 있는 데이터를 삭제
1. post requests로 pixela API에 계정 생성하기
🔍 유의 사항
- pixela 웹사이트에서 How to use 참조
- pixela documentation
- ❗️참고 : 현재 기준 서포트 없이 무료로 이용하는 경우 25% 확률로 요청이 거절됨
- Request Body
token: 유저가 직접 만든 일종의 API 키username: 직접 설정한 유저 이름(중복되지 않은 이름)agreeTermsOfService: 서비스를 이용하려면 "yes"notMinor: 서비스를 이용하려면 "yes"- response.text
- request의 결과를 text로 반환하는 속성
- 이를 출력하면 전송이 성공적으로 이루어졌는지 확인 가능
- 성공 시 pixela 개인 프로필 페이지 링크가 출력됨
⌨️ main.py
import requests

## 1. 계정 생성
pixela_endpoint = "https://pixe.la/v1/users"
user_params = {
    "token": "직접 생성한 문자열",
    "username": "유저이름",
    "agreeTermsOfService": "yes",
    "notMinor": "yes"
}

# 계정을 생성한 후에는 다시 실행할 필요 없음
response = requests.post(url=pixela_endpoint, json=user_params)

# response를 text로 반환
print(response.text)
{"message":"Success. Let's visit https://pixe.la/@<유저이름> , it is your profile page!","isSuccess":true}
❖ HTTP Header
Request Header : 요청에 대한 부가적인 정보가 담겨 있는 부분
Request Body : 실제 내용(데이터)이 담긴 본문
인증 방식의 차이
API key이용- API 키를 단순히 매개변수로 전송하는 방식
- 요청 자체에 모든 비밀 정보가 존재
- https를 통해 엑세스되기 때문에(s=secure) 요청이 암호화되나,
여전히 정보가 누군가에게 보여지거나 훔쳐질 위험이 크다
HTTP Header이용- 인증을 헤더에 제공하는 방식
(**kwargs에 속하는 매개변수 headers) - API를 노출시키지 않기 때문에 API 키를 이용하는 방식보다 더 안전하다
- 인증을 헤더에 제공하는 방식
2. HTTP 헤더를 이용한 고급 인증
🔍 유의 사항
- 생성한 계정에 대한 새 그래프를 pixela에 생성
- Request Header
X-USER-TOKEN: 계정 등록 시 사용한token- Request Body
id: 그래프를 식별할 IDname: 그래프의 이름unit: 기록할 측정 단위(시간, 거리, 칼로리 등)type: 측정한 데이터의 타입(정수 또는 실수만 가능)color: 그래프의 색상(❗️일본식 색상 이름을 문자열로 입력)- 그래프 생성에 성공하면 링크를 통해 해당 페이지에 접속
https://pixe.la/v1/users/<유저이름>/graphs/<그래프id>.html
⌨️ main.py
import requests
import os
TOKEN = os.getenv("TOKEN")
USERNAME = os.getenv("USERNAME")
## 1. 계정 생성
pixela_endpoint = "https://pixe.la/v1/users"
…
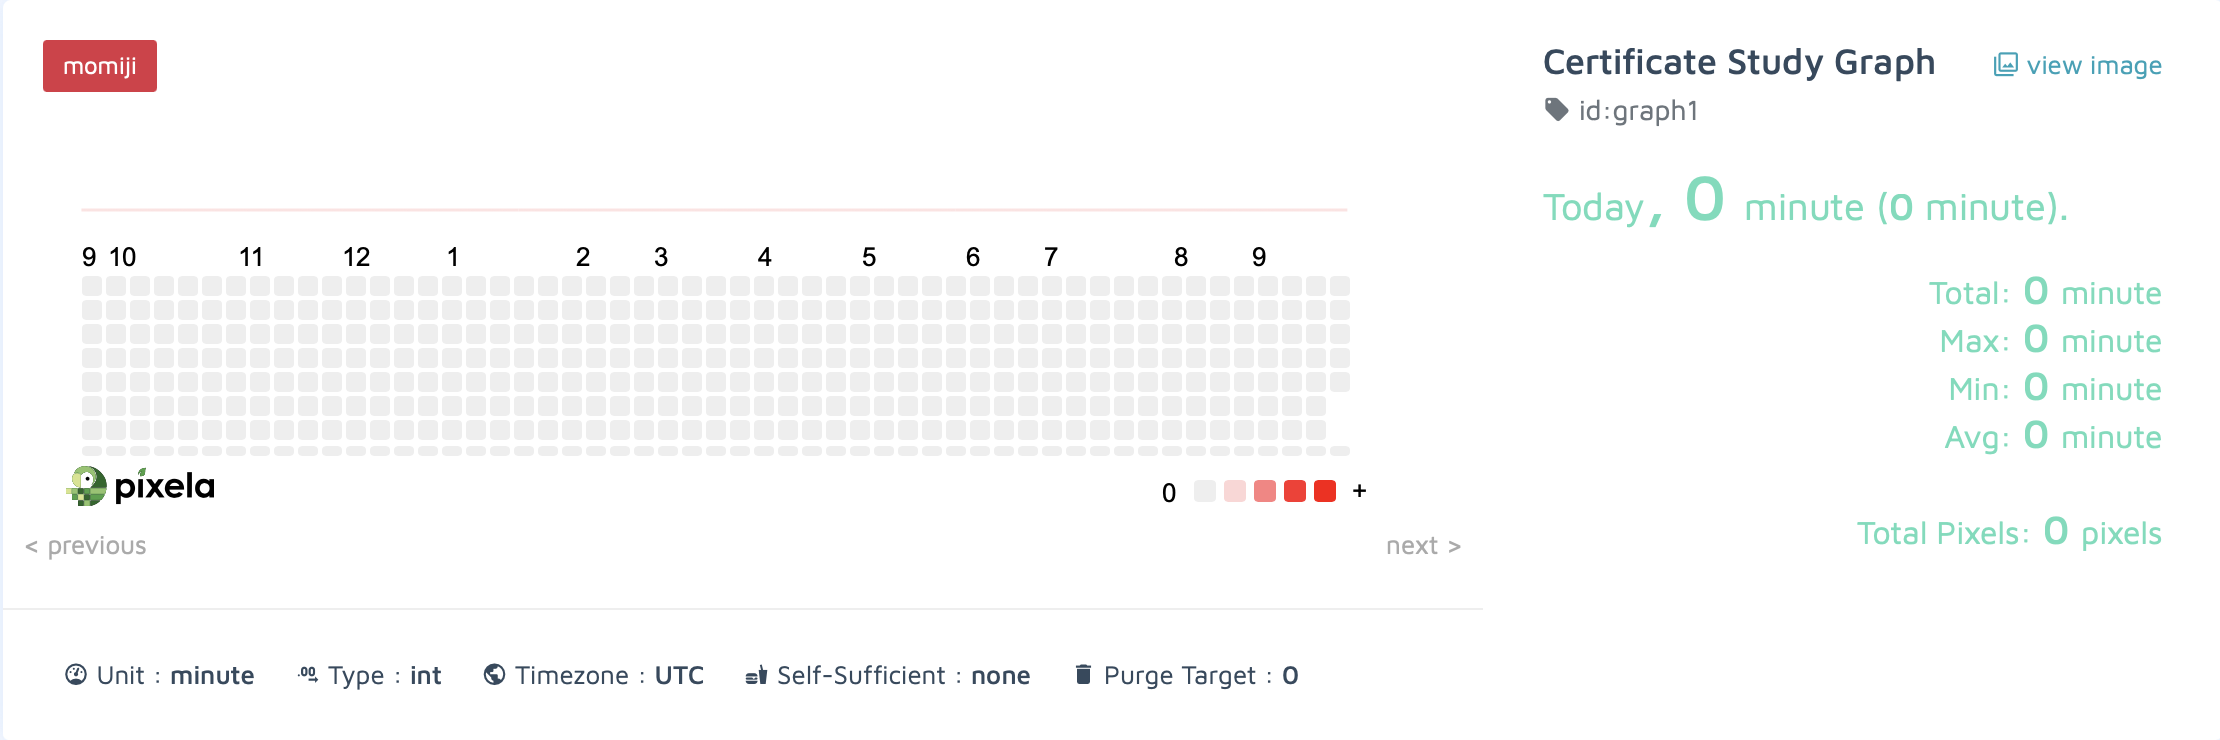
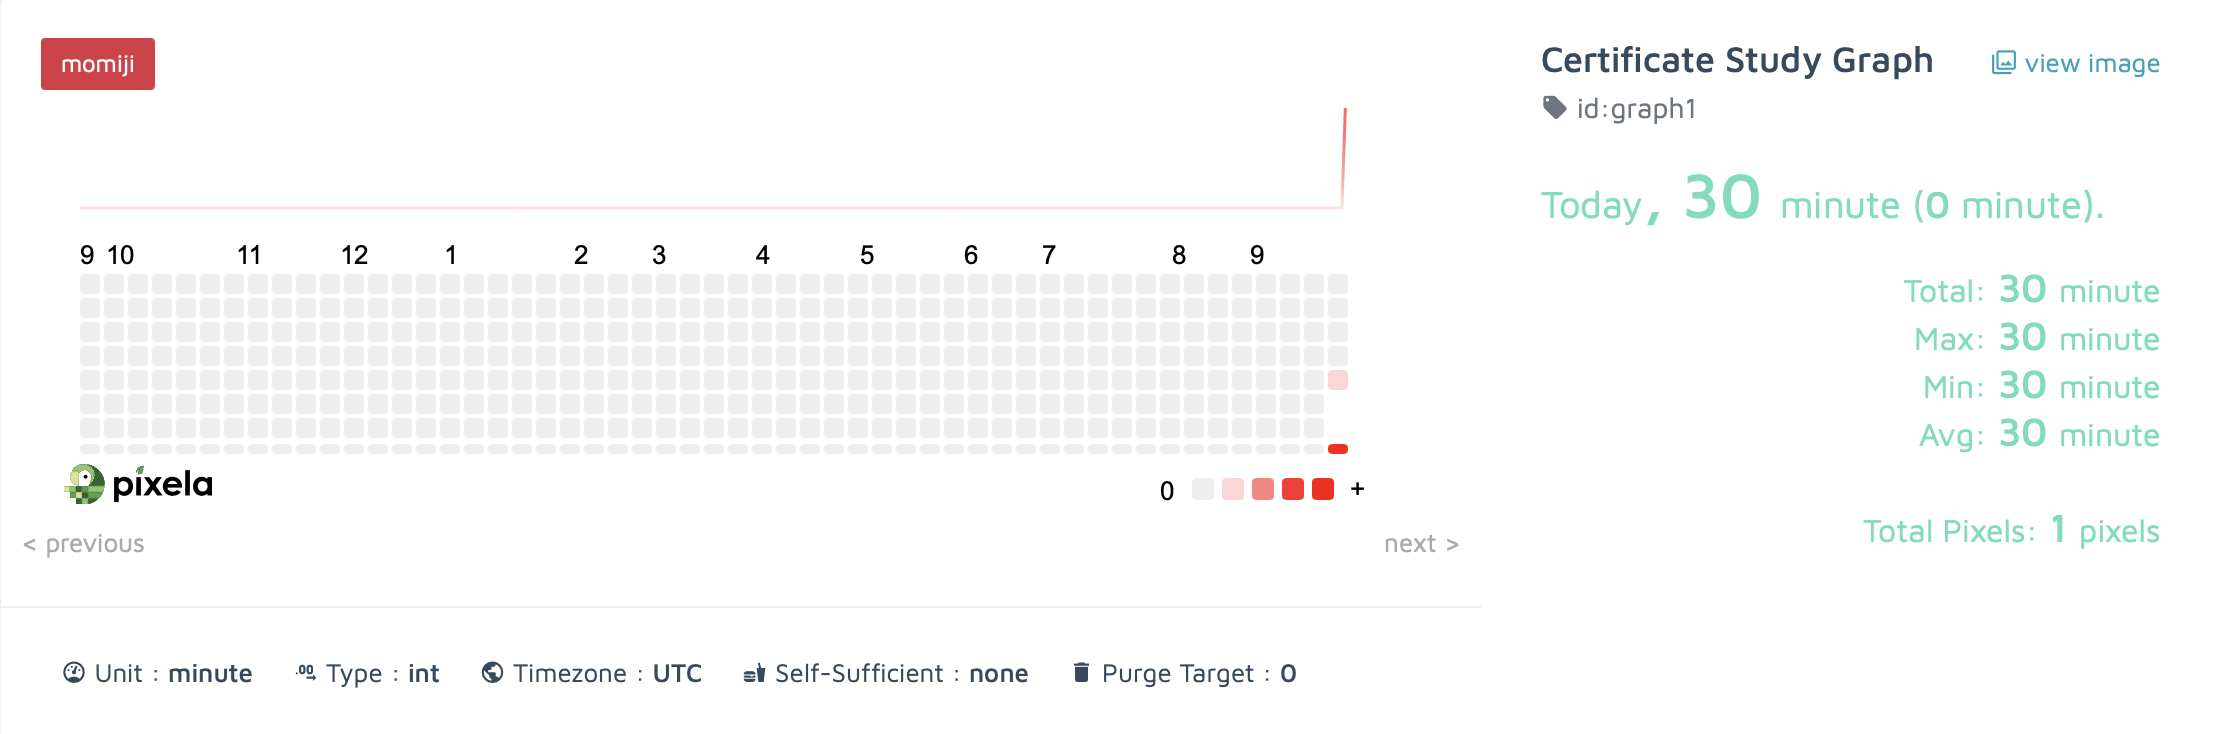
## 2. 그래프 생성
graph_endpoint = f"{pixela_endpoint}/{USERNAME}/graphs"
graph_config = {
"id": "graph1",
"name": "Certificate Study Graph",
"unit": "minute",
"type": "int",
"color": "momiji"
}
headers = {"X-USER-TOKEN": TOKEN}
# 그래프를 새로 생성할 때만 요청
response = requests.post(url=graph_endpoint, json=graph_config, headers=headers)
print(response.text){"message":"Success.","isSuccess":true}
3. post requests로 습관 추적기에 픽셀 추가하기
🔍 유의 사항
- 생성한 그래프에 픽셀을 추가하기
- Request Header
X-USER-TOKEN: 계정 등록 시 사용한token- Request Body
date: 픽셀에 추가할 날짜(format: yyyyMMdd)quantity: 픽셀에 추가할 양을 지정(정수 또는 실수만 가능)
⌨️ main.py
import requests
import os
TOKEN = os.getenv("TOKEN")
USERNAME = os.getenv("USERNAME")
GRAPH_ID = "graph1"
## 1. 계정 생성
pixela_endpoint = "https://pixe.la/v1/users"
…
## 2. 그래프 생성
graph_endpoint = f"{pixela_endpoint}/{USERNAME}/graphs"
…
headers = {"X-USER-TOKEN": TOKEN}
…
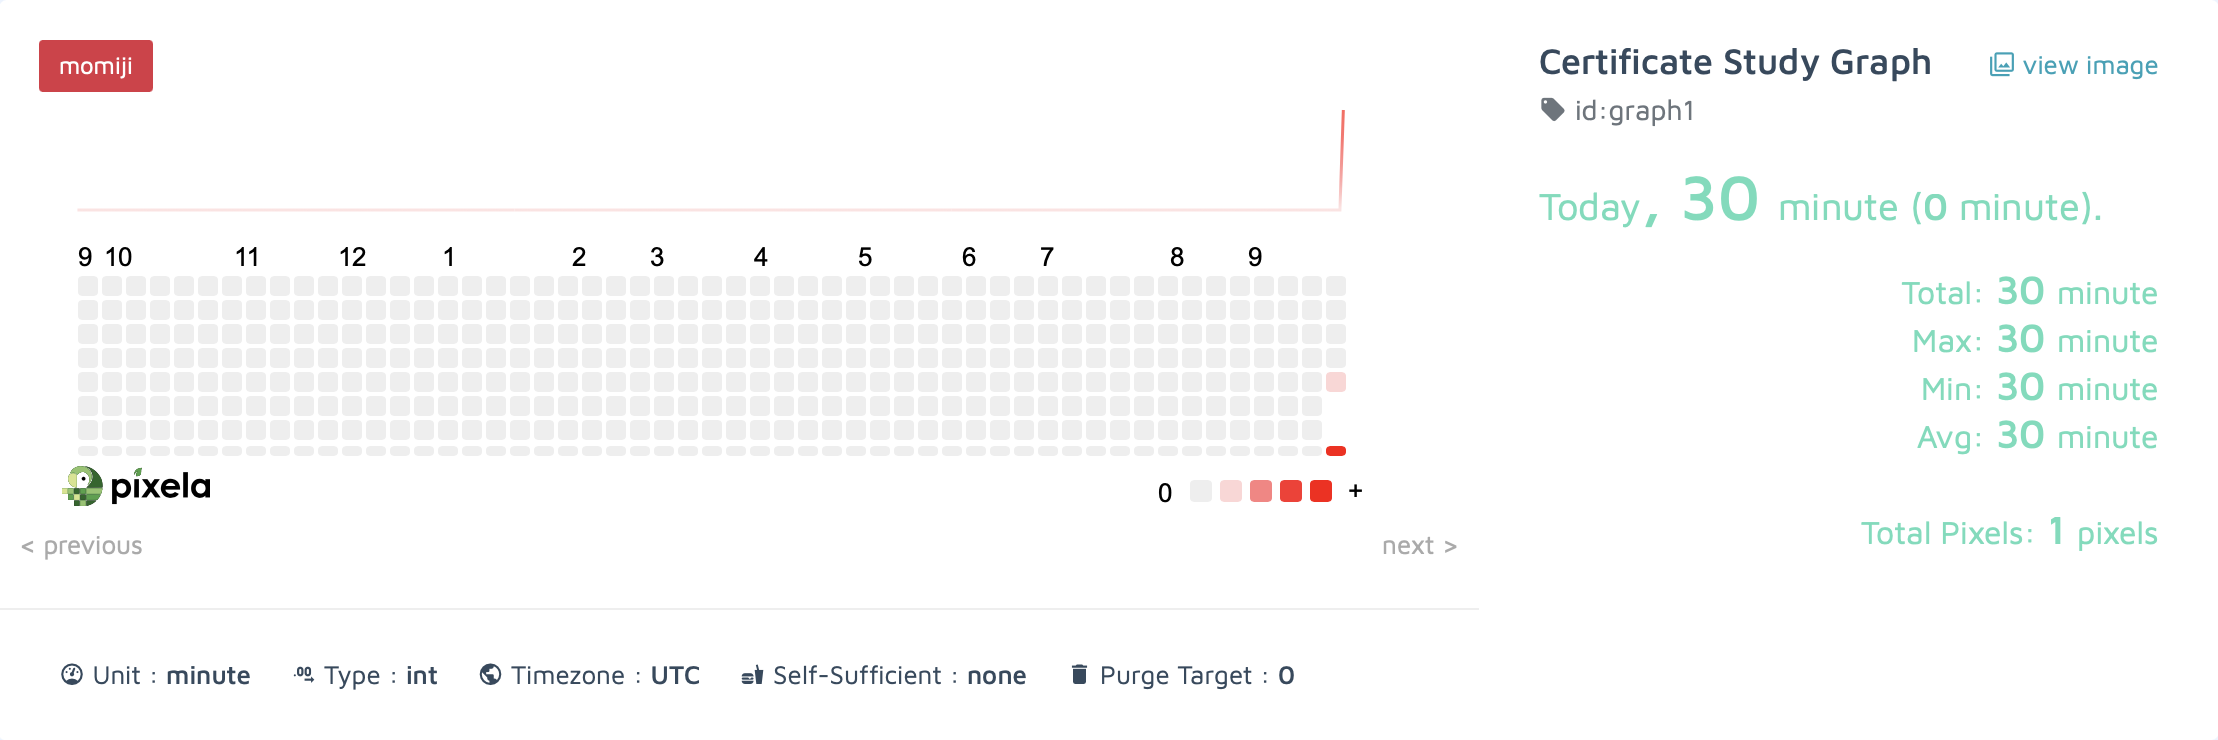
## 3. 픽셀 생성
pixel_creation_endpoint = f"{graph_endpoint}/{GRAPH_ID}"
pixel_data = {
"date": "20240919",
"quantity": "30"
}
# 픽셀을 새로 생성할 때만 요청
response = requests.post(url=pixel_creation_endpoint, json=pixel_data, headers=headers)
print(response.text){"message":"Success.","isSuccess":true}
❖ strftime 메소드
datetime_obj.strftime( "%code" ) : datetime 모듈로 받은 날짜를 원하는 형식의 문자열로 변환
import datetime as dt

today = dt.datetime.now()

print(today.strftime("%a"))     # 요일(짧은 단어)
print(today.strftime("%A"))     # 요일(긴 단어)
print(today.strftime("%w"))     # 요일(0-6사이의 숫자로 표현, 일요일은 0)

print(today.strftime("%d"))     # 일(숫자)

print(today.strftime("%b"))     # 월(짧은 단어)
print(today.strftime("%B"))     # 월(긴 단어)
print(today.strftime("%m"))     # 월(숫자)

print(today.strftime("%y"))     # 년(세기 생략)
print(today.strftime("%Y"))     # 년(세기 포함)

print(today.strftime("%H"))     # 시(24시 표기)
print(today.strftime("%I"))     # 시(12시 표기)
print(today.strftime("%p"))     # AM/PM
print(today.strftime("%M"))     # 분
print(today.strftime("%S"))     # 초
print(today.strftime("%f"))     # 마이크로초

print(today.strftime("%j"))     # 1년에서 n번째 일
print(today.strftime("%U"))     # 1년에서 n번째 주(한 주의 시작은 일요일)
print(today.strftime("%W"))     # 1년에서 n번째 주(한 주의 시작은 월요일)

print(today.strftime("%c"))     # 로컬 버전(요일 월 일 시:분:초 년)
print(today.strftime("%C"))     # 세기
print(today.strftime("%x"))     # 로컬 버전(월/일/년)
print(today.strftime("%X"))     # 로컬 버전(시:분:초)
Sun
Sunday
0
15
Sep
September
09
24
2024
00
12
AM
14
12
538226
259
37
37
Sun Sep 15 00:14:12 2024
20
09/15/24
00:14:12
4. strftime으로 자동으로 오늘 날짜 채우기
🔍 유의 사항
- 날짜 입력하기
- datetime.now() : 오늘 날짜 자동 입력
- datetime(year=yyyy, month=mm, day=dd) : 원하는 날짜 수동 입력
⌨️ main.py
…
## 3. 픽셀 생성
pixel_creation_endpoint = f"{graph_endpoint}/{GRAPH_ID}"

# 기록할 날짜
today = datetime(year=2024, month=9, day=18)

pixel_data = {
    "date": today.strftime("%Y%m%d"),   # 날짜 형식을 알맞게 변경
    "quantity": "30"
}

…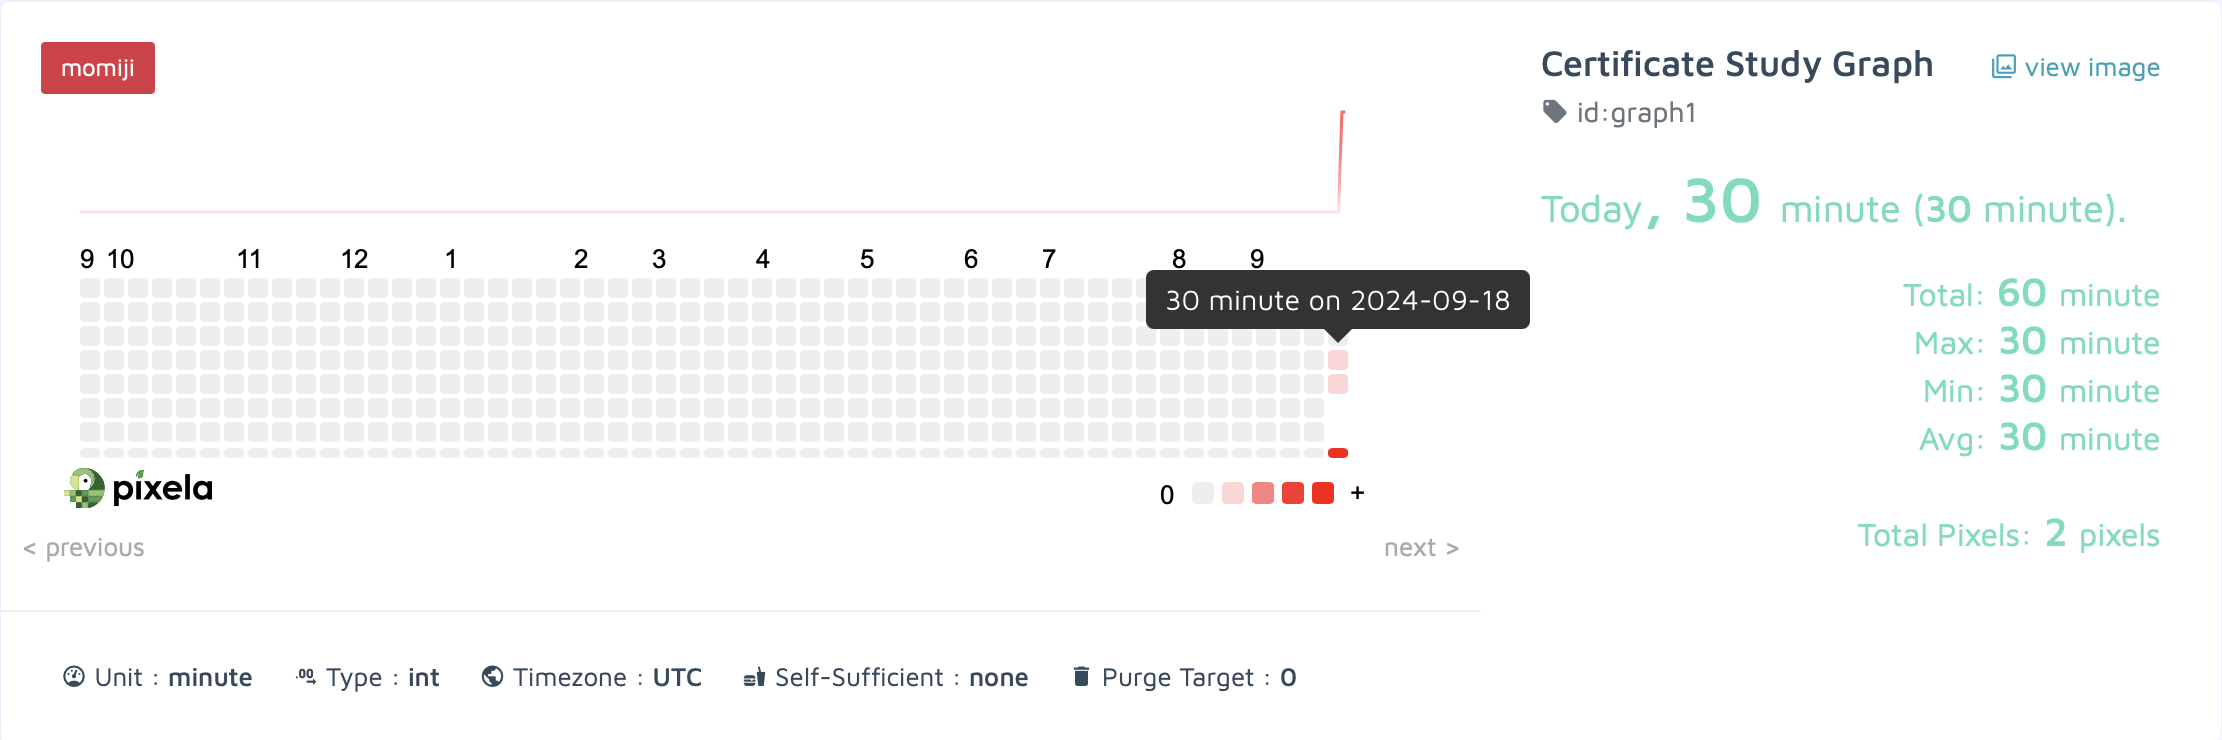
어제 날짜로 픽셀 추가
5. put 및 delete requests 사용
🔍 유의 사항
- 위에서 어제 날짜에 추가했던 픽셀 사용
- delete 요청으로 픽셀을 삭제할 때는 바디 필요 없음
- 앞으로 픽셀에 추가할 양을 입력으로 받도록 수정하기
⌨️ main.py
import requests
import os
from datetime import datetime

TOKEN = os.getenv("TOKEN")
USERNAME = os.getenv("USERNAME")
GRAPH_ID = "graph1"

## 1. 계정 생성
pixela_endpoint = "https://pixe.la/v1/users"
user_params = {
    "token": TOKEN,
    "username": USERNAME,
    "agreeTermsOfService": "yes",
    "notMinor": "yes"
}
# 계정을 새로 생성할 때만 요청
# response = requests.post(url=pixela_endpoint, json=user_params)
# print(response.text)

## 2. 그래프 생성
graph_endpoint = f"{pixela_endpoint}/{USERNAME}/graphs"
graph_config = {
    "id": GRAPH_ID,
    "name": "Certificate Study Graph",
    "unit": "minute",
    "type": "int",
    "color": "momiji"
}
headers = {"X-USER-TOKEN": TOKEN}

# 그래프를 새로 생성할 때만 요청
# response = requests.post(url=graph_endpoint, json=graph_config, headers=headers)
# print(response.text)

## 3. 픽셀 생성
pixel_creation_endpoint = f"{graph_endpoint}/{GRAPH_ID}"

# 오늘 날짜
today = datetime.now()

pixel_data = {
    "date": today.strftime("%Y%m%d"),
    "quantity": input("How many minutes did you study today?: ")
}

# 픽셀을 새로 생성할 때만 요청
# response = requests.post(url=pixel_creation_endpoint, json=pixel_data, headers=headers)
# print(response.text)

## 4. 픽셀 업데이트 / 삭제
pixel_manage_endpoint = f"{pixel_creation_endpoint}/{today.strftime("%Y%m%d")}"
new_pixel_data = {"quantity": input("Change the minutes: ")}

# 픽셀을 업데이트할 때만 요청
# response = requests.put(url=pixel_manage_endpoint, json=new_pixel_data, headers=headers)
# print(response.text)

# 픽셀을 삭제할 때만 요청
# response = requests.delete(url=pixel_manage_endpoint, headers=headers)
# print(response.text)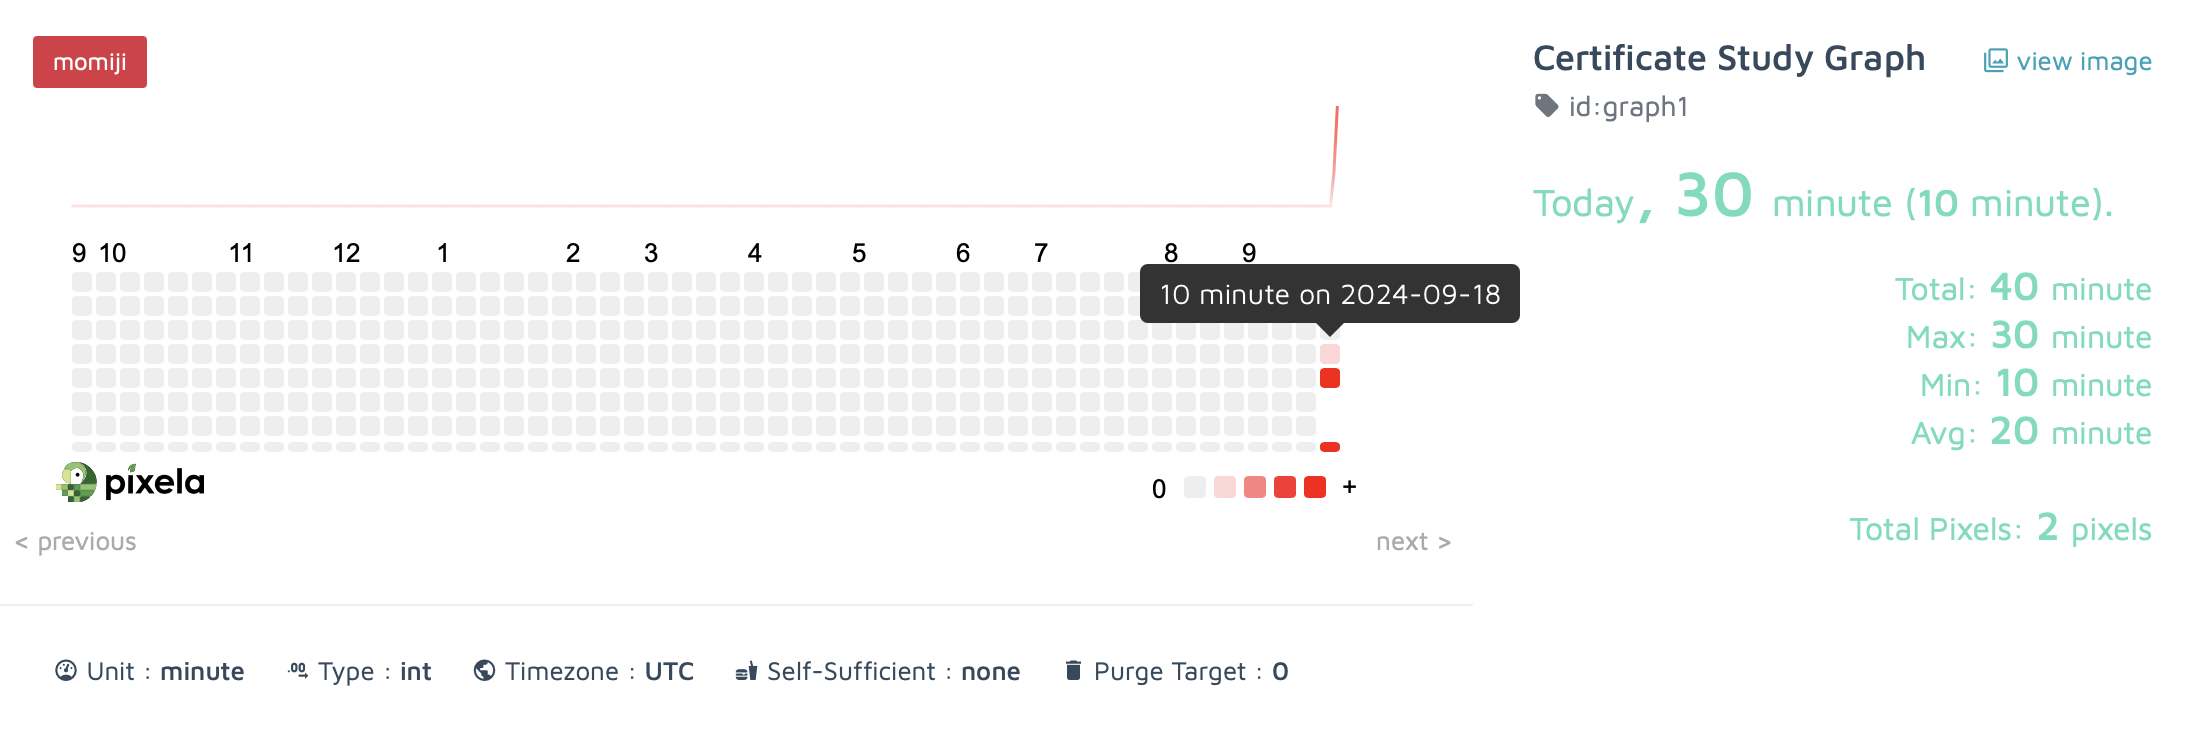
픽셀 업데이트 결과
픽셀 삭제 결과