
Config 서버, 분산 추적, 이벤트 드리븐에 대해 학습했다.
Config Server
Spring Cloud Config란?
- 분산 시스템 환경에서 중앙 집중식 구성 관리를 제공하는 프레임워크
- 애플리케이션의 설정을 중앙에서 관리하고, 변경 사항을 실시간으로 반영
- Git, 파일 시스템, JDBC 등 다양한 저장소를 지원
실습
❗ 컨피그 서버를 생성하고 product 애플리케이션이 local 에서 동작할 때 포트 정보 및 메시지를 컨피그 서버에서 가져온다.컨피그 서버의 메시지를 변경하여 product 애플리케이션의 message가 갱신되는 모습을 확인한다.
우선 스프링 클라우드 게이트웨이에서 학습한 모든 프로젝트(유레카 서버, 상품 애플리케이션 등)를 복사하여 사용한다.
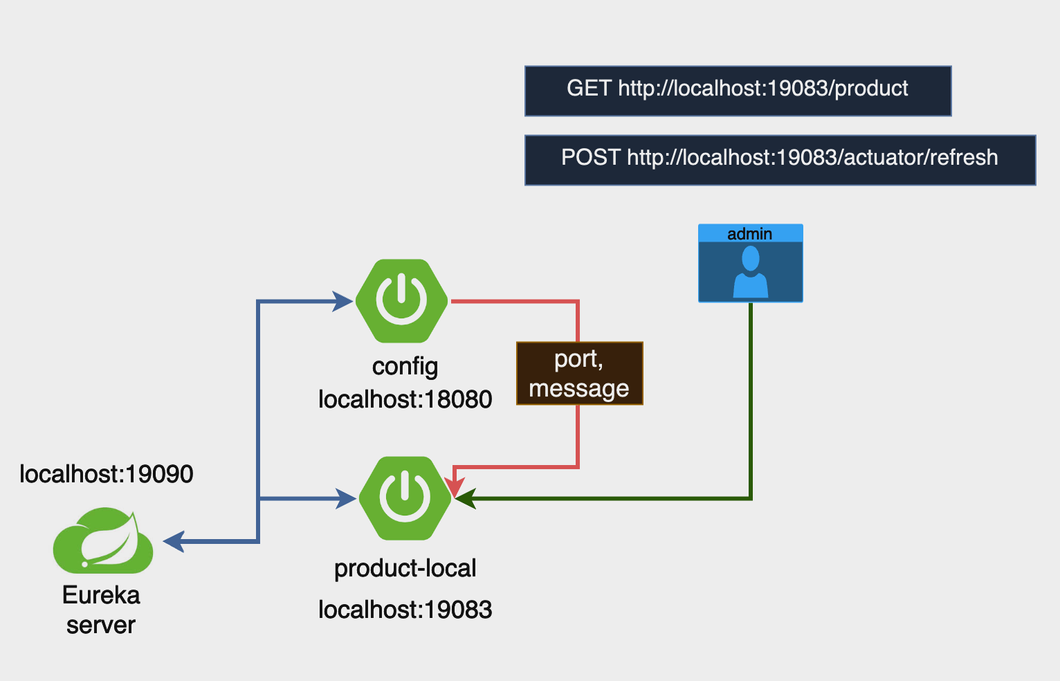
Config-Server
- start.spring.io 에서 디펜던시를 아래와 같이 설정하고 프로젝트를 생성한다.
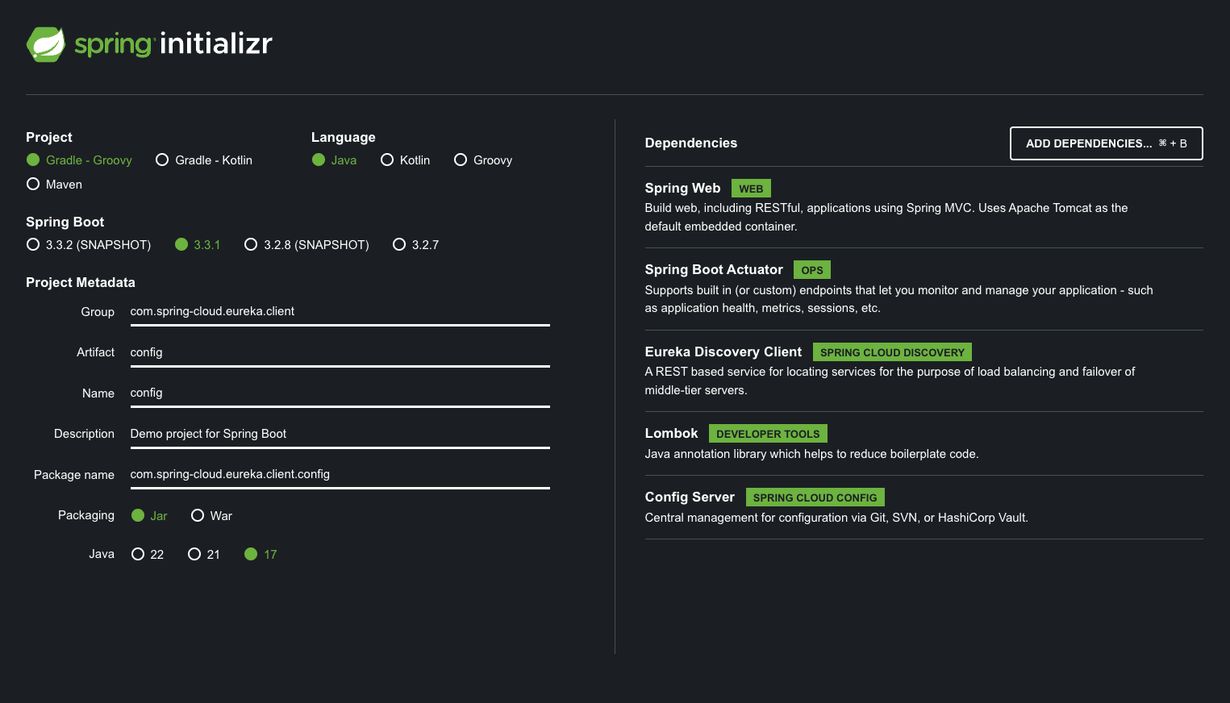
- ConfigApplication.java
import org.springframework.boot.SpringApplication; import org.springframework.boot.autoconfigure.SpringBootApplication; import org.springframework.cloud.config.server.EnableConfigServer; @SpringBootApplication @EnableConfigServer public class ConfigApplication { public static void main(String[] args) { SpringApplication.run(ConfigApplication.class, args); } } - resources/appication.yml
server: port: 18080 spring: profiles: active: native application: name: config-server cloud: config: server: native: search-locations: classpath:/config-repo # 리소스 폴더의 디렉토리 경로 eureka: client: service-url: defaultZone: http://localhost:19090/eureka/ - resources 안에 config-repo라는 폴더를 생성한 후 아래의 두 파일을 만든다.
- product-service.yml
server: port: 19093 message: "product-service message" - product-service-local.yml
server:
  port: 19083

message: "product-service-local message"
- product-service.yml
Product-service
- build-gradle의 디펜던시에 config 를 추가한다.
dependencies { implementation 'org.springframework.boot:spring-boot-starter-actuator' implementation 'org.springframework.cloud:spring-cloud-starter-config' implementation 'org.springframework.boot:spring-boot-starter-web' implementation 'org.springframework.cloud:spring-cloud-starter-netflix-eureka-client' compileOnly 'org.projectlombok:lombok' annotationProcessor 'org.projectlombok:lombok' testImplementation 'org.springframework.boot:spring-boot-starter-test' testRuntimeOnly 'org.junit.platform:junit-platform-launcher' } - application.yml
server: port: 0 # 임시 포트, 이후 Config 서버 설정으로 덮어씌움 spring: profiles: active: local application: name: product-service config: import: "configserver:" cloud: config: discovery: enabled: true service-id: config-server management: endpoints: web: exposure: include: refresh eureka: client: service-url: defaultZone: http://localhost:19090/eureka/ message: "default message" - ProductController.java
import org.springframework.beans.factory.annotation.Value;
import org.springframework.cloud.context.config.annotation.RefreshScope;
import org.springframework.web.bind.annotation.GetMapping;
import org.springframework.web.bind.annotation.RequestMapping;
import org.springframework.web.bind.annotation.RestController;

/**
 * @RefreshScope 애노테이션은 Spring 애플리케이션의 빈이 설정 변경을 반영할 수 있도록 하는 역할을 한다.
 * 기본적으로 Spring 애플리케이션의 빈은 애플리케이션이 시작될 때 초기화되고, 설정 값이 변경되더라도 해당 빈은 갱신되지 않는다.
 * 이 애노테이션을 사용하면 /actuator/refresh 엔드포인트를 호출하여 설정 변경 사항을 동적으로 반영할 수 있다.
 */
@RefreshScope
@RestController
@RequestMapping("/product")
public class ProductController {

    @Value("${server.port}") // 애플리케이션이 실행 중인 포트를 주입받는다.
    private String serverPort;

    @Value("${message}")
    private String message;

    @GetMapping
    public String getProduct() {
        return "Product detail from PORT : " + serverPort + " and message : " + this.message ;
    }
}
RUN
-
유레카 서버 > 컨피그 서버 > 상품 순으로 실행한다.
-
상품이 실행될때 로그의 포트를 확인해보자. 19083 으로 할당됨을 볼 수 있다.

-
http://localhost:19083/product 을 호출하면 포트와 메시지를 확인 할 수 있다.
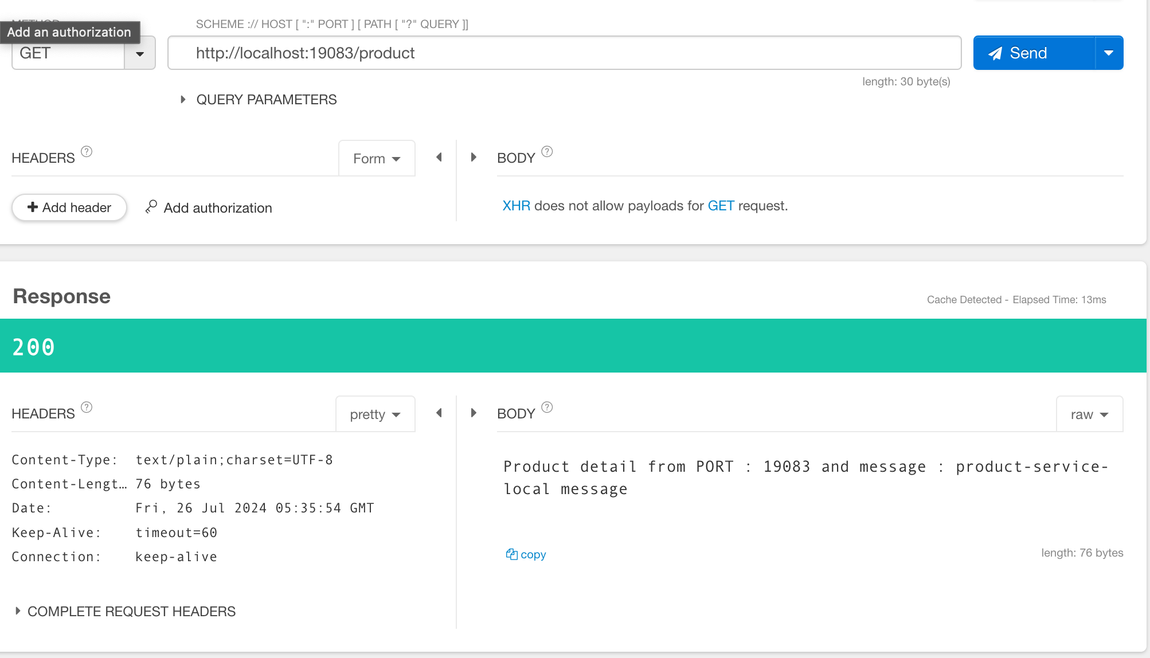
-
config-server 의 product-service-local.yml 파일의 message를 수정하고 config-server 를 재시작한다.
server: port: 19083 message: "product-service-local message updated" -
talend api tester를 실행하고 http://localhost:19083/actuator/refresh 로 post 요청을 한다. 응답으로 메시지가 업데이트 됨을 확인 할 수 있다.
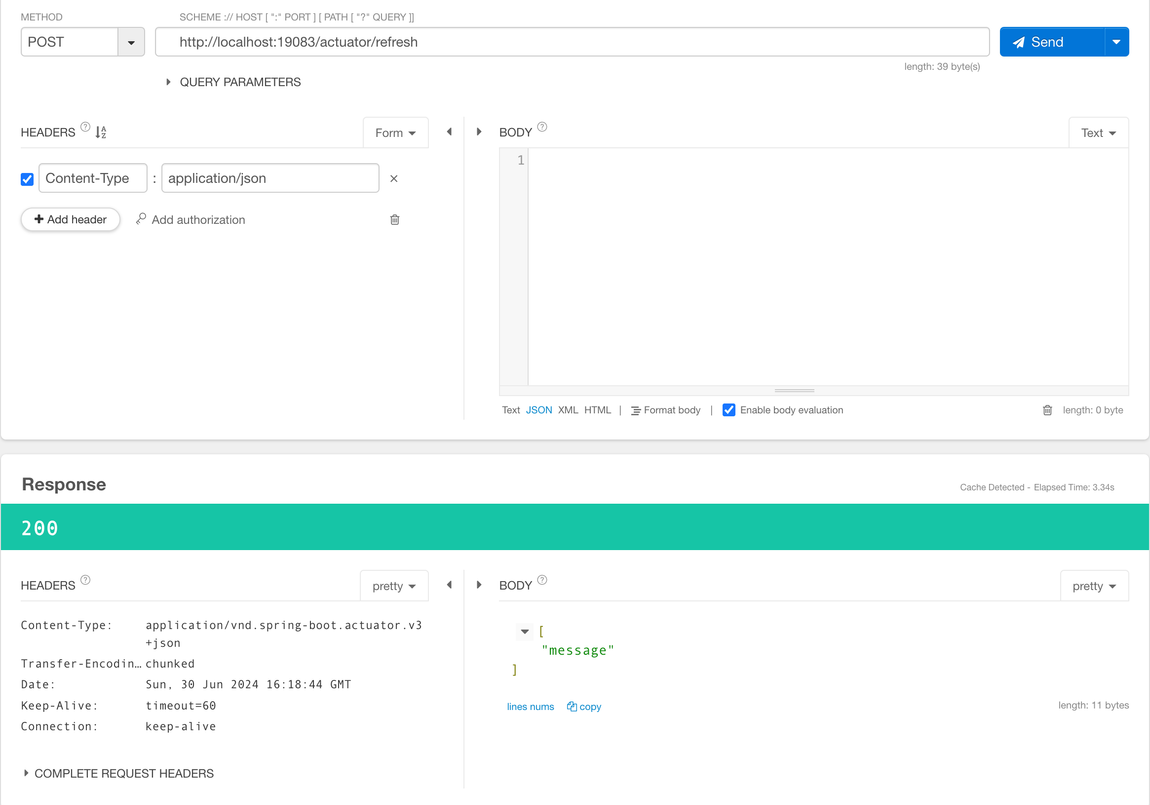
-
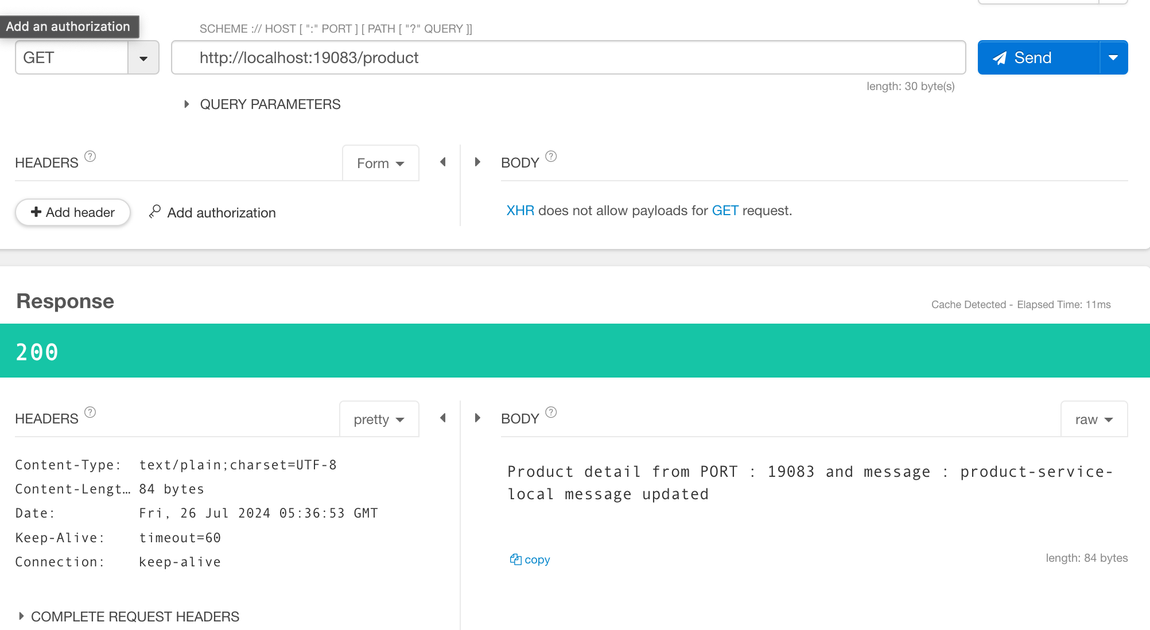
다시 http://localhost:19083/product를 호출 하면 메시지가 변경된 것을 확인 할 수 있다.
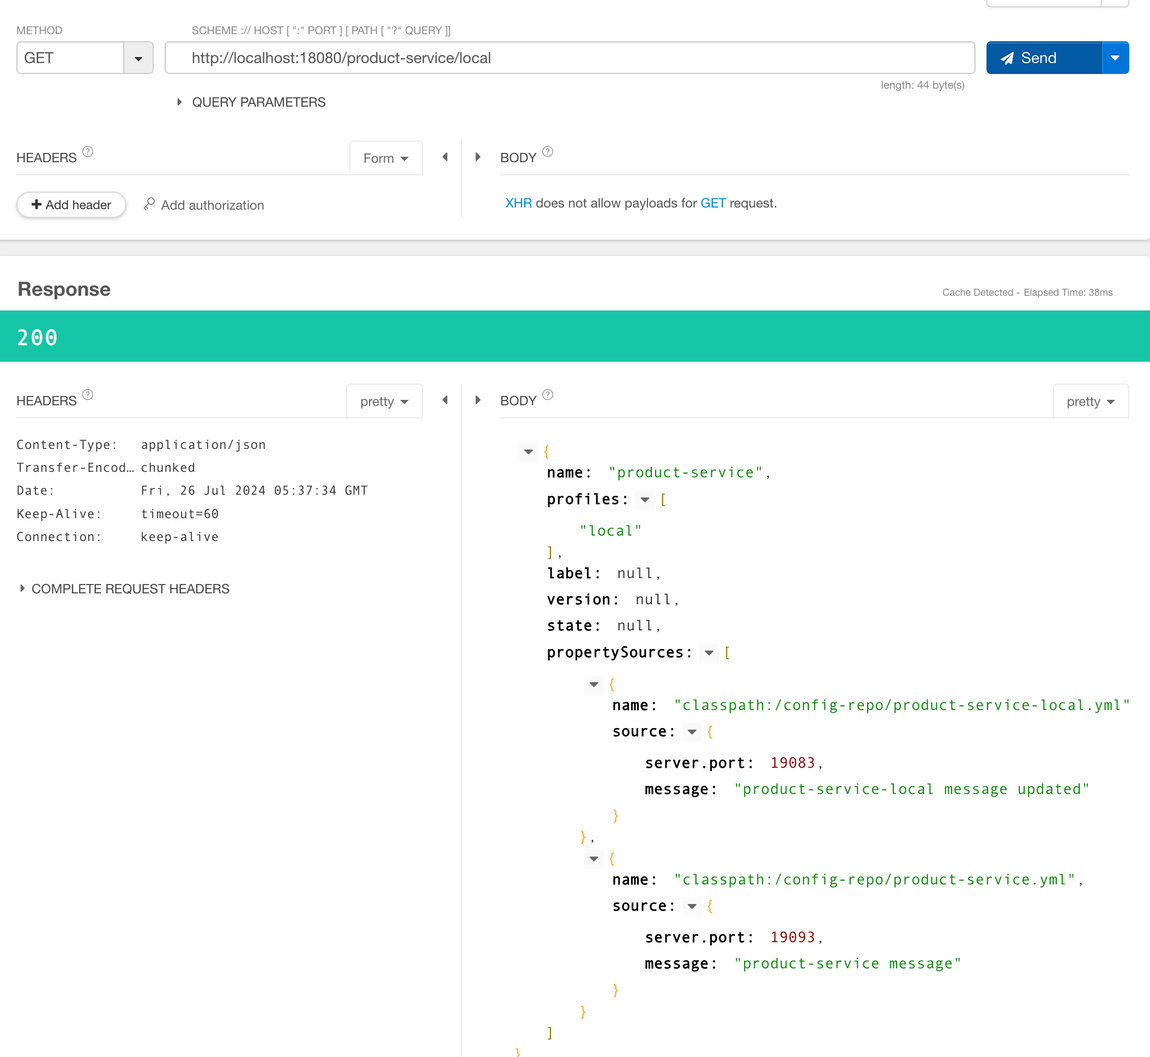
- *참고 http://localhost:18080/product-service/local 로 접속하면 product-service의 설정 값들을 볼 수 있다.(이를 통해 다른 설정값들도 확인할 수 있음)
분산 추적(Spring Cloud Sleuth) 및 로깅(Zipkin)
분산 추적이란?
- 분산 시스템에서 서비스 간의 요청 흐름을 추적하고 모니터링하는 방법
- 각 서비스의 호출 관계와 성능을 시각화하여 문제를 진단하고 해결할 수 있도록 돕는다.
분산 추적의 필요성
- MSA에서는 여러 서비스가 협력하여 하나의 요청을 처리한다.
- 서비스 간의 복잡한 호출 관계로 인해 문제 발생 시 원인을 파악하기 어려울 수 있다.
- 분산 추적을 통해 각 서비스의 호출 흐름을 명확히 파악하고, 성능 병목이나 오류를 빠르게 진단할 수 있다.
- 어느 인스턴스에서 오류가 났는지 빠르게 파악 가능!
Zipkin이란?
- 트레이스 데이터를 수집하고 시각화하는 분산 추적 시스템
- 각 서비스의 트레이스와 스팬 데이터를 저장하고 이를 통해 호출 흐름을 시각화
실습
❗ Docker를 사용하여 Zipkin 서버를 실행하고, 로드 밸런싱 실습에서 만들어진 결과물을 가지고 진행한다.Product-service
- build.gradle 파일 디펜던시를 아래와 같이 수정한다.
dependencies { implementation 'org.springframework.boot:spring-boot-starter-actuator' implementation 'io.micrometer:micrometer-tracing-bridge-brave' implementation 'io.github.openfeign:feign-micrometer' implementation 'io.zipkin.reporter2:zipkin-reporter-brave' implementation 'org.springframework.boot:spring-boot-starter-web' implementation 'org.springframework.cloud:spring-cloud-starter-netflix-eureka-client' implementation 'org.springframework.cloud:spring-cloud-starter-openfeign' compileOnly 'org.projectlombok:lombok' annotationProcessor 'org.projectlombok:lombok' providedRuntime 'org.springframework.boot:spring-boot-starter-tomcat' testImplementation 'org.springframework.boot:spring-boot-starter-test' testRuntimeOnly 'org.junit.platform:junit-platform-launcher' } - application.yml
spring:
  application:
    name: product-service
server:
  port: 19092
eureka:
  client:
    service-url:
      defaultZone: http://localhost:19090/eureka/

management:
  zipkin:
    tracing:
      endpoint: "http://localhost:9411/api/v2/spans"
  tracing:
    sampling:
      probability: 1.0
Order-service
- build.gradle 파일 디펜던시를 아래와 같이 수정한다.
dependencies { implementation 'org.springframework.boot:spring-boot-starter-actuator' implementation 'io.micrometer:micrometer-tracing-bridge-brave' implementation 'io.github.openfeign:feign-micrometer' implementation 'io.zipkin.reporter2:zipkin-reporter-brave' implementation 'org.springframework.boot:spring-boot-starter-web' implementation 'org.springframework.cloud:spring-cloud-starter-netflix-eureka-client' implementation 'org.springframework.cloud:spring-cloud-starter-openfeign' compileOnly 'org.projectlombok:lombok' annotationProcessor 'org.projectlombok:lombok' providedRuntime 'org.springframework.boot:spring-boot-starter-tomcat' testImplementation 'org.springframework.boot:spring-boot-starter-test' testRuntimeOnly 'org.junit.platform:junit-platform-launcher' } - application.yml
spring:
  application:
    name: order-service
server:
  port: 19091
eureka:
  client:
    service-url:
      defaultZone: http://localhost:19090/eureka/

management:
  zipkin:
    tracing:
      endpoint: "http://localhost:9411/api/v2/spans"
  tracing:
    sampling:
      probability: 1.0
Zipkin
- Zipkin 도커 컨테이너 실행 코드를 커맨드를 켜서 입력한다.
docker run -d -p 9411:9411 openzipkin/zipkin
9.6.4 RUN
-
Eureka Server > Order > Product 순으로 실행한다.
-
http://localhost:19091/order/1 를 접속해보자. 이전의 응답과 결과가 같다.
- 일반 브라우저에서 접속

- Talend 접속
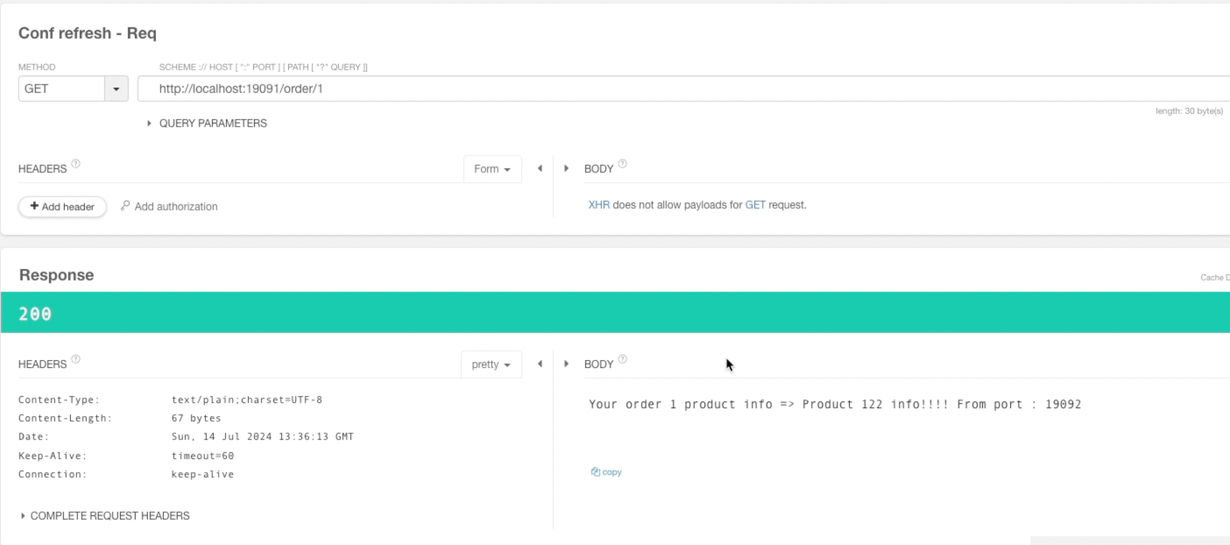
- 일반 브라우저에서 접속
-
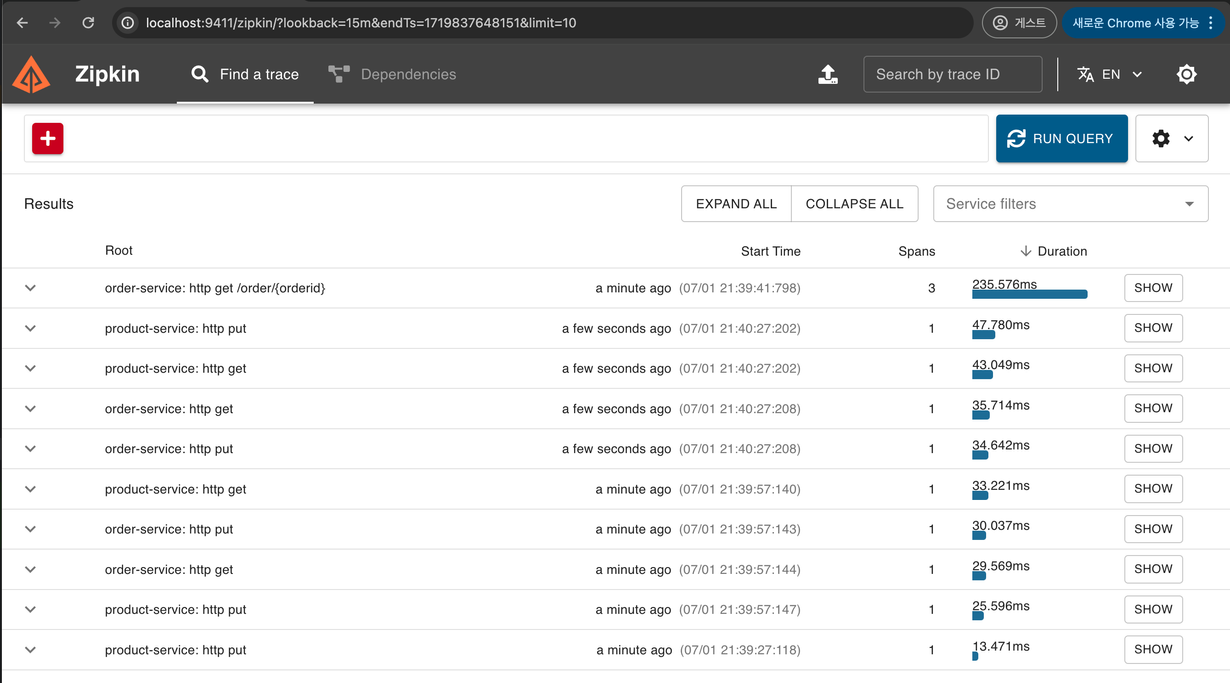
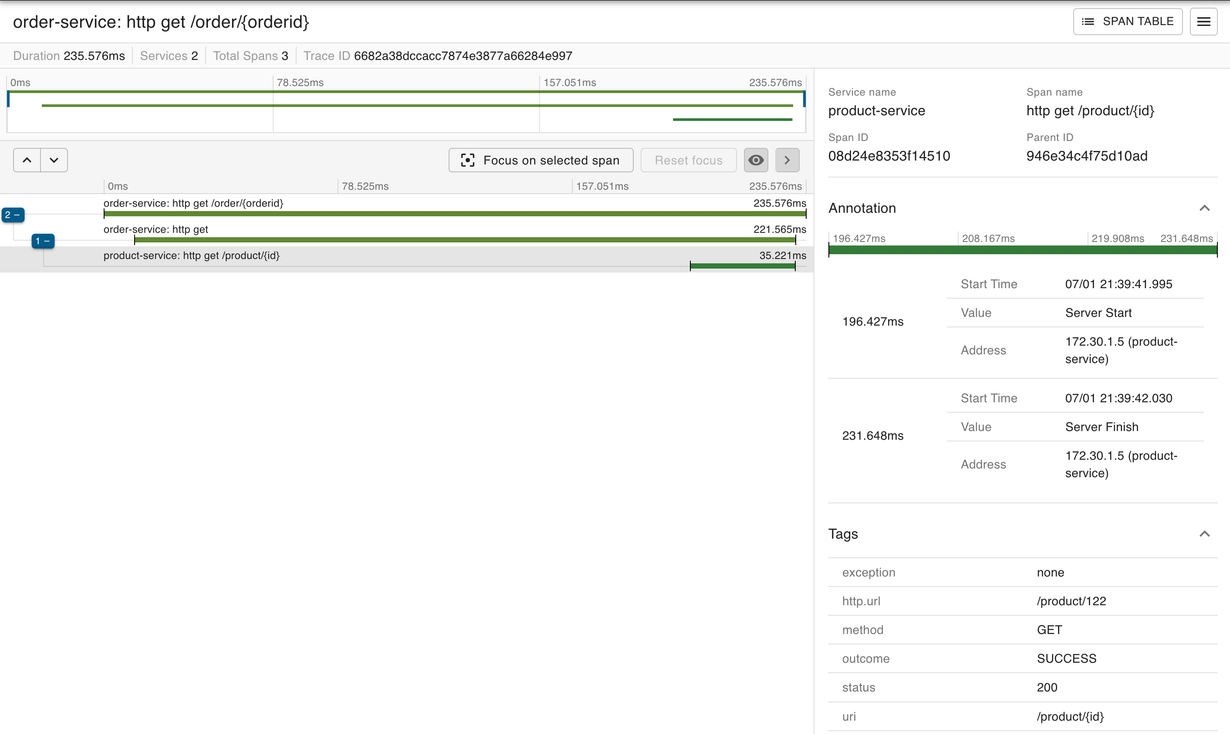
http://localhost:9411/zipkin/ 로 접속 후에 RUN QUERY를 클릭한다. 리스트가 나오며 Spans 3 인 항목의 SHOW를 클릭한다.
-
Order-service가 Product-service를 호출하는 과정이 트래킹 되는 것을 확인 할 수 있다.
이벤트 드리븐 아키텍처와 스트림 처리 (Spring Cloud Stream)
이벤트 드리븐 아키텍처란?
- 이벤트 드리븐 아키텍처는 시스템에서 발생하는 이벤트(상태 변화나 행동)를 기반으로 동작하는 소프트웨어 설계 스타일이다. 이벤트는 비동기적으로 처리되며, 서비스 간의 느슨한 결합을 통해 독립적으로 동작할 수 있게 한다.
예시: 온라인 쇼핑몰
- 이벤트 소스: 사용자가 온라인 쇼핑몰에서 주문을 한다.
- 주문 서비스가 '주문 생성' 이벤트를 발생시킨다.
- 이벤트 버스: Kafka나 RabbitMQ와 같은 메시지 브로커가 '주문 생성' 이벤트를 전달한다.
- 이벤트 핸들러:
- 재고 서비스: '주문 생성' 이벤트를 수신하여 재고를 확인하고 업데이트한다.
- 배송 서비스: '주문 생성' 이벤트를 수신하여 배송 준비를 시작한다.
- 결제 서비스: '주문 생성' 이벤트를 수신하여 결제 처리를 한다.
