
☀️만들 앱 소개
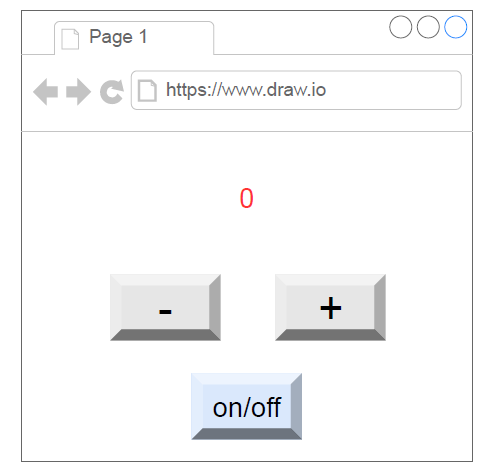
on/off를 누르면은 버튼이 비활성화되고 -, + 버튼을 누르면 화면에 보이는 수가 증감할 수 있는 앱이다. 테스트 주도 개발을 실습하기 위해 앱을 만들 예정이다.
⭐Counter 생성
🪐테스트 코드
test('the counter starts at 0', () => {
  render(<App />);

  const counterElement = screen.getByTestId("counter");
  expect(counterElement).toBe(0);
});
test()의 첫번째 인자는 테스트의 이름이고 두번째 인자는 테스트 함수이다. 테스트 함수에서는 기본적으로 테스트를 진행하고자 하는 컴포넌트를 렌더링한다.
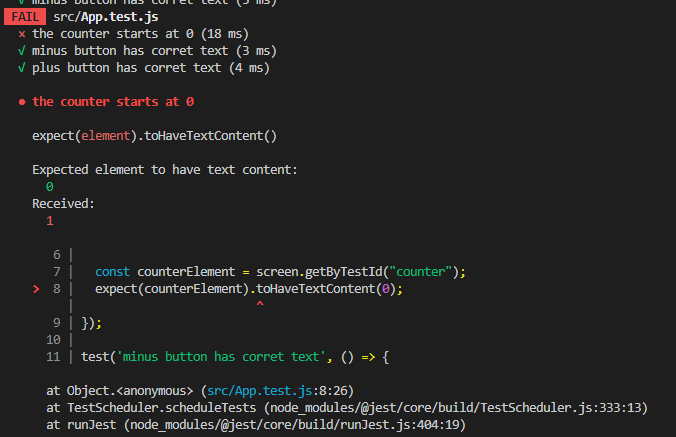
테스트를 진행하면 실행하면 실패한다.

에러 화면인데 기대한 값과 실제값이 일치하지 않는다는 메세지를 보내고 있다. toBe 매처는 Object.is를 사용하고 Object.is는 strict equality를 이용하는데 counterElement는 DOM요소이고 0은 integer이므로 같지 않다고 판별하는 것이다.
이를 해결하기 위해서는 toBe matcher 대신에 toHaveTextContent matcher을 사용하는 것이 좋다.
수정된 코드는 다음과 같다.
test('the counter starts at 0', () => {
  render(<App />);

  const counterElement = screen.getByTestId("counter");
  expect(counterElement).toHaveTextContent(0);
});
🪐실제 코드 작성
export default function App() {
  const [count, setCount] = useState(0);

  return (
    <div className="App">
      <header className="App-header">
        <h3 data-testid="counter">{count}</h3>
    </div>
  );
}
이제 다시 테스트를 진행해보면 코드도 작성되어 있고 toBe 매처가 아닌 toHaveTextContent 매처로 작성되어 있으므로 성공한다.
test는 id를 기준으로 값을 찾고 있는데 실제 할당된 id값이 아닌 data-testid 속성에 id값을 할당해서 테스트를 진행하는 것을 볼 수 있다.
☄️초기값 변경해보기
위 경우에서 count의 초기값을 1로 할당하면
예상된 값과 초기값이 다르기 때문에 에러가 발생한다.
⭐버튼 생성
🪐테스트 코드 작성
다시 가장 먼저 진행해야할 일은 테스트 코드를 작성하는 것이다.
test('minus button has corret text', () => {
  render(<App/>);

  const buttonElement = screen.getByTestId('minus-button');
  expect(buttonElement).toHaveTextContent('-');
})

test('plus button has corret text', () => {
  render(<App/>);

  const buttonElement = screen.getByTestId('plus-button');
  expect(buttonElement).toHaveTextContent('+');
})
이 상태로 다시 테스트를 진행하면 당연히 fail이다. 왜냐하면 실제 코드가 작성되어있지 않기 때문이다. 여기서 pass가 되면 test 코드를 잘못 작성했거나 실제 코드가 잘못 작성되어 있는 것이다.
🪐실제 코드 작성
export default function App() {
  const [count, setCount] = useState(0);

  return (
    <div className="App">
      <header className="App-header">
        <h3 data-testid="counter">{count}</h3>
        <button data-testid="minus-button">-</button>
        <button data-testid="plus-button">+</button>
      </header>
    </div>
  );
}
다시 테스트를 진행하면 pass한다.
⭐+, - 버튼에 기능 추가하기
🪐테스트 코드 작성
test('When the + button is pressed, the counter changes to 1',()=> {
  render(<App/>);

  const buttonElement = screen.getByTestId('plus-button');
  fireEvent.click(buttonElement); // 버튼을 화면에서 클릭하는 대목

  const counterElement = screen.getByTestId('counter');
  expect(counterElement).toHaveTextContent(1);
})

test('When the - button is pressed two times, the counter change to -2', () => {
  render(<App/>);

  const buttonElement = screen.getByTestId('minus-button');
  fireEvent.click(buttonElement);
  fireEvent.click(buttonElement);

  const counterElement = screen.getByTestId('counter');
  expect(counterElement).toHaveTextContent(-2);
})
교재와는 조금 다르게 click event가 2번 발생했을 때도 동일한 결과가 나오는 지에 대해서도 테스트를 진행했다.
🌈fireEvent
fireEvent는 React Testing Library에서 제공하는 도우미 함수로, 테스트 중에 DOM 요소에 대한 이벤트를 트리거하는 데 사용됩니다. 이 함수를 사용하여 특정 이벤트를 모방하고 테스트 도중에 DOM 요소를 상호작용할 수 있습니다.
fireEvent 함수는 특정 이벤트를 발생시키기 위해 DOM 요소에 대한 이벤트 핸들러를 호출합니다. 이벤트 객체는 필요에 따라 이벤트 핸들러에 전달할 수 있습니다.
-chatGPT
🪐실제 코드 작성
export default function App() {
  const [count, setCount] = useState(0);

  return (
    <div className="App">
      <header className="App-header">
        <h3 data-testid="counter">{count}</h3>
        <button
          data-testid="minus-button"
          onClick={() => setCount(prev => prev - 1)}>-</button>
        <button
          data-testid="plus-button"
          onClick={() => setCount(prev => prev + 1)}>+</button>
      </header>
    </div>
  );
}
🌈fireEvent vs userEvent
fireEvent는 프로그래밍을 통하여 이벤트를 트리거 하지만 userEvent는 사용자의 실제 상호작용을 모방하여 이벤트를 트리거한다. 즉, fireEvent는 이벤트 핸들러를 호출하고 이벤트 객체를 전달하지만 userEvent는 키 입력, 마우스 클릭 등 실제 동작을 시뮬레이션한다.
userEvent는 별도의 라이브러리 이므로 사용하기 전에 따로 서맃를 해야하지만 fireEvent는 내장되어 있는 도우미 함수이므로 따로 설치할 필요가 없다.
⭐onOff button 기능 추가하기
🪐테스트 코드 작성
test('on/off button has blue color', () => {
  render(<App/>);

  const buttonElement = screen.getByTestId('on/off-button');
  expect(buttonElement).toHaveStyle({backgroundColor:"blue"});
})

test('Prevent the -, + button from geing pressed when the on/off button is clicked', () => {
  render(<App/>);

  const onOffbuttonElement = screen.getByTestId('on/off-button');
  fireEvent.click(onOffbuttonElement);
  const plusButtonElement = screen.getByTestId('plus-button');
  expect(plusButtonElement).toBeDisabled();
})
on/off 버튼의 색이 blue가 맞는지 또 onOff 버튼을 클릭하면 +,- 버튼이 disabled 되는지를 테스트하는 코드이다.
🪐실제 코드 작성
export default function App() {
  const [count, setCount] = useState(0);
  const [onoff, setOnoff] = useState(false)
  return (
    <div className="App">
      <header className="App-header">
        <h3 data-testid="counter">{count}</h3>
        <button
          data-testid="minus-button"
          disabled={onoff}
          onClick={() => setCount(prev => prev - 1)}>-</button>
        <button
          data-testid="plus-button"
          disabled={onoff}
          onClick={() => setCount(prev => prev + 1)}>+</button>
      </header>
      <div>
        <button
        style={{backgroundColor: "blue"}}
        data-testid="on/off-button"
        onClick={() => setOnoff(prev => !prev)}>{onoff ? "on" : "off"}</button>
      </div>
    </div>
  );
}
🌌정리하며
위 예제 모두 기능을 만들기 전에 테스트 코드를 먼저 만들고 실제 코드를 작성한 다음에 테스트를 하는 것을 볼 수 있다.
다소 번거로워 보일 수는 있지만 기능을 구현해가면서 테스트 코드는 누적되어갈 것이고 중간에 특정 코드로 인해 이전에 만들어놓은 테스트 코드가 fail한다면 해당 코드에 기존 코드를 망가뜨리는 코드가 있는 것을 잡아낼 수도 있으므로 직관적으로 알기 어려운 오류를 잡아내기 좋아보인다.
