[SwiftUI] User Notifications으로 Local 푸시알림 보내보기
앱에서 푸시알림을 보내기 위해 Local과 Remote방식이 있다. Local은 앱 내에서 미리 푸시알림 보낼 컨텐츠를 설정하여 보내고 Remote는 원격으로 푸시알림을 보낼 수 있다. 이번 글에서는 Local로 푸시 알림 보내는 예제를 학습해 보겠다.
User Notifications
-> User Notifications는 서버에서 사용자 기기로 푸시알람을 보내거나 앱에서 로컬로 알림을 생성할 수 있게 해주는 프레임워크다.
로컬 알림의 경우, 앱에서 알림 콘텐츠를 생성하고 시간이나 위치와 같이 알림 전송을 트리거하는 조건을 지정한다.
알림콘텐츠와 트리거가 당장 이해 안될 수 있지만 밑에 예제에서 다시 다뤄보겠다.
우선 전체 코드부터 보자.
전체 코드
import SwiftUI
struct ContentView: View {
@State private var selectedDate = Date()
var body: some View {
VStack {
//설정된 시간으로 알림 보내기
DatePicker("알림 시간", selection: $selectedDate, displayedComponents: .hourAndMinute)
.datePickerStyle(.wheel)
.labelsHidden()
Button("설정한 시간에 알림 보내기") {
Task { await scheduleNotification(at: selectedDate) }
}
//5초후 알림 보내기
Button("5초후 알림 보내기") {
Task { await scheduleNotification(after: 5) }
}
}
.onAppear {
Task { await requestNotiPermission() }
}
}
//MARK: - 알림 권한 요청
func requestNotiPermission() async {
let center = UNUserNotificationCenter.current()
do {
try await center.requestAuthorization(options: [.alert, .sound, .badge])
} catch {
print(error)
}
}
//MARK: - 설정한 시간에 맞춰 보내기
func scheduleNotification(at date: Date) async {
let notificationCenter = UNUserNotificationCenter.current()
notificationCenter.removeAllPendingNotificationRequests()
//<---- 알람 보낼 콘텐츠 제작 ---->
let content = UNMutableNotificationContent()
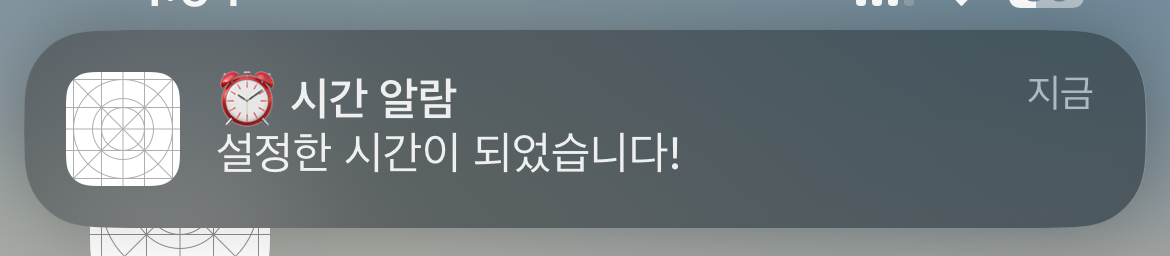
content.title = "⏰ 시간 알람"
content.body = "설정한 시간이 되었습니다!"
content.sound = UNNotificationSound(named: UNNotificationSoundName("notiSound.caf"))
//<-------------------------->
//<---- 트리거 설정 ---->
let triggerDate = Calendar.current.dateComponents([.hour, .minute], from: date)
let trigger = UNCalendarNotificationTrigger(
dateMatching: triggerDate, repeats: true)
//<------------------>
//<---- 알림 요청 생성 + 등록 ---->
let request = UNNotificationRequest(identifier: UUID().uuidString, content: content, trigger: trigger)
do {
try await notificationCenter.add(request)
} catch {
print(error)
}
//<--------------------------->
}
//MARK: - 특정 시간 후 보내기
func scheduleNotification(after seconds: TimeInterval) async {
let notificationCenter = UNUserNotificationCenter.current()
notificationCenter.removeAllPendingNotificationRequests()
//<---- 알람 보낼 콘텐츠 제작 ---->
let content = UNMutableNotificationContent()
content.title = "⏱ 5초 뒤 알람"
content.body = "방금 요청한 알람이 도착했습니다!"
content.sound = UNNotificationSound(named: UNNotificationSoundName("notiSound.caf"))
//<-------------------------->
//<---- 트리거 설정 ---->
let trigger = UNTimeIntervalNotificationTrigger(timeInterval: seconds, repeats: false)
//<------------------>
//<---- 알림 요청 생성 + 등록 ---->
let request = UNNotificationRequest(identifier: UUID().uuidString, content: content, trigger: trigger)
do {
try await notificationCenter.add(request)
} catch {
print(error)
}
//<--------------------------->
}
}이 코드에서는 크게 두 가지 기능이 있는데,
1. 사용자가 설정한 시간에 알림을 보내는 기능
2. 일정시간 후 알림을 보내는 기능
이렇게 볼 수 있다.
우선, 이 기능들이 가능하게 하기 위해서는 알림 권한 요청이 필요하다.
//MARK: - 알림 권한 요청
    func requestNotiPermission() async {
        let center = UNUserNotificationCenter.current()

        do {
            try await center.requestAuthorization(options: [.alert, .sound, .badge])
        } catch {
            print(error)
        }
    }
알림 권한을 유저가 허용해야만 푸시알림이 정상적으로 간다 !
이 메서드를 실행하게 되면 유저에게 알림 권한을 허용하라는 팝업이 뜬다.
여기서, UNUserNotificationCenter 객체를 자주 보게될 것인데 이 친구는 앱에서 알림 관련 활동을 중앙에서 관리해주는 친구로 보면 된다.
requestAuthorization(options: [.alert, .sound, .badge])
이 메서드를 통해 알림표시, 알림소리, 앱 아이콘에 숫자로 붙는 뱃지 등을 요청할 수 있다.
//MARK: - 설정한 시간에 맞춰 보내기
    func scheduleNotification(at date: Date) async {
        let notificationCenter = UNUserNotificationCenter.current()
        notificationCenter.removeAllPendingNotificationRequests()

        //<---- 알람 보낼 콘텐츠 제작 ---->
        let content = UNMutableNotificationContent()
        content.title = "⏰ 시간 알람"
        content.body = "설정한 시간이 되었습니다!"
        content.sound = UNNotificationSound(named: UNNotificationSoundName("notiSound.caf"))
        //<-------------------------->

        //<---- 트리거 설정 ---->
        let triggerDate = Calendar.current.dateComponents([.hour, .minute], from: date)
        let trigger = UNCalendarNotificationTrigger(
            dateMatching: triggerDate, repeats: true)
        //<------------------>

        //<---- 알림 요청 생성 + 등록 ---->
        let request = UNNotificationRequest(identifier: UUID().uuidString, content: content, trigger: trigger)
        do {
            try await notificationCenter.add(request)
        } catch {
            print(error)
        }
        //<--------------------------->
    }
그 다음 보게될 메서드는 설정한 시간에 맞춰 알림을 보내는 기능이다.
여기서, 로컬에서 푸시알림을 보내기 위해서는 크게 3가지 흐름으로 볼 수 있는데
1. 알림 콘텐츠 제작 -> 2. 알림 트리거 설정 -> 3. 알림 요청 생성 + 등록
이렇게 볼 수 있다.
- 먼저 알림 콘텐츠 제작 같은 경우에는 UNMutableNotificationContent 클래스를 통해 제작할 수 있다. 푸시알림에 들어갈 title, body, sound 등을 설정할 수 있으며 sound 같은 경우에 기본 소리를 원한다면 .default 로 설정해주면 된다. 그런데 나는 소리를 커스텀하고 싶어서 UNNotificationSound를 통해 직접 설정을 해주었으며,
 무료 mp3파일을 다운받아 caf 형식으로 바꿔서 넣어줬다.
(mp3 형식은 지원을 안하기에 지원하는 형식들은 UNNotificationSound 공식문서에서 확인할 수 있다)
- 알림 트리거는 3가지가 있는데
- UNCalendarNotificationTrigger (설정한 시간 알림 트리거)
- UNTimeIntervalNotificationTrigger (특정 시간 간격 알림 트리거)
- UNLocationNotificationTrigger (위치에 따른 알림 트리거)
어떤 방아쇠를 선택하냐에 따라 알림을 쏘는 방식이 달라지는 것이다 ~
여기 코드에서는 UNCalendarNotificationTrigger를 사용했고
dateMatching에는 선택한 시간을 넣어주고 repeats을 true로 두면 설정한 시간마다 반복해서 알림을 쏘게 된다
- 알림요청 생성 + 등록 같은 경우에는
UNNotificationRequest 를 통해 우리가 만들어둔 알림콘텐츠, 트리거를 넣어 request를 만들어준다. 여기서 주의할 점은 identifier는 알림의 식별자 역할을 해주며 고유해야한다.
그후, notificationCenter.add(request) 메서드가 실행되면 시스템은 요청과 관련된 트리거 조건을 추적하기 시작하며, 트리거 조건이 충족되면 알림이 전송된다 !
이렇게 로컬 푸시알림이 동작하게 된다.
 //MARK: - 특정 시간 후 보내기
    func scheduleNotification(after seconds: TimeInterval) async {
        let notificationCenter = UNUserNotificationCenter.current()
        notificationCenter.removeAllPendingNotificationRequests()

        //<---- 알람 보낼 콘텐츠 제작 ---->
        let content = UNMutableNotificationContent()
        content.title = "⏱ 5초 뒤 알람"
        content.body = "방금 요청한 알람이 도착했습니다!"
        content.sound = UNNotificationSound(named: UNNotificationSoundName("notiSound.caf"))
        //<-------------------------->

        //<---- 트리거 설정 ---->
        let trigger = UNTimeIntervalNotificationTrigger(timeInterval: seconds, repeats: false)
        //<------------------>

        //<---- 알림 요청 생성 + 등록 ---->
        let request = UNNotificationRequest(identifier: UUID().uuidString, content: content, trigger: trigger)
        do {
            try await notificationCenter.add(request)
        } catch {
            print(error)
        }
        //<--------------------------->
    }
방금 로컬 푸시알림 과정에 대해 알았으니 이 코드도 쉽게 보일 것이다.
똑같이 알림보낼 콘텐츠를 제작, 트리거를 설정, 요청을 생성하고 등록하는 절차를 밟는다.
달라진건 UNTimeIntervalNotificationTrigger 트리거로 변경된 것 뿐이다.
이 트리거 같은 경우에, timeInterval에 원하는 시간을 넣어줄 수 있는데 만약에 60을 넣어주면 60초후 알림이 울리게 된다.
그리고 repeats을 true로 두면 알림이 반복하게 오는데, 60초를 넣으면 60초마다 푸시 알림이 오는 것이다.
하지만 주의할 점은 !! repeats이 true일때, timeInterval을 최소 60초로 두지 않으면 에러가 난다. (아마 짧은 시간에 계속 반복적으로 알림을 쏘면 성능상 문제가 있어서 애플측에서 막아둔거 같다)
그래도 repeats이 false면 5초를 넣어도, 1초를 넣어도 상관없다 ~
- 아 그리고 removeAllPendingNotificationRequests()을 위에 코드도 그렇고 젤 위에 넣어준 이유는 이 친구가 이전에 있는 알림 request를 없애주는 역할을 하는데, 만약에 이 메서드를 실행하지 않으면 한 번 발사된 알림은 계속 반복되어 발사되는 현상을 보게 될 것이다.
실제 구현 영상
*설정한 시간으로 알림보내기

*5초후 알림보내기
* 현재 foreground 에서는 알림이 오지 않는데 foreground 에서도 알림을 받을려면 AppDelegate설정을 해줘야 하는데 이 부분은 다음에 알아보겠습니다.
🍎 참고
https://developer.apple.com/documentation/usernotifications
https://developer.apple.com/documentation/usernotifications/asking-permission-to-use-notifications
https://developer.apple.com/documentation/usernotifications/unusernotificationcenter
https://developer.apple.com/documentation/usernotifications/scheduling-a-notification-locally-from-your-app
