NestJS documentation을 번역하고 공부해가며 적은 글입니다.
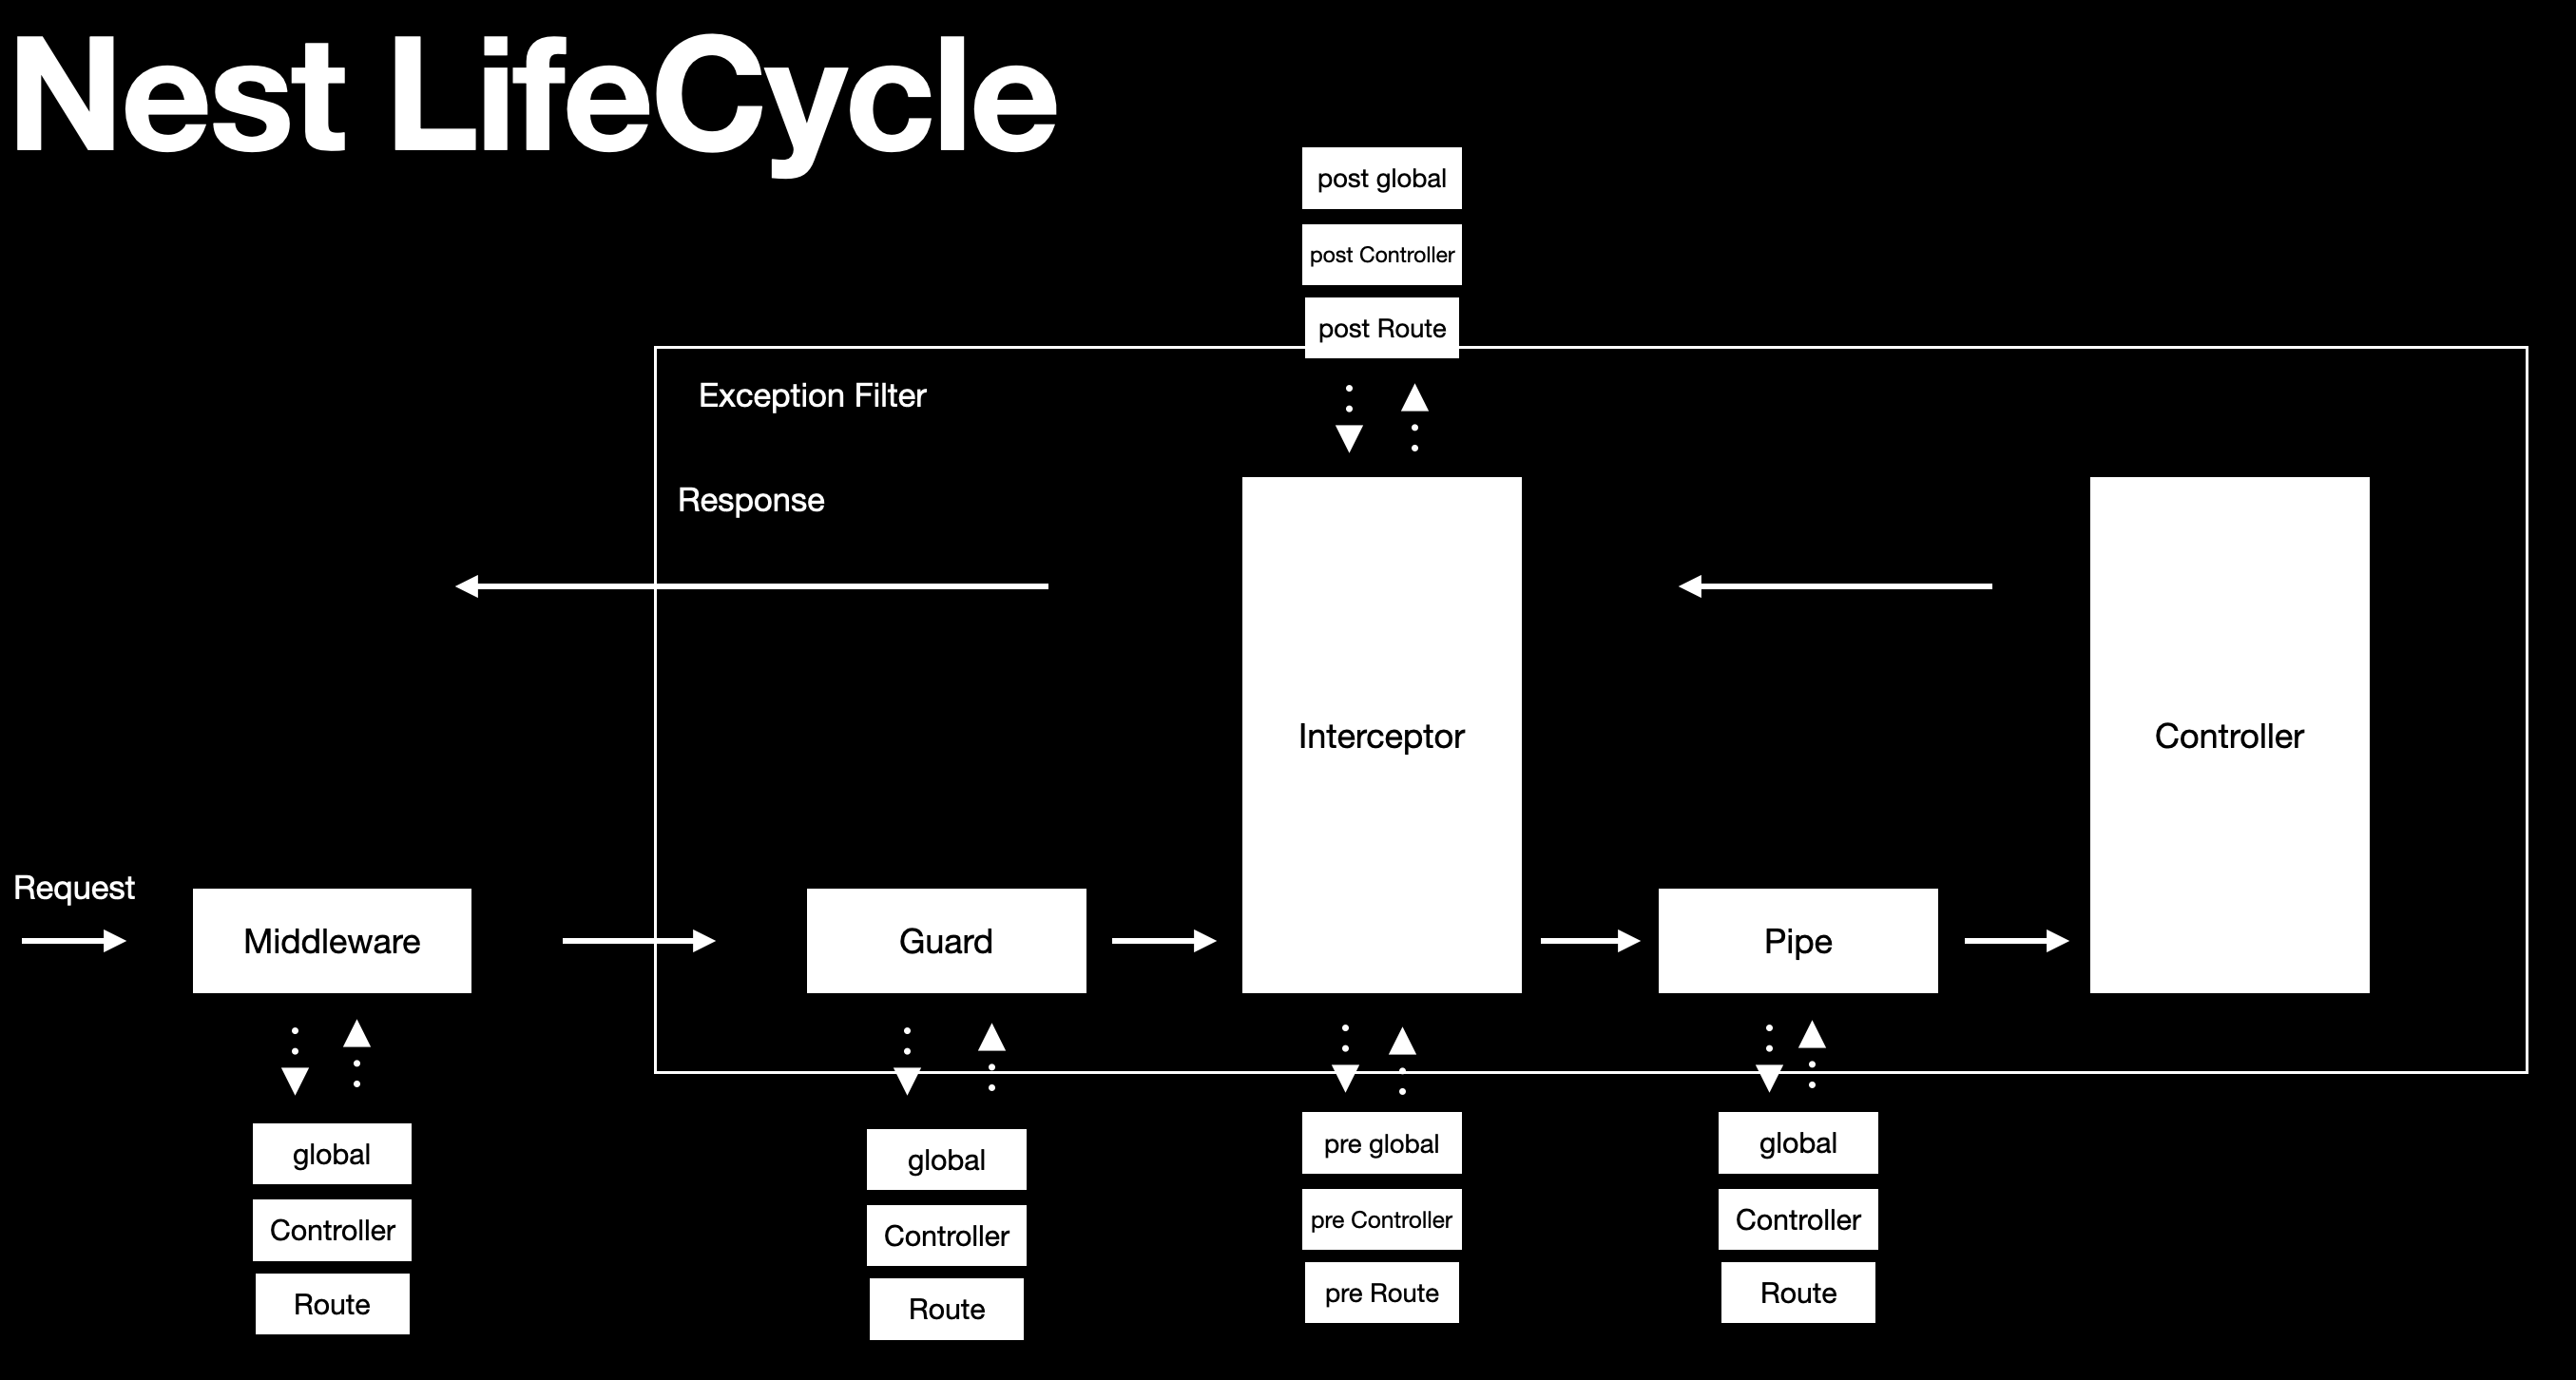
Nest LifeCycle에서 Exception Filter의 범위를 잘 보여주는 그림이다.

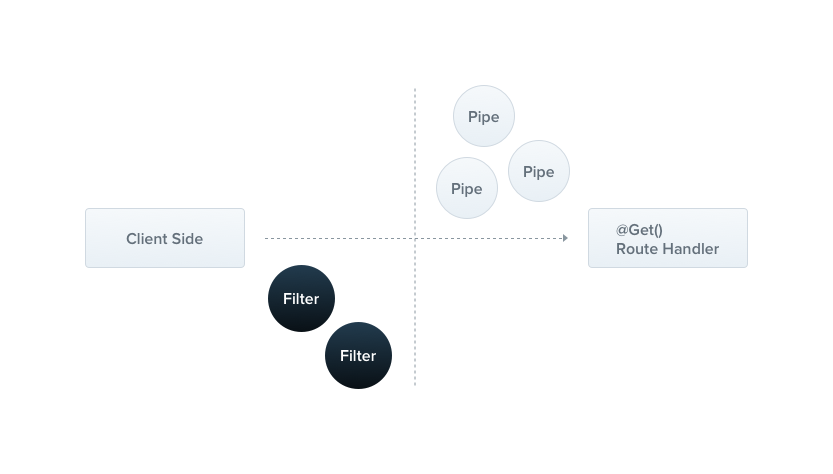
Exceptions Layer
Nest는 application 전체의 모든 unhandled exceptions를 처리하는 exception layer가 내장되어 있다.
따로 예외처리를 하지 않으면 이 exception layer에서 예외를 포착한 다음 자동으로 적절한 response를 보내준다.

기본적으로 이 작업은 전역으로 내장되어있는 HttpException 유형에 맞는 예외처리 필터에 의해 이루어진다.
예외가 인식되지 않는 경우(HttpException이 아니고 HttpException에서 상속하는 클래스도 아닌 경우)는 exception filter는 이런 기본값 response를 보낸다.
{
  "statusCode": 500,
  "message": "Internal server error"
}
Throwing standard exceptions
Nest는 @nestjs/common 패키지에서 expose 하는 HttpException 클래스를 제공한다.
일반적인 HTTP REST/GraphQL API 기반 응용 프로그램의 경우 특정 오류 조건이 발생할 때 표준 HTTP 응답 개체를 보내는 것이 가장 좋다.
예를 들어, CatsController에는 findAll() 메서드(GET방식)가 있다. 이 라우트 핸들러는 어떤 이유료 예외를 throw 했다고 가정해보자. 아래의 코드를 보자
//cats.controller.ts
@Get()
async findAll() {
  throw new HttpException('Forbidden', HttpStatus.FORBIDDEN);
}
클라이언트가 endpoint를 호출할 때 response는 다음과 같다.
{
  "statusCode": 403,
  "message": "Forbidden"
}
HttpException constructor는 두개의 필수 인수를 사용하여 응답을 결정한다.
- response 인수는 JSON 바디 형태로 되어있으며 String 또는 Object 일 수 있다.
- status 인수는 HTTP status code로 정의한다.
기본값으로 JSON response body 에는 두 가지 properties가 있다.
- statusCode : 기본값은 상태 인수에 제공된 HTTP 상태 코드이다.
- message : 상태에 따른 HTTP 오류에 관한 간단한 설명이다.
JSON response body를 Override 하려면 응답 인수(response argument)를 제공하면 된다.
Nest는 객체를 serialize 해 JSON response body를 return 한다.
두 번째 constructor 인수인 status는 유효한 HTTP status code 여야 한다.
@nestjs/common의 HttpStatus enum을 import 해 사용하는 것이 베스트다.
아래는 response body를 overriding 하는 예이다.
// cats.controller.ts
@Get()
async findAll() {
  throw new HttpException({
    status: HttpStatus.FORBIDDEN,
    error: 'This is a custom message',
  }, HttpStatus.FORBIDDEN);
}
이렇게 하면
{
  "status": 403,
  "error": "This is a custom message"
}
이런 response body를 받을 수 있다.
Custom Exception
Nest에선 대부분의 경우 custom exception을 쓸 필요가 없다.
Nest에 내장된 HTTP Exception을 사용하면 된다. 만약 정말 필요하다면, HttpException 클래스로부터 상속받는 고유한 exception layer를 만드는 것이 좋다.
이 방식을 사용하면 Nest가 예외를 인식하고 자동으로 error reponse를 처리한다.
이러한 구현 예를 보겠다.
//foridden.exception.ts
export class ForbiddenException extends HttpException {
  constructor() {
    super('Forbidden', HttpStatus.FORBIDDEN);
  }
}
ForbiddenException이 HttpException을 상속받기 때문에, 내장 Exception handler가 원할하게 작동하므로 아래와 같이 findAll() 메서드 내에서 사용할 수 있다.
// cats.controller.ts
@Get()
async findAll() {
  throw new ForbiddenException();
}
Built-in HTTP exceptions
Nest는 기본적으로 HttpException 에서 상속되는 표준 예외를 제공한다.
이들은 @nestjs/common 패키지에서 expose되며 가장 일반적인 HTTP 예외를 나타낸다.
- BadRequestException
- UnauthorizedException
- NotFoundException
- ForbiddenException
- NotAcceptableException
- RequestTimeoutException
- ConflictException
- GoneException
- HttpVersionNotSupportedException
- PayloadTooLargeException
- UnsupportedMediaTypeException
- UnprocessableEntityException
- InternalServerErrorException
- NotImplementedException
- ImATeapotException
- MethodNotAllowedException
- BadGatewayException
- ServiceUnavailableException
- GatewayTimeoutException
- PreconditionFailedException
Exception filters
기본으로 내장된 exception filter가 자동으로 많은 예외를 처리해주지만, exceptions layer에 대한 완전히 제어하고 싶을 수 있다.
예를 들면, log를 추가해주고 싶다거나, 여러 동적인 요인을 기반으로 다른 JSON schema를 사용하고 싶은 경우이다.
이런 목적을 위해 고안한 것이 Exception Filter 이다.
이는 클라이언트에게 보내지는 응답의 내용이나 제어의 정확한 흐름을 제어할 수 있게 한다.
//http-exception.filter.ts
import { ExceptionFilter, Catch, ArgumentsHost, HttpException } from '@nestjs/common';
import { Request, Response } from 'express';

@Catch(HttpException)
export class HttpExceptionFilter implements ExceptionFilter {
  catch(exception: HttpException, host: ArgumentsHost) {
    const ctx = host.switchToHttp();
    const response = ctx.getResponse<Response>();
    const request = ctx.getRequest<Request>();
    const status = exception.getStatus();

    response
      .status(status)
      .json({
        statusCode: status,
        timestamp: new Date().toISOString(),
        path: request.url,
      });
  }
}
@Catch(HttpException) 데코레이터는 필요한 메타데이터를 exception filter에 바인딩하여 이 특정 필터가 Nest HttpException 유형에 있는지 찾는다.
@Catch() 데코레이터는 단일 매개변수 또는 쉼표로 구분된 목록을 사용할 수 있다.
이를 통해 한번에 여러 유형의 예외에 대한 필터를 설정할 수 있다.
Arguments host
catch() 메서드의 매개변수를 보자. exception 매개변수는 현재 처리 중인 exception object이다.
host 매개변수는 ArgumentsHost object이다.
위의 코드에서, 우리는 이것을 원래의 request handler에서 통과된 Request와 Response 오브젝트들의 레퍼런스를 가져오기 위해서 사용했다. ArgumentsHost는 강력한 유틸리티 개체이다. 나중에 execution context 챕터에서 더 자세히 다룬다고 한다. 일단은 넘어가겠다.
Binding Filters
이제 새 HttpExceptionFilter를 CatsController의 create() 메서드에 연결해 보자.
// cats.controller.ts
@Post()
@UseFilters(new HttpExceptionFilter())
async create(@Body() createCatDto: CreateCatDto) {
  throw new ForbiddenException();
}
HINT
@UseFilters() 데코레이터는 @nestjs/common 패키지에서 import 하면된다.
위의 코드는 new HttpExceptionFilter()로 인스턴스를 만들었다.
하지만 대신에, class를 instance 대신 넣으면, 인스턴스화의 책임을 회피하면서, 의존성 주입 을 가능하게 할 수 있다.
// cats.controller.ts
@Post()
@UseFilters(HttpExceptionFilter)
async create(@Body() createCatDto: CreateCatDto) {
  throw new ForbiddenException();
}
HINT
가능하면 인스턴스 대신 클래스를 사용하여 필터를 적용하는 것을 선호하자. Nest는 전체 모듈에서 동일한 클래스의 인스턴스를 쉽게 재사용할 수 있으므로 메모리 사용량을 줄여준다.
// cats.controller.ts
@UseFilters(new HttpExceptionFilter())
export class CatsController {}
이런 식으로 class를 적용하는 방식이 좋다고 한다. 이러면 Cats 컨트롤러 전체에 적용되게 된다.
글로벌 스코프로 필터를 적용하려면
// main.ts
async function bootstrap() {
  const app = await NestFactory.create(AppModule);
  app.useGlobalFilters(new HttpExceptionFilter());
  await app.listen(3000);
}
bootstrap();
main.ts에 적용하면 된다.
WARNING
useGlobalFilters() 메서드는 게이트웨이 또는 하이브리드 어플리케이션에는 적용되지 않는다.
하지만 main.ts를 통한 글로벌 적용은 의존성 주입이 불가능해진다.
module의 context 내에 있지 않기 때문이다.
이 문제를 해결하기 위해, module 파일에서 적용하는 것을 권장한다.
// app.module.ts
import { Module } from '@nestjs/common';
import { APP_FILTER } from '@nestjs/core';

@Module({
  providers: [
    {
      provide: APP_FILTER,
      useClass: HttpExceptionFilter,
    },
  ],
})
export class AppModule {}
이렇게 providers array에 추가해주면 된다.
Catch everything
모든 unhandled exception에서 catch 하고 싶다면, 파라미터 없이 Catch() 데코레이터를 사용하면 된다.
Inheritance
일반적으로, 어플리케이션의 요구사항을 충족하도록 custom 제작된 exception filter를 만들 것이다.
하지만 Nest에서 기본 제공되는 exception filter를 단순히 확장하고 특정 요인에 따라 Overriding 하는 경우가 있을 것이다.
예외 처리를 기본 필터에 위임하려면 BaseExceptionFilter를 extend 한 뒤 상속된 catch() 메소드를 호출하면 된다.
// all-exception.filter.ts
import { Catch, ArgumentsHost } from '@nestjs/common';
import { BaseExceptionFilter } from '@nestjs/core';

@Catch()
export class AllExceptionsFilter extends BaseExceptionFilter {
  catch(exception: unknown, host: ArgumentsHost) {
    super.catch(exception, host);
  }
}
WARNING
BaseExceptionFilter 에서 extend 된 메소드 스코프와 컨트롤러 스코프 필터들은 new로 인스턴스화 해서는 안된다.
대신 프레임워크가 자동으로 인스턴스를 생성하도록 한다.
위를 바탕으로 business logic에 맞게 설정하면 되겠다.
전역필터는 base filter를 extend 받을 수 있다.
사용자 지정 전역필터를 인스턴스화 할 때 HttpServer에서 참조하도록 삽입하는 것이다.
async function bootstrap() {
  const app = await NestFactory.create(AppModule);

  const { httpAdapter } = app.get(HttpAdapterHost);
  app.useGlobalFilters(new AllExceptionsFilter(httpAdapter));

  await app.listen(3000);
}
bootstrap();