GPT-3가 잘 안 돼서 어쩌나 하고 이리저리 찾아보다가 ChatGPT 관련 포스팅을 찾았고 GPT-3는 잠시 내려두고 ChatGPT를 써보기로 했다.
ChatGPT
GPT 3.5를 기반으로 하는 대화형 인공지능 서비스이며, 간단한 회원가입 후 무료 혹은 유료로 이용할 수 있다.
ChatGPT는 사용자와 주고받는 대화에서 질문에 답하도록 설계된 언어모델이며, 오픈AI는 블로그 게시글을 통해 “챗GPT가 대화 형식으로 추가적인 질문에 답하고 실수를 인정하며 정확하지 않은 전제에 대해서는 이의를 제기하고 부적절한 요청을 거부할 수 있다”고 설명했다.
나무위키에 저렇게 설명되어 있지만 추가로 알아본 바로는 GPT-3를 기반으로 만들어졌지만 GPT-3와 다르게 대화에 최적화 된 모델이라고 한다. 성능면에서는 GPT-3가 우세하나 서비스의 목적과 규모에 따라 다르다고 한다. 솔직히 나는 ChatGPT가 대화를 더 잘한다는 것 말고는 차이를 모르겠다.
그럼 이제 코드로 살펴보자.
프로젝트 생성

Spring Initialzr를 통해서 프로젝트를 위와 같이 생성해 주었다.
Controller
@RestController
@RequestMapping("/chat-gpt")
public class ChatGptController {

    private final ChatGptService chatGptService;

    public ChatGptController(ChatGptService chatGptService) {
        this.chatGptService = chatGptService;
    }

    @PostMapping("/question")
    public ChatGptResponseDto sendQuestion(@RequestBody QuestionRequestDto requestDto) {
        return chatGptService.askQuestion(requestDto);
    }
}
Service
@Service
public class ChatGptService {

    private static RestTemplate restTemplate = new RestTemplate();

    public HttpEntity<ChatGptRequestDto> buildHttpEntity(ChatGptRequestDto requestDto) {
        HttpHeaders headers = new HttpHeaders();
        headers.setContentType(MediaType.parseMediaType(ChatGptConfig.MEDIA_TYPE));
        headers.add(ChatGptConfig.AUTHORIZATION, ChatGptConfig.BEARER + ChatGptConfig.API_KEY);
        return new HttpEntity<>(requestDto, headers);
    }

    public ChatGptResponseDto getResponse(HttpEntity<ChatGptRequestDto> chatGptRequestDtoHttpEntity) {
        ResponseEntity<ChatGptResponseDto> responseEntity = restTemplate.postForEntity(
                ChatGptConfig.URL,
                chatGptRequestDtoHttpEntity,
                ChatGptResponseDto.class);

        return responseEntity.getBody();
    }

    public ChatGptResponseDto askQuestion(QuestionRequestDto requestDto) {
        return this.getResponse(
                this.buildHttpEntity(
                        new ChatGptRequestDto(
                                ChatGptConfig.MODEL,
                                requestDto.getQuestion(),
                                ChatGptConfig.MAX_TOKEN,
                                ChatGptConfig.TEMPERATURE,
                                ChatGptConfig.TOP_P
                        )
                )
        );
    }
}
Dto
@Getter
public class QuestionRequestDto implements Serializable {
    private String question;
}
@Getter
@NoArgsConstructor
public class ChatGptRequestDto implements Serializable {
private String model;
private String prompt;
@JsonProperty("max_tokens")
private Integer maxTokens;
private Double temperature;
@JsonProperty("top_p")
private Double topP;
@Builder
public ChatGptRequestDto(String model, String prompt,
Integer maxTokens, Double temperature,
Double topP) {
this.model = model;
this.prompt = prompt;
this.maxTokens = maxTokens;
this.temperature = temperature;
this.topP = topP;
}
}@Getter
@NoArgsConstructor
public class ChatGptResponseDto implements Serializable {
private String id;
private String object;
private LocalDate created;
private String model;
private List<Choice> choices;
@Builder
public ChatGptResponseDto(String id, String object,
LocalDate created, String model,
List<Choice> choices) {
this.id = id;
this.object = object;
this.created = created;
this.model = model;
this.choices = choices;
}
}@Getter
@NoArgsConstructor
public class Choice implements Serializable {
private String text;
private Integer index;
@JsonProperty("finish_reason")
private String finishReason;
@Builder
public Choice(String text, Integer index, String finishReason) {
this.text = text;
this.index = index;
this.finishReason = finishReason;
}
}Config
public class ChatGptConfig {
    public static final String AUTHORIZATION = "Authorization";
    public static final String BEARER = "Bearer ";
    public static final String API_KEY = "Your-API-Key";
    public static final String MODEL = "text-davinci-003";
    public static final Integer MAX_TOKEN = 300;
    public static final Double TEMPERATURE = 0.0;
    public static final Double TOP_P = 1.0;
    public static final String MEDIA_TYPE = "application/json; charset=UTF-8";
    public static final String URL = "https://api.openai.com/v1/completions";
}
변수명과 URL 정도만 내 스타일로 변경했고 거의 그대로 썼다.
결과 확인
이제 포스트맨으로 결과를 확인해보자.

대박이다. 이전과 다르게 정상적인 답변이 날아온다.
클라이언트 결과 확인
프론트는 Vue.js로 간단하게 구성했다. 결과를 확인해 보면?
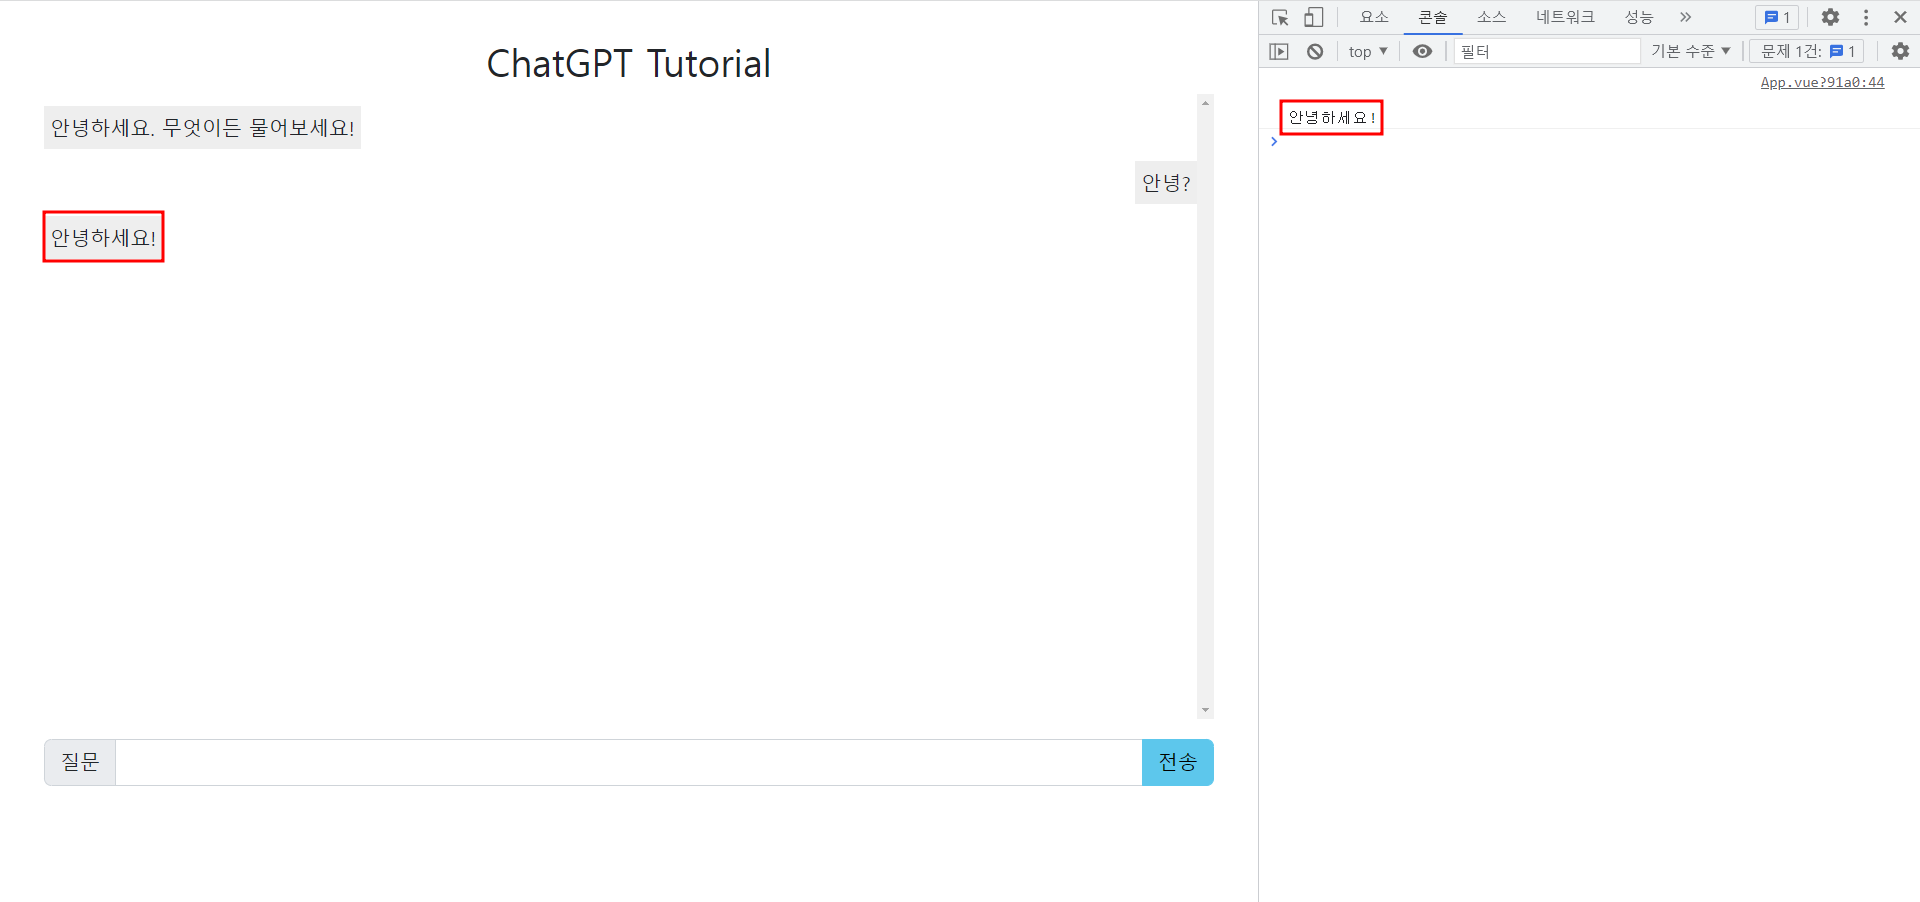
로딩 시간이 좀 있지만 결과 값은 잘 출력된다. 성공이다.
Vue.js code
<template>
  <b-container class="text-center">

    <h2 class="h2-title">ChatGPT Tutorial</h2>

    <div class="chat-content">
      <div class="line">
        <span class="chat-box">안녕하세요. 무엇이든 물어보세요!</span>
      </div>
    </div>

    <div>
      <b-input-group prepend="질문" class="mt-3">
        <b-form-input id="input"></b-form-input>
        <b-input-group-append>
          <b-button @click="sendQuestion()" variant="info">전송</b-button>
        </b-input-group-append>
      </b-input-group>
    </div>

  </b-container>
</template>

<script>
import axios from "axios";

const BASE_URL = 'http://localhost:8081/chat-gpt'

export default {
  name: 'App',
  methods: {
    sendQuestion() {
      let question = document.querySelector('#input').value;
      let template = `<div class="line">
        <span class="chat-box mine">${ question }</span>
      </div>`;
      document.querySelector('.chat-content').insertAdjacentHTML('beforeend', template);

      let data = {
        'question' : question
      };
      axios.post(BASE_URL + '/question', data).then(response => {
        console.log(response.data.choices[0].text)
        let template = `<div class="line">
          <span class="chat-box">${ response.data.choices[0].text }</span>
        </div>`
        document.querySelector('.chat-content').insertAdjacentHTML('beforeend', template);
      })
    },


  },
  components: {

  }
}
</script>

<style>
.h2-title {
  margin-top: 30px;
}
.div-chats {
  height: 500px;
  /* border: 1px solid black; */
}
.chat-content { height: 500px; overflow-y: scroll;}
.line { margin-top: 10px; display: flex;}
.chat-box {background: #eee; padding: 5px; max-width: 50%;}
.mine {margin-left: auto;}
</style>
성공해서 매우 기분이 좋다. 튜토리얼을 진행하면서 공부가 된 것도 많은데 나중에 추가로 정리해야겠다.
