
🧑🏫 미니 개인 프로젝트로 todoList를 만들어보면서 UITableView, UIAlertView 등에 대해 실습해보쟈!
📕 TodoListViewController
일단 먼저 TodoListViewController.swift 파일과 스토리 보드를 연결시켜준다.
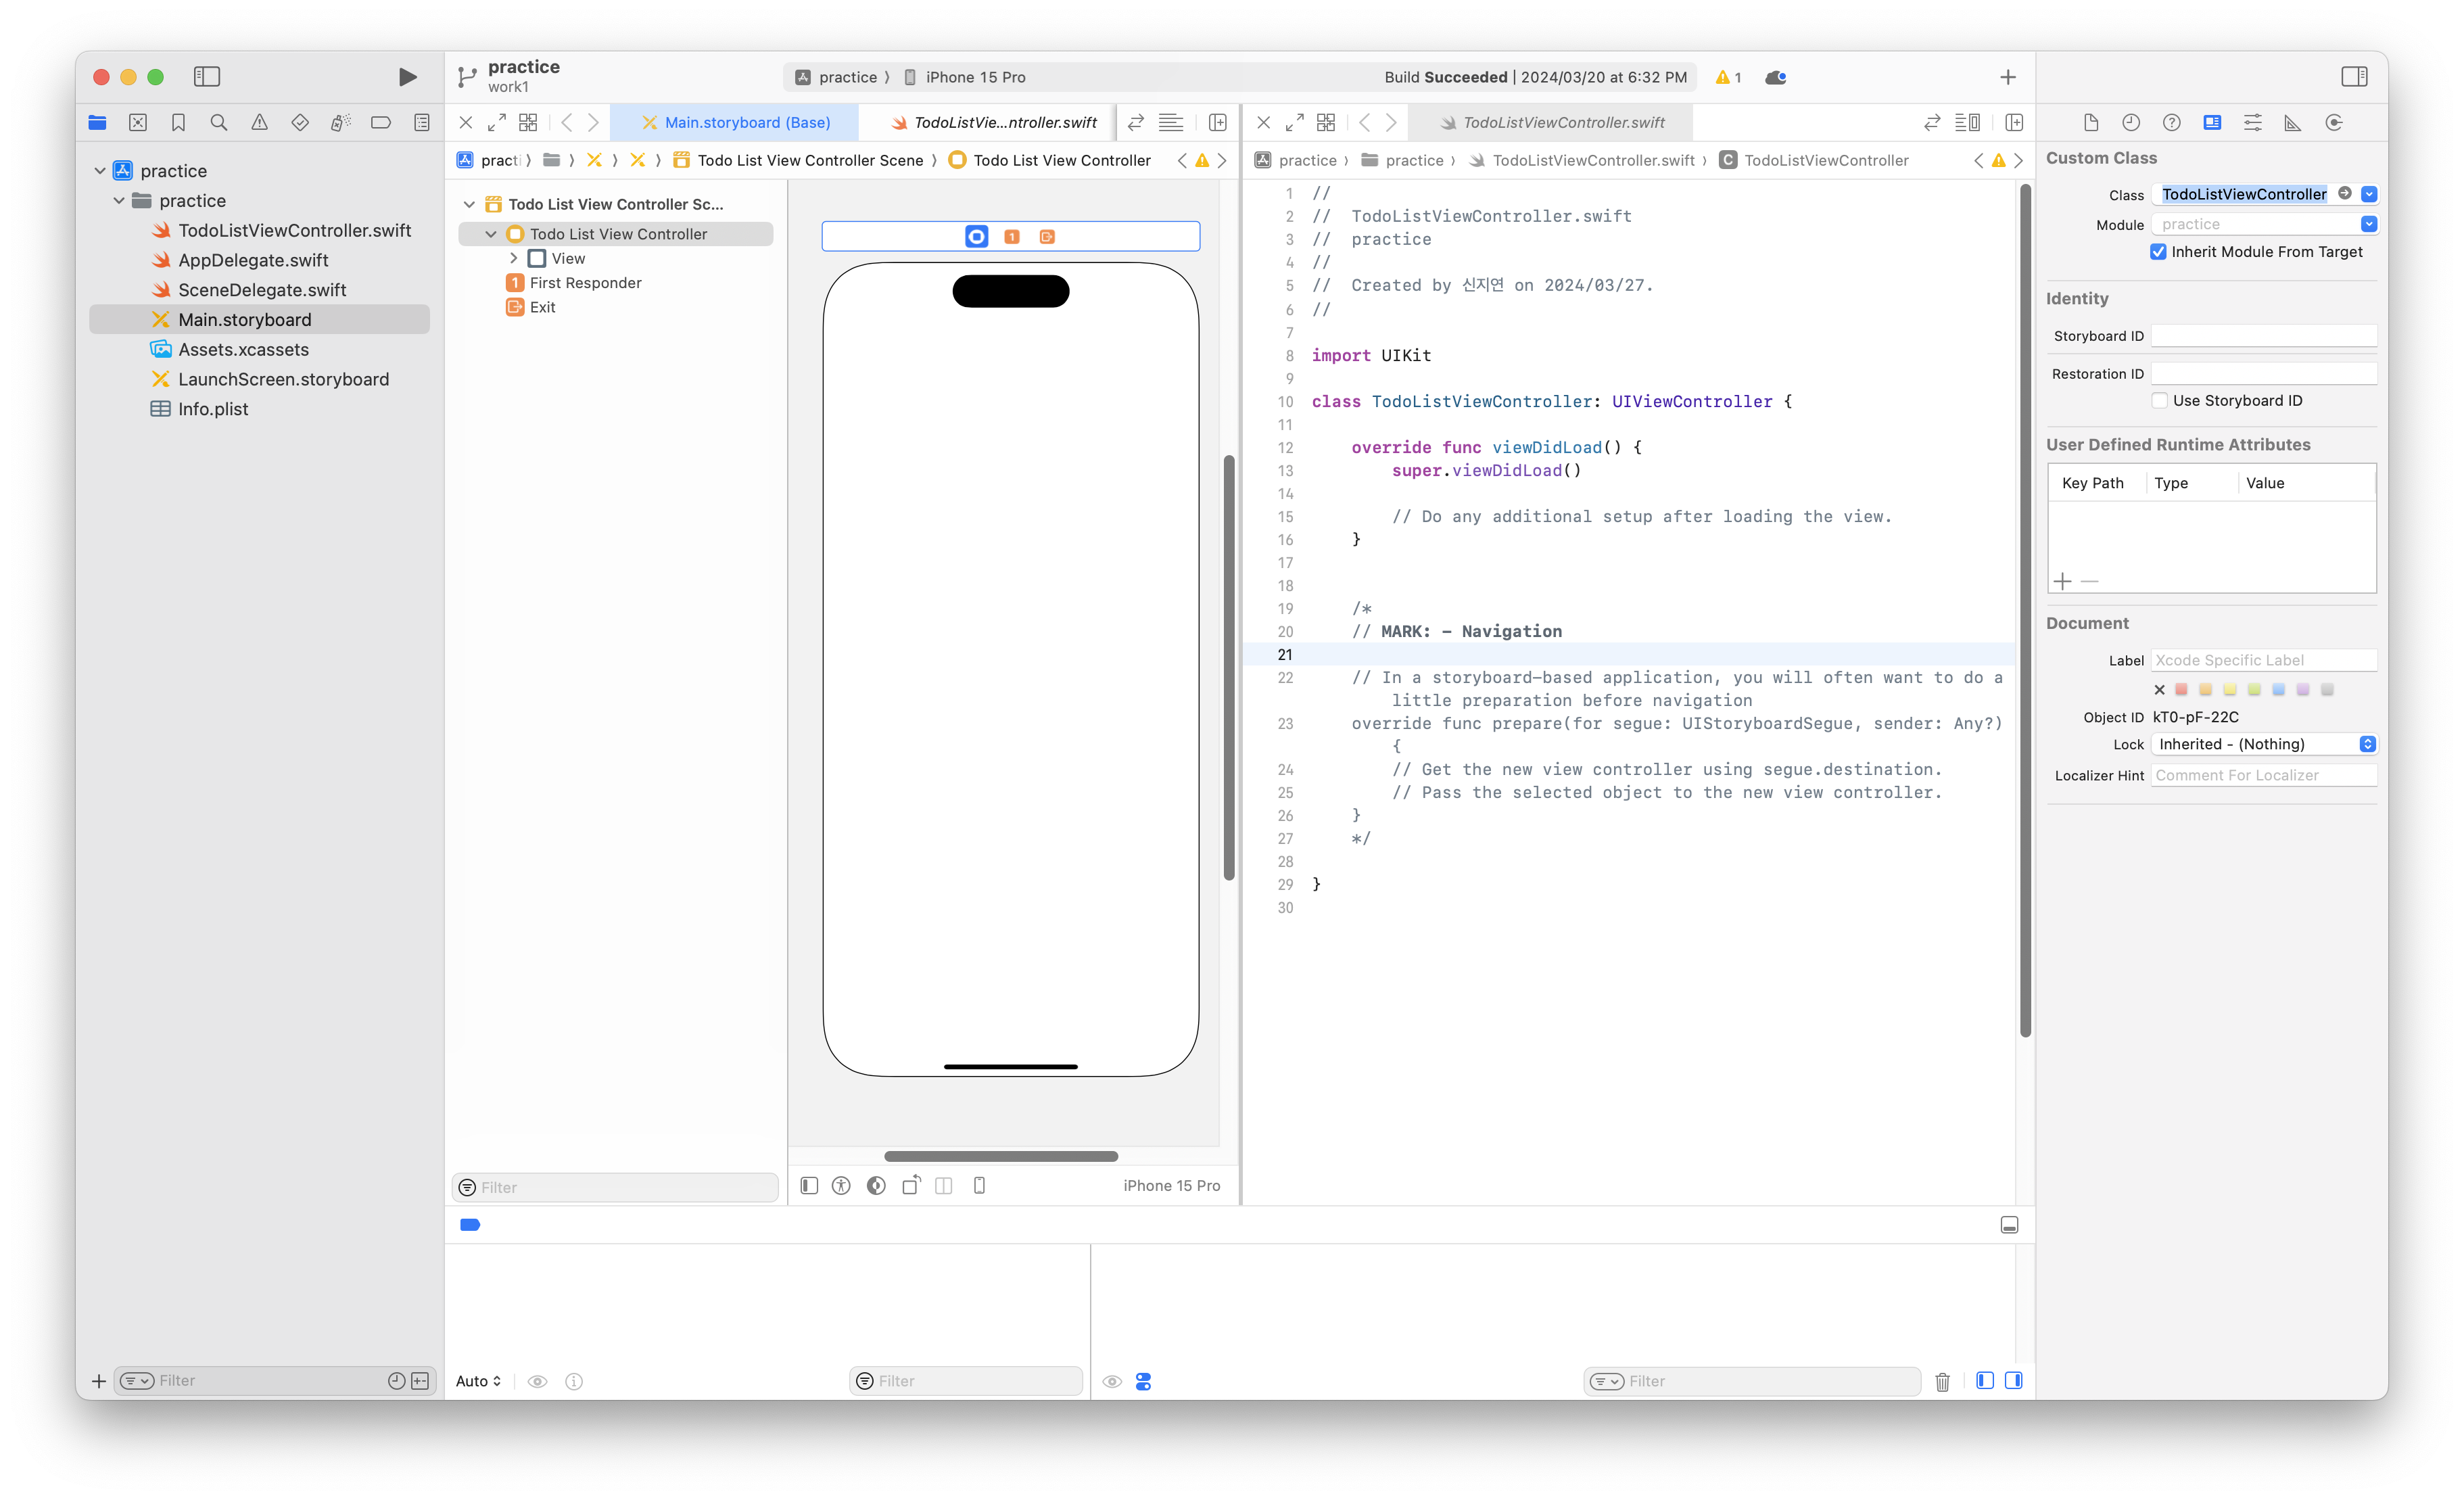
화면 좌측의 인스펙터에서 스토리보드와 파일의 연결이 잘 되어있는지 확인할 수 있다!!
📖 Storyboard를 활용하여 화면 UI 구성
그리고 이제 화면을 구성할 것이다. 일단 먼저 화면 상단에 위치할 뷰를 놓아주고 그 아래에 테이블 뷰를 놓아줄 것이다.
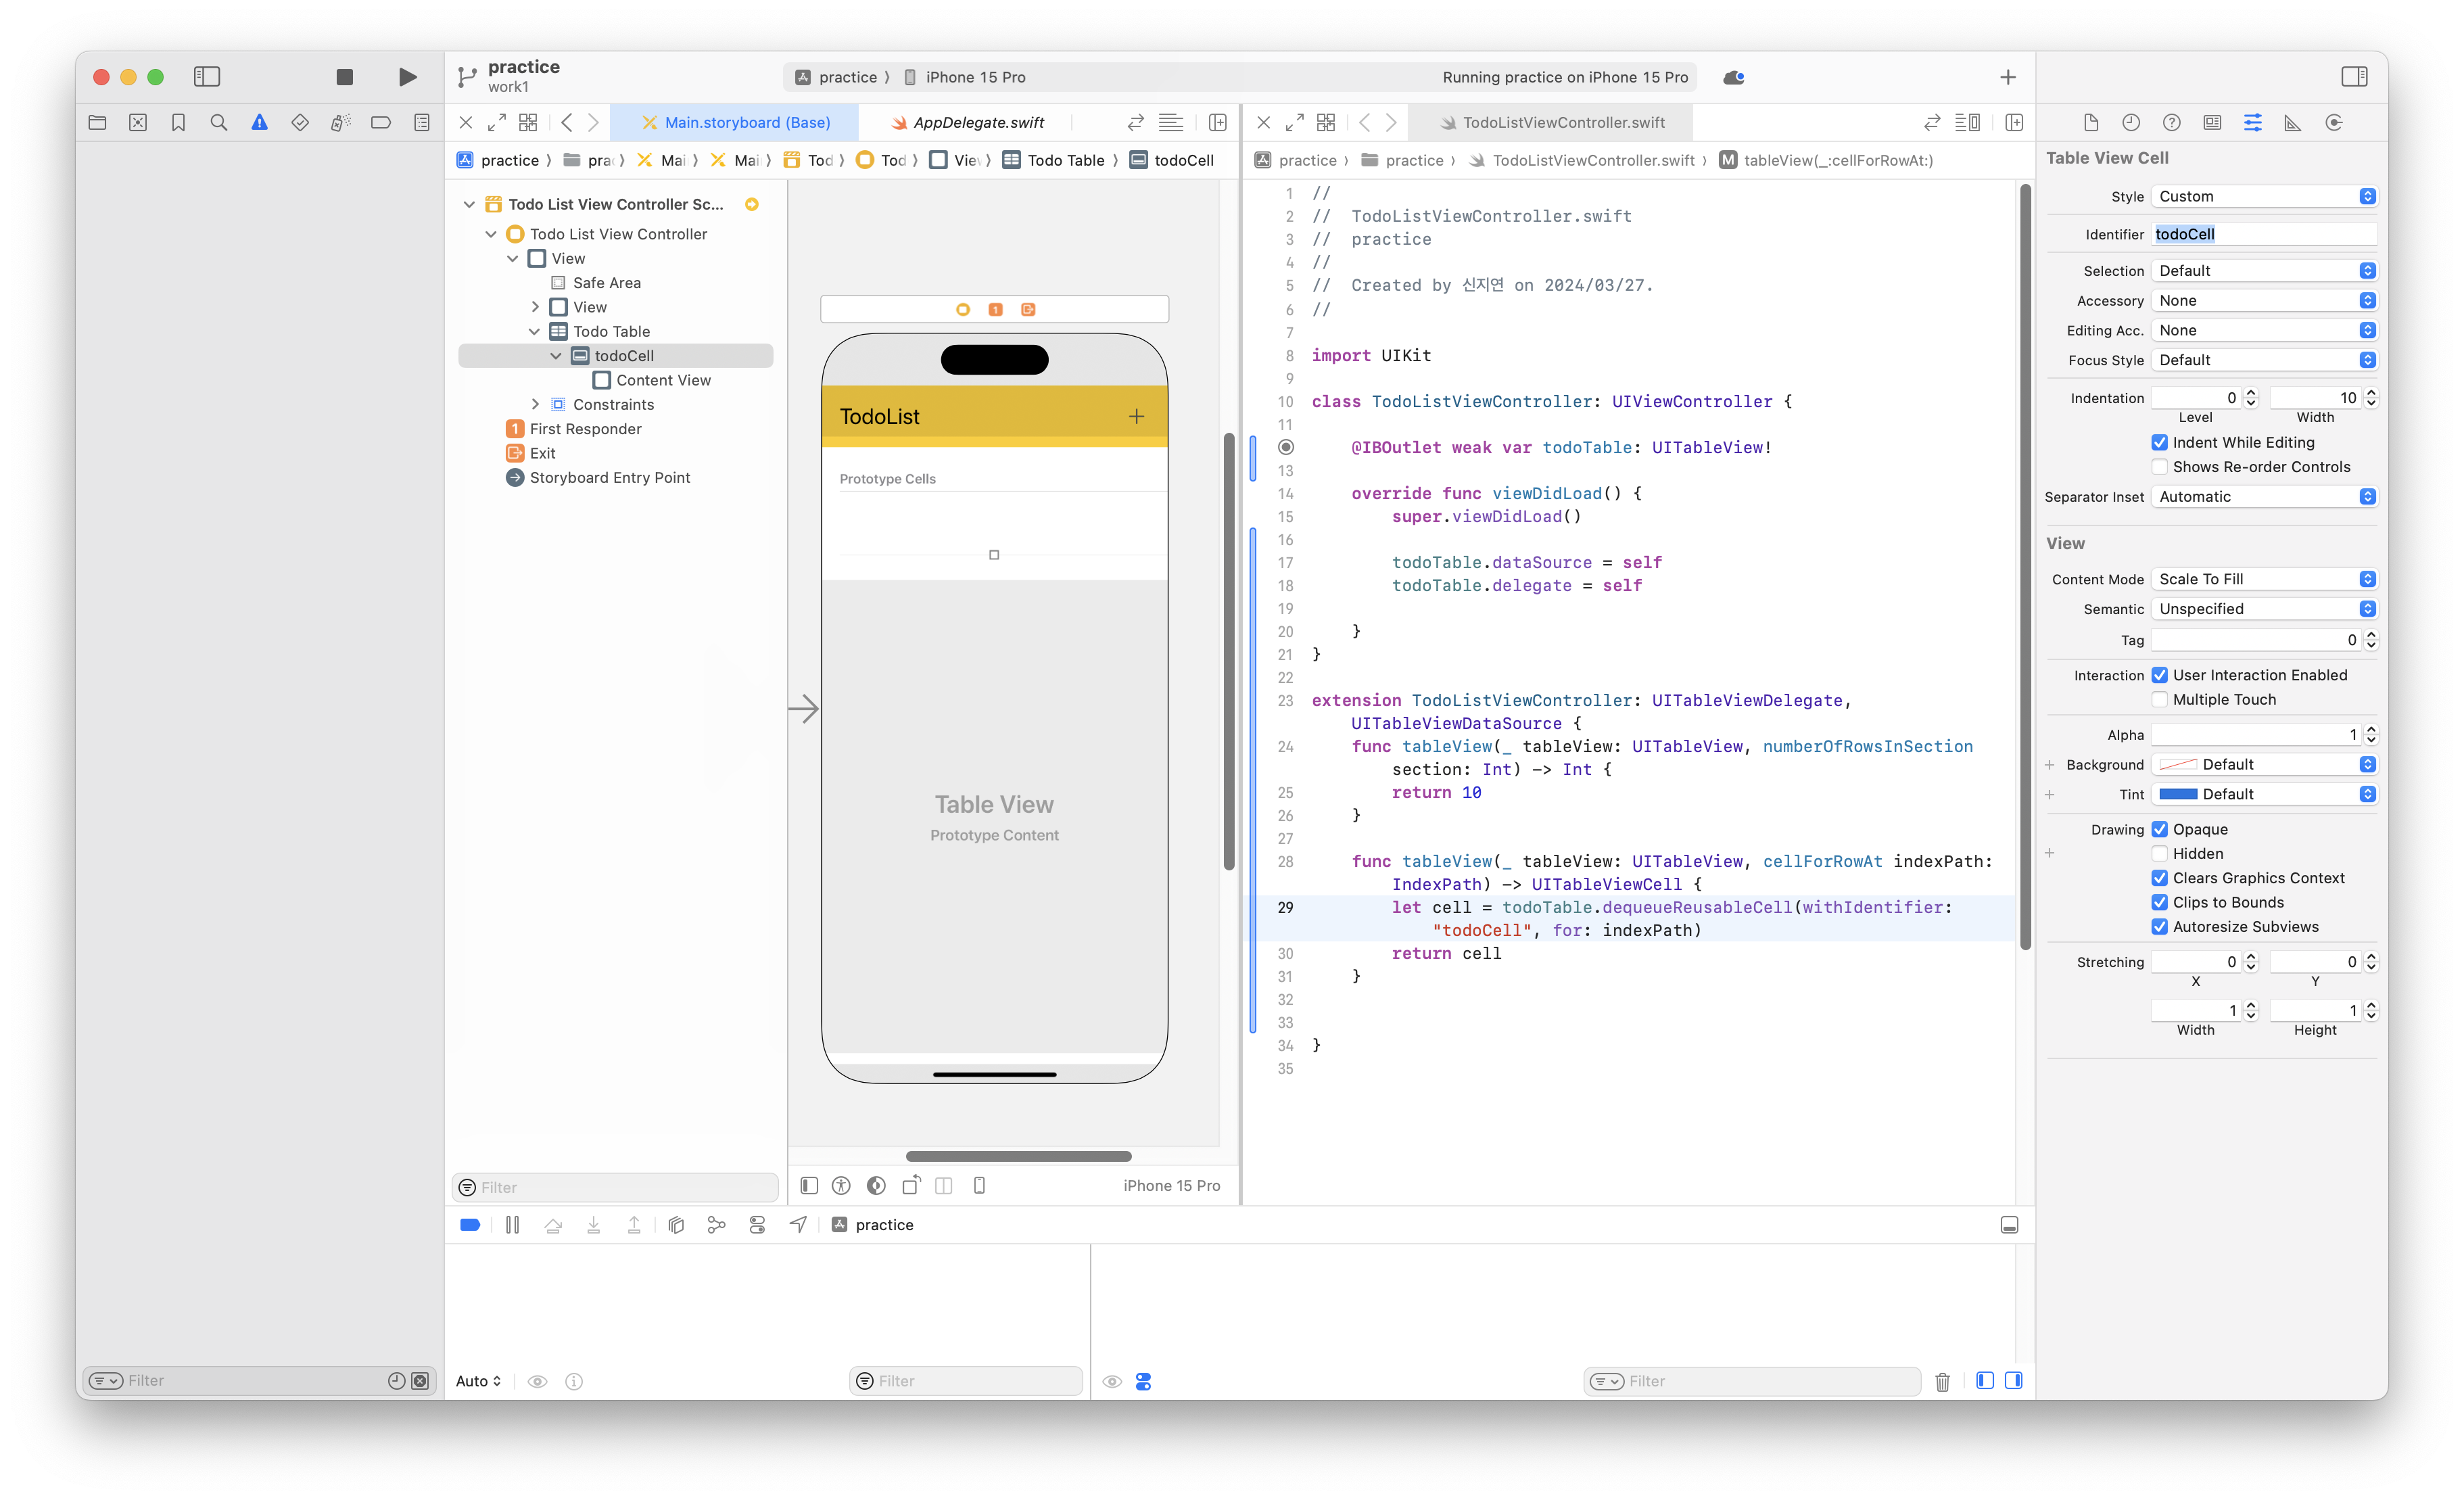
일단 다음과 같이 화면을 구성해 주었다. UIView위의 + 버튼을 통해 tableView의 셀, 즉 todo를 추가해줄 예정이다. 테이블 셀을 "todoCell"이라는 id를 가지고 스토리보드 위에 구현해주었다.
📖 필요한 데이터 구성해주기
todo에 필요한 최소한의 데이터를 생각해보았을때 고유id, 타이틀, 완료여부가 일단은 최소한의 데이터이기에 이를 구조체로 구성해주었다. 만약 추후에 더 필요하다면 추가할 계획이다.
struct Todo {
    var id: Int
    var title: String
    var isCompleted: Bool
}
📖 Todo 추가하기 버튼 기능 구현하기
이제 화면 우측 상단에 있는 + 버튼을 눌렀을 때 alert창이 생기면서 todo를 추가할 것이다. 먼저 사용자의 todo를 담을 리스트를 만들어준다.
var todoList: [Todo] = []플러스 버튼을 눌렀을때 먼저 alert창이 떠야한다. alert창에는 입력필드로 할일의 title을 받고 새로운 Todo타입을 생성해서 todoList에 append 해야한다.
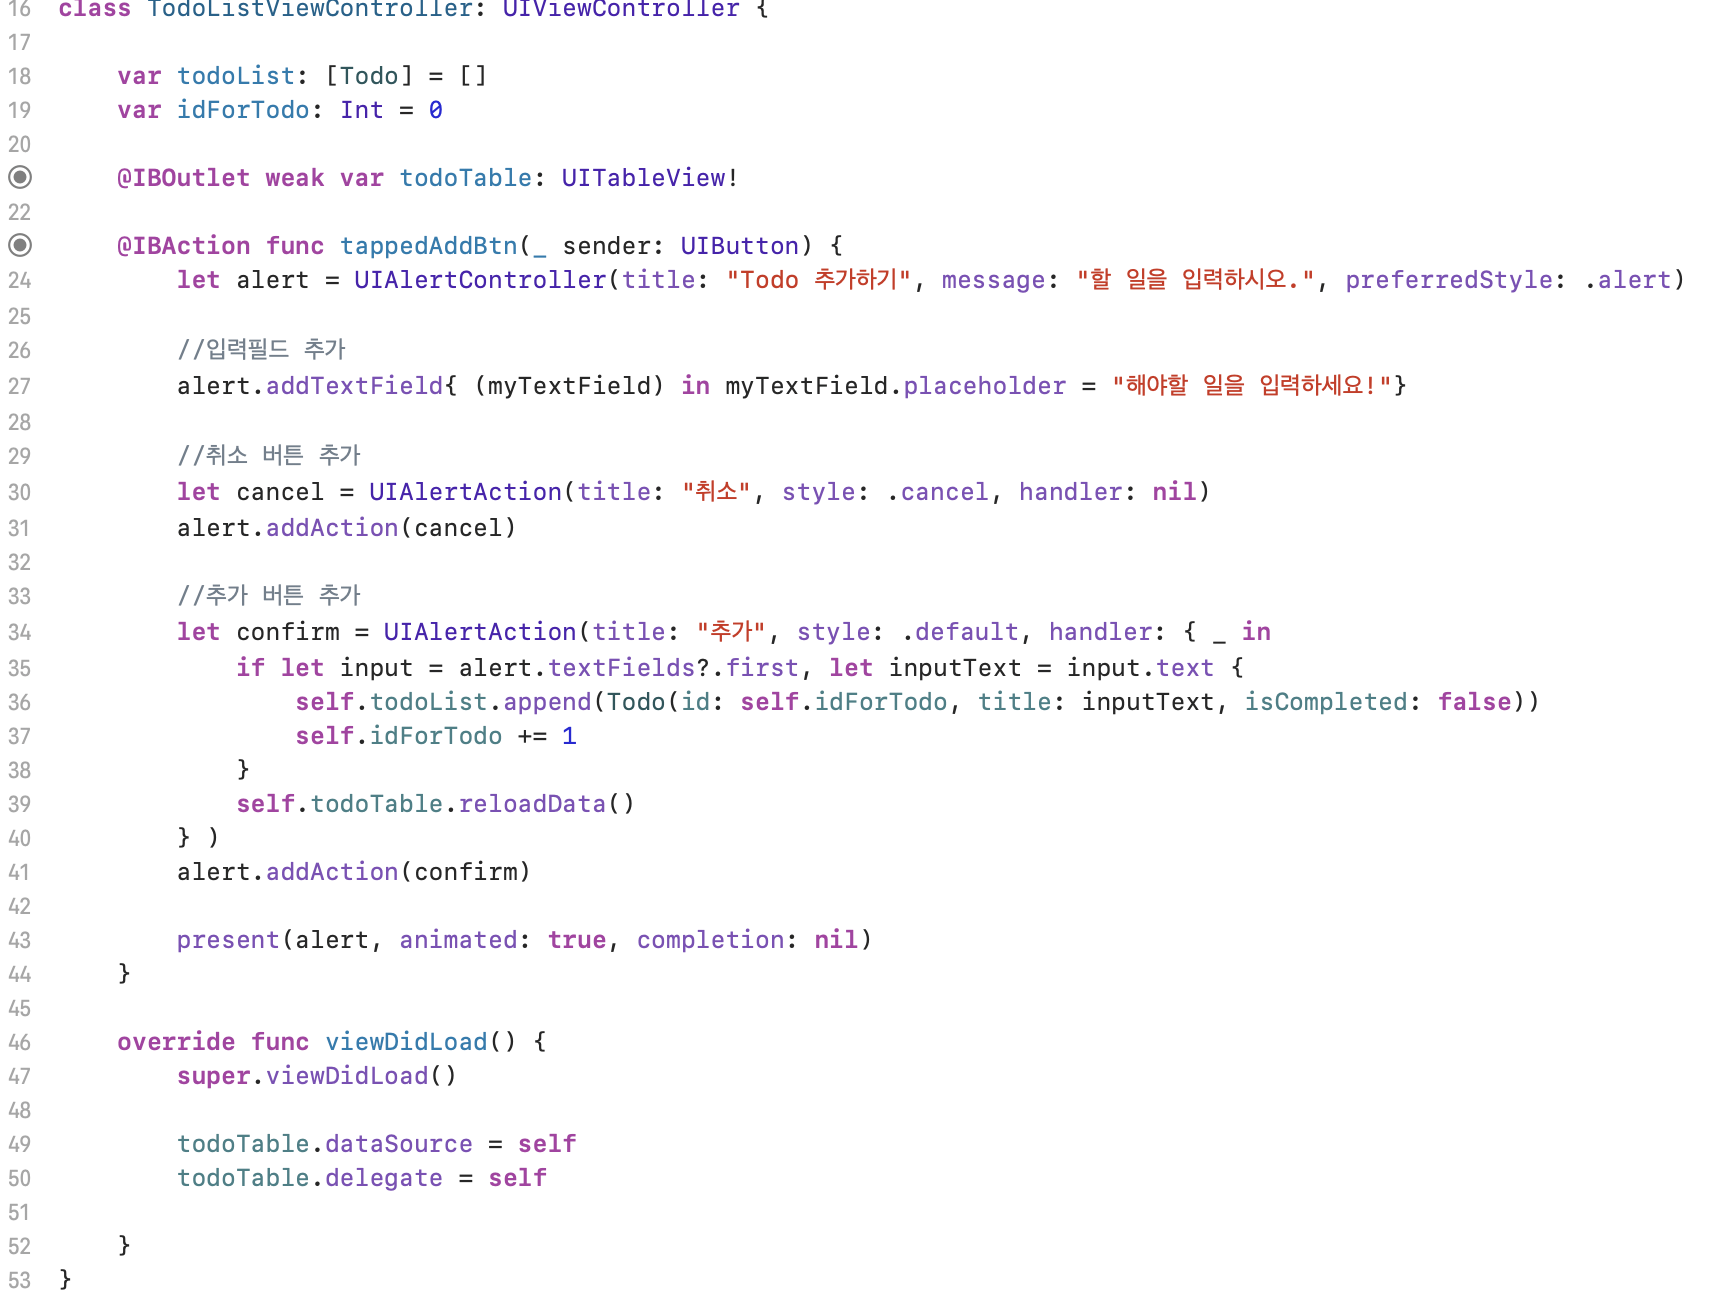
다음과 같이 화면을 구현하면

이렇게 된다. 아직 셀을 연결하지는 않았지만 todoList구조체에는 내용이 추가된다.
📖 TodoCell UI 만들고 데이터 연결하기
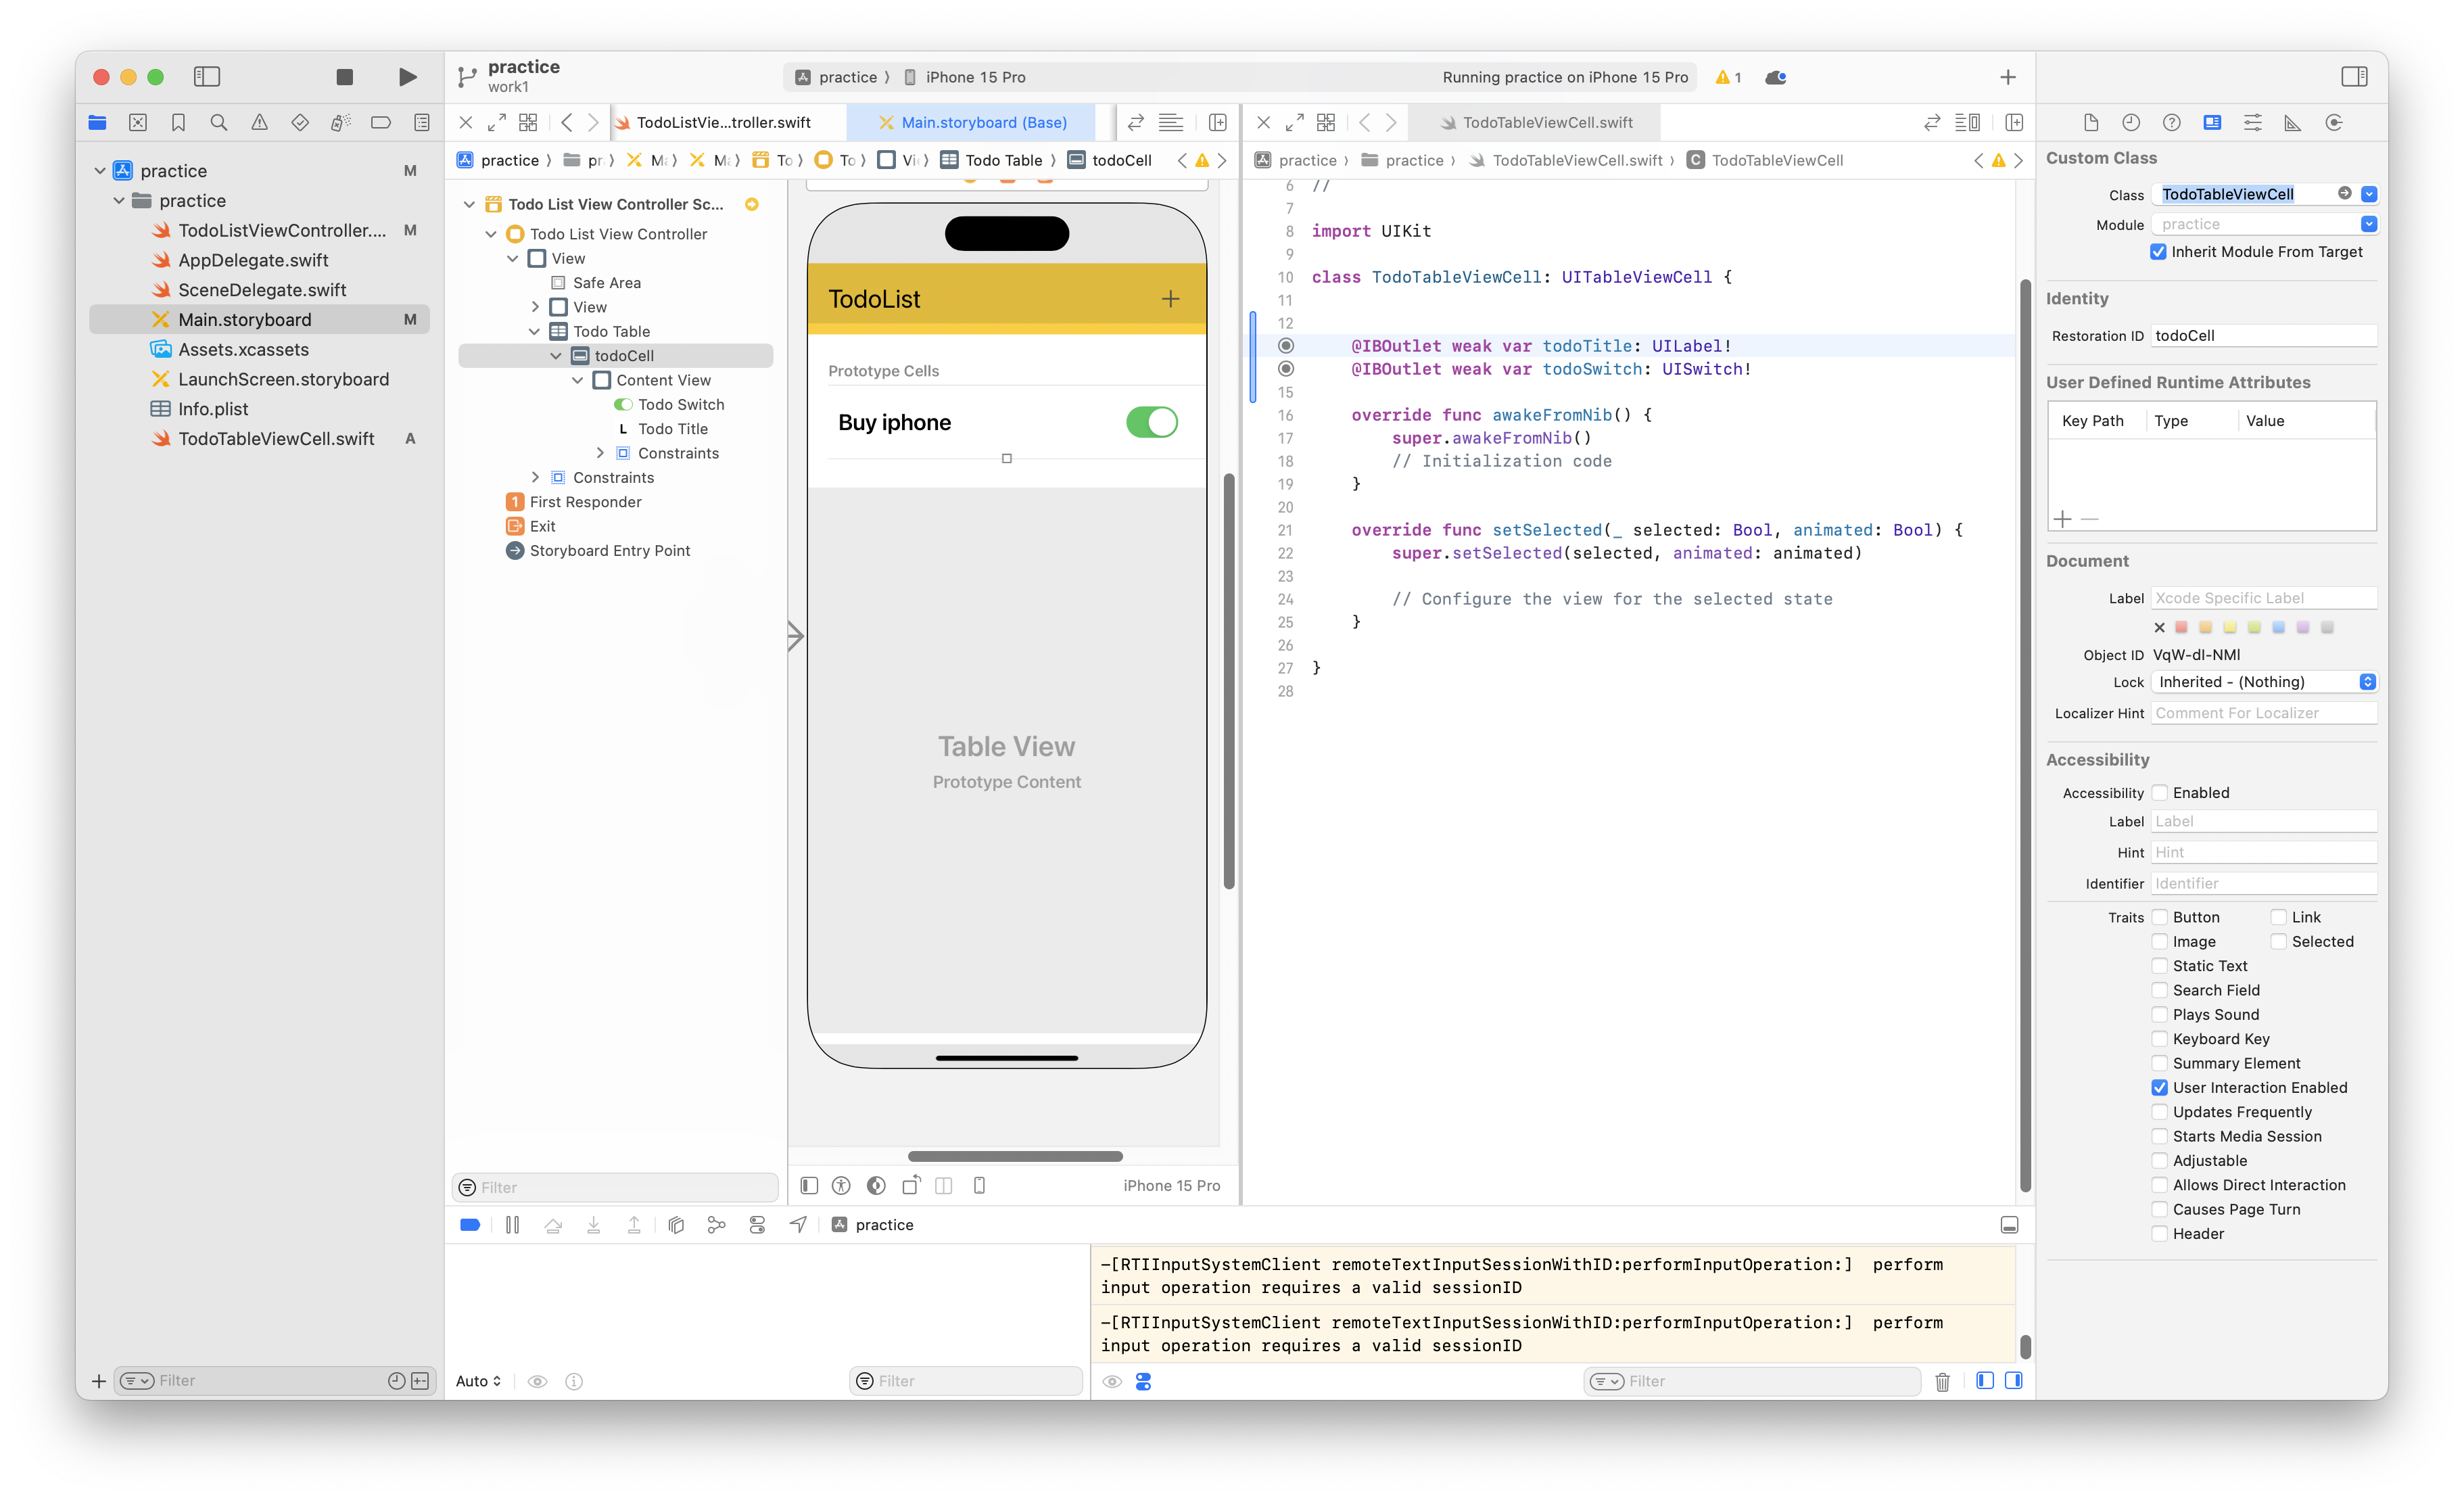
todocell은 따로 TodoTableViewCell.swift라는 파일을 만들어 다음과 같이 만들어 주었다. cell의 요소는 todo구조체의 title을 나타낼 UILabel과 완료여부를 나타낼 switch 버튼으로 구성하였다.
그리고 이제 todoList에 담겨있는 내용을 셀에 뿌려야 한다!!
먼저 cell의 갯수는 리스트이 크기와 같으므로 numberOfRowsInSection 은 다음과 같이 설정해준다.
func tableView(_ tableView: UITableView, numberOfRowsInSection section: Int) -> Int {
        return todoList.count
    }
이렇게 셀의 갯수를 맞추어 주었다면 이제는 각 셀에 구조체의 내용을 연결해줄 차례이다.
func tableView(_ tableView: UITableView, cellForRowAt indexPath: IndexPath) -> UITableViewCell {
        let cell = todoTable.dequeueReusableCell(withIdentifier: "todoCell", for: indexPath) as! TodoTableViewCell

        //데이터 뿌리기
        let todo = todoList[indexPath.row]
        cell.todoTitle.text = todo.title
        if todo.isCompleted {
            cell.todoSwitch.setOn(true, animated: true)
        } else {
            cell.todoSwitch.setOn(false, animated: true)
        }

        return cell
    }
그런데 이렇게 연결만 해서는 안된다!!! 사용자가 스위치버튼을 조작함에 따라 구조체의 isCompleted 변수의 true/false 여부도 바뀌어야 한다.
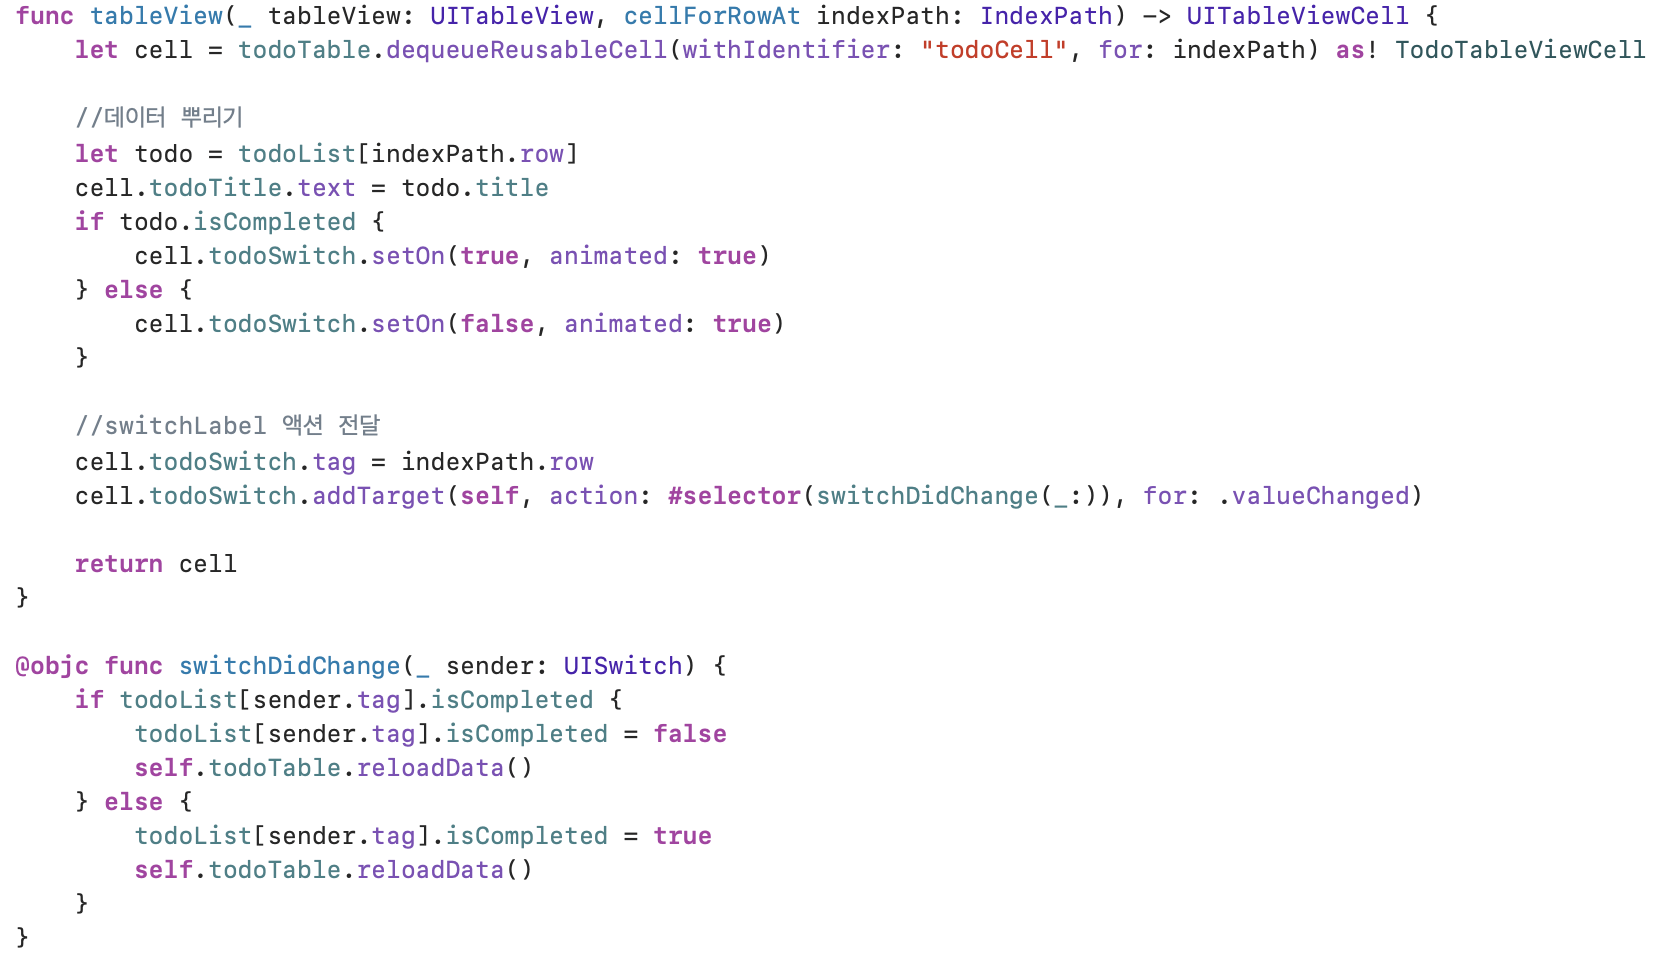
@objc
#selector를 사용하여 Objective-C의 Selector를 지정할 때, 해당 메서드는 Objective-C에서 노출되어야 한다. 즉, 해당 메서드는 @objc 어노테이션으로 표시되어야 합
아래와 같이 구현하면 다음과 같은 결과를 확인할 수 있다.
구현하고 보니 셀의 높이를 조금더 늘려주면 좋을것 같아서 아래의 코드를 추가로 구현했다.
func tableView(_ tableView: UITableView, heightForRowAt indexPath: IndexPath) -> CGFloat {
        return 80
    }
📖 TodoCell 삭제기능 추가
완료된 todo는 삭제하는 것이 좋다!! 그래서 셀을 왼쪽으로 밀었을 때 셀을 삭제하는 기능을 추가할 것이다.
editingStyleForRowAt: 특정 indexPath의 편집 스타일을 반환한다. 편집스타일에는 .delete, .insert, .none 등이 있으며 셀 당 하나의 편집스타일만 반환 가능하다.commit: 사용자가 편집 스타일을 선택하고 해당 행을 삭제하거나 다른 작업을 수행할 때 이 메서드가 호출된다.
func tableView(_ tableView: UITableView, editingStyleForRowAt indexPath: IndexPath) -> UITableViewCell.EditingStyle {
        return .delete
    }

    func tableView(_ tableView: UITableView, commit editingStyle: UITableViewCell.EditingStyle, forRowAt indexPath: IndexPath) {
        tableView.beginUpdates()
        todoList.remove(at: indexPath.row)
        tableView.deleteRows(at: [indexPath], with: .fade)
        tableView.endUpdates()
    }
최종코드
import UIKit

struct Todo {
    var id: Int
    var title: String
    var isCompleted: Bool
}

class TodoListViewController: UIViewController {

    var todoList: [Todo] = []
    var idForTodo: Int = 0

    @IBOutlet weak var todoTable: UITableView!

    @IBAction func tappedAddBtn(_ sender: UIButton) {
        let alert = UIAlertController(title: "Todo 추가하기", message: "할 일을 입력하시오.", preferredStyle: .alert)

        //입력필드 추가
        alert.addTextField{ (myTextField) in myTextField.placeholder = "해야할 일을 입력하세요!"}

        //취소 버튼 추가
        let cancel = UIAlertAction(title: "취소", style: .cancel, handler: nil)
        alert.addAction(cancel)

        //추가 버튼 추가
        let confirm = UIAlertAction(title: "추가", style: .default, handler: { _ in
            if let input = alert.textFields?.first, let inputText = input.text {
                self.todoList.append(Todo(id: self.idForTodo, title: inputText, isCompleted: false))
                self.idForTodo += 1
            }
            self.todoTable.reloadData()
        } )
        alert.addAction(confirm)

        present(alert, animated: true, completion: nil)
    }

    override func viewDidLoad() {
        super.viewDidLoad()

        todoTable.dataSource = self
        todoTable.delegate = self

    }
}

extension TodoListViewController: UITableViewDelegate, UITableViewDataSource {
    func tableView(_ tableView: UITableView, numberOfRowsInSection section: Int) -> Int {
        return todoList.count
    }

    func tableView(_ tableView: UITableView, cellForRowAt indexPath: IndexPath) -> UITableViewCell {
        let cell = todoTable.dequeueReusableCell(withIdentifier: "todoCell", for: indexPath) as! TodoTableViewCell

        //데이터 뿌리기
        let todo = todoList[indexPath.row]
        cell.todoTitle.text = todo.title
        if todo.isCompleted {
            cell.todoSwitch.setOn(true, animated: true)
        } else {
            cell.todoSwitch.setOn(false, animated: true)
        }

        //switchLabel 액션 전달
        cell.todoSwitch.tag = indexPath.row
        cell.todoSwitch.addTarget(self, action: #selector(switchDidChange(_:)), for: .valueChanged)

        return cell
    }

    @objc func switchDidChange(_ sender: UISwitch) {
        if todoList[sender.tag].isCompleted {
            todoList[sender.tag].isCompleted = false
            self.todoTable.reloadData()
        } else {
            todoList[sender.tag].isCompleted = true
            self.todoTable.reloadData()
        }
    }

    func tableView(_ tableView: UITableView, heightForRowAt indexPath: IndexPath) -> CGFloat {
        return 80
    }

}