
오늘은 싱글 페이지에서 스크롤을 이용해 전환하는 방법을 정리해보려고 합니다. 저는 styled-component를 사용하여 스타일을 적용하였습니다.
저는 아래와 같이 크게 3가지 컴포넌트를 만들어 페이지를 구성하였습니다.
Header - 네비게이션 구성
Contents - 페이지에 들어갈 내용 구성
Main - Header와 Contents를 담을 페이지
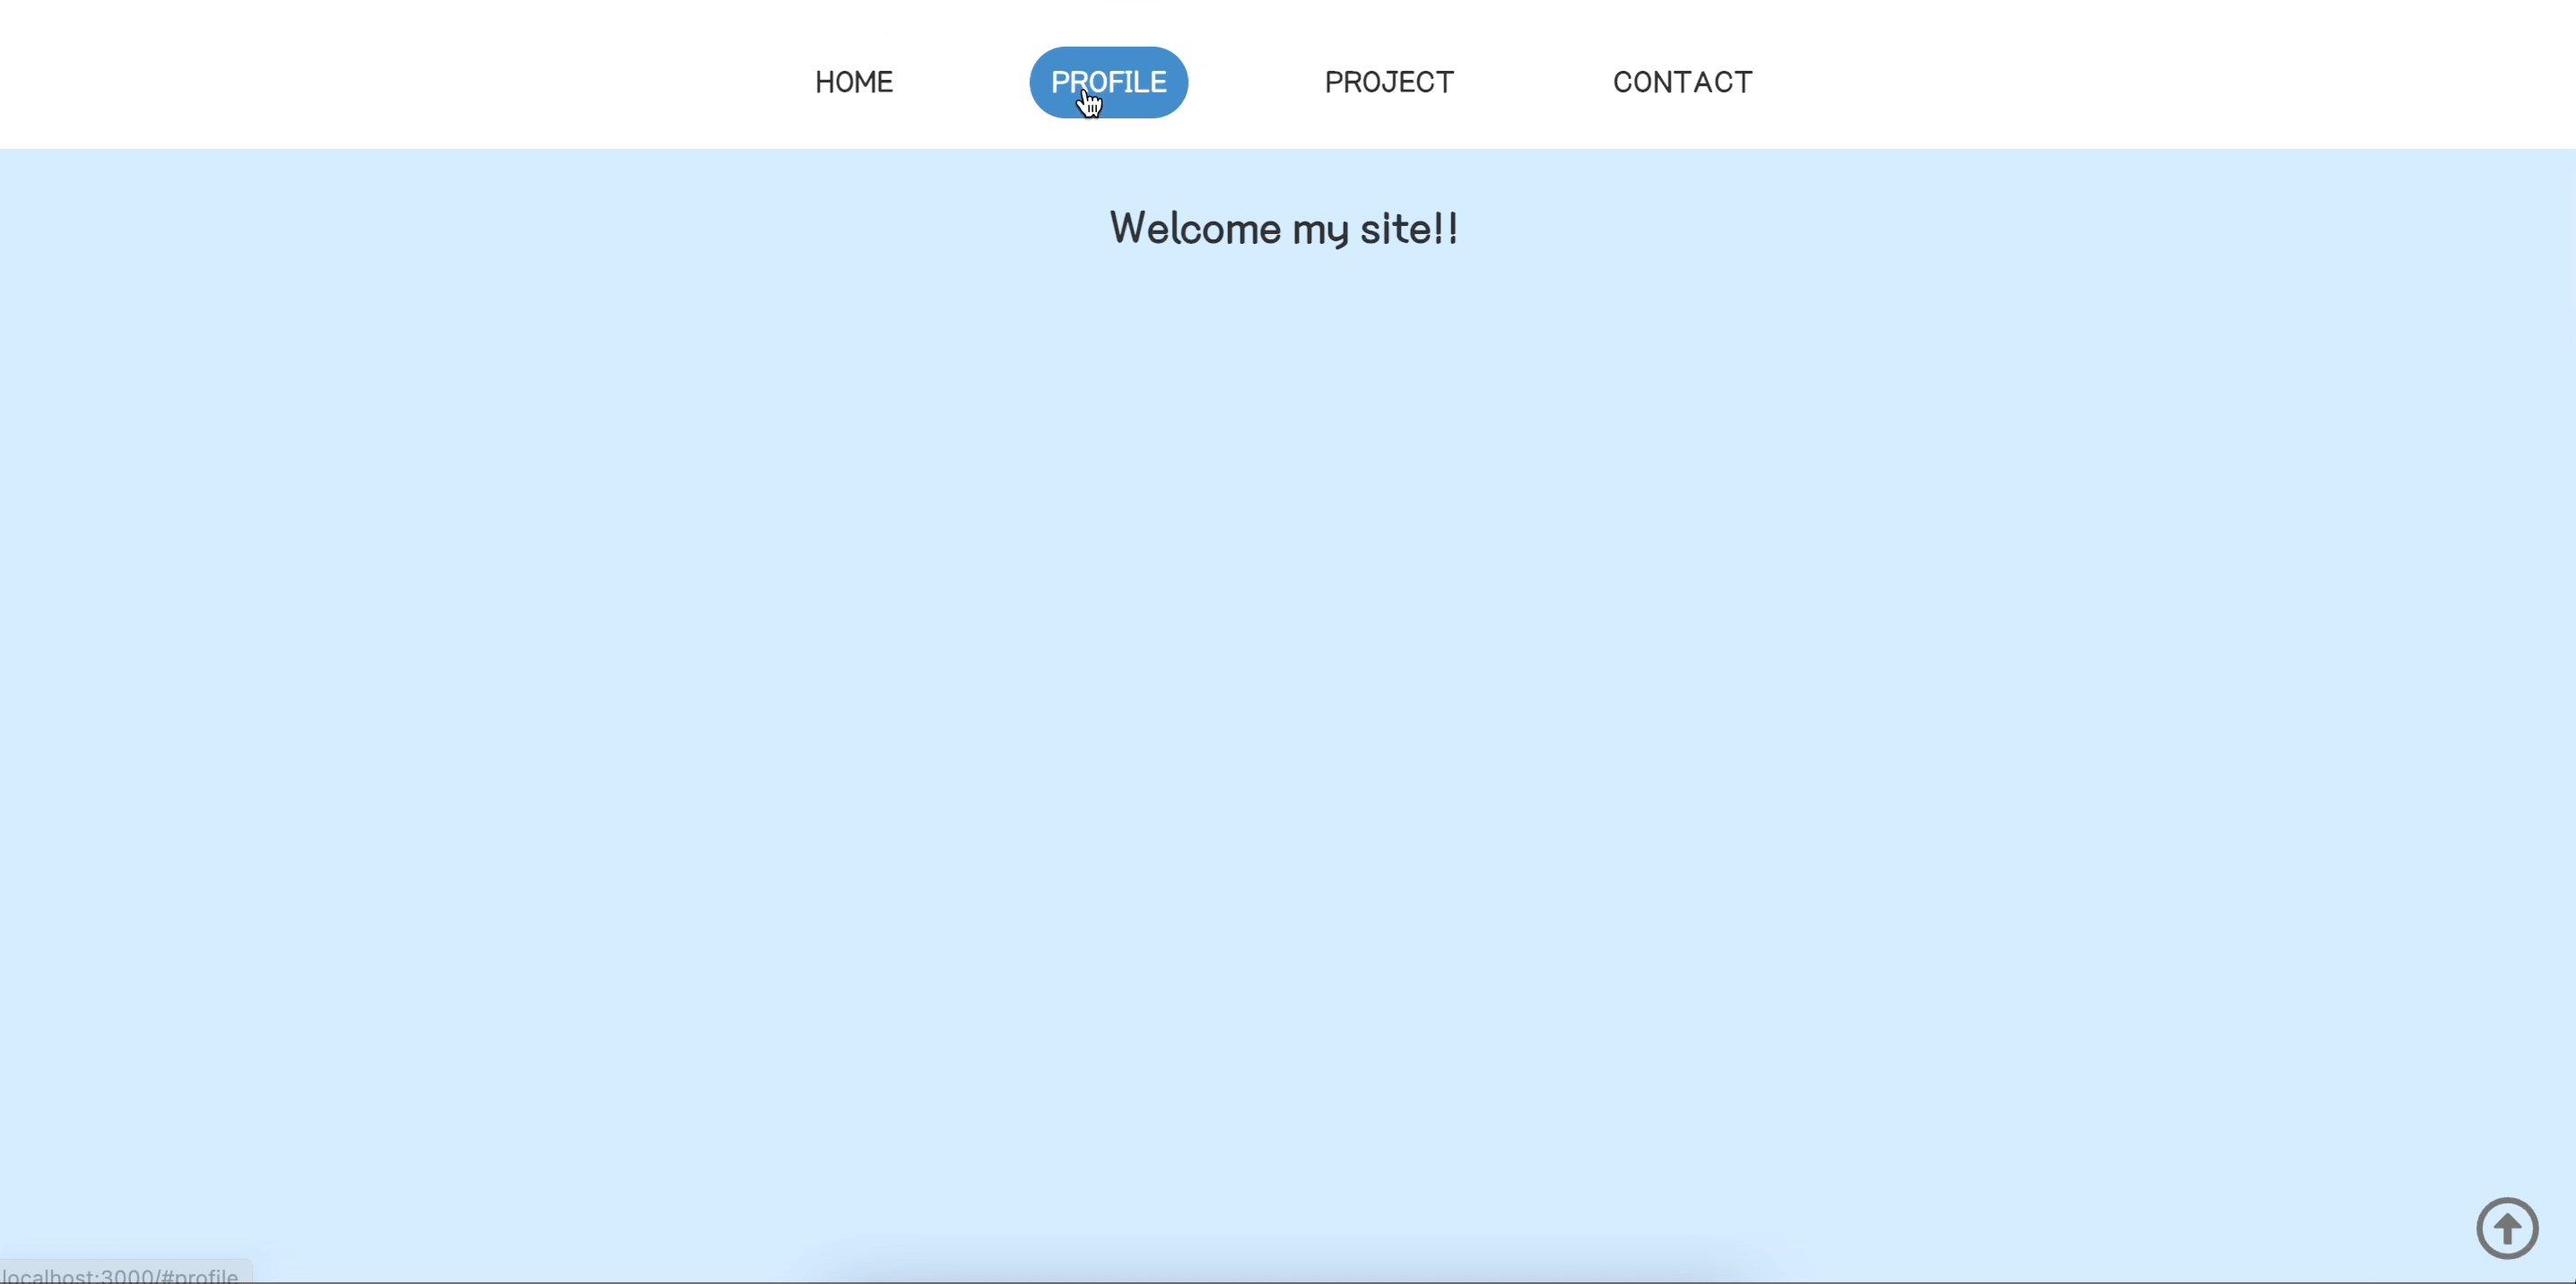
🔥 Header 만들기
ul과 li , a 태그를 스타일링하여 구성하였습니다. handleClickMenu함수에 scrollIntoView를 사용하여 해당 id를 가진 요소의 위치로 스크롤이 이동하게 구성하였습니다.
👉 ScrollIntoView()
해당 위치로 스크롤이 이동
behaivor: "smooth"를 추가하여 부드럽게 이동하게 구현할 수 있음
import React from "react";
import styled from "styled-components";
const Header = () => {
  const handleClickMenu = (e) => {
    e.preventDefault();
    if (e.target.classList.contains("menu-item")) {
      const id = e.target.getAttribute("href");
      document.querySelector(id).scrollIntoView({
        behavior: "smooth",
      });
    }
  };

  return (
    <div>
      <Menu onClick={handleClickMenu}>
        <MenuItem>
          <Link href="#home" className="menu-item">
            HOME
          </Link>
        </MenuItem>
        <MenuItem>
          <Link href="#profile" className="menu-item">
            PROFILE
          </Link>
        </MenuItem>
        <MenuItem>
          <Link href="#project" className="menu-item">
            PROJECT
          </Link>
        </MenuItem>
        <MenuItem>
          <Link href="#contact" className="menu-item">
            CONTACT
          </Link>
        </MenuItem>
      </Menu>
    </div>
  );
};

export default Header;

const Menu = styled.ul`
  display: flex;
  flex-direction: row;
  width: 50%;
  height: 54px;
  padding: 0px;
  align-items: center;
  justify-content: center;
  position: absolute;
  top: 0px;
  right: 50%;
  transform: translateX(50%);
`;

const MenuItem = styled.li`
  margin: 0px 32px;
  list-style: none;
`;

const Link = styled.a`
  font-size: 16px;
  text-decoration: none;
  color: #333;
  font-weight: bold;
  padding: 12px;
  border-radius: 20px;

  &:hover {
    background-color: #438ecc;
    color: #fff;
  }
`;
Contents 만들기
Contents는 페이지를 구성할 내용을 담을 컴포넌트로, 각각의 내용은 id로 구분하여 주었습니다. <Header />에서 클릭된 아이템의 id와 일치하는 id를 가진 영역으로 스크롤이 이동됩니다.
import React from "react";
import styled from "styled-components";
import Home from "./contents/Home";
import Profile from "./contents/Profile";
import Project from "./contents/Project";
import Contact from "./contents/Contact";

const Contents = () => (
  <Container>
    <ContentsWrapper id="home" bgColor="#d4ecff">
      <Home />
    </ContentsWrapper>
    <ContentsWrapper id="profile">
      <Profile />
    </ContentsWrapper>
    <ContentsWrapper id="project" bgColor="#d4ecff">
      <Project />
    </ContentsWrapper>
    <ContentsWrapper id="contact" bgColor="#133f63">
      <Contact />
    </ContentsWrapper>
  </Container>
);

export default Contents;
const Container = styled.div`
  display: flex;
  width: 100vw;
  flex-direction: column;
  align-items: center;
  margin-top: 80px;
`;

const ContentsWrapper = styled.div`
  width: 100%;
  height: 100vh;
  background-color: ${(props) => (props.bgColor ? props.bgColor : "#fff")};
`;
Main 만들기
<Header /> 와 <Contents />를 담아주기 위하여 저는 Main라는 이름의 컴포넌트를 하나 추가해주었습니다.
/* event Delegation을 사용한 nav 구현 */
import React from "react";
import styled from "styled-components";
import Contents from "./contents";
import Header from "./header";
const Main = () => {
  return (
    <Container>
      <Header />
      <Contents />
    </Container>
  );
};

export default Main;

const Container = styled.div`
  display: flex;
  width: 100vw;
  flex-direction: column;
  align-items: center;
  position: relative;
`;
그리고 마지막으로 만들어준 컴포넌트들을 App 컴포넌트 내에 추가하여 줍니다. 추가적으로 다시 상단으로 이동하기 위해 버튼을 하나 만들어주었습니다.
import React from "react";
import Contents from "./scorllPage/index";
import styled from "styled-components";
import { FaRegArrowAltCircleUp } from "react-icons/fa";

const App = () => {
   const handleScrollToTop = () => {
    window.scrollTo({
      top: 0,
      behavior: "smooth",
    });
  };
  return (
    <Container>
      <Button size="36px" color="#767676" onClick={handleScrollToTop} />
	  <ScrollPage />
    </Container>
  );
};

const Container = styled.div`
  position: relative;
`;
const Button = styled(FaRegArrowAltCircleUp)`
  position: fixed;
  bottom: 20px;
  right: 20px;
  z-index: 1000;
  outline: none;
`;

개발 기록💻