
💚state
변경될 수 있는 값
💛클래스형 컴포넌트에서 state
클래스형 컴포넌트에서는 컴포넌트 생성자 메서드인 constructor()를 이용하여 state를 설정할 수 있습니다. 이 때, 반드시 super(props)를 호출해주어야 합니다.
class Counter extends React.Component{

    constructor(props) {
        super(props);
        this.state = {
            num : 0
        };
    }
    render(){
        const {num} = this.state;

        return (
            <div>
                <h1><strong>COUNTER</strong></h1>
                <h2>{num}</h2>
                <button onClick={ () => {
                    this.setState({num : num + 1});
                }}>증가</button>
            </div>
        );
    }
}
또 다른 방법은 constrouctor()대신에 객체 형태로 state를 직접 추가해주는 것입니다.
class Home extends React.Component{

    state = {
        num : 0
    };

    render(){
        const {num} = this.state;

        return (
            <div>
                <h1><strong>COUNTER</strong></h1>
                <h2>{num}</h2>
                <button onClick={ () => {
                    this.setState({num : num + 1});
                }}>증가</button>
            </div>
        );
    }
}
💛함수형 컴포넌트에서 state
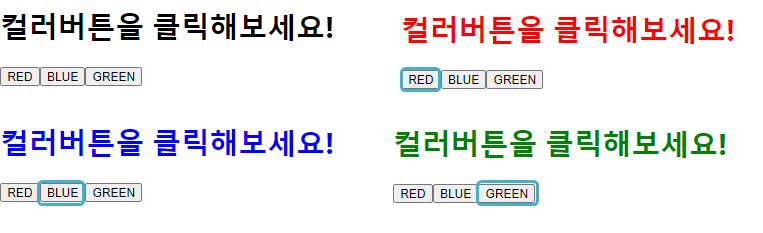
함수형 컴포넌트에서는 useState()를 사용하여 state를 설정합니다. useState()는 두가지 인자를 가지는, 현재상태와 상태를 바꿔주는 함수가 있습니다.
아래 코드는 버튼에 따라 글자의 색이 변하는 코드예시 입니다.
const ColorMessage = () => {
  const [color, setColor] = useState("");
  const onClickColorBtn = (e) => {
    setColor(e.target.value);
  };

  return (
    <div>
      <h1 id="text" style={{color}}> 컬러버튼을 클릭해보세요!</h1>
      <button value="red" onClick={onClickColorBtn}>
        RED
      </button>
      <button value="blue" onClick={onClickColorBtn}>
        BLUE
      </button>
      <button value="green" onClick={onClickColorBtn}>
        GREEN
      </button>
    </div>
  );
};
참고 자료 및 사이트

개발 기록💻