
스프링 프로젝트 생성
스프링 파일 생성 사이트
https://start.spring.io/
Dependency는Thymeleaf, Spring Web추가
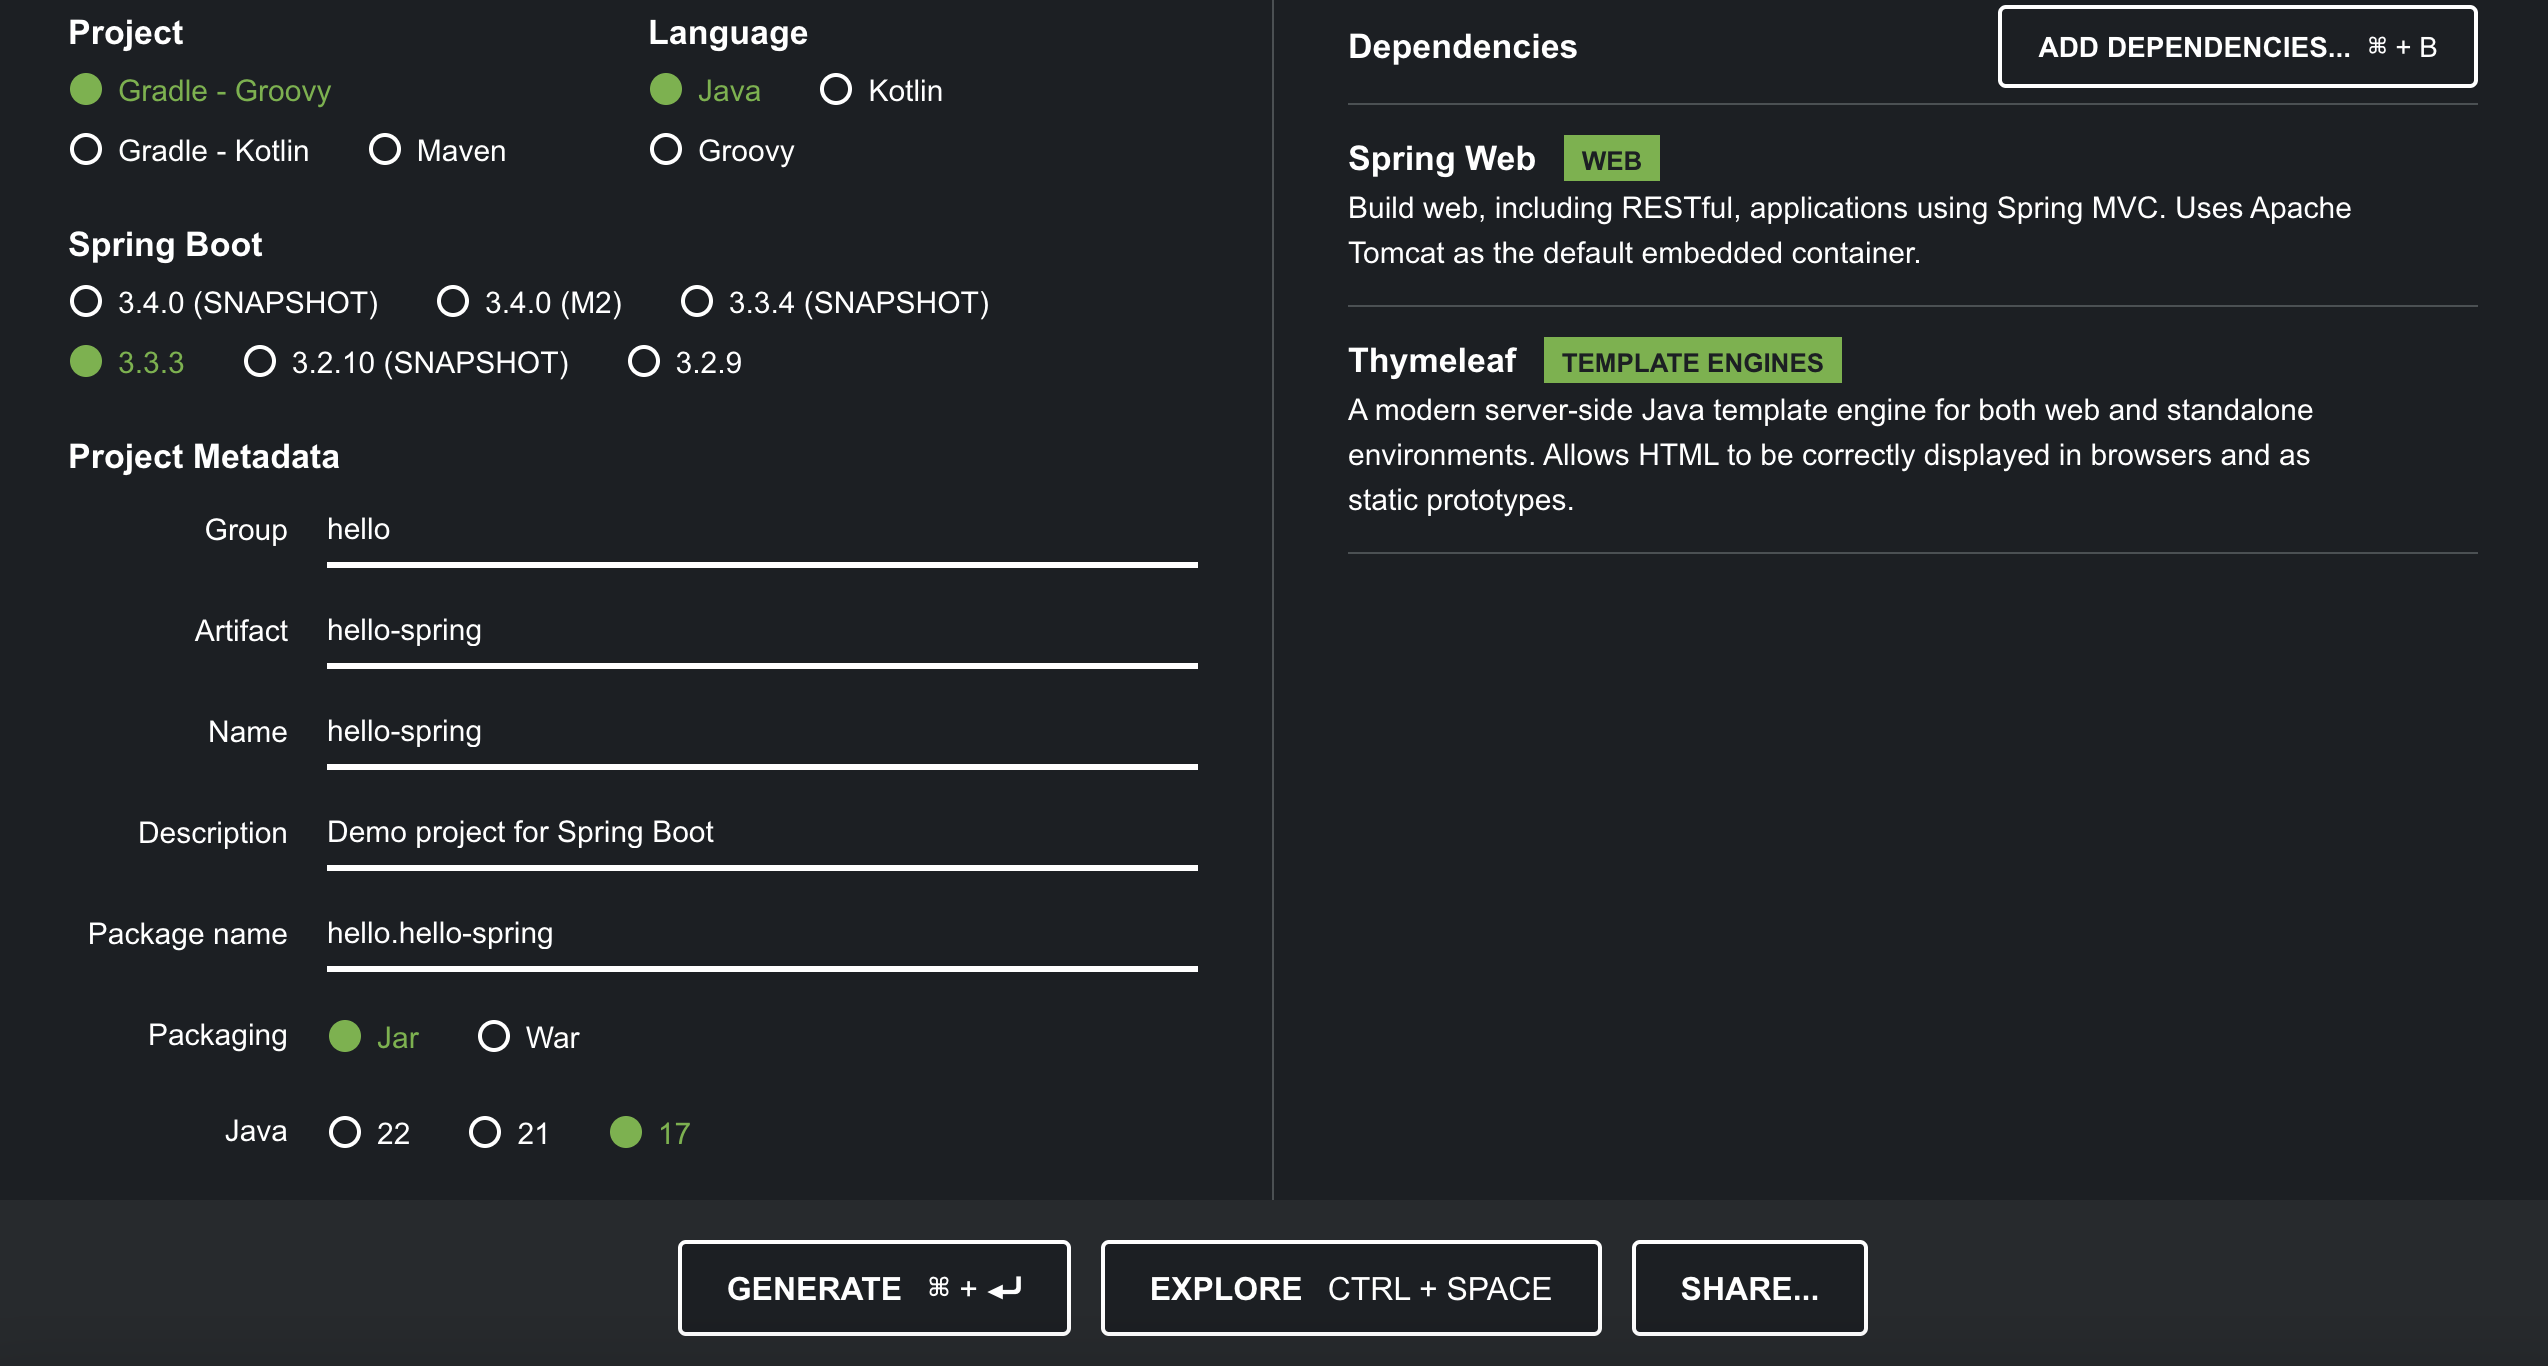
이후 GENERATE를 통해 파일 생성후 인텔리제이에서 Open
기본 실행은 HelloSpringApplication.java를 실행시켜주면 된다.
package hello.hello_spring;

import org.springframework.boot.SpringApplication;
import org.springframework.boot.autoconfigure.SpringBootApplication;

@SpringBootApplication
public class HelloSpringApplication {

	public static void main(String[] args) {
		SpringApplication.run(HelloSpringApplication.class, args);
	}

}
HelloSpringApplication.class클래스를SpringApplication.run에 넣으면SpringBoot의 애플리케이션이 실행이 되는 원리이다.
실행 후localhost:8080에 들어가게 되면 웹사이트가 뜨게 된다.
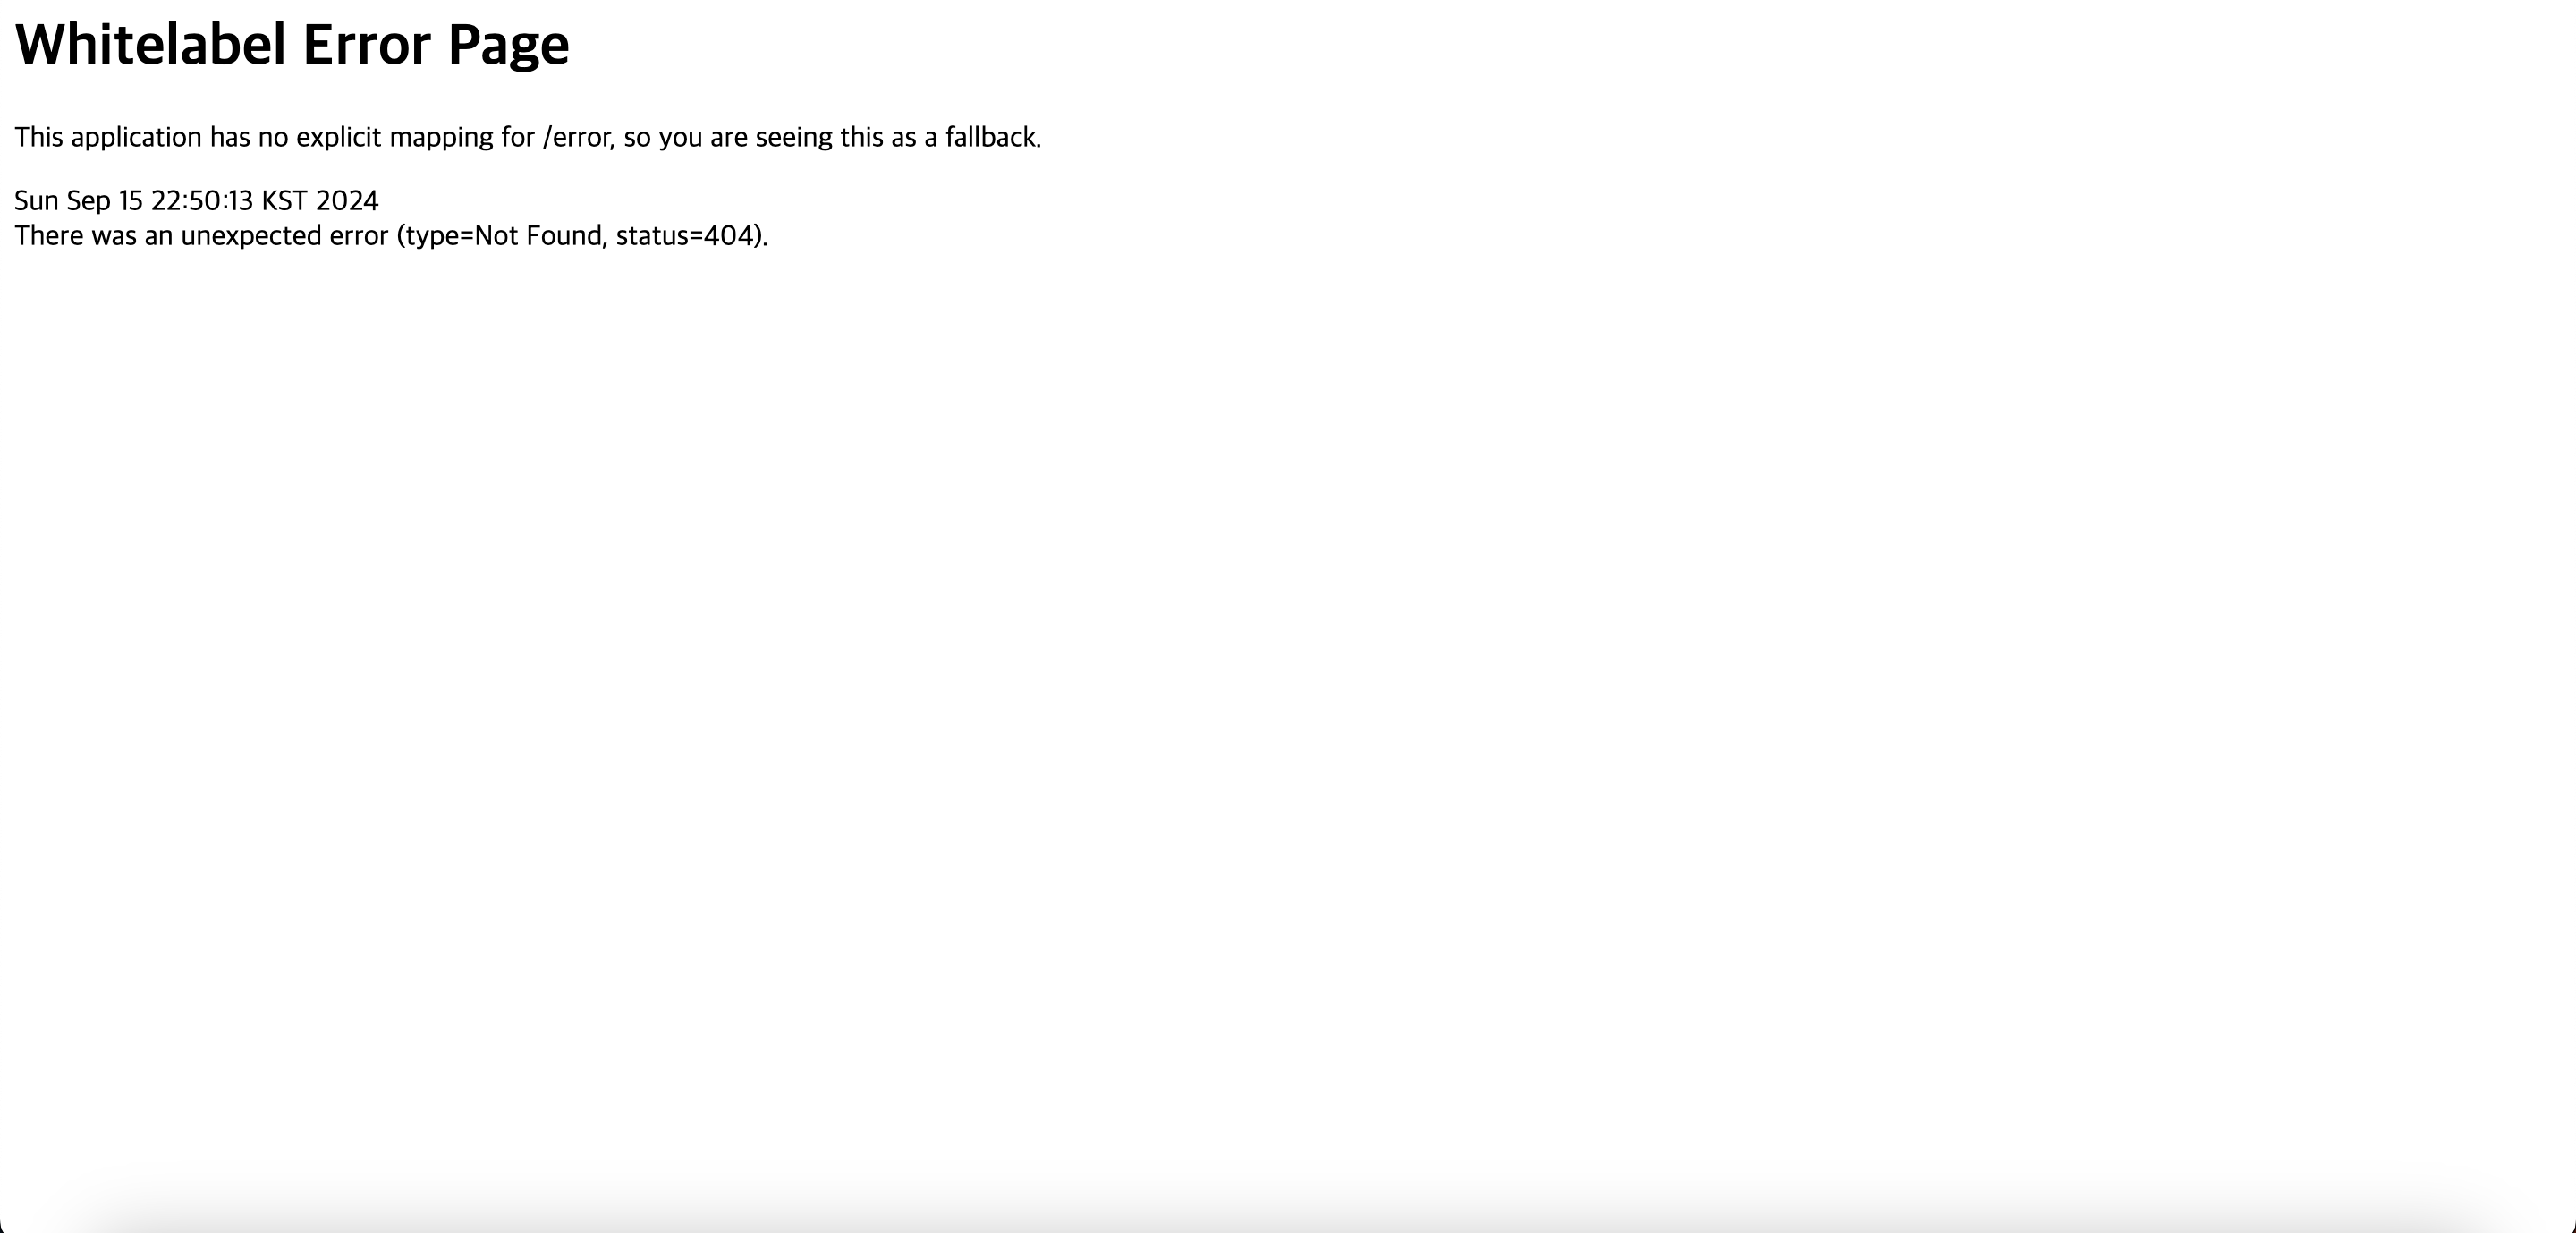
그러면 다음과 같은 에러 창이 뜨는데 이렇게 뜨면 성공이다.
과정
Spring Boot는 기본적으로Tomcat이라는 내장 웹 서버를 포함하고 있다.Tomcat 실행:HTTP요청을 처리할 준비를 한다.포트 바인딩:8080포트에 바인딩되며, 애플리케이션이 해당 포트에서HTTP 요청을 받을 준비를 한다.
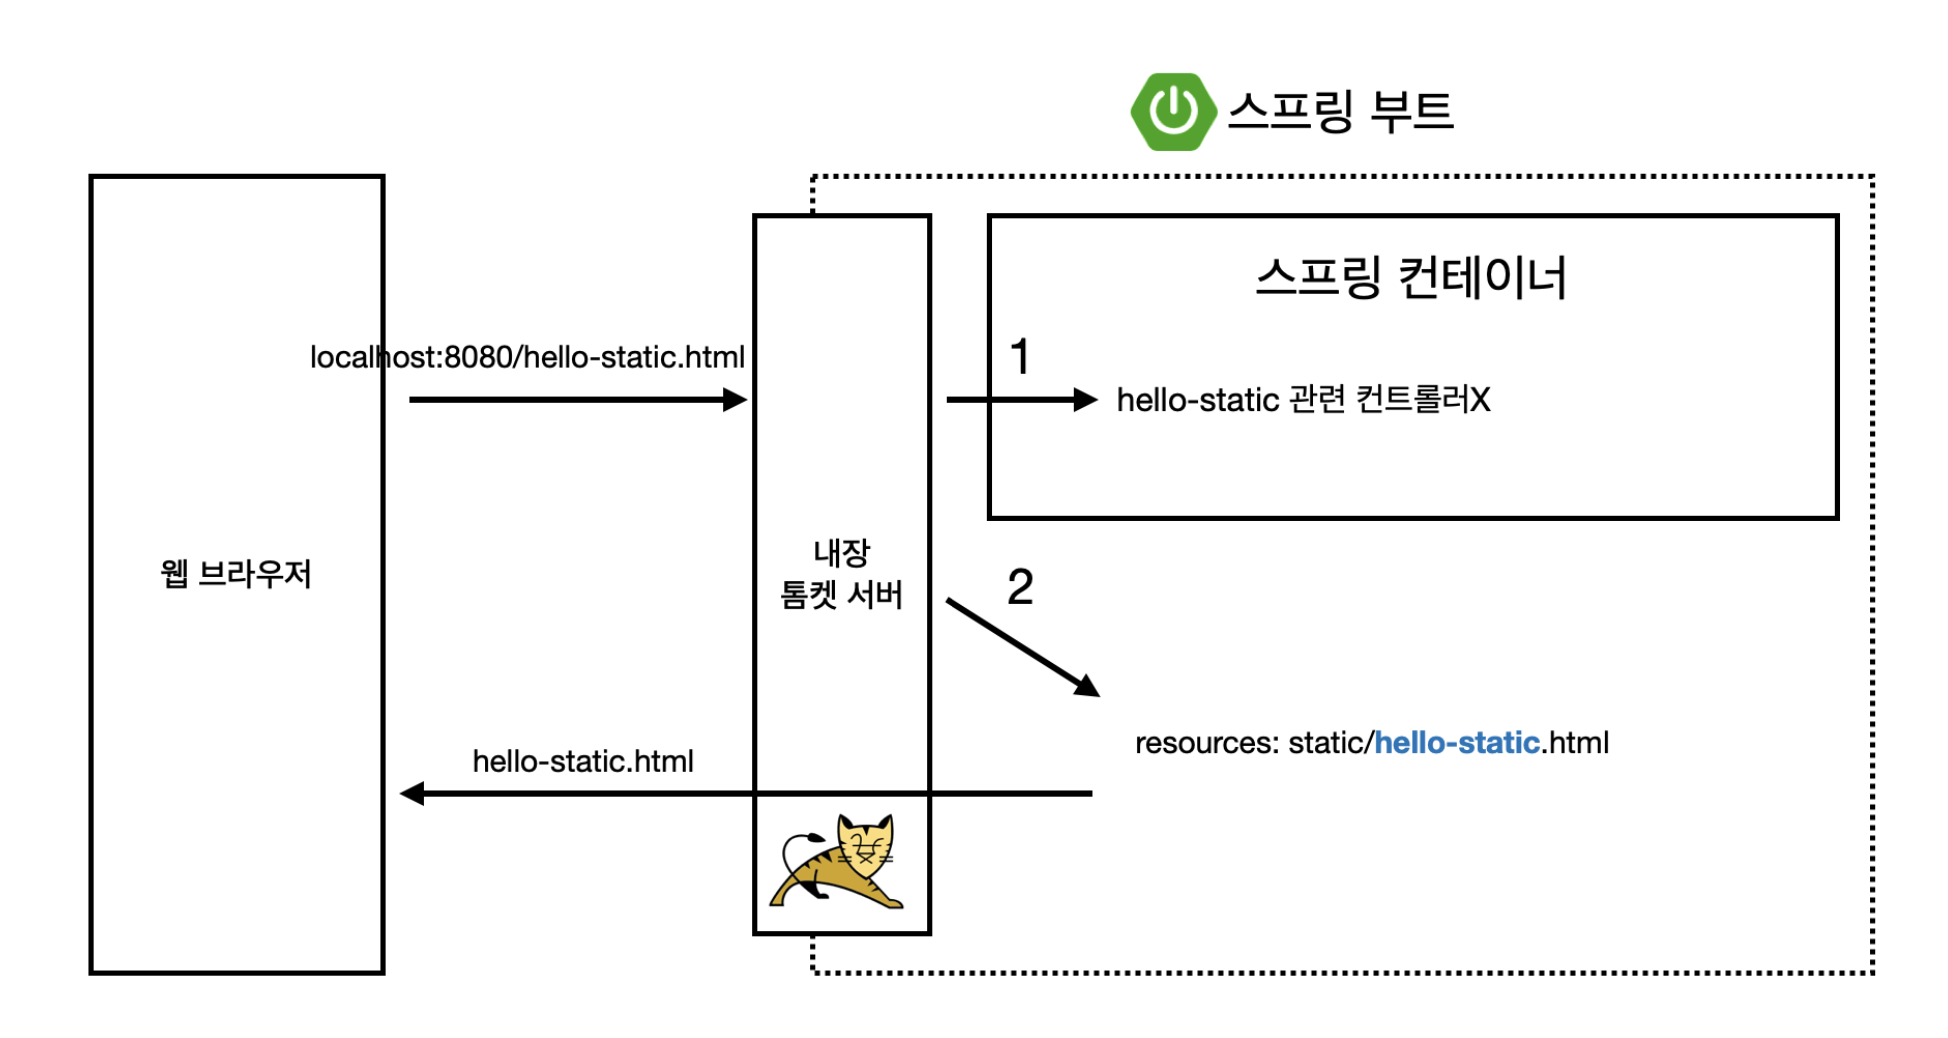
기본 정적 화면
- 스프링 부트는
resources/static/index.html파일을 만들어주면
자동으로 Welcome Page가 웹상에서 뜨게 된다.(정적파일)
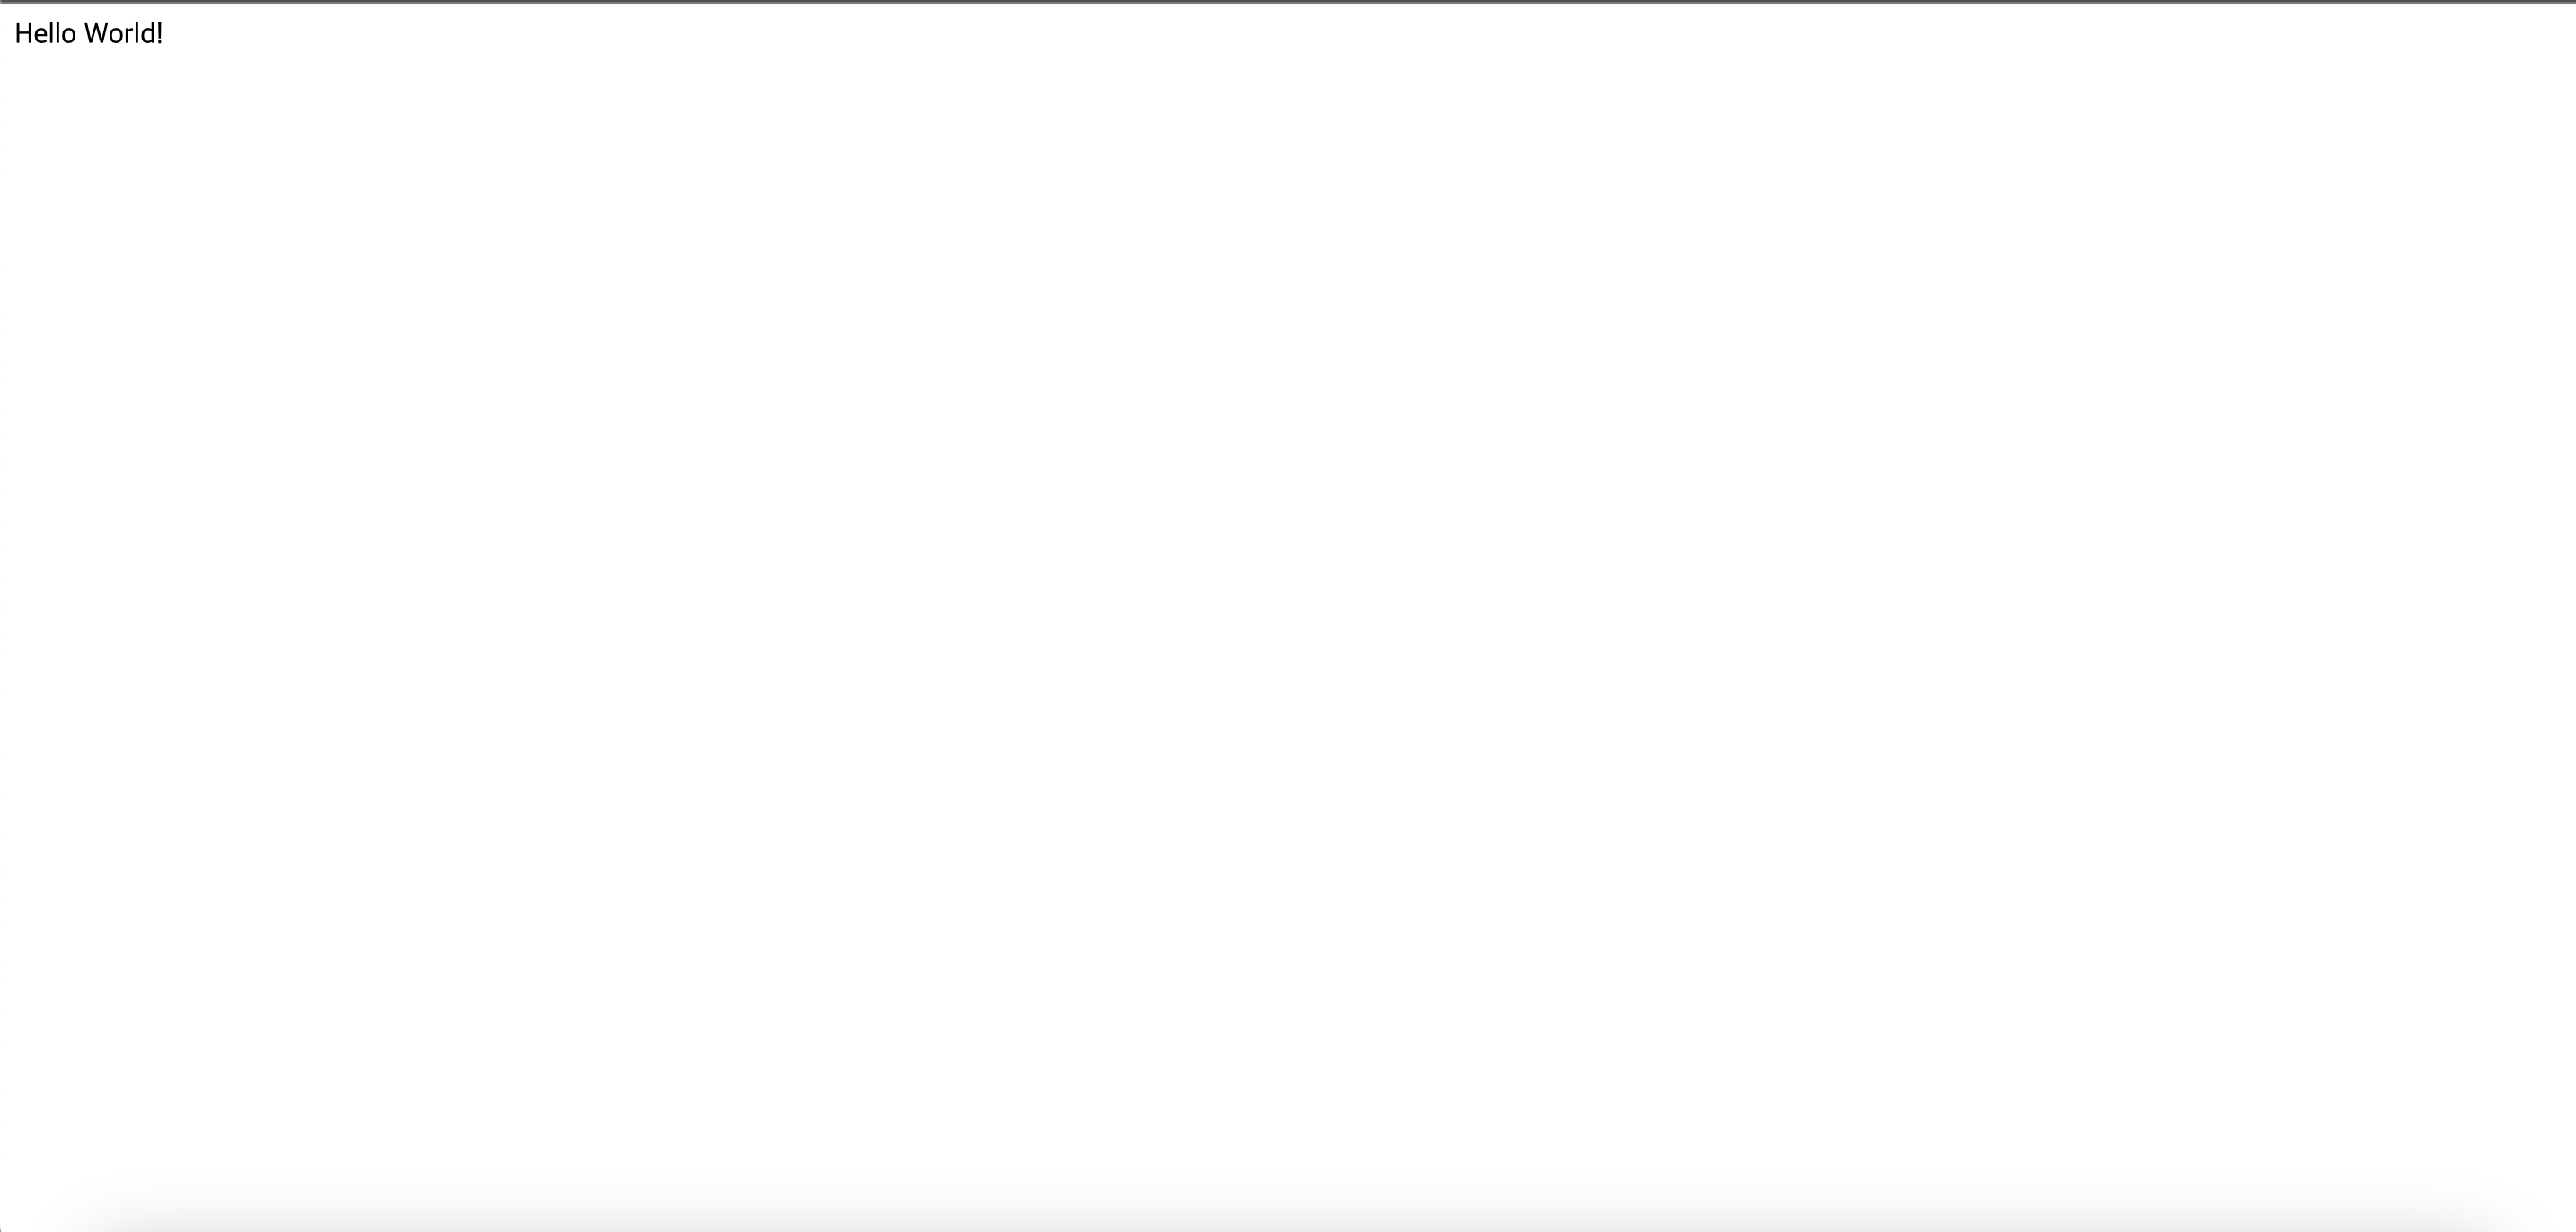
<!DOCTYPE>
<html lang="ko">
<head>
    <title>Hello</title>
    <meta http-equiv="Content-Type" content="text/html; charset=UTF-8"/>
</head>
<body>
<p>Hello World!</p>
</body>
</html> - 지금같은 경우는 그냥 파일을 던져준 거고
thymeleaf템플릿 엔진을 쓰면 루프를 바꾸거나 모양을 변경할 수 있다.
package hello.hello_spring.Controller;

import org.springframework.context.annotation.ComponentScan;
import org.springframework.stereotype.Controller;
import org.springframework.ui.Model;
import org.springframework.web.bind.annotation.GetMapping;
import org.springframework.web.bind.annotation.RequestParam;
import org.springframework.web.bind.annotation.ResponseBody;

@Controller
@ComponentScan
public class HelloController {

    @GetMapping("hello")
    public String hello(Model model) {
        model.addAttribute("data", "hello!!");
        return "hello";

    }

    @GetMapping("hello-mvc")
    public String helloMvc(@RequestParam("name") String name, Model model) {
        model.addAttribute("name", name);
        return "hello-template";
    }

    @GetMapping("hello-string")
    @ResponseBody
    public String helloString(@RequestParam("name") String name) {
        return "hello " + name; //html 태그 하나 없이 문자 그대로 웹에 띄어준다. "hello string"
    }

    @GetMapping("hello-api")
    @ResponseBody
    public Hello helloApi(@RequestParam("name") String name){
        Hello hello = new  Hello();
        hello.setName(name);
        return hello;  //문자가 아닌 객체를 넘겼다. json 방식
    }

    static class Hello{
        private String name;

        public String getName(){
            return name;
        }

        public void setName(String name){
            this.name = name;
        }
    }

}
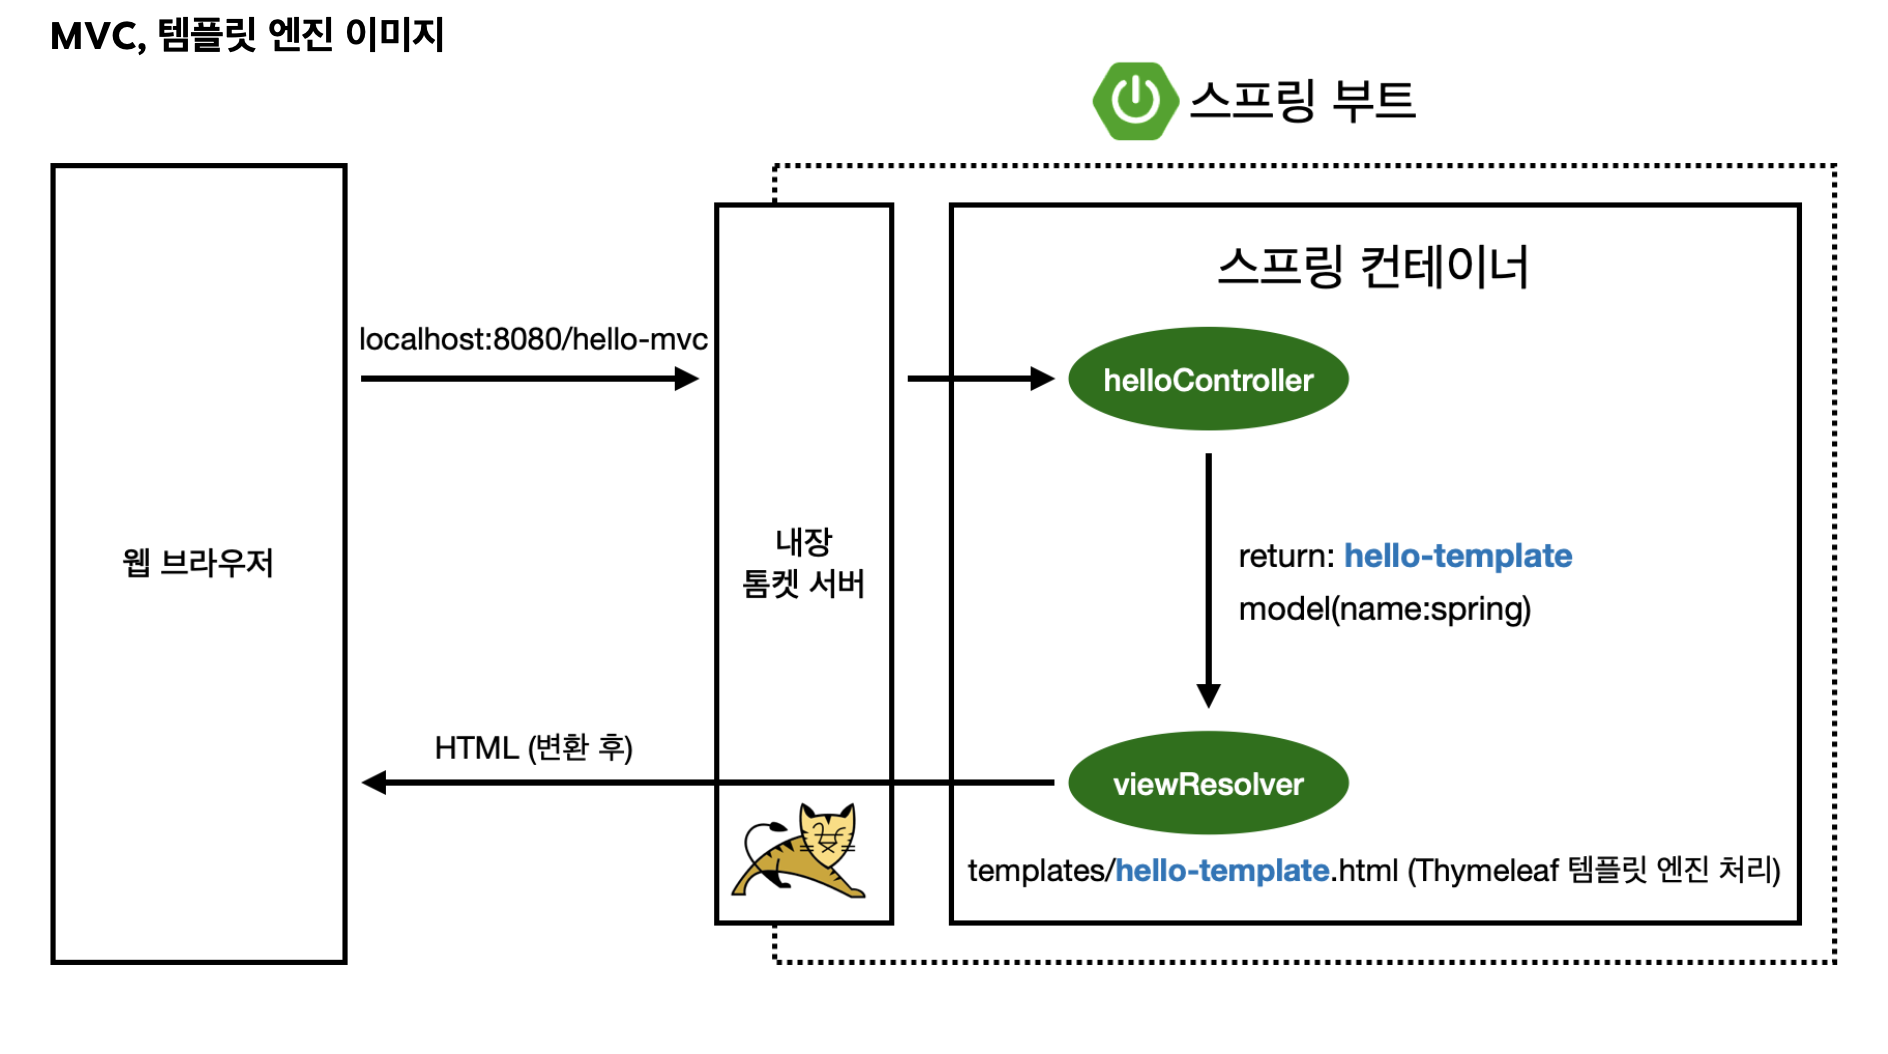
@Controller애노테이션은 스프링MVC에서컨트롤러 클래스를 명시할 수 있다.@GetMapping(“hello”)부분이 클라이언트 요청을 받는 부분이고 따라서 웹에서 접속시localhost:8080/hello로 들어가야한다.model.addAttribute에서data가hello.html에서${data}에 들어갈 부분- 정리하자면, 웹 브라우저에서 요청이 오면 내장 톰캣에 요청이 전달되고 내장 톰캣이 스프링한테 전달
- 그다음
HelloController에서 매핑이 되고hello라는 메서드가 실행된다. - 해당 메서드는 이후
return hello;을 반환해주고 - 이후
viewResolver가 템플릿에hello.html실행시키게 된다.
Ex)resources: templates/ + {viewName} + .html - 그다음
hello.html에서HelloControler에model에서 넘어온 키값이${data}에 들어가게 된다.
터미널에서 gradlew 빌드하는 법
./gradlew build실행

그러면 위와같이 bulid 파일이 생성된다.
libs폴더 들어가기build파일에 들어가게되면libs라는 파일이 보일 것이다.

- 이후 libs에 들어가게되면
hello-spring-0.0.1-SNAPSHOT.jar라 는 이름을 가진 파일이 보일 것이다.

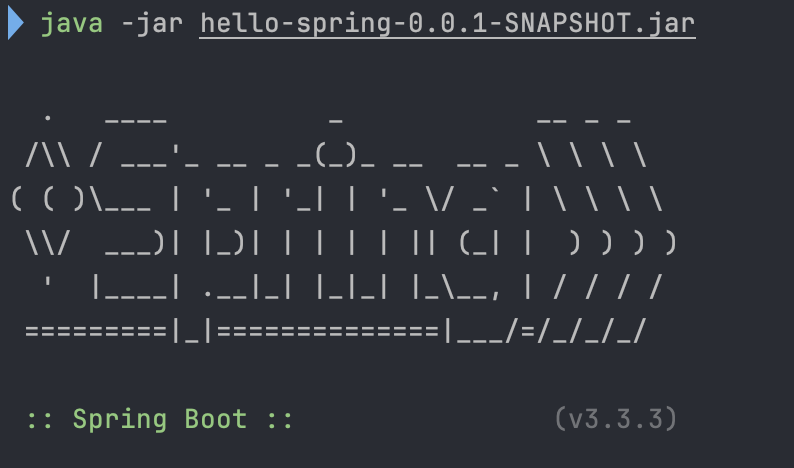
java -jar hello-spring-0.0.1-SNAPSHOT.jar(파일명)를 실행
- 나중에 서버에 배포할 때는
hello-spring-0.0.1-SNAPSHOT.jar파일만 복사해서java -jar를 실행하면 된다.

혼자 성장하는 것보다 함께 성장하는 것을 선호합니다.