
계속해서 웹 애플리케이션을 실습해보자!
📝 학습 내용
- 모델 데이터를 브라우저에서 보이기
- 폼 입력 처리하고 검사
- 뷰 템플릿 라이브러리 선택
1. 도메인 설정
타코클라우드는 온라인으로 타코를 주문하는 애플리케이션이다.
1.1. 타코 식자제 도메인
package tacos;


import lombok.Data;
import lombok.RequiredArgsConstructor;

import java.lang.reflect.Type;

@Data//getter setter 안써도 되는 유용한 lombok 어노테이션
@RequiredArgsConstructor
public class Ingredient {

    private final String id;
    private final String name;
    private final Type type;

    public static enum Type{
        WRAP,PROTEIN,VEGGIES,CHEESE,SAUCE
    }


}
❗ lombok은 편리한 기능만큼 사용할 때 주의하는것이 좋다. 자세한건 블로그에 잘 정리되어있다!
1.2. 타코 디자인 도메인
package tacos;

import lombok.Data;

import java.util.List;

@Data
public class Taco {
    private String Name;
    private List<String> ingredients;
}
2. 컨트롤러 설정
식자재의 내역을 생성하고 식자재 데이터의 HTML을 뷰에 요청하고 전송하는 컨트롤러를 만들어보자
2.1. 타코 디자인 컨트롤러
package tacos.web;

import java.util.Arrays;
import java.util.List;
import java.util.stream.Collectors;

import org.springframework.stereotype.Controller;
import org.springframework.ui.Model;
import org.springframework.web.bind.annotation.GetMapping;
import org.springframework.web.bind.annotation.ModelAttribute;
import org.springframework.web.bind.annotation.RequestMapping;

import lombok.extern.slf4j.Slf4j;
import tacos.Ingredient;
import tacos.Ingredient.Type;
import tacos.Taco;

@Slf4j
@Controller//컨트롤러로 식별
@RequestMapping("/design")// design경로의 요청 처리
public class DesignTacoController {

    @ModelAttribute//사용자의 요청시 전달값을 오브젝트형태로 매핑
    public void addIngredientsToModel(Model model) {
        List<Ingredient> ingredients = Arrays.asList(
                new Ingredient("FLTO", "Flour Tortilla", Type.WRAP),
                new Ingredient("COTO", "Corn Tortilla", Type.WRAP),
                new Ingredient("GRBF", "Ground Beef", Type.PROTEIN),
                new Ingredient("CARN", "Carnitas", Type.PROTEIN),
                new Ingredient("TMTO", "Diced Tomatoes", Type.VEGGIES),
                new Ingredient("LETC", "Lettuce", Type.VEGGIES),
                new Ingredient("CHED", "Cheddar", Type.CHEESE),
                new Ingredient("JACK", "Monterrey Jack", Type.CHEESE),
                new Ingredient("SLSA", "Salsa", Type.SAUCE),
                new Ingredient("SRCR", "Sour Cream", Type.SAUCE)
        );

        Type[] types = Ingredient.Type.values();
        for (Type type : types) {
            model.addAttribute(type.toString().toLowerCase(),
                    filterByType(ingredients, type));
        }
    }

    @GetMapping
    public String showDesignForm(Model model) {
        model.addAttribute("design", new Taco());
        return "design";//모델 데이터를 design이란 이름으로 반환
    }

    private List<Ingredient> filterByType(
            List<Ingredient> ingredients, Type type) {
        return ingredients
                .stream()
                .filter(x -> x.getType().equals(type))
                .collect(Collectors.toList());
    }
}
❗ 요청에 대응하는 어노테이션은 종류가 다양하다. 가급적으로 특화된것을 사용하는게 좋다고한다.
@RequestMapping: 다목적 요청 처리
@GetMapping: HTTP GET 요청 처리
@PostMapping: HTTP POST 요청 처리
@PutMapping: HTTP PUT 요청 처리
@DeleteMapping: HTTP DELETE 요청 처리
@PatchMapping: HTTP PATCH 요청 처리
3. 뷰 설정
Thymeleaf 뷰를 사용하여 타코 디자인 뷰를 만들어보자
💡 Thymeleaf 사용법
템플릿 엔진의 일종으로 html 태그에 속성을 추가해 페이지에 동적으로 값을 추가하거나 처리할 수 있다.
<p th:text="${message}">placeholder message</p>템플릿이 HTML로 표현될 때 <p>태그의 몸체는 key가 "message"인 서블릿 요청속성의 값으로 교체된다. th:text는 교체를 수행하는 Thymeleaf 네임스페이스 속성이다. ${message}는 "message"의 값을 사용하라는 것으로 알려준다.
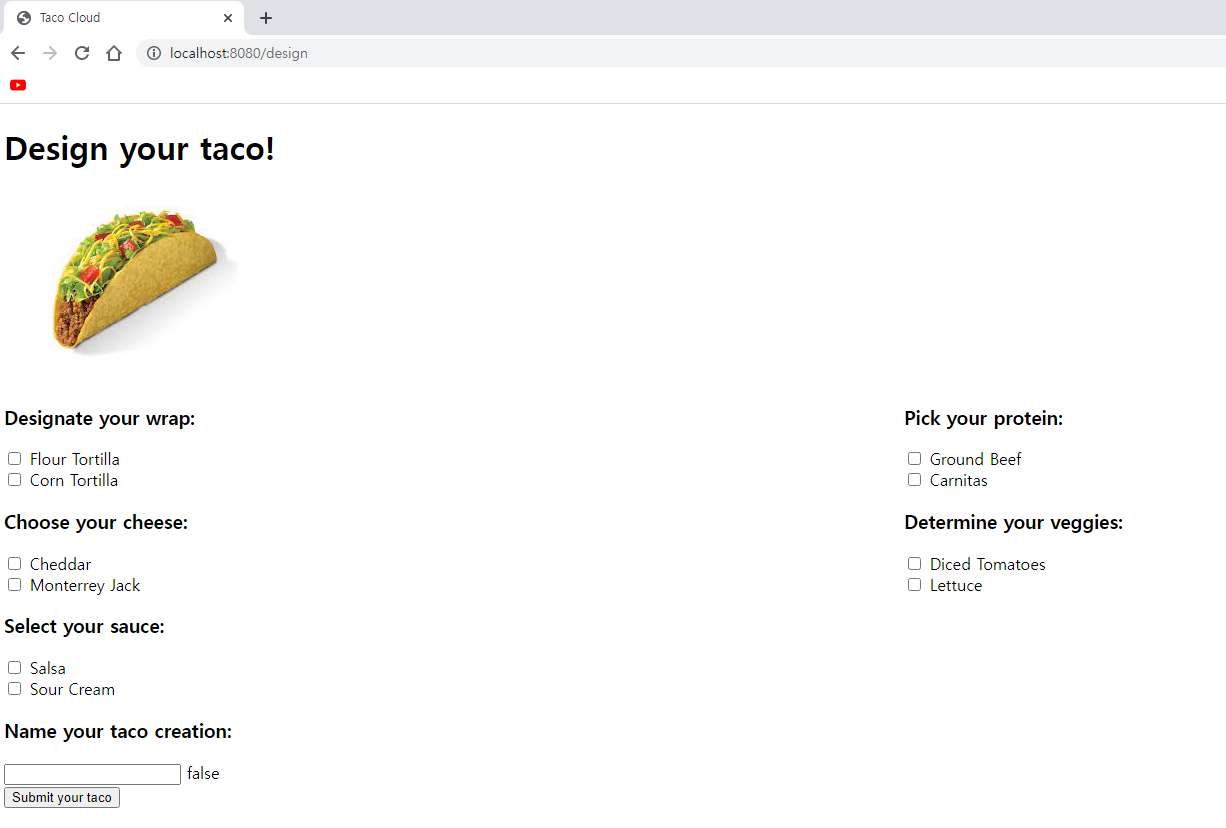
3.1. 타코 디자인 뷰
<!DOCTYPE html>
<html xmlns="http://www.w3.org/1999/xhtml"
      xmlns:th="http://www.thymeleaf.org">
<head>
    <title>Taco Cloud</title>
    <link rel="stylesheet" th:href="@{/styles.css}" />
</head>

<body>
<h1>Design your taco!</h1>
<img th:src="@{/images/TacoCloud.png}"/>

<form method="POST" th:object="${design}">


    <span class="validationError"
          th:if="${#fields.hasErrors('ingredients')}"
          th:errors="*{ingredients}">Ingredient Error</span>

    <div class="grid">

        <div class="ingredient-group" id="wraps">
            <h3>Designate your wrap:</h3>
            <div th:each="ingredient : ${wrap}">
                <input name="ingredients" type="checkbox" th:value="${ingredient.id}" />
                <span th:text="${ingredient.name}">INGREDIENT</span><br/>
            </div>
        </div>

        <div class="ingredient-group" id="proteins">
            <h3>Pick your protein:</h3>
            <div th:each="ingredient : ${protein}">
                <input name="ingredients" type="checkbox" th:value="${ingredient.id}" />
                <span th:text="${ingredient.name}">INGREDIENT</span><br/>
            </div>
        </div>

        <div class="ingredient-group" id="cheeses">
            <h3>Choose your cheese:</h3>
            <div th:each="ingredient : ${cheese}">
                <input name="ingredients" type="checkbox" th:value="${ingredient.id}" />
                <span th:text="${ingredient.name}">INGREDIENT</span><br/>
            </div>
        </div>

        <div class="ingredient-group" id="veggies">
            <h3>Determine your veggies:</h3>
            <div th:each="ingredient : ${veggies}">
                <input name="ingredients" type="checkbox" th:value="${ingredient.id}" />
                <span th:text="${ingredient.name}">INGREDIENT</span><br/>
            </div>
        </div>

        <div class="ingredient-group" id="sauces">
            <h3>Select your sauce:</h3>
            <div th:each="ingredient : ${sauce}">
                <input name="ingredients" type="checkbox" th:value="${ingredient.id}" />
                <span th:text="${ingredient.name}">INGREDIENT</span><br/>
            </div>
        </div>
    </div>

    <div>


        <h3>Name your taco creation:</h3>
        <input type="text" th:field="*{name}"/>
        <span th:text="${#fields.hasErrors('name')}">XXX</span>
        <span class="validationError"
              th:if="${#fields.hasErrors('name')}"
              th:errors="*{name}">Name Error</span>
        <br/>

        <button>Submit your taco</button>
    </div>
</form>
</body>
</html>
3.1.1. style.css
div.ingredient-group:nth-child(odd) {
	float: left;
	padding-right: 20px;
}

div.ingredient-group:nth-child(even) {
    float: left;
	padding-right: 0;
}

div.ingredient-group {
	width: 50%;
}

.grid:after {
  content: "";
  display: table;
  clear: both;
}

*, *:after, *:before {
  -webkit-box-sizing: border-box;
  -moz-box-sizing: border-box;
  box-sizing: border-box;
}

span.validationError {
	color: red;
}
실행결과
4. 폼 제출 처리하기
위의 실행결과가 잘 작동하기위해서 폼 제출을 처리하는 컨트롤러를 추가해보자!
4.1. 타코 주문 폼 컨트롤러
package tacos.web;
import lombok.extern.slf4j.Slf4j;
import org.springframework.stereotype.Controller;
import org.springframework.ui.Model;
import org.springframework.web.bind.annotation.GetMapping;
import org.springframework.web.bind.annotation.PostMapping;
import org.springframework.web.bind.annotation.RequestMapping;
import tacos.Order;
@Slf4j
@Controller
@RequestMapping("/order")
public class OrderController {
@GetMapping("/current")
public String orderForm(Model model){
model.addAttribute("order",new Order());
return "orderForm";
}
@PostMapping
public String processOrder(Order order){
log.info("Order submitted: " + order);
return "redirect:/";
}
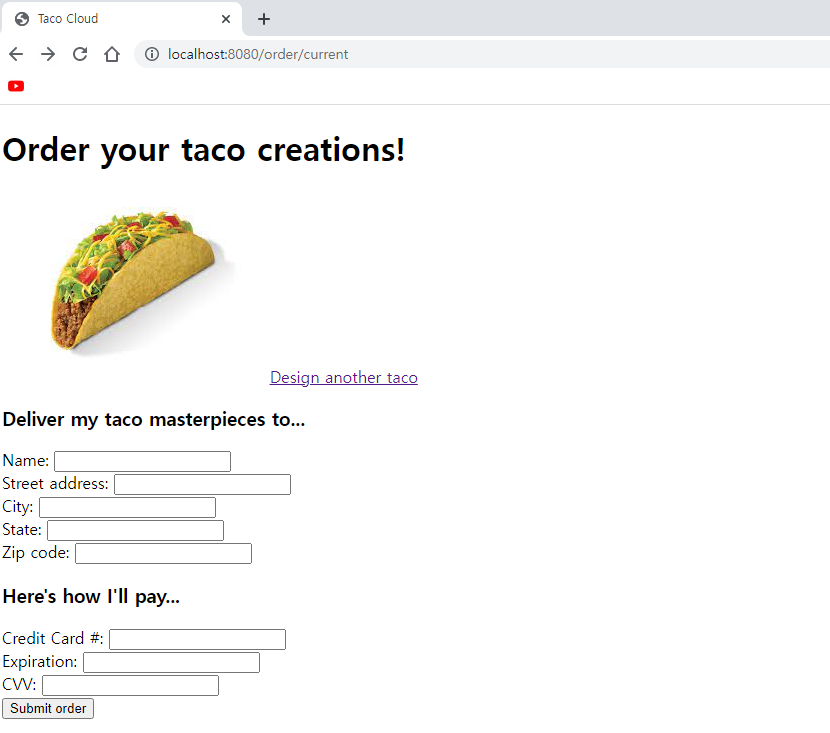
}4.2. 타코 주문 폼 뷰
<!DOCTYPE html>
<html xmlns="http://www.w3.org/1999/xhtml"
      xmlns:th="http://www.thymeleaf.org">
<head>
  <title>Taco Cloud</title>
  <link rel="stylesheet" th:href="@{/styles.css}" />
</head>

<body>

<form method="POST" th:action="@{/orders}" th:object="${order}">
  <h1>Order your taco creations!</h1>

  <img th:src="@{/images/TacoCloud.png}"/>
  <a th:href="@{/design}" id="another">Design another taco</a><br/>

  <div th:if="${#fields.hasErrors()}">
        <span class="validationError">
        Please correct the problems below and resubmit.
        </span>
  </div>

  <h3>Deliver my taco masterpieces to...</h3>
  <label for="name">Name: </label>
  <input id="name" type="text" th:field="*{name}"/>
  <br/>
  <label for="street">Street address: </label>
  <input id="street" type="text" th:field="*{street}"/>
  <br/>
  <label for="city">City: </label>
  <input id="city" type="text" th:field="*{city}"/>
  <br/>

  <label for="state">State: </label>
  <input id="state" type="text" th:field="*{state}"/>
  <br/>

  <label for="zip">Zip code: </label>
  <input id="zip" type="text" th:field="*{zip}"/>
  <br/>

  <h3>Here's how I'll pay...</h3>
  <label for="ccNumber">Credit Card #: </label>
  <input id="ccNumber" type="text" th:field="*{ccNumber}"/>
  <br/>

  <label for="ccExpiration">Expiration: </label>
  <input id="ccExpiration" type="text" th:field="*{ccExpiration}"/>
  <br/>

  <label for="ccCVV">CVV: </label>
  <input id="ccCVV" type="text" th:field="*{ccCVV}"/>
  <br/>

  <input type="submit" value="Submit order"/>
</form>

</body>
</html>
실행결과
사실 이 부분에서 작동이 제대로 안돼서 의아했는데 찾고보니 타코 주문 폼 컨트롤러의
@RequestMapping와 타코 디자인 컨트롤러의 processDesign 메소드의 리턴값이 매핑이 제대로 되지않았던 잘못이었다 😭 processDesign의 리턴값을 "redirect:/order/current" -> "redirect/orders/current" 으로 수정하니 정상작동되었다..
5. 유효성 검사
페이지에서 값이 제대로 입력되지않는 오류를 방지하기위해 유효성 검사규칙을 추가해주자!
5.1. 타코 도메인 유효성 검사 규칙 선언
package tacos;

import jakarta.validation.constraints.NotNull;
import jakarta.validation.constraints.Size;
import lombok.Data;

import java.util.List;

@Data
public class Taco {

    @NotNull
    @Size(min=5, message="Name must be at least 5 characters long")
    private String Name;

    @Size(min=1, message="You must choose at least 1 ingredient")
    private List<String> ingredients;
}
5.2 타코 주문 유효성 검사 규칙 선언
package tacos;

import jakarta.validation.constraints.Digits;
import jakarta.validation.constraints.NotBlank;
import jakarta.validation.constraints.Pattern;
import org.hibernate.validator.constraints.CreditCardNumber;

import lombok.Data;

@Data
public class Order {

    @NotBlank(message="Name is required")
    private String name;

    @NotBlank(message="Street is required")
    private String street;

    @NotBlank(message="City is required")
    private String city;

    @NotBlank(message="State is required")
    private String state;

    @NotBlank(message="Zip code is required")
    private String zip;

    @CreditCardNumber(message="Not a valid credit card number")
    private String ccNumber;

    @Pattern(regexp="^(0[1-9]|1[0-2])([\\/])([1-9][0-9])$",
            message="Must be formatted MM/YY")
    private String ccExpiration;

    @Digits(integer=3, fraction=0, message="Invalid CVV")
    private String ccCVV;

}
5.3 타코 주문 컨트롤러 유효성 검사 추가
        @PostMapping
    public String processDesign(@Valid Taco design, Errors errors){
        if(errors.hasErrors()) return "design";

        log.info("Processing design: " + design);
        return "redirect:/orders/current";
    }
5.4 제출된 주문 유효성 검사 추가
    @PostMapping
    public String processOrder(@Valid Order order, Errors errors){
        if(errors.hasErrors())return "orderForm";
        log.info("Order submitted: " + order);
        return "redirect:/";
    }
5.5 폼에서 유효성 검사 에러 보여주기
<!DOCTYPE html>
<html xmlns="http://www.w3.org/1999/xhtml"
      xmlns:th="http://www.thymeleaf.org">
<head>
  <title>Taco Cloud</title>
  <link rel="stylesheet" th:href="@{/styles.css}" />
</head>

<body>

<form method="POST" th:action="@{/orders}" th:object="${order}">
  <h1>Order your taco creations!</h1>

  <img th:src="@{/images/TacoCloud.png}"/>
  <a th:href="@{/design}" id="another">Design another taco</a><br/>

  <div th:if="${#fields.hasErrors()}">
        <span class="validationError">
        Please correct the problems below and resubmit.
        </span>
  </div>

  <h3>Deliver my taco masterpieces to...</h3>
  <label for="name">Name: </label>
  <input id="name" type="text" th:field="*{name}"/>
  <span class="validationError"
        th:if="${#fields.hasErrors('name')}"
        th:errors="*{name}">Name Error</span>
  <br/>
  <label for="street">Street address: </label>
  <input id="street" type="text" th:field="*{street}"/>
  <span class="validationError"
        th:if="${#fields.hasErrors('street')}"
        th:errors="*{street}">Street Error</span>
  <br/>
  <label for="city">City: </label>
  <input id="city" type="text" th:field="*{city}"/>
  <span class="validationError"
        th:if="${#fields.hasErrors('city')}"
        th:errors="*{city}">City Error</span>
  <br/>

  <label for="state">State: </label>
  <input id="state" type="text" th:field="*{state}"/>
  <span class="validationError"
        th:if="${#fields.hasErrors('state')}"
        th:errors="*{state}">State Error</span>
  <br/>

  <label for="zip">Zip code: </label>
  <input id="zip" type="text" th:field="*{zip}"/>
  <span class="validationError"
        th:if="${#fields.hasErrors('zip')}"
        th:errors="*{zip}">Zip Error</span>
  <br/>

  <h3>Here's how I'll pay...</h3>
  <label for="ccNumber">Credit Card #: </label>
  <input id="ccNumber" type="text" th:field="*{ccNumber}"/>
  <span class="validationError"
        th:if="${#fields.hasErrors('ccNumber')}"
        th:errors="*{ccNumber}">CC Num Error</span>
  <br/>

  <label for="ccExpiration">Expiration: </label>
  <input id="ccExpiration" type="text" th:field="*{ccExpiration}"/>
  <span class="validationError"
        th:if="${#fields.hasErrors('ccExpiration')}"
        th:errors="*{ccExpiration}">CC Num Error</span>
  <br/>

  <label for="ccCVV">CVV: </label>
  <input id="ccCVV" type="text" th:field="*{ccCVV}"/>
  <span class="validationError"
        th:if="${#fields.hasErrors('ccCVV')}"
        th:errors="*{ccCVV}">CC Num Error</span>
  <br/>

  <input type="submit" value="Submit order"/>
</form>

</body>
</html>
실행결과
양식에 맞지않는 데이터가 존재할때 제출에 오류가 발생한다
6. 뷰 컨트롤러로 작업하기
HomeController와 같이 모델 데이터나 사용자 입력을 처리하지않는 간단한 컨트롤러의 경우는 앞선 두가지 컨트롤러(타코디자인, 타코주문)와는 다른 방법으로 컨트롤러를 정의할 수 있다.
6.1. 뷰 컨트롤러 선언
package tacos.web;

import org.springframework.context.annotation.Configuration;
import org.springframework.web.servlet.config.annotation.ViewControllerRegistry;
import org.springframework.web.servlet.config.annotation.WebMvcConfigurer;

@Configuration
public class WebConfig implements WebMvcConfigurer {

    @Override
    public void addViewControllers(ViewControllerRegistry registry) {
        registry.addViewController("/").setViewName("home");
    }

}
✍ 후기
어노테이션은 신이다..! 이걸 쓰기 전 개발자들의 노고는 상상이 되지않을 정도다 😅 하지만 보이지않는곳에서 처리하는 기능때문에 오류가 발생한다면 알기 힘든경우가 많이 존재할것같아서 적재적소에 사용하는것이 제일 중요하다고 느껴졌다. 그리고 실습을 통해 mvc개념을 조금 더 다잡은거같고 스프링 프레임워크는 시키는대로 하면되는 MVC를 이용해서 편리한 개발이 장점인것같다! 👍