Next.js 12버전에서 동적으로 Opengraph image를 만들고 그 이미지를 og:image 태그에 주입시킨 경험을 공유합니다.
📌 동적으로 만들기 전
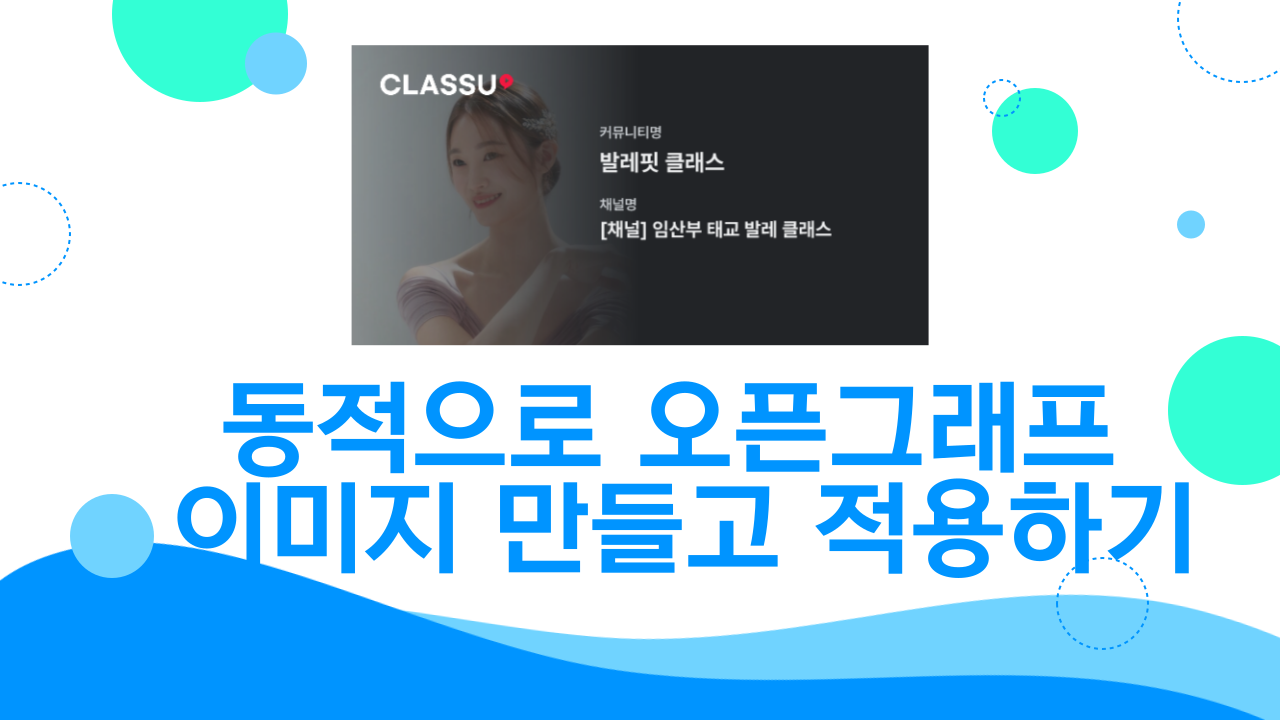
운영중인 서비스는 각 커뮤니티가 있고 커뮤니티에 여러 채널들이 존재하는 서비스입니다. 기존에는 SSR (Server Side Rendering) 방식으로 커뮤니티 아이디와 채널 아이디에 해당하는 커뮤니티 명, 채널 명을 조회한 후 HTML 문서의 og:title, og:description에 주입시켜 주었습니다. og:image 경우에는 정적인 이미지를 넣어주었습니다.

커뮤니티를 공유했을 때 제일 눈에 띄는 부분이 오픈그래프 이미지인데, 이미지에서 커뮤니티명과 채널명을 한 눈에 알 수 없었습니다. 이걸 해결하고자 커뮤니티 이름과 채널 명을 넣은 이미지를 만들고 해당 이미지를 og:image 에 주입시키는 것을 구현하기로 했습니다.
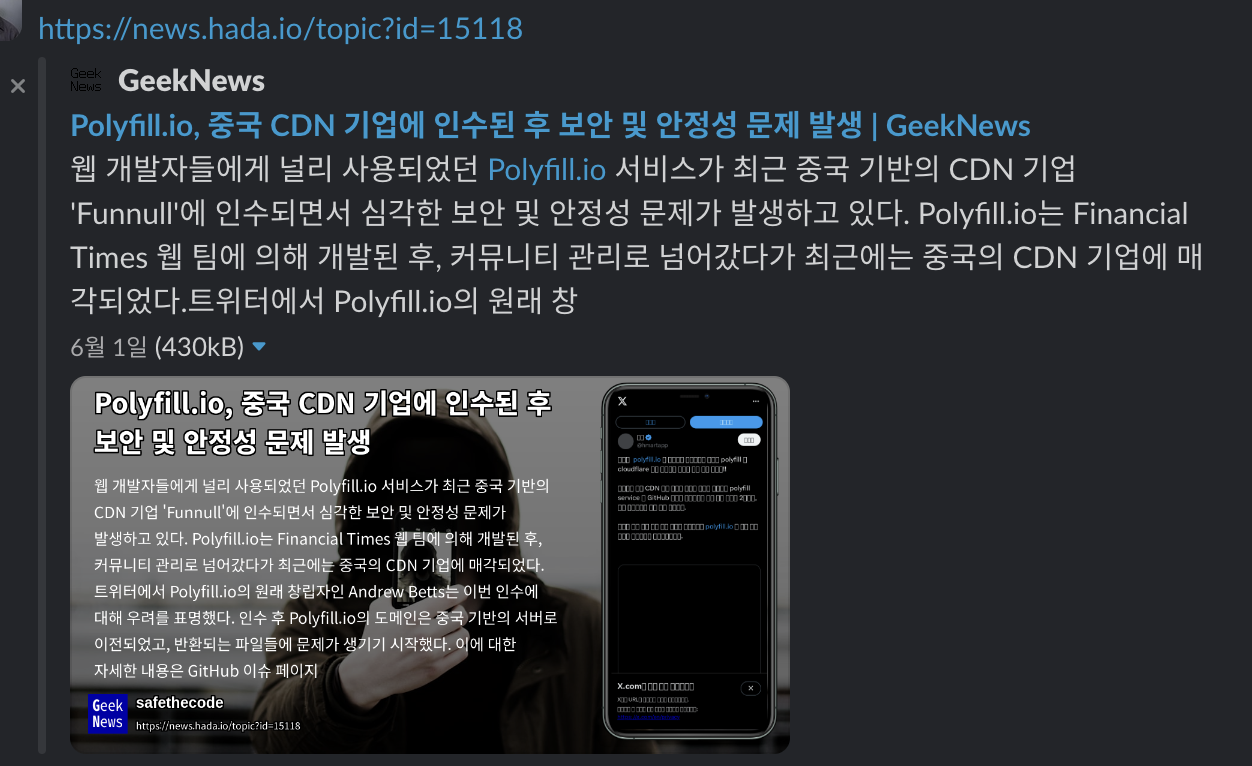
위 사이트는 og:image 에 뉴스의 제목과 내용을 동적으로 이미지를 만들어서 주입시켜 주고 있었는데, 이런 식으로 우리 서비스에도 적용하면 유저가 외부에서 링크를 공유했을 때 한눈에 어느 커뮤니티인지, 어느 채널인지 확인할 수 있을 것입니다.
개발중인 서비스는 Next.js 12 버전입니다.
Next.js 12 버전으로 개발하다보니 13버전 이후에 나온 기능들을 많이 사용하지 못해서 헤맨 부분들이 있습니다. 먼저, og:title 과 og:description, 정적으로 주입한 og:image 는 아래와 같이 구현했었습니다.
// /pages/community/[communityId]/index.jsx

const CommunityHomePage = () => {
	...
    return (
      <Header_OG_Meta ogTitle={ogTitle} ogDescription={ogDescription} ogImage={ogImage} />
    )
}

export async function getServerSideProps(context) {
  const { community_id, channel_id } = context.query;
  const host = context.req.headers.host;

    const getOpengraphInfo = async ({ community_id, channel_id }) => {
    try {
      const response = await axios.get(`xxx`, {
        params,
        timeout: 2000,
      });
      return response;
    } catch (error) {
      console.error(error);
      return null;
    }
  };


  const response = await getOpengraphInfo({ community_id, channel_id });
  const ogTitle = response.data.data?.community_title;
  const ogDescription = response.data.data?.channel_title;
  const ogImage = '이미지 주소'

  return {
      props: {
        ogTitle,
        ogDescription,
        ogImage,
      },
    }
}
// Header_OG_Meta.jsx
import Head from 'next/head';
const Header_OG_Meta = ({ ogTitle, ogDescription, ogImage }) => {
return (
<Head>
<meta property="og:image" content={ogImage} />
<meta property="og:type" content="website" />
{ogTitle && <meta property="og:title" content={ogTitle} />}
{ogDescription && <meta property="og:description" content={ogDescription} />}
</Head>
);
};
export default Header_OG_Meta;📌 동적으로 OG 이미지 주입하기
📌 Next.js 13버전이었다면
동적으로 OG 이미지를 만들 수 있는 방법 중 가장 쉬운 방법은 Vercel에서 HTML/CSS를 SVG로 변환하여 빠르고 편하게 만들 수 있는 @vercel/og 라이브러리를 사용하면 된다. 이 경우 Edge 런타임만 지원하기 때문에 Next.js 12 버전에서는 이 방법을 사용할 수 없다. 직접 라이브러리를 import 해보았지만 사용할 수 없었다.
📕 satori
따라서 satori를 사용하려 한다. satori는 HTML 및 CSS를 기반으로 한 동적 SVG 생성과 관련된 기능을 제공한다. 우리에게 친숙한 JSX 문법으로 SVG를 만들수 있다.
og image를 만들어서 리턴해줄 API route부터 생성한다.
// /pages/api/v1/og.js

export default async function handler(req, res) {
  /** satori는 woff2 지원하지 않아서 woff 불러옴 */
  const fontPath_600 = path.join(process.cwd(), 'public', 'fonts', 'Pretendard-SemiBold.woff');
  const fontData_600 = readFileSync(fontPath_600);
  const fontPath_700 = path.join(process.cwd(), 'public', 'fonts', 'Pretendard-Bold.woff');
  const fontData_700 = readFileSync(fontPath_700);


}
라우트를 생성했고 satori에서 사용할 font를 로드해주었다. satori는 woff2를 지원하지 않기 때문에 woff 파일을 추가적으로 받아서 로드해주었다.
  const community_name = req.query.community_name || '';
  const channel_name = req.query.channel_name || '';
  const community_image= req.query.community_image || '';
이미지에 주입할 커뮤니티 이름, 채널 이름, 커뮤니티 사진을 받아왔다. 이미지 태그의 src에 주입할 community_image는 상대경로는 안된다. 무조건 절대경로로 만들어주어야 한다.
또한, webp 확장자는 지원하지 않는데 webp 이미지가 들어올 케이스가 있다면 webp에 한해 png로 변경해주는 작업을 진행하였다.
import webp from 'webp-converter';

if (absoluteCommunityImage.match(/\.(webp)$/i)) {
    try {
      // webp 이미지를 png로 변환
      const response = await fetch(absoluteCommunityImage);
      const webpBuffer = Buffer.from(await response.arrayBuffer());

      // Save the buffer to a temporary file
      const tempWebpPath = path.join(process.cwd(), 'public', 'image.webp');
      await fsPromises.writeFile(tempWebpPath, webpBuffer);

      // Convert WebP to PNG
      const tempPngPath = path.join(process.cwd(), 'public', 'image.png');
      await webp.dwebp(tempWebpPath, tempPngPath, '-o');

      // Read the converted PNG file
      const pngBuffer = await fsPromises.readFile(tempPngPath);
      absoluteCommunityImage = `data:image/png;base64,${pngBuffer.toString('base64')}`;

      // Clean up temporary files
      await fsPromises.unlink(tempWebpPath);
      await fsPromises.unlink(tempPngPath);
      absoluteCommunityImage = `data:image/png;base64,${pngBuffer.toString('base64')}`;
    } catch (error) {
      console.error('WebP to PNG conversion failed:', error);
    }
  }
이제 우리에게 익숙한 JSX 문법으로 이미지를 만들면 된다.
const svg = await satori(
    <div
      style={{
        display: 'flex',
        fontSize: 40,
        color: 'black',
        width: '100%',
        height: '100%',
        position: 'relative',
      }}>
      <img
        src={absoluteCommunityImage}
        width={313}
        height={313}
        style={{
          position: 'absolute',
          top: 0,
          left: 0,
          objectFit: 'cover',
        }}
      />
      <div
        style={{
          display: 'flex',
          width: '100%',
          height: '100%',
          backgroundImage: 'linear-gradient(to right, rgba(34, 36, 39, 0.3), rgba(34, 36, 39, 1), rgba(34, 36, 39, 1))',
          position: 'relative',
        }}>
        {/** 좌측 상단 클래스유 로고 사진 */}
        <img
          src="..."
          width={137.87}
          height={21.6}
          style={{
            position: 'absolute',
            top: 30,
            left: 30,
          }}
        />
        <div
          style={{
            display: 'flex',
            position: 'absolute',
            top: channel_name ? 82 : 115,
            left: 258,
            flexDirection: 'column',
            width: '318px',
            height: '230px',
            overflow: 'hidden',
          }}>
          <p style={{ fontFamily: 'Pretendard-600', color: '#CACED2', fontSize: 15, margin: '0 0 8px 0' }}>
            커뮤니티명
          </p>
          <p
            style={{
              fontFamily: 'Pretendard-700',
              color: '#EEEFF0',
              fontSize: 24,
              margin: '0 0 20px 0',
            }}>
            {community_name}
          </p>

          <p style={{ fontFamily: 'Pretendard-600', color: '#CACED2', fontSize: 15, margin: '0 0 6px 0' }}>
            {channel_name ? '채널명' : ''}
          </p>
          <p style={{ fontFamily: 'Pretendard-700', color: '#EEEFF0', fontSize: 20, margin: 0 }}>
            {channel_name ? channel_name : ''}
          </p>
        </div>
      </div>
    </div>,
    {
      width: 600,
      height: 312,
      fonts: [
        {
          name: 'Pretendard-600',
          data: fontData_600,
          weight: 600,
          style: 'normal',
        },
        {
          name: 'Pretendard-700',
          data: fontData_700,
          weight: 600,
          style: 'normal',
        },
      ],
    },
  );
svg 형태로 리스폰스를 주게 되면 og:image로 인식 못하는 플랫폼들이 있었다. 따라서 이미지 형태(png)로 만들어줄 것이다. svg를 png로 변환하는 라이브러리로 resvg-js를 사용했다.
  const resvg = new Resvg(svg, {});
  const pngData = resvg.render();
  const pngBuffer = pngData.asPng();
이렇게 만든 png 파일을 리턴해주면 된다.
  res.setHeader('Content-Type', 'image/png');
  res.status(200).send(pngBuffer);
📌 og:image 주입
이제 동적으로 이미지는 만들어졌으니까 기존에 주입했던 방식으로 주입하면 된다.
// /pages/community/[communityId]/index.jsx

... 생략

const getOgImageUrl = `https://${host}/api/v1/og?community_name=${ogTitle}&channel_name=${ogDescription}&community_image=${community_image}`;

return {
      props: {
        ogTitle,
        ogDescription,
        ogImage: getOgImageUrl,
      },
    }
📌 확인
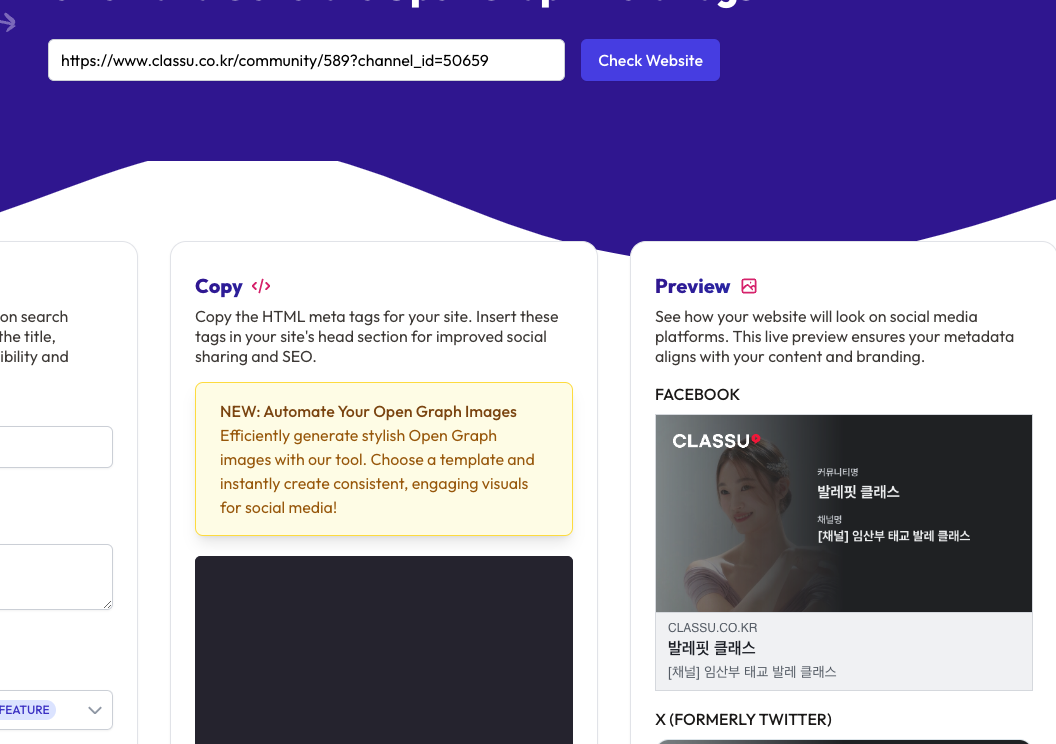
이제 페이지를 열고 태그를 직접 확인하면 된다.

잘 들어간것을 확인했고, 해당 url을 입력해보았다.
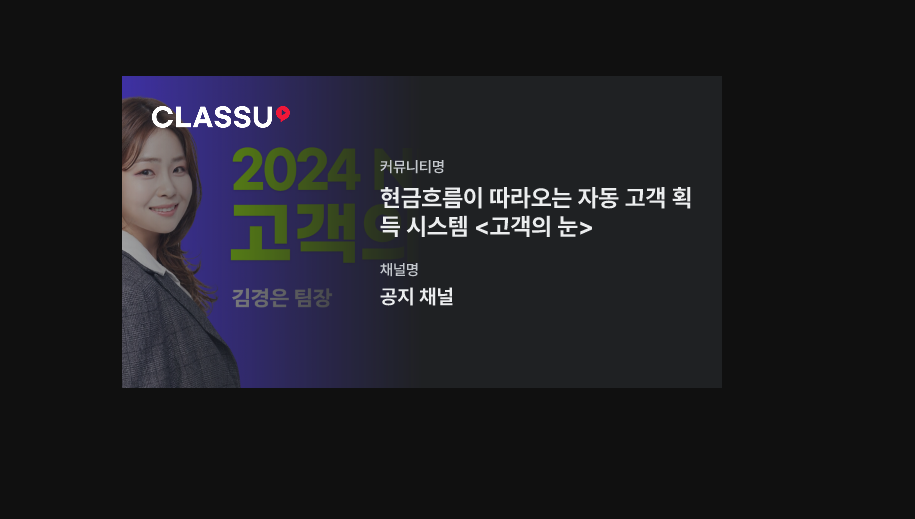
이런 형식으로 잘 가져오는것을 확인했다.
혹시 몰라서 opengraph.xyz 라는 사이트에서 직접 확인해보았다.
📌 되는 플랫폼이 있고 안되는 플랫폼이 있었다..
우리가 사용하는 GetStream.io 플랫폼에서는 잘 나왔다.
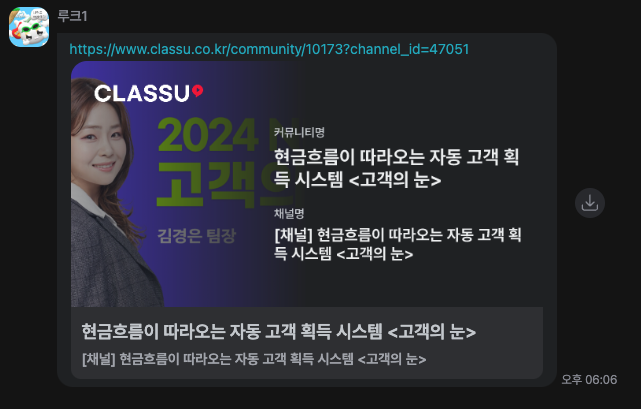
하지만 슬랙, 카카오톡과 같은 플랫폼에서 나오지 않거나 잘리는 현상을 발견했다.
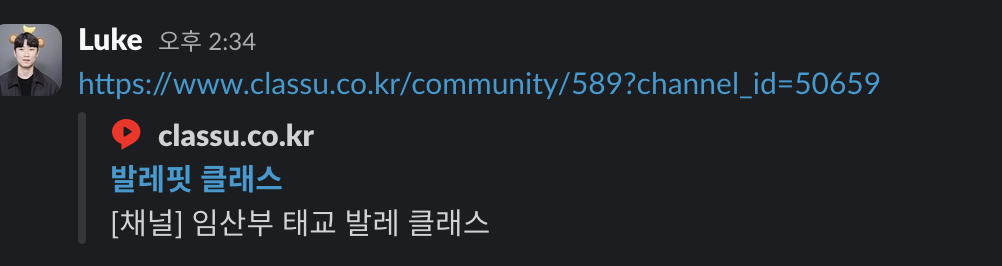
슬랙에서는 og image가 보이지 않았고,

카카오톡에서는 나오다가 마는 현상을 발견했다.
📌 & 앤퍼센트의 변환
내가 opengraph 의 값을 가져오는 봇이라고 생각하고 URL의 HTML 문서를 직접 받아보았다.
포스트맨을 사용하여 URL의 리스폰스를 직접 까보았다.
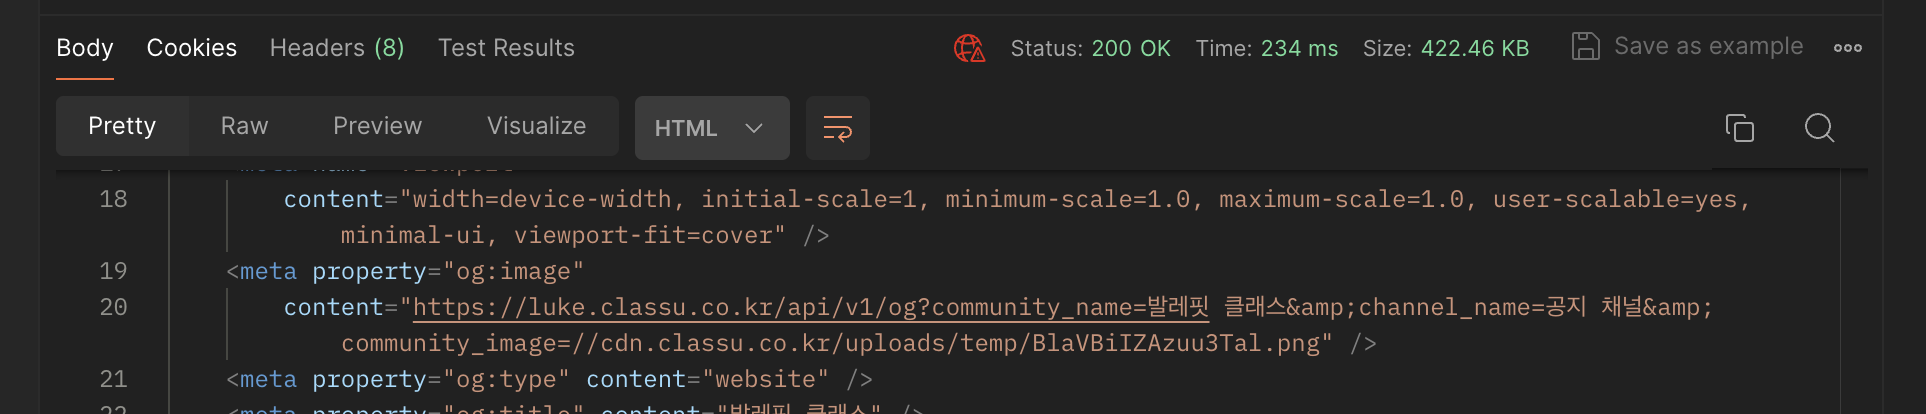
쿼리 파라미터를 구분짓는 & 앤퍼센트가 & 로 변환되고 있었다. 그리고 띄어쓰기가 발생하다 보니 띄어쓰기 직전 까지 url을 인식하여 og image를 호출하여 카카오톡 og image가 짤린것이었다. 특수문자가 HTML 엔티티로 표기되어 치환이 필요했다.
📌 encodeURIComponent
encodeURIComponent는 URI Component를 안전하게 인코딩하게 위해 사용한다.
const uriComponent = "https://www.example.com/search?q=JavaScript & Web Development";
const encodedUriComponent = encodeURIComponent(uriComponent);

console.log(encodedUriComponent);
// 출력: "https%3A%2F%2Fwww.example.com%2Fsearch%3Fq%3DJavaScript%20%26%20Web%20Development"
encodeURIComponent() 함수는 URI Component 중에서 데이터를 나타내는 부분을 인코딩한다. 이 구성 요소에는 쿼리 문자열의 값, 경로의 일부, 해시 등이 포함될 수 있다. 이 함수는 URI 구성 요소 내에 존재하는 특수 문자들을 인코딩하여 안전한 형태로 만들어준다. 예를 들어 &, =, ? 등의 문자를 인코딩하여 URI가 제대로 해석되도록 도와준다.
따라서 쿼리 파라미터로 붙는 community_name, channel_name,community_image를 data라는 쿼리파라미터 하나로 인코딩시켜주었다.
  const getOgImageUrl = `https://${host}/api/v1/og?data=${encodeURIComponent(
    `community_name=${ogTitle}&channel_name=${ogDescription}&community_image=${community_image}`,
  )}`;
그리고 og 이미지를 만들어주는 라우트에서 기존엔 params를 뽑아내었지만, 인코딩 하고 나서는 data의 parameter를 URLSeacrhParams를 사용해 뽑아내었다.
  const data = req.query.data;
  const params = new URLSearchParams(`?${data}`);
  const community_name = params.get('community_name') || '';
  const channel_name = params.get('channel_name') || '';
  const community_image = params.get('community_image') || '';
📌 결과
파라미터를 인코딩한 이후 확인해보았다. 확인하는데 카카오톡 같은 경우 캐시가 남아있으므로 지우고 확인해야한다.
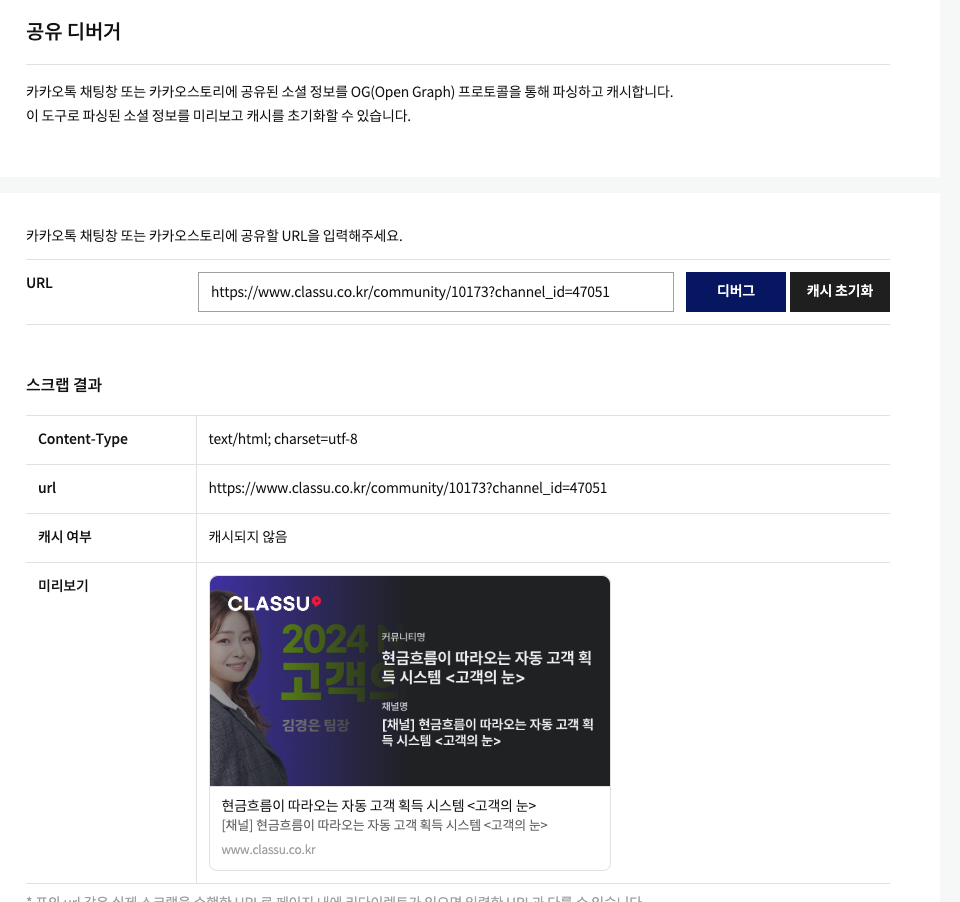
https://www.opengraph.xyz/ 를 맹신했었는데 이 사이트에서는 잘나와도 다른 플랫폼에서 잘 안나올 수 있으니까 꼭 여러 플랫폼에서 제공하는 디버거 툴에서 테스트를 하자.
슬랙에서도 제공한다.
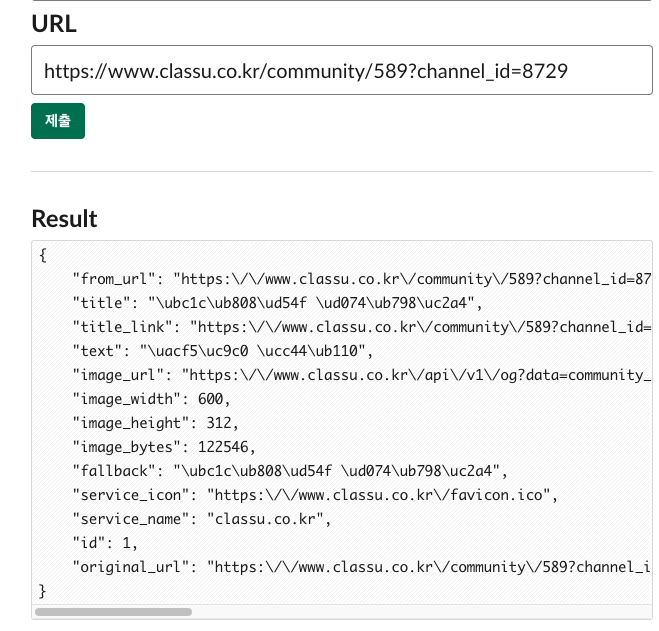
image_url 필드 혹은 thumb 필드를 확인하면 되는것 같다.
📌 참고자료
인프랩 테크 - 인프런 콘텐츠에 동적으로 생성되는 Open Graph(OG) 이미지 적용하기
Next js dynamic opengraph 및 twitter card 이미지 생성하기
[개발삽질 satori]
자바스크립트 - encodeURIComponent