📌 DOM 사용한 회원가입 화면(signup)
❗️ 우선 html 골격을 만들고, .wrapper 안에배경화면 img를 깔아준다
<!DOCTYPE html>
<html lang="ko">
  <head>
    <meta charset="UTF-8" />
    <meta name="viewport" content="width=device-width, initial-scale=1.0" />
    <title>sign up</title>
    <link rel="stylesheet" href="../styles/common.css" />
    <link rel="stylesheet" href="../styles/register.css" />
  </head>
  <body>
    <main>
      <div class="wrapper">
      </div>
    </main>
    <script src="../js/register.js"></script>
  </body>
</html>
.wrapper {
  min-height: 100vh;
  background-image: linear-gradient(rgba(0, 0, 0, 0.5), rgb(0, 0, 0, 0.5)),
    url('../images/background.jpg');
  background-repeat: no-repeat;
  background-position: center;
  background-size: cover;

  display: flex;
  justify-content: center;
  align-items: center;
}
✏️
background-image에 그라데이션 주고싶을땐,linear-gradient(rgba(0, 0, 0, 0.5),
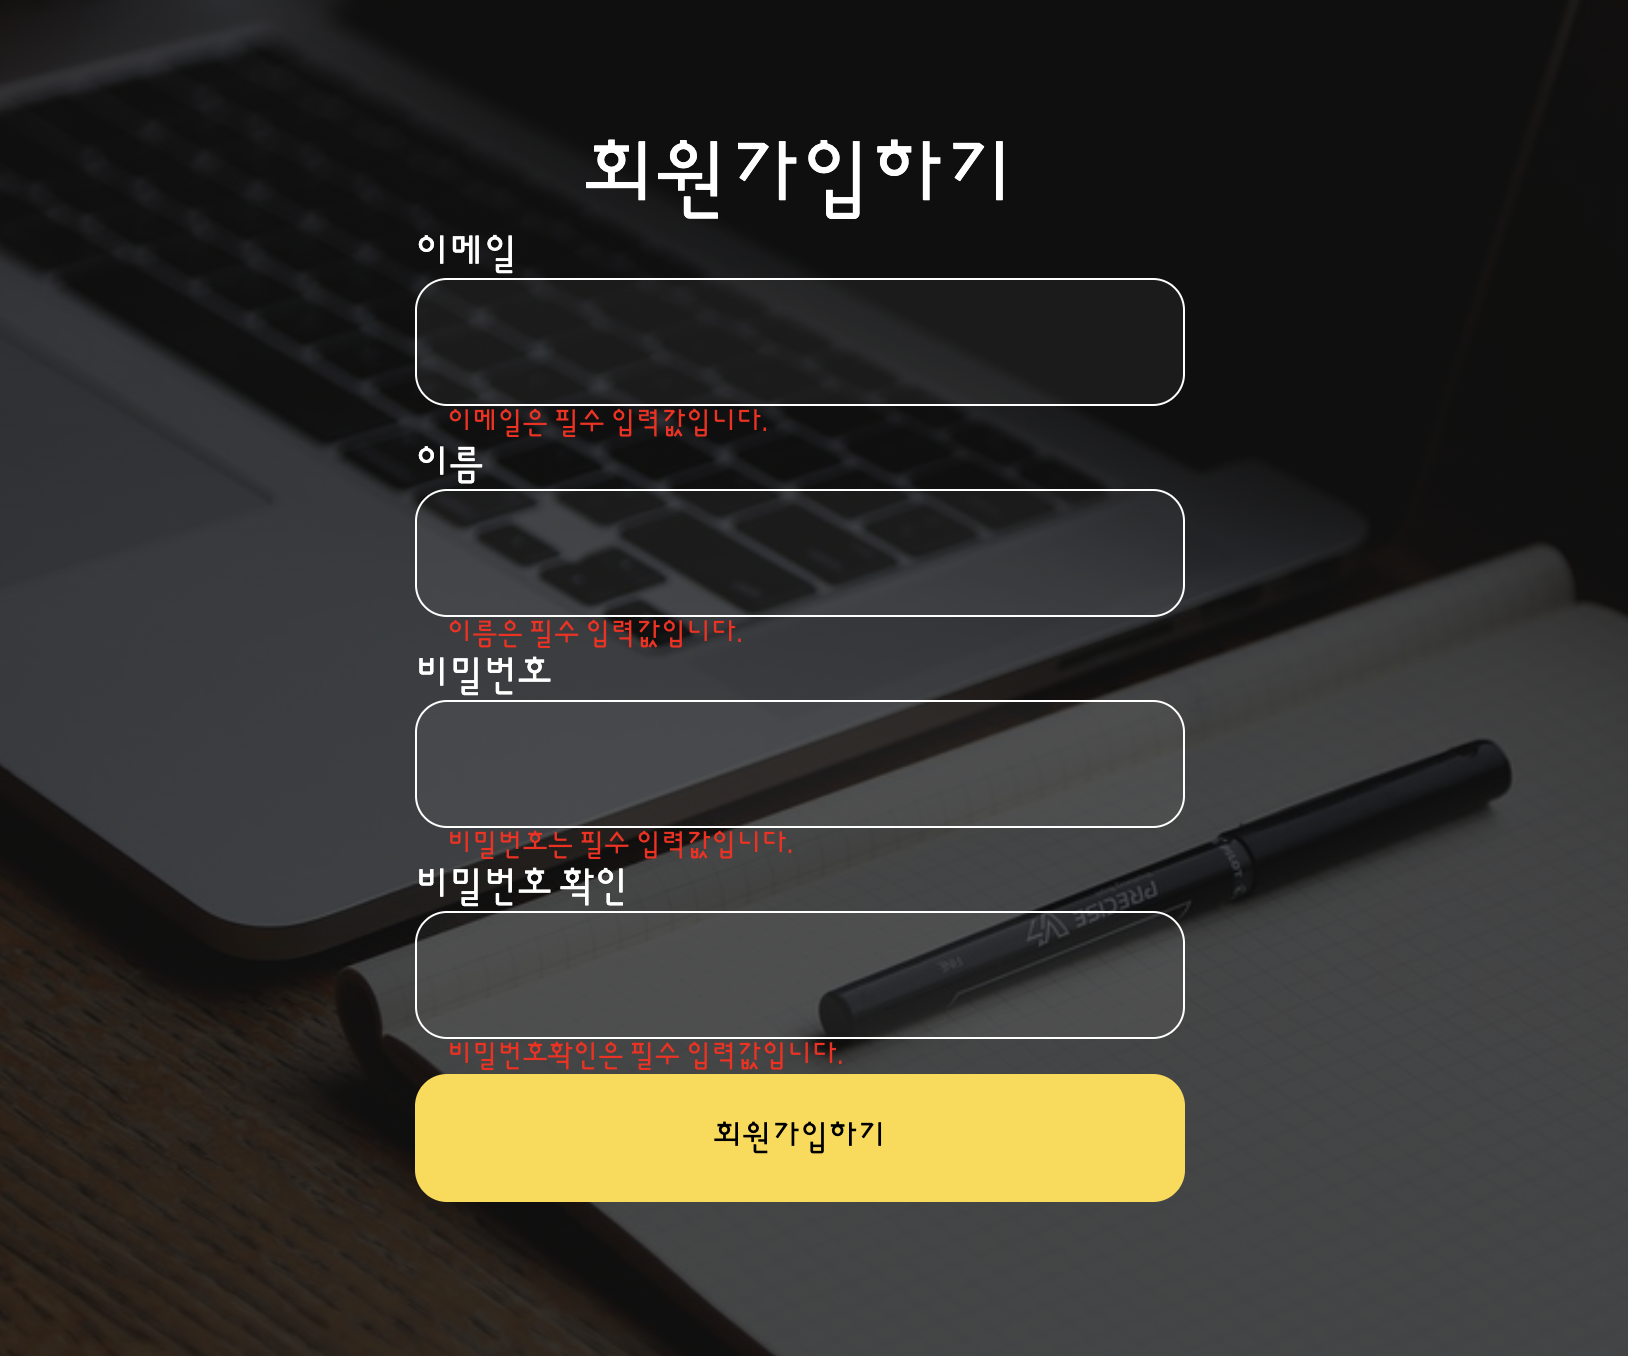
❗️ 그리고, form tag를 만들어준다. (서버쪽에 전달할때 form tag 안에 있는 입력값이 전달되어 정보를 처리하게 됩다.)
 <form name="register-form" id="register-form">
        <div class="form-header">
          <h2>회원가입하기</h2>
        </div>
        <div class="input-wrapper">
          <label for="email">이메일</label>
          <input id="email" name="email" type="email" />
          <p class="err-msg" id="email-err-msg">이메일은 필수 입력값입니다.</p>
        </div>
        <div class="input-wrapper">
          <label for="username">이름</label>
          <input id="username" name="username" type="text" />
          <p class="err-msg" id="username-err-msg">이름은 필수 입력값입니다.</p>
        </div>
        <div class="input-wrapper">
          <label for="password">비밀번호</label>
          <input id="password" name="password" type="password" />
          <p class="err-msg" id="password-err-msg">비밀번호는 필수 입력값입니다.</p>
        </div>
        <div class="input-wrapper">
          <label for="password-check">비밀번호 확인</label>
          <input id="password-check" name="password-check" type="password" />
          <p class="err-msg" id="password-check-err-msg">비밀번호 확인은 필수 입력값입니다.</p>
        </div>
        <button type="button" onclick="onRegister()">회원가입하기</button>
  </form>
register.css code
#register-form{
    display: flex;
    flex-direction: column;
    width: 385px;
  }

  .form-header{
    text-align: center;
  }

  .input-wrapper{
    display: flex;
    flex-direction: column;
  }

  input{
    height: 64px;
    box-sizing: border-box;
    padding: 20px 16px;
    border-radius: 16px;
    background-color: rgba(256, 256, 256, 0.05);
    border: 1px solid white;
    color: white;
  }

  .err-msg{
    color: red;
    padding: 0 16px;
    font-size: 14px;
    display: none;
  }

  button{
    height: 64px;
    border-radius: 16px;
    border: none;
    background-color: #fddb3a;
  }
회원가입 form 이랑 css로 회원가입 페이지 만들기는 다했고 ❗️

input에 value값 없이 회원가입 버튼 누르면 어떻게 되는지 코드를 보자❗️
register.js code
const onRegister = () => {
    let emailInput = document.querySelector('#email');
    // 사용자가 email입 input태그에 입력한 값은
    // emailInput.value 에 들어있다

    let userNameInput = document.querySelector('#username');
    // userNameInput.value에

    let passwordInput = document.querySelector('#password');

    let passwordCheckInput = document.querySelector('#password-check');

    // check에는 true가 들어있다
    let check = true;

    // 🌟 출력이 잘되는지 확인하려면 console.log 로 체크!
    // console.log(emailInput.value);
    // console.log(userNameInput.value);
    // console.log(passwordInput.value);
    // console.log(passwordCheckInput.value);
    let emailErrMsg = document.querySelector('#email-err-msg');

    // 이메일 입력 여부
    if (emailInput.value === '') { // 이메일을 입력하지 않았다는 소리
        // emailInput.value === '' 가 true 일때 실행되는 공간
        emailErrMsg.style.display = 'block';
        check = false;
    } else { // 이메일이 입력 되었다는 소리
        emailErrMsg.style.display = 'none';
    }

    // 이름 입력 여부
    let userNameErrMsg = document.querySelector('#username-err-msg');
    if (userNameInput.value === '') {
        userNameErrMsg.style.display = 'block';
        check = false;
    } else {
        userNameErrMsg.style.display = 'none';
    }
    // 비밀번호 입력 여부
    let passwordErrMsg = document.querySelector('#password-err-msg');
    if (passwordInput.value === '') {
        passwordErrMsg.style.display = 'block';
        check = false;
    } else {
        passwordErrMsg.style.display = 'none';
    }

    // 비밀번호 확인 입력 여부
    let passwordCheckErrMsg = document.querySelector('#password-check-err-msg');
    if (passwordCheckInput.value === '') {
        passwordCheckErrMsg.textContent = '비밀번호확인은 필수 입력값입니다.';
        passwordCheckErrMsg.style.display = 'block';
        check = false;
    } else if (passwordCheckInput.value !== passwordInput.value) {
        passwordCheckErrMsg.textContent = '비밀번호에 입력된 값가 다릅니다.';
        passwordCheckErrMsg.style.display = 'block';
        check = false;
    } else {
        passwordCheckErrMsg.style.display = 'none';
    }
비밀번호 확인 입력 여부 ( 확인이 다르면 값이 다르다고 뜸) ❗️

여기서 알아야할것은 ❗️ if else 예시 보세요 ❗️
//만약 버튼이 클릭이 된다면 특정 태그의 글자색상을 붉은색으로 바꿔줘
//if
if(조건식){
  조건식이 true일때 실행됨;
}
//if else
if(조건식){
  조건식이 true일때 실행됨;
}else{
  조건식이 false일때 실행됨;
}
//if else, if else
if(조건식1){
  조건식1이 true일때 실행;
}else{
  조건식1이 false일때 실행;
  if(조건식2){
    조건식2가 true일때 실행;
  }else{
    조건식2가 false일때 실행;
  }
}
//if, else if, else if, else
if(조건식1){
  조건식1이true일때실행;
}else if(조건식2){
  조건식1이 false이고 조건식2가 true일때 실행;
}else if(조건식3){
  조건식1false, 조건식2도 false, 조건식3은 true실행
}...{
  ...
}else{
  위에있는 조건식이 모두 false일때 실행;
}
이제 마지막으로 모달창(modal)을 뛰우자❗️
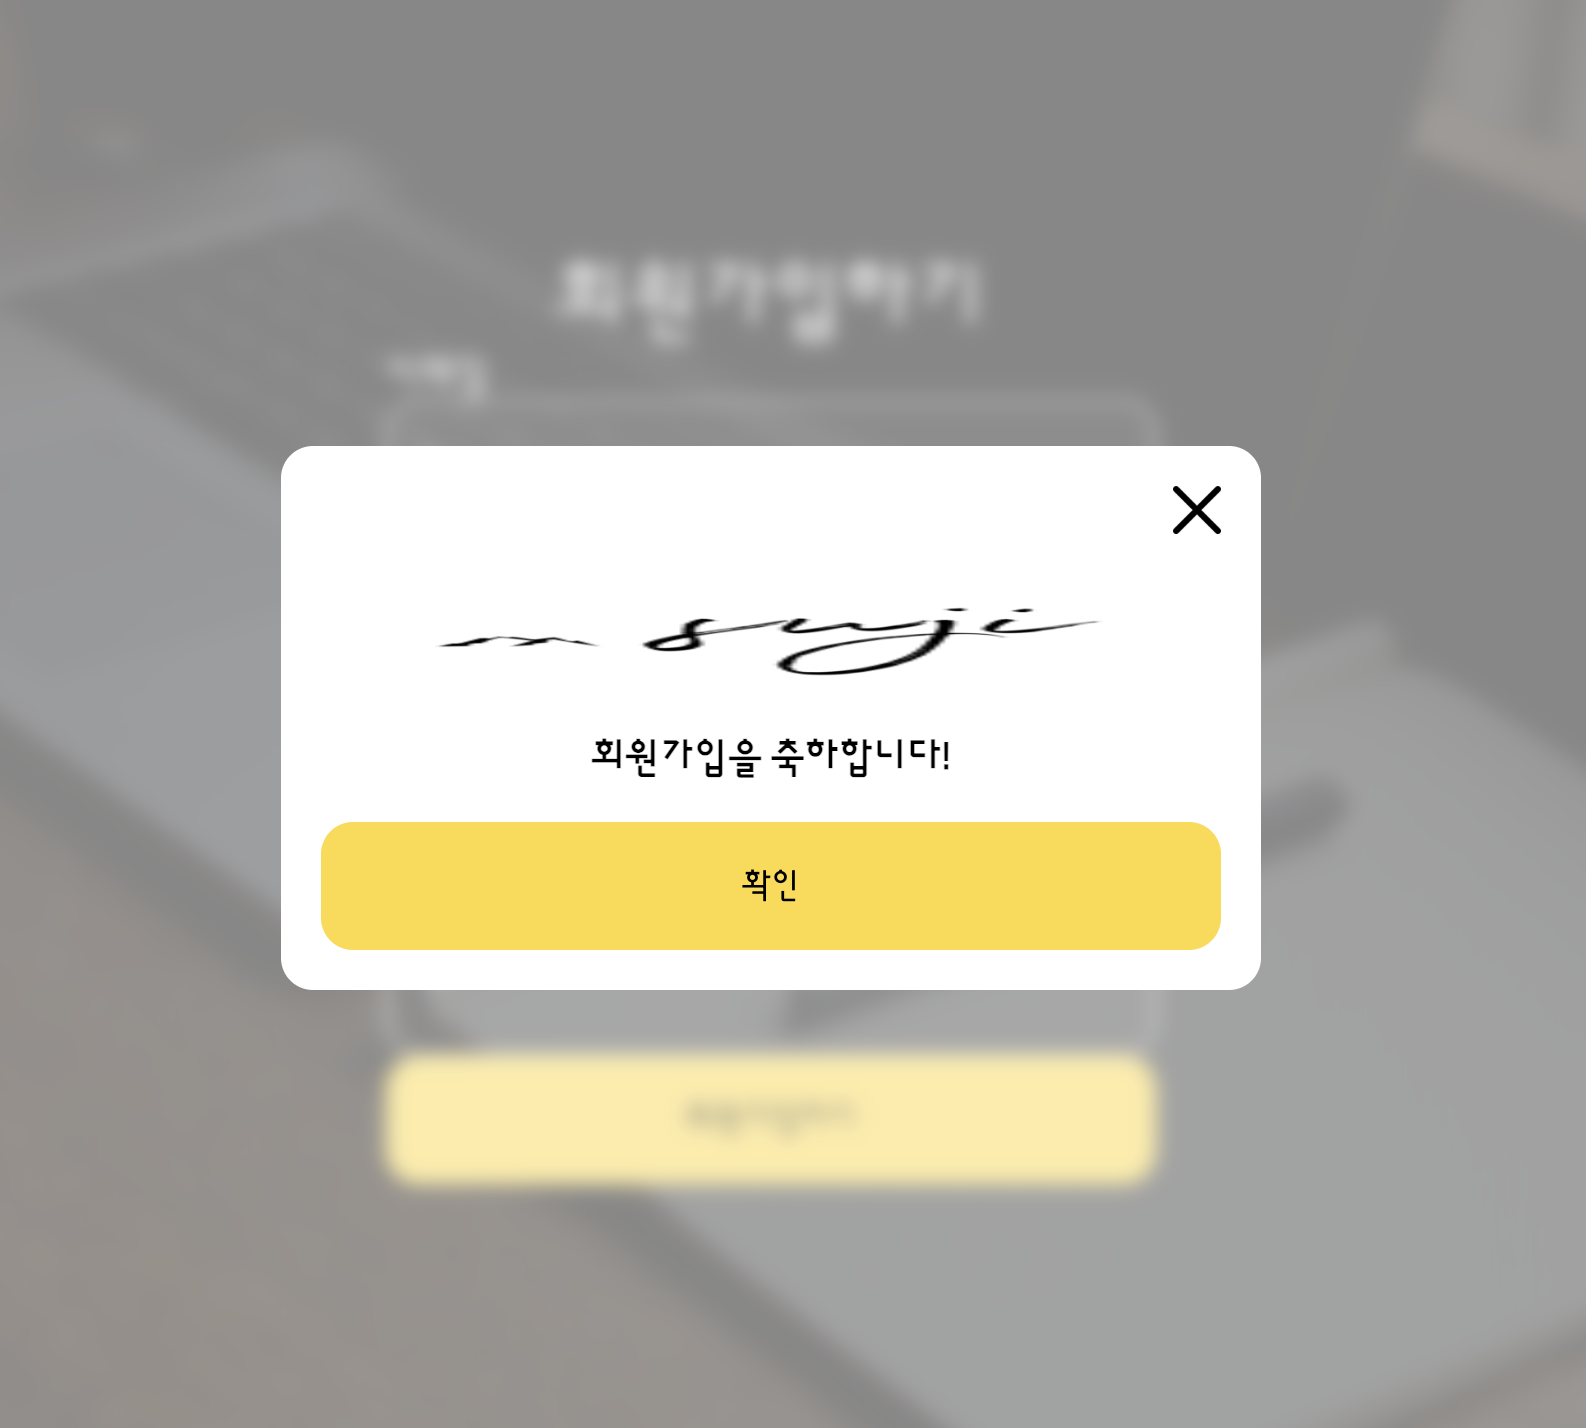
register.html
  <div class="modal-wrapper">
        <div class="modal">
          <img
            class="cancel-icon"
            src="../images/icons/close-black.png"
            alt="모달창닫기"
          />
          <img onclick="moveTo();" class="logo" src="../images/icons/sujilogo.png" alt="로고" />
          <p>회원가입을 축하합니다!</p>
          <button onclick="moveTo();">확인</button>
        </div>
  </div>
register.css
 .modal-wrapper{

    position: fixed;
    top: 0;
    bottom: 0;
    right: 0;
    left: 0;
    background-color: rgba(256, 256, 256, 0.5);
    backdrop-filter: blur(5px);

    display: none;
    justify-content: center;
    align-items: center;
  }

  .modal{
    width: 450px;
    border-radius: 16px;
    padding: 20px;
    background-color: white;

    display: flex;
    flex-direction: column;
    row-gap: 20px;
  }

  .modal > .cancel-icon{
    width: 24px;
    align-self: flex-end;
    cursor: pointer;
  }

  .modal > .logo{
    height: 60px;
  }

  .modal > p{
    color: black;
    text-align: center;
    font-weight: bold;
  }
register.js
// if 영역으로 한번도 들어간적이 없다면(모든 값들이 정상적으로 입력되었다는소리)
 if (check) {
     // 모달창을 보여줘
     // alert('회원가입이 성공했습니다!');
     let modalWrapper = document.querySelector('.modal-wrapper');
     modalWrapper.style.display = 'flex';
 }
}

const moveTo = () => {
 // console.log('확인');
 // 메인화면으로 이동시켜줘
 location.replace('../pages/index.html');
}
여기서❗️ window.location (Location 객체) 에 대해 봐보자 ❗️(window 생략가능)
location객체(내장객체)
위치와 관련된 여러가지key와value들이 들어있다
인터페이스는객체가🌟 연결된 장소(URL)를 표현합니다.
예를들어, {
href:'',
assign:function(){
},
replace:function(){
},
pathname:'/index.html',
...
...
}
location객체 안의assign,replace함수는 인자로 경로를 받아오며 해당 경로로 페이지를 이동시켜준다.
assign은뒤로가기가 가능하고,replace는뒤로가기가 불가능하다
✏️ 또다른
속성들, 이렇게나 많다. 쓸떄마다 필요한거 찾아쓰기!// "https://velog.io/@sjkang930" window.location.href // "https:" window.location.protocol // "velog.io/@sjkang930.com" window.location.host // "velog.io/@sjkang930.com" window.location.hostname // "" window.location.port // "/325" window.location.pathname // ?category=764998" window.location.search

나를위한 노트필기 📒🔎📝

그뤠잇!