GeometryReader 정의
A container view that defines its content as a function of its own size and coordinate space.
definition of GeometryReader from Apple.
활용 방법
기본적인 활용 방법
struct ContentView: View {
    var body: some View {
        GeometryReader { geometry in
            VStack(alignment: .center) {
                Text("Hello, world!")
                    .font(.largeTitle)
                    .frame(width: geometry.size.width / 2, height: (geometry.size.height / 4) * 3)
                    .border(Color.black)

                Text("Goodbye World")
                    .font(.largeTitle)
                    .frame(width: geometry.size.width, height: geometry.size.height / 4)
                    .border(Color.black)
            }
        }
    }
}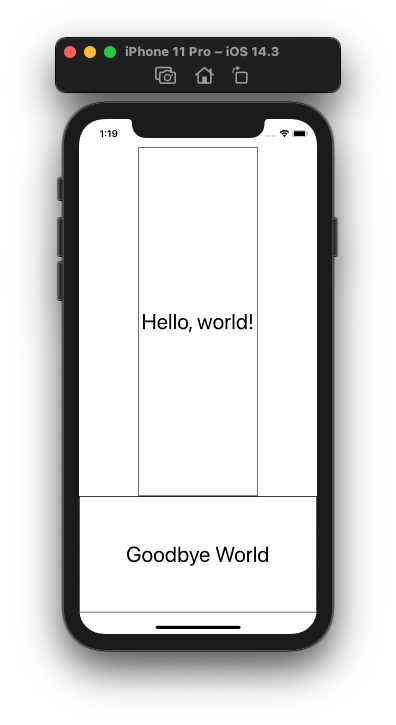
Hello, World! 텍스트는 스크린 가로 길이의 1/2, 세로 길이의 3/4,
Goodbye World 텍스트는 스크린 가로 길이는 동일, 세로 길이는 1/4 크기가 되었음을 확인할 수 있다.
부모뷰와 자식뷰
struct ParentView: View {
   var body: some View {
       VStack() {
           Rectangle()
               .foregroundColor(.blue)
           ContentView()
       }
   }
}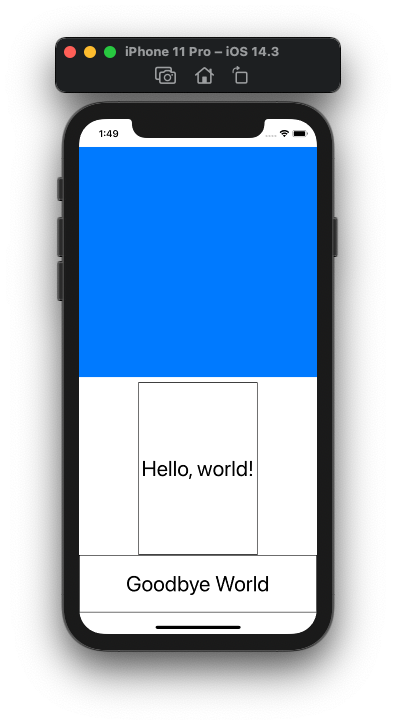
부모뷰에서 Rectangle() 을 추가하였고, 이에 따라 ContentView 가 활용할 수 있는 공간은 줄어들었다.
ContentView 는 줄어든 공간 크기에 맞춰 앞서 기본적인 활용에서 설정한 비율로 조정된 것을 확인할 수 있다.
Gesture & Animation 활용한 frame 변경
struct ContentView: View {
   @State var isScaled = false

   var body: some View {
       GeometryReader { geometry in
           VStack(alignment: .center) {
               Text("Hello, world!")
                   .font(.largeTitle)
                   .frame(width: isScaled ? geometry.size.width : geometry.size.width / 2, height: (geometry.size.height / 4) * 3)
                   .border(Color.black)
                   .onTapGesture {
                       withAnimation {
                           isScaled.toggle()
                       }
                   }

               Text("Goodbye World")
                   .font(.largeTitle)
                   .frame(width: geometry.size.width, height: geometry.size.height / 4)
                   .border(Color.black)
           }
       }
   }
}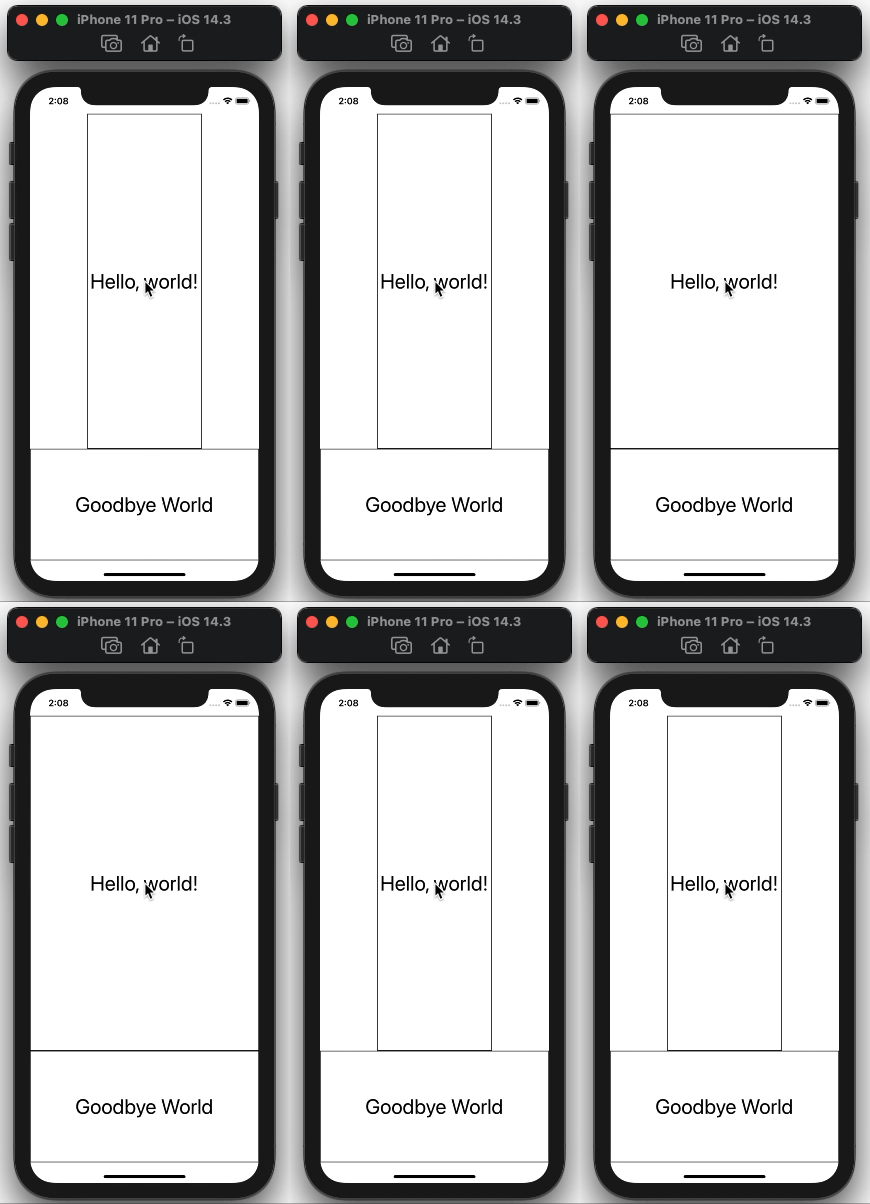
제스쳐와 에니메이션을 활용하며 프레임의 크기를 변경시켜 보았다.
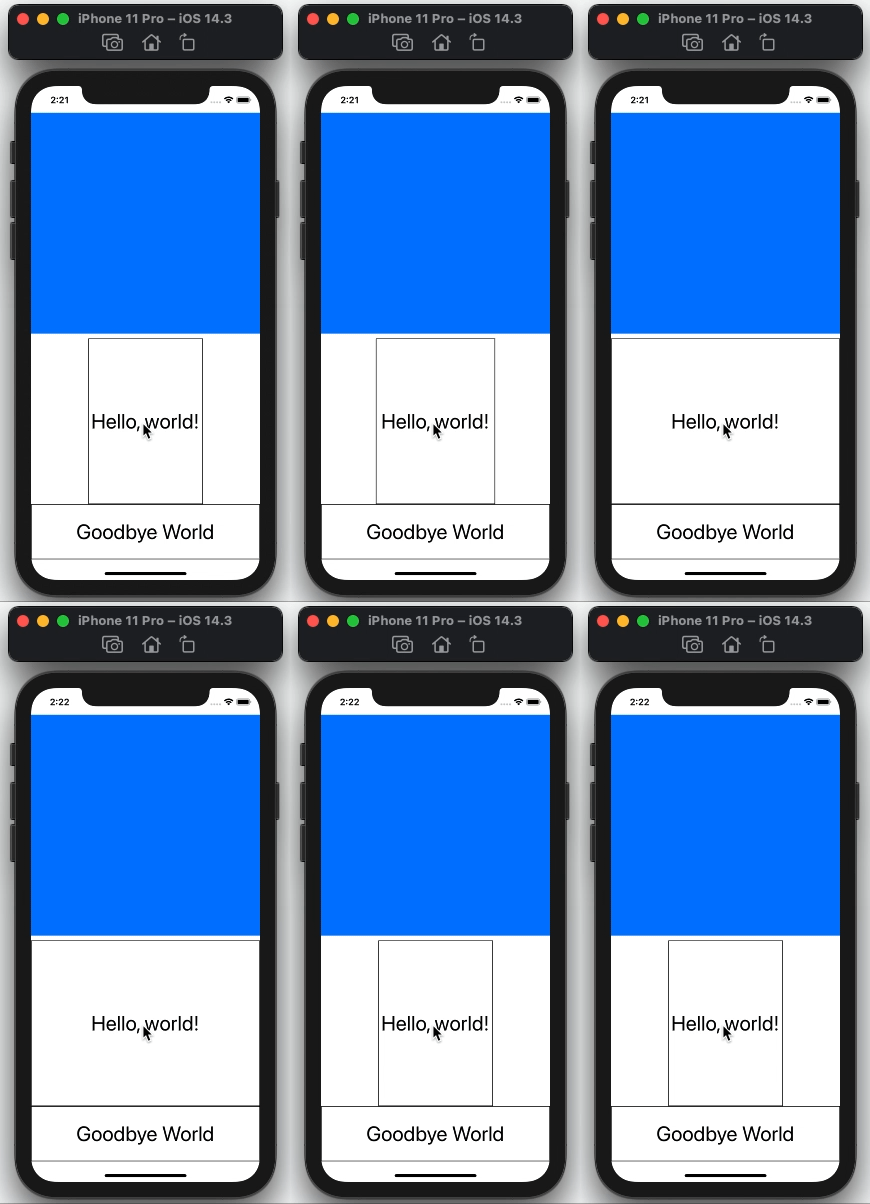
부모뷰에서도 정상적으로 작동하는 것을 확인할 수 있다.
부모뷰의 padding 을 무시하며 확장시키기
struct ParentView: View {
   @State var isScaled = false

   var body: some View {
       VStack(spacing: 0) {
           Rectangle()
               .foregroundColor(.blue)
           ContentView(isScaled: $isScaled)
               .ignoresSafeArea()
               .padding(isScaled ? 0 : 30)
       }
   }
}

struct ParentView_Previews: PreviewProvider {
   static var previews: some View {
       ParentView()
   }
}
struct ContentView: View {
@Binding var isScaled: Bool
var body: some View {
GeometryReader { geometry in
VStack(alignment: .center) {
Text("Hello, world!")
.font(.largeTitle)
.frame(width: isScaled ? geometry.size.width : geometry.size.width / 2, height: (geometry.size.height / 4) * 3)
.border(Color.black)
.onTapGesture {
withAnimation {
isScaled.toggle()
}
}
Text("Goodbye World")
.font(.largeTitle)
.frame(width: geometry.size.width, height: geometry.size.height / 4)
.border(Color.black)
}
}
}
}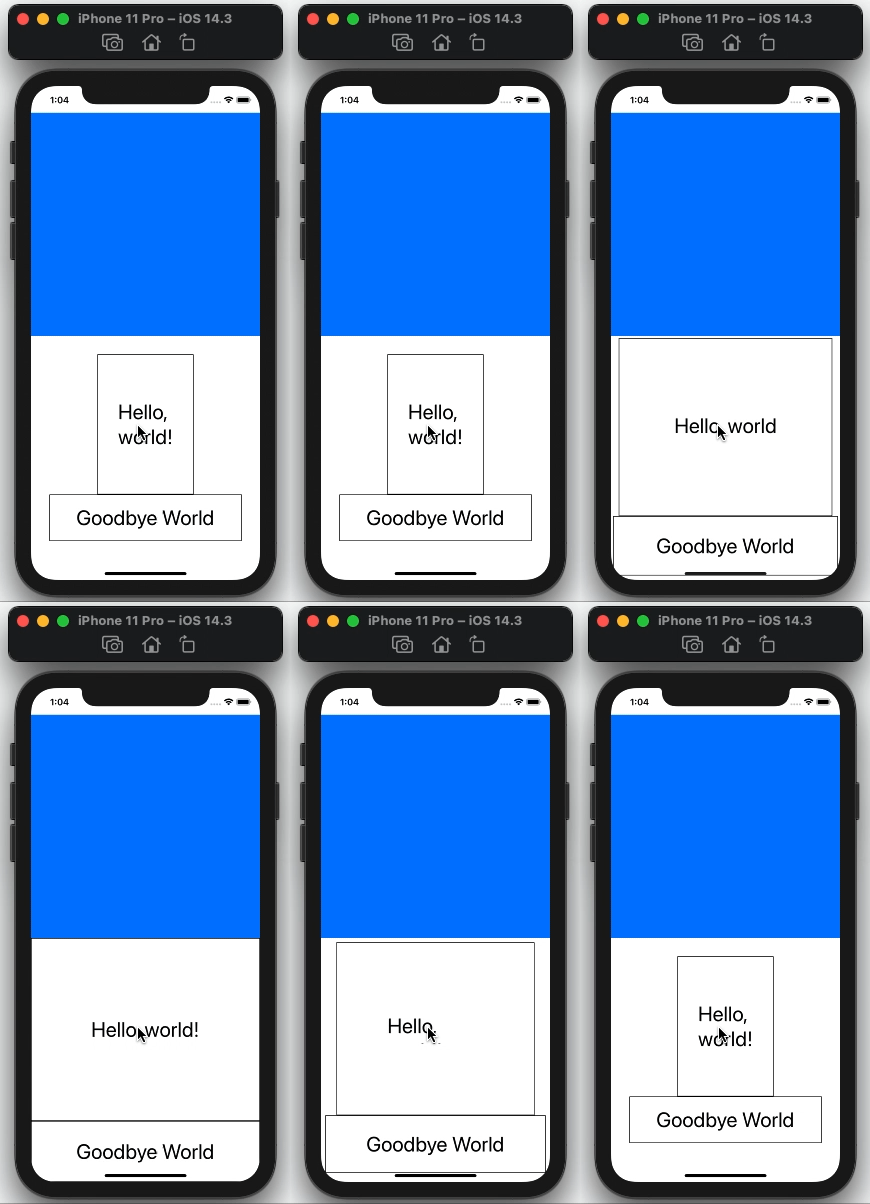
상태 프로퍼티(State property) 를 바인딩을 통하여 isScaled 라는 boolean 타입의 변수를 자식뷰와 함께 공유하도록 한다. 그 후, 클릭 여부에 맞게 padding 의 값을 조정하는 방식으로 구현하였다.
position(x:y:) - 자식뷰를 부모뷰의 가운데에 배치하기
struct GeometryView: View {
    var body: some View {
        GeometryReader { zgio in
            Text("hey")
                .frame(width: 100, height: 100, alignment: .center)
                .border(Color.black, width: 3)
        }
        .frame(width: 200, height: 200)
        .border(Color.red, width: 3)
    }
}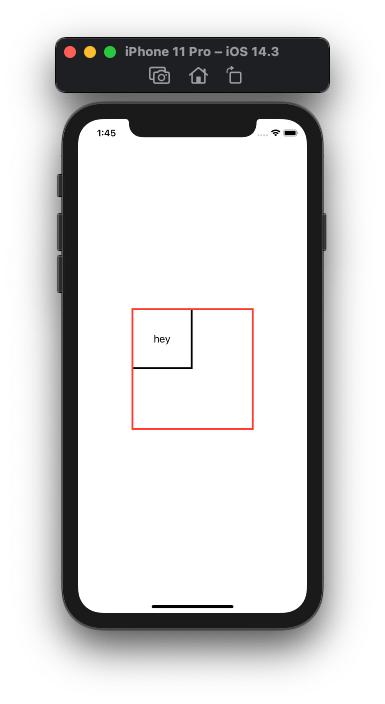
GeometryReader 를 적용하였을 때, 위와 같이 하위뷰의 위치가 가운데로 정렬되지 않는 것을 확인할 수 있다. 이를 해결하기 위해 postion 메소드를 적용한다.
struct GeometryView: View {
    var body: some View {
        GeometryReader { zgio in
            Text("hey")
                .frame(width: 100, height: 100, alignment: .center)
                .border(Color.black, width: 3)
                .position(x: zgio.size.width / 2, y: zgio.size.height / 2) // 추가된 항목
        }
        .frame(width: 200, height: 200)
        .border(Color.red, width: 3)
    }
}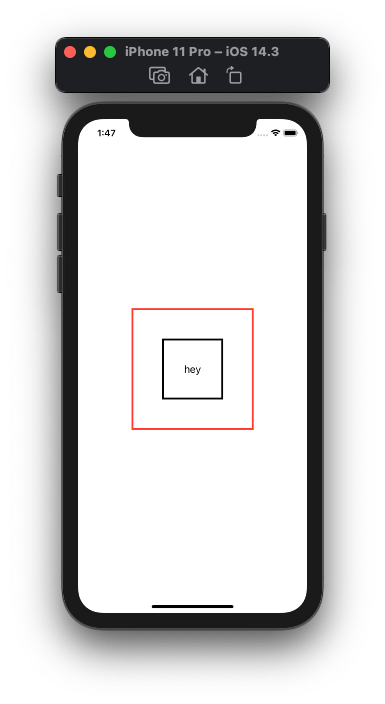
poistion method 를 적용해 준 뒤, x와 y값을 각각 부모뷰의 크기의 반으로 지정해 주었다. 이에 자식뷰가 가운데로 정렬이 된 것을 확인할 수 있다.
Instance Method
- position(x:y:) - 입력되는 x 와 y 값에 의하여 해당 자식뷰의 가운데 지점의 좌표가 정해진다.
func position(x: CGFloat = 0, y: CGFloat = 0) -> some View