1. ScoreManager (점수 시스템)
2. SoundManager (효과음)
3. MouseManager (커서 관리)
이번에는 자신이 얼마나 잘하는지를 알수있게끔 해주는 점수 시스템을 만들어 볼 것이다.
점수 시스템은 ScoreManager에서 관리하고, 플레이 도중에 계속해서 점수를 나타낸 것이다.
플레이 시간에 따라, 혹은 음식을 먹으면 점수가 늘어나고, 게임오버시 점수를 보여준다.
using System.Collections;
using System.Collections.Generic;
using UnityEngine;
using UnityEngine.UI;

public class ScoreManager : MonoBehaviour
{
    [SerializeField] Text textScore;
    public int score
    {
        get; private set;
    } = 0;
    public void AddScore(int newScore)
    {
        score += newScore;
    }
    public void Update()
    {
        if (!GameManager.Instance.State) return;
        textScore.text = score.ToString();
    }
}
먼저 ScoreManager를 만들어준뒤 다음과 같이 작성한다.
textScore는 score를 보여줄 Text,
score는 다른 클래스에서 읽기만 가능하게 프로퍼티로 작성하였다. (초깃값은 0)
AddScore함수를 통해 score 값을 증가시키고, Update로 계속해서 Textscore의 텍스트를 변화시킨다.
이후에 Score Text와 Manager를 만들고, ScoreManager에 ScoreText를 넣어준다.
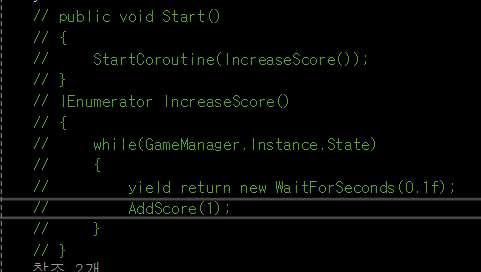
    public void Start()
    {
        StartCoroutine(IncreaseScore());
    }
    IEnumerator IncreaseScore()
    {
        while(GameManager.Instance.State)
        {
            yield return new WaitForSeconds(0.1f);
            AddScore(1);
        }
    }
이후 ScoreManager에 시간이 흐를때마다 점수가 증가하는 코드를 추가로 붙혀준다.
0.1초마다 1의 점수가 증가하기에 1초마다 10의 점수가 증가하게된다.
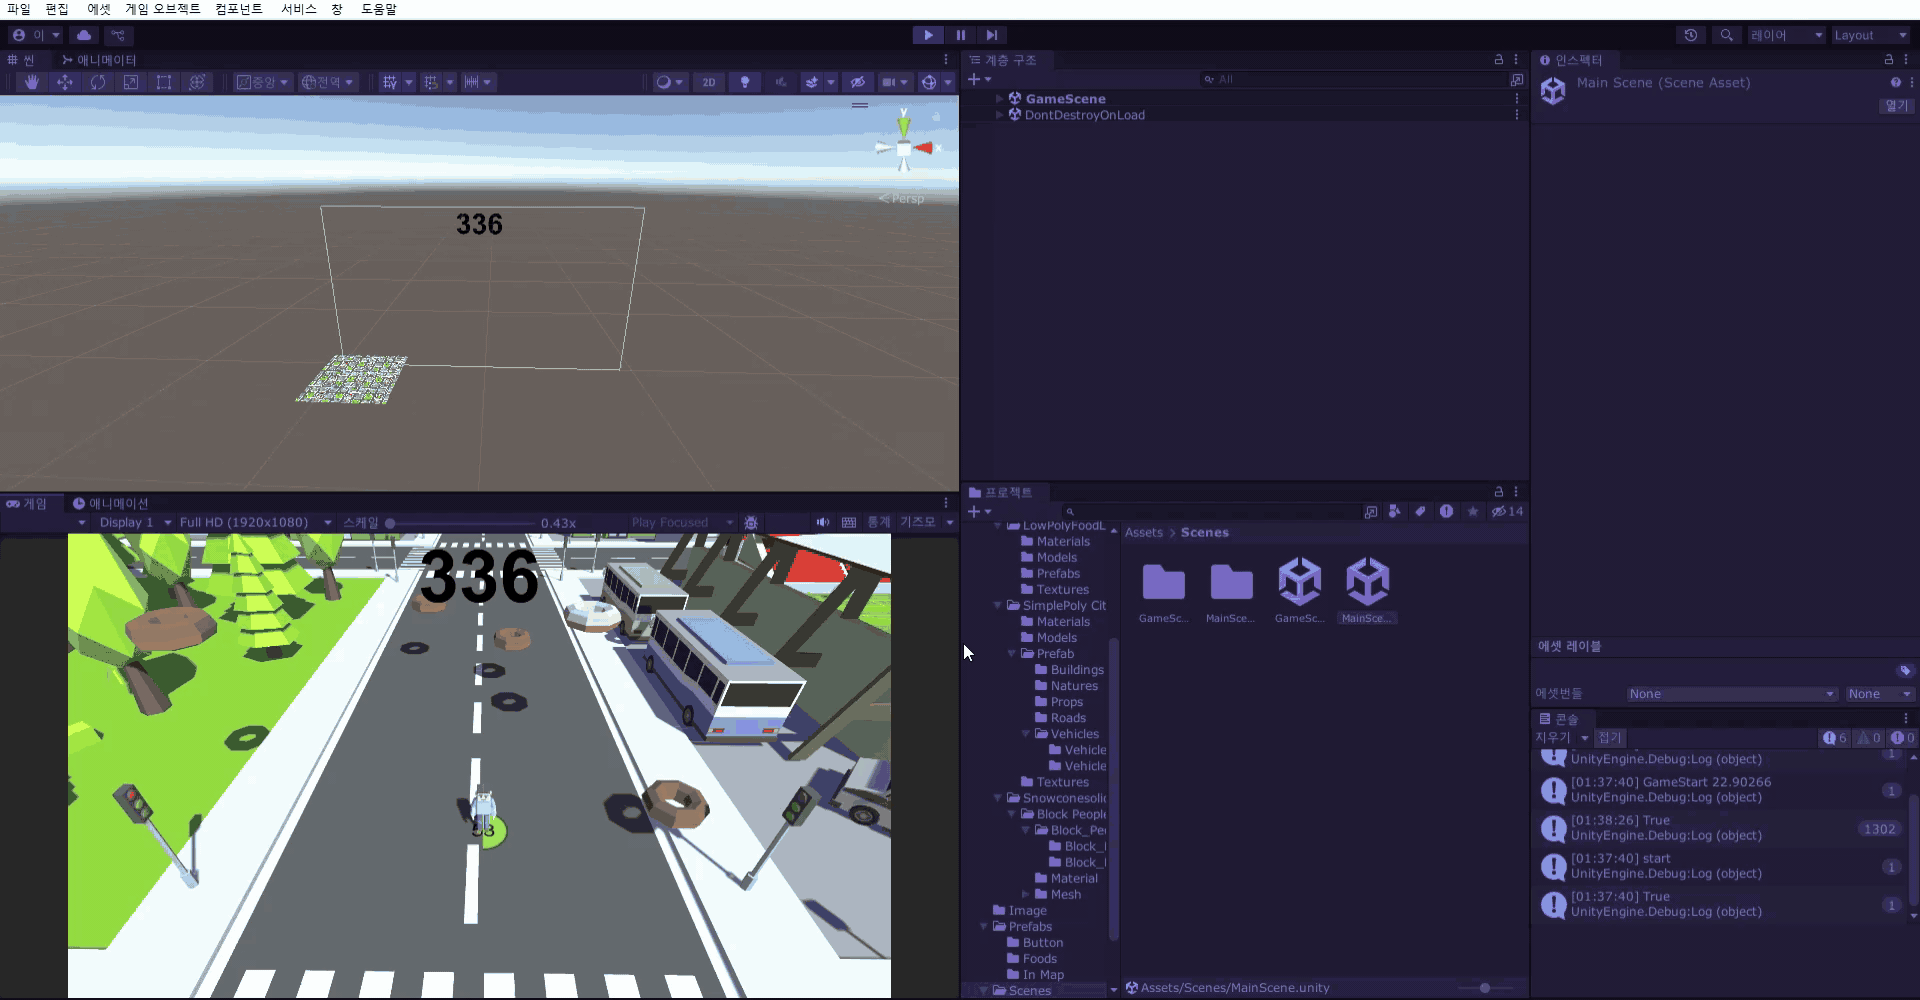
실행해보면 이렇게 점수의 값이 증가하는 것을 볼 수있다.
[SerializeField] ScoreManager scoreManager;이후 PlayerHealth 스크립트에 ScoreManager형의 변수를 만들고,
public void HealthUpdate(int value)
{
Health = Health + value;
scoreManager.AddScore(value);
healthBar.fillAmount = (float)Health / maxHealth;
healthText.text = Health.ToString();
if(Health <= 0 && GameManager.Instance.State)
{
Die();
}
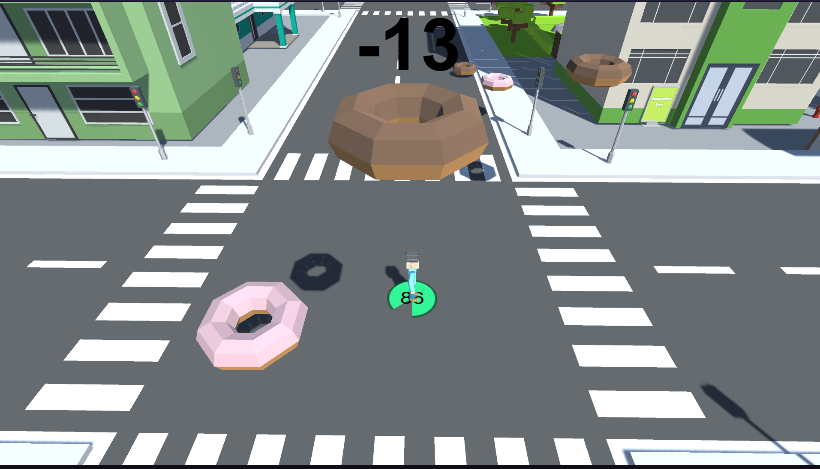
}HealthUpdate 코드 안에 ScoreManager의 점수를 올리는 코드를 한줄 작성한다.
이후 Inspector창에서 ScoreManager를 넣어주면...
음식을 먹을때, 증가되는 회복량만큼 점수가 증가하는 것을 볼 수있다.
public event Action onDead;그리고 GameManger에 델리게이트를 만들어줄건데,
이 이벤트함수는 게임 오버시 호출된다.
조금더 간편한 코드간의 연결을 위해 작성해 주었다.
    public void GameOver()
    {
        Debug.Log("GameOver " + Time.time);
        state = false;
        onDead();
    }
이후에 GameOver함수에 onDead(); 를 넣어 구독하고 있는 함수를 모두 호출시킨다.
    void GameOverText()
    {
        textScore.transform.position += new Vector3(0, -351, 0);
        textScore.fontSize = 214;
        Color color = new Color32(48, 48, 48,255);
        textScore.color = color;
    }
ScoreManager에 위 함수를 작성한다.
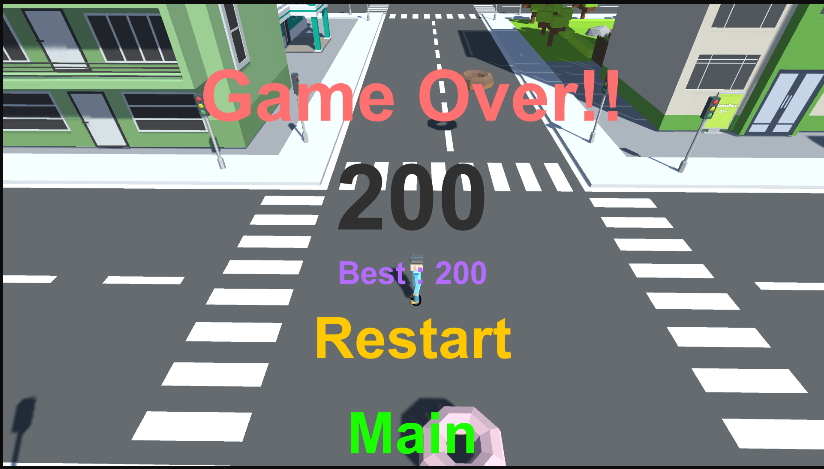
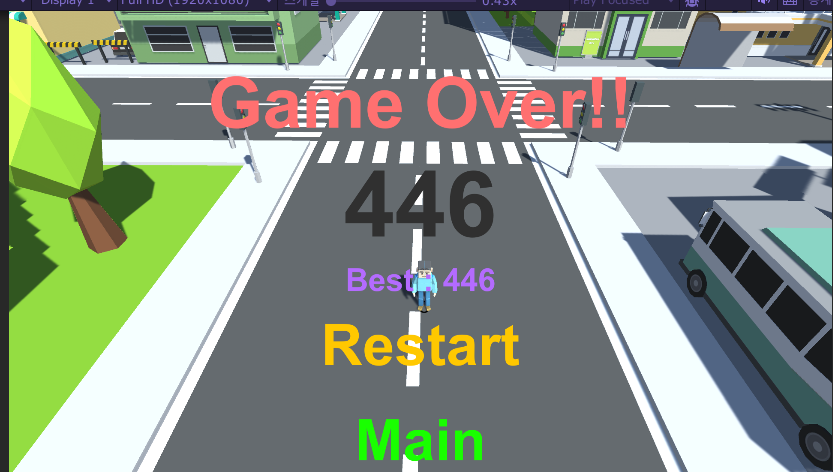
게임오버 시, textScore의 위치와, 색깔, 크기를 바꿔주는 함수이다.
    private void OnEnable()
    {
        GameManager.Instance.onDead += GameOverText;
    }
    private void OnDisable()
    {
        GameManager.Instance.onDead -= GameOverText;
    }
이후에 OnEnable과 OnDisable에 이벤트 함수를 구독,해제를 한다.
게임오버 시 적절한 위치로 이동하는 것을 볼 수 있다.
그런데 Score의 값이 뭔가 이상한게 보인다.
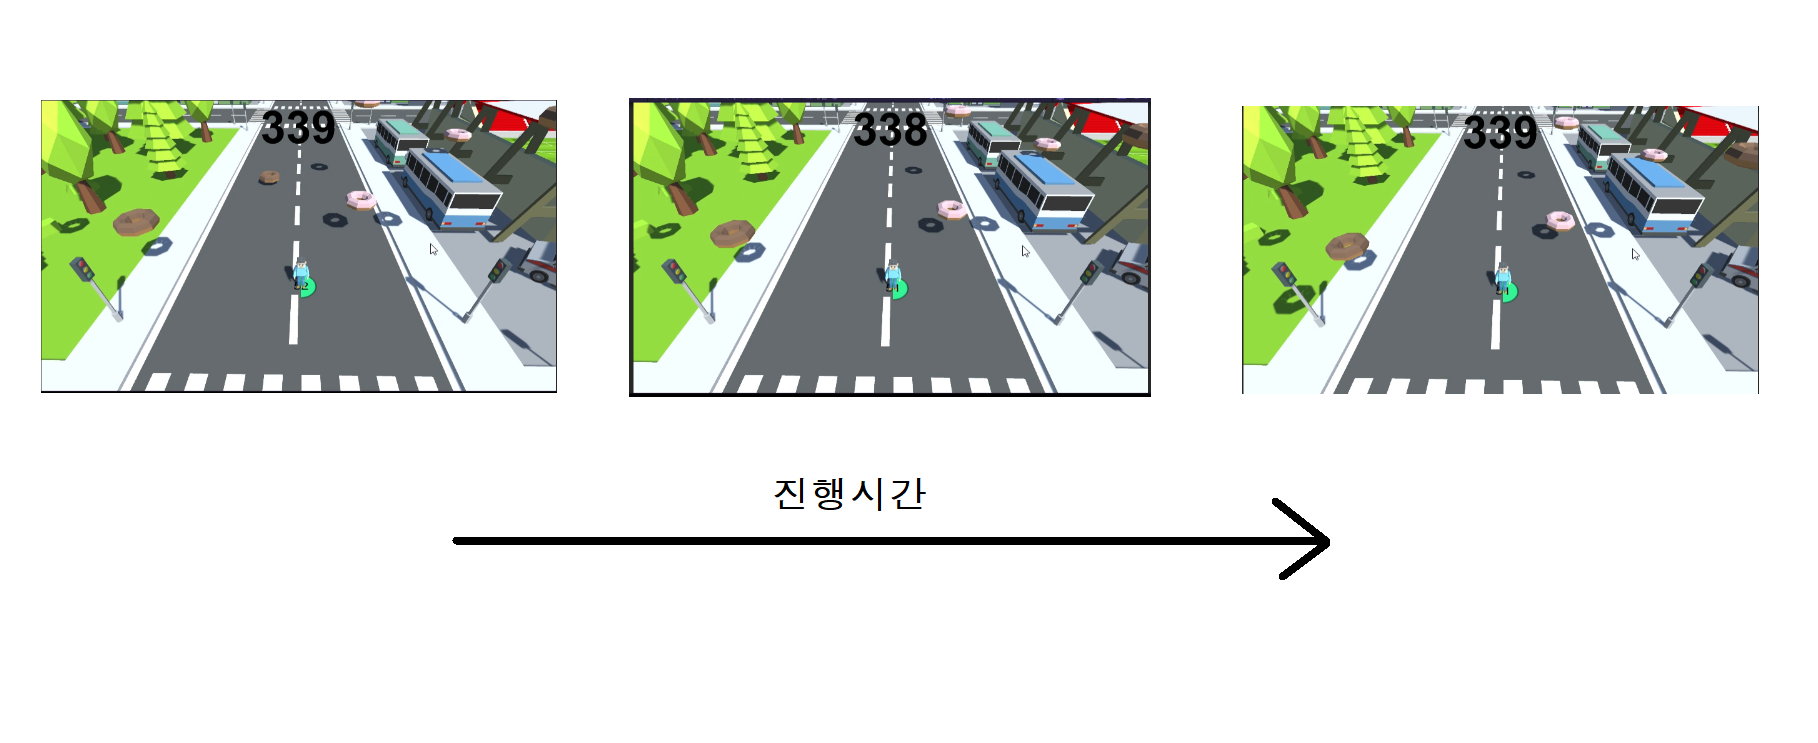
확인 해보니, 잠깐씩 Score가 전으로 돌아가는 경우가 존재하였다.
ScoreManager에서 계속해서 점수를 증가하는 함수를 주석처리 해보고 실행을 해보니
약 1초마다 계속해서 점수가 1씩 감소한다는 것을 알게되었고,
뭔가 속도가 이상해서 Hp바를 살펴보니 Hp가 감소할때도, Score의 영향을 준다는 것을 알게되었다.
[SerializeField] ScoreManager scoreManager;

scoreManager.AddScore(value);
그래서 PlayerHealth의 위 코드들을 지워준 이후,
Food 스크립트를 수정해주었다.
using System.Collections;
using System.Collections.Generic;
using UnityEngine;
using UnityEngine.SceneManagement;

public class Food : MonoBehaviour
{
    [SerializeField] float fallSpeed; // 떨어지는 속도
    [SerializeField] int increaseHealth; // 체력 증가값
    [SerializeField] int increaseScore; // 점수 증가값

    ScoreManager scoreManager;
    private void Awake()
    {
        scoreManager = FindObjectOfType<ScoreManager>();
    }
    private void Update()
    {
        transform.position += Vector3.down * TimeManager.Instance.FoodFallSpeed * Time.deltaTime;
    }
    private void OnTriggerEnter(Collider other)
    {
        switch(other.gameObject.tag)
        {
            case "Player":
                PlayerHealth playerhealth = other.gameObject.GetComponent<PlayerHealth>();
                if (playerhealth != null) playerhealth.HealthUpdate(increaseHealth);
                OnContect();
                scoreManager.AddScore(increaseScore);
                break;
            case "Ground": OnContect(); break;
        }
    }
    void OnContect()
    {
        Destroy(gameObject);
    }
}
추가 한 코드는 점수 증가값 변수 선언, ScoreManager를 찾는 코드, Player와 닿았을 때, 점수 증가값만큼 score를 더하는 함수를 추가해 주었다.
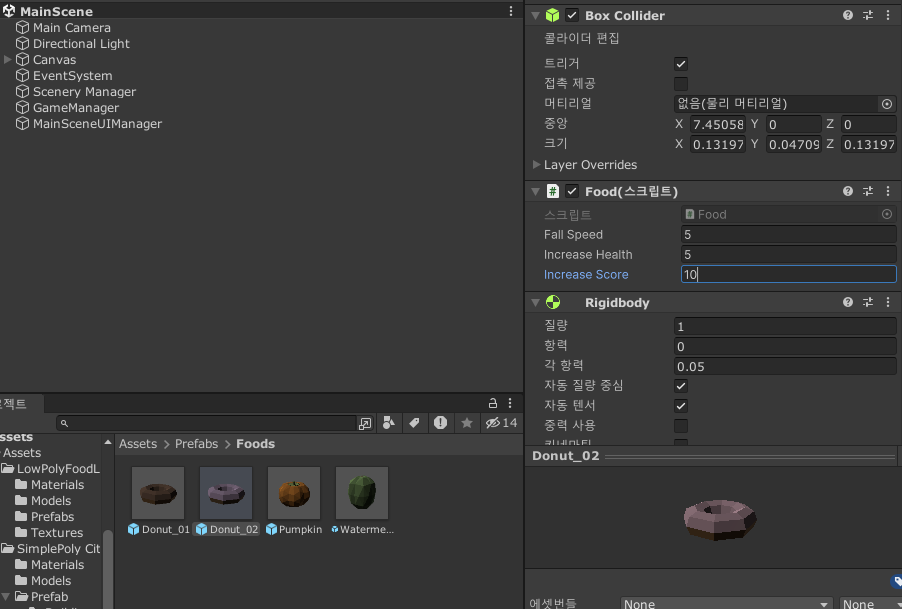
이후에 여러 Food의 프리팹에 들어가 점수 증가값을 정해주었다.
(점수를 여러 수정하였고, 1초에 자동적으로 50점(0.02f), 초코도넛은 5, 딸기도넛은 10의 점수를 가지게 하였다.)
이번에는 최고 점수 시스템을 만들어 볼 것이다.
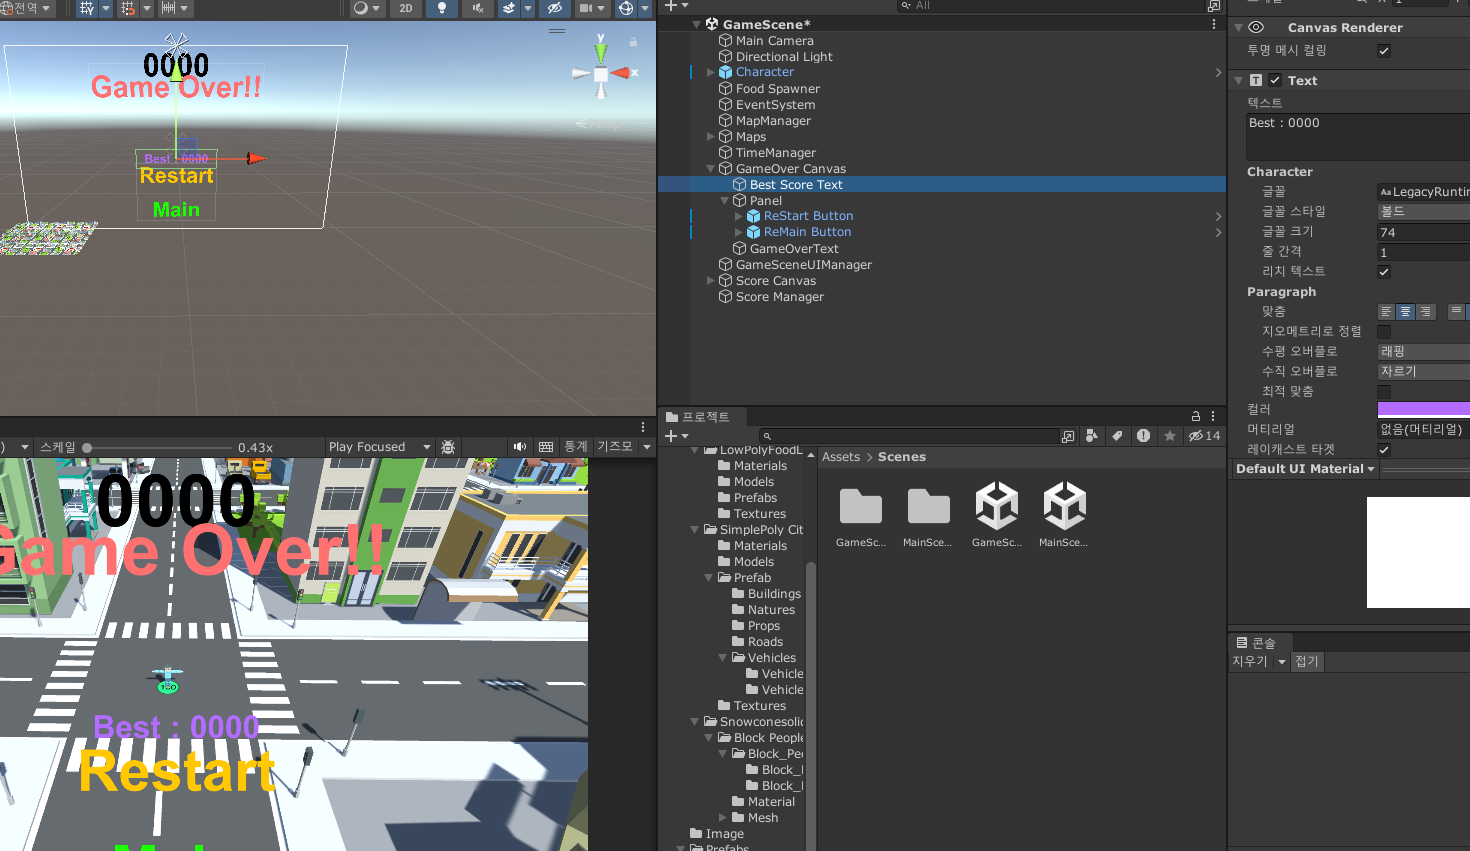
먼저 GameOver창에 Best Score Text를 만들어준다.
Best Score같은 경우, 플레이를 계속해서 할 때, 가장 높은 점수를 text로 가진다.
    void OnGameOverText()
    {
        SetTextScore();
    }
    void SetTextScore()
    {
        textScore.transform.position += new Vector3(0, -351, 0);
        textScore.fontSize = 214;
        Color color = new Color32(48, 48, 48, 255);
        textScore.color = color;
    }
먼저 ScoreManager의 "GameOverText"함수를 OnGameOverText라고 이름을 바꿔준 이후에, 내부 코드를 SetTextScore로 옮기고 SetTextScore함수를 호출하게끔 바꿔준다.
이렇게 수정한 이유는 조금더 가독성있고, 역할을 분리해주기 위해서이다.
[SerializeField] Text textBestScore;이후에 최고 점수를 보여줄 Text 변수를 선언한 뒤,
    void SetBestScore()
    {
        // textScore.text = score.ToString();
        if (PlayerPrefs.GetInt("BestScore") <= score)
        {
            PlayerPrefs.SetInt("BestScore", score);
        }
        textBestScore.text = "Best : " + PlayerPrefs.GetInt("BestScore").ToString();
    }
SetBestScore함수를 만들었다.
PlayerPrefs를 이용하여 GetInt("BestScore")에다가 최고득점을 넣게 되는데, 현재 score가 더 클 경우에, BestScore를 score로 할당해준다.
이후에 최고득점 텍스트에 최고득점과 함께 text를 채워준다.
    void OnGameOverText()
    {
        SetTextScore();
        SetBestScore();
    }
이후 OnGameOverText함수에 SetBestScore함수를 호출하도록 작성한다.
이렇게 작성하고 Inspector창에서 textBestScore에 최고 득점 텍스트를 넣어준 후 플레이를 해보면
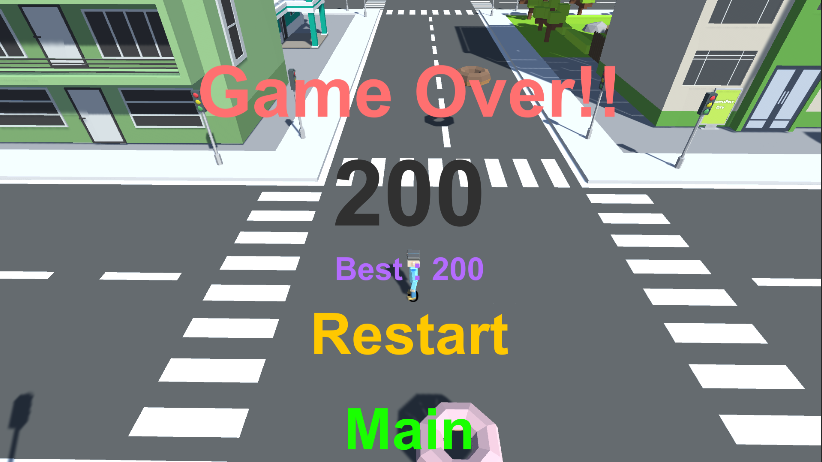
최고득점 점수가 잘 나오는 것을 볼 수 있다. PlayerPrefs를 통해 저장해두었기 때문에, Restart,Main, 게임 껐다 켜기를 해도 BestScore는 남아있는 것을 볼 수 있다.

간혹 가다가 이런식으로 현 점수가 최고점수일 때, 서로 맞지 않는 경우가 있었다.

또한 Restart나 Main을 눌렀을 때, 불편하게 Score가 변하는 것을 볼수 있었다.
내 생각에 이러한 이유는 ScoreManager에 있는 IncreaseScore함수 때문이라고 생각하는데,
    IEnumerator IncreaseScore()
    {
        while(GameManager.Instance.State)
        {
            yield return new WaitForSeconds(0.02f);
            AddScore(1);
        }
    }
아마 저 0.02초 후에 점수가 올라가는 코드가
State가 false가 되었는데도, 그사이에 한번 실행되어서, 점수가 올라가거나,
State가 true가 되었을 때, 씬 불러오기 전, 바로 실행되어서, 점수가 올라가는 그런 오류인 것같다.
이런 문제점을 해결하기 위해, Score의 변화가 있을 때만, ScoreText의 text값을 변화시켜주면 될 것 같기에, 위와 같이 작성해준다.
    public void AddScore(int newScore)
    {
        if (!GameManager.Instance.State) return;
        score += newScore;
        textScore.text = score.ToString();

    }
    public void Update()
    {

    }
Update에서 게임오버가 아닐시, Text를 바꾸는 코드를 점수의 변동이 있을때만 바꿔주게금 코드를 옮겨주었다.
이렇게 작성하게된다면,
현 스코어와 Best Score의 차이가 안나고, 다시 시작을 해도 스코어가 바뀌지 않는 것을 볼 수 있다.
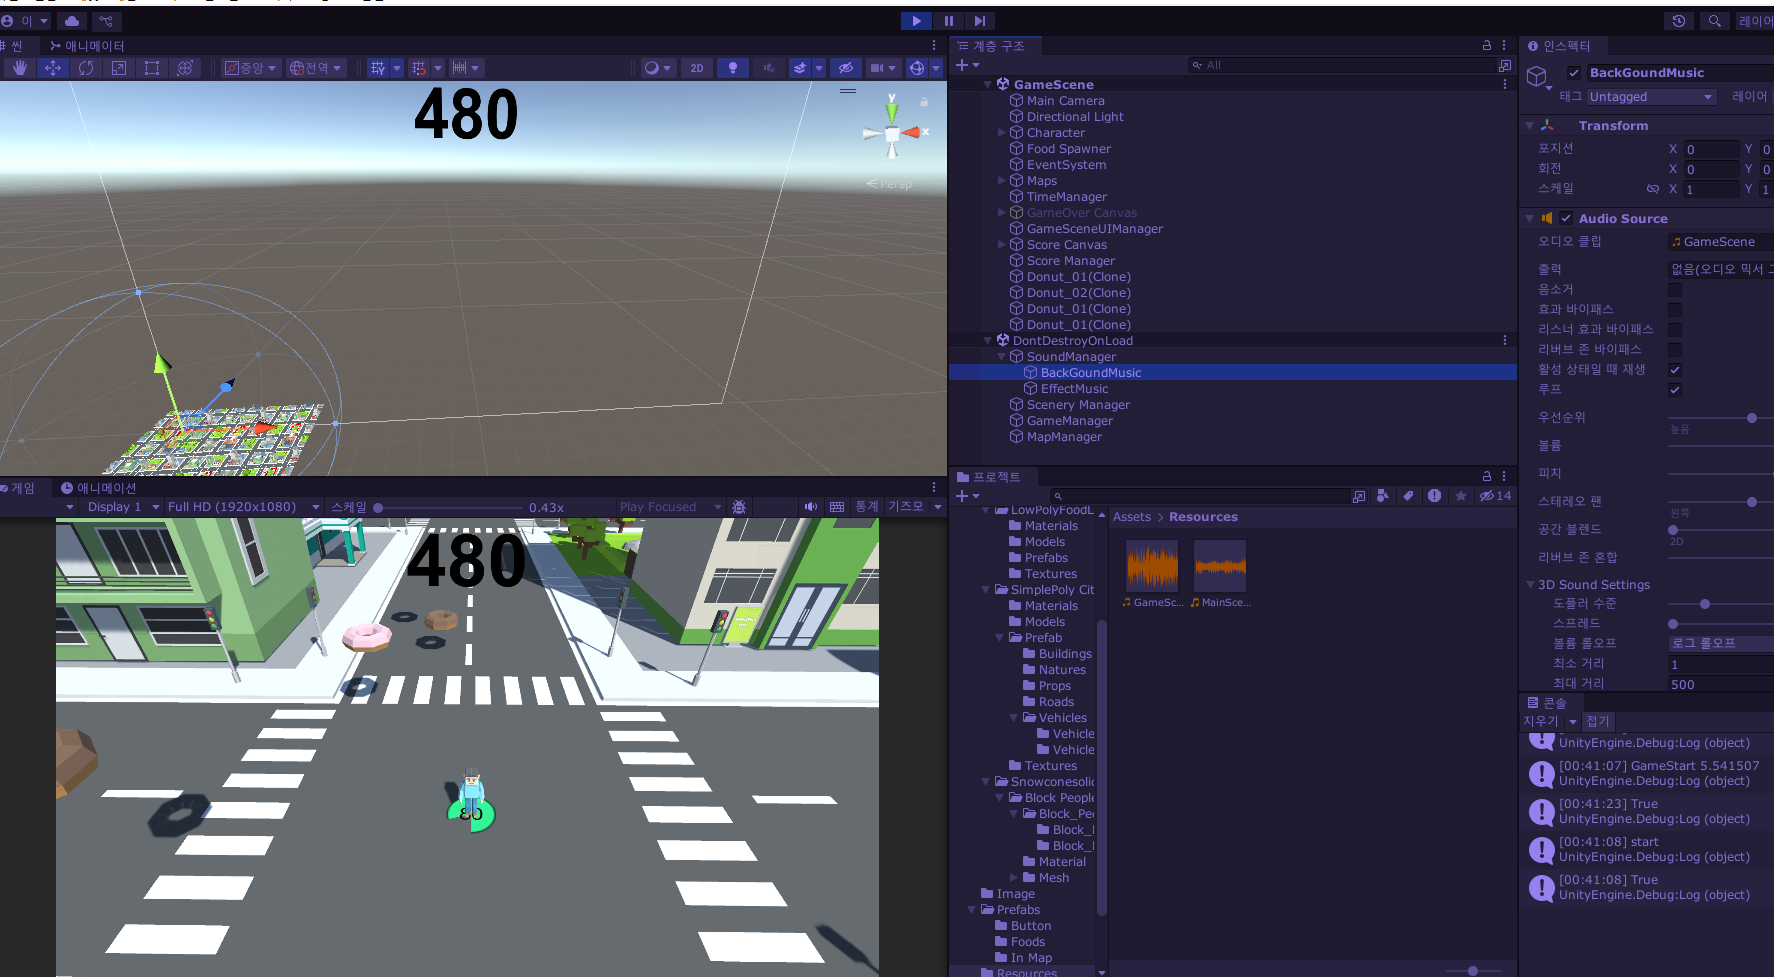
이번엔 게임의 소리를 추가해 볼 것이다.
먼저 SoundeManager를 만들어서 배경음과, UI효과음 같은 것들을 관리할 것이고, 음식을 먹을때 등은 해당 스크립트에서 관리 할 것으로 생각중이다.
using System.Collections;
using System.Collections.Generic;
using UnityEngine;
using UnityEngine.SceneManagement;
public class SoundManager : MonoBehaviour
{
    [SerializeField] AudioSource backGroundSound;
    [SerializeField] AudioSource effectSound;

    private static SoundManager instance;
    public static SoundManager Instance
    {
        get { return instance; }
    }
    private void Awake()
    {
        if(instance == null)
        {
            instance = this;
            DontDestroyOnLoad(gameObject);
        }
        else
        {
            Destroy(gameObject);
        }
    }
}
먼저 SoundManager를 작성해 주었다.
배경음과 효과음을 분리하여 나타낼 것이기에 따로 변수를 선언해주고,
이후 싱글톤을 통해, 모든 곳에서 접근 할수 있게 만들어 주었다.
private void OnEnable()
{
    SceneManager.sceneLoaded += OnSceneLoaded;
}
void BgmPlay(AudioClip clip)
{
    backGroundSound.clip = clip;
    backGroundSound.loop = true;
    backGroundSound.Play();
}
private void OnSceneLoaded(Scene scene, LoadSceneMode loadSceneMode)
{
    BgmPlay(Resources.Load<AudioClip>(scene.name));
}
private void OnDisable()
{
    SceneManager.sceneLoaded -= OnSceneLoaded;
}
이후에 SceneManager의 sceneLoaded 이벤트 함수를 사용하여, 배경음부터 만들어 주었다.
씬이 불러와질때, Resources의 Load를 사용하여, 배경음을 실행하는 함수를 호출한다.
BgmPlay함수에서는 배경음을 받고 무한반복을 걸어준이후 출력시킨다.
여기서 중요한 점은 Resources를 사용하기 때문에 'Resources'라는 폴더를 만들어줘야하고, scene의 이름으로 AudioClip을 찾기에 scene이름과 동일하게 AudioClip의 이름을 변경해 주어야 한다.
    public void EffectPlay(AudioClip clip)
    {
        effectSound.PlayOneShot(clip);
    }
이후 효과음을 내는 함수를 추가 해주었다.
아주 간단하게 소리낼 Audio를 받고 호출한다.
중요한 점은 Play로 하면 효과음을 내는도중 다른 효과음을 받을 때, 진행중인 소리가 끊기기 때문에,
PlayOneShot을 통해 동시에 소리가 날수도 있게끔 작성해준다.
이후 Unity창으로 돌아와서,
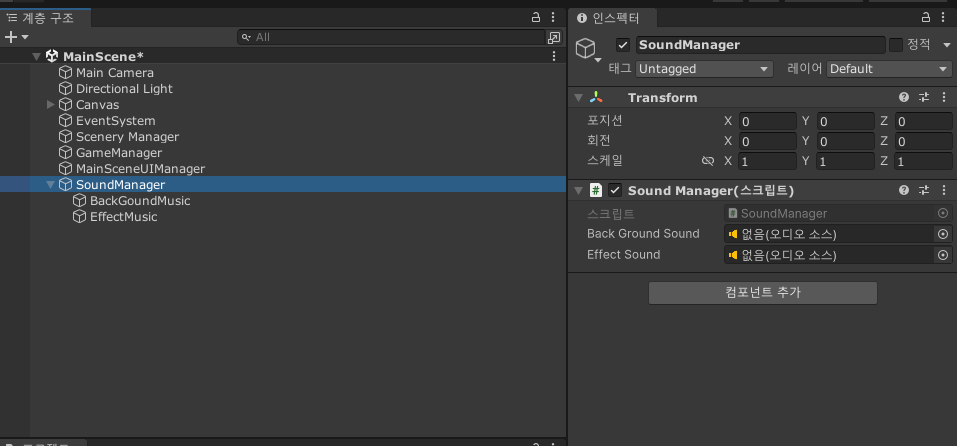
빈 게임 오브젝터가 SoundManager를 넣어준이후
자식 오브젝트로 배경음과 효과음을 출력할 오브젝트를 만들어준다.
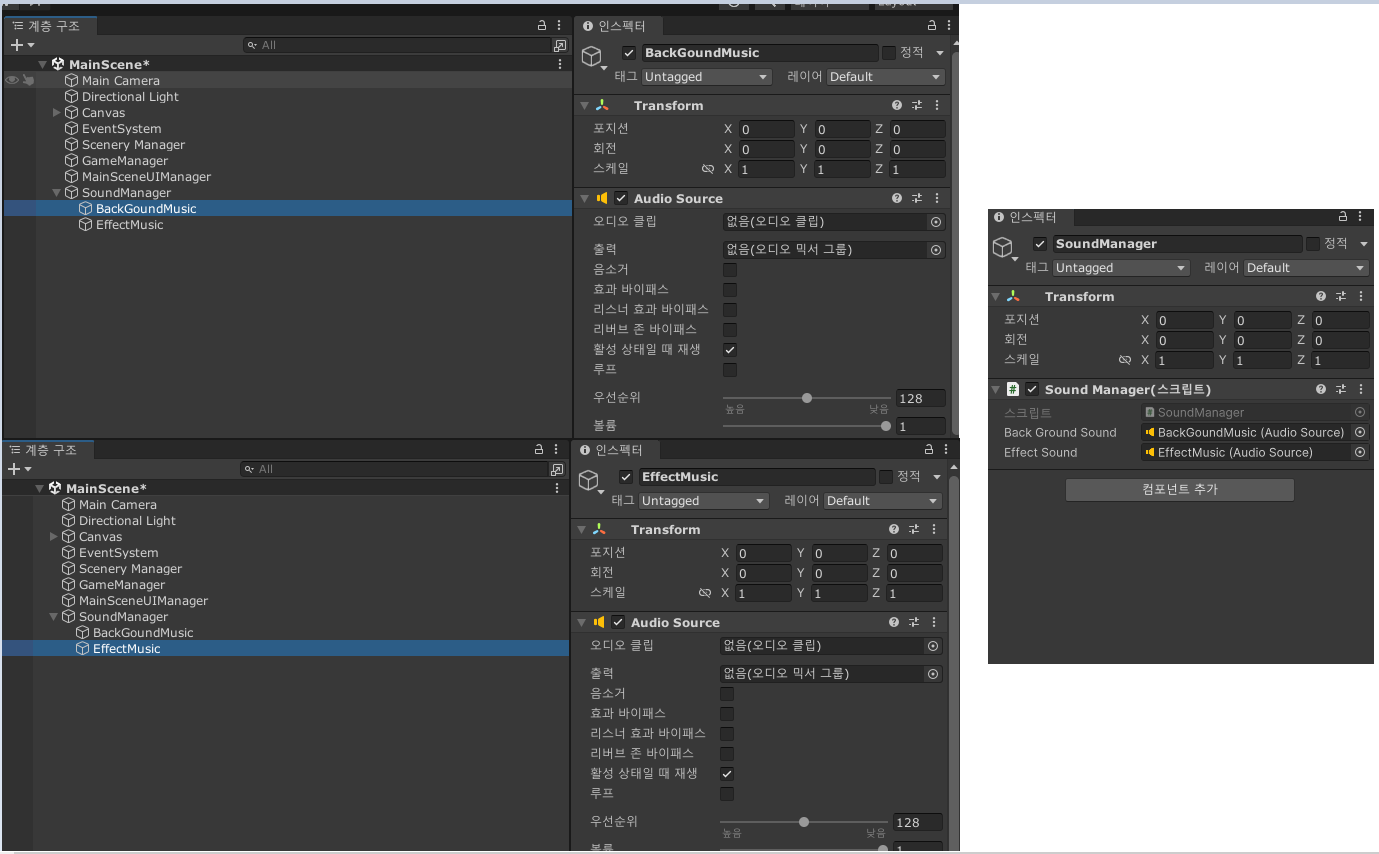
이후에 각각 Audio Source컴포넌트를 추가하고, SoundManager 변수에 각각 오브젝트를 넣어준다.
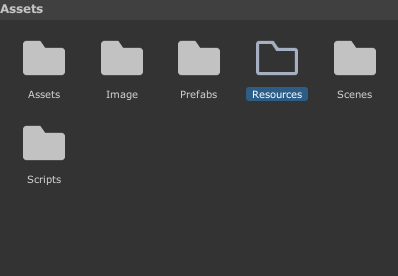
이후 Resource 폴더를 만들고, (오타 주의)
사용할 배경음들을 폴더 안에 넣어준다.
이때, 이름은 사용할 씬의 이름과 동일하게 작성해 준다.
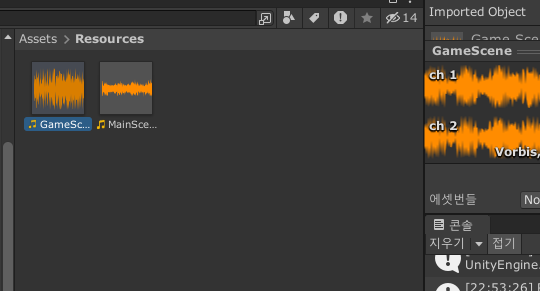
https://assetstore.unity.com/packages/audio/music/free-casual-relaxing-game-music-pack-262740 - Space Walk (MainScene)
https://mix.audio/bgm/explore - AI 음악 생성 사이트 (GameScene)
이후 실행을 해보면 Scene에 호출될 때마다 다른 BGM이 들리는 것을 볼 수 있다.
MainScene에서는 MainScene Auido가 GameScene에서는 GameScene Audio가 AudioSource에 들어간다.
이번에는 효과음을 만들어 볼 것이다.
효과음 같은 경우 다른 스크립트에서 특정 행동을 했을 때, SoundManager의 EffectPlay함수를 호출시키는 식으로 효과음을 낼 것이다.
먼저 버튼에 관련해서 효과음을 낼 것이다.
버튼에 마우스를 올렸을 때와, 클릭했을 때에 효과음을 낼 것이다.
using System.Collections;
using System.Collections.Generic;
using UnityEngine;
using UnityEngine.EventSystems;
using UnityEngine.UI;

public class ButtonManager : MonoBehaviour
{
    private Text buttonText;
    private int textFontSize;
    [SerializeField] AudioClip buttonEnterAudio;
    [SerializeField] AudioClip buttonDownAudio;
    private void Start()
    {
        buttonText = GetComponentInChildren<Text>();
        textFontSize = buttonText.fontSize;
    }
    public void OnEnter()
    {
        buttonText.fontSize = textFontSize + 15;
        SoundManager.Instance.EffectPlay(buttonEnterAudio);
    }
    public void OnClick()
    {
        buttonText.fontSize = textFontSize - 15;
        SoundManager.Instance.EffectPlay(buttonDownAudio);
    }
    public void OnExit()
    {
        buttonText.fontSize = textFontSize;
    }
}
ButtonManager에 두개의 오디오클립을 넣어주었다.
하나는 마우스를 올렸을 때, 또 하나는 마우스를 클릭했을 때, SoundManager의 EffectPlay를 호출한다.
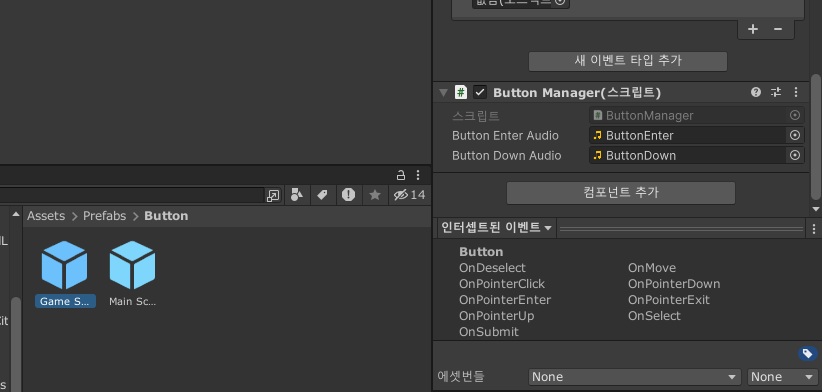
이후 사용하는 Button 프리팹에 적절한 AudioClip을 넣어준다.
https://assetstore.unity.com/account/assets 3번 - ButtonDown, 32번 - ButtonEnter
이렇게 하고 플레이를 해보면 소리가 잘 나는 것을 볼 수 있다.
(gif라 여기서는 안난다...)
이번에는 음식을 먹을 때, 먹는 소리가 나게끔 만들어 볼 것이다.
using System.Collections;
using System.Collections.Generic;
using UnityEngine;
using UnityEngine.SceneManagement;

public class Food : MonoBehaviour
{
    [SerializeField] float fallSpeed; // 떨어지는 속도
    [SerializeField] int increaseHealth; // 체력 증가값
    [SerializeField] int increaseScore; // 점수 증가값

    [SerializeField] AudioClip eatingAudio;

    ScoreManager scoreManager;
    private void Awake()
    {
        scoreManager = FindObjectOfType<ScoreManager>();
    }
    private void Update()
    {
        transform.position += Vector3.down * TimeManager.Instance.FoodFallSpeed * Time.deltaTime;
    }
    private void OnTriggerEnter(Collider other)
    {
        switch(other.gameObject.tag)
        {
            case "Player": ContactPlayer(other);break;
            case "Ground": OnContact(); break;
        }
    }
    void ContactPlayer(Collider other)
    {
        PlayerHealth playerhealth = other.gameObject.GetComponent<PlayerHealth>();
        if (playerhealth != null) playerhealth.HealthUpdate(increaseHealth);
        OnContact();
        SoundManager.Instance.EffectPlay(eatingAudio);
        scoreManager.AddScore(increaseScore);
    }
    void OnContact()
    {
        Destroy(gameObject);
    }
}
먼저 먹을 때 날 소리는 변수로 선언해주고,
OnTriggerEnter안에 코드가 지저분해서, 플레이어와 부딧혔을때, ContactPlayer함수를 호출하게끔 하고 안의 코드를 가져왔다. 이후 안에서 먹는 소리를 호출해 준다. (Contect --> Contact (오타수정))
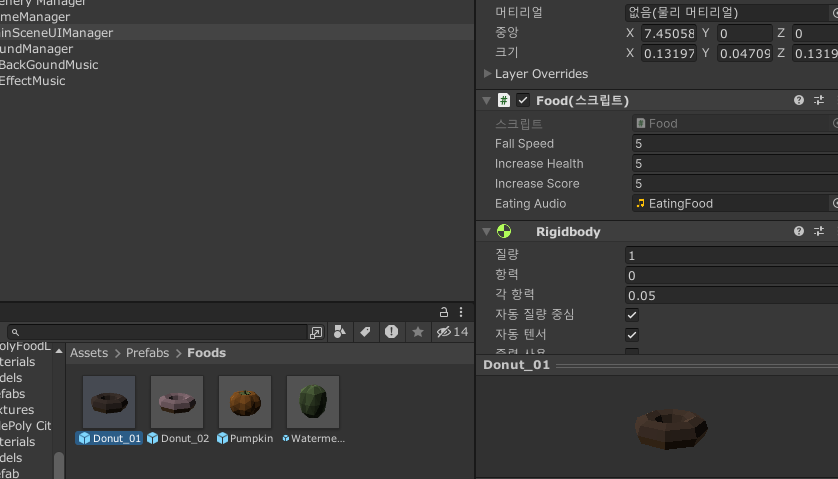
이후 음식의 AudioClip에 사용할 음식 먹는 소리를 넣어주었다.
https://pixabay.com/sound-effects/eating-sound-effect-36186/ - 음식 먹는 소리
마지막으로 게임오버가 되었을 때와, 그때의 최고득점을 달성했을 때 나올 효과음을 만들어 볼 것이다.
using System.Collections;
using System.Collections.Generic;
using UnityEngine;
using UnityEngine.UI;

public class ScoreManager : MonoBehaviour
{
    [SerializeField] Text textScore;
    [SerializeField] Text textBestScore;

    [SerializeField] AudioClip gameOverAudio;
    [SerializeField] AudioClip bestScoreAudio;
    public int score
    {
        get; private set;
    } = 0;
    private void OnEnable()
    {
        GameManager.Instance.onDead += OnGameOverText;
    }
    private void OnDisable()
    {
        GameManager.Instance.onDead -= OnGameOverText;
    }
    public void AddScore(int newScore)
    {
        if (!GameManager.Instance.State) return;
        score += newScore;
        textScore.text = score.ToString();

    }
    public void Update()
    {

    }
    public void Start()
    {
        StartCoroutine(IncreaseScore());
    }
    IEnumerator IncreaseScore()
    {
        while(GameManager.Instance.State)
        {
            yield return new WaitForSeconds(0.02f);
            AddScore(1);
        }
    }
    void OnGameOverText()
    {
        SetTextScore();
        SetBestScore();
    }
    void SetTextScore()
    {
        textScore.transform.position += new Vector3(0, -351, 0);
        textScore.fontSize = 214;
        Color color = new Color32(48, 48, 48, 255);
        textScore.color = color;
    }
    void SetBestScore()
	{
    	// textScore.text = score.ToString();
    	if (PlayerPrefs.GetInt("BestScore") < score)
    	{
    	    PlayerPrefs.SetInt("BestScore", score);
    	    SoundManager.Instance.EffectPlay(bestScoreAudio);
    	}
    	else
    	{
    	    SoundManager.Instance.EffectPlay(gameOverAudio);
    	}
    	textBestScore.text = "Best : " + 	PlayerPrefs.GetInt("BestScore").ToString();
	}
}
먼저 ScoreManager에서 오디오 클립 두개를 선언한다.
이후 SetBestScore함수를 수정하는데, 점수가 최고점수보다 낮으면 게임오버 오디오를, 같거나 크면, 최고점수 오디오를 출력하게끔 수정해 주었다.
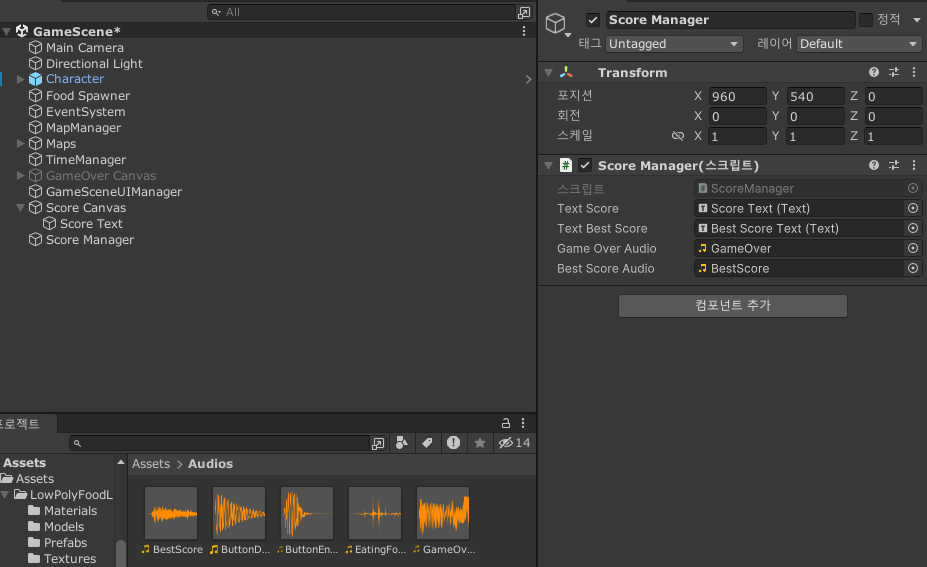
이후 Score Manager에 효과음을 넣어준다.
https://assetstore.unity.com/packages/audio/sound-fx/free-casual-game-sfx-pack-54116 - 27번 (GameOver)
https://assetstore.unity.com/packages/audio/sound-fx/hints-stars-points-rewards-sound-effects-lite-pack-295538 - Magic Score 5 (BestScore)
이렇게 먹는소리와, 게임오버 소리로 인해 게임이 더 재밌어진 것 같다.
이번에는 커서 관리를 할 것이다.
마우스 커서 같은 경우 MainScene에서는 보이다가 GameScene으로 넘어갈 시, 커서가 보이지 않게끔 만들어 줄 것이다.
using System.Collections;
using System.Collections.Generic;
using UnityEngine;
using UnityEngine.SceneManagement;

public class MouseManager : MonoBehaviour
{
    private static MouseManager instance;
    public static MouseManager Instance { get { return instance; } }

    private void Awake()
    {
        if(instance == null)
        {
            instance = this;
            DontDestroyOnLoad(gameObject);
        }
        else
        {
            Destroy(gameObject);
        }
    }
    private void OnEnable()
    {
        SceneManager.sceneLoaded += OnSceneLoaded;
    }

    void OnSceneLoaded(Scene scene, LoadSceneMode loadSceneMode)
    {

    }
    private void OnDisable()
    {
        SceneManager.sceneLoaded -= OnSceneLoaded;
    }
}
먼저 MouseManager에 가장 익숙한 싱글톤 + 씬관련 코드를 적어주었다.
using System.Collections;
using System.Collections.Generic;
using UnityEngine;
using UnityEngine.SceneManagement;

public class MouseManager : MonoBehaviour
{
    private static MouseManager instance;
    public static MouseManager Instance { get { return instance; } }

    private void Awake()
    {
        if(instance == null)
        {
            instance = this;
            DontDestroyOnLoad(gameObject);
        }
        else
        {
            Destroy(gameObject);
        }
    }
    private void OnEnable()
    {
        SceneManager.sceneLoaded += OnSceneLoaded;
    }
    private void Start()
    {
        GameManager.Instance.onDead += GameOver;
    }
    public void GameOver()
    {
        Debug.Log("커서 온");
        Cursor.visible = true;
    }

    void SetCursor(bool state)
    {
        Cursor.visible = state;
    }

    void OnSceneLoaded(Scene scene, LoadSceneMode loadSceneMode)
    {
        switch(scene.buildIndex)
        {
            case 0: SetCursor(true); break;
            case 1: SetCursor(false); break;
        }
    }
    private void OnDisable()
    {
        SceneManager.sceneLoaded -= OnSceneLoaded;
    }
}
이후에 SetCursor함수를 만들고, 씬이 호출될 때, 씬에 맞는 커서의 보임의 유무를 맞춰주었다.
또한, GameOver가 되었을 때는 다시 커서가 보여야 하기때문에 GameOver라는 함수를 따로 만들어서 Start에서 GameManger의 onDead에 GameOver함수를 구독시켜주었는데,
이러한 의문점이 들수있다.
어? 왜 OnEnable에서 구독하지 않지?
와 같은 생각을 할 수 있는데, 위 경우 OnEnable에 구독하게 된다면 MouseManager의 OnEnable이 GameManager의 Awake보다 먼저 실행이 될 수 있다..!! (이후 nullreference로 에러)
이 이유는 이벤트의 경우 한프레임에 묶어서 처리되기 때문에,
A라는 오브젝트의 OnEnable이 끝나고 B라는 오브젝트의 Awake가 실행되는 식으로 작동할수 있다고 한다...
Start의 경우 Awake와 OnEnable이 모두 끝난 후에야 실행되는 것이 보장되기 때문에 위와 같이 작성했다.
MainScene에서는 커서가 보이며, GameScene에서는 보이지 않고 다시 GameOver상태에서는 커서가 보이는 것을 볼 수있다.
이번에는 커서의 이미지를 변경시킬 것이다.
딱히 작성할 코드는 없고, 에셋을 가져온뒤 커서를 교체해주면 그만이다.
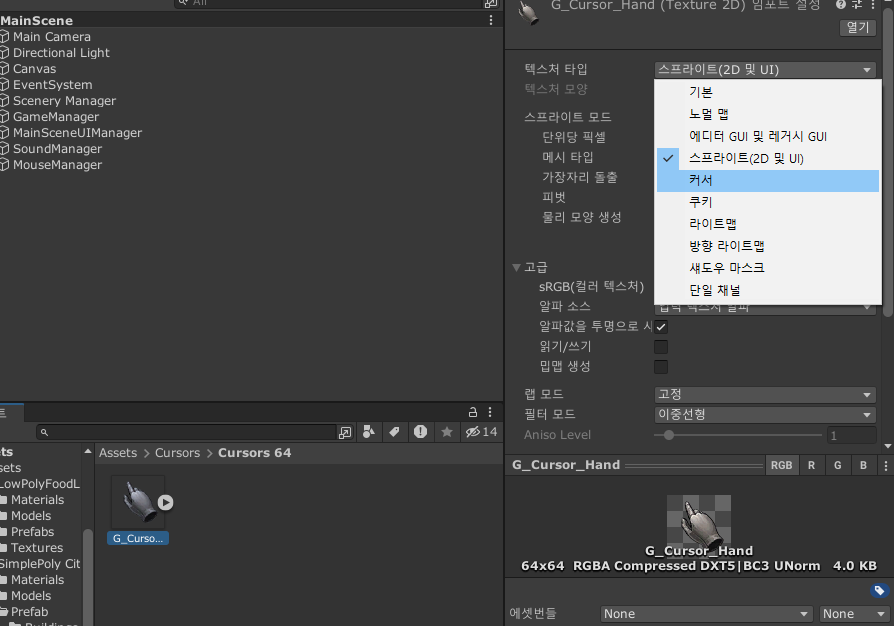
커서 이미지를 가져온뒤 텍스쳐 타입을 커서로 바꿔준다.
https://assetstore.unity.com/packages/2d/textures-materials/basic-rpg-cursors-139404 - G_Cursor_Hand
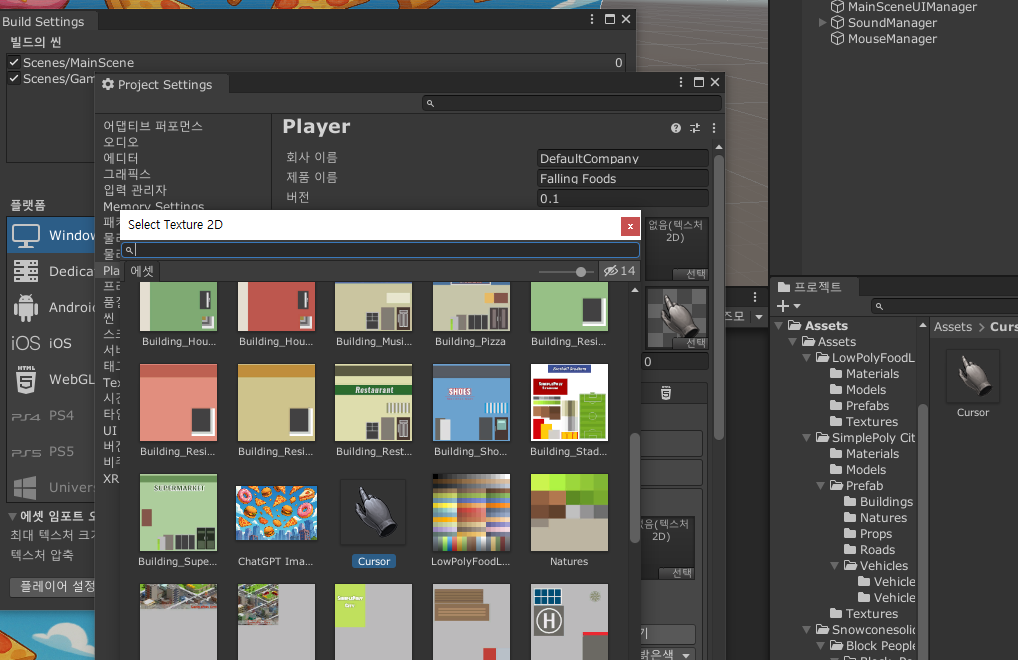
이후에 플레이어 설정에 들어가서 기본 커서의 이미지를 바꿔주기만 한다면 그만이다.
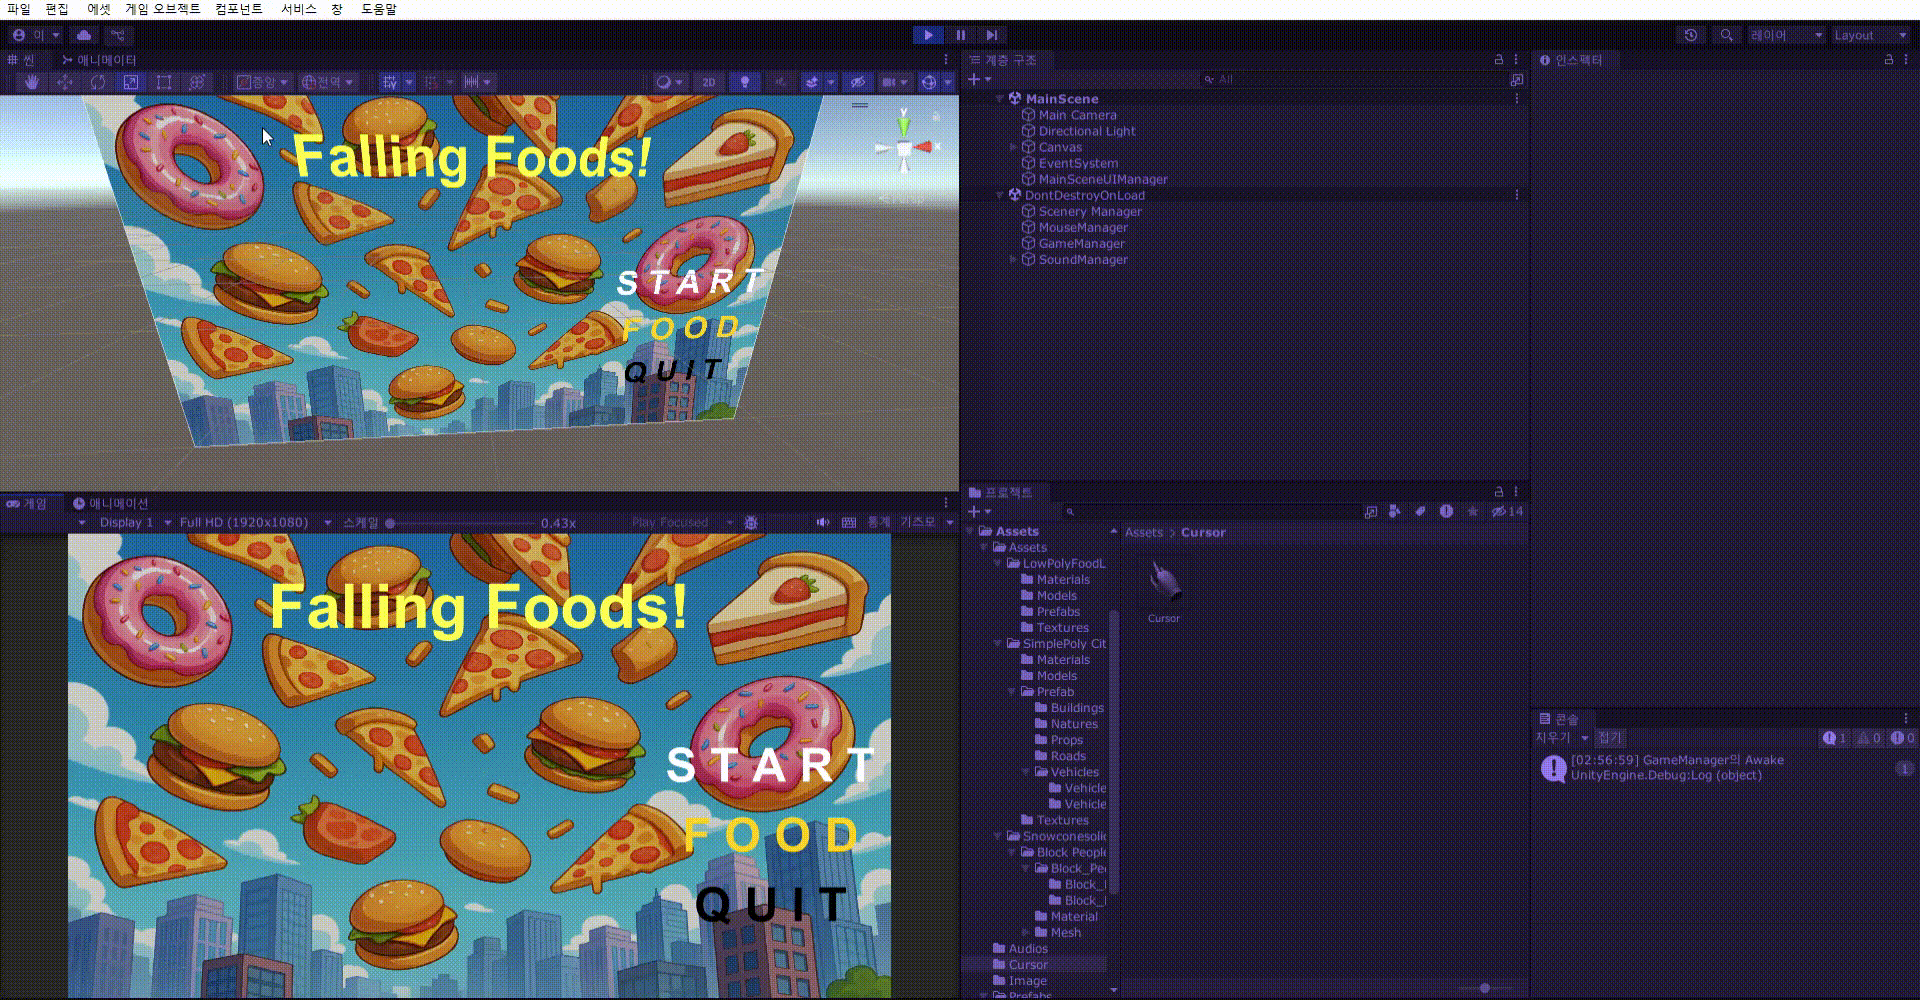
그러면 이렇게 게임화면에서 마우스 커서의 모양이 바뀐 것을 볼 수 있다.
개발기간 25/ (04/ 29,30), (05/ 01)
