1. Vehicle Spawner (장애물 생성)
2. Item Spawner (아이템 생성)
3. 다양한 음식
지금까지 대략적인 게임의 틀을 다 잡았다면 이제부터 게임을 확장하는 식의 활동이 많아질 것으로 예상된다. (게임의 뼈는 이미 다 잡았다.)
먼저 만들어 볼 시스템은 장애물 시스템이다.
게임을 더 재밌고 흥미롭게 하는 방해요소를 만들 것이다.
이 게임에서는 방해요소를 차량으로 할 것인데, 도로에서 차량이 나오고 이 차량에 부딧히면, hp가 감소한다거나, 움직이지 못하게 되는 등의 시스템을 생각하고 있다.
가장 먼저 생각해야하는 것은 '차량을 어떻게 도로위에서 움직이게 할까' 이다.
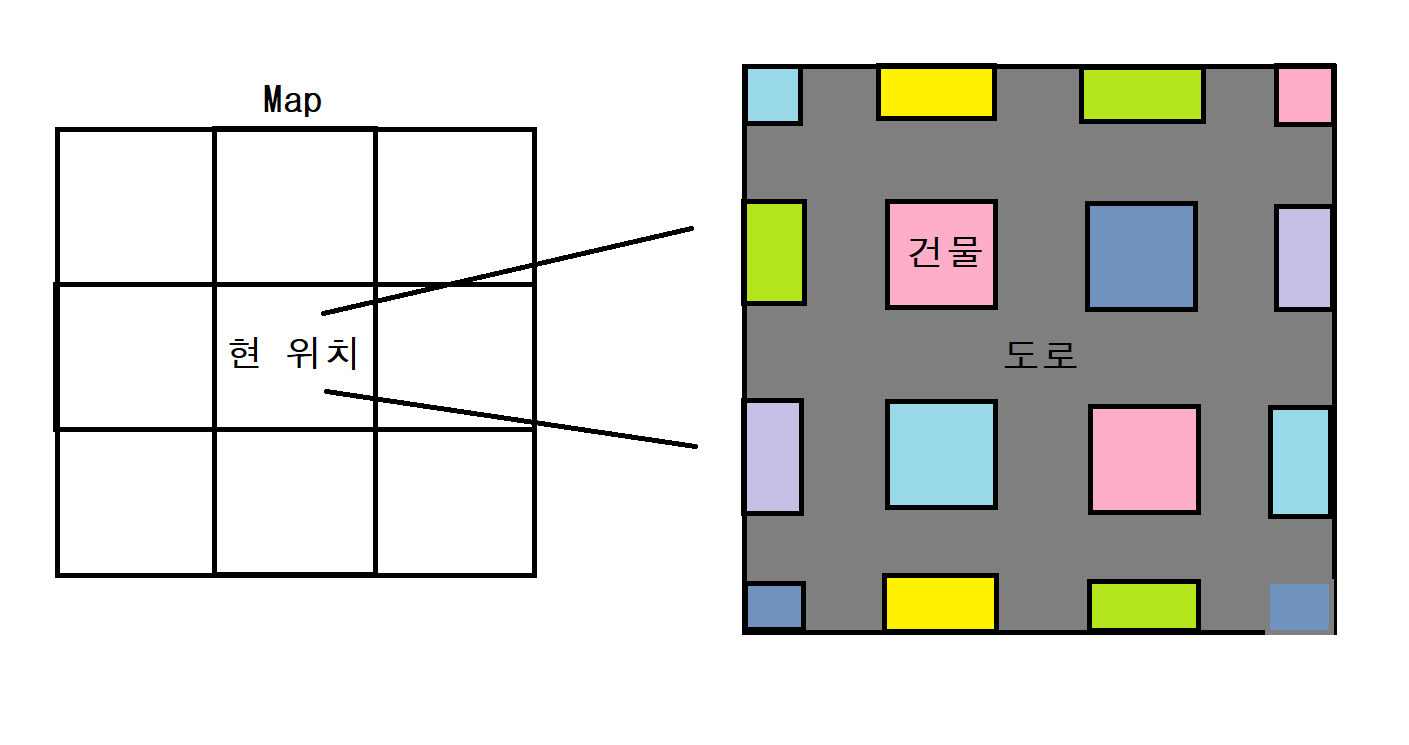
먼저 플레이어의 위치에 맞는 9개의 맵중 번호를 구하고 그 맵의 도로에 차량을 생성하는 식,
이것을 실행하려면 아마 맵과 플레이어의 위치에 관한 코드가 있는 MapManager와 연관되게끔 해야 할 것이다.
public GameObject[] maps = new GameObject[9];MapManager의 maps배열의 접근 지정자를 [SerializeField]에서 public 으로 바꿔 주었다.
차량을 생성하는 VehicleSpawner에서 생성될 위치를 구하기 위해 이런게 변경하였다.
그리고 차량을 생성하는 VehicleSpawner 스크립트를 임시적으로 작성해 주었다.
using System.Collections;
using System.Collections.Generic;
using UnityEngine;

public class VehicleSpawner : MonoBehaviour
{
   [SerializeField] GameObject vehicles;

   [SerializeField] Vector3 offset;
   [SerializeField] float offsetRange;

   private void Start()
   {
       StartCoroutine(InsVehicle());
   }
   private Vector3 SetPosition()
   {
       offset = new Vector3(Random.Range(-offsetRange,offsetRange),offset.y,Random.Range(-offsetRange,offsetRange));
       return MapManager.Instance.maps[4].transform.position + offset;
   }
   IEnumerator InsVehicle()
   {
       while(GameManager.Instance.State)
       {
           yield return new WaitForSeconds(5f);
           Instantiate(vehicles, SetPosition() ,Quaternion.identity);
           Debug.Log("생성");
       }

   }
}
먼저 시작과 동시에 차량을 특정 주기마다 생성시키는 코루틴을 실행하고,
코루틴 내에서는 5초마다 차량을 생성시킨다. 여기서 SetPosition함수를 사용하는데, 이 함수는 생성될 위치를 정해주는 함수로, offset에 랜덤으로 x좌표와 z좌표를 부여한 이후,
플레이어가 존재하는 maps[4]맵을 기준으로 생성시킨다.
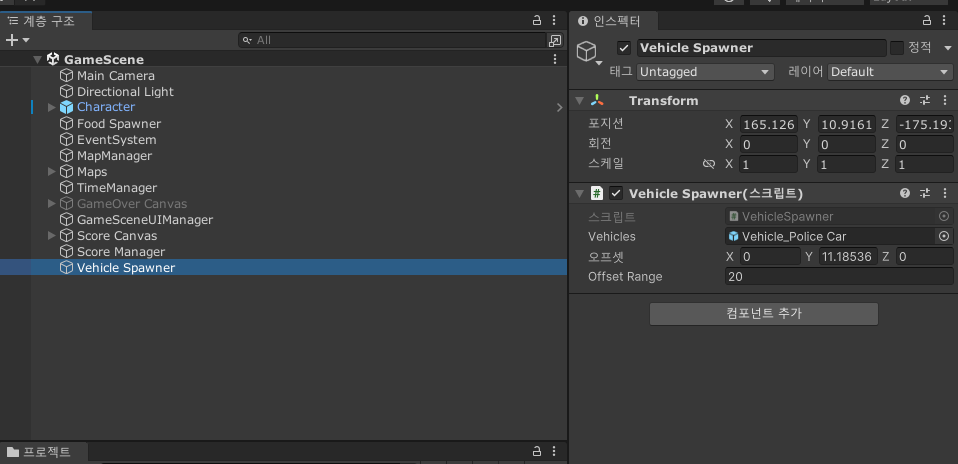
Vehicles에는 임시적인 차량이, offset은 y축을 변경하였는데, 차량이 땅 위에 있을 때의 y축을 구해 적어주었다. 이후 Offset같은 경우 임시적으로 20으로 잡아주었다.
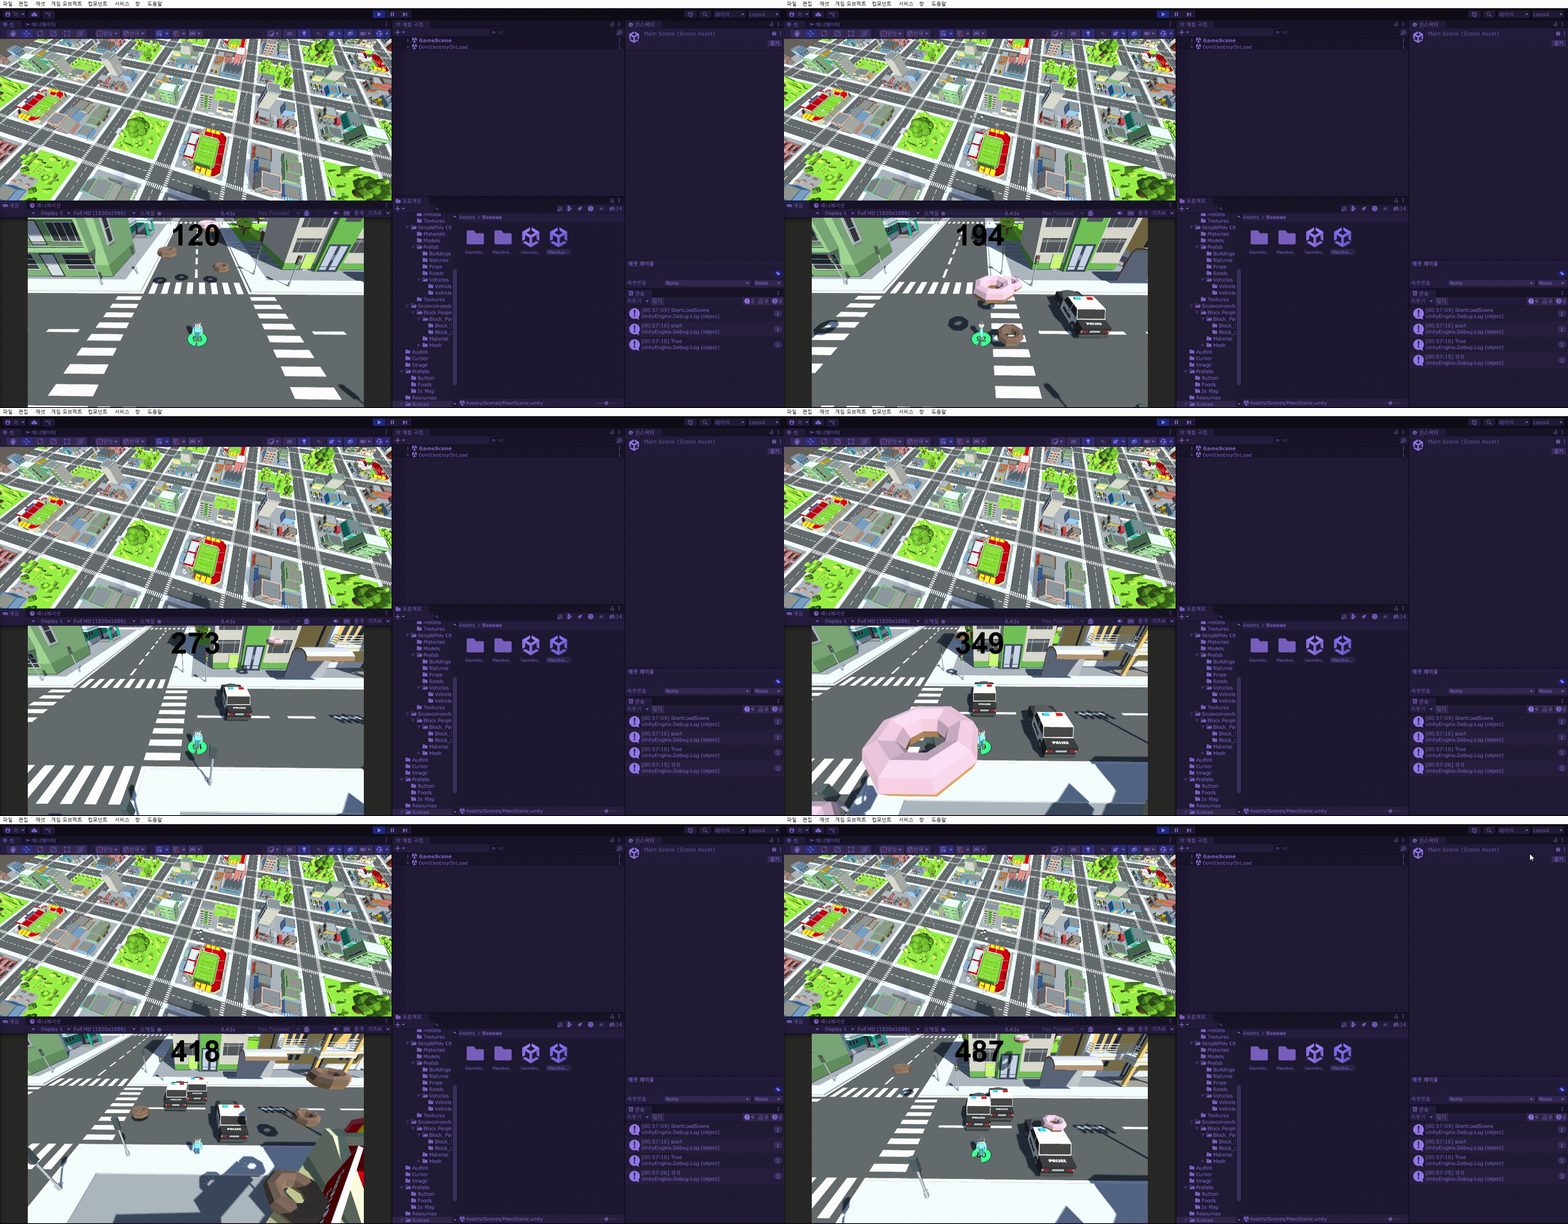
맵의 중앙 좌표(자식오브젝트 center)는 중앙보다 살짝 오른쪽에 있기에 이렇게 생성되는 것을 볼 수 있다.
(center의 position을 0,0,0으로 하고 부모 오브젝트에 넣어도 부모오브젝트의 중앙에 존재하지 않는다...)
이 코드의 핵심은 맵이 이동해도 현재 위치에 따라 차량에 생성된다는 것인데,
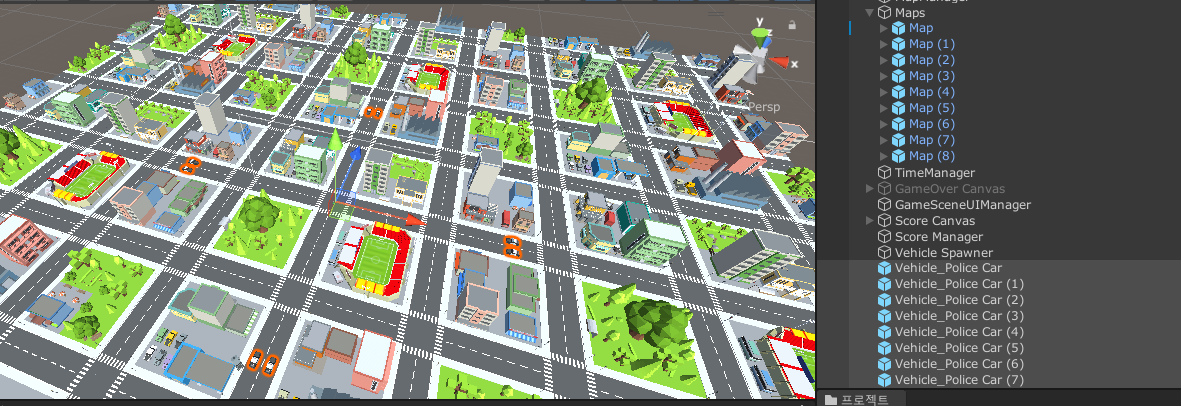
maps[4]를 기준으로 생성되기 때문에 맵이 이동해도, 캐릭터가 존재하는 중앙 맵을 기준으로 해서 생성되는 것을 볼 수 있다.
차량이 캐릭터 위치에 따라 생성되는 것을 보았으니,
이번에는 차량의 위치를 구체적으로 정해줄 것이다.
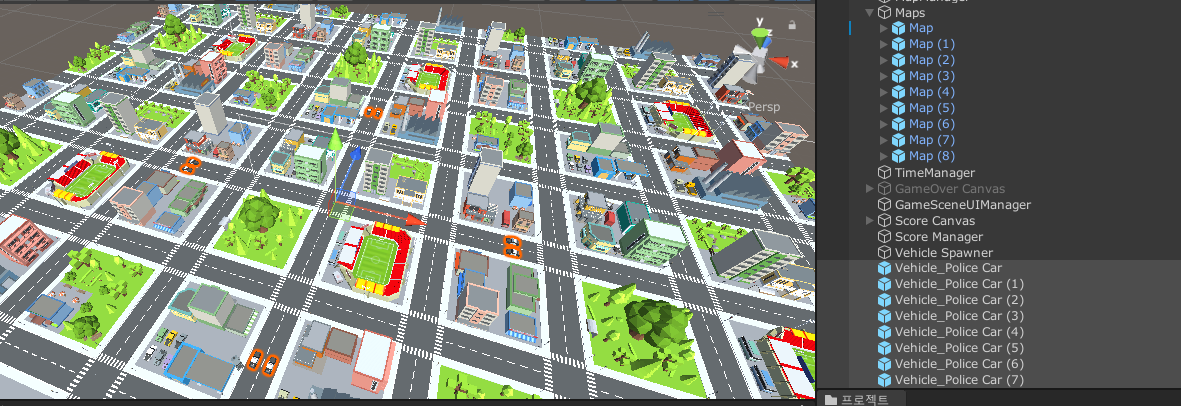
먼저 생성될 위치인 좌표에 임시적으로 차량을 두어 좌표를 구한이후
[SerializeField] Transform[] carPosition;VehicleSpawner에 생성될 좌표를 저장할 배열을 만들어 준다.
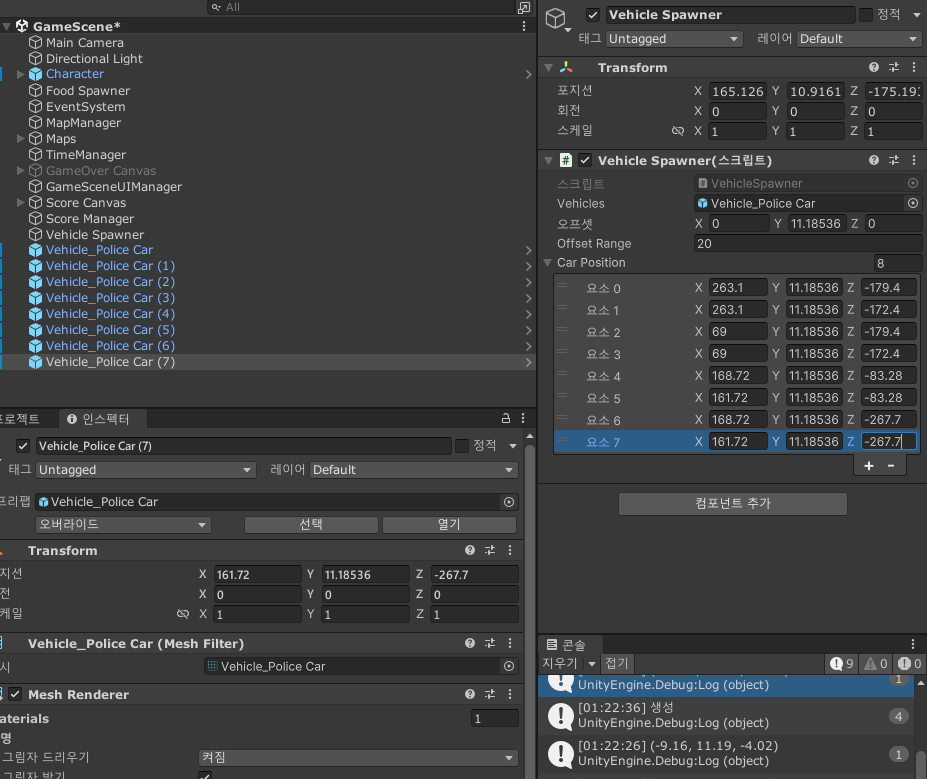
이후 배열의 크기를 8로 잡고, 임시적으로 생성될 좌표를 일일이 넣어준다.
(하나하나씩 복붙해가면서 했는데 Transform을 사용하면 더 쉬웠을까..?)
using System.Collections;
using System.Collections.Generic;
using System.IO;
using UnityEngine;

public class VehicleSpawner : MonoBehaviour
{
    [SerializeField] GameObject vehicles;

    [SerializeField] Vector3 offset;

    [SerializeField] float offsetRange;
    [SerializeField] Vector3[] carPosition;
    private int index;

    private void Start()
    {
        StartCoroutine(InsVehicle());
    }
    private Vector3 SetPosition()
    {
        //   5 4
        // 3     1
        // 2     0
        //   7 6
        index = Random.Range(0, carPosition.Length);
        return carPosition[index];

        // offset = new Vector3(Random.Range(-offsetRange,offsetRange),offset.y,Random.Range(-offsetRange,offsetRange));
        // Debug.Log(MapManager.Instance.maps[4].transform.position);
        // Debug.Log(offset);
        // return MapManager.Instance.maps[4].transform.position + offset;

    }
    private Quaternion SetRotation()
    {
        Quaternion direction = Quaternion.Euler(0, 0, 0);
        switch(index / 2)
        {
            case 0: direction = Quaternion.Euler(0, -90, 0); break;
            case 1: direction = Quaternion.Euler(0, 90, 0); break;
            case 2: direction = Quaternion.Euler(0, 180, 0); break;
            case 3: direction = Quaternion.Euler(0, 0, 0); break;
        }
        return direction;
    }
    IEnumerator InsVehicle()
    {
        while(GameManager.Instance.State)
        {
            yield return new WaitForSeconds(5f);
            Instantiate(vehicles, SetPosition(), SetRotation());
            //Instantiate(vehicles, SetPosition() ,Quaternion.identity);
            Debug.Log("생성");
        }

    }
}
이후에는 SetPosition함수를 수정하고 SetRotation함수를 만들어서 코루틴에서 호출하는 방식으로 작성 해 주었다.
위에 index라는 변수를 선언해 주는데 이 변수는 내가 어떤 위치에 차량을 생성했는지를 보여준다.
(SetPosition함수 의 주석부분을 보면 알수있다.)
SetPosition에서 생성할 위치를 잡아주고, SetRotation에서는 위치에 따른 차량의 회전값을 정해주었다.
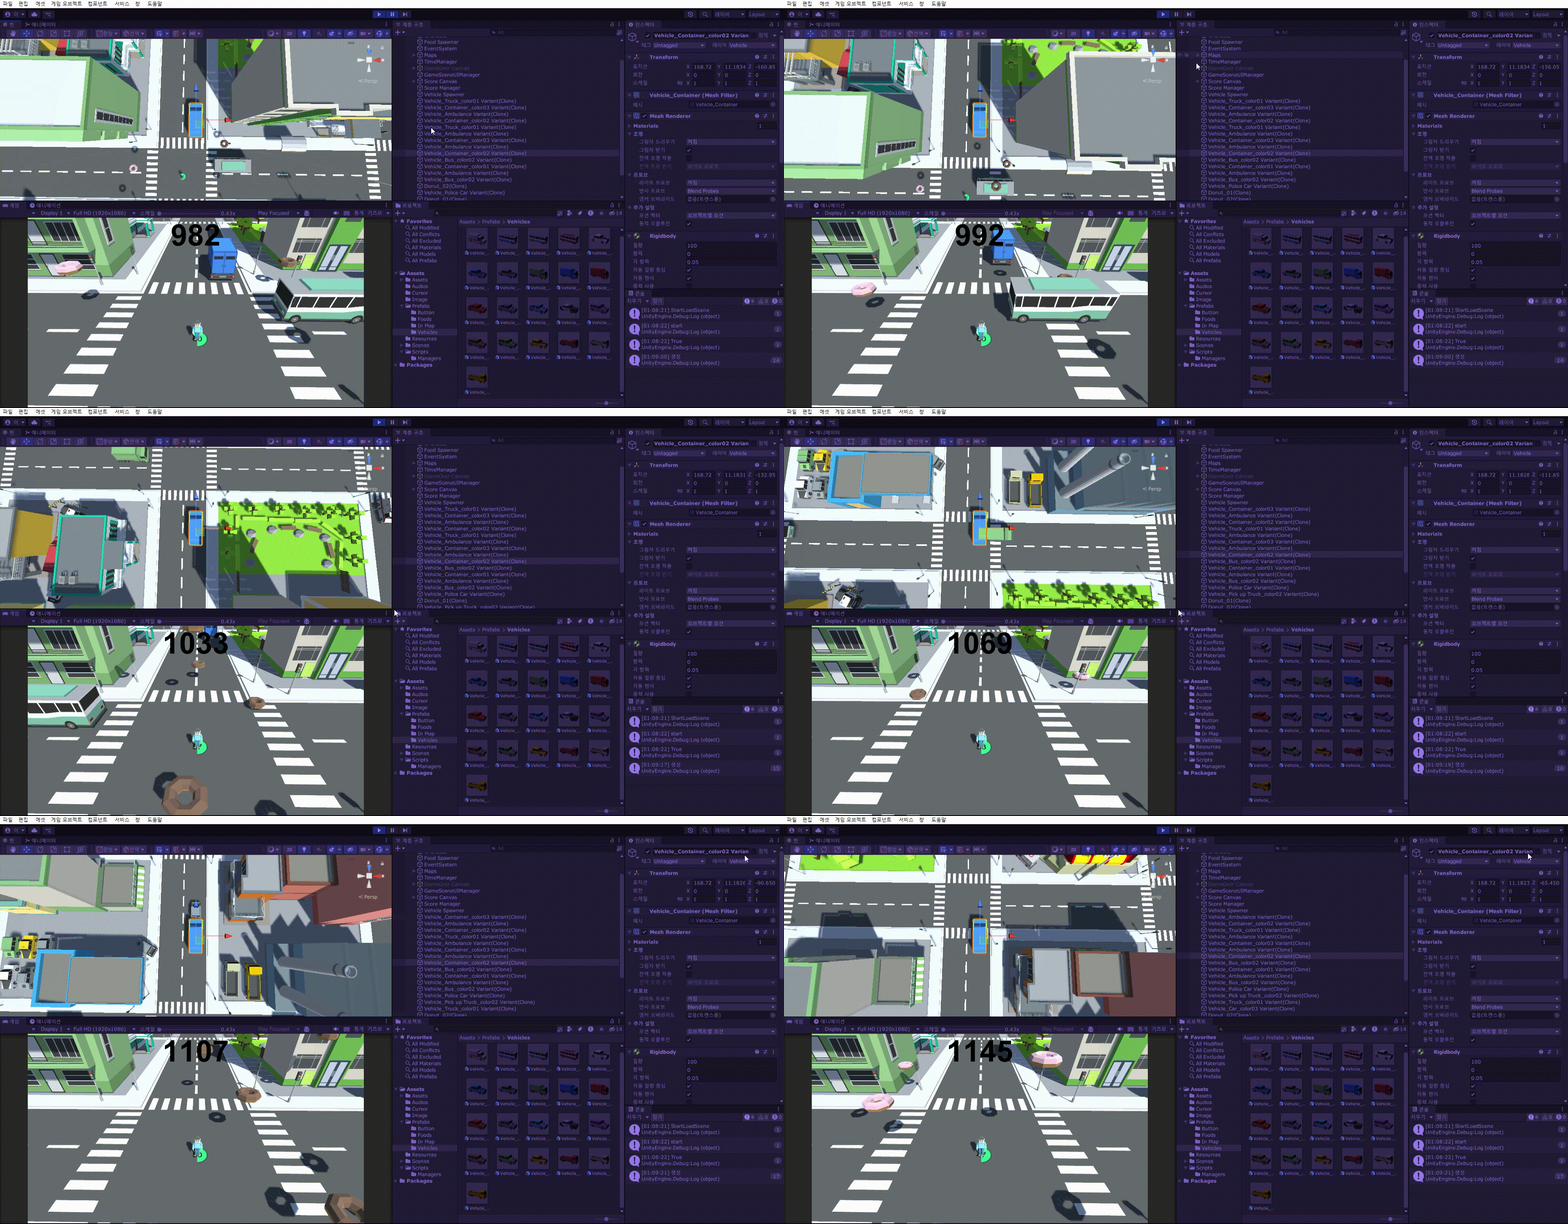
그러면 이렇게 차량이 옳바른 위치와 방향을 가지고 생성되는 것을 볼 수 있다.
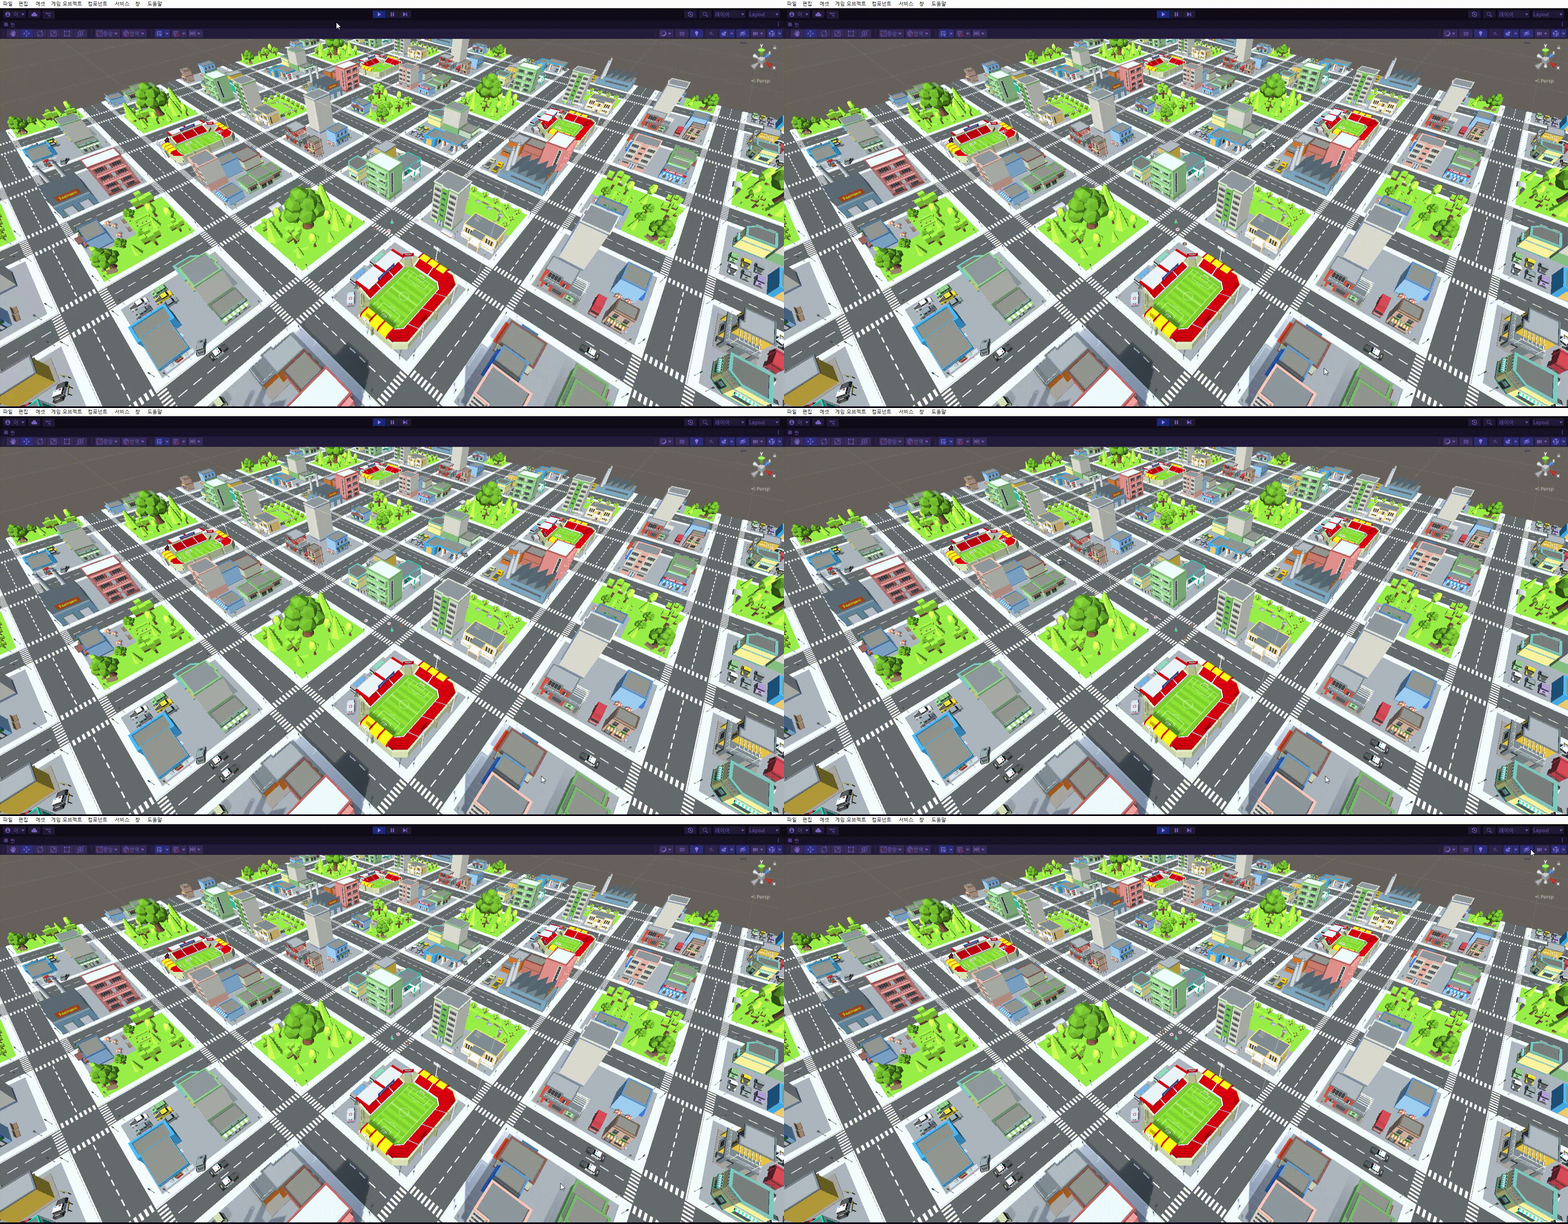
(녹화를 위해 잠시 차량 생성시간을 1초로 만들었다.)
하지만 잠시 깜빡 한것이 있는데, 이 코드로는 맵이 이동했을 때를 호환하지 않기 때문에, 수정해주어야 하는데,
임시로 정해준 8개의 좌표가 부모 오브젝트없이 월드 포지션이기 때문에, maps[4]을 가져와도, 잘 호환되지 않는다. 그래서 임시로 이 좌표들을 맵의 자식 오브젝트로 넣어주고, 다시 좌표값을 받아올 것이다.
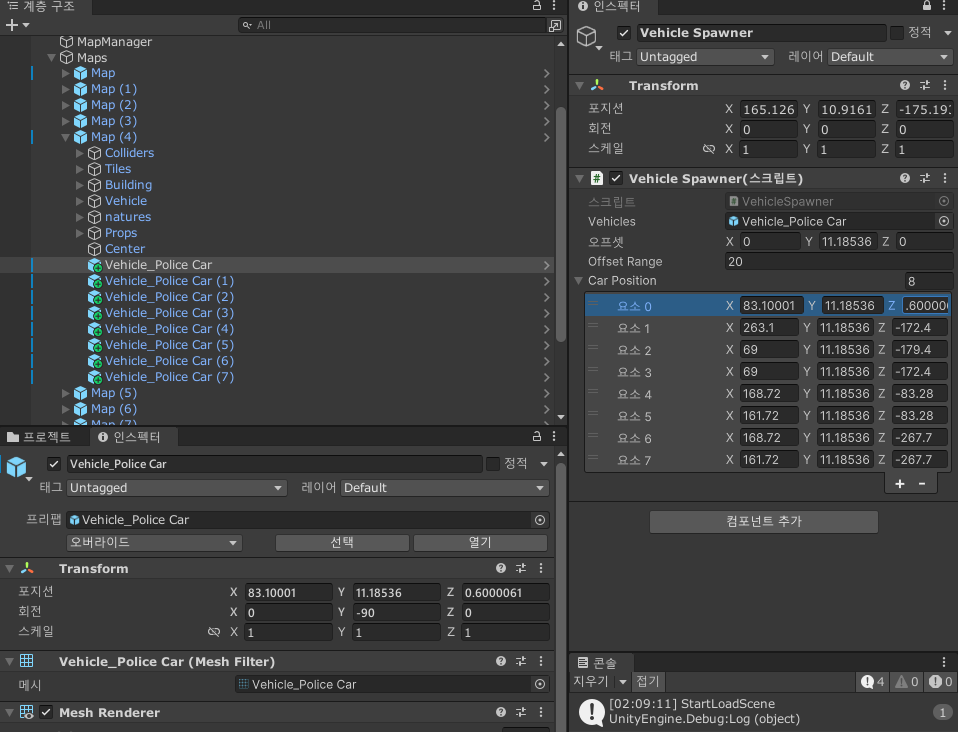
자식 오브젝트로 넣어준 이후, 자식 오브젝트일때의 좌표를 다시 넣어준다.
이러면 자신이 생성되야할 기준 맵이 바뀌어도 호환이 될 것이다.
    private Vector3 SetPosition()
    {
        //   5 4
        // 3     1
        // 2     0
        //   7 6
        index = Random.Range(0, carPosition.Length);
        return carPosition[index] + MapManager.Instance.maps[4].transform.position;

        // offset = new Vector3(Random.Range(-offsetRange,offsetRange),offset.y,Random.Range(-offsetRange,offsetRange));
        // Debug.Log(MapManager.Instance.maps[4].transform.position);
        // Debug.Log(offset);
        // return MapManager.Instance.maps[4].transform.position + offset;

    }
이후 SetPosition함수의 반환값에 maps[4]의 좌표값을 더해서 반환을 하게 되면 맵이 재배치 되어도 차량의 생성이 정상적으로 작동할 것이다.
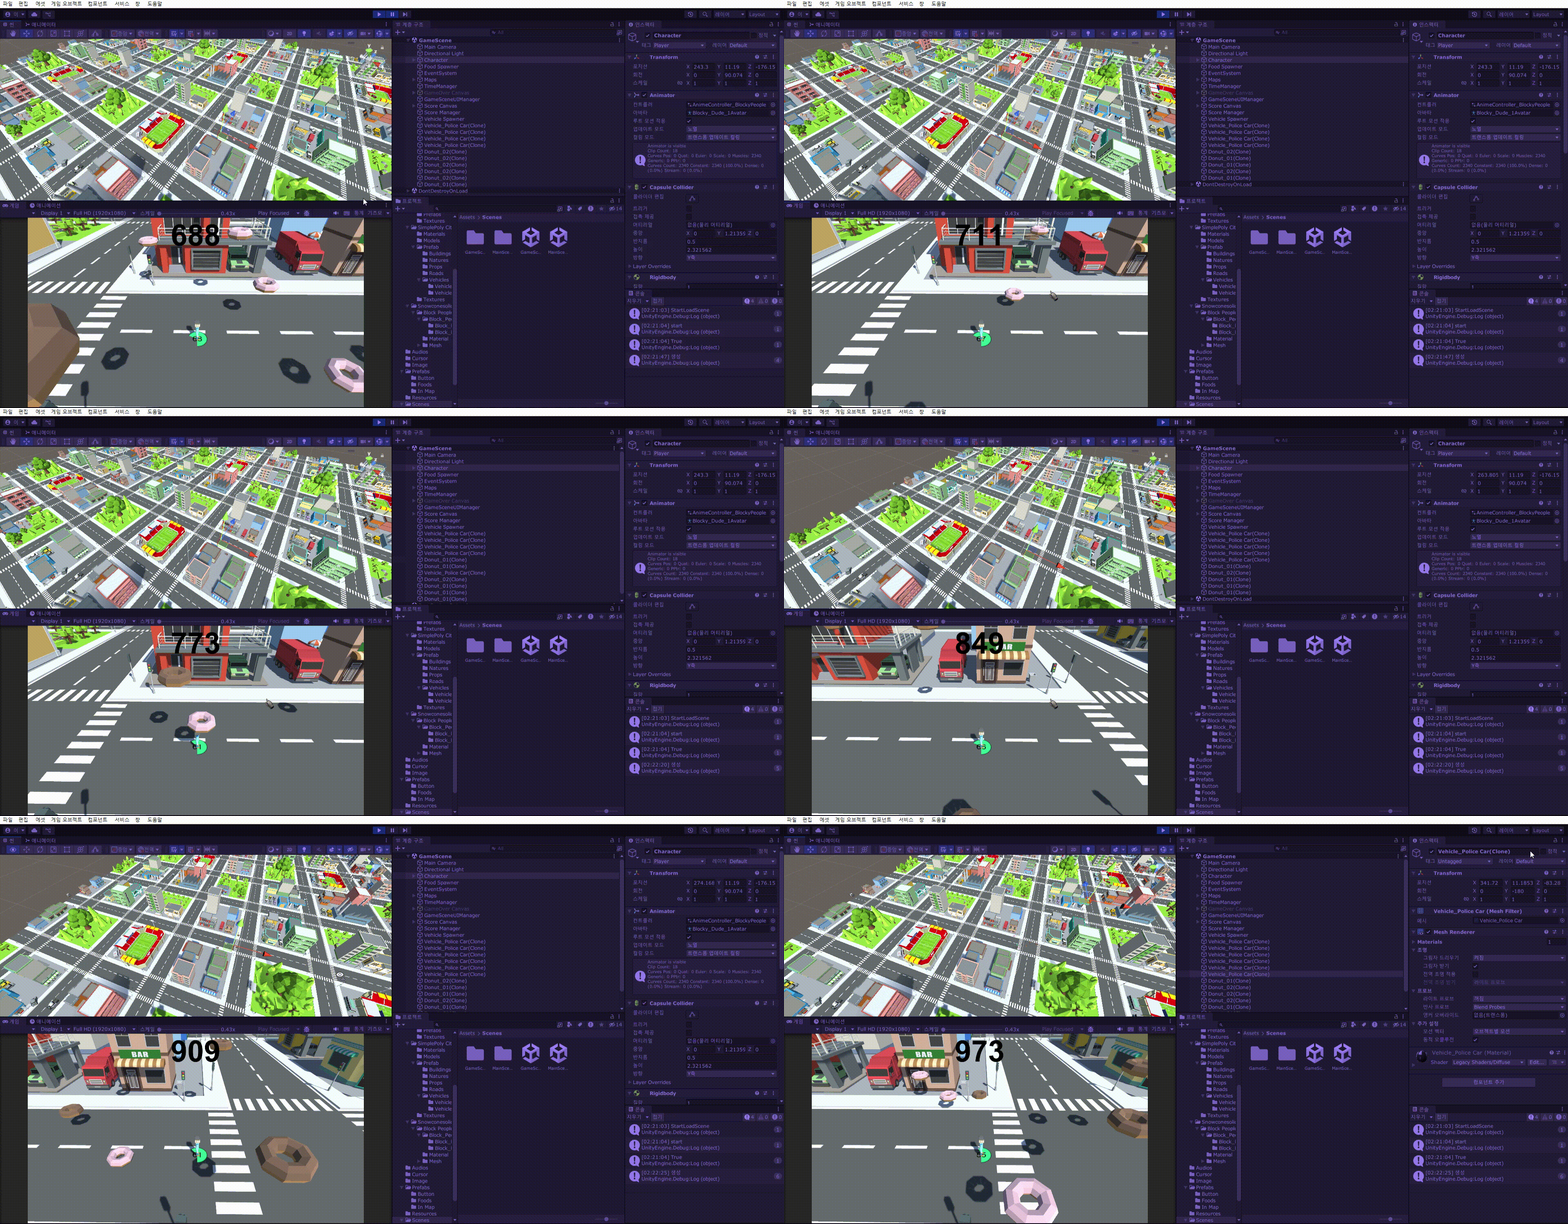
이렇게 맵이 재배치되고, 전체적인 맵의 중앙이 바뀔 때, 차량이 생성되는 위치도 바뀌는 것을 볼 수 있다.
(잘 안보이긴 하나 맵이 바뀌고나서 아예 다른곳에서 차량이 생성되었다.)
차량 생성 위치와 캐릭터가 가까울때, 차량이 생성되는게 화면이 보일 때가 있다. 때문에 차량 생성 위치를 조금 더 멀리 잡아 주었다.
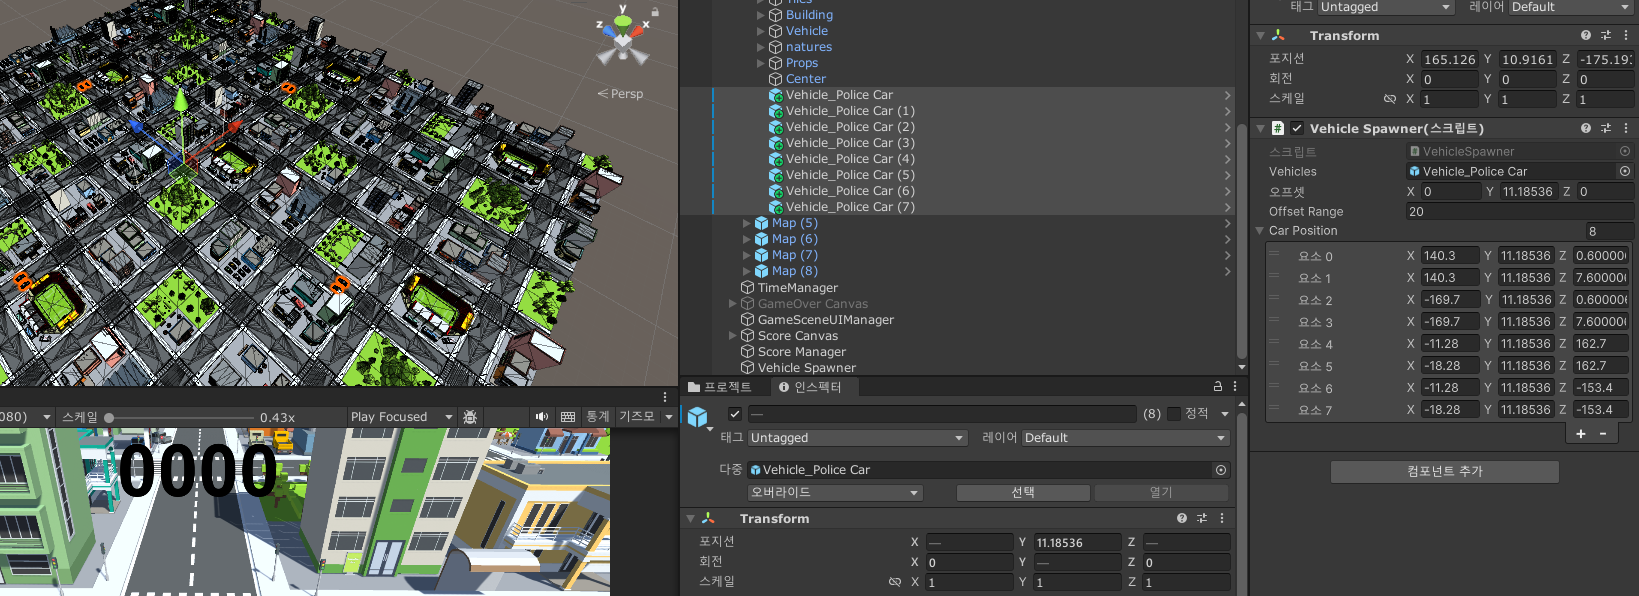
이제 차량이 생성되고 움직이는것, 부딧혔을때, 마무리 작업을 만들 것이다.
먼저 차량이 생성되고 움직이는 스크립트를 작성할껀데 이건 차량의 이동을 제어하는 스크립트를 따로 만들어서 제어할 예정이다.
using System.Collections;
using System.Collections.Generic;
using UnityEngine;

public class Vehicle : MonoBehaviour
{
    private Rigidbody rigidBody;
    private GameObject player;
    [SerializeField] float speed;

    private void Awake()
    {
        rigidBody = GetComponent<Rigidbody>();
        player = GameObject.FindWithTag("Player");
    }
    private void FixedUpdate()
    {
        rigidBody.position += transform.forward * speed * Time.deltaTime;
    }
}
먼저 Vehicle이라는 스크립트를 만들어준다.
이 스크립트는 자신을 앞으로 계속해서 움직이게 해주는 코드이다.
FixexUpdate에 Vector.forward를 사용하게 되면 월드 좌표를 기준으로 앞으로 가게되기에 로컬 좌표로 앞으로 이동하게 되는 transform.forward를 사용해 주었다.
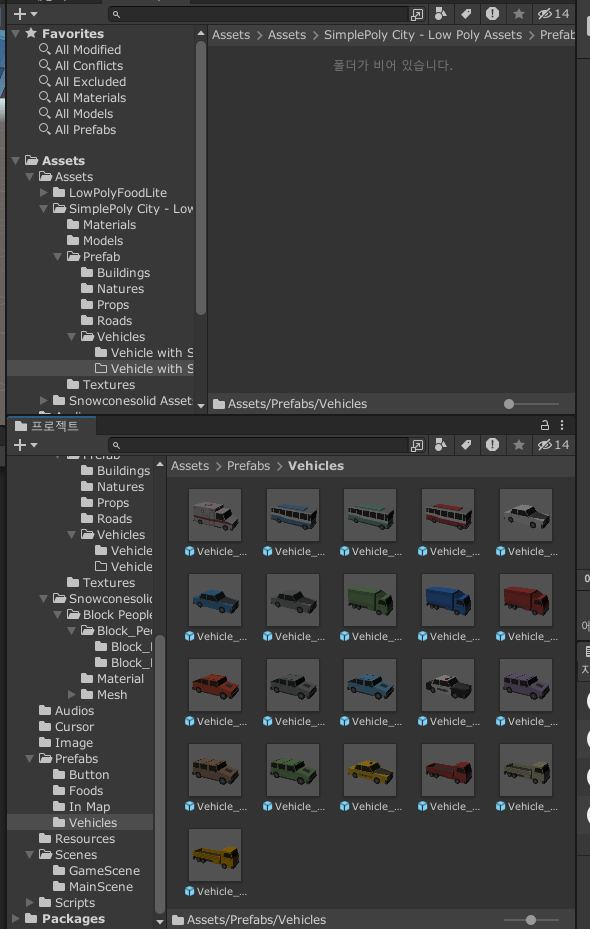
먼저 Prefab에 Vehicles폴더를 만들어서 사용할 차량들을 드래그&드롭 해주었다.
이후 사용할 차량들에 필요한 컴포넌트를 추가해주었다.
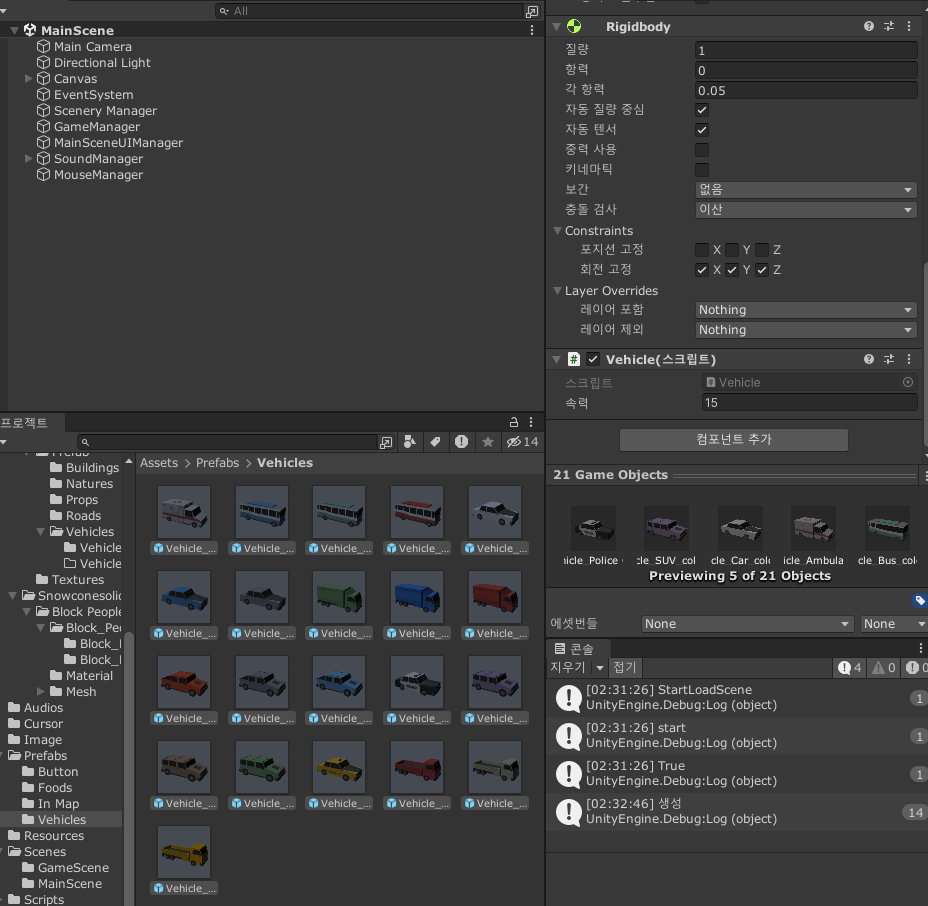
중력사용 X, 회전 고정, 속력할당
여러가지의 차량들을 사용할 것이기 때문에, VehicleSpawner 스크립트도 수정해주었다.
using System.Collections;
using System.Collections.Generic;
using System.IO;
using UnityEngine;

public class VehicleSpawner : MonoBehaviour
{
    [SerializeField] GameObject[] vehicles;

    private GameObject SetObject()
    {
        return vehicles[Random.Range(0, vehicles.Length)];
    }
    IEnumerator InsVehicle()
    {
        while(GameManager.Instance.State)
        {
            yield return new WaitForSeconds(5f);
            Instantiate(SetObject(), SetPosition(), SetRotation());
            //Instantiate(vehicles, SetPosition() ,Quaternion.identity);
            Debug.Log("생성");
        }

    }
}
바뀐 코드만 보여주자면 vehicles를 배열로 지정해 주었고, SetObject라는 함수를 만들어서 랜덤으로 생성시킬 차량의 종류를 선택하게끔 해주었다.
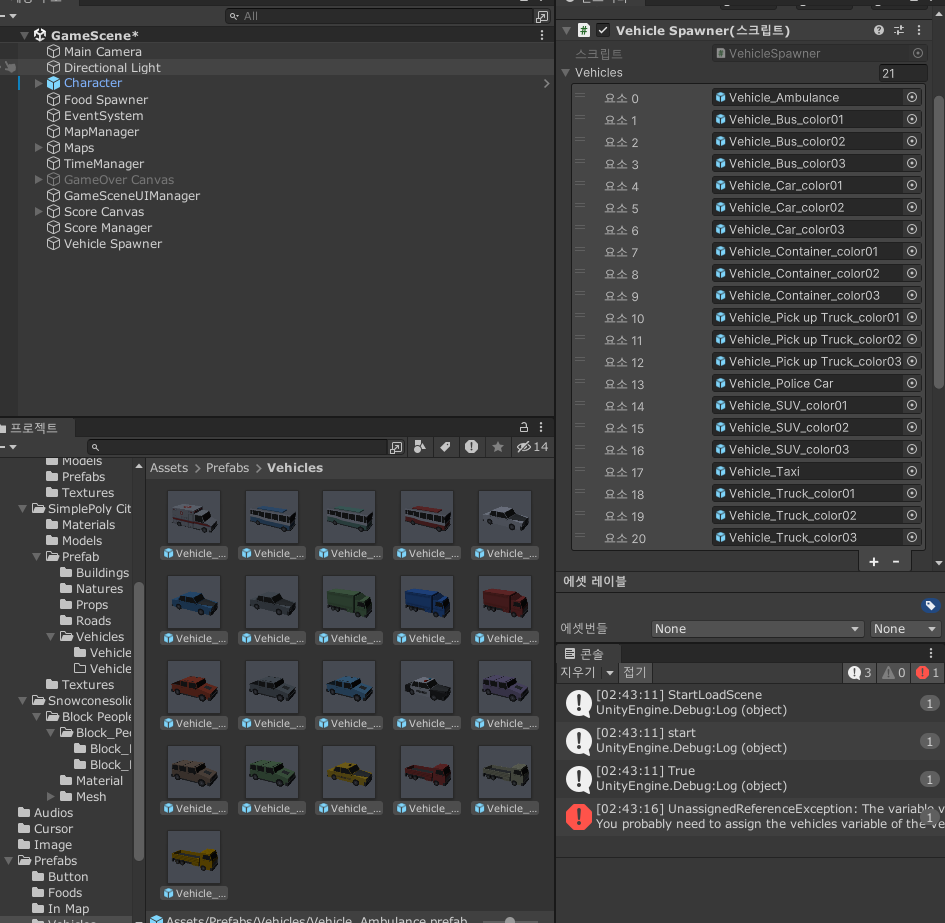
이후에 사용할 차량을 배열에 넣어준다.
이후 실행을 해보면 뭔가 이상한 점이 생기게 되는데,
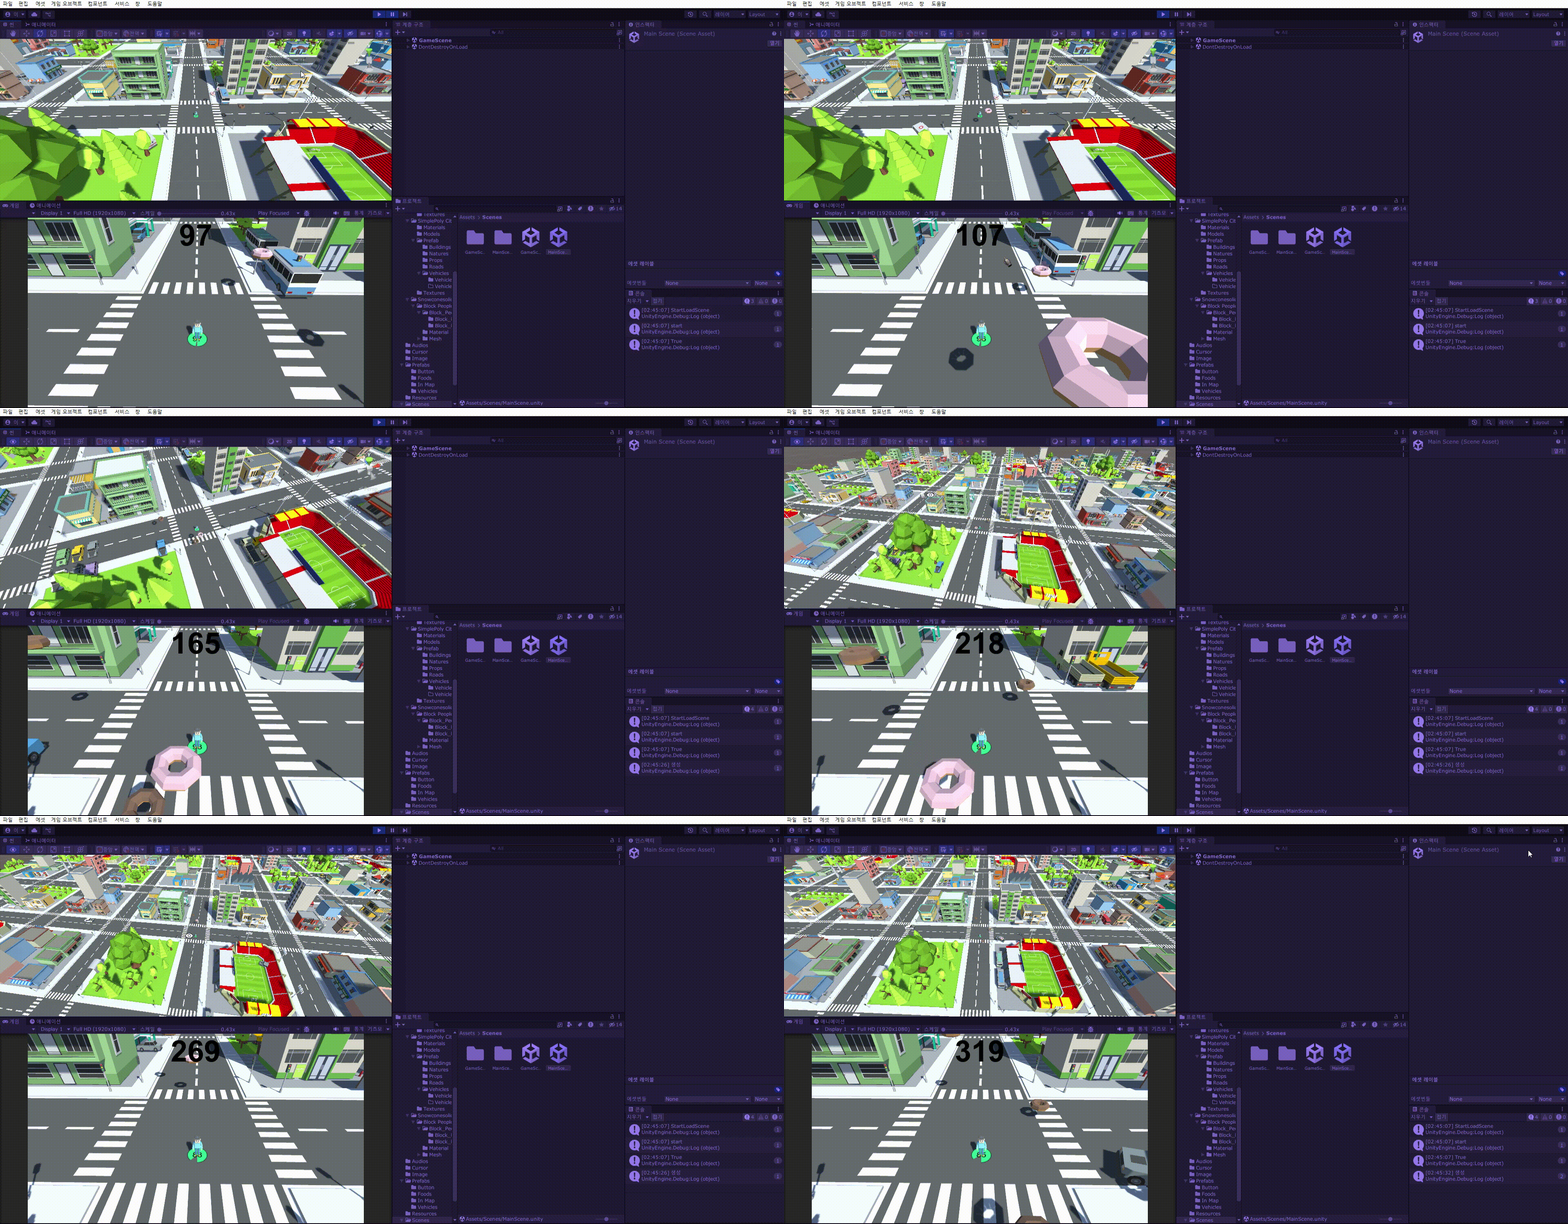
갑자기 생성시키지도 않은 여러 차량들이 움직이는 것을 볼수 있다.
이 이유는 맵을 만들 때, 차량들을 사용하였는데, 이때 사용한 차량 프리팹에도 움직일 차량에 넣은 컴포넌트들이 부착되어있기 때문에 움직인다.
이 문제를 해결하기 위해서 먼저 든 생각은 맵을 통째로 정적 오브젝트로 만드는 것이였다.
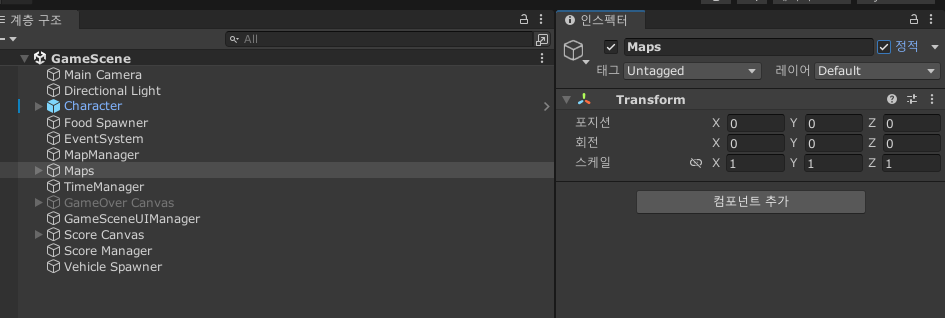
이렇게만 하면 차량도 안움직이고 한번에 깔끔하게 구현할 수 있었다.
하지만 이렇게만 하면, 맵에 있는 차량들이 움직이지만 않을뿐, 내장되어있는 스크립트가 아마 실행될 것이기때문에, 충돌과 같은 시스템을 위해서는 적합하지 않았다.
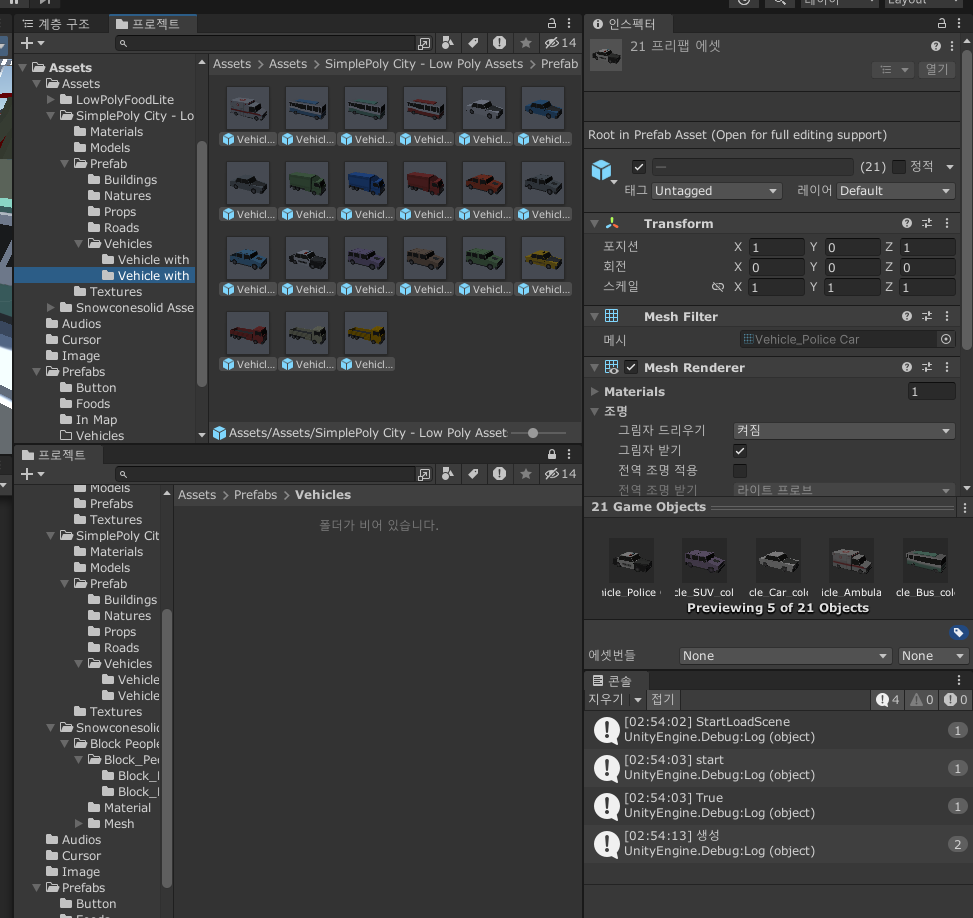
그래서 프리팹 베리언트를 만들어서 기능을 추가한 이후에 새로 만들어진 프리팹을 사용할 것이다.
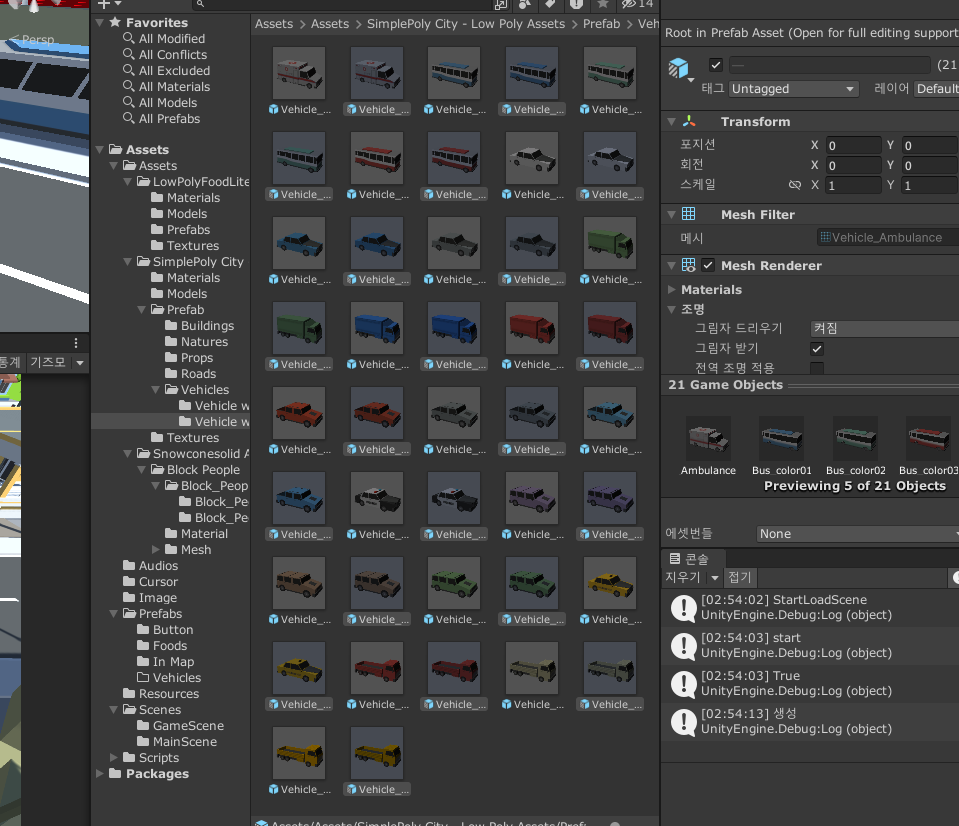
프리팹 우클릭(전체선택이후) - 생성 - 프리팹 베리언트
이후 생성된 프리팹들을 다시 Prefab폴더에 넣어준다.
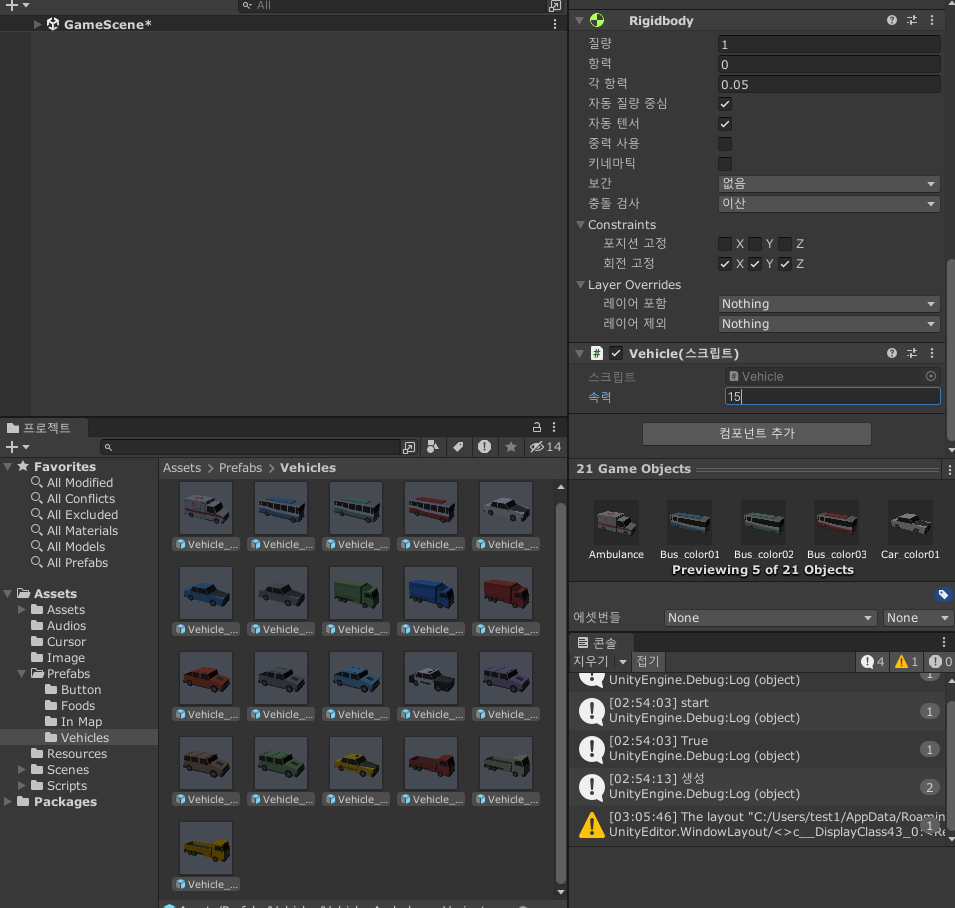
이후 모두 선택을 해서 컴포넌트를 부착해준 이후 값을 기호에 맞게 수정해 주었다.
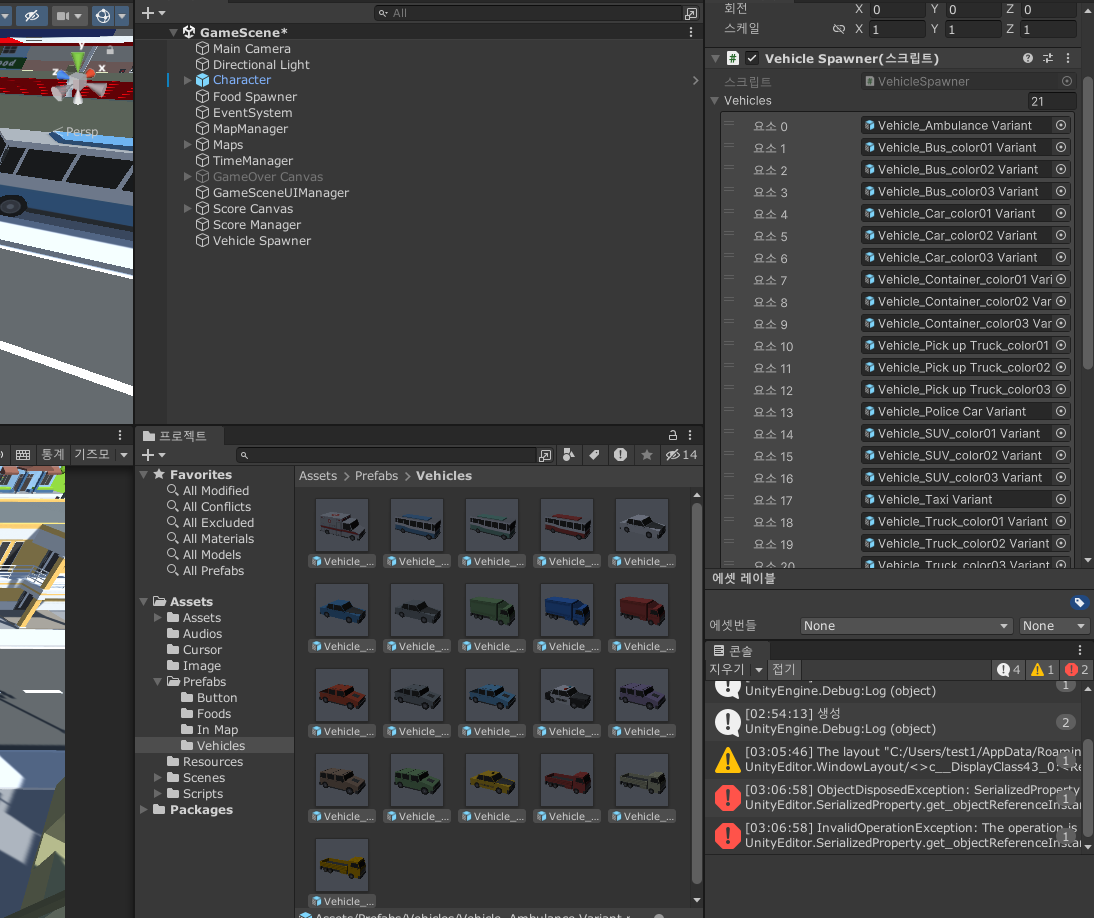
VehicleSpawner의 Vehicles 배열도 다시 넣어준다.
이렇게 해주면 기존에 꾸미기 용도로 있던 차량들은 바뀌는게 없고,
움직일 차량들만 컴포넌트가 추가되고, 기능이 작동되는 것을 볼 수 있다.
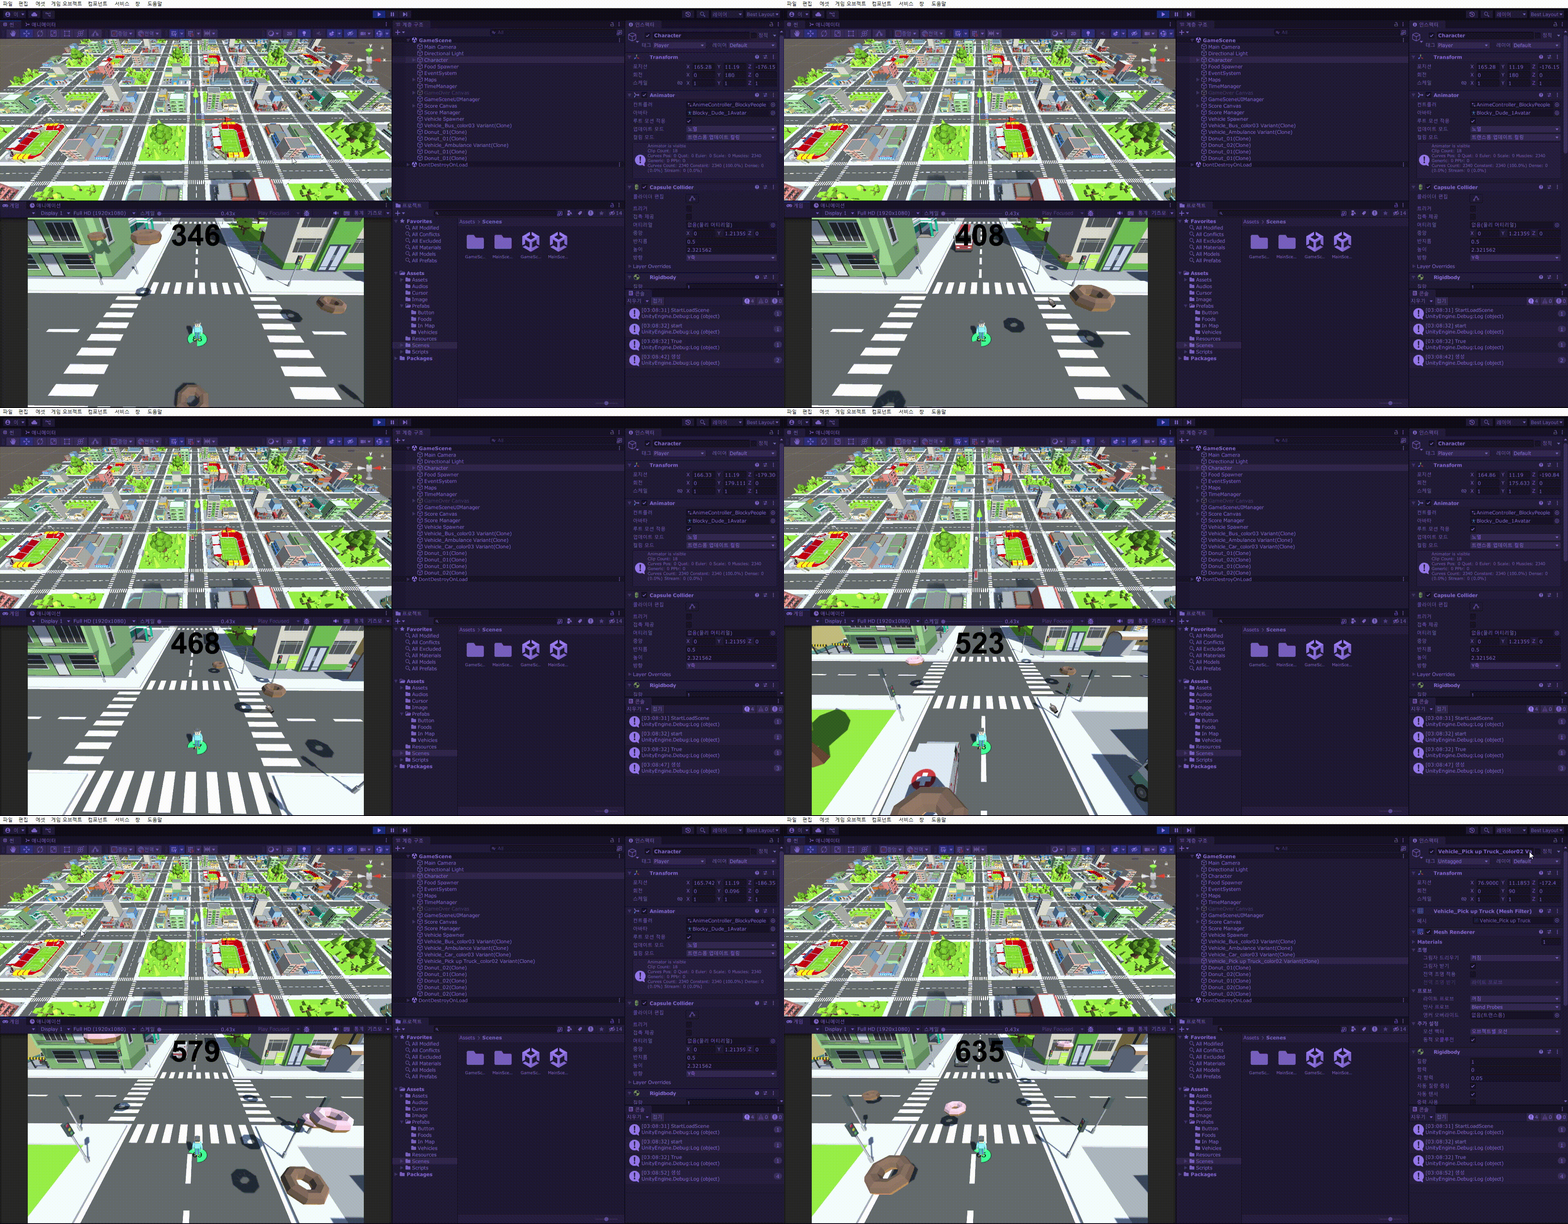
확인해보면 9개의 맵의 중아에는 이렇게 차량이 잘 나오는 것을 볼수 있지만, 한개의 맵에는 9개의 사거리가 존재하는데 차량들은 가운데에 있는 사거리를 향해서만 가는 것을 볼수 있다.
때문에 기존에 차량들이 나왔던 8곳을 총 24곳으로 나누어 주었다.
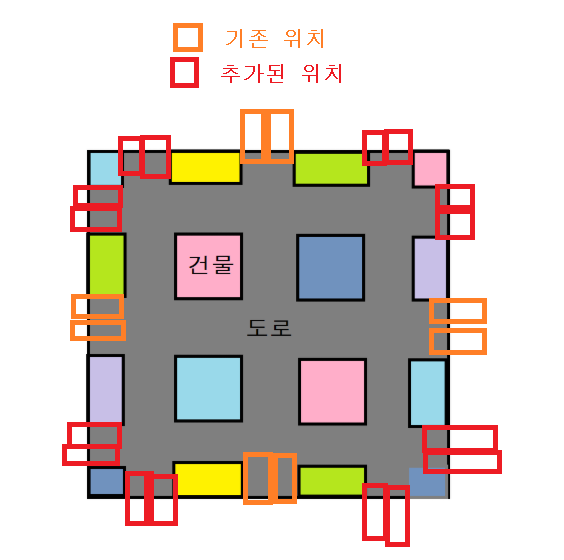
원래는 가운데를 향해서만 차량이 생성되었기에 한개의 맵에 구석에 가면 차량을 볼 수 없다.
때문에 이런식으로 배치하면 계속해서 차량이 여러군데에서 생성되는 것을 볼 수 있다.
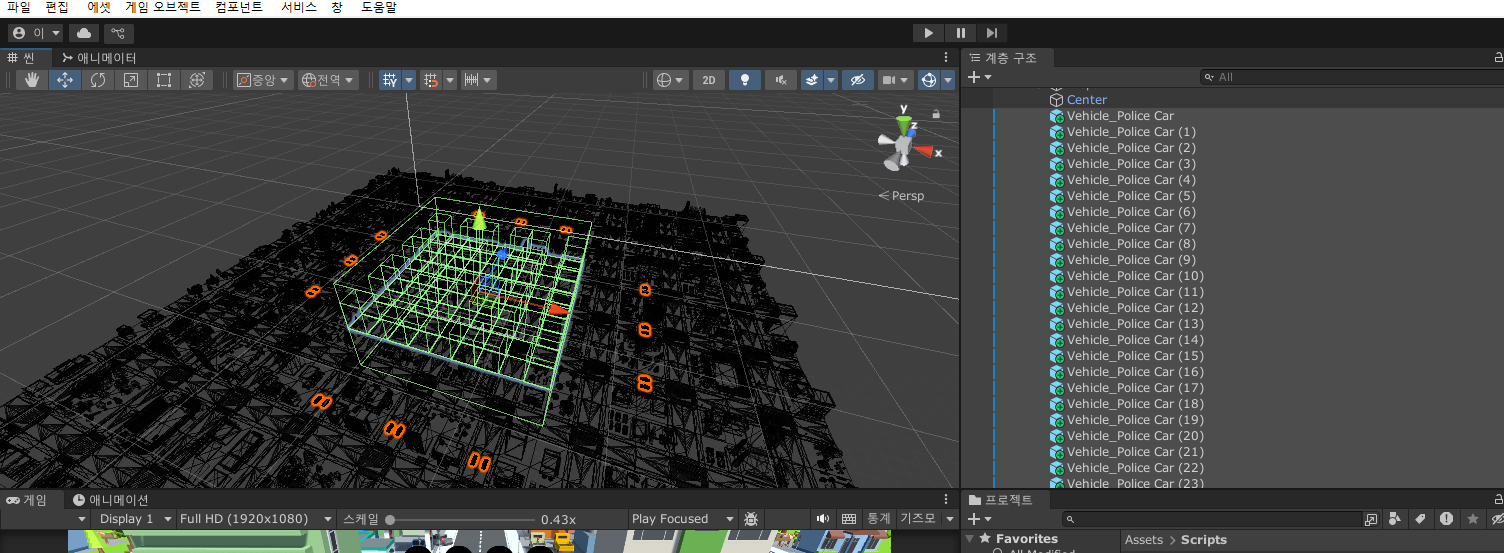
차량 스폰위치를 설정한 뒤, VehicleSpawner 스크립트를 수정해 주겠다.
[SerializeField] GameObject[] carPosition;먼저 carPosition의 변수타입을 Vector3에서 GameObject로 바꾼다.
이유는 일일이 작성하는 것이 많아졌기에 귀찮기 때문이다. 이 코드로 GameObject를 가져오고 그 GameObject에 Position을 가져와 사용할 것이다.
    private Vector3 SetPosition()
    {
        //   5 4
        // 3     1
        // 2     0
        //   7 6
        index = Random.Range(0, carPosition.Length);
        return carPosition[index].transform.localPosition + MapManager.Instance.maps[4].transform.position;

        // offset = new Vector3(Random.Range(-offsetRange,offsetRange),offset.y,Random.Range(-offsetRange,offsetRange));
        // Debug.Log(MapManager.Instance.maps[4].transform.position);
        // Debug.Log(offset);
        // return MapManager.Instance.maps[4].transform.position + offset;

    }
이후 return 반환값의 코드를 수정하였다.
Vector3에서 GameObject가 되었기에 Position을 사용해야 하고, 게임오브젝트가 자식 오브젝트이기 때문에, transform.localPosition으로 작성해 주었다.
이후에는 Inspector창에서 차량 생성위치 오브젝트를 드래그&드롭해주면 되는데, 쉽게 한쪽 방향을 보고 있는 차량들끼리 묶어서 할당을 해줄 것이다.
예를 들어 왼쪽을 바라봐야 하는 차량들 6개를 묶어 0~5배열 인덱스에 넣고 오른쪽을 바라봐야 하는 차량들 6개를 6~11배열 인덱스에 넣은 것 처럼 말이다.
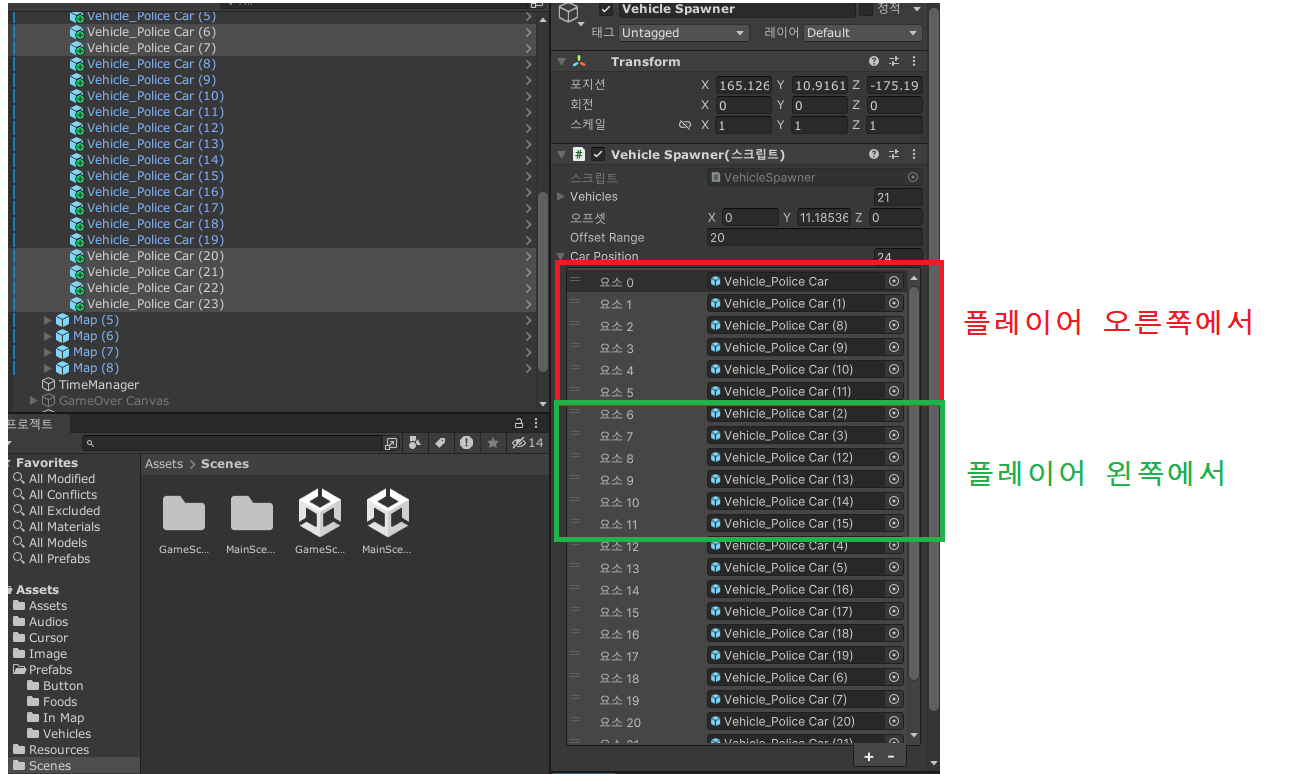
이후에 VehicleSpawner 스크립트에서 방향을 제어하는 코드를 수정해주면 된다.
    private Quaternion SetRotation()
    {
        Quaternion direction = Quaternion.Euler(0, 0, 0);
        switch(index / 6)
        {
            case 0: direction = Quaternion.Euler(0, -90, 0); break;
            case 1: direction = Quaternion.Euler(0, 90, 0); break;
            case 2: direction = Quaternion.Euler(0, 180, 0); break;
            case 3: direction = Quaternion.Euler(0, 0, 0); break;
        }
        return direction;
    }
switch 문의 index / 2를 index / 6으로 변경해주었다.
    IEnumerator InsVehicle()
    {
        while(GameManager.Instance.State)
        {
            yield return new WaitForSeconds(2f);
            Instantiate(SetObject(), SetPosition(), SetRotation());
            //Instantiate(vehicles, SetPosition() ,Quaternion.identity);
            Debug.Log("생성");
        }

    }
배열의 크기가 늘어났기에 생성되는 시간도 짧아지도록 수정해주었다.
생성 빈도를 대략적으로 맞춰주었다. (차량이 생성되는 빈도는 나중에 TimeManager에서 수정할 것이다.)
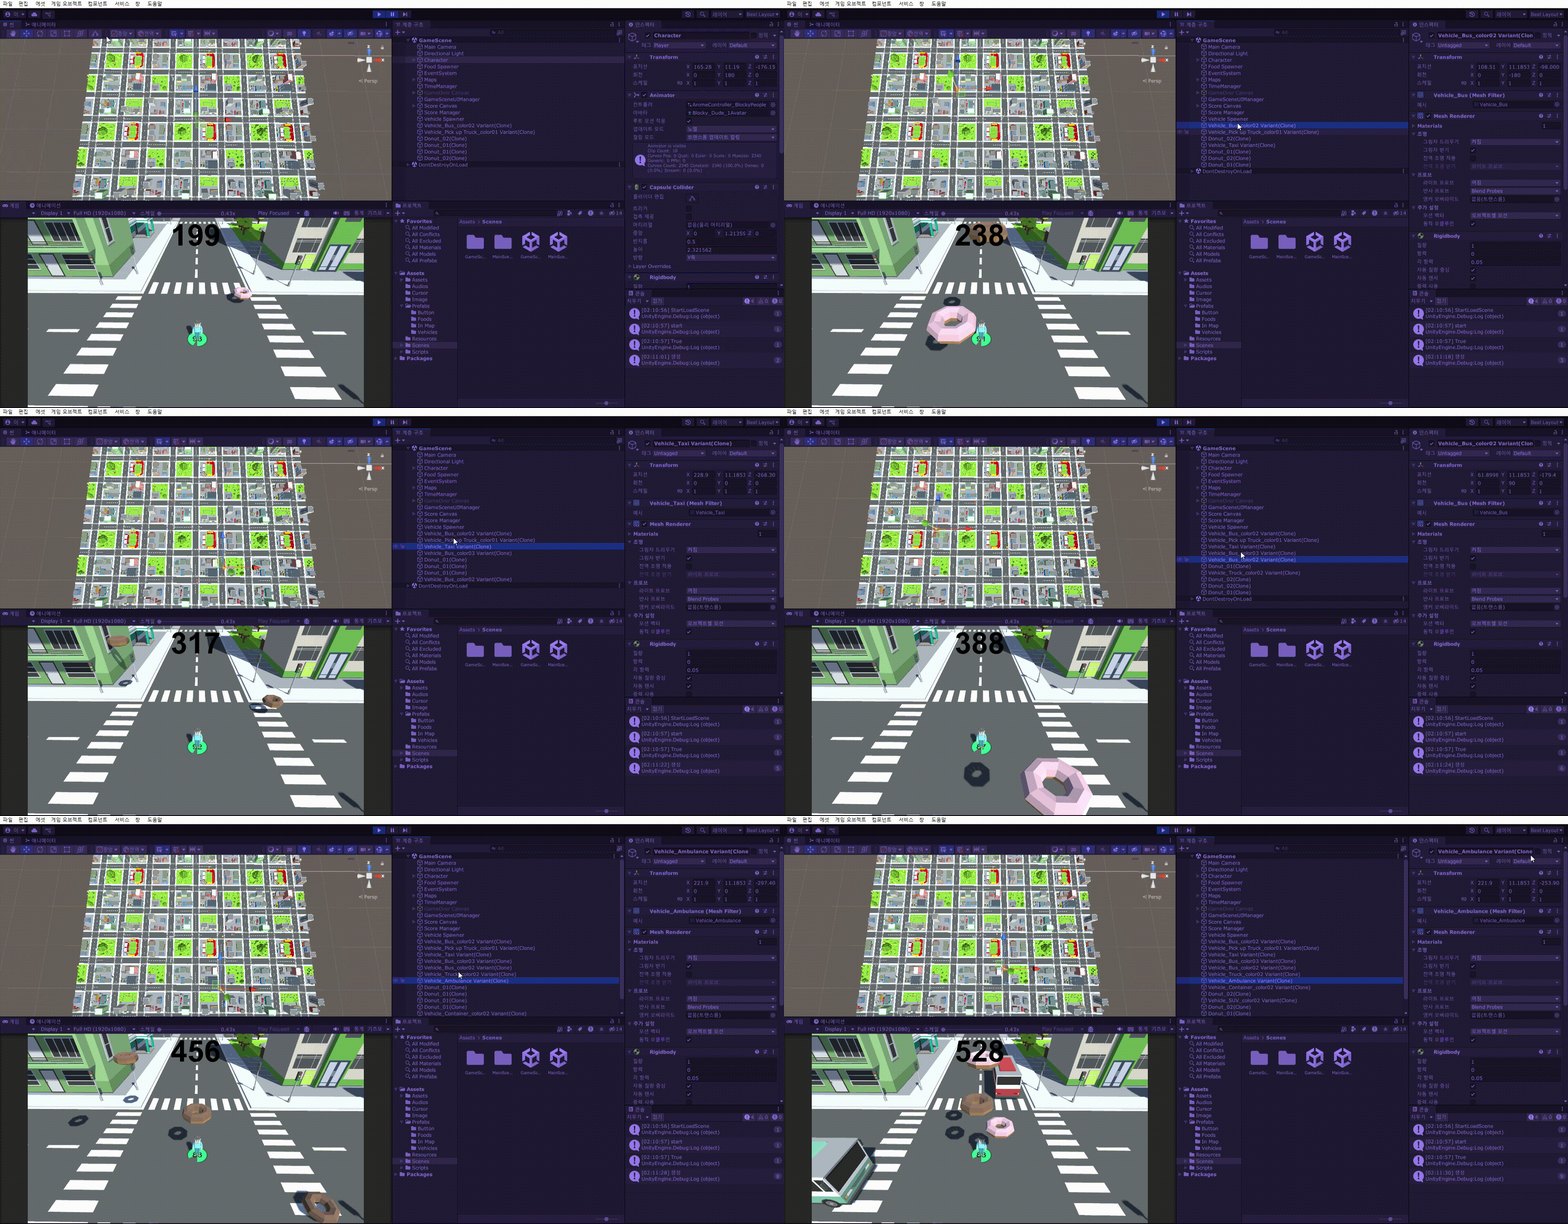
이렇게 가운데맵을 기준으로 9개의 사거리 모두 차량이 생성되는 것을 볼수 있다.
이번엔 차량에 관해 시스템을 만들 것이다.
이전까지는 차량의 생성에 관해 시스템을 작성하였다면, 이번에는 차량의 충돌이나, 삭제 같은 시스템을 만들 것이다.
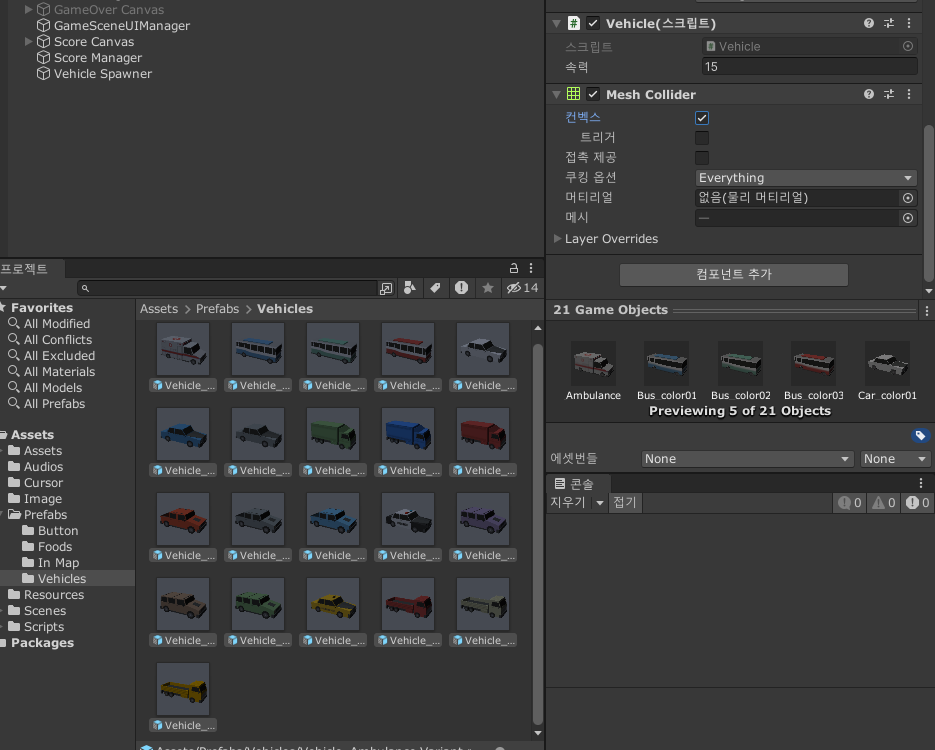
먼저 차량의 충돌을 확인하기 위해, 모든 차량에 Mesh Collider를 추가해주었다.
이후 Convex를 체크하여 충돌처리를 할수 있게 해준다.
using System.Collections;
using System.Collections.Generic;
using UnityEngine;

public class Vehicle : MonoBehaviour
{
    private Rigidbody rigidBody;
    private GameObject player;
    [SerializeField] float speed;
    private float destroyDistance = 300;

    private void Awake()
    {
        rigidBody = GetComponent<Rigidbody>();
        player = GameObject.FindWithTag("Player");
    }
    private void FixedUpdate()
    {
        rigidBody.position += transform.forward * speed * Time.deltaTime;
    }
    private void Update()
    {
        ScreenCheck();
    }
    void ScreenCheck()
    {
        if (Mathf.Abs(player.transform.position.x - transform.position.x) >= destroyDistance ||
            Mathf.Abs(player.transform.position.z - transform.position.z) >= destroyDistance)
        {
            Destroy(gameObject);
        }
    }
}
이후 Vehicle 스크립트에 기능을 추가해 주는데
ScreenCheck이라는 함수를 만들어서 Player를 기준으로 일정 이상 멀어지게 되면 차량을 삭제하는 기능을 추가해 주었다. 대략적으로 x 또는 z축으로 300이상 플레이어와 떨어지게 된다면 삭제되게끔 해주었다.
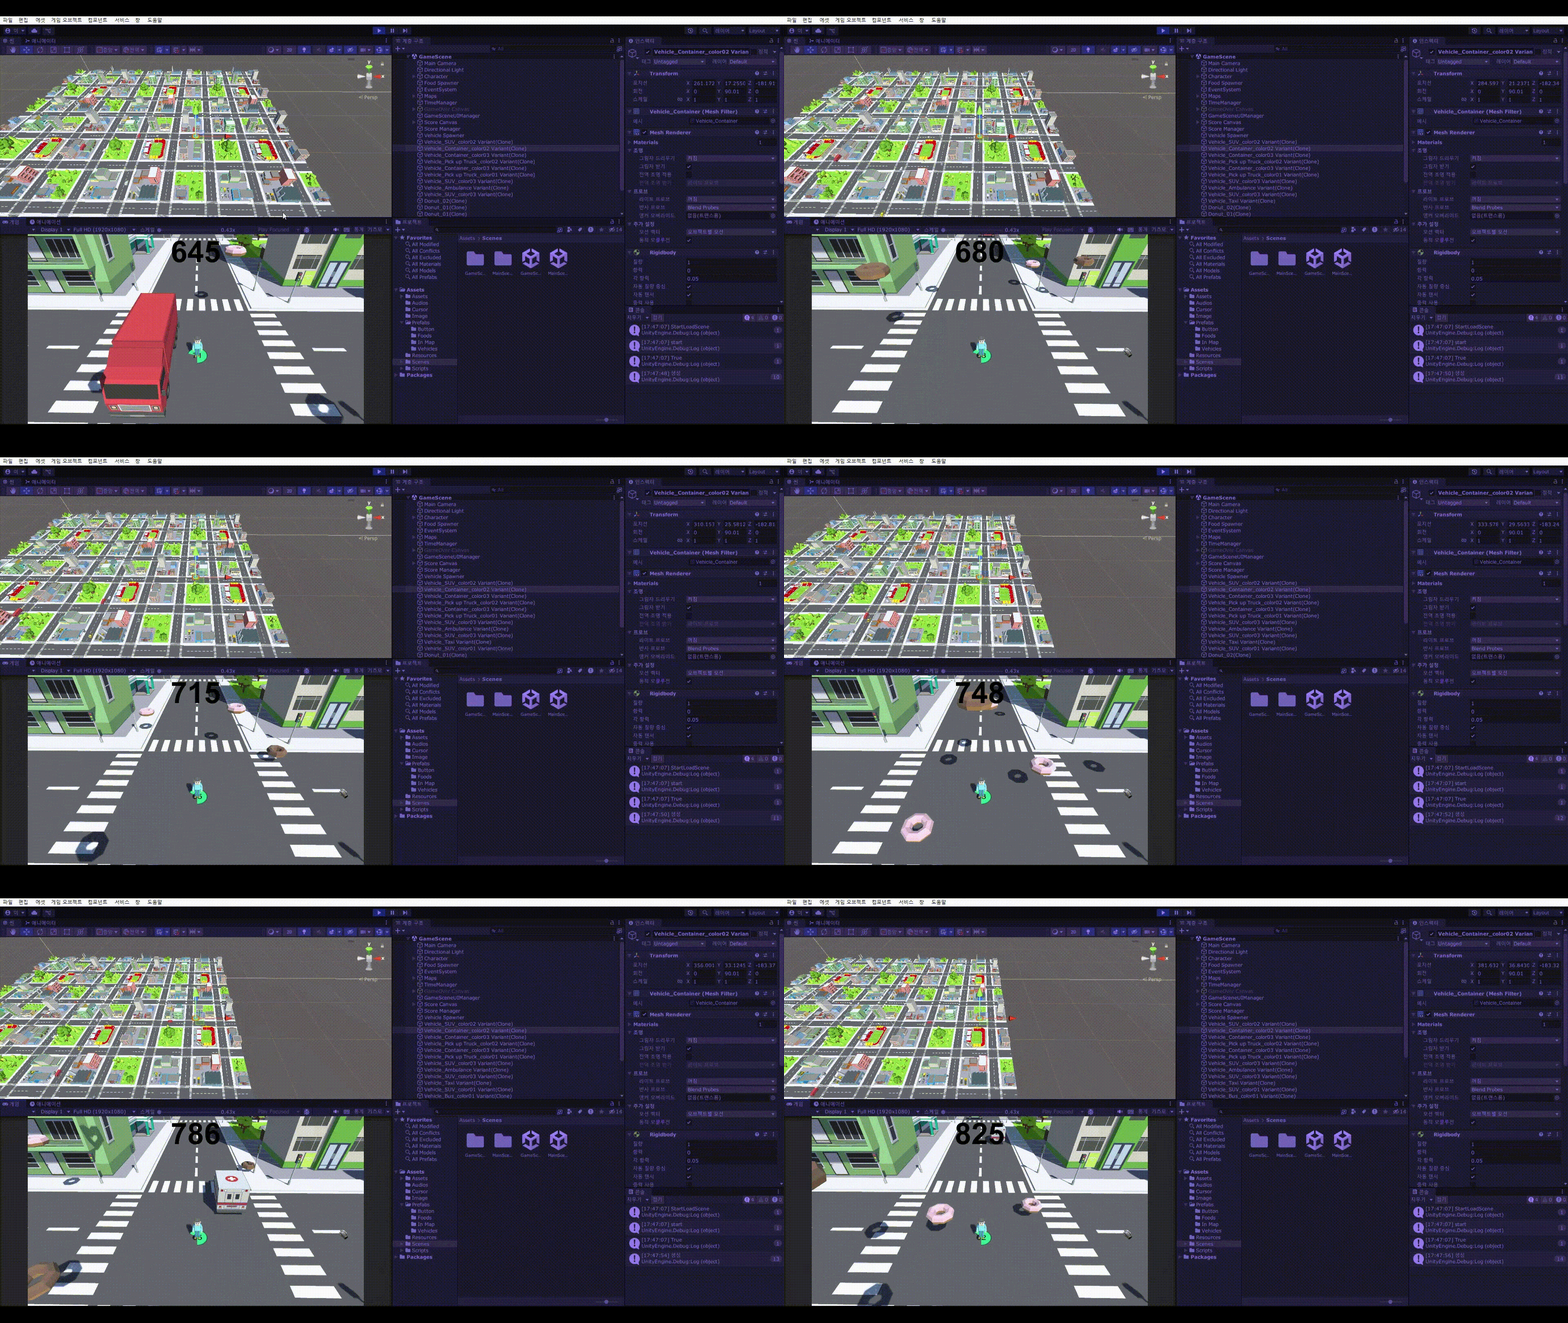
플레이어의 x위치가 약 165였을때, 차량이 465쯤에서 삭제되는 것을 볼 수 있다.
이후에는 캐릭터와의 충돌을 관리할 것인데,
먼저 스크립트를 작성하기전에, 차량의 컴포넌트를 조금 수정해줄 것이다.
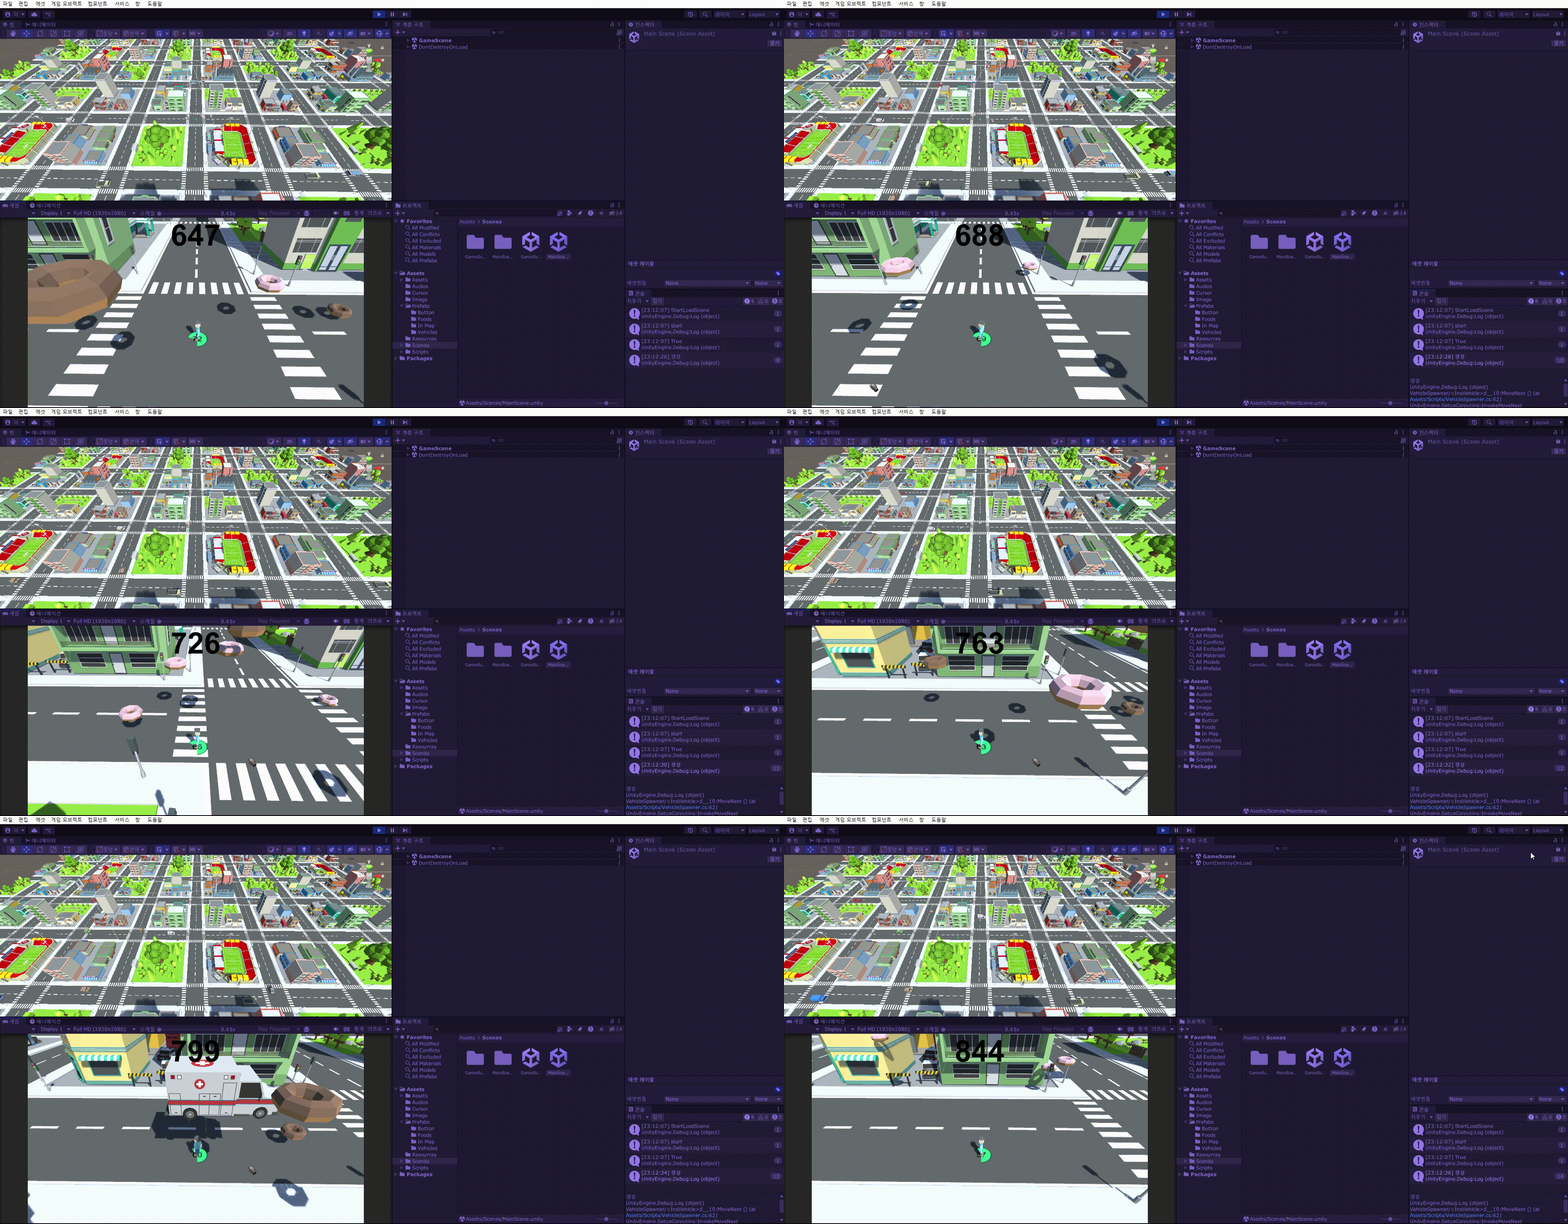
기존에는 이렇게 차량과 캐릭터가 부딧히면, 차량이 날라가는 것을 볼수 있는데,
이 것을 방지하고자, 모든 차량의 Rigidbody컴포넌트에 y축 포지션 고정과, 질량을 수정해 주었다.
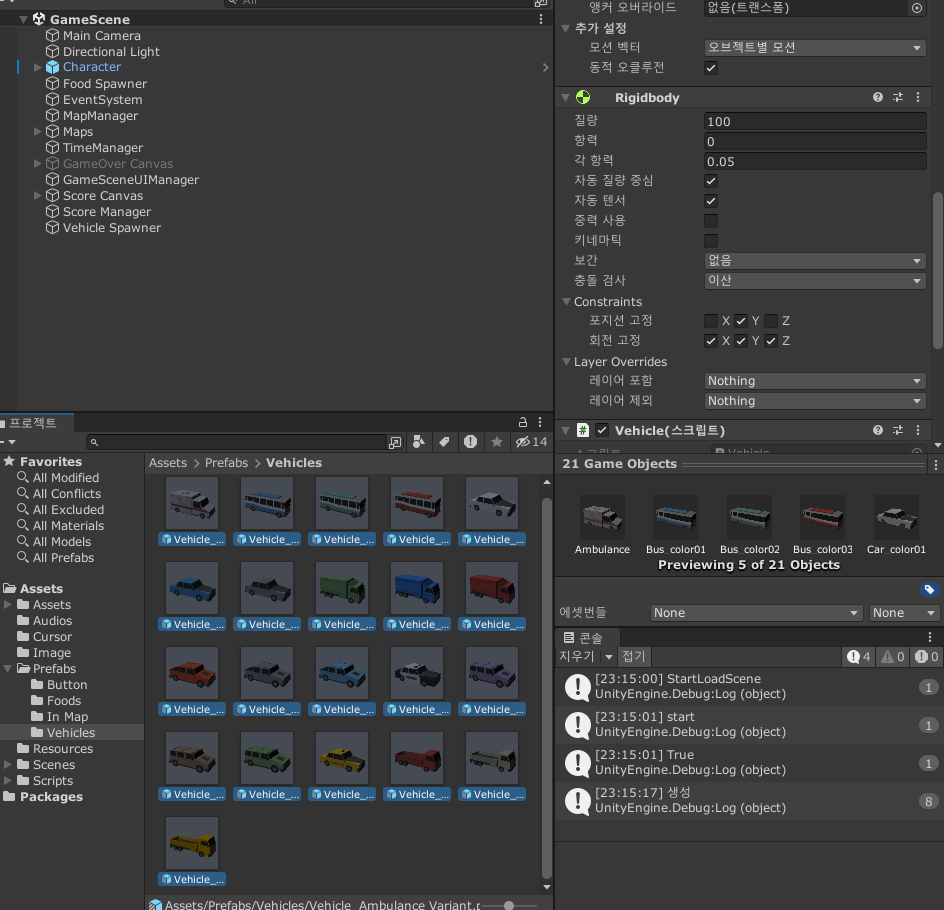
이렇게 하면 차량이 캐릭터와 부딧쳤을때, 날아가지 않고, 캐릭터가 밀리는 것을 볼수 있게 된다.
이제 직접 충돌 하였을때를 만들어 줄 것이다. 기본적으로 캐릭터의 Hp가 깎이면, 캐릭터를 밀쳐내는 스크립트를 만들어 줄 것이다.
private int contactDamage = -20;

    private void OnCollisionEnter(Collision collision)
    {
        PlayerHealth playerHealth = collision.gameObject.GetComponent<PlayerHealth>();
        if(playerHealth != null)
        {
            playerHealth.HealthUpdate(contactDamage);
        }
    }
Vehicle 스크립트의 추가된 내용이다.
먼저 OnCollisionEnter로 충돌하였을때를 검사하고, 캐릭터와 부딧혔을 때, contactDamage만큼 캐릭터의 Hp를 깎는 코드를 작성해 주었다.
이후에는 충돌을 할때 캐릭터를 밀쳐내는 요소를 추가해 줄 것이다.
private float contactPushPower = 100;

    private void OnCollisionEnter(Collision collision)
    {
        PlayerHealth playerHealth = collision.gameObject.GetComponent<PlayerHealth>();
        if(playerHealth != null)
        {
            playerHealth.HealthUpdate(contactDamage);

            Vector3 contactNormal = collision.contacts[0].normal * contactPushPower;
            collision.gameObject.GetComponent<Rigidbody>().AddForce(-contactNormal, ForceMode.Impulse);
        }
    }
추가된 코드로는 collision.contacts[0].normal를 통해 충돌된 위치를 가져오고 그 위치의 반대로 힘을 더해 밀쳐내지게끔 만들어 주었다.
밀려나는 크기는 100으로 잡아주었다.
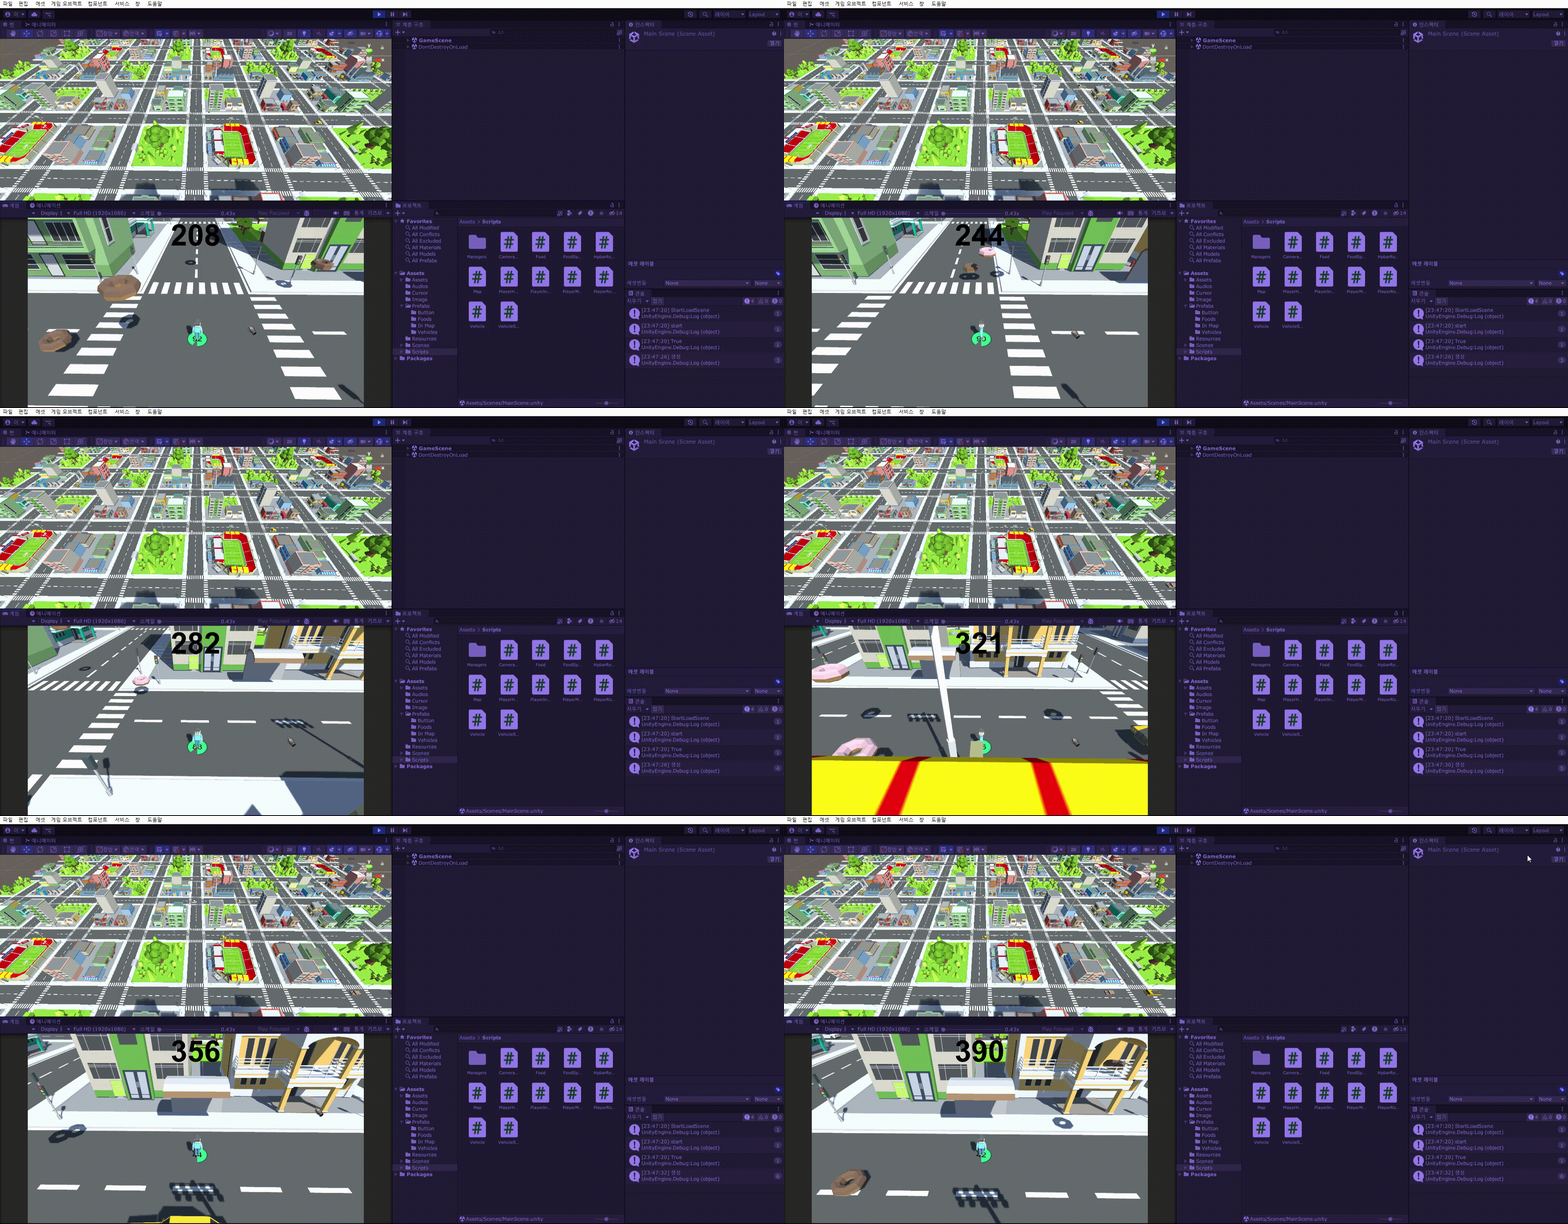
이렇게 작성을 하게 된다면, 차량과 충돌하였을 때 체력이 깎이고, 밀려나는 것을 볼수 있다.
여기서 살짝 수정할 점이 있다면, 정면으로 충돌할때, 충돌이 많아져 빠르게 hp가 깎인다는 점이다.
그래서 차량과 충돌하였을 때, 일시적으로 캐릭터를 무적상태를 만들어 줄 것이다.
    public bool isContactVehicle
    {
        get; private set;
    } = false;`

        public IEnumerator ContactVehicle()
    {
        isContactVehicle = true;
        yield return new WaitForSeconds(1f);
        isContactVehicle = false;
    }
PlayerHealth 스크립트에 기능을 추가해준다.
isContactVehicle이라는 bool형 변수를 선언해주고 이 변수가 true일때는 hp가 깎이지 않으며, false일 때만 hp가 깎이게 ContactVehicle 코루틴 함수를 작성해준다.
충돌을 하게 될 시, 코루틴 함수가 호출되고, 1초동안 hp가 깎이지 않게끔 함수를 만들어 준다.
    private void OnCollisionEnter(Collision collision)
    {
        PlayerHealth playerHealth = collision.gameObject.GetComponent<PlayerHealth>();
        if(playerHealth != null && !playerHealth.isContactVehicle)
        {
            playerHealth.HealthUpdate(contactDamage);

            Vector3 contactNormal = collision.contacts[0].normal * contactPushPower;
            collision.gameObject.GetComponent<Rigidbody>().AddForce(-contactNormal, ForceMode.Impulse);

            StartCoroutine(playerHealth.ContactVehicle());
        }
    }
다시 Vehicle스크립트로 돌아와서 if문의 조건을 무적상태가 아닐때도 추가해주고,
모든 충돌 시스템 이후에 ContactVehicle코루틴 함수를 호출시켜 바로 이후의 충돌을 막는다.
뭔가 좀 밋밋하기 때문에, 차량에 소리를 넣어줄 것이다.
챠량이 캐릭터와 근접 하였을때와, 부딧혔을 때의 소리를 추가해 주도록 하겠다.
    [SerializeField] AudioClip approachAudio;
    [SerializeField] AudioClip contactAudio;
    private float approachDistance = 30;
    private bool isPlayapproachAudio = false;
Vehicle 스크립트에 4개의 변수를 선언해 주는데,
각각, 캐릭터와 가까워졌을때 사운드, 부딧혔을 때 사운드,
가까워진 소리를 내는 거리, 가까워진 소리 1회 실행하게끔 하는 변수 이렇게 있다.
    void ScreenCheck()
    {
        if (Mathf.Abs(player.transform.position.x - transform.position.x) <= approachDistance &&
    Mathf.Abs(player.transform.position.z - transform.position.z) <= approachDistance)
{
    if(!isPlayapproachAudio)
    {
        SoundManager.Instance.EffectPlay(approachAudio);
        isPlayapproachAudio = true;
    }

}

        else if (Mathf.Abs(player.transform.position.x - transform.position.x) >= destroyDistance ||
            Mathf.Abs(player.transform.position.z - transform.position.z) >= destroyDistance)
        {
            Destroy(gameObject);
        }
    }
이후에 ScreenCheck함수를 수정해준다.
위쪽에 if문을 생성시켜, 차량이 캐릭터와 가까워졌을때, 소리를 내는 코드를 작성해 준다.
여기서 중요한 점은 인접할 때, 소리를 내기때문에 OR연산자가 아닌 AND연산자를 사용해주었다.
    private void OnCollisionEnter(Collision collision)
    {
        PlayerHealth playerHealth = collision.gameObject.GetComponent<PlayerHealth>();
        if(playerHealth != null && !playerHealth.isContactVehicle)
        {
            playerHealth.HealthUpdate(contactDamage);

            Vector3 contactNormal = collision.contacts[0].normal * contactPushPower;
            collision.gameObject.GetComponent<Rigidbody>().AddForce(-contactNormal, ForceMode.Impulse);

            SoundManager.Instance.EffectPlay(contactAudio);

            StartCoroutine(playerHealth.ContactVehicle());
        }
    }
OnCollisionEnter함수에 EffectPlay함수를 호출하는 코드를 추가해준다.
충돌되었을때 (무적상태X), 충돌하는 소리를 낼 것이다.
이후에 받아놓았던 소리들을 Audios 폴더에 넣어줄 것이다.
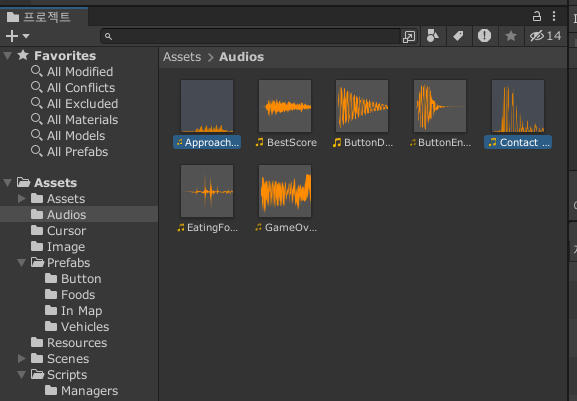
Approach Vehicle : https://pixabay.com/ko/sound-effects/camry-horn-103641/
Contact Vehicle : https://pixabay.com/ko/sound-effects/box-crash-106687/
오디오를 GoldWave라는 프로그램을 통해 잘라서 사용해 주었다.
이후 모든 차량의 Vehicle 컴포넌트에 알맞은 Audio를 삽입해주었다.
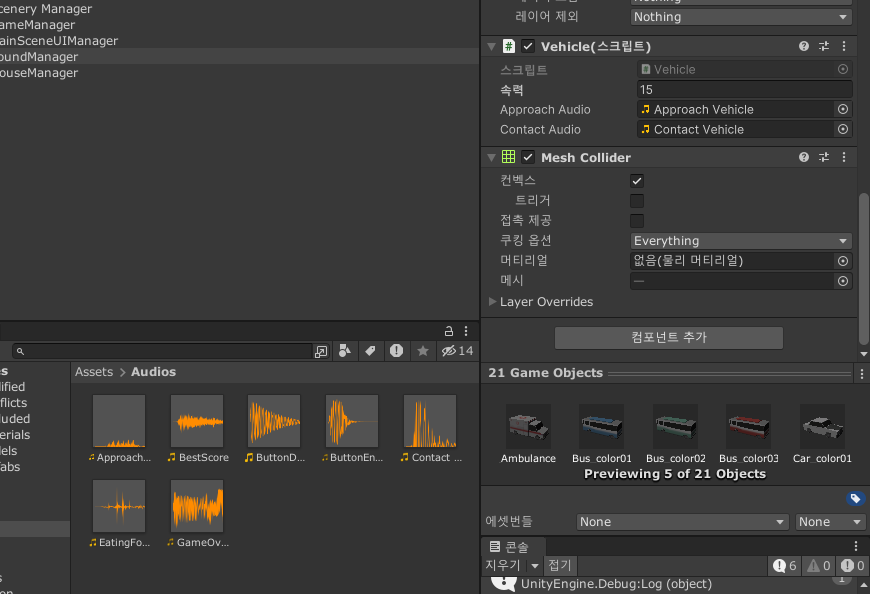
이렇게 해주면 무적상태와, 인접할 때 소리, 부딧혔을 때의 소리가 잘 작동하는 것을 볼 수 있다.
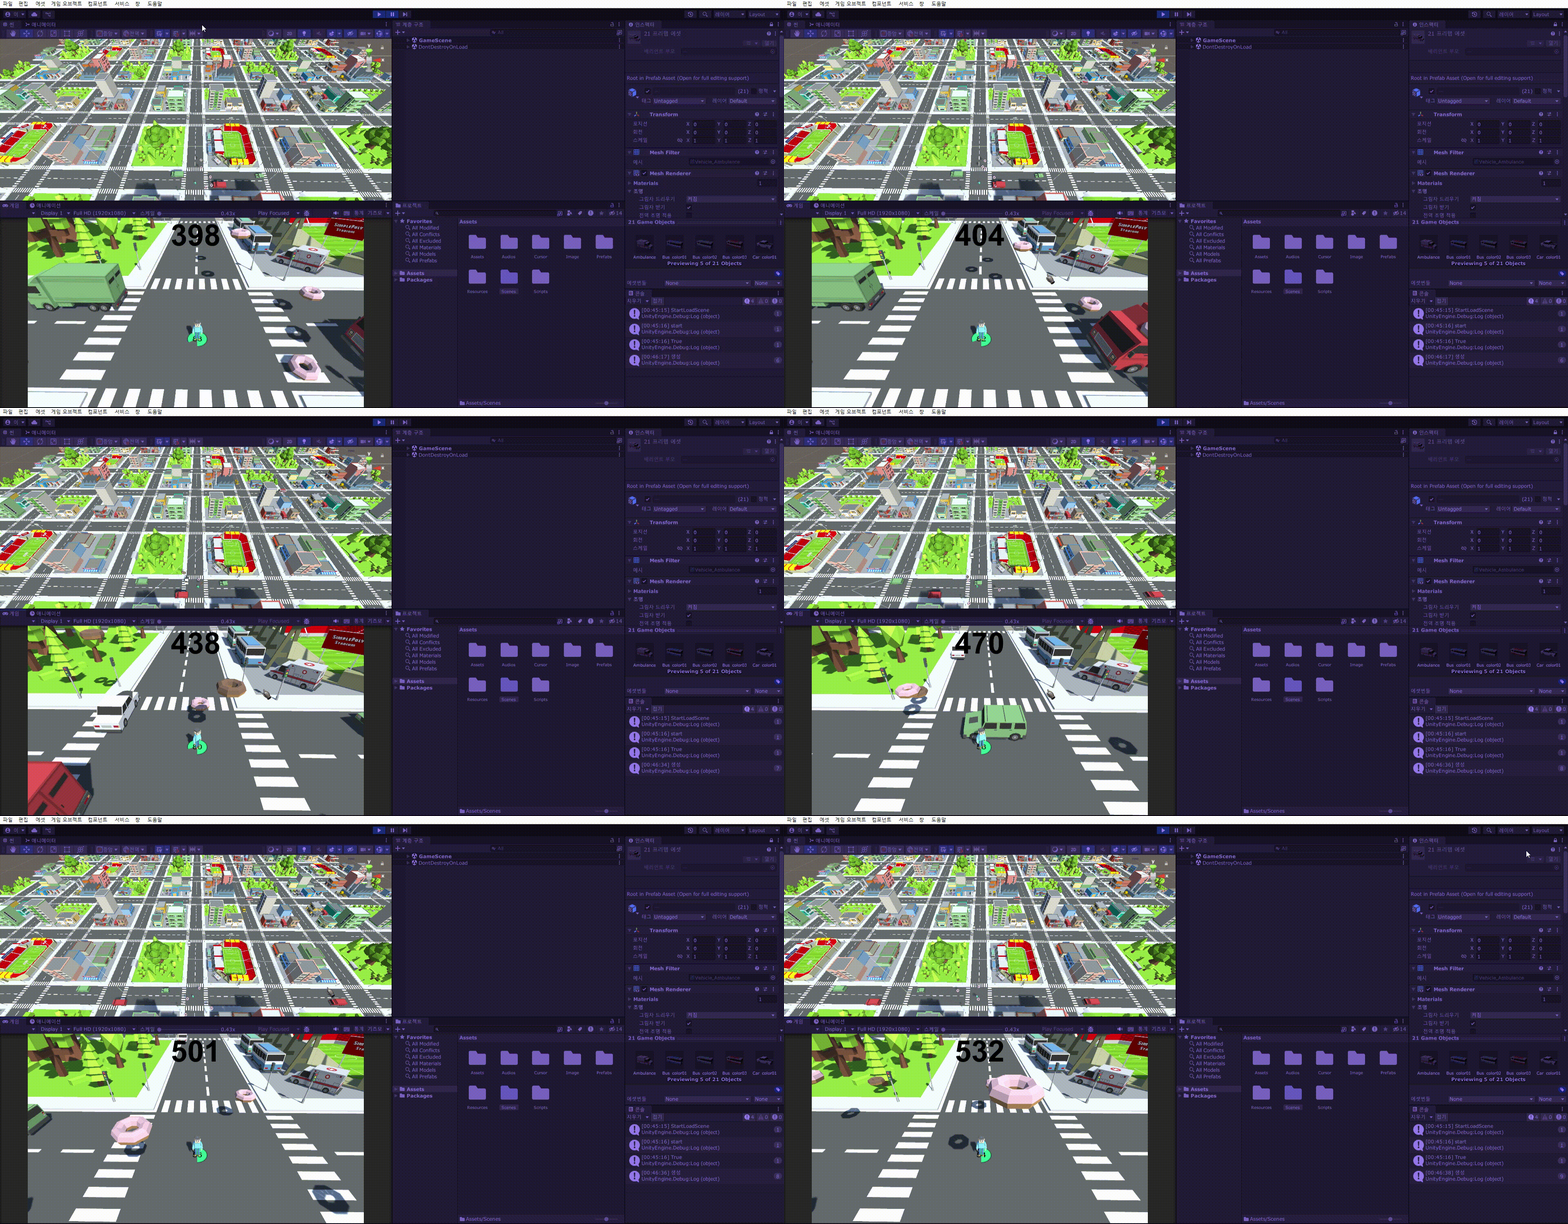
차량과 부딧히고 나서 1초간 무적상태가 되자, hp가 깎이지 않고, 밀려나지도, 소리가 나지도 않는다.
마지막으로 수정해 줄 것은, 차량끼리의 충돌이다.
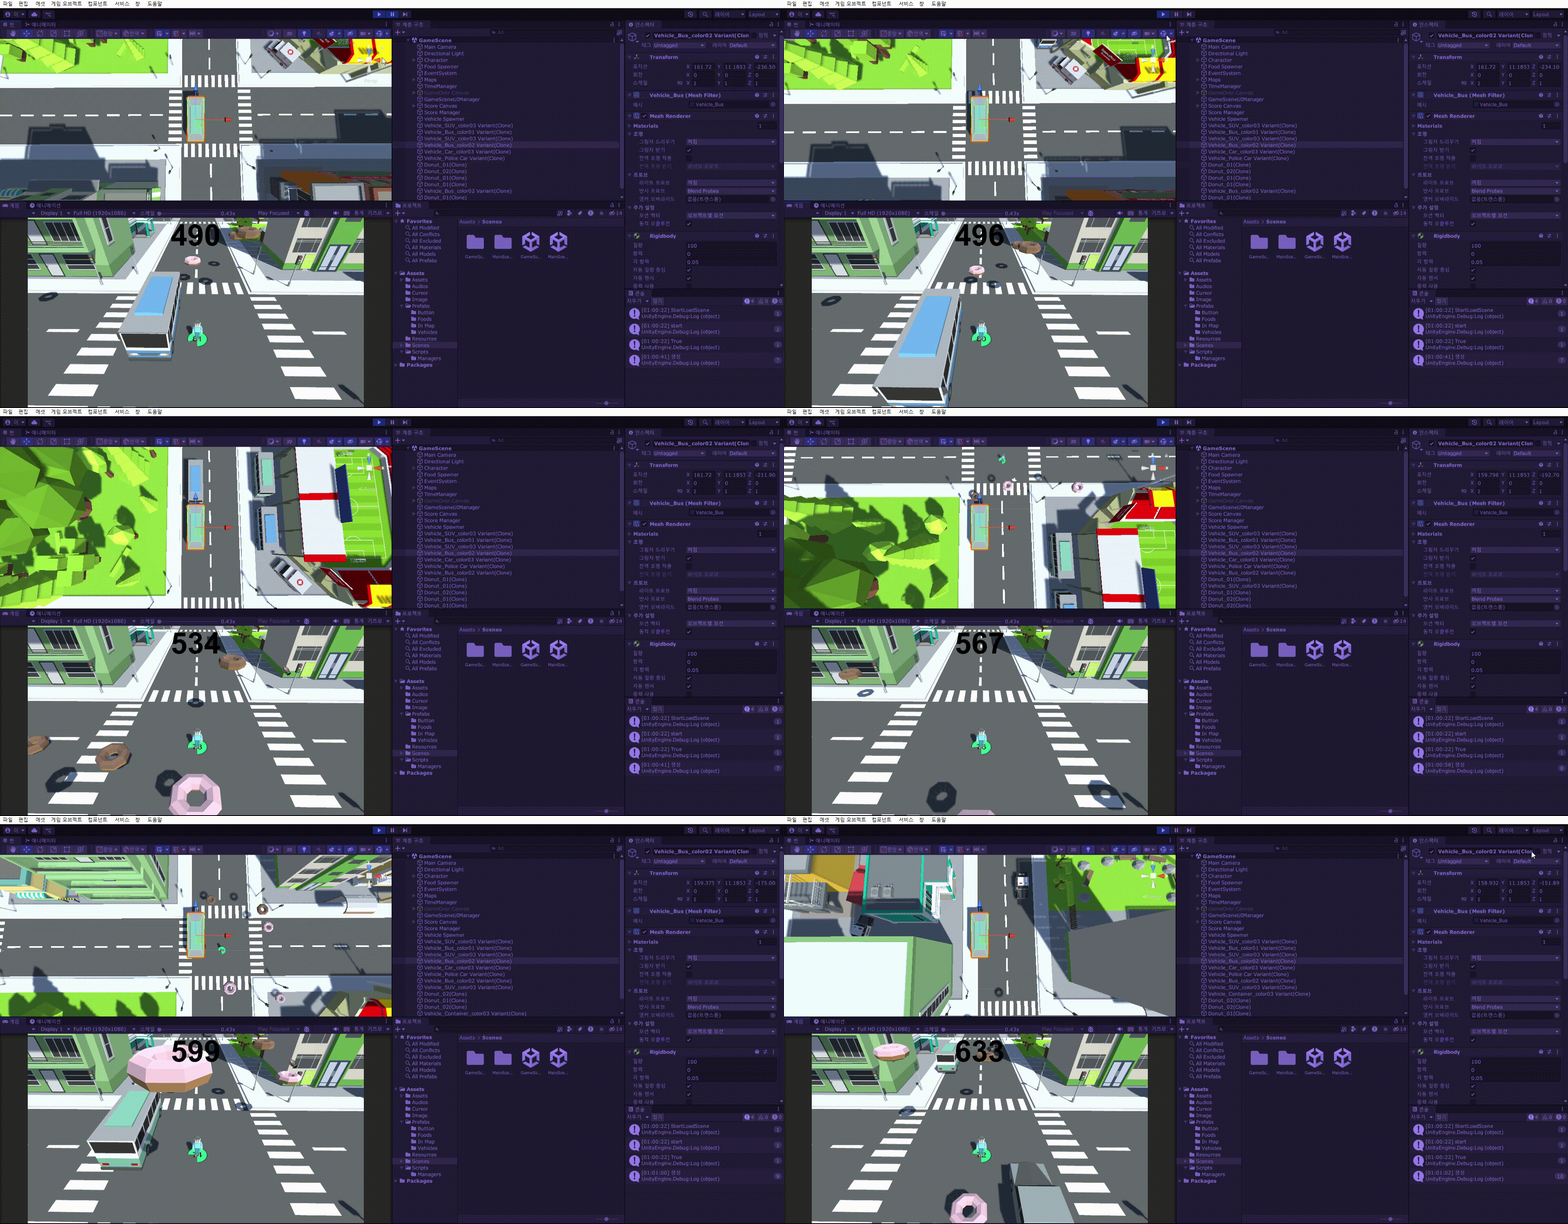
가끔가다가 차량들이 노선을 이탈하는 일이 생기는데 이 경우 차량들끼리의 충돌을 했기 때문이다.
이를 고치기 위해서 간단하게 차량끼리의 충돌을 제거해 줄 것이다.
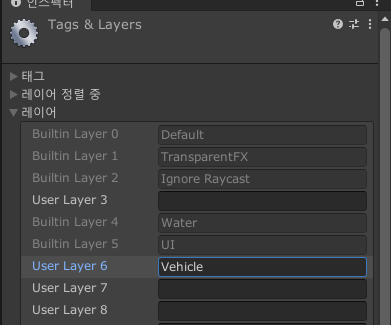
먼저 레이어에 Vehicle이라는 레이어를 추가해준 이후, 모든 차량의 레이어를 Vehicle로 바꿔준다.
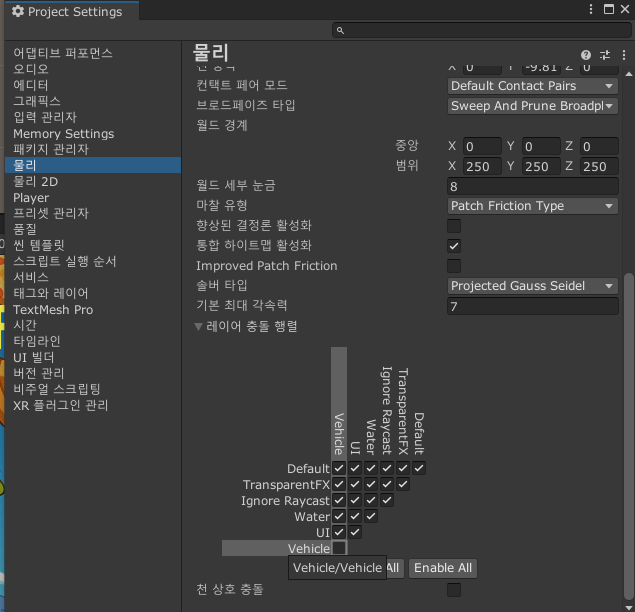
이후에 edit - project Settings - Physics에서
Vehicle레이어와 Vehicle 레이어간의 충돌을 체크해제 해준다.
이렇게 해주면 차량과 차량간의 충돌은 일어나지 않게 된다.
마지막으로 게임을 플레이하면서 알게 된 것인데, 현재 상황에서 ReStart를 눌러 재시작을 하게 되면
MissingReferenceException: The variable maps of MapManager doesn't exist anymore.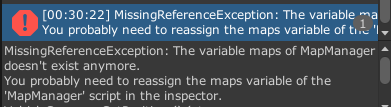
오류가 뜨게되는데 이 오류를 들어가보면, VehicleSpawner 스크립트의 SetPosition함수의 위 코드를 가리키는 것을 볼수 있는데, 이 경우, MapManager가 싱글톤으로 작성 되어있기 때문인 것으로 확인했다.
return carPosition[index].transform.localPosition + MapManager.Instance.maps[4].transform.position; 자세히는 모르겠지만, 씬이 재시작 될때, 차량을 생성하는 코루틴함수 내에서, 싱글톤으로 되어있는 클래스를 사용할 때, 이 클래스를 찾지 못하는 것 같다.
애초에 MapManager라는 클래스는 GameScene에서만 존재해야 했기에 잘 수정한 것 같다.
오류를 수정할 때, 먼저 MapManager의 싱글톤 인스턴스를 사용하는 코드를 찾고 수정해 주었다.
using System.Collections;
using System.Collections.Generic;
using UnityEngine;

public class Map : MonoBehaviour
{

    public int number;
    MapManager mapManager;

    private void Awake()
    {
        mapManager = FindObjectOfType<MapManager>();
    }

    private void OnTriggerEnter(Collider other)
    {
        if(other.gameObject.CompareTag("Player"))
        {
            mapManager.MapUpdate(number);
        }
    }
}
Map 스크립트 경우 Awake에서 MapManager를 찾고 사용하는 식으로 바꿔주었고,
[SerializeField] GameObject[] carPosition;

private void Awake()
{
    mapManager = FindObjectOfType<MapManager>();
}
    private Vector3 SetPosition()
    {
        index = Random.Range(0, carPosition.Length);
        return carPosition[index].transform.localPosition + mapManager.maps[4].transform.position;
    }
VehicleSpawner 스크립트의 변경된 부분 또한 비슷하게 처리해 주었다.
이번엔 아이템 시스템을 만들어 볼 것이다.
아이템 시스템 같은경우, 음식처럼 하늘에서 내려오고, 먹었을 때, 플레이어에게 득이 되는 효과를 발휘하게끔 만들어 줄 것이다.
아이템의 효과의 경우 총 3가지로 생각해 봤는데, 이동속도가 빨라지는 아이템, 캐릭터의 크기가 커지는 아이템, 음식과 차량의 움직임을 정지시키는 아이템 이렇게 총 세가지로 할 것이다.
이번에는 에셋말고 직접 아이템 상자를 만들어 줄 것이다.
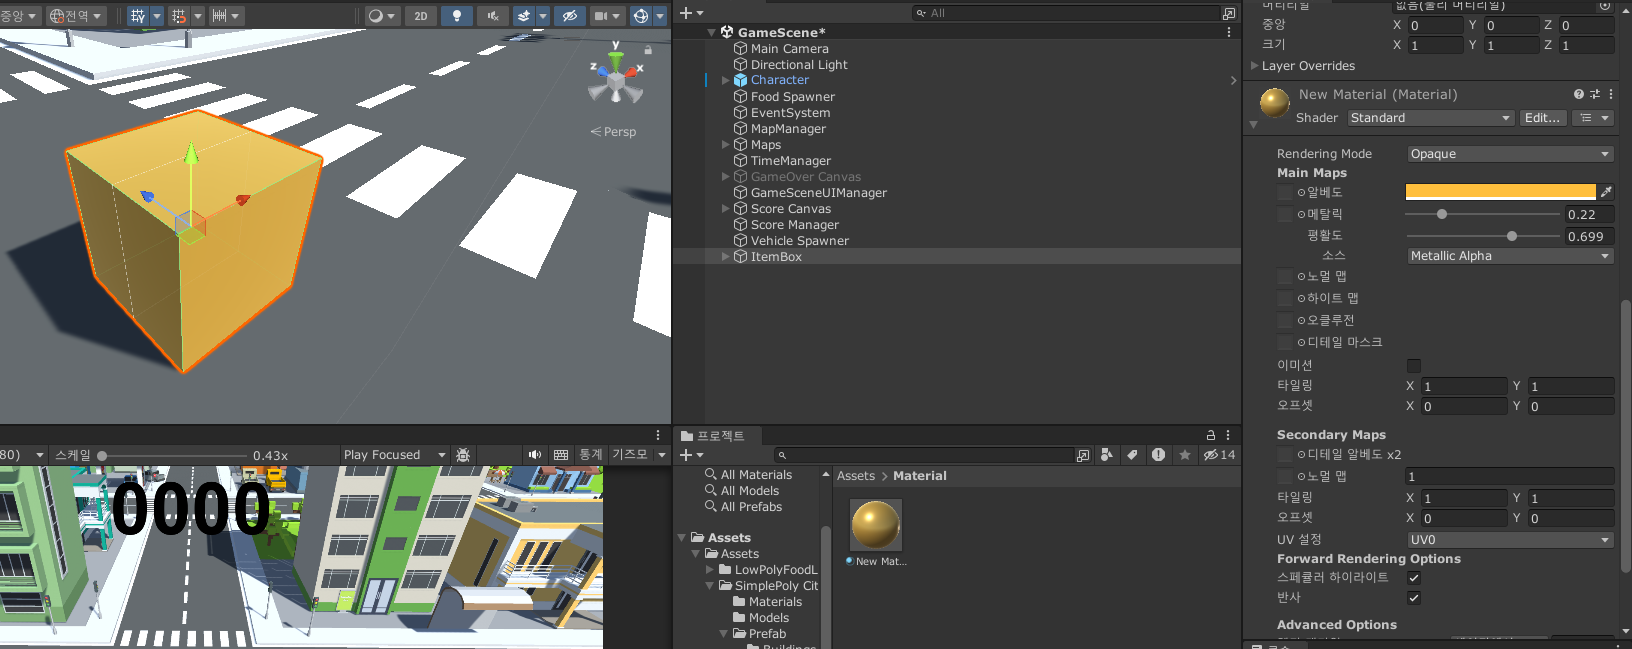
우선 이렇게 Cube오브젝트를 만들어준후, Material 폴더를 만들어 Material를 하나 만들어 준 이후, Cube 오브젝트에 넣어준다.
상자같은 표면을 위해 Material의 Albedo, Metallic, Smoothness를 설정해 주었다.
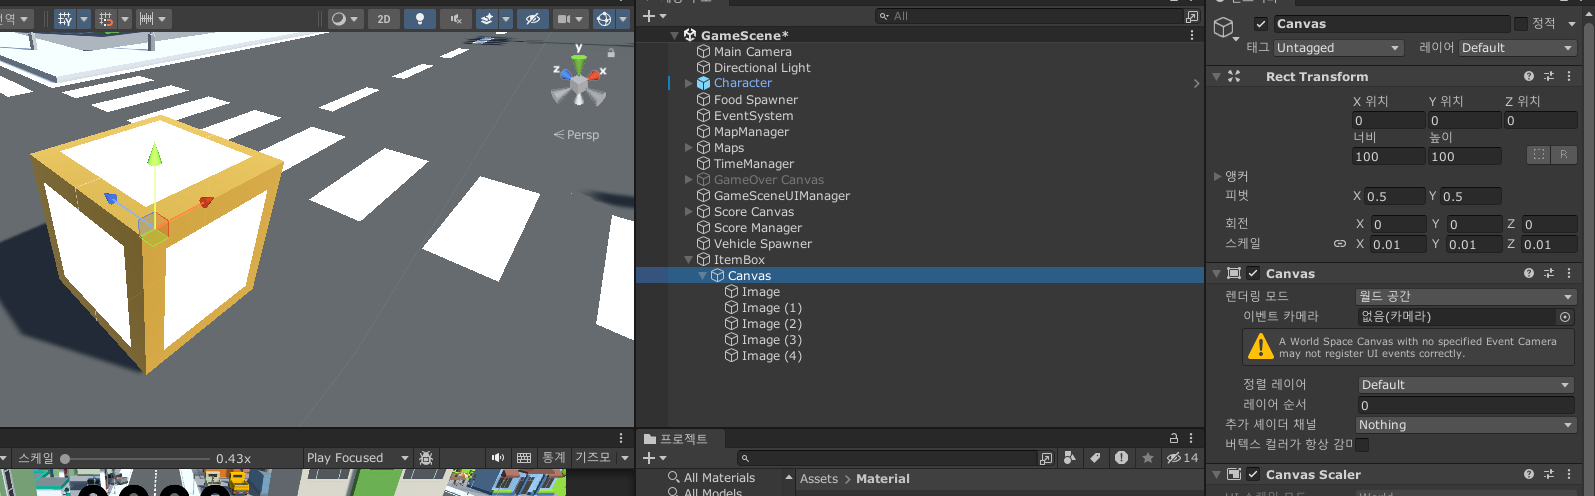
이후, 상자의 자식오브젝트로 Canvas를 만들어준다. 이때, Canvas는 월드공간 그리고, 스케일을 0.01로 잡아준다. 이렇게 해야 상자에 이미지를 부착할때 수월하다.
이후 상자의 아랫면을 제외한 곳에 이미지를 생성시킨다.
이 아이템 상자를 3개로 복제시켜 아이템 종류에 맞는 각각의 아이콘 이미지를 넣어준다.
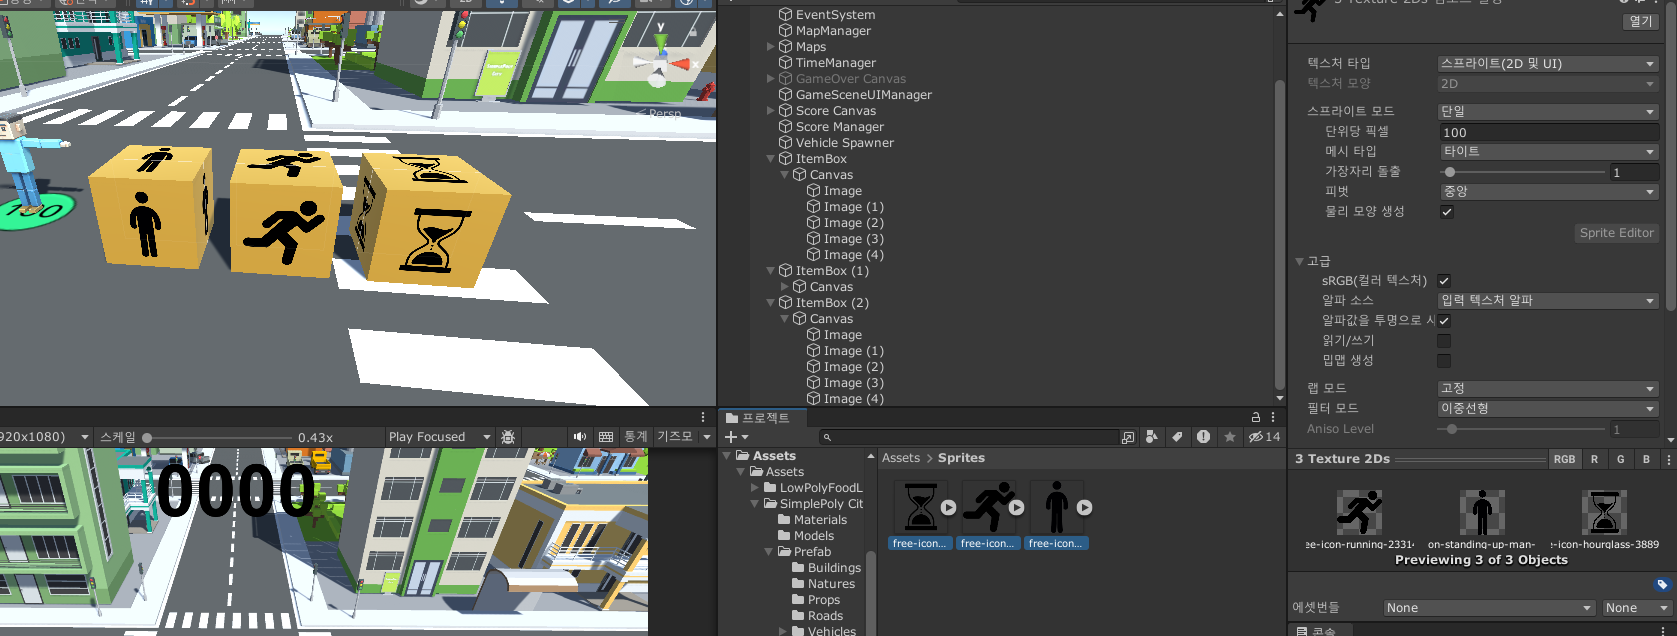
사용할 이미지들은 Sprites폴더를 만들어 이곳에 넣어준 이후 Texture타입을 Sprite로 바꿔준 이후 사용한다.
달리는 아이콘 : https://www.flaticon.com/kr/free-icon/running_233146
모래시계 아이콘 : https://www.flaticon.com/kr/free-icon/hourglass_3889548
서있는 사람 아이콘 : https://www.flaticon.com/kr/free-icon/standing-up-man-_10522
이후 이름을 바꿔준 이후 프리팹폴더에 ItemBox라는 폴더를 만들어 위 3개의 상자를 넣어준다.
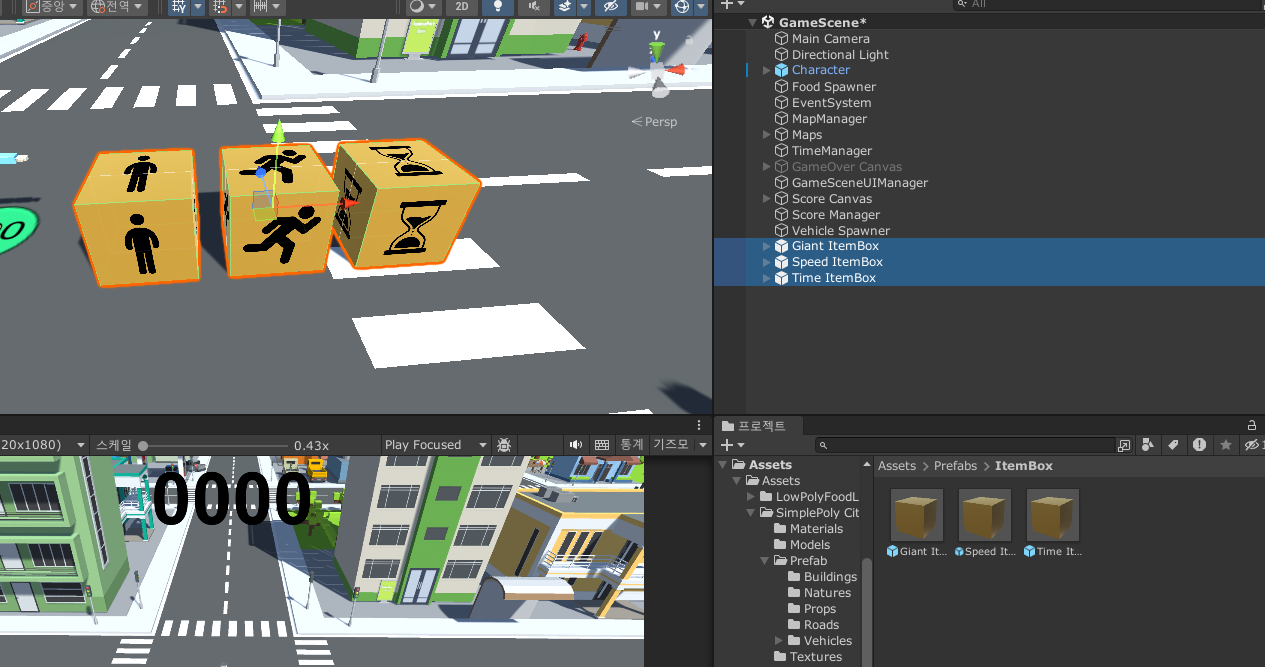
Hierarchy창에 있는 오브젝트는 지워주도록 하자.
이제 오브젝트도 만들었겠다 코드를 작성해 줄 것이다.
먼저 작성해 줄 것은 아이템을 생성시키는 ItemSpawner 라는 스크립트를 만들 것이다.
using System.Collections;
using System.Collections.Generic;
using UnityEngine;

public class ItemSpawner : MonoBehaviour
{
    [SerializeField] GameObject[] itemBoxes;

    private void Start()
    {
        StartCoroutine(InsItemBox());
    }

    private GameObject SetObject()
    {
        return itemBoxes[Random.Range(0, itemBoxes.Length)];
    }
    void SetPosition()
    {

    }
    IEnumerator InsItemBox()
    {
        while(GameManager.Instance.State)
        {
            // Instantiate(SetObject,);
            yield return new WaitForSeconds(15f);
        }
    }
}
대충 이렇게 틀만 잡아준다.
아이템의 경우 도로에만 떨어지도록 설계를 해야 하기 때문에,
떨어질 위치에 대한 범위를 지정해줄 필요가 있다.
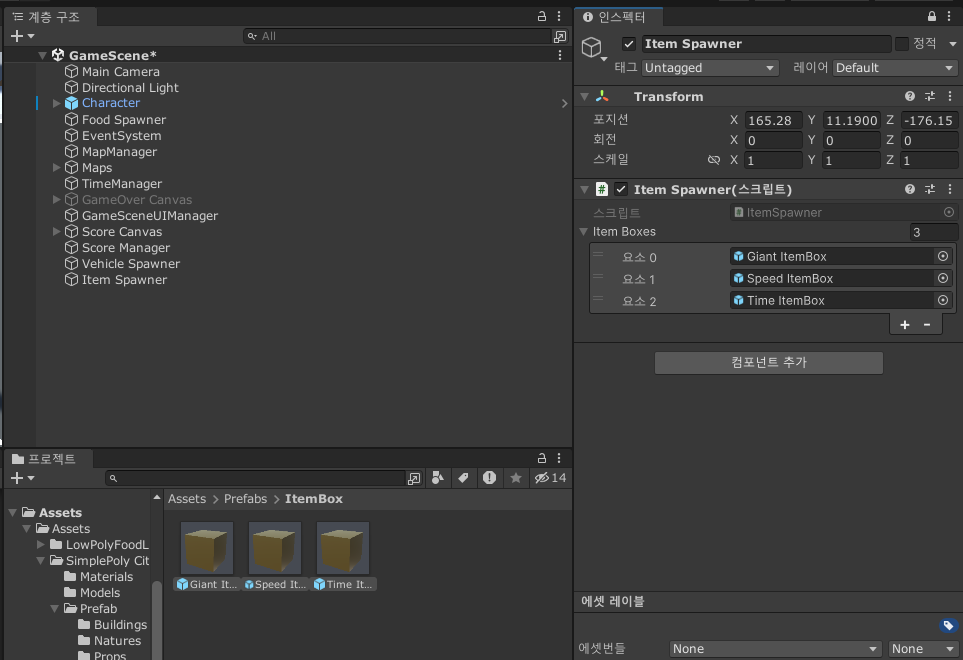
이후 유니티 화면으로 돌아와, Item Spawner를 만들어준 이후 사용할 아이템 박스들을 배열에 넣어준다.
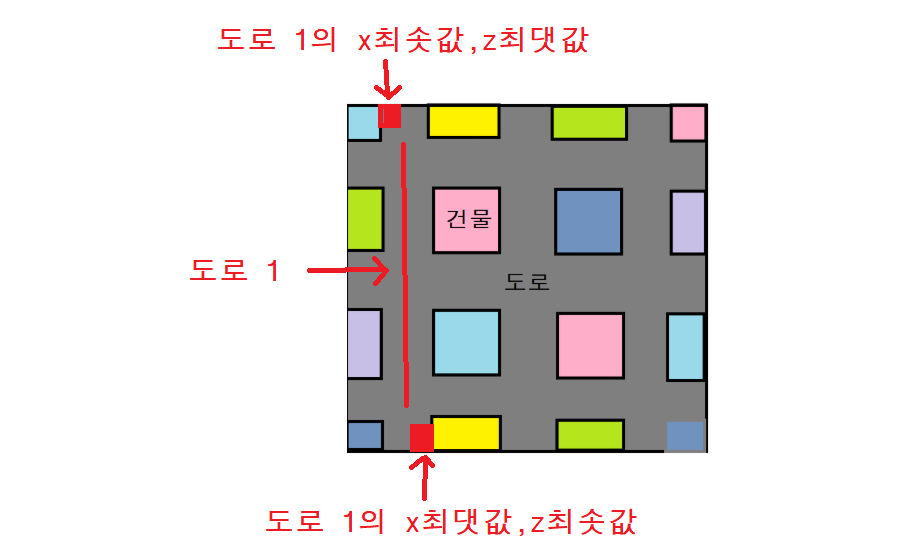
이번에 할 것은 아이템이 나올 도로위의 범위를 구해줄 것인데,
챠량의 경우 포지션을 여러개로 정해주고 정해진 곳 에서 나오게 했지만, 아이템의 경우 세로 3줄 가로 3줄해서 총 6개의 도로의 x의 최대,최소값, z의 최대 최소값을 구하고 사용할 것이다.
물론, 차량생성처럼 현재 중앙맵을 사용하여 작성할 것이다.
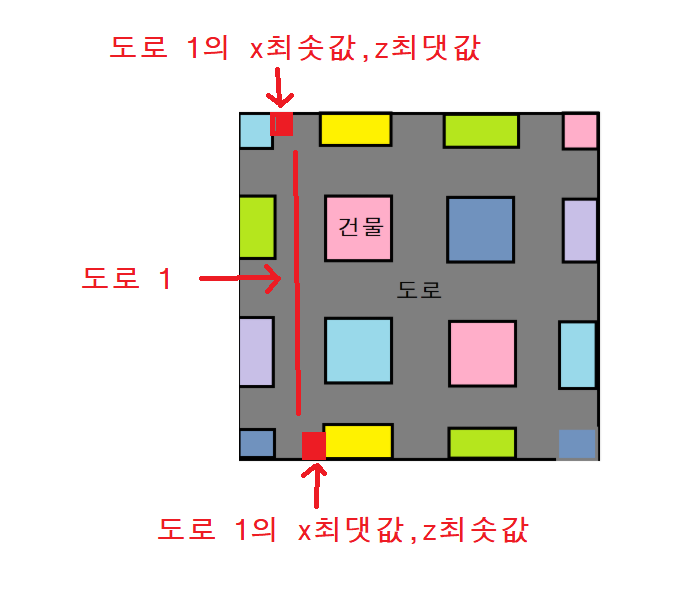
예시로 중앙 맵의 좌측 열 도로인 도로1의 경우 두가지의 좌표를 구해, 사용할 수 있다.
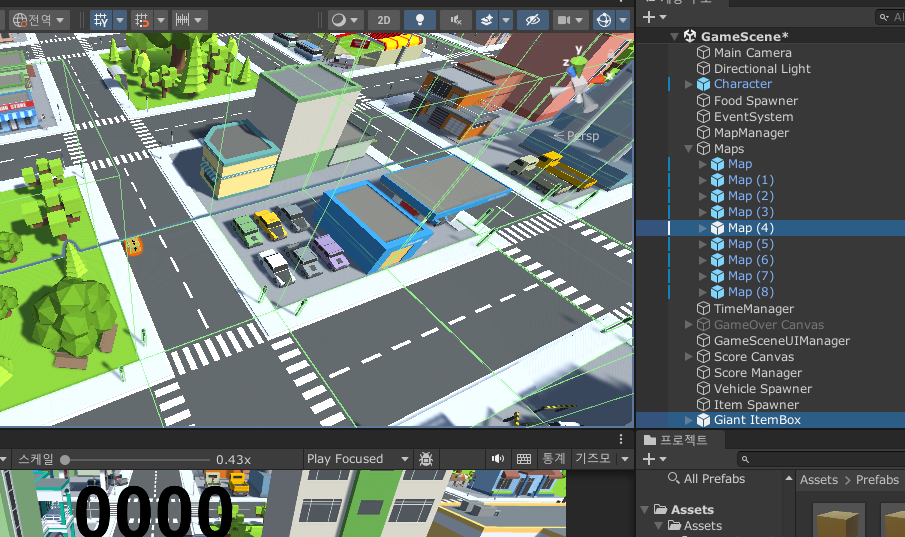
이렇게 배치하여 도로 1의 x의 최솟값, z의 최댓값을 구했다.
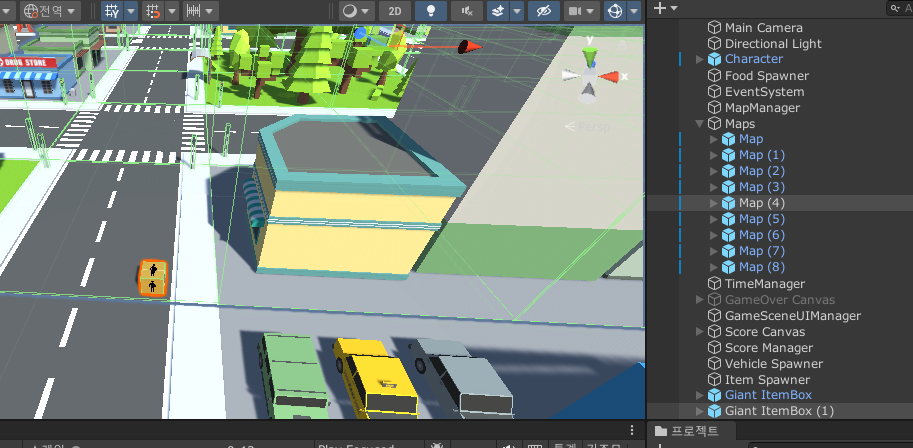
이어서 x의 최댓값, z의 최솟값을 구하면 도로 1에서 상자가 나올 범위를 모두 구했다.
이어서 방금 생성한 아이템 박스 오브젝트를 복사하여 6개의 도로의 범위를 구해준다.
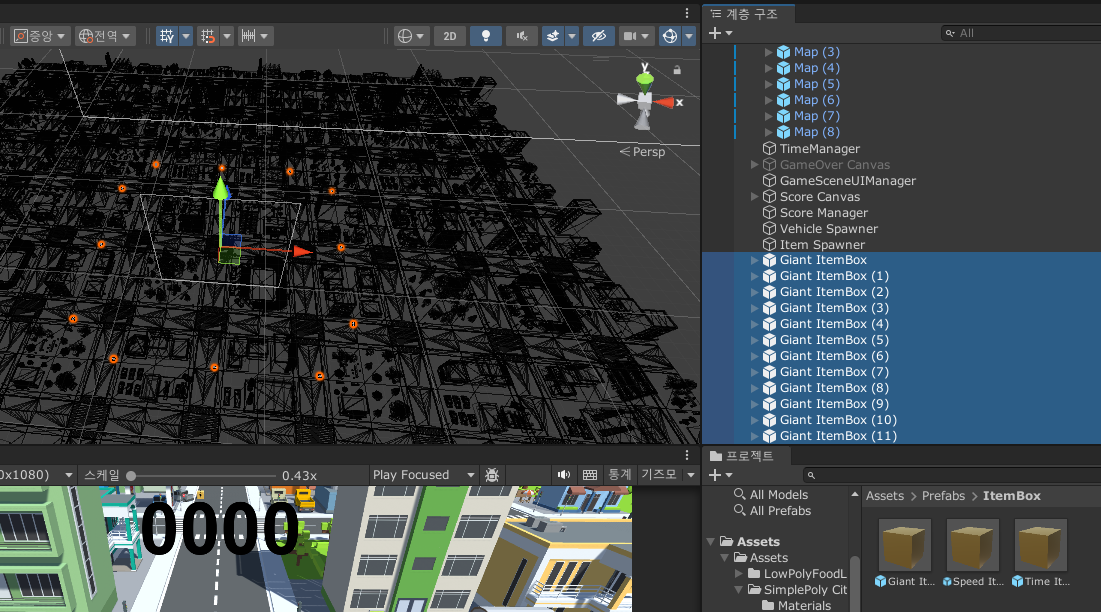
총 12개의 아이템상자를 배치했다면 다시 스크립트로 돌아가 코드를 마저 작성해준다.
using System.Collections;
using System.Collections.Generic;
using UnityEngine;

public class ItemSpawner : MonoBehaviour
{
    [SerializeField] GameObject[] itemBoxes;

    [SerializeField] GameObject[] itemPosition;

    private void Start()
    {
        StartCoroutine(InsItemBox());
    }

    private GameObject SetObject()
    {
        return itemBoxes[Random.Range(0, itemBoxes.Length)];
    }
    Vector3 SetPosition()
    {
        int roadNumber = Random.Range(0, itemPosition.Length / 2);

        Vector3 first = itemPosition[roadNumber * 2].transform.position;
        Vector3 second = itemPosition[roadNumber * 2 + 1].transform.position;

        float minX = Mathf.Min(first.x, second.x);
        float maxX = Mathf.Max(first.x, second.x);
        float minZ = Mathf.Min(first.z, second.z);
        float maxZ = Mathf.Max(first.z, second.z);

        return new Vector3(Random.Range(minX, maxX), first.y, Random.Range(minZ, maxZ)); ;

    }
    IEnumerator InsItemBox()
    {
        while(GameManager.Instance.State)
        {
            Instantiate(SetObject(),SetPosition(),Quaternion.identity);
            yield return new WaitForSeconds(3f);
        }
    }
}
ItemSpawner 스크립트
먼저 itemPosition으로 아이템의 범위를 받아준다. 총 12개의 오브젝트를 넣게 된다.
이후에 SetPosition을 살펴보면 먼저 roadNumber로 도로의 번호를 뽑게된다. 도로마다 2개의 상자로 범위가 이루어져 있어, 나누기 2로 6개의 도로만 뽑을 수 있도록 한다.
first 변수와 second변수는 각각 뽑은 도로에 있는 아이템 박스이다.
minX, maxX, minZ, maxZ를 통해서 도로에 위치한 각각의 최솟값, 최댓값을 구해낸 이후,
최솟값과 최댓값 사이의 랜덤한 위치로 아이템 박스를 생성시킨다.
유니티 화면으로 돌아와서, ItemSpawner 의 itemPosition배열에 미리 만들어둔 오브젝트들을 순서대로 넣어준다.
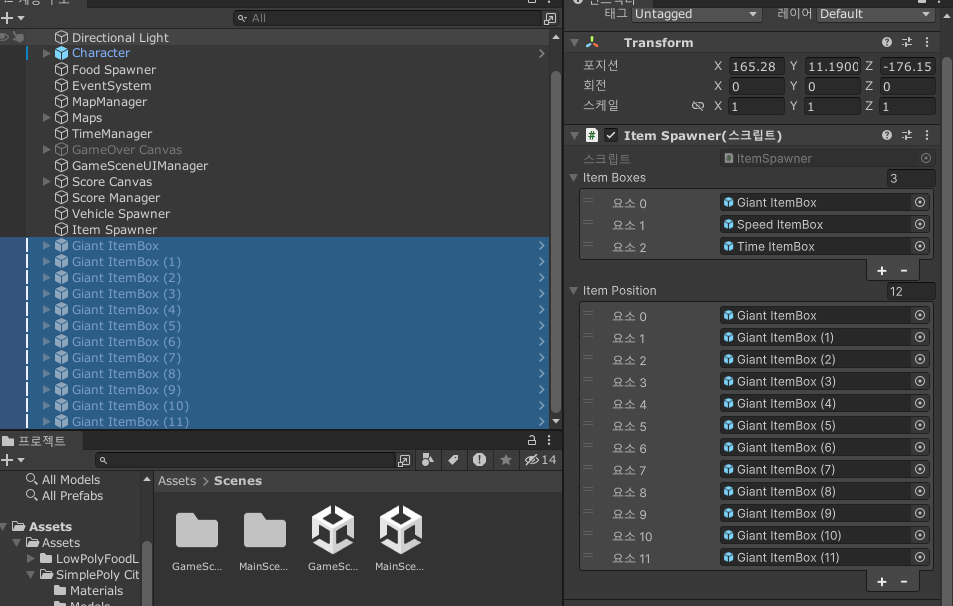
여기서 주의 해야 할 점은 0,1번째와 6,7번째와 같이 짝수-홀수로 붙어있는 오브젝트들은 하나의 도로의 범위를 갖게끔 해줘야 한다.
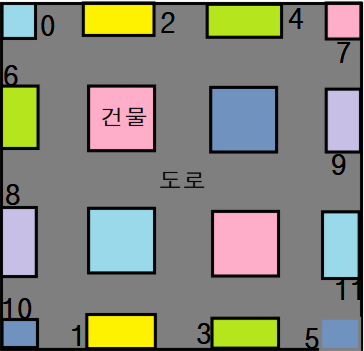
이런식으로 배열이 잡혀있어야 한다는 소리이다. (내가 만들고 넣은 순서이기도 하다.)
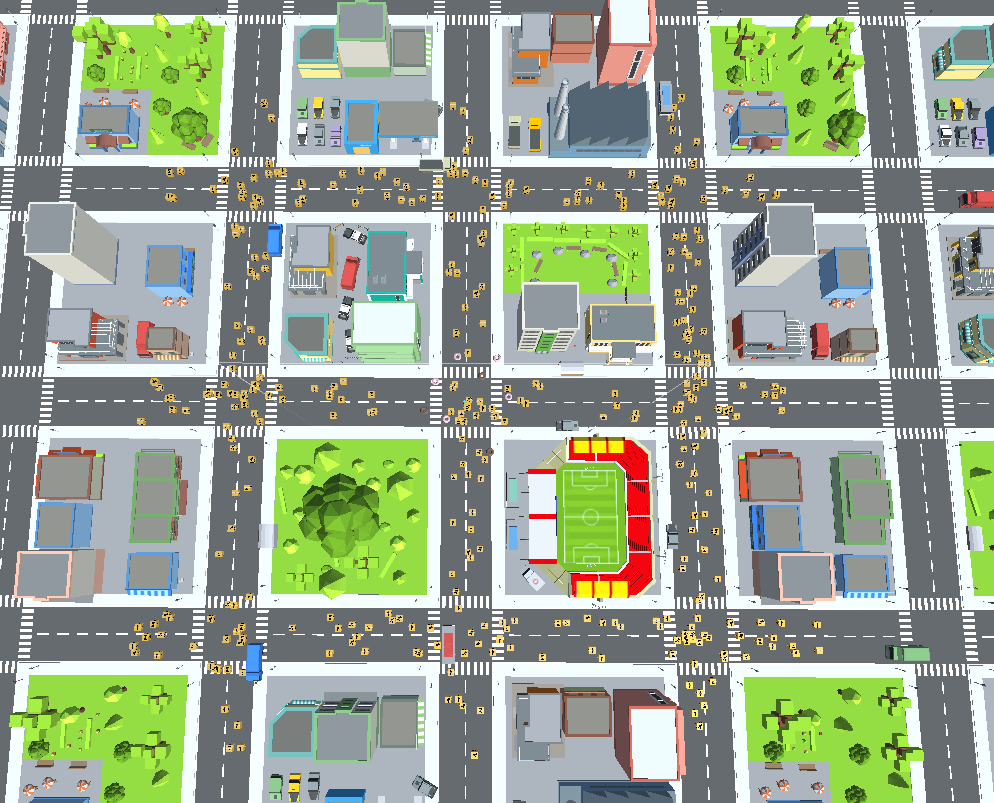
이렇게 작성했다면 이런식으로 상자가 도로위 범위내에서만 생겨나는 것을 볼 수 있게된다.
이제 맵의 변화에 맞게끔 생성되게 해줄 것이다. VehicleSpawner처럼 작성해주면 된다.
    MapManager mapManager;

    private void Awake()
    {
        mapManager = FindObjectOfType<MapManager>();
    }

    Vector3 SetPosition()
{
    int roadNumber = Random.Range(0, itemPosition.Length / 2);

    Vector3 first = itemPosition[roadNumber * 2].transform.localPosition;
    Vector3 second = itemPosition[roadNumber * 2 + 1].transform.localPosition;

    float minX = Mathf.Min(first.x, second.x);
    float maxX = Mathf.Max(first.x, second.x);
    float minZ = Mathf.Min(first.z, second.z);
    float maxZ = Mathf.Max(first.z, second.z);

    Vector3 boxPosition = new Vector3(Random.Range(minX, maxX), first.y, Random.Range(minZ, maxZ));

    return boxPosition + mapManager.maps[4].transform.position;

}
ItemSpawner 스크립트의 수정된 내용이다.
먼저 MapManager를 사용할 것이기때문에 선언과 할당을 해주고,
first와 second에 각각 position대신 localPosition을 넣어준다.
이 이후에 유니티에서 아이템생성 위치를 Maps[4] 오브젝트에 넣어 줄 것이기 때문이다.
이후에 boxPosition이라는 코드에 랜덤한 값을 할당하고,
값을 리턴 할때에는 중아에 있는 맵의 좌표를 더해서 반환한다.
다시 유니티 씬으로 돌아와서
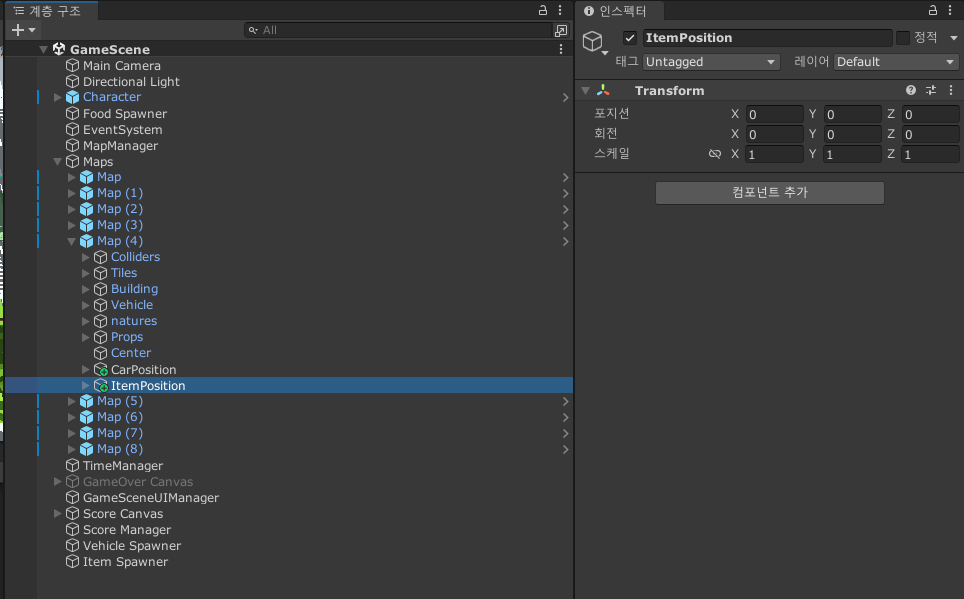
만들어 주었던 아이템 상자범위 오브젝트들을 가운데 맵의 자식으로 옮겨준다.
(차량의 스폰 위치를 CarPosition으로 묶고, 아이템 스폰 위치도 동일하게 정리하였다.)
이렇게 해주면 모든 아이템 생성 코드가 끝났다.
using System.Collections;
using System.Collections.Generic;
using UnityEngine;

public class ItemSpawner : MonoBehaviour
{
    [SerializeField] GameObject[] itemBoxes;

    [SerializeField] GameObject[] itemPosition;

    MapManager mapManager;

    private void Awake()
    {
        mapManager = FindObjectOfType<MapManager>();
    }
    private void Start()
    {
        StartCoroutine(InsItemBox());
    }

    private GameObject SetObject()
    {
        return itemBoxes[Random.Range(0, itemBoxes.Length)];
    }
    Vector3 SetPosition()
    {
        int roadNumber = Random.Range(0, itemPosition.Length / 2);

        Vector3 first = itemPosition[roadNumber * 2].transform.localPosition;
        Vector3 second = itemPosition[roadNumber * 2 + 1].transform.localPosition;

        float minX = Mathf.Min(first.x, second.x);
        float maxX = Mathf.Max(first.x, second.x);
        float minZ = Mathf.Min(first.z, second.z);
        float maxZ = Mathf.Max(first.z, second.z);

        Vector3 boxPosition = new Vector3(Random.Range(minX, maxX), first.y, Random.Range(minZ, maxZ));

        return boxPosition + mapManager.maps[4].transform.position;

    }
    IEnumerator InsItemBox()
    {
        while(GameManager.Instance.State)
        {
            Instantiate(SetObject(),SetPosition(),Quaternion.identity);
            yield return new WaitForSeconds(5f);
        }
    }
}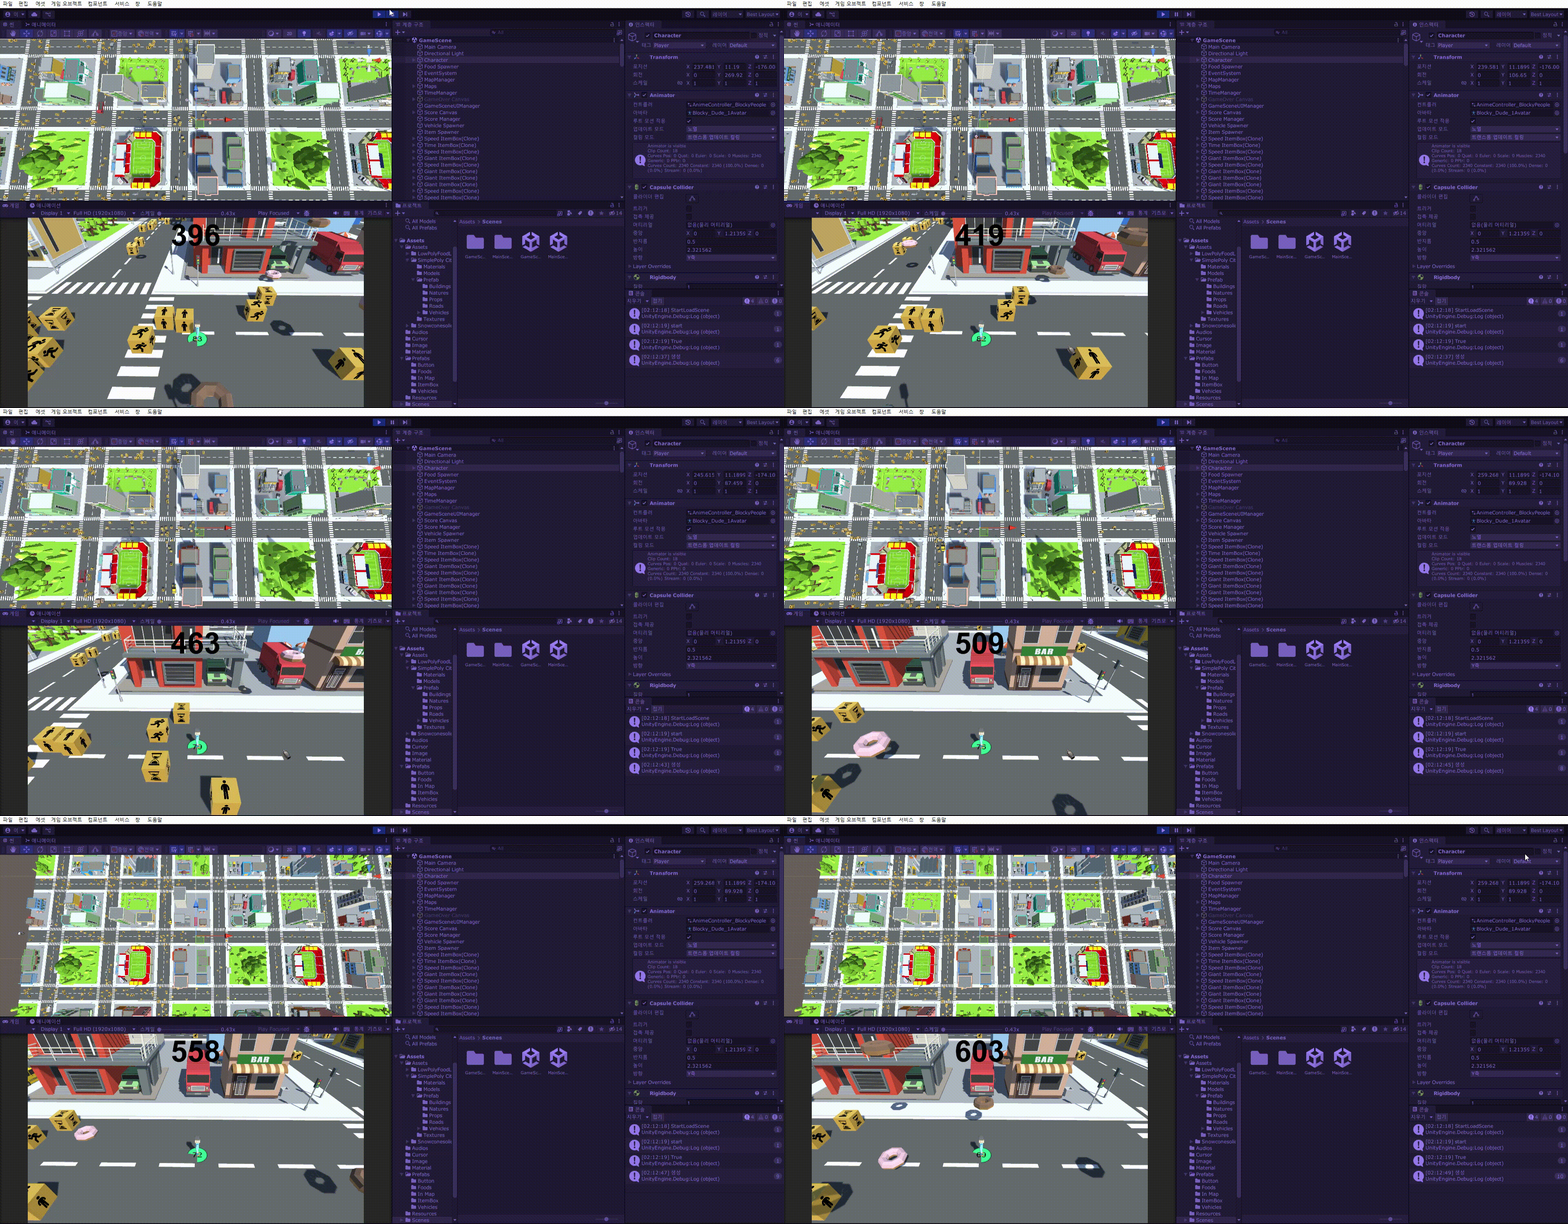
맵이 전환되어도 아이템이 잘 나오는 것을 볼 수 있다.
이제 아이템의 움직임, 먹었을 때 효과, 삭제 등 아이템의 요소를 직접적으로 만들어 볼 것이다.
- 여러개의 아이템의 경우 먹었을 때, 효과는 나지만 효과의 종류가 다른 특성을 보았을 때,
상속을 활용 하면 좋을 것 같다고 생각했다. (interface 하다가 바꿈)
이후에 아이템마다 스크립트를 만들어서 효과를 작성해주면 될 것같다. - 아이템의 움직임의 경우 ItemSpawner 스크립트를 보면, 임의로 생성높이를 first.y 로 잡아주었는데, 이점을 수정하고, Food처럼 자의적으로 내려오게 하면 될 것 같다.
- 아이템의 삭제의 경우 바닥에 닿았을 때, 5초정도 이후 삭제되게 하면 좋을 것 같다.
먼저 아이템들이 상속받을 부모 클래스부터 만들 것이다.
using System.Collections;
using System.Collections.Generic;
using UnityEngine;

public abstract class Item : MonoBehaviour
{
    protected float effectTime;
    [SerializeField] float fallSpeed;
    protected abstract void Use();

    protected void Update()
    {
        FallDown();
    }
    protected void FallDown()
    {
        transform.Translate(Vector3.down * fallSpeed * Time.deltaTime);
    }
}
Item 부모 클래스 스크립트
먼저 아이템들의 효과시간, 떨어지는 속도등을 변수로 가진다.
FallDown이라는 함수로 상속받는 객체들은 모두 계속해서 떨어지게끔 만들어 주었다.
이후에 GiantItem, SpeedItem, TiemItem라는 스크립트를 만들어 Item을 상속시켜준 이후 프리팹에 각각 맞는 스크립트를 넣어준다.
using System.Collections;
using System.Collections.Generic;
using UnityEngine;

public class GiantItem : Item
{
    protected override void Use()
    {

    }
}
GiantItem 스크립트
using System.Collections;
using System.Collections.Generic;
using UnityEngine;

public class SpeedItem : Item
{
    protected override void Use()
    {

    }
}
SpeedItem 스크립트
using System.Collections;
using System.Collections.Generic;
using UnityEngine;

public class TimeItem : Item
{
    protected override void Use()
    {

    }
}
TiemItem 스크립트
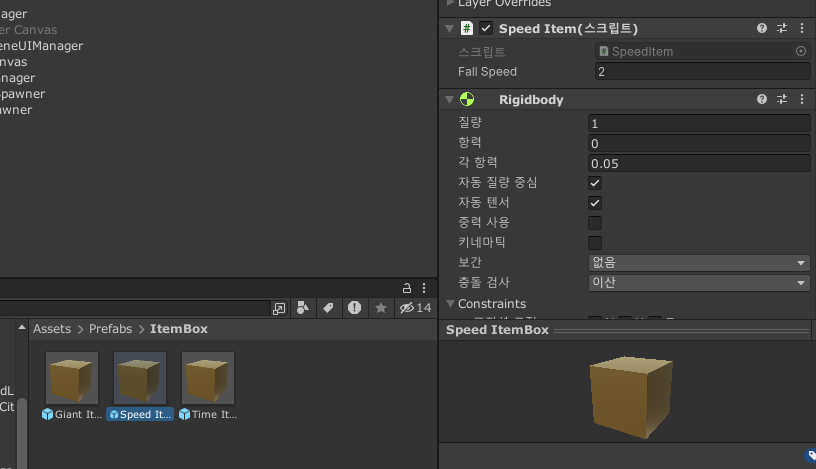
모든 아이템상자의 FallSpeed는 2로 맞춰주었다.
이후 아이템이 생성될 높이를 정해준다.
[SerializeField] float itemPosY;
    Vector3 SetPosition()
    {
        int roadNumber = Random.Range(0, itemPosition.Length / 2);

        Vector3 first = itemPosition[roadNumber * 2].transform.localPosition;
        Vector3 second = itemPosition[roadNumber * 2 + 1].transform.localPosition;

        float minX = Mathf.Min(first.x, second.x);
        float maxX = Mathf.Max(first.x, second.x);
        float minZ = Mathf.Min(first.z, second.z);
        float maxZ = Mathf.Max(first.z, second.z);

        Vector3 boxPosition = new Vector3(Random.Range(minX, maxX), itemPosY, Random.Range(minZ, maxZ));

        return boxPosition + mapManager.maps[4].transform.position;

    }
ItemSpawner 스크립트
이후에 아이템이 생성될 위치를 가지는 변수를 잡아주고 위치를 생성시킬때, 이 높이로 생성시킨다.
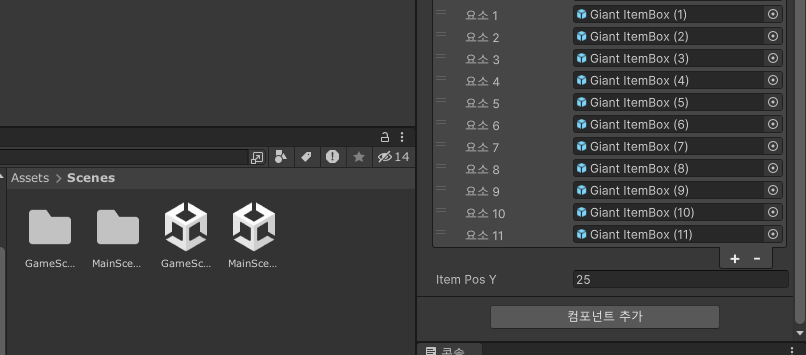
높이 위치는 25로 잡아주었다.
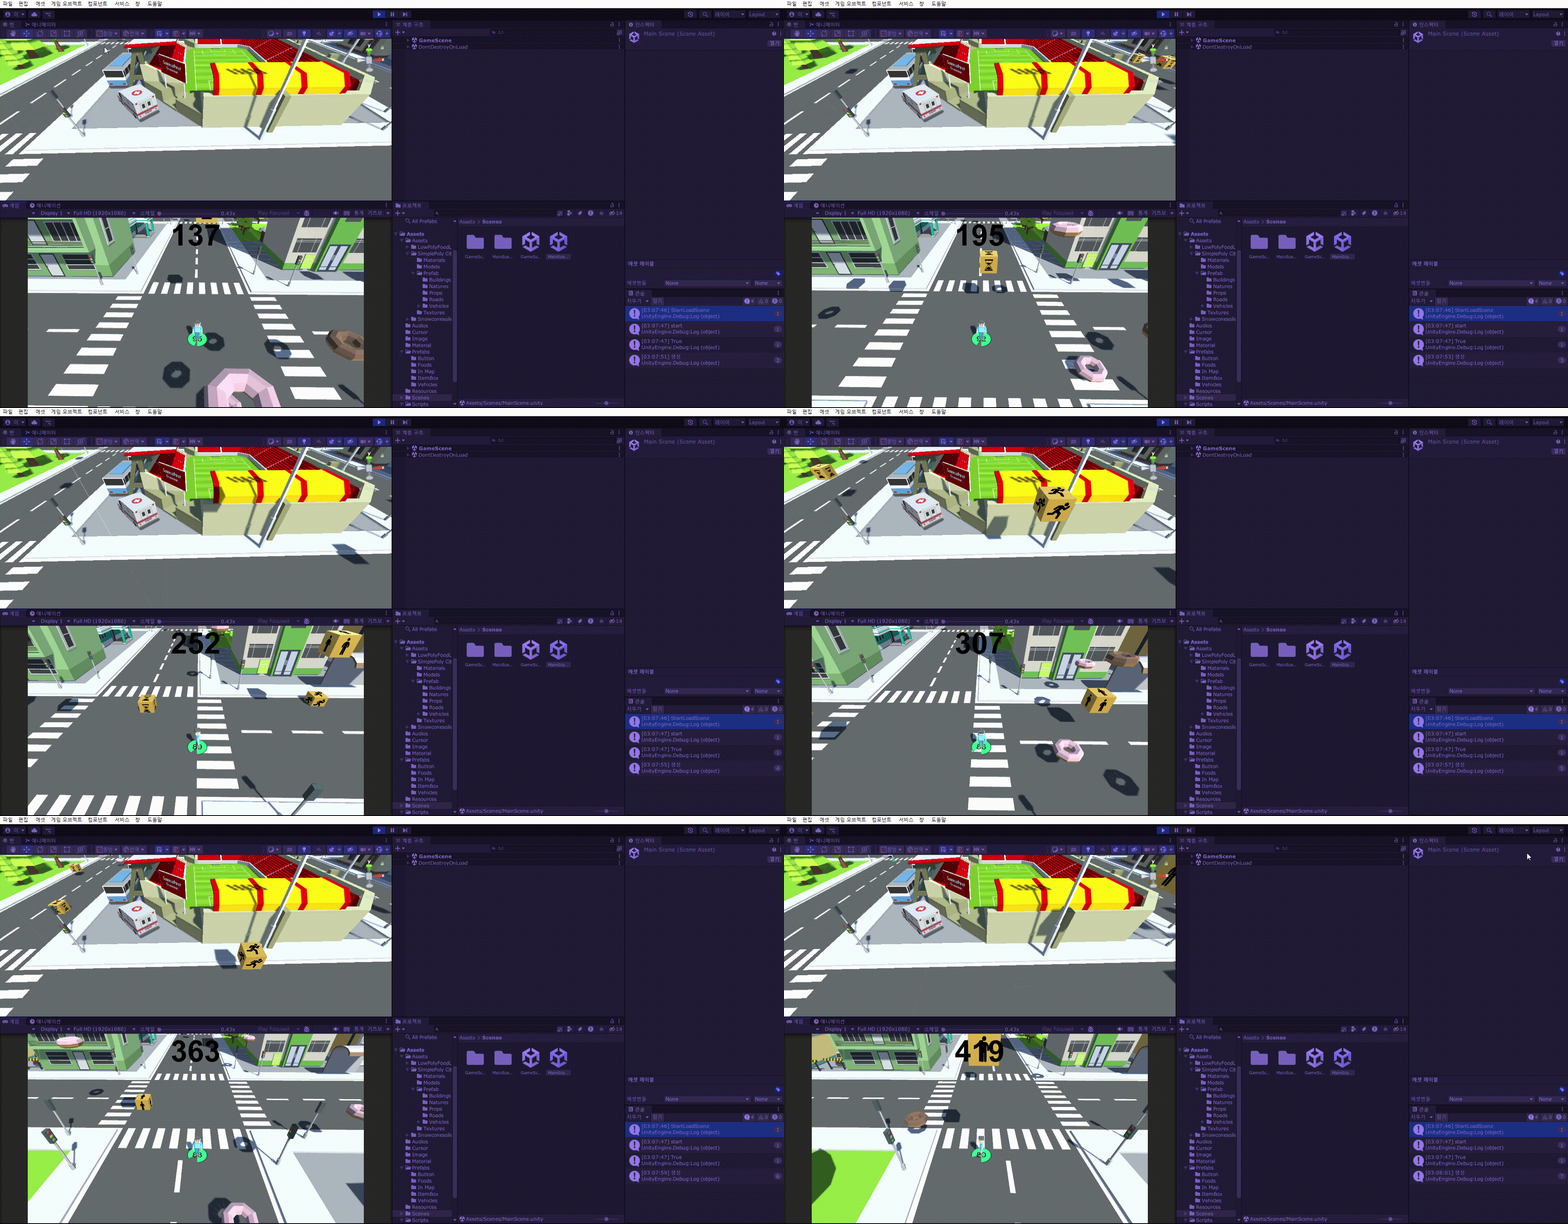
이렇게 높은 곳에서 천천히 떨어지는 것을 볼수 있다.
다만 아이템이 바닥을 뚫게 되는데
이 경우 아이템 프리팹에 Rigidbody를 넣고 코드를 수정하여 못 뚫게 해줄 것이다.
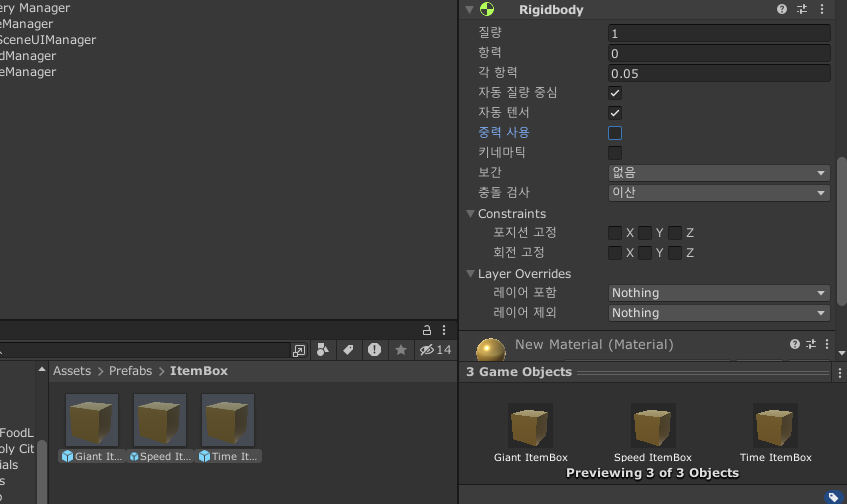
먼저 Rigidbody를 넣어준다. 이때 중력사용은 체크해제 해준다.
using System.Collections;
using System.Collections.Generic;
using UnityEngine;

public abstract class Item : MonoBehaviour
{
    Rigidbody rigidBody;

    protected float effectTime;
    [SerializeField] float fallSpeed;

    protected abstract void Use();

    protected void Awake()
    {
        rigidBody = GetComponent<Rigidbody>();
    }
    protected void FixedUpdate()
    {
        FallDown();
    }
    protected void FallDown()
    {
        rigidBody.MovePosition(rigidBody.position + Vector3.down * fallSpeed * Time.deltaTime);
    }
}
Item 스크립트를 수정해준다.
먼저 Rigidbody를 사용하는 물체인 만큼 Rigidbody선언과 할당을 해주고,
Update가 아닌 FixedUpdate에서 물리 연산을 해준다.
transform.Translate가 아닌 MovePosition으로 콜라이더끼리의 접촉에서 유리하도록 바꿔준다.
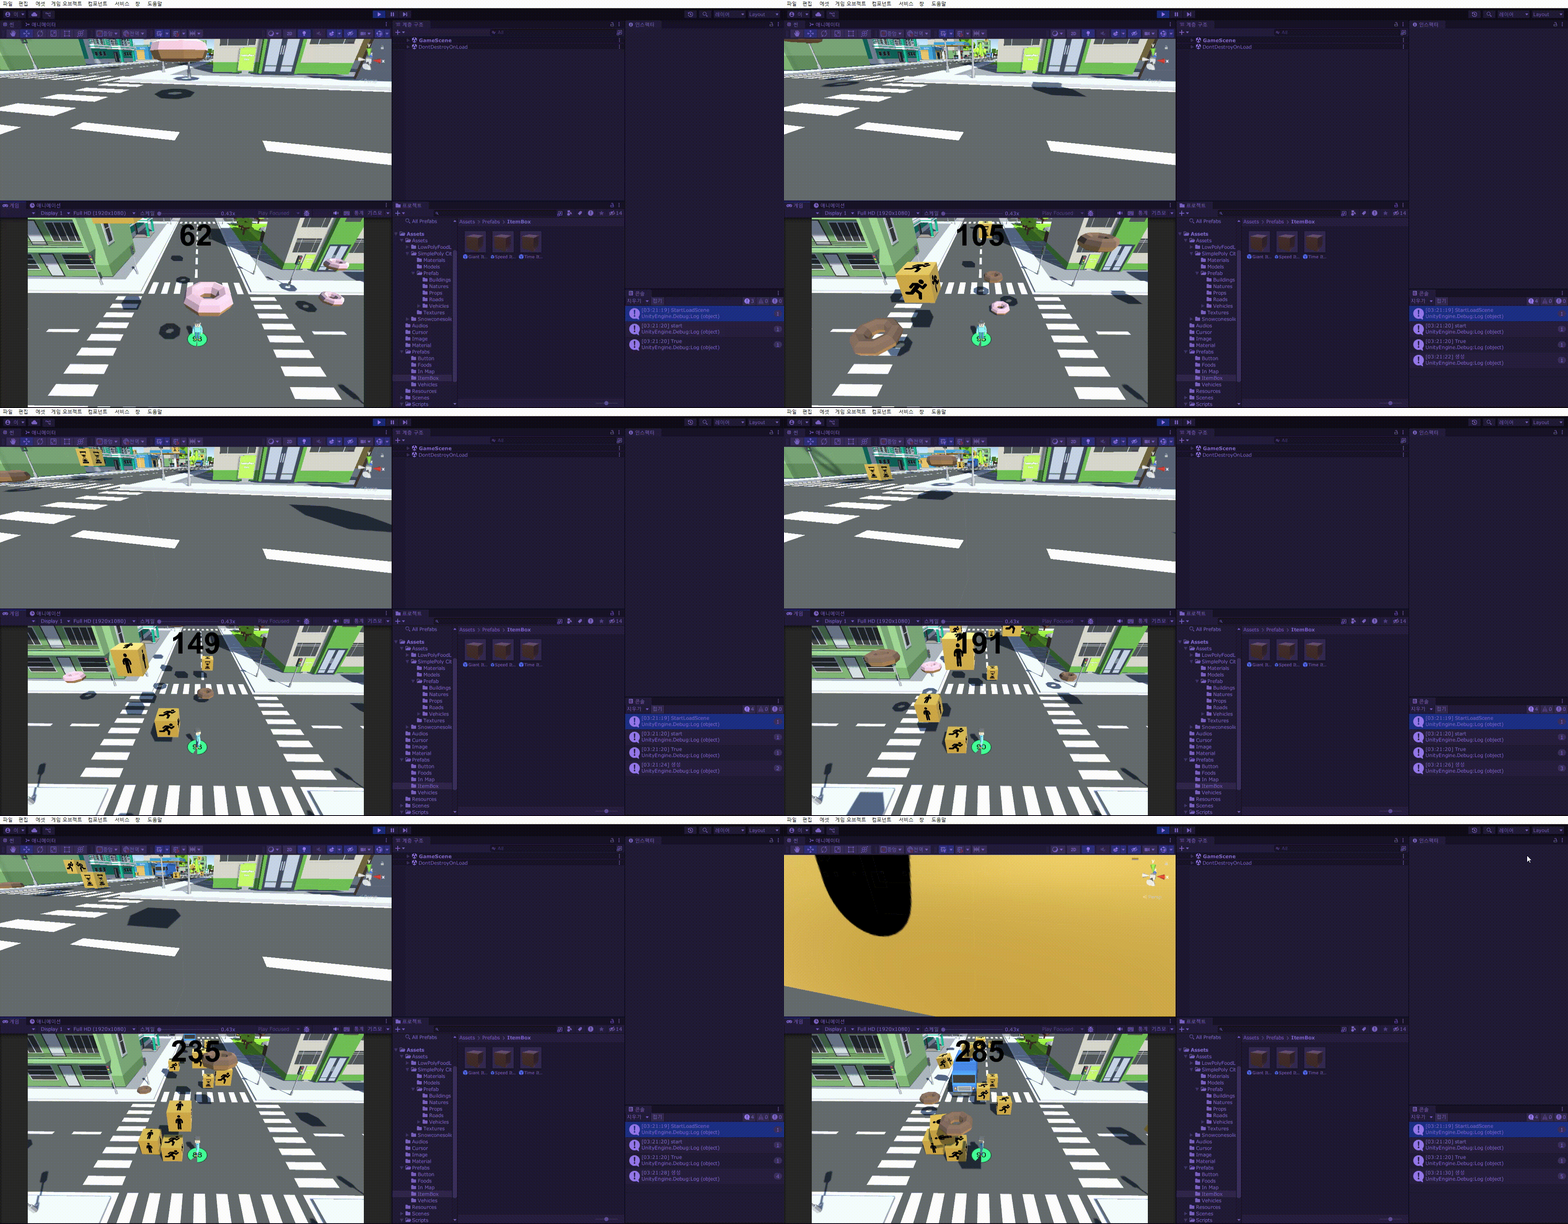
이렇게 아이템이 바닥에 잘 접촉하는 것을 볼 수 있게된다.
(만약 FixedUpdate가 아닌 Update에서 했다면 덜덜덜 떨리는 모습을 보인다.)
이번엔 아이템 각각의 효과를 만들 것이다.
먼저 가장쉬운 SpeedItem을 만들 것이다 (SpeedItem -> GiantItem -> TimeItem순)
SpeedItem를 작성하기 전에 부모클래스를 수정할 것이 있는데,
    protected virtual void Awake()
    {
        rigidBody = GetComponent<Rigidbody>();
    }
Item 스크립트
Awake 함수에 virtual 키워드를 붙혀주었다.
Awake의 같은 생명주기 함수들은 많이 사용하기 때문에 virtual로 선언하고 자식 클래스에서 base.~~~() 이후 재정의를 통해 확장하는 식으로 사용할 것이기 때문에 이렇게 수정해주었다.
public float speed;PlayerMove 스크립트
그리고 여기서 speed 변수의 접근 지정자를 [SerializeField]에서 public으로 바꿔 접근 할수 있도록 한다.
이제 SpeedItem 작성 해준다.
using System.Collections;
using System.Collections.Generic;
using UnityEngine;

public class SpeedItem : Item
{
    PlayerMove playerMove;

    protected override void Awake()
    {
        base.Awake();
        playerMove = FindObjectOfType<PlayerMove>();
        effectTime = 5;
    }

    protected override void Use()
    {
        StartCoroutine(SpeedUp());
    }
    IEnumerator SpeedUp()
    {
        playerMove.speed += 20;
        yield return new WaitForSeconds(effectTime);
        playerMove.speed -= 20;
    }
}
SpeedItem 스크립트
PlayerMove에 있는 speed 변수를 사용할 것이기 때문에 PlayerMove변수를 선언및 할당해준다.
effectTime은 임의적으로 5초로 잡아주었다.
캐릭터가 아이템을 먹으면 SpeedUp 코루틴 함수가 실행되고 5초간 이동속도가 20빨리지게 되어있다.
코드를 더 작성하기 전에 고쳐야할 사항을 발견했는데,
PlayerMove 스크립트에서 speed가 아닌 TimeManager의 speed를 사용한다는 점이였다.
그래서 TimeManager와 PlayerMove 스크립트에서의 speed 구조를 수정할 것이다.
    void Move()
    {
        rigidBody.MovePosition(rigidBody.position + playerInput.Move * speed * Time.deltaTime);
    }
PlayerMove 스크립트
먼저 TimeManager의 playerSpeed 대신 자신의 변수인 speed를 사용하게끔 수정해준다.
이 문제를 해결할 방법은
TimeManager에서 PlayerMove의 속도값을 정해주는게 아니라, PlayerMove에서 기본 속도 값이 있고, TimeManager에서는 그 값에 추가 이속을 더해주는 식으로 작성 해줄 것이다.
    private PlayerMove playerMove;

        private void Awake()
    {
        instance = this;
        playerMove = FindObjectOfType<PlayerMove>();
    }

        public float PlayerSpeed
    {
        get { return playerSpeed; }
        set
        {
            playerSpeed = value;
            if(playerSpeed >= 15)
            {
                playerSpeed = 15;
            }
            playerMove.speed += playerSpeed - playerMove.speed;
        }
    }
TimeManager의 수정된 코드이다.
먼저 playerMove의 speed값을 사용하기 위해 선언 및 할당을 해준다.
이후 PlayerSpeed 프로퍼티에 코드 한줄을 추가해 주는데, PlayerSpeed의 값이 변고, 한계값을 적용한 이후에 PlayerMove의 speed 값에 현재 이속 - 기본 이속 을 통하여, 추가 된 값만 보낸다.
이렇게 작성하게되면, 레벨디자인의 변화가 존재하지 않고, 두 speed값을 분리시킬 수 있다.
다른 아이템 스크립트를 만들기전캐릭터와 만났을 때 실행될 수 있도록 하는 코드를 작성해줄 것이다.
OnCollisionEnter를 Item 부모클래스에 적어줄 계획이다.
    private void OnCollisionEnter(Collision collision)
    {
        if(collision.gameObject.CompareTag("Player"))
        {
            Use();
            Debug.Log("실행");
        }
    }
Item 스크립트에 추가한 코드
Item 스크립트에 OnCollisionEnter 함수를 추가해준다. virtual을 사용하지 않은 이유는 모든 Item은 부모클래스의 OnCollisionEnter의 로직과 동일하게 행동할 것이기 때문에 굳이 재정의를 하진 않았다.
만약 Player 태그를 가진 오브젝트와 부딧친다면 추상함수 Use를 호출해 아이템 사용을 실행한다.
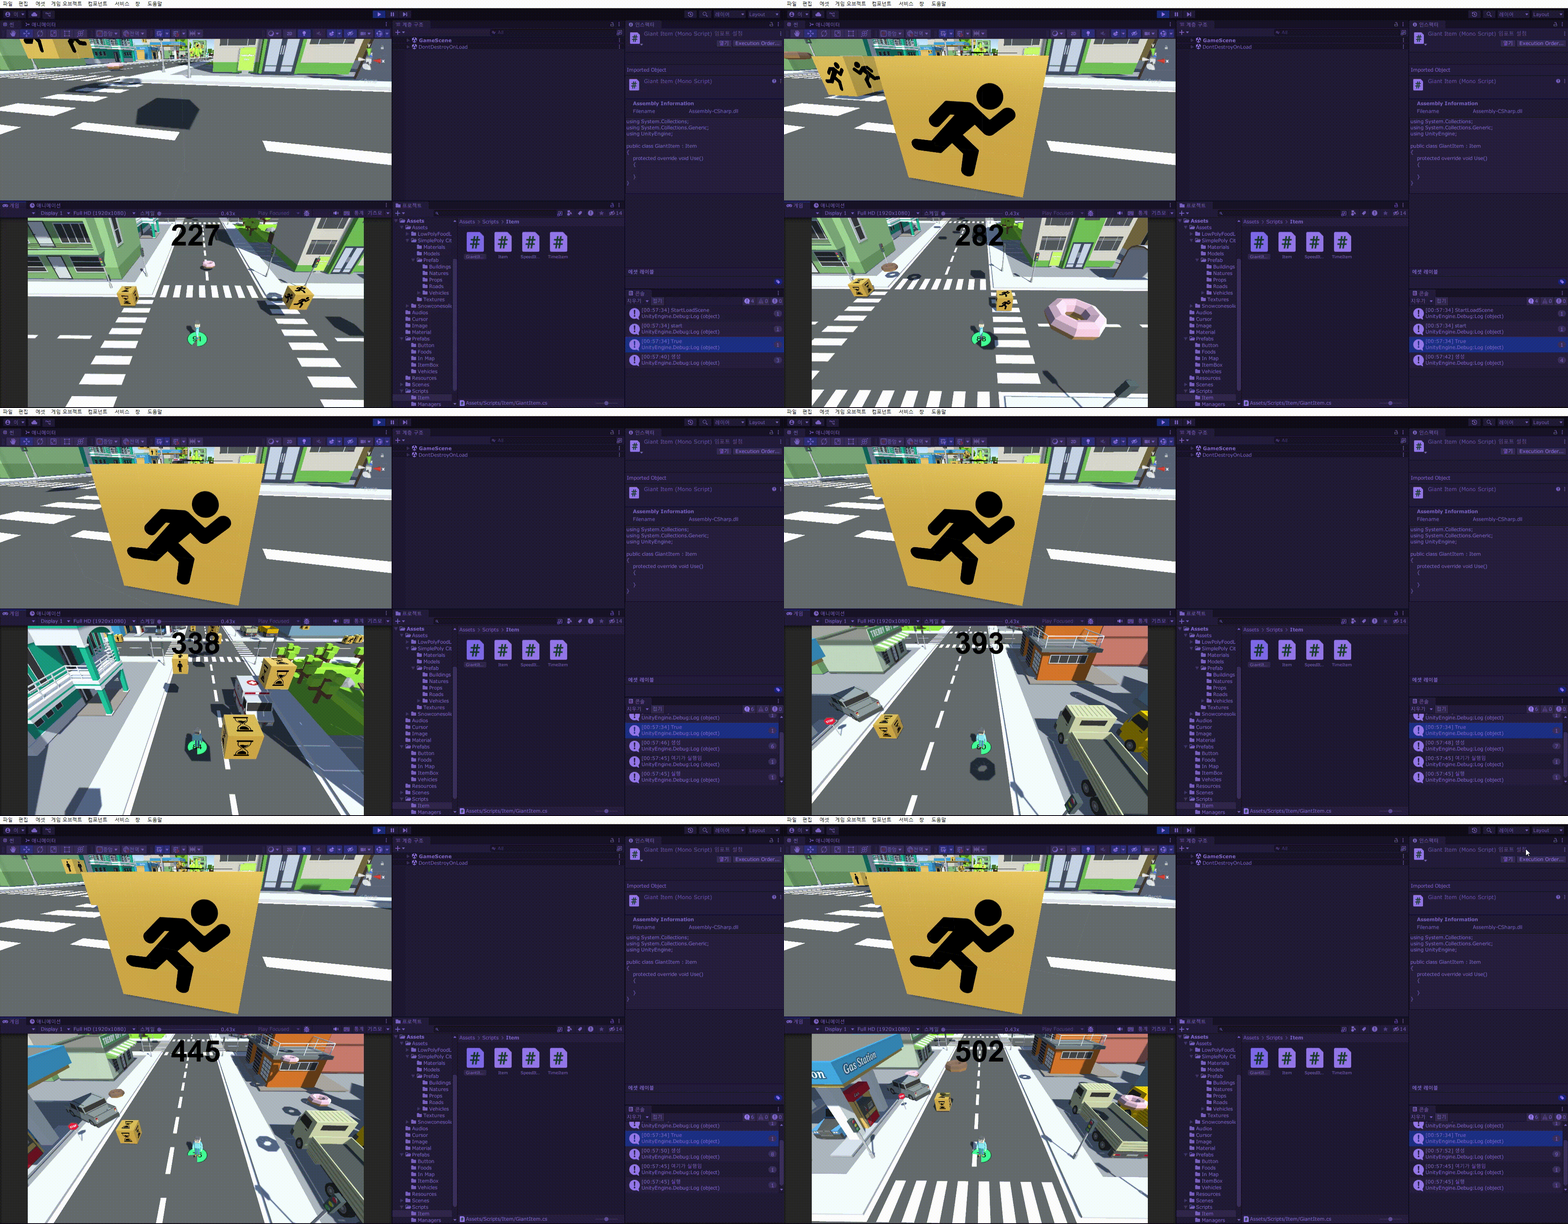
이렇게 캐릭터가 SpeedItem과 접촉시 이동 속도가 빨라지는 것을 볼 수 있다.
이번엔 GiantItem의 기능을 구현할 것이다.
자이언트 아이템의 경우 캐릭터의 크기가 커지고, 플레이어의 화면이 축소된다.
이로써 큰 음식 획득 범위로 많은 음식을 먹을 수 있고, 더 많은 시야 정보를 제공받는다.
이번엔 TimeItem의 기능을 구현할 것이다.
타임 아이템의 능력은 음식(아이템)과 차량, 체력을 잠시동안 정지시킨다.
이로써 스코어만 계속 올라가는 상황과, 체력이 없을 때 일시적으로 구사일생이 될수 있는 아이템이다.
using System.Collections;
using System.Collections.Generic;
using UnityEngine;

public class GiantItem : Item
{
    private CameraMove cameraMove;
    private GameObject player;
    protected override void Awake()
    {
        base.Awake();
        cameraMove = FindObjectOfType<CameraMove>();
        player = GameObject.FindWithTag("Player");
        effectTime = 7;
    }
    protected override void Use()
    {
        StartCoroutine(SizeUp());
    }
    IEnumerator SizeUp()
    {
        float size = Random.Range(1f, 10f);
        Debug.Log(size);
        Vector3 sizeVec = new Vector3(size, size, size);
        while(player.transform.localScale.x + 0.001f <= sizeVec.x)
        {
            player.transform.localScale = Vector3.Lerp(player.transform.localScale, sizeVec, 0.2f);
            yield return null;
        }

        yield return new WaitForSeconds(effectTime);

        sizeVec = Vector3.one;

        while(player.transform.localScale.x - 0.001f >= 1)
        {
            player.transform.localScale = Vector3.Lerp(player.transform.localScale, sizeVec, 0.2f);
            yield return null;
        }
    }
}
GiantItem 스크립트
먼저 몸이 커지기 때문에 캐릭터를 저장할 player와 카메라의 위치를 잡아줘야 하기에 CameraMove를 선언 및 할당 해주었다.
effectTime 같은 경우 일단은 7초로 잡아주었다.
자이언트 상자와 접촉하면 SizeUP이라는 코루틴 함수를 실행하는데,
먼저 1~10배중 랜덤한 값으로 몸의 크기가 변한다. 이후 지속시간이 지나면 다시 1로 작아지는 코드이다.
자연스럽게 몸이 변화하기 위해 Lerp를 사용해주었다.
아직 카메라를 구현하지 않은 상태이다.
여기서 살짝 아쉬웠던 점은 player의 경우 OnCollision으로 접촉했을 때만 오브젝트를 가져오면 될 거 같은데 OnCollision이라는 함수는 virtual이나 abstract이 안되고, 자식 오브젝트에서 또 작성하게 된다면, 부모 클래스의 함수가 무시 되기 때문에 그나마 내가 생각한 방법으론 생성되자마자 player찾기로 할당해주었다..
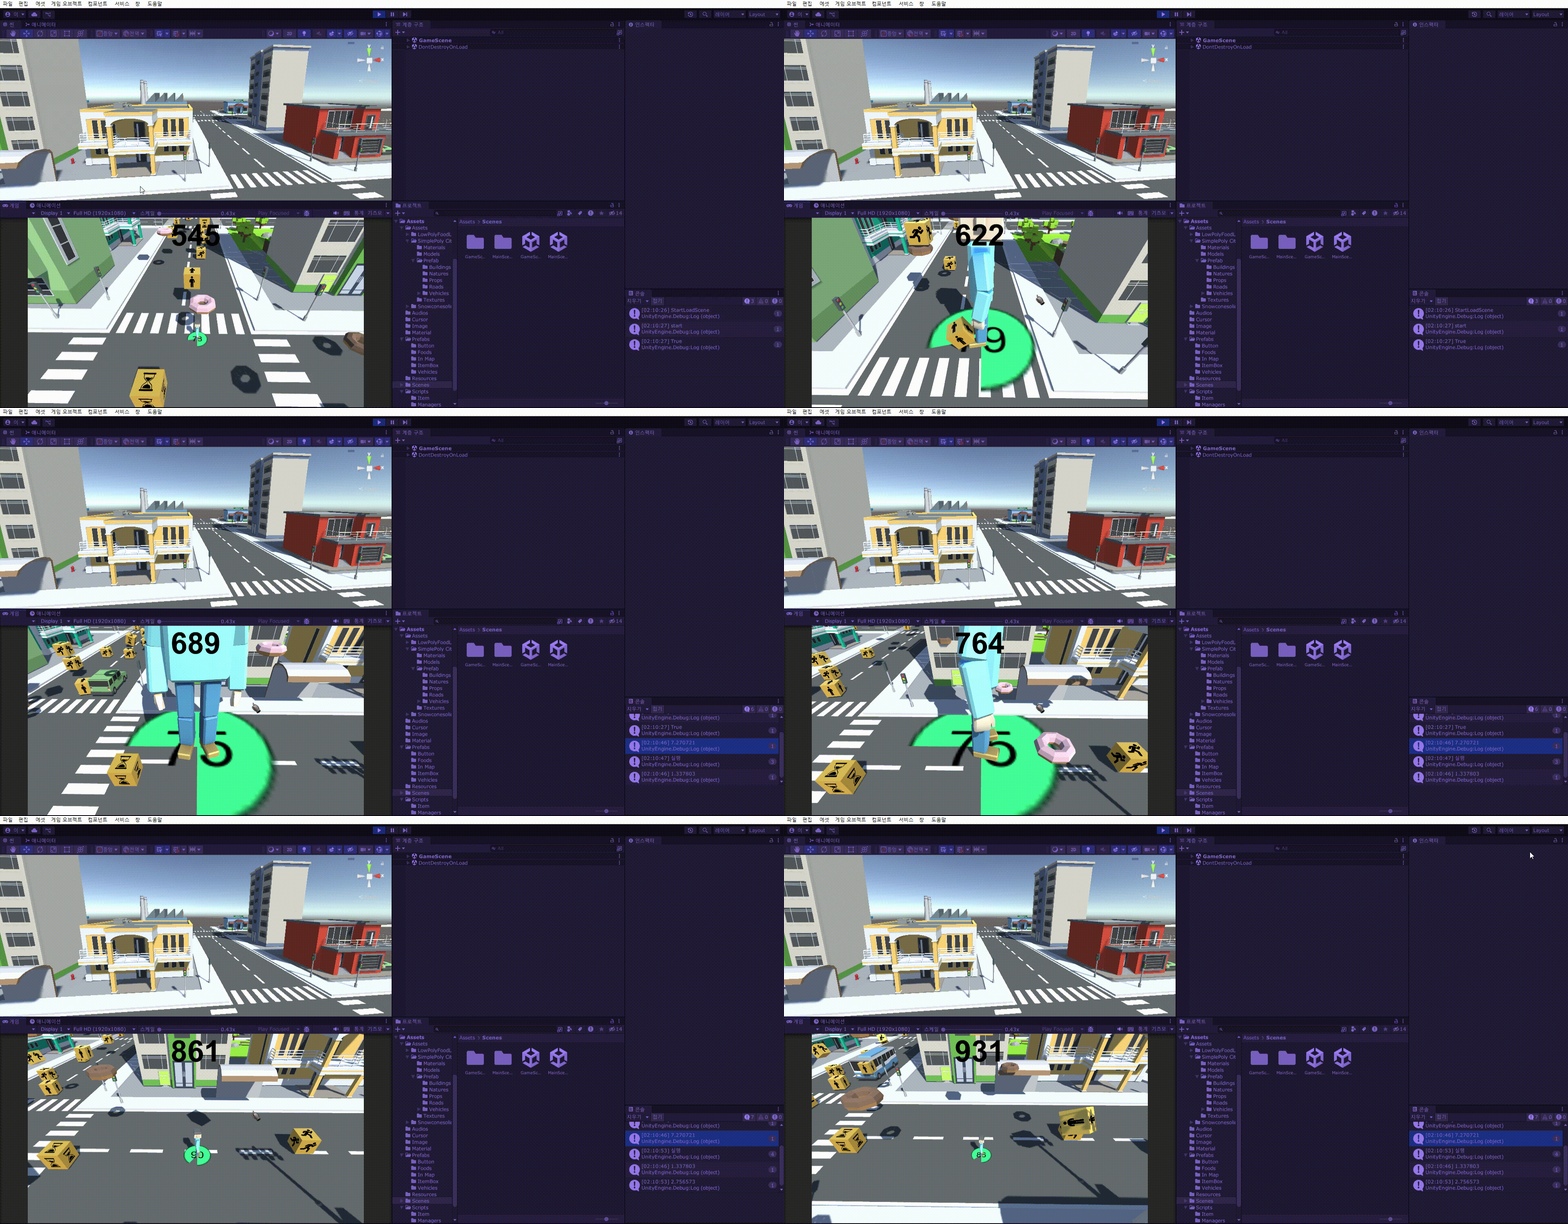
이렇게 아이템과 접촉하면 크기가 커지고 작아지는 것을 볼 수 있다.
이후 카메라의 위치를 변경해주는 코드를 작성 할 것이다.
using System.Collections;
using System.Collections.Generic;
using UnityEngine;

public class CameraMove : MonoBehaviour
{
    [SerializeField] GameObject target;
    public Vector3 positionOffset;

    private void LateUpdate()
    {
        transform.position = target.transform.position + positionOffset;
    }
}
CameraMove 스크립트
positionOffest의 값에 변화를 주어 플레이어를 쳐다보도록 하기 위해 접근 지정자를 public으로 수정한다.
이후 GiantItem의 코드를 수정해준다
using System.Collections;
using System.Collections.Generic;
using UnityEngine;

public class GiantItem : Item
{
    private CameraMove cameraMove;
    private GameObject player;

    Vector3 oneCameraTransform;

    private float size;
    protected override void Awake()
    {
        base.Awake();
        cameraMove = FindObjectOfType<CameraMove>();
        player = GameObject.FindWithTag("Player");
        effectTime = 7;

        oneCameraTransform = cameraMove.positionOffset;
    }
    protected override void Use()
    {
        size = Random.Range(1f, 10f);

        StartCoroutine(SizeUp());
        StartCoroutine(CameraBack());
    }
    IEnumerator SizeUp()
    {

        Vector3 sizeVec = new Vector3(size, size, size);

        while (player.transform.localScale.x + 0.001f <= sizeVec.x)
        {
            player.transform.localScale = Vector3.Lerp(player.transform.localScale, sizeVec, 0.2f);

            yield return null;
        }

        yield return new WaitForSeconds(effectTime);

        Debug.Log("크기 끝");

        sizeVec = Vector3.one;

        while(player.transform.localScale.x - 0.001f >= 1)
        {
            player.transform.localScale = Vector3.Lerp(player.transform.localScale, sizeVec, 0.2f);
            yield return null;
        }
    }
    IEnumerator CameraBack()
    {
        Vector3 endCameraTransform = oneCameraTransform + new Vector3(0, (size + size * 0.5f), -size);

        while (cameraMove.positionOffset.y + 0.001f <=endCameraTransform.y)
        {
            cameraMove.positionOffset = Vector3.Lerp(cameraMove.positionOffset, endCameraTransform, 0.2f);
            yield return null;
        }

        yield return new WaitForSeconds(effectTime);

        while(cameraMove.positionOffset.y - 0.001f > oneCameraTransform.y)
        {
            cameraMove.positionOffset = Vector3.Lerp(cameraMove.positionOffset, oneCameraTransform, 0.2f);
            yield return null;
        }
        cameraMove.positionOffset = oneCameraTransform;
    }
}
Giant 스크립트
위에서 부터 살펴보자면 oneCameraTransform 같은 경우 원래의 카메라 오프셋 (캐릭터의 크기가 1일때)를 저장해 주는 변수이고
size같은 경우, 기존엔 SizeUp 코루틴 함수에서 랜덤 값으로 정해줬는데, 두 개의 함수에서 사용하기 때문에 전역변수로 정해주었다.
Awake안에서는 oneCameraTransform에 원래의 카메라 오프셋을 저장해준다.
Use함수의 경우 size의 값을 랜덤으로 할당해 주고, CameraBack이라는 코루틴함수를 뒤에 호출시켜준다.
SizeUp함수의 경우 size의 값을 할당해주는 코드가 없어졌다.
중요한 CameraBack 코루틴 함수의 경우 먼저 캐릭터의 사이즈가 바뀌고 도착할 위치를 endCameraTransform 으로 정해주었다. 처음 카메라의 위치에서 인위적으로 size값에 비례하여 위치가 크기가 변하는 Vector3를 더해주었다. (size값이 클수록 높이가 올라가고, 캐릭터에서 멀어진다.)
이후 Vector3.Lerp를 이용하여 자연스럽게 카메라의 위치가 변경되고, 지속시간을 기다렸다가, 다시 자연스럽게 카메라의 위치가 원래 있던 오프셋으로 이동하는 것을 볼수 있다.
혹시모를 버그를 위해 마지막에 직접적으로 카메라 오프셋의 좌표를 지정해 주었다.
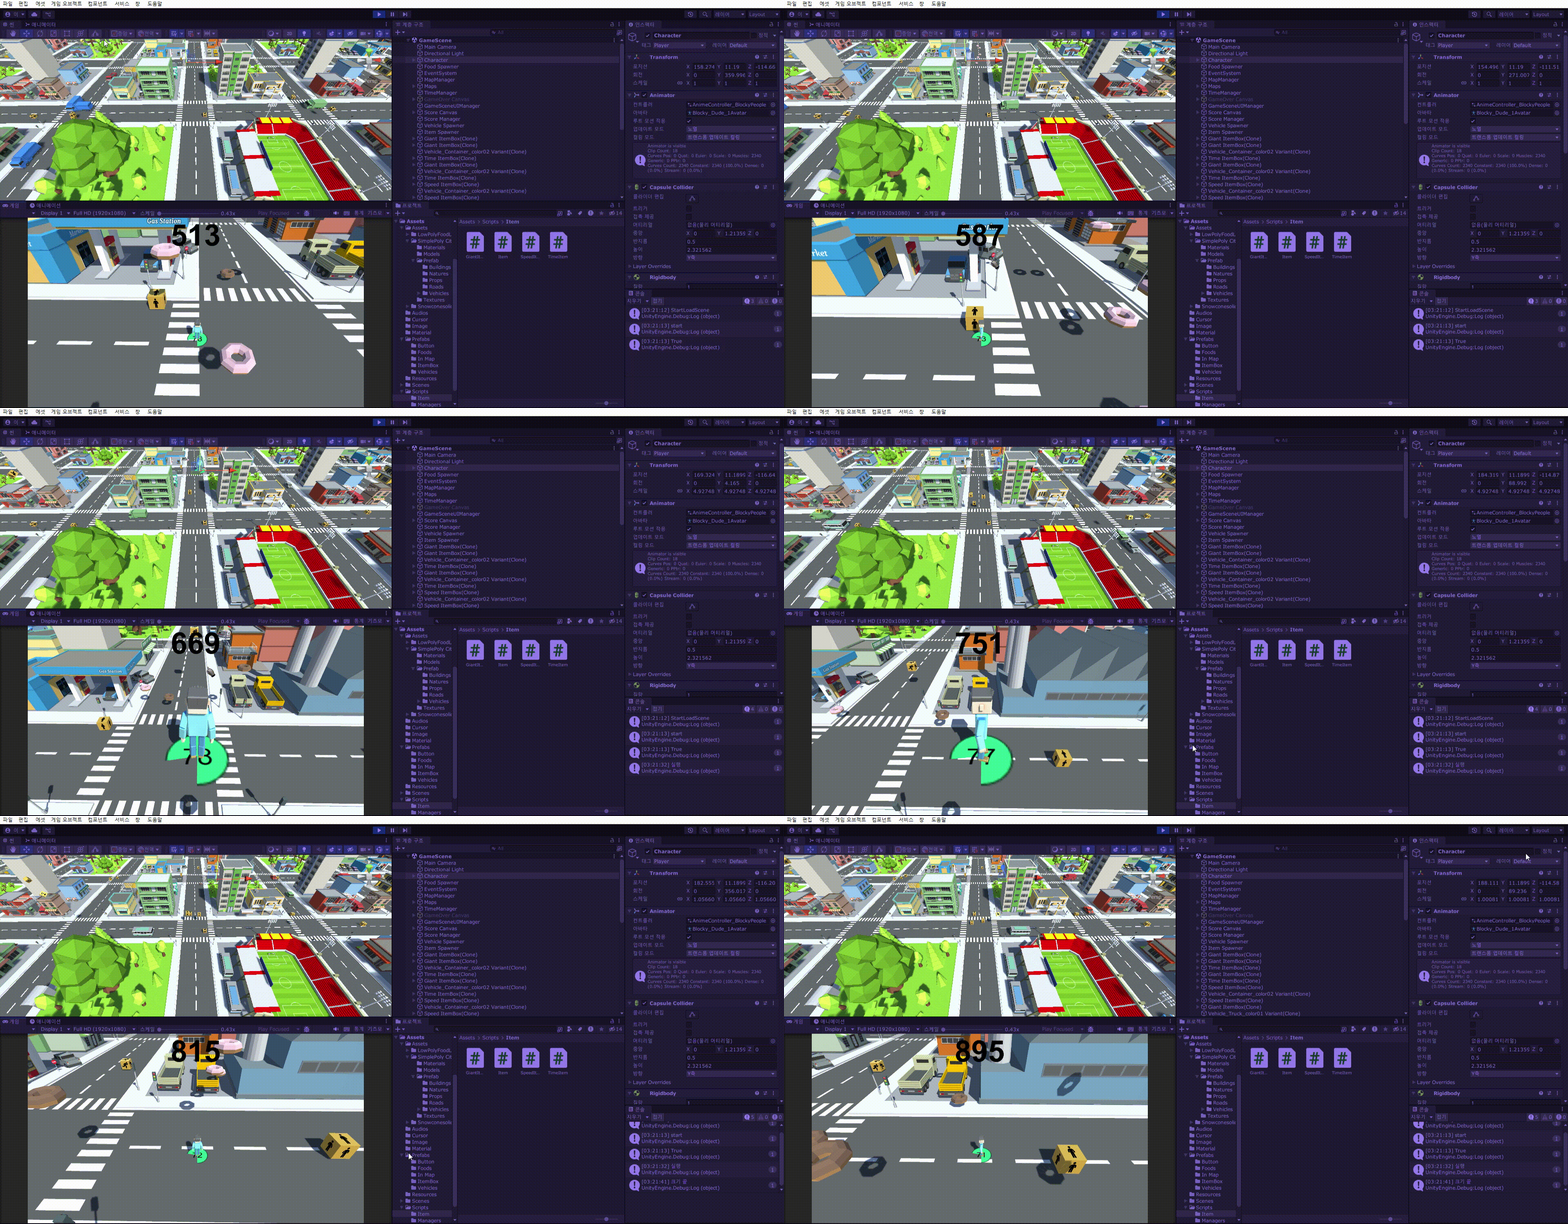
이렇게 Giant 아이템을 먹었을 때, 카메라의 위치도 변하는 것을 볼 수 있다.
세부적인 사항같은 경우 캐릭터가 커지는 코루틴과 카메라가 움직이는 코루틴간의 지속시간이 끝나는 시간이 동일 하지않을 때도 있다. (각각 처음 while문을 통과하는 시간이 다르다.)
이번엔 마지막으로 TimeItem을 만들 것이다.
가장 만들기 힘들어서 마지막에 둔 만큼 참조해야할 것이 매우 많다.
TimeItem의 경우 떨어지는 음식,아이템, 차량의 움직임, 체력감소가 일정 시간동안 정지하게된다.
이 아이템을 먹었을때, 일시적으로 스코어만 올라가고, 땅과 가까운 음식을 먹어 체력을 회복할수 있는 매리트가 존재한다.
코드의 양이 많아 단계별로 만들 것이다 (음식 - 아이템 - 차량 - 체력)
먼저 음식을 만들어 볼 것인데, Food의 떨어지는 속도를 0으로 만들어 줘야 하는데, food의 경우 TimeManager의 속도를 사용하기 때문에, 이를 수정 해줄 것이다.
    public float fallSpeed; // 떨어지는 속도

    private void Start()
    {
        fallSpeed += TimeManager.Instance.FoodFallSpeed - fallSpeed;
    }
        private void Update()
    {
        transform.position += Vector3.down * fallSpeed * Time.deltaTime;
    }
Food 스크립트의 수정된 부분
처음에 fallSpeed의 변수를 다른 곳에서 할당할 수 있도록 접근지정자를 public으로 바꿔준다.
Start에서 fallSpeed를 재정의 해준다. 기존 속도에 TimeManager의 속도 - 현재 속도를 해줌으로써,
TimeManager에서 계속 증가하는 FoodFallSpeed의 기존 값(5) 말고 증가하는 값(기존값 * 1.075)만 추가해주며, TimeManager에서 수정하지 않은 이유는 Food라는 객체는 여러개이기 때문이다.
이후에 Update에서 fallSpeed를 사용하여 떨어지는 속도를 정의해준다.
이후에 바꿔줘야할 코드는 FoodSpawner로 TimeItem을 먹었을 때, 음식 생성을 하지 못하도록 해준다.
    public bool isCreateTime = true;

    public IEnumerator CreateFood()
    {
        while(GameManager.Instance.State && isCreateTime)
        {
            InsFoodPosition = new Vector3(Random.Range(-foodX, foodX), foodY, Random.Range(-foodZ, foodZ)) + target.transform.position;

            Instantiate(foods[Random.Range(0, foods.Length)], InsFoodPosition, Quaternion.identity);

            yield return new WaitForSeconds(TimeManager.Instance.FoodFallTime);
        }
    }
FoodSpawner 스크립트의 수정된 부분
이 경우 bool 변수를 이용하여 만들어 주었다. isCreateTime이 true일 때만 생성키기는 코드를 음식을 생성시키는 코루틴 함수의 while문에 추가하여 생성의 유무를 쉽게 접근할 수 있도록 하였다.
또한 CreateFood의 접근 지정자를 public으로 바꿔주었는데, isCreateTime이 false가 되어 코루틴 함수가 중단되면 다시 생성시킬 수 없는데 TimeItem에서 다시 이 코루틴 함수를 실행시켜줄 것이기 때문이다.
TimeItem 스크립트
using System.Collections;
using System.Collections.Generic;
using UnityEngine;
using UnityEngine.UIElements;

public class TimeItem : Item
{
    private FoodSpawner foodSpawner;
    private List<Food> foods = new List<Food>();
    private List<float> foodsFallSpeed = new List<float>();

    protected override void Awake()
    {
        base.Awake();
        foodSpawner = FindObjectOfType<FoodSpawner>();
        effectTime = 7;
    }
    protected override void Use()
    {
        StartCoroutine(TimeStop());
    }

    IEnumerator TimeStop()
    {
        FoodStop();
        yield return new WaitForSeconds(effectTime);
        FoodStart();
    }
    void FoodStop()
    {
        foods = new List<Food>(FindObjectsOfType<Food>());
        for(int i = 0;i < foods.Count; i++)
        {
            foodsFallSpeed.Add(foods[i].fallSpeed);
            foods[i].GetComponent<Food>().fallSpeed = 0;
        }
        foodSpawner.isCreateTime = false;
    }
    void FoodStart()
    {
        for(int i = 0;i < foods.Count; i++)
        {
            if (foods[i] != null)
            {
                foods[i].GetComponent<Food>().fallSpeed = foodsFallSpeed[i];
            }
        }
        foodSpawner.isCreateTime = true;
        StartCoroutine(foodSpawner.CreateFood());
    }
}
아이템을 먹었을 때, 음식의 로직에 관한 코드이다.
위에서 부터 설명하자면,
List인 foods의 경우 현재 있는 음식들을 담아둘 list이며, foodsFallSpeed의 경우 그 음식들의 속도를 저장해주는 list이다.
Awake에서 foodSpawner를 할당하고 effectTime을 7로 설정해준다.
Use함수가 호출되면 TimeStop 코루틴함수를 호출하는데 TimeStop의 경우 FoodStop으로 음식을 이동을 정지시키는 함수 이후 지속시간 이후에 FoodStart라는 다시 음식을 이동시키는 함수를 호출한다.
FoodStop 함수의 경우 먼저 foods로 현재 있는 Food 컴포넌트를 넣어준 다음 for문을 통해 foodFallSpeed에 현재 떨어지는 속도를 넣어준다음 속도를 0으로 바꿔준다.
이후 foodSpawner의 isCreateTime을 false로 로 바꿔준다. 이러면 음식을 생성을 하지 못하게된다.
FoodStart 함수의 경우 for문을 이용하여 foods에 있는 음식들의 속도를 foodsFallSpeed를 사용하여 원상복수 시키는데, 이때 if문을 통해, 음식이 존재하는지를 판단해 준다. 이 이유는 음식이 정지했을 때, 플레이어가 음식을 먹어버린다면 참조할 수 없기 때문에, 이미 먹을 음식은 패스해준다고 볼 수 있다.
이후 다시 isCreateTime을 true로 바꿔 음식 생성 조건을 활성화 시키고, 중단되었던 CreateFood 코루틴 함수를 실행 시켜주며, 다시 음식을 생성시키게끔 해준다.
이후 TimeItem을 먹을 경우 음식의 이동이 멈추고 지속시간 이후에 다시 음식이 움직이고 생성되는 것을 볼 수 있다.
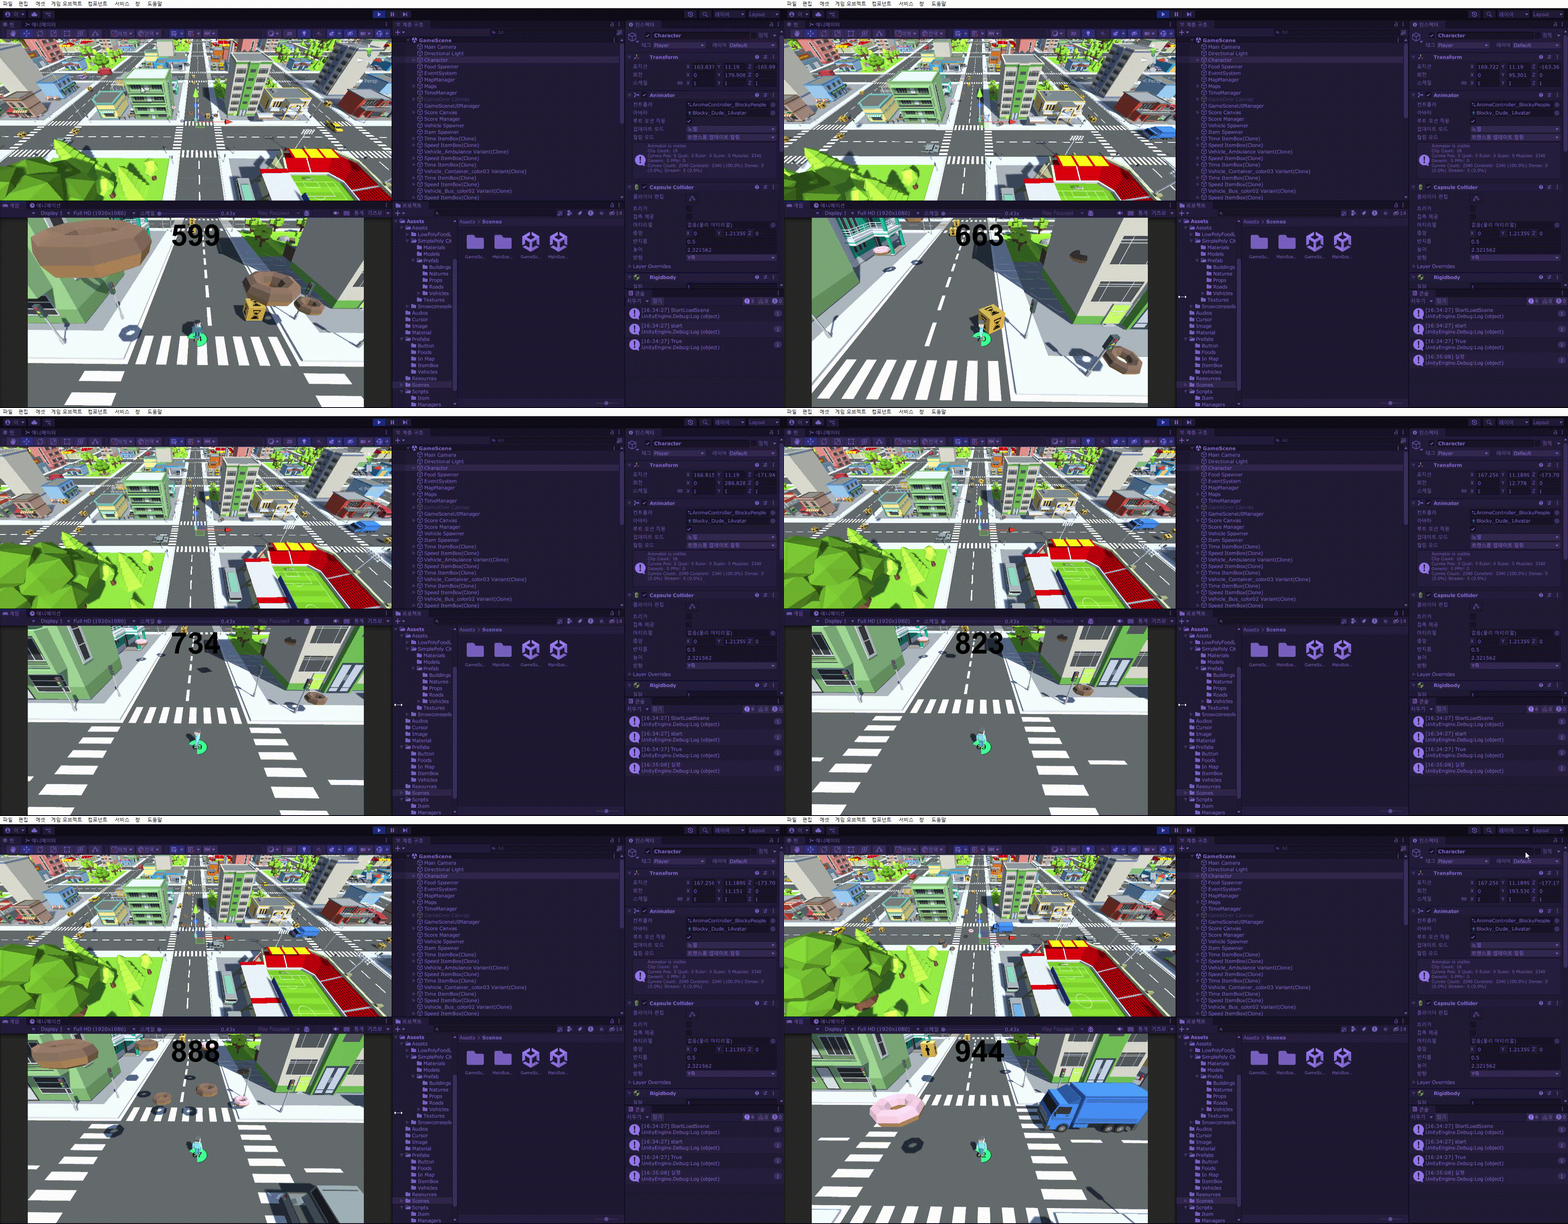
이번엔 아이템을 제어할 것이다.
기본적으로 Food와 로직 방식이 비슷하기 때문에, 비교적 만들어 주기 간단하다.
Food를 만들었던 코드와 유사하기에 설명은 하지 않겠다.
    public bool isCreateTime = true;

    public IEnumerator InsItemBox()
    {
        while(GameManager.Instance.State && isCreateTime)
        {
            Instantiate(SetObject(),SetPosition(),Quaternion.identity);
            yield return new WaitForSeconds(1f);
        }
    }
ItemSpawner 스크립트의 수정된 부분
public float fallSpeed;Item 스크립트의 수정된 부분
    private ItemSpawner itemSpawner;
    private List<Item> items = new List<Item>();
    private List<float> itemsFallSpeed = new List<float>();

        protected override void Awake()
    {
        base.Awake();
        foodSpawner = FindObjectOfType<FoodSpawner>();
        itemSpawner = FindObjectOfType<ItemSpawner>();
        effectTime = 7;
    }

        IEnumerator TimeStop()
    {
        FoodStop();
        ItemStop();
        yield return new WaitForSeconds(effectTime);
        FoodStart();
        ItemStart();
    }

        void ItemStop()
    {
        items = new List<Item>(FindObjectsOfType<Item>());
        for(int i = 0;i < items.Count;i++)
        {
            itemsFallSpeed.Add(items[i].fallSpeed);
            items[i].fallSpeed = 0;
        }
        itemSpawner.isCreateTime = false;

    }
    void ItemStart()
    {
        for(int i = 0;i < items.Count; i++)
        {
            if (items[i] != null)
            {
                items[i].fallSpeed = itemsFallSpeed[i];
            }
        }
        itemSpawner.isCreateTime = true;
        StartCoroutine(itemSpawner.InsItemBox());
    }
TimeItem 스크립트의 수정된 부분
이번엔 차량의 로직에 관해 작성해줄 것이다.
차량같은 경우에도 아이템을 먹으면 생성금지, 움직임 금지를 하면 되기에 앞선 코드들과 비슷하다.
역시나 코드의 설명은 하지 않겠다.
public float speed;Vehicle 스크립트의 수정된 부분
    public IEnumerator InsVehicle()
    {
        while(GameManager.Instance.State && isCreateTime)
        {
            yield return new WaitForSeconds(2f);
            Instantiate(SetObject(), SetPosition(), SetRotation());
            //Instantiate(vehicles, SetPosition() ,Quaternion.identity);
            // Debug.Log("생성");
        }

    }
VehicleSpawner 스크립트의 수정된 부분
    private VehicleSpawner vehicleSpawner;
    private List<Vehicle> vehicles = new List<Vehicle>();
    private List<float> vehiclesSpeed = new List<float>();

        protected override void Awake()
    {
        base.Awake();
        foodSpawner = FindObjectOfType<FoodSpawner>();
        itemSpawner = FindObjectOfType<ItemSpawner>();
        vehicleSpawner = FindObjectOfType<VehicleSpawner>();
        effectTime = 7;
    }

        void VehicleStop()
    {
        vehicles = new List<Vehicle>(FindObjectsOfType<Vehicle>());
        for(int i = 0;i < vehicles.Count; i++)
        {
            vehiclesSpeed.Add(vehicles[i].speed);
            vehicles[i].speed = 0;
        }
        vehicleSpawner.isCreateTime = false;
    }
    void VehicleStart()
    {
        for(int i = 0;i < vehicles.Count; i++)
        {
            if (vehicles[i] != null)
            {
                vehicles[i].speed = vehiclesSpeed[i];
            }
        }
        vehicleSpawner.isCreateTime = true;
        StartCoroutine(vehicleSpawner.InsVehicle());
    }
TimeItem 스크립트의 수정된 부분
마지막으로 캐릭터의 체력의 관한 로직을 작성해줄 것이다.
PlayerHealth 스크립트는 씬에 하나만 존재하기 때문에 더욱 간단하다.
    public bool isDecreaseTime = true;

    public IEnumerator DecreaseHealth()
    {
        while (GameManager.Instance.State && isDecreaseTime)
        {
            yield return new WaitForSeconds(TimeManager.Instance.DecreaseHpTime);
            HealthUpdate(-decreaseHealthValue);
        }
    }
PlayerHealth 스크립트의 수정된 부분
(public으로 된 변수의 경우 초기값이 적절하지 않을수도 있으니, Inspector에서 한번 확인하자...!)
    private PlayerHealth playerHealth;

    protected override void Awake()
    {
        base.Awake();
        foodSpawner = FindObjectOfType<FoodSpawner>();
        itemSpawner = FindObjectOfType<ItemSpawner>();
        vehicleSpawner = FindObjectOfType<VehicleSpawner>();
        playerHealth = FindObjectOfType<PlayerHealth>();
        effectTime = 7;
    }

    IEnumerator TimeStop()
    {
        FoodStop();
        ItemStop();
        VehicleStop();
        HealthStop();
        yield return new WaitForSeconds(effectTime);
        FoodStart();
        ItemStart();
        VehicleStart();
        HealthStart();
    }
        void HealthStop()
    {
        playerHealth.isDecreaseTime = false;
    }
    void HealthStart()
    {
        playerHealth.isDecreaseTime = true;
        StartCoroutine(playerHealth.DecreaseHealth());
    }
TimeItem 스크립트의 수정된 부분
using System.Collections;
using System.Collections.Generic;
using Unity.VisualScripting;
using UnityEngine;
using UnityEngine.UIElements;

public class TimeItem : Item
{
    private FoodSpawner foodSpawner;
    private List<Food> foods = new List<Food>();
    private List<float> foodsFallSpeed = new List<float>();

    private ItemSpawner itemSpawner;
    private List<Item> items = new List<Item>();
    private List<float> itemsFallSpeed = new List<float>();

    private VehicleSpawner vehicleSpawner;
    private List<Vehicle> vehicles = new List<Vehicle>();
    private List<float> vehiclesSpeed = new List<float>();

    private PlayerHealth playerHealth;

    protected override void Awake()
    {
        base.Awake();
        foodSpawner = FindObjectOfType<FoodSpawner>();
        itemSpawner = FindObjectOfType<ItemSpawner>();
        vehicleSpawner = FindObjectOfType<VehicleSpawner>();
        playerHealth = FindObjectOfType<PlayerHealth>();
        effectTime = 7;
    }
    protected override void Use()
    {
        StartCoroutine(TimeStop());
    }

    IEnumerator TimeStop()
    {
        FoodStop();
        ItemStop();
        VehicleStop();
        HealthStop();
        yield return new WaitForSeconds(effectTime);
        FoodStart();
        ItemStart();
        VehicleStart();
        HealthStart();
    }
    void FoodStop()
    {
        foods = new List<Food>(FindObjectsOfType<Food>());
        for(int i = 0;i < foods.Count; i++)
        {
            foodsFallSpeed.Add(foods[i].fallSpeed);
            foods[i].GetComponent<Food>().fallSpeed = 0;
        }
        foodSpawner.isCreateTime = false;
    }
    void FoodStart()
    {
        for(int i = 0;i < foods.Count; i++)
        {
            if (foods[i] != null)
            {
                foods[i].GetComponent<Food>().fallSpeed = foodsFallSpeed[i];
            }
        }
        foodSpawner.isCreateTime = true;
        StartCoroutine(foodSpawner.CreateFood());
    }
    void ItemStop()
    {
        items = new List<Item>(FindObjectsOfType<Item>());
        for(int i = 0;i < items.Count;i++)
        {
            itemsFallSpeed.Add(items[i].fallSpeed);
            items[i].fallSpeed = 0;
        }
        itemSpawner.isCreateTime = false;

    }
    void ItemStart()
    {
        for(int i = 0;i < items.Count; i++)
        {
            if (items[i] != null)
            {
                items[i].fallSpeed = itemsFallSpeed[i];
            }
        }
        itemSpawner.isCreateTime = true;
        StartCoroutine(itemSpawner.InsItemBox());
    }
    void VehicleStop()
    {
        vehicles = new List<Vehicle>(FindObjectsOfType<Vehicle>());
        for(int i = 0;i < vehicles.Count; i++)
        {
            vehiclesSpeed.Add(vehicles[i].speed);
            vehicles[i].speed = 0;
        }
        vehicleSpawner.isCreateTime = false;
    }
    void VehicleStart()
    {
        for(int i = 0;i < vehicles.Count; i++)
        {
            if (vehicles[i] != null)
            {
                vehicles[i].speed = vehiclesSpeed[i];
            }
        }
        vehicleSpawner.isCreateTime = true;
        StartCoroutine(vehicleSpawner.InsVehicle());
    }
    void HealthStop()
    {
        playerHealth.isDecreaseTime = false;
    }
    void HealthStart()
    {
        playerHealth.isDecreaseTime = true;
        StartCoroutine(playerHealth.DecreaseHealth());
    }
}
(전체코드)
이제 이렇게 TimeItem을 먹으면 음식, 아이템, 차량, 체력이 모두 정지하는 것을 볼 수 있다.
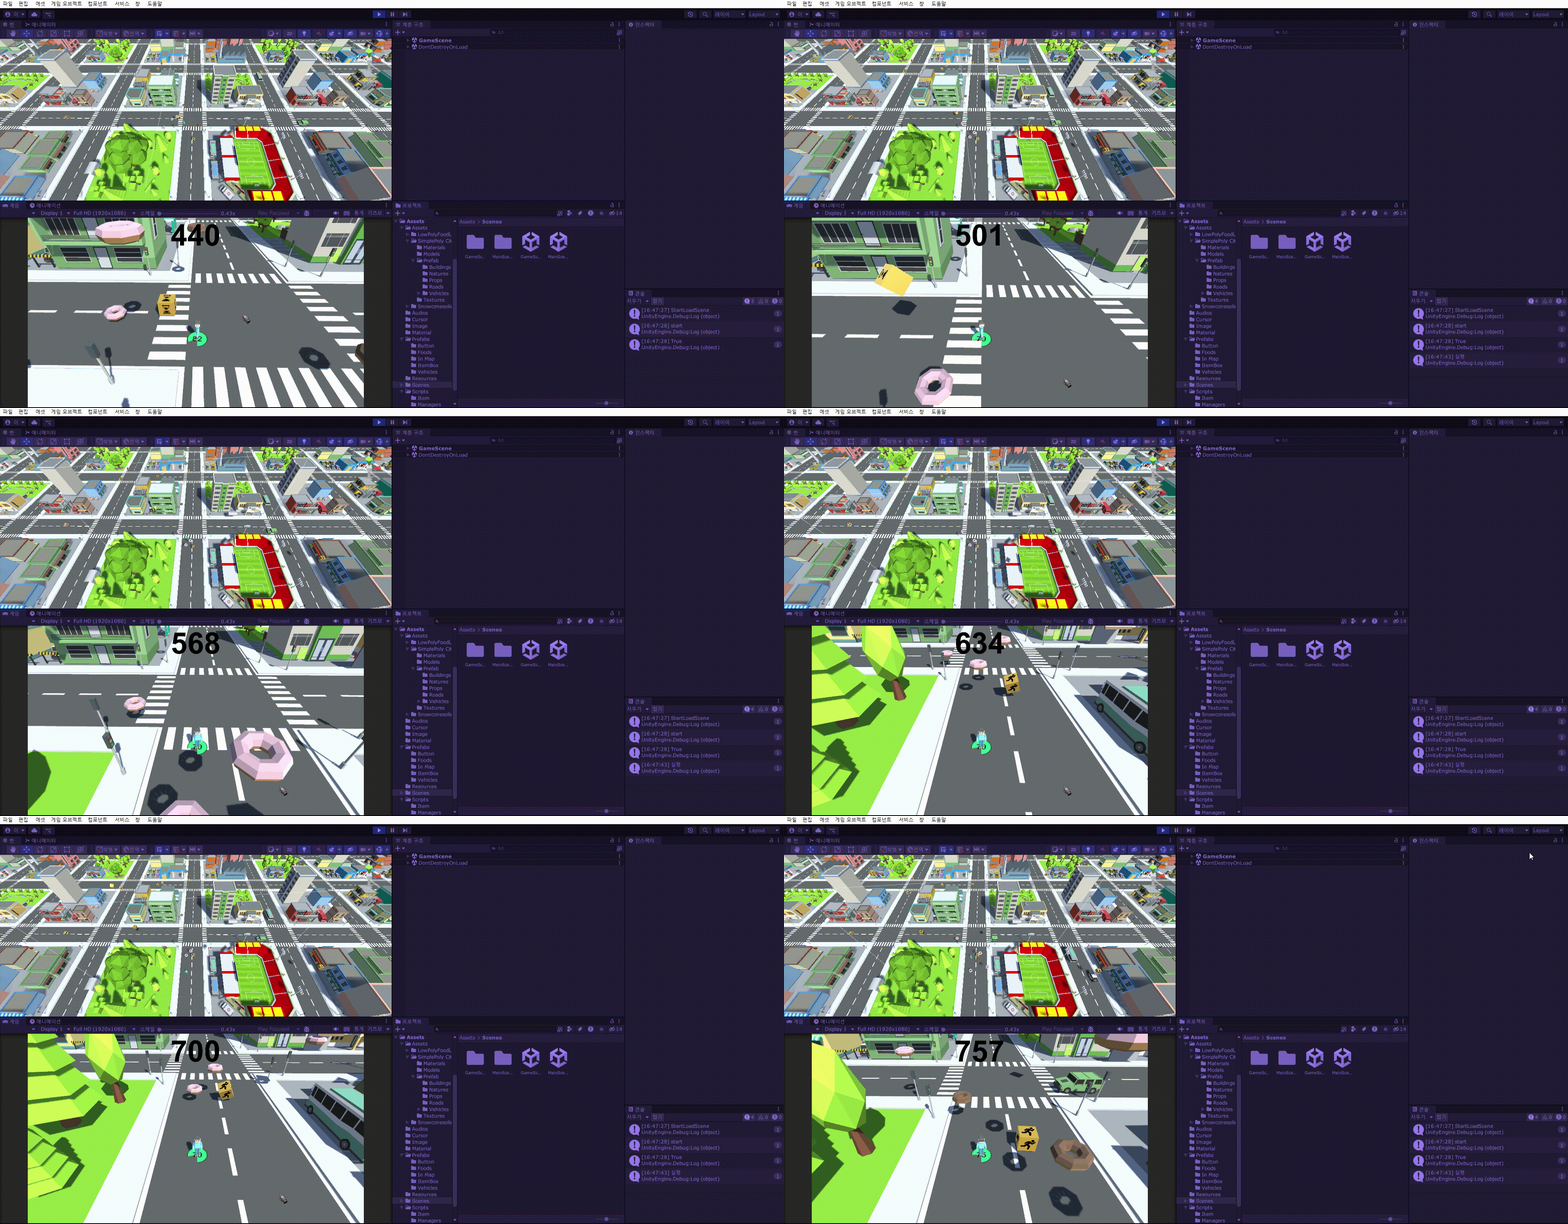
이제 Item의 삭제와 추가적인 기능들을 넣을 것이다.
먼저 캐릭터, 바닥에 닿았을 때, 일정시간 이후 삭제되는 코드를 넣어준다.
    private bool isContact = false;

    private void OnCollisionEnter(Collision collision)
    {
        if (collision.gameObject.CompareTag("Player"))
        {
            Use();
            ItemActive();
            isContact = true;
            Debug.Log("실행");
        }
        else if (collision.gameObject.CompareTag("Ground"))
        {
            StartCoroutine(ItemDestroy(5f));
        }
    }

        void ItemActive()
    {
        gameObject.GetComponent<MeshRenderer>().enabled = false;
        gameObject.GetComponent<Collider>().enabled = false;
        transform.GetChild(0).gameObject.SetActive(false);
    }
    protected IEnumerator ItemDestroy(float time)
    {
        yield return new WaitForSeconds(time);
        if(!isContact)
        {
            Destroy(gameObject);
        }
    }
Item 스크립트의 수정된 코드
먼저 isContact라는 변수를 선언해주는데, 이 변수의 경우 이 아이템이 캐릭터와 부딧혔는지 판단한다.
플레이어와 닿았을 때와 바닥에 닿았을 때 다른 실행을 하는데,
플레이어와 닿았을 때, 먼저 isContact를 true로 바꿔주고, ItemActive 함수를 호출하여, 아이템의 비주얼과, 콜라이더, 자식오브젝트를 비활성화 시켜 삭제가 된 것처럼 해준다.
이 이유는 아이템을 바로 삭제시키면 아이템의 코드가 실행되지 않기 때문이다.
바닥에 닿았을 때는 ItemDestroy 코루틴 함수를 통해, 5초가 지날때 까지 캐릭터와 부딧히지 않았다면 아이템을 삭제시킨다.
플레이어와 닿았을 때는 자식 클래스의 실행이 모두 끝났을 때, ItemDestroy를 호출시킨다.
그러므로 자식 클래스도 수정해 준다.
    IEnumerator TimeStop()
    {
        FoodStop();
        ItemStop();
        VehicleStop();
        HealthStop();
        yield return new WaitForSeconds(effectTime);
        FoodStart();
        ItemStart();
        VehicleStart();
        HealthStart();

        StartCoroutine(ItemDestroy(0));
    }
TimeItem 스크립트의 수정된 부분
지속시간이 지나 모든 실행이 끝나고서야 아이템을 즉시 삭제시킨다.
    IEnumerator SpeedUp()
    {
        playerMove.speed += 20;
        yield return new WaitForSeconds(effectTime);
        playerMove.speed -= 20;

        StartCoroutine(ItemDestroy(0));

    }
SpeedItem 스크립트의 수정된 부분
    private bool isSizeUp = false;
    private bool isCameraBack = false;

   private void Update()
   {
       if(isSizeUp && isCameraBack)
       {
           StartCoroutine(ItemDestroy(0));
       }
   }
       IEnumerator SizeUp()
    {

        Vector3 sizeVec = new Vector3(size, size, size);

        while (player.transform.localScale.x + 0.001f <= sizeVec.x)
        {
            player.transform.localScale = Vector3.Lerp(player.transform.localScale, sizeVec, 0.2f);

            yield return null;
        }

        yield return new WaitForSeconds(effectTime);

        Debug.Log("크기 끝");

        sizeVec = Vector3.one;

        while(player.transform.localScale.x - 0.001f >= 1)
        {
            player.transform.localScale = Vector3.Lerp(player.transform.localScale, sizeVec, 0.2f);
            yield return null;
        }
        isSizeUp = true;
    }
        IEnumerator CameraBack()
    {
        Vector3 endCameraTransform = oneCameraTransform + new Vector3(0, (size + size * 0.5f), -size);

        while (cameraMove.positionOffset.y + 0.001f <=endCameraTransform.y)
        {
            cameraMove.positionOffset = Vector3.Lerp(cameraMove.positionOffset, endCameraTransform, 0.2f);
            yield return null;
        }

        yield return new WaitForSeconds(effectTime);

        while(cameraMove.positionOffset.y - 0.001f > oneCameraTransform.y)
        {
            cameraMove.positionOffset = Vector3.Lerp(cameraMove.positionOffset, oneCameraTransform, 0.2f);
            yield return null;
        }
        cameraMove.positionOffset = oneCameraTransform;
        isCameraBack = true;
    }
GiantItem 스크립트의 수정된 부분
GiantItem의 경우 하나의 코루틴으로 지속시간을 제어하지 않기 때문에 bool변수 두개를 이용하여 만들어 주었다. isSizeUp과 isCameraBack이 모두 true일때, 아이템을 삭제시켜준다.
각각 사이즈가 모두 줄었을때와, 카메라가 원래 위치로 돌아왔을때, true를 반환한다.
이렇게 작성해주면 아이템이 유동적으로 삭제되는 것을 볼 수 있다.
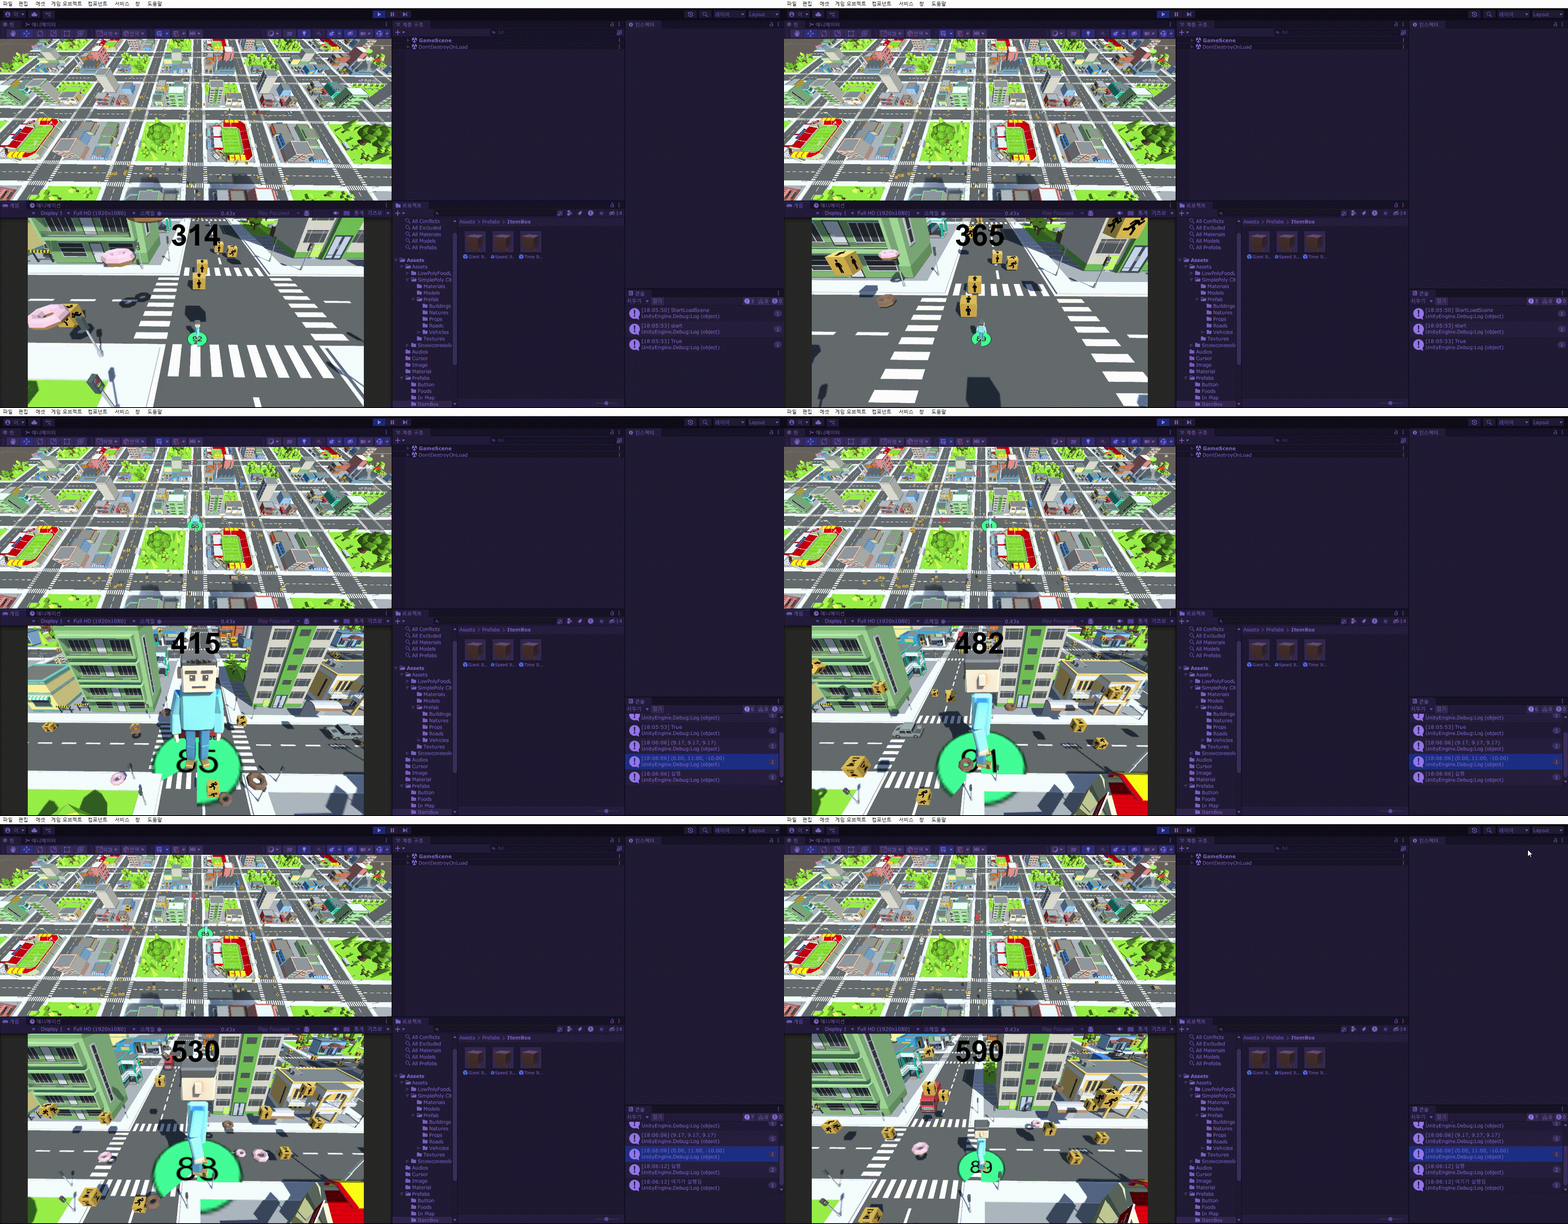
이번엔 아이템을 먹었을 때 소리가 나도록 해주겠다.
    public AudioClip audioClip;
    private void OnCollisionEnter(Collision collision)
    {
        if (collision.gameObject.CompareTag("Player"))
        {
            SoundManager.Instance.EffectPlay(audioClip);
            Use();
            ItemActive();
            isContact = true;
            Debug.Log("실행");
        }
        else if (collision.gameObject.CompareTag("Ground"))
        {
            StartCoroutine(ItemDestroy(5f));
        }
    }
Item 스크립트의 수정된 부분
public으로 AudioClip 변수를 추가해 각각의 Item에서 나오는 소리를 정할수 있게하고,
플레이어와 닿았을때 SoundManager를 통해 소리를 출력한다.
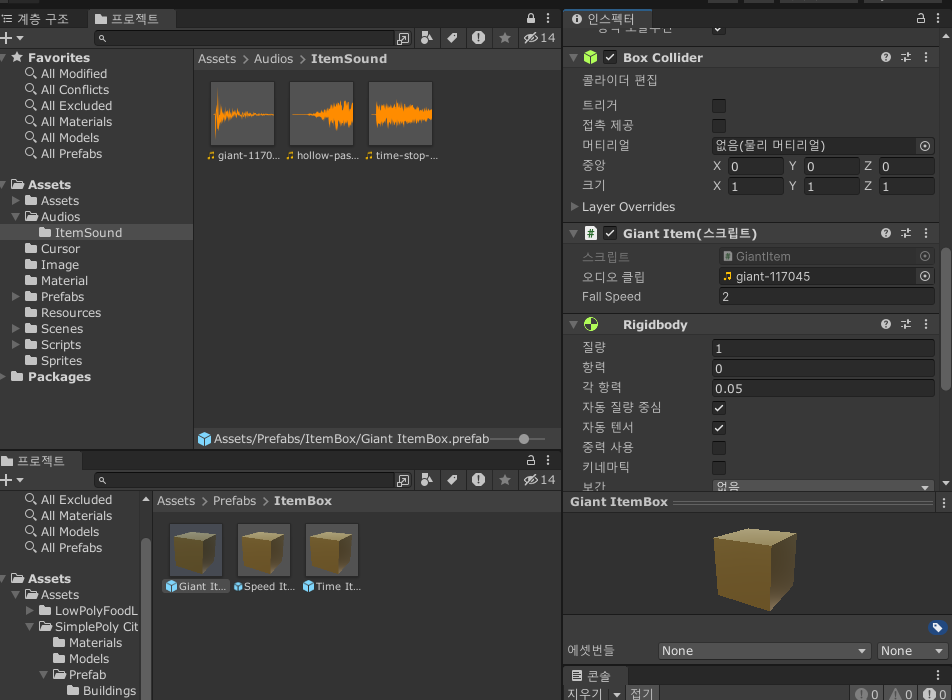
이후 받아둔 Auido 파일을 알맞게 아이템 오디어 클립에 넣어준다.
Giant Item : https://pixabay.com/ko/sound-effects/giant-117045/
Speed Item : https://pixabay.com/ko/sound-effects/hollow-passby-sfx-230499/
Time Item : https://pixabay.com/ko/sound-effects/time-stop-80521/
이번엔 TimeItem을 먹었을 때와 GiantItem을 먹었을 땐 차량에 피해를 입지 않도록 추가해줄 것이다.
먼저 TimeItem의 경우 차량의 속도가 0일때는 충돌 처리를 하지 않게 해준다
    private void OnCollisionEnter(Collision collision)
    {
        PlayerHealth playerHealth = collision.gameObject.GetComponent<PlayerHealth>();
        if(playerHealth != null && !playerHealth.isContactVehicle && speed != 0)
        {
            playerHealth.HealthUpdate(contactDamage);

            Vector3 contactNormal = collision.contacts[0].normal * contactPushPower;
            collision.gameObject.GetComponent<Rigidbody>().AddForce(-contactNormal, ForceMode.Impulse);

            SoundManager.Instance.EffectPlay(contactAudio);

            StartCoroutine(playerHealth.ContactVehicle());
        }
    }
Vehicle 스크립트의 수정된 부분
Giant의 경우에도 쉽게 그냥 충돌이 되지 않게끔 할 것이다.
public bool isGiant = false;PlayerHealth 스크립트의 추가된 부분
isGiant는 현재 캐릭터의 상태를 나타낸다.
    IEnumerator SizeUp()
    {

        Vector3 sizeVec = new Vector3(size, size, size);

        playerHealth.isGiant = true;

        while (player.transform.localScale.x + 0.001f <= sizeVec.x)
        {
            player.transform.localScale = Vector3.Lerp(player.transform.localScale, sizeVec, 0.2f);

            yield return null;
        }

        yield return new WaitForSeconds(effectTime);


        sizeVec = Vector3.one;

        while(player.transform.localScale.x - 0.001f >= 1)
        {
            player.transform.localScale = Vector3.Lerp(player.transform.localScale, sizeVec, 0.2f);
            yield return null;
        }
        playerHealth.isGiant = false;

        isSizeUp = true;
    }
GiantItem 스크립트의 수정된 부분
크기가 커질때와 작아지고 날때에 isGiant의 변수를 변경한다.
    private void OnCollisionEnter(Collision collision)
    {
        PlayerHealth playerHealth = collision.gameObject.GetComponent<PlayerHealth>();
        if (playerHealth != null && !playerHealth.isContactVehicle && speed != 0 && !playerHealth.isGiant)
        {

            playerHealth.HealthUpdate(contactDamage);

            Vector3 contactNormal = collision.contacts[0].normal * contactPushPower;
            collision.gameObject.GetComponent<Rigidbody>().AddForce(-contactNormal, ForceMode.Impulse);

            SoundManager.Instance.EffectPlay(contactAudio);

            StartCoroutine(playerHealth.ContactVehicle());

        }
    }
Vehicle 스크립트의 수정된 부분
TimeItem과 같이 충돌 if 조건문에 isGiant가 아닐때에만 실행되도록 한다.
이제 마지막으로 아이템의 버그를 수정할 것이다.
Giant Item 카메라버그
    protected override void Awake()
    {
        base.Awake();
        cameraMove = FindObjectOfType<CameraMove>();
        player = GameObject.FindWithTag("Player");
        effectTime = 7;

        oneCameraTransform = cameraMove.positionOffset;
    }
GiantItem 의 경우 이렇게 Awake에서 oneCameraTransform의 값을 할당하는데, 여기서 오류가 난다.
만약 캐릭터의 크기가 커졌을 때, 이 아이템이 생성되고, 그 아이템을 먹게 된다면, 카메라의 위치가 비정상적으로 커지는 오류가 발생하기 때문이다.
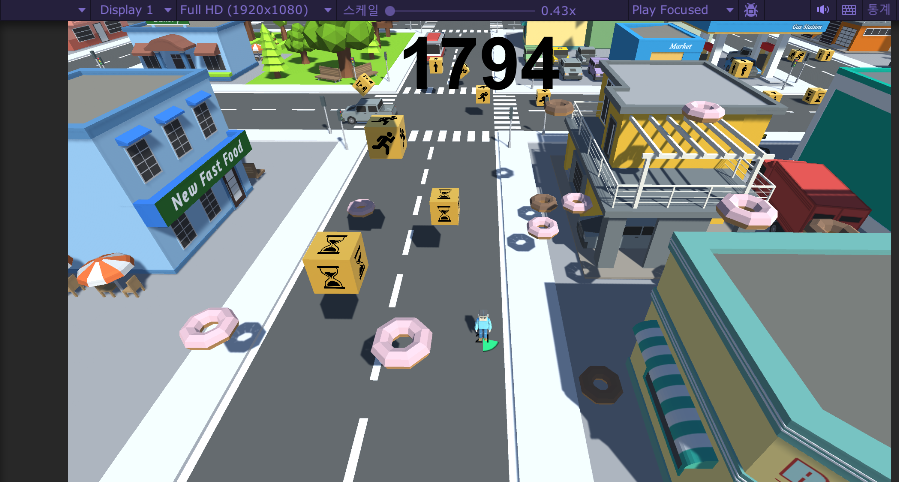
(캐릭터의 크기는 원래대로 돌아왔지만 카메라의 위치가 이상한 모습)
이 버그를 수정하자면,
    public Vector3 OnePositionOffset
    {
        get; private set;
    }
        private void Awake()
    {
        OnePositionOffset = positionOffset;
    }
CameraMove 스크립트의 수정된 부분
프로퍼티로 절대적인 카메라 원래 위치를 정해주고,
    protected override void Awake()
    {
        base.Awake();
        cameraMove = FindObjectOfType<CameraMove>();
        player = GameObject.FindWithTag("Player");
        effectTime = 7;

        oneCameraTransform = cameraMove.OnePositionOffset;
    }
이렇게 oneCameraTransform이 프로퍼티의 값을 가져가도록 설정해준다.
SpeedItem 이동 버그
    IEnumerator SpeedUp()
    {
        playerMove.speed += 20;
        yield return new WaitForSeconds(effectTime);
        playerMove.speed -= 20;

        StartCoroutine(ItemDestroy(0));

    }
SpeedItem 의 경우 현재 플레이어의 이속에 20을 더하고 지속시간이 끝나면 20을 빼는 식으로 처리 되어있는데, 이 지속시간 중에 TimeManager의 레벨이 변화하면 코드가 꼬이게 된다.
    public float PlayerSpeed
    {
        get { return playerSpeed; }
        set
        {
            playerSpeed = value;
            if(playerSpeed >= 15)
            {
                playerSpeed = 15;
            }
            playerMove.speed += playerSpeed - playerMove.speed;
        }
    }
TimeManager에서 PlayerSpeed의 값을 변경하면 player의 속도에 영향을 주게되는데,
이때 SpeedItem을 먹을 상태여서 playerMove.speed의 값이 30이상 이렇게 변하게 된 상태면
playerMove.speed의 값이 음수와 같이 이상한 값으로 되어
누른 방향키의 반대쪽으로 캐릭터가 이동하게된다.
이 또한 기본값이 변하여서 이루어지는 일이기 때문에, 프로퍼티로 처리해준다.
    public float OneSpeed
    {
        get; private set;
    }

    private void Awake()
    {
        rigidBody = GetComponent<Rigidbody>();
        playerInput = GetComponent<PlayerInput>();

        OneSpeed = speed;
    }
PlayerMove 스크립트의 수정된 부분
OneSpeed라는 프로퍼티를 만들고 Awake에서 기본값을 할당해 준다.
    public float PlayerSpeed
    {
        get { return playerSpeed; }
        set
        {
            playerSpeed = value;
            if(playerSpeed >= 15)
            {
                playerSpeed = 15;
            }
            playerMove.speed += playerSpeed - playerMove.OneSpeed;
        }
    }
TimeManager 스크립트의 수정된 부분
PlayerSpeed 프로퍼티에서 빼주는 값을 OneSpeed로 변경해준다.
다만 이렇게 작성해주면 또 버그가 발생하는데, playerSpeed의 값이 변경될 때 마다, 속도값이 추가도 증가되어서 비정상적으로 빨라지는 현상이 일어나게된다.
public float addSpeed = 0;PlayerMove 스크립트
생각보다 여기서 조금 헤맸는데, 해결은 PlayerMove 쪽에서 더해지는 속도값을 받는 변수를 선언함으로써 해결해 주었다. addSpeed는 TimeManager에서 추가되는 속도값을 받는다.
    public float PlayerSpeed
    {
        get { return playerSpeed; }
        set
        {
            playerSpeed = value;
            if(playerSpeed >= 15)
            {
                playerSpeed = 15;
            }
            playerMove.speed -= playerMove.addSpeed;
            playerMove.addSpeed = playerSpeed - playerMove.OneSpeed;
            playerMove.speed += playerMove.addSpeed;

        }
    }
TimeManager
기존 이동속도값에 전 레벨에서 추가된 추가속도를 빼준이후, 새로운 추가속도를 다시 넣어준다.
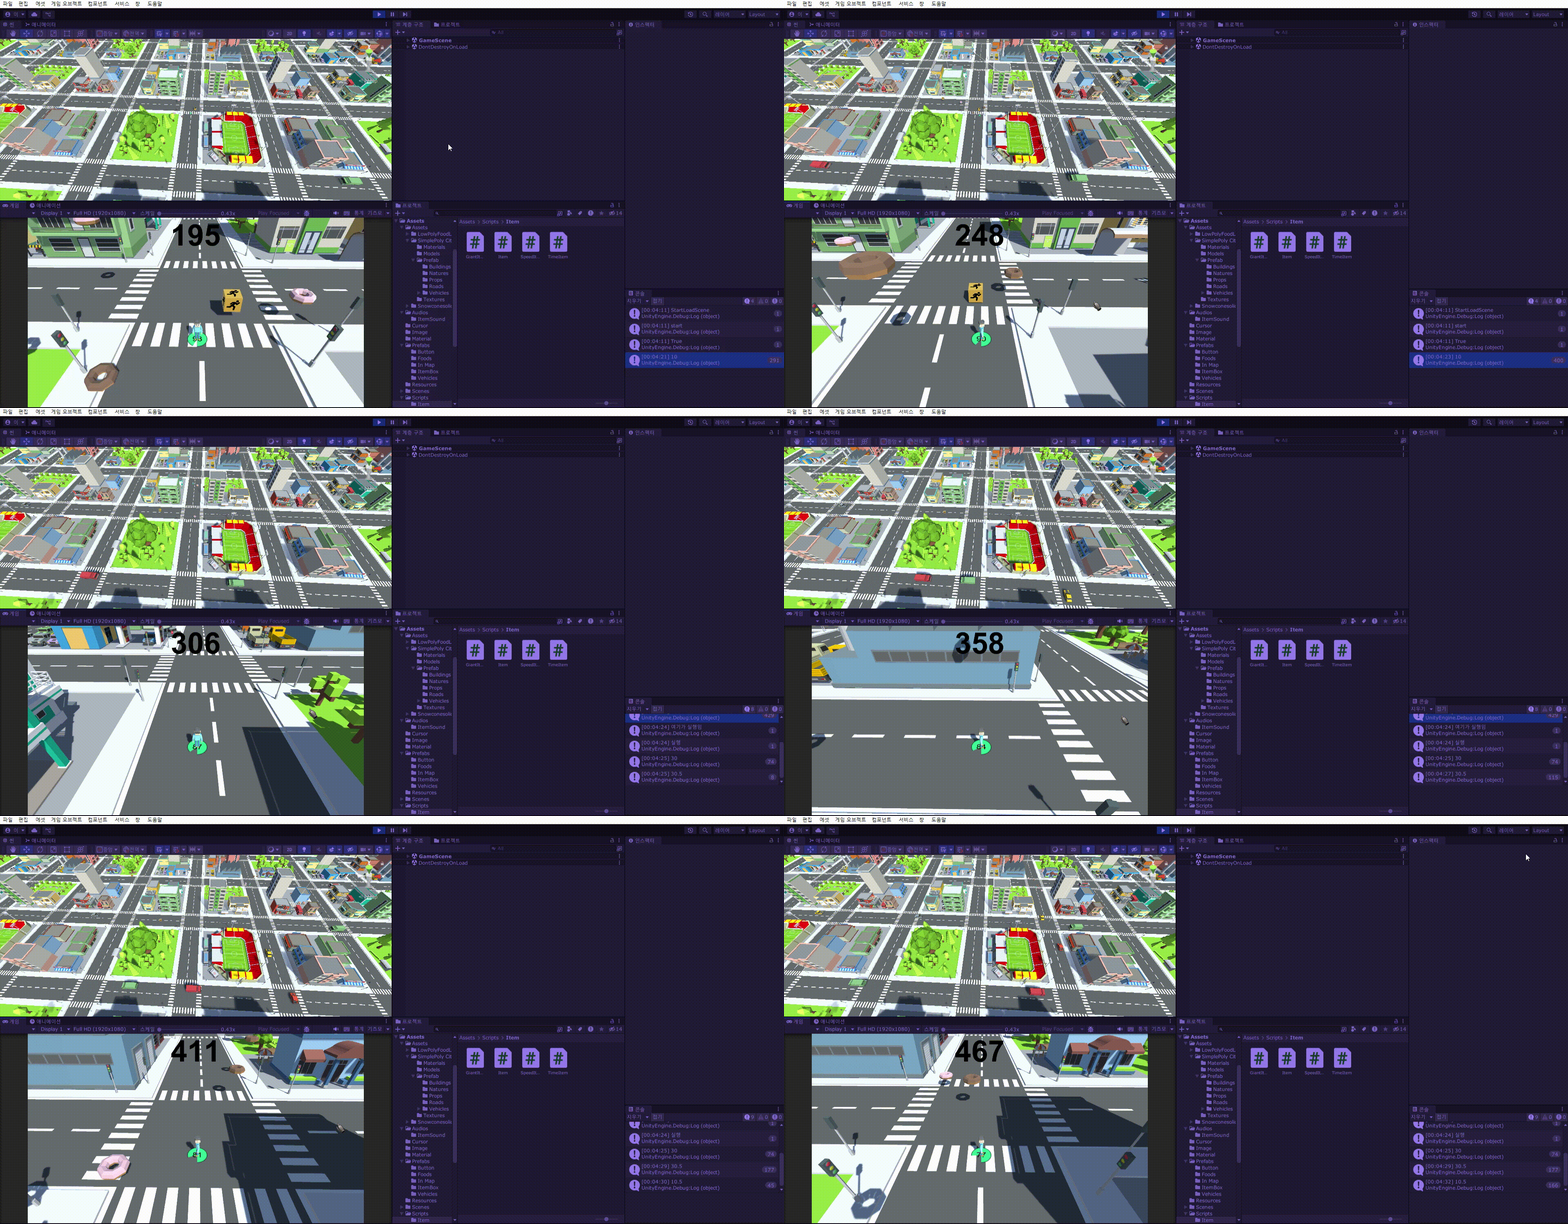
이렇게 이동관련 버그까지 고쳐진 것을 볼 수 있다.
여기까지 Item을 만들어 보았다. 아이템의 경우 다양한 효과를 내기 때문에 분량이 엄청 길어진거 같다...
이번엔 다양한 음식들을 만들어 볼 것이다.
현재까지는 먹기만 하면 좋은 아이템만 나왔다면
이번에는 먹었을 때 안좋거나, 음식의 여러 바리에이션을 만들어 줄것이다.
이 경우 스크립터블 오브젝트를 이용하여 각각의 음식의 개별적인 데이터를 넣어줄 것이다.
떨어지는 속도, 먹었을때 변하는 체력값, 점수 증가값 등을 수정할 수 있는 데이터로 만들어준다.
먼저 FoodData라는 스크립트를 만들어주고, 스크립터블 오브젝틀 형식으로 적어준다.
using System.Collections;
using System.Collections.Generic;
using UnityEngine;

[CreateAssetMenu(menuName = "Scriptable/FoodData", fileName = "Food Data")]
public class FoodData : ScriptableObject
{
    public float fallSpeed;
    public int increaseHealth;
    public int increaseScore;
}
FoodData 스크립트
CreateAsseMenu를 통해 에셋을 생성하는 메뉴를 만들어 주고
ScriptableObject를 상속 받아 스크립터블 오브젝트로 사용되게끔 해준다.
변수의 경우 public 으로 떨어지는 속도, 체력증가값, 점수증가값을 두었다.
이후에는 Food 스크립트를 수정해준다.
public float fallSpeed; // 떨어지는 속도
[SerializeField] int increaseHealth; // 체력 증가값
[SerializeField] int increaseScore; // 점수 증가값

[SerializeField] FoodData foodData;

[SerializeField] AudioClip eatingAudio;

ScoreManager scoreManager;
private void Awake()
{
    scoreManager = FindObjectOfType<ScoreManager>();

    fallSpeed = foodData.fallSpeed;
    increaseHealth = foodData.increaseHealth;
    increaseScore = foodData.increaseScore;

}
Food 스크립트의 수정된 부분
SerializeField로 FoodData 변수를 선언해주고 Awake에서 안의 데이터를 옮겨 받는다.
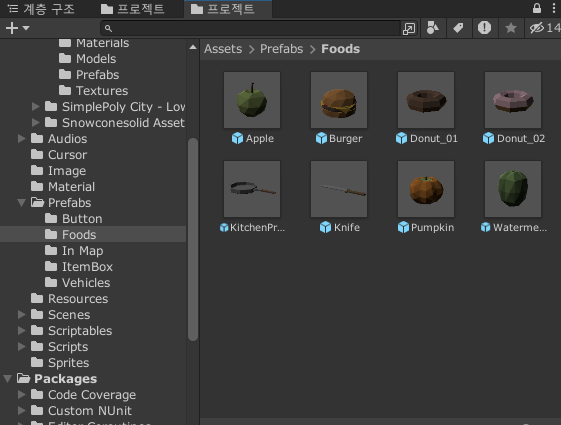
에셋은 처음 받아두었던 에셋의 오브젝트를 사용하였다.
총 사용할 음식은 8개로 각각의 특징이 존재한다. 큰 특징들로는 (떨어지는 속도, 체력증가값, 점수증가값)
초콜릿 도넛 : 가장 기본적인 음식 ( 5 , 3 , 5 )
딸기 도넛 : 획득 점수가 우수함 ( 5 , 5 , 30 )
사과 : 떨어지는 속도가 빠르며, 체력증가값이 높음 ( 10 , 25 , 1 )
햄버거 : 체력증가값, 점수증가값이 높음 ( 5 , 15 , 15 )
호박 : 떨어지는 속도가 느리지만 점수 증가값이 우수함 ( 2.5 , 10 , 100 )
수박 : 떨어지는 속도가 느리지만 체력 증가값이 우수함 ( 2.5 , 30 , 50 )
프라이팬 : 떨어지는 속도가 빠르며 체력이 조금, 점수가 크게 감소함 ( 7.5 , -10 , -100 )
칼 : 떨어지는 속도가 빠르며 점수가 조금, 체력이 크게 감소함 ( 7.5 , -30 , -30 )
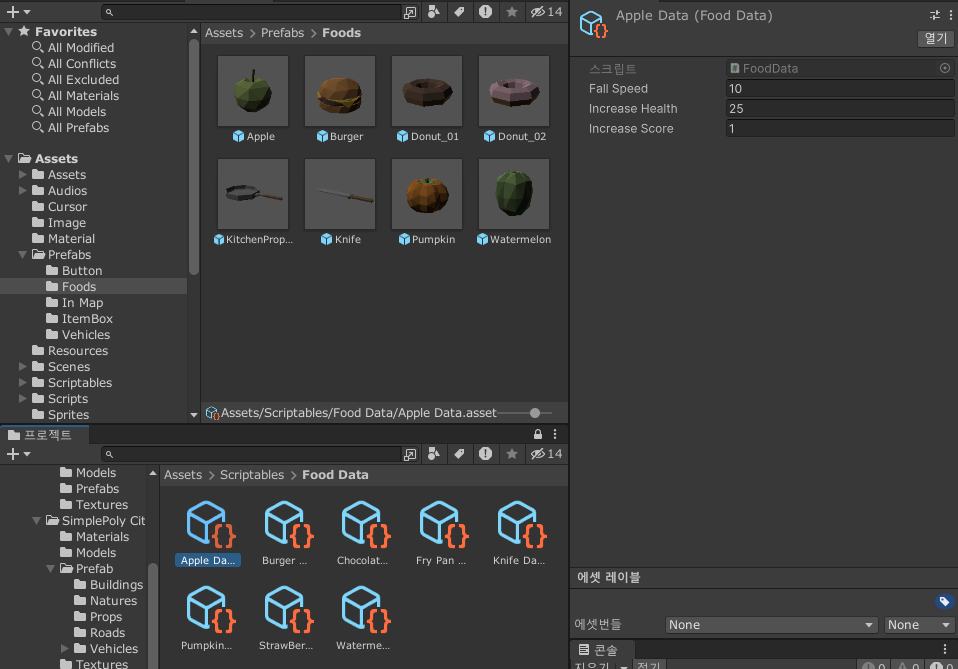
이제 데이터 에셋을 만들고 각각에 맞는 데이터들을 넣어준다.
도넛들을 제외한 음식들은 컴포넌트가 비어있기 때문에, 모두 다시 설정해 준다.
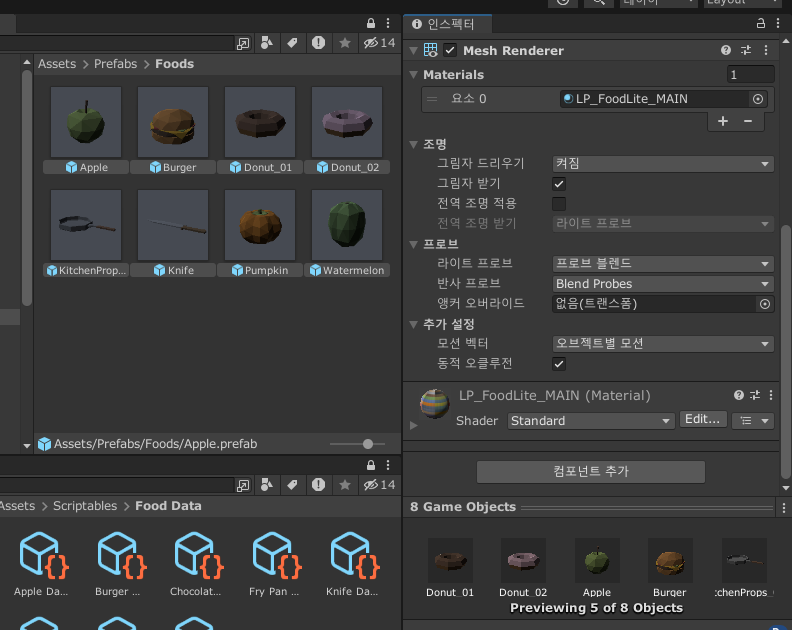
음식들에 Food컴포넌트가 있다면 삭제해준이후, 모든 음식의 BoxCollider와 Rigidbody를 지워준다.
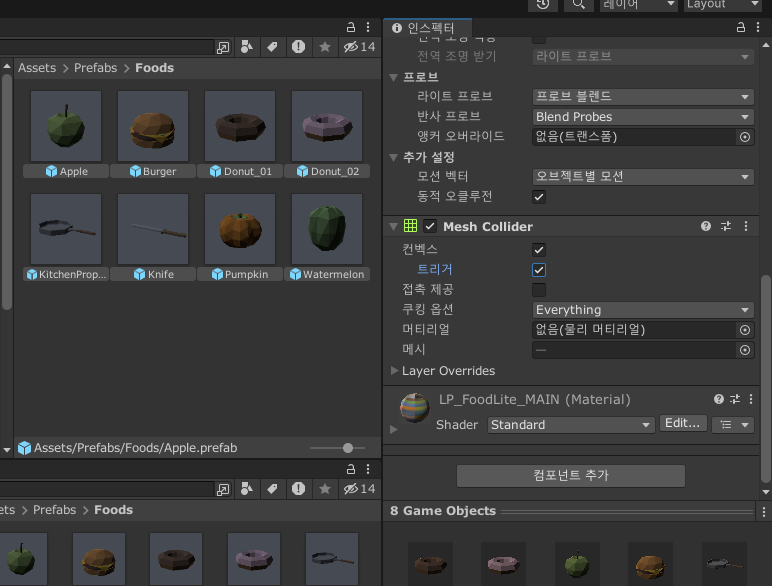
이후에는 모든 음식들에 Mesh Collider를 추가하고 컨벡스와 트리거를 체크한다.
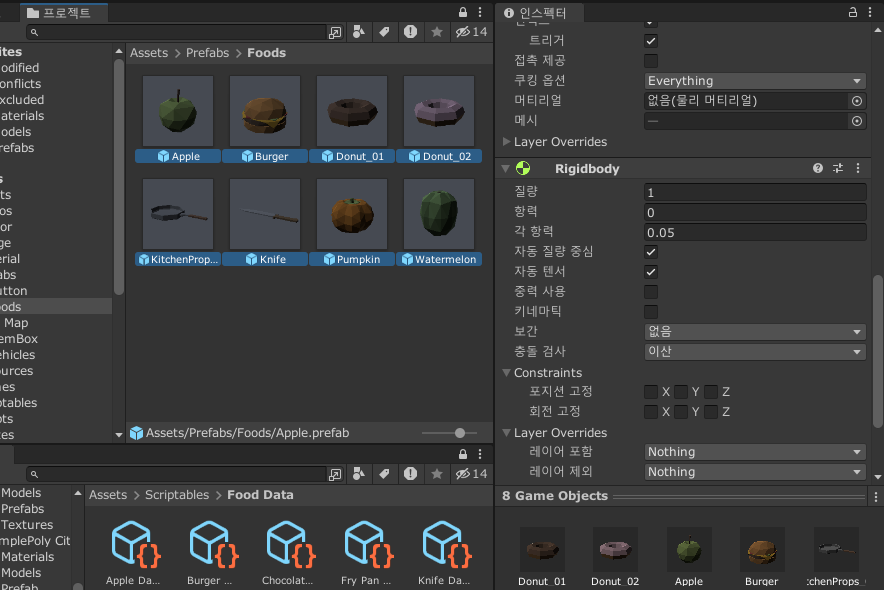
그 다음 Rigidbody를 넣고 중력사용을 해제해준다.
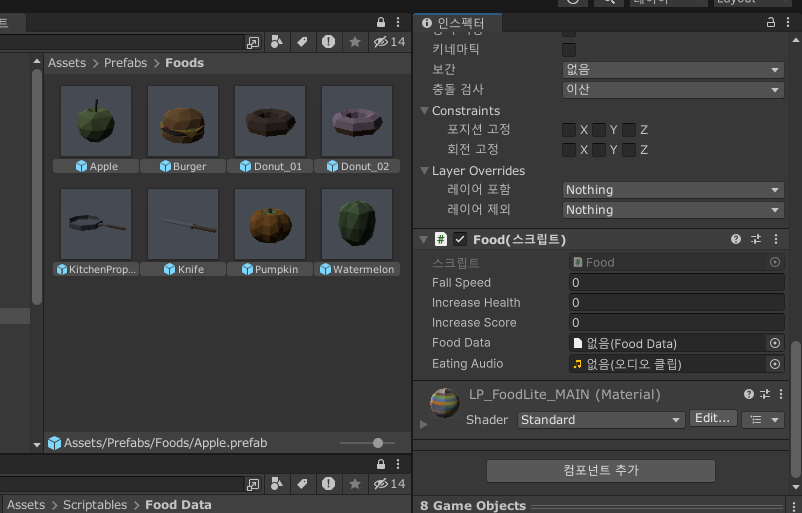
마지막으론 Food 스크립트를 넣어준다.
Food Data에 각각에 맞는 FoodData 에셋을 넣어준다.
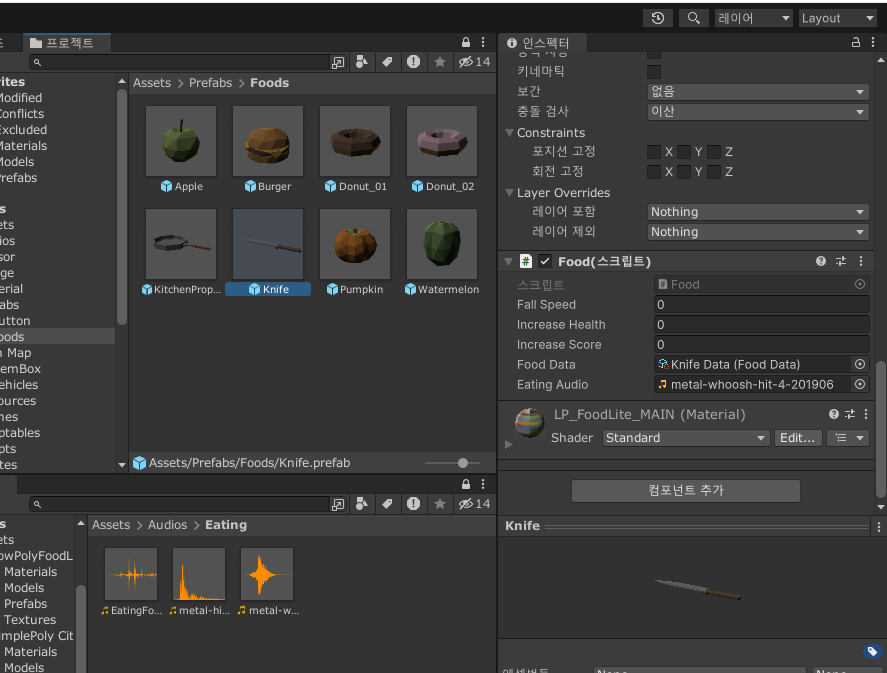
Eating Audio의 경우 프라이팬과, 칼이외에는 기존 먹는 사운드를 넣어주고,
프라이팬과 칼은 따로 다른 사운드를 넣어준다.
칼 사운드 : https://pixabay.com/ko/sound-effects/metal-whoosh-hit-4-201906/
프라이팬 사운드 : https://pixabay.com/ko/sound-effects/metal-hit-cartoon-7118/
이후에는 음식들의 기본 크기와 방향을 정해줄 것이다.
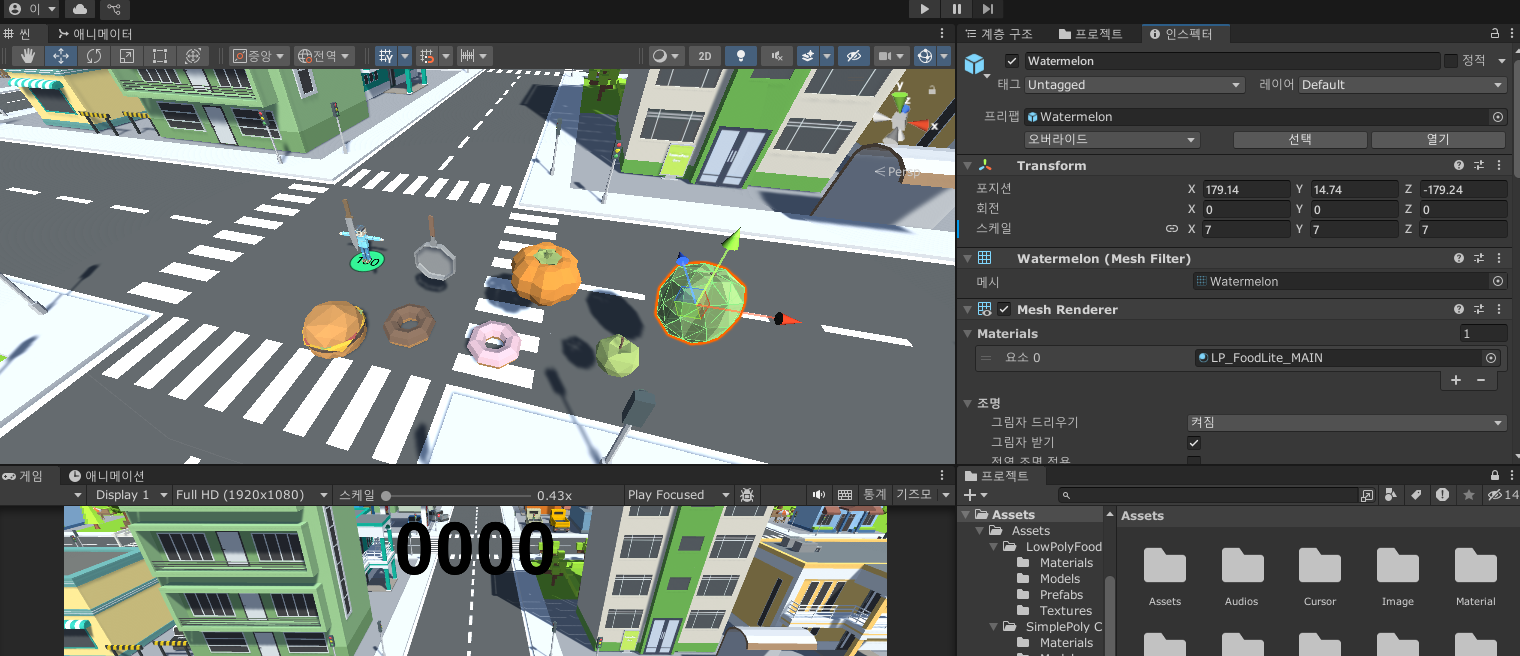
원하는 크기에 알맞게 크기를 설정해주고, 오버라이드를 해 프리팹의 Transform 값을 수정해준다.
(칼, 프라이팬 x회전 -90 xyz 스케일 4 , 호박,수박 스케일 7 , 사과 스케일 12.5 , 햄버거 스케일 17.5)
(회전값의 경우 변경이 복잡하여 적용되지 않을수도 있으니 프리팹에서 직접 수정하자...)
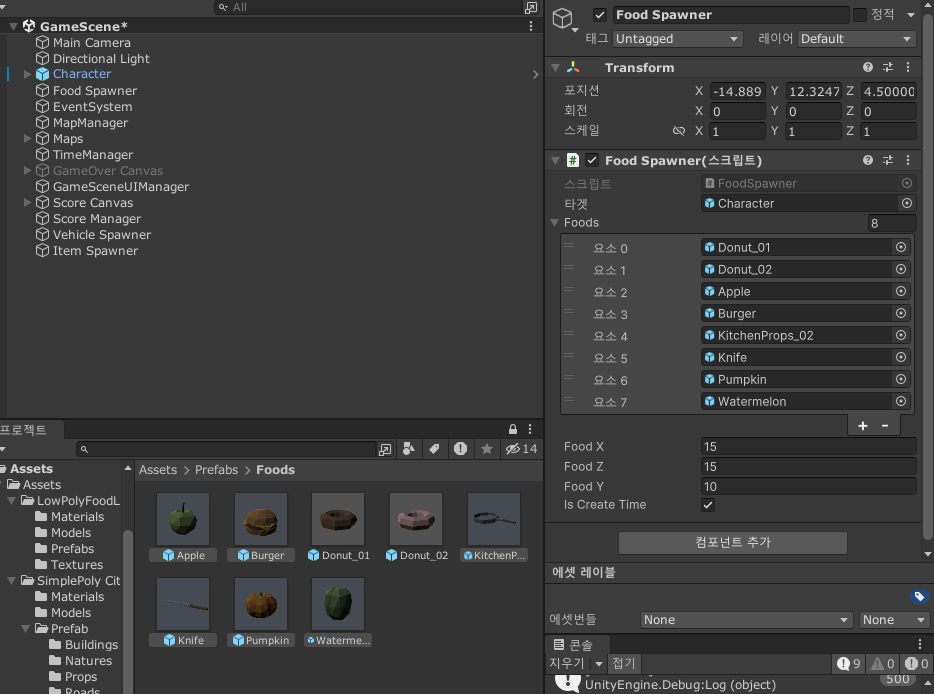
모든 변경점이 끝났다면 Food Spawner의 생성되는 음식리스트에 추가된 음식들을 넣어준다.
이후에 FoodSpawner를 약간 수정해 준다.
    public IEnumerator CreateFood()
    {
        while(GameManager.Instance.State && isCreateTime)
        {
            InsFoodPosition = new Vector3(Random.Range(-foodX, foodX), foodY, Random.Range(-foodZ, foodZ)) + target.transform.position;

            GameObject food = foods[Random.Range(0, foods.Length)];

            Instantiate(food, InsFoodPosition, food.transform.rotation);

            yield return new WaitForSeconds(TimeManager.Instance.FoodFallTime);
        }
    }
FoodSpawner 스크립트의 수정된 부분
생성시킬 때, 회전값을 Quaternion.identity로 하게 되면 회전값(0,0,0)으로 생성되니 food.transform.rotation으로 개별적인 회전값에 맞춰 생성시킨다.
이번에는 음식들의 속도값을 제어하는 TimeManager 스크립트를 수정해 줄것이다.
TimeManager에서 음식의 떨어지는 속도를 지정해주면 모두 같은 속도로 내려오기 때문에, TimeManager에서는 기존 음식의 떨어지는 추가적인 속도를 더해주는 방식으로 수정해줄 것이다.
먼저 TimeManager에서 추가할 변수를 및 프로퍼티를 작성해줄 것이다.
    private float addFoodFallSpeed = 0;
    public float AddFoodFallSpeed
    {
        get
        {
            addFoodFallSpeed = FoodFallSpeed - 5;
            return addFoodFallSpeed;
        }
    }
TimeManager 스크립트의 추가된 부분
addFoodFallSpeed라는 변수를 통해 FoodFallSpeed의 추가된 값만 가져오게끔 되어있다.
-5 같은 경우 처음의 FoodFallSpeed 기본값으로 잡아준다.
    private void Start()
    {
        fallSpeed += TimeManager.Instance.AddFoodFallSpeed;
    }
Food 스크립트의 수정된 부분
이렇게 떨어지는 값에 TimeManager의 FoodFallSpeed가 아닌 AddFoodFallSpeed의 값을 추가해준다.
이렇게 게임을 플레이 해보면 음식이 개별적인 속도로 떨어지고, 점점 빨리 떨어지는 것을 볼 수 있다.
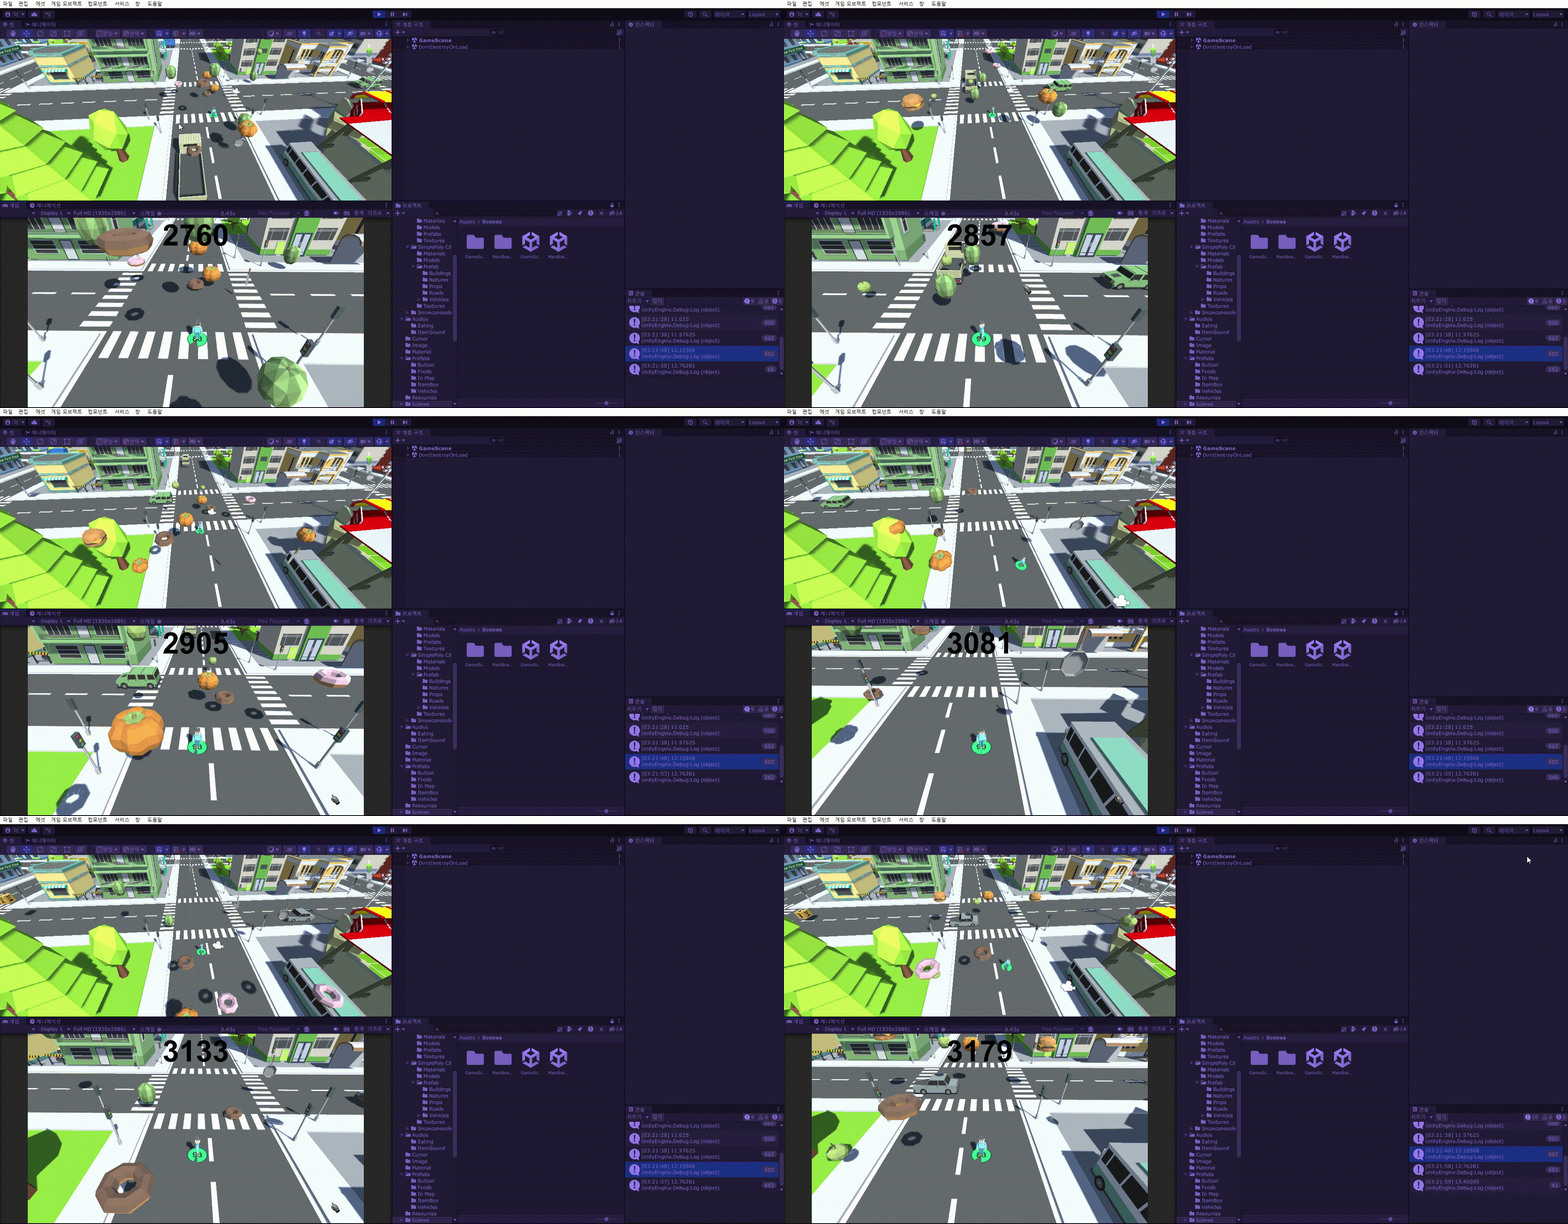
마지막으로 음식들의 정보를 알려줄 창을 하나 만들 것이다.
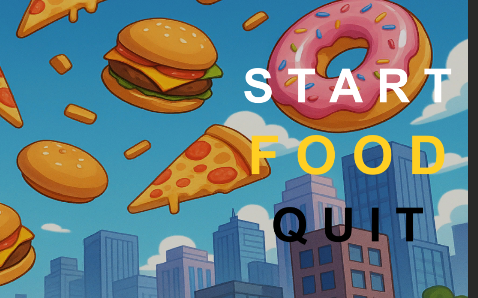
메인화면에 있는 Food 버튼을 눌렀을 때, 여러 음식들의 정보를 넣어 줄 것이다.
먼저 Food 설명 창을 만들 것이다.
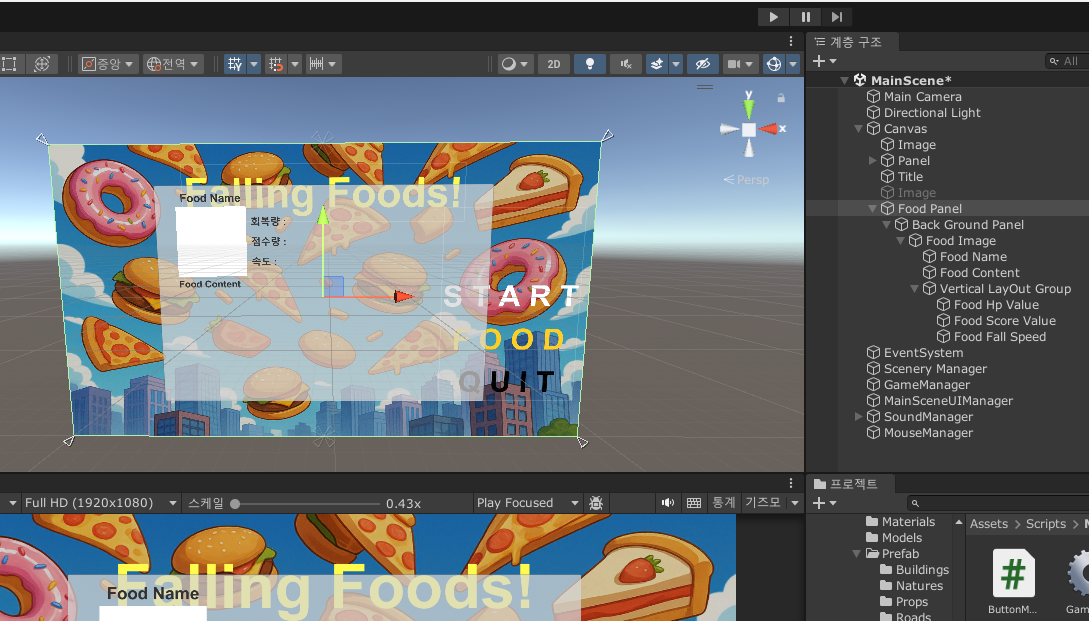
Food Panel 이라는 이름으로 화면을 뒤덮는 투명한 패널을 추가해준다.
이 패널은 이 창이 생겼을 때, 다른 버튼을 누르는 것을 막아주는 역할을 한다.
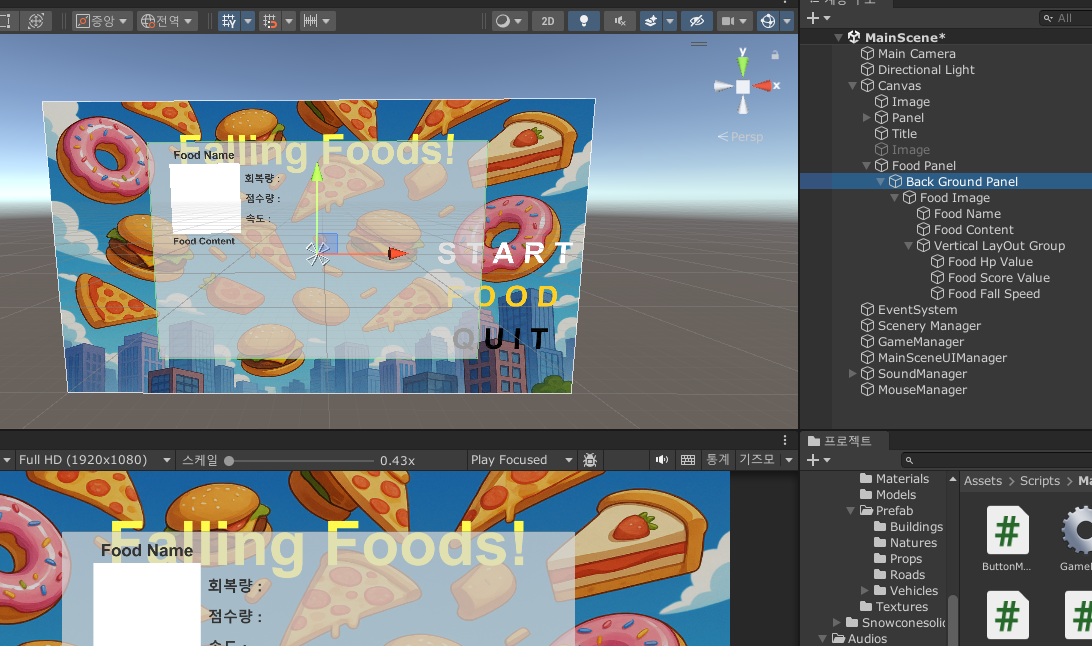
Back Ground Panel 이라는 패널을 자식오브젝트로 넣어준다.
이 패널은 불투명하게 창을 띄워 Food가 나올 창이라는 것을 인식시켜준다.
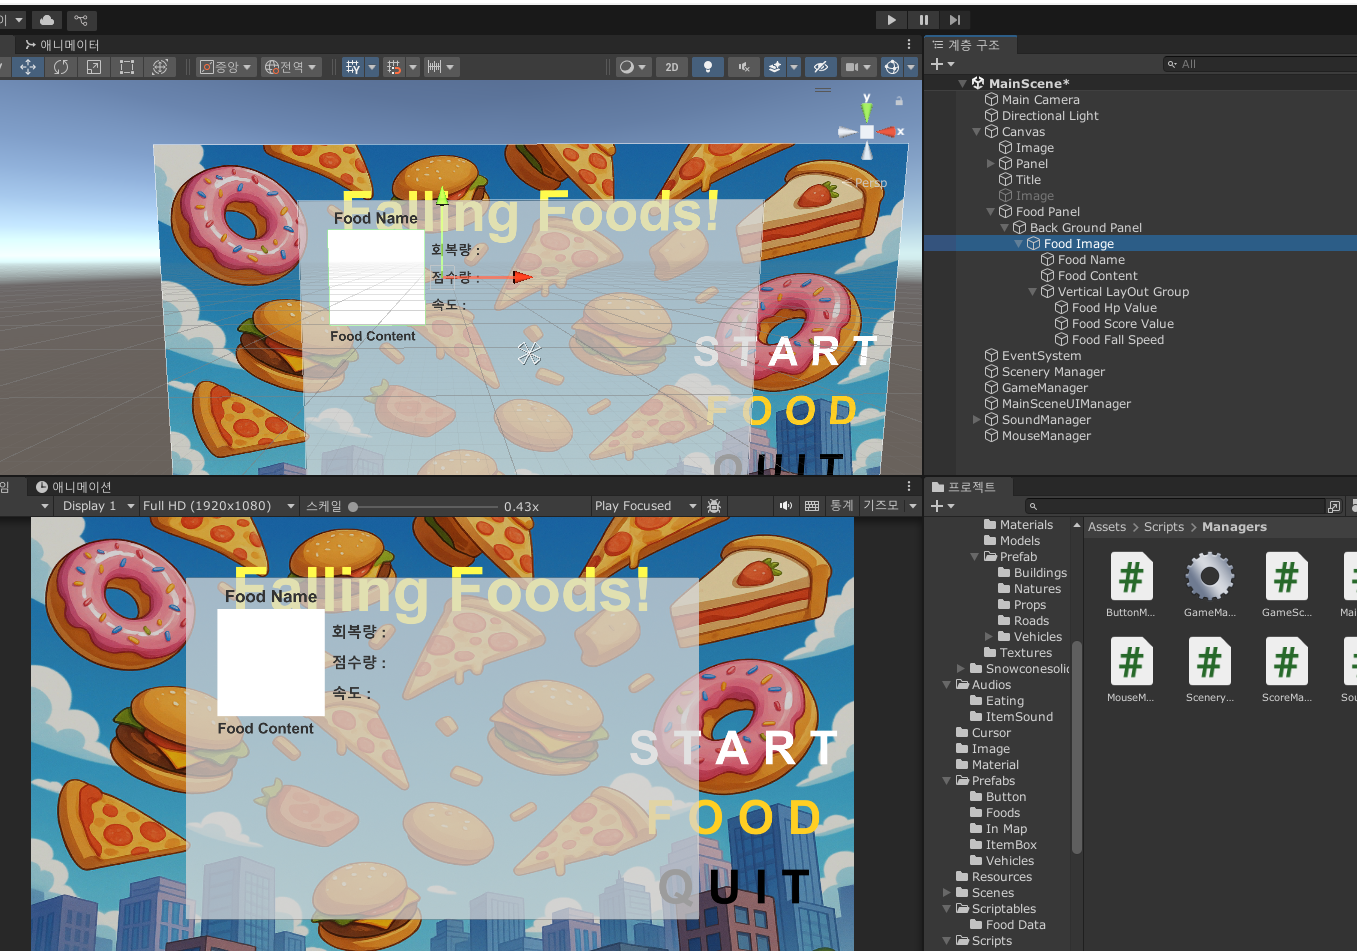
음식의 사진과 이름, 한 줄 설명, 그리고 음식의 관련 정보들을 만들어 준다.
Food Image의 경우 음식의 사진을 넣어줄 공간이며 이 오브젝트를 기준으로 Food Name은 음식의 이름, Food Content는 음식의 한 줄 설명을 적을 텍스트이다.
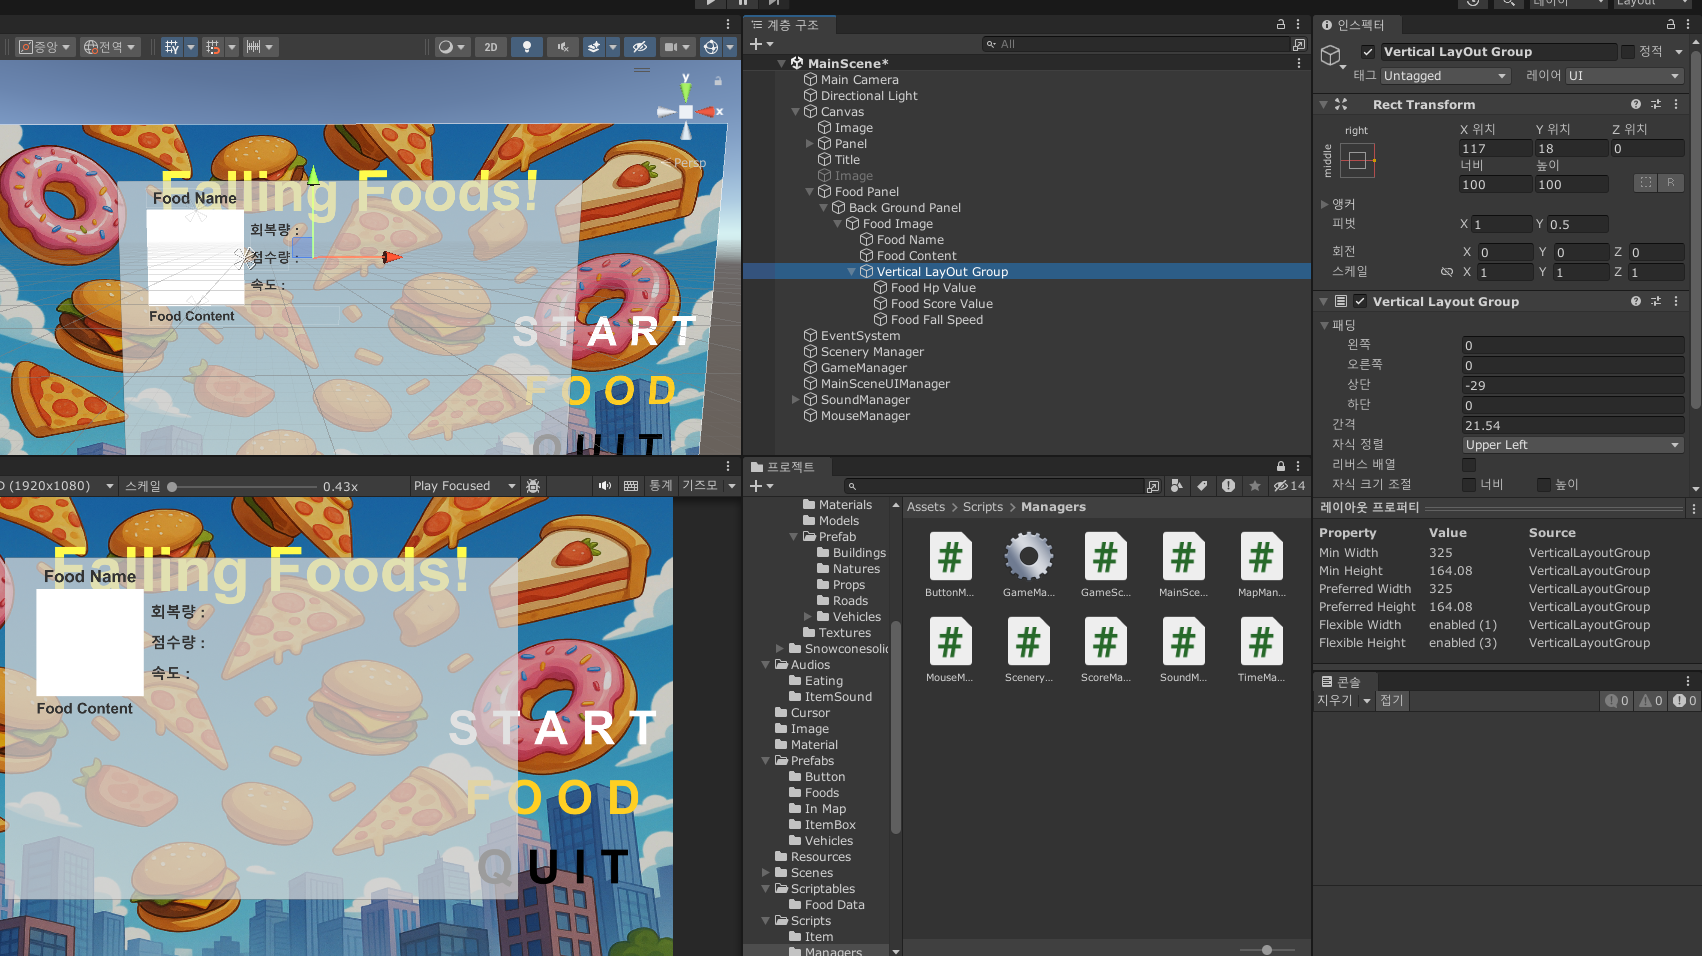
음식 관련 정보들은 다시 Vertical LayOut Group이라는 오브젝트로 묶어주었는데, 음식의 회복량, 점수량, 속도가 동일한 간격으로 벌어지는게 좋았기 때문에 사용하였다.
이후 Food Image를 프리팹으로 만들어 준 이후, 4개의 음식을 만들어 준다.
그 이후에 Food Image에 들어갈 사진을 구해야 하는데, 마냥 구할 방법이 없다고 생각 했기에 직접 캡쳐를 해서 구하기로 하였다.
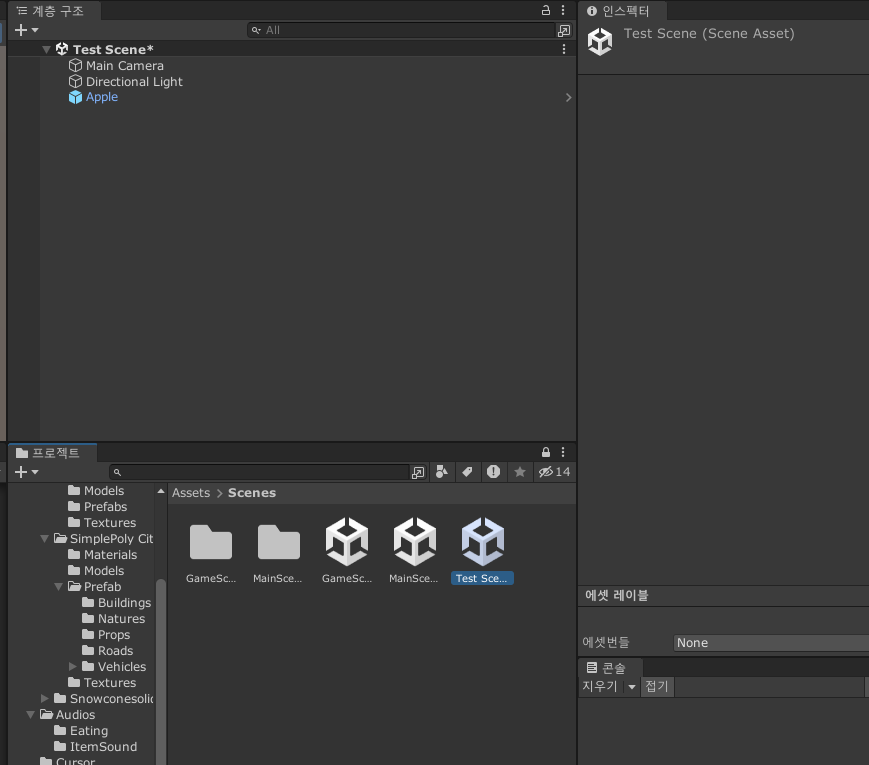
먼저 아무 Scene이나 만들어주고, 들어가서 사용되는 음식을 생성한다.
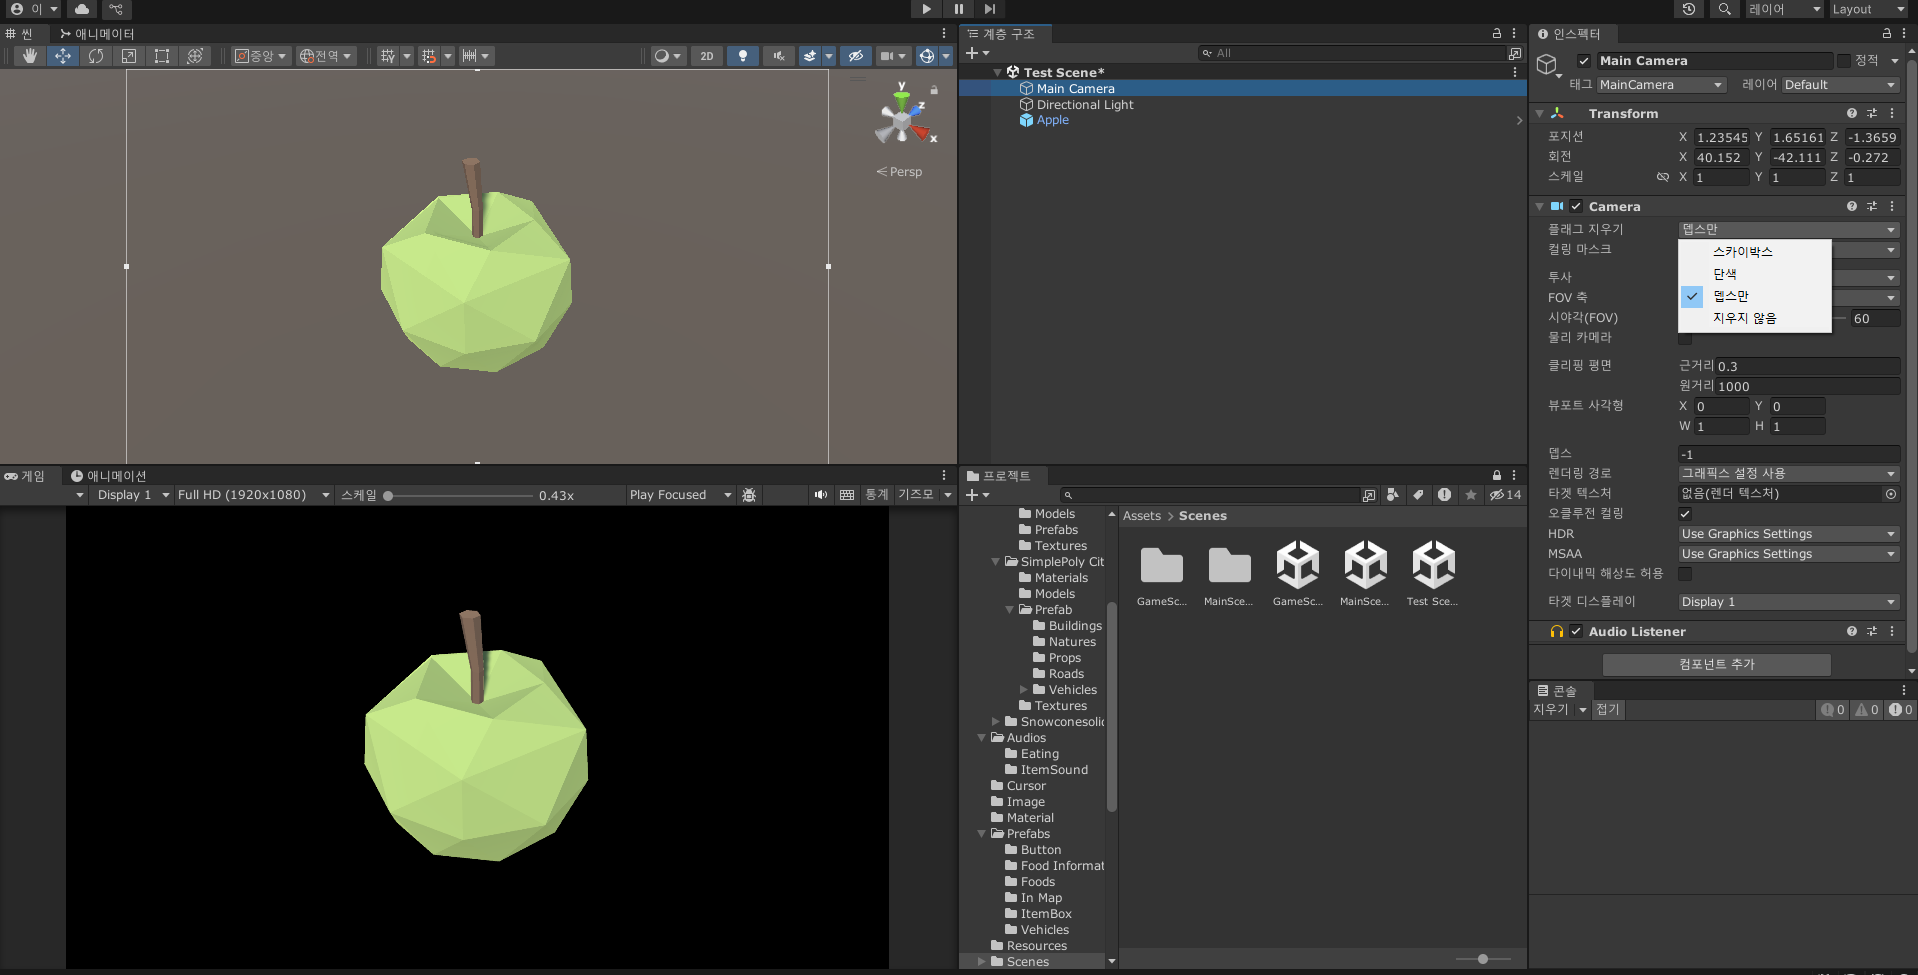
이후에는 메인 카메라의 Clears Flags를 '뎁스만'으로 바꾼다.
이렇게 하면 카메라에서 보는 화면 배경색이 검정색으로 되는 것을 볼 수 있는데, 이제 카메라를 눌러 Ctrl + Shift + F 를 눌러 각도를 정해주고 캡쳐를 해주면 된다.
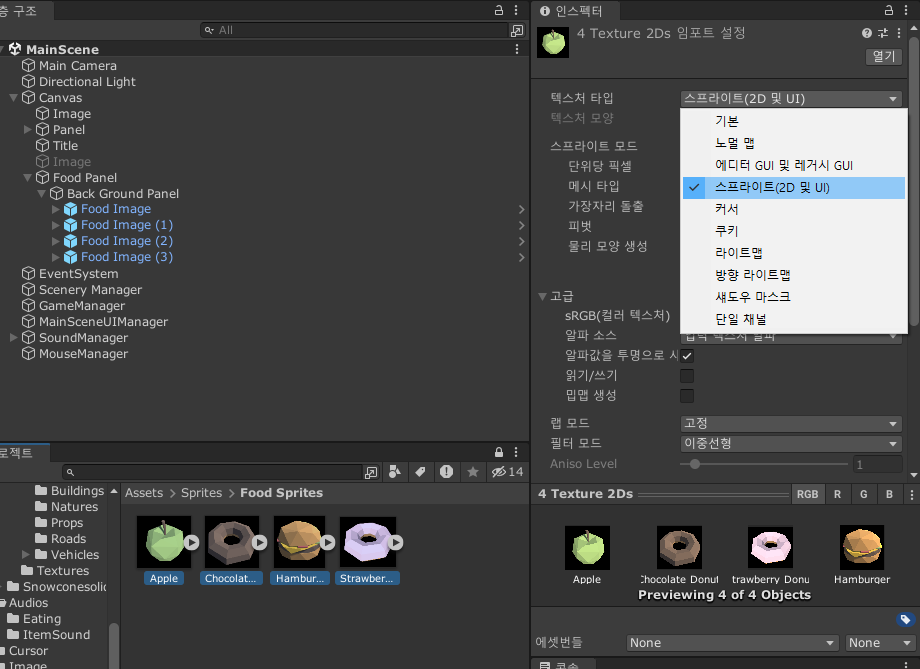
사용할 음식을 찍었다면 스프라이트 형식으로 바꾼이후 Food Image에 각각 넣어준다.
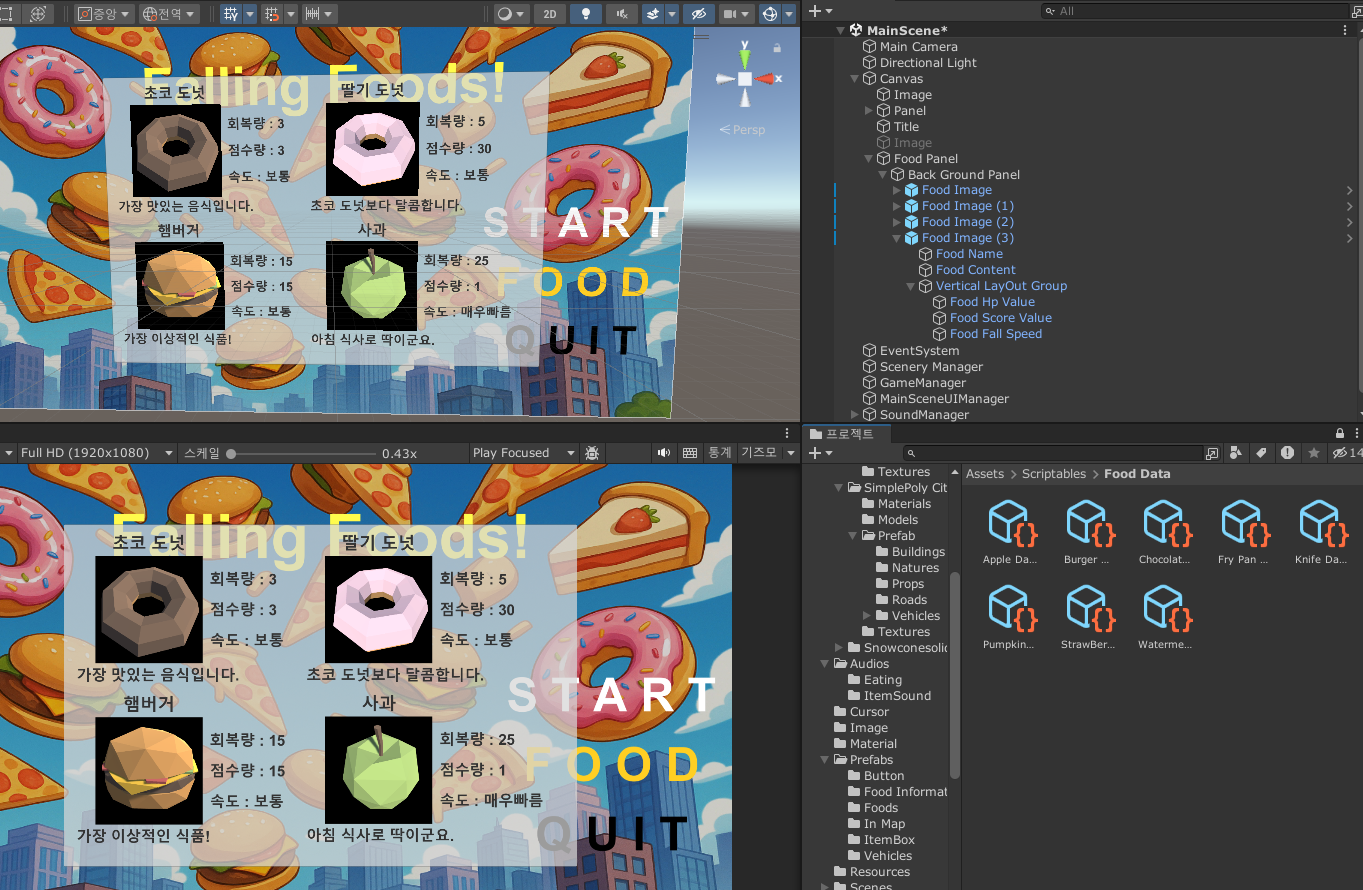
음식의 이름과 내용을 적어주고 데이터를 보면서 정보도 채워준다.
지금 보면 음식의 배경이 투명이면 좋겠지만 아직 내겐 그러할 여유가 없다...
이번에는 다음 창으로 넘어가는 버튼이나 창을 닫는 뒤로가는 버튼을 만들어 줄 것이다.
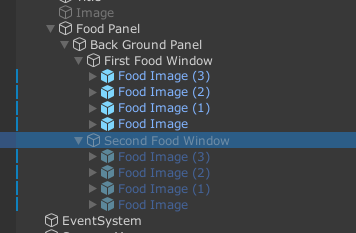
먼저 효율적인 처리를 위해 First Food Window라는 창과 Second Food Window 창을 만들어 첫번째 창에 있는 음식들과 두번째 창에 있는 오브젝트들을 분리하여 작업할 것이다.
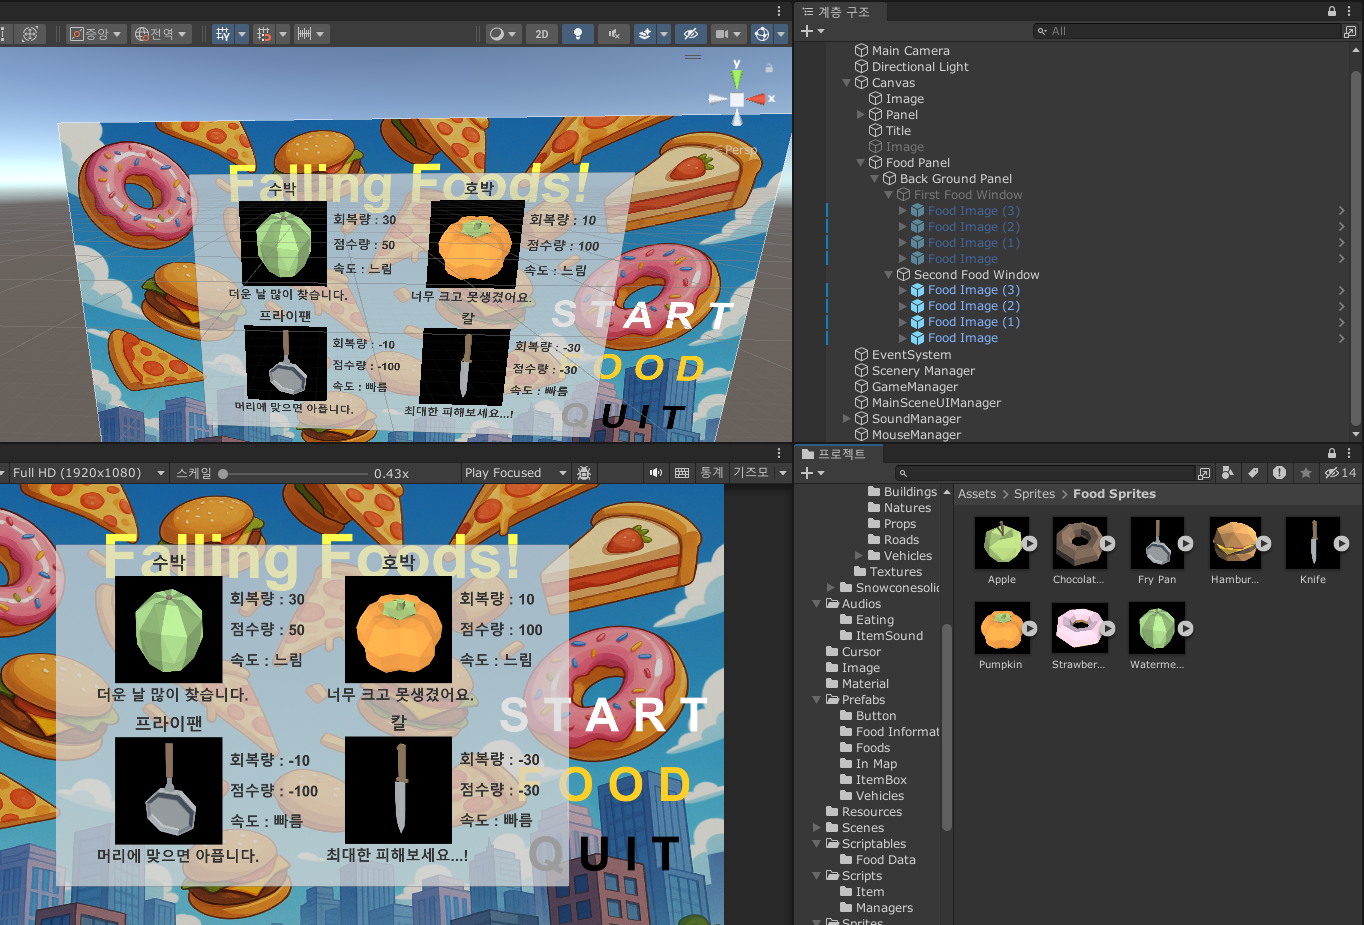
이후 스프라이트를 가져와 이미지를 부착하고 그에따른 내용들도 적어준다.
버튼을 창 왼쪽에 둘 것이기 때문에, Second Food Window의 x위치를 오른쪽으로 살짝 옮겨주었다.
이제 버튼들을 만들어 줄 것이다.
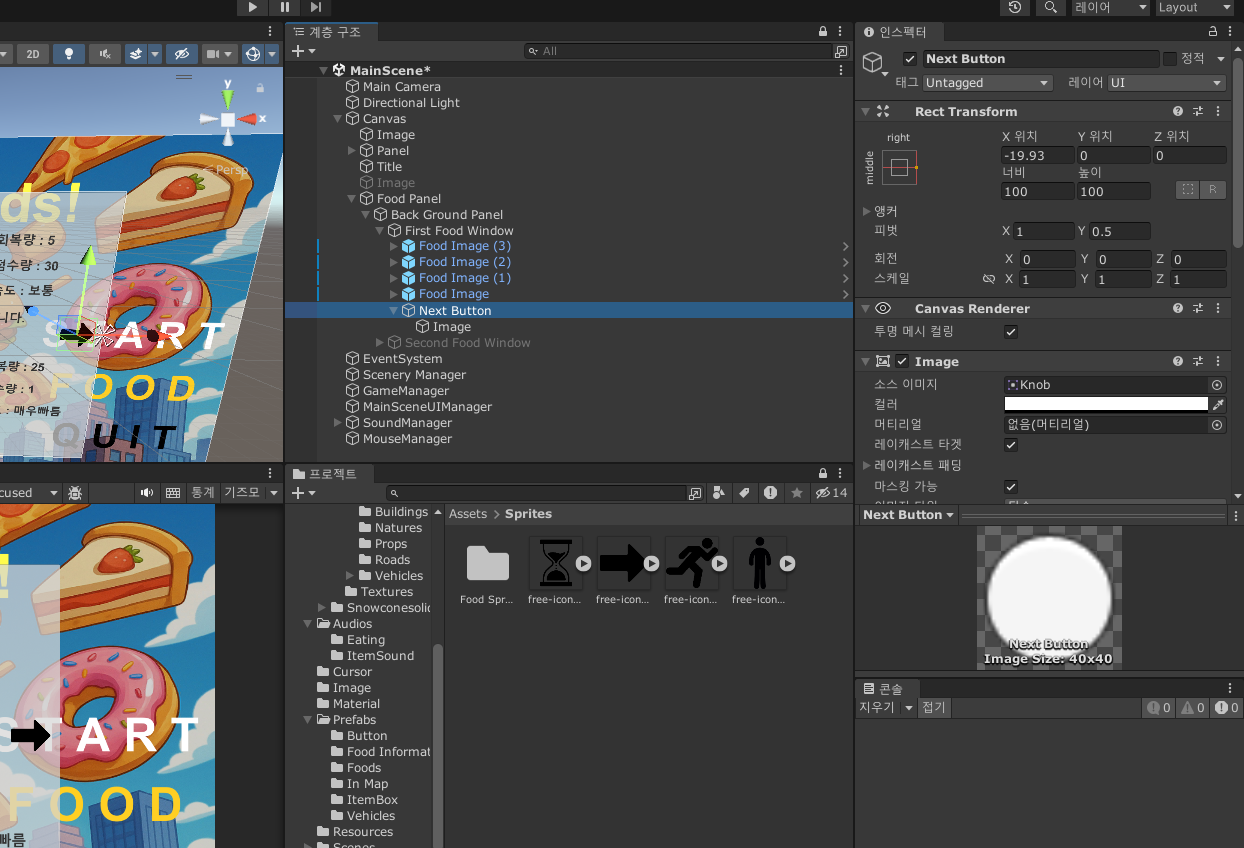
첫번째 페이지에서 버튼 하나를 만들어 준다.
버튼은 창의 오른쪽 중간부분에 위치하고 자식오브젝트의 Text는 삭제시키고 이미지를 추가하였다.
이후 이미지에 화살표 이미지를 넣어주고 버튼의 Image 컴포넌트는 삭제 시켜주었다.
화살표 이미지 : https://www.flaticon.com/kr/free-icon/right-arrow_6364358
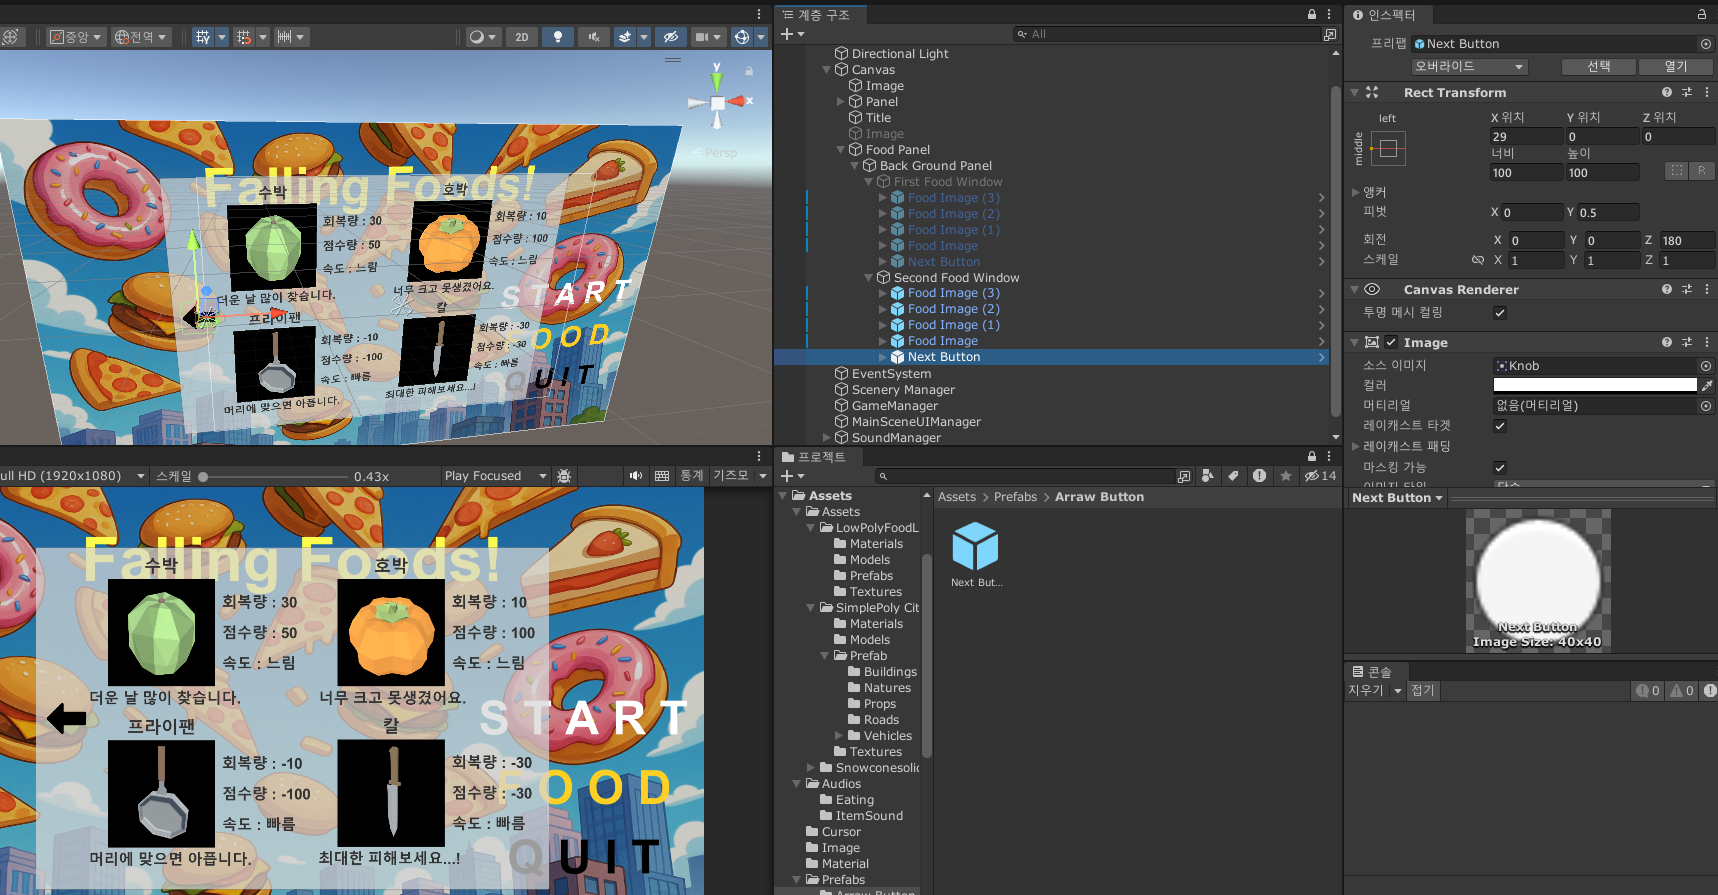
화살표 버튼을 프리팹으로 바꿔준 이후 두번째 창에 생성시켜준다.
화살표의 z회전을 180도로 하여 화살표가 반대족을 향하도록 한다.
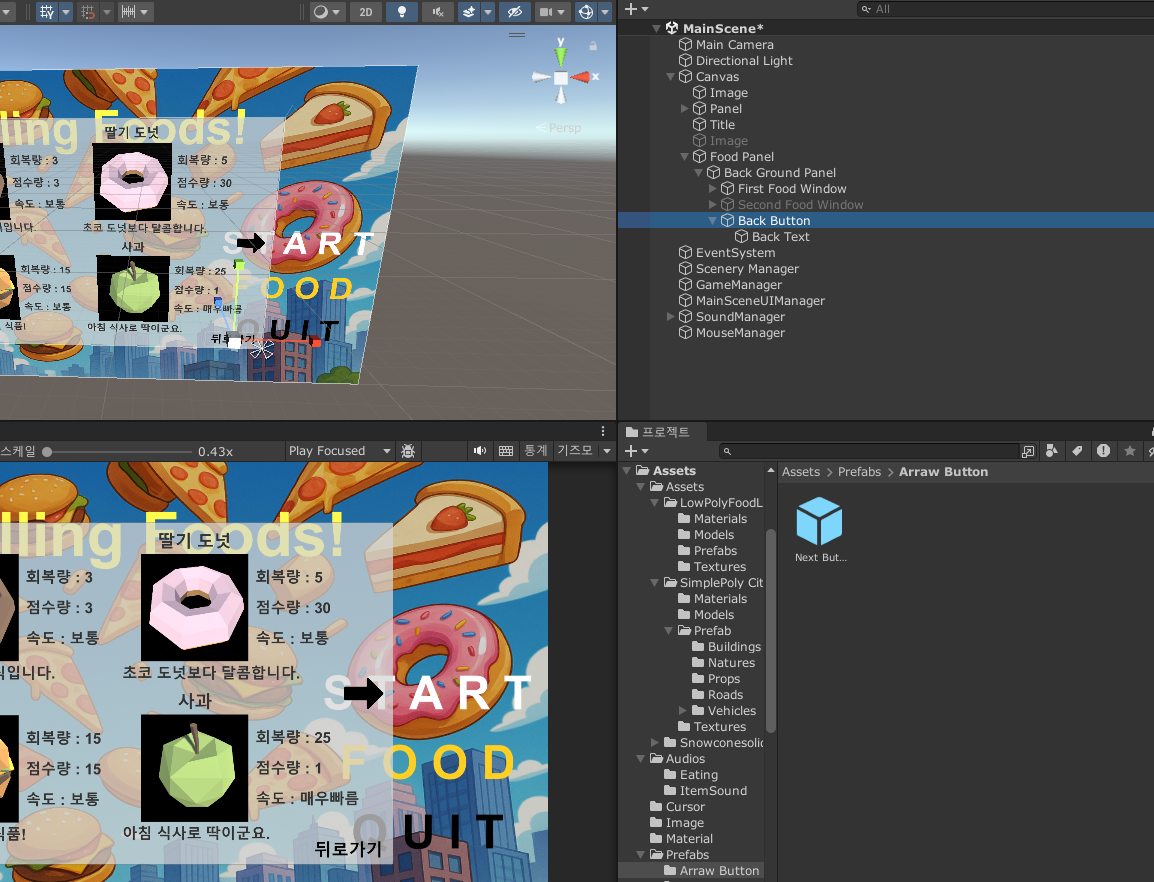
이번엔 창을 없애는 '뒤로가기 버튼'을 만들어 준다.
Back Ground Panel의 자식 오브젝트로 설정하여 창의 페이지가 바뀌더라도 이 버튼은 남아있다.
버튼의 이미지 컴포넌트를 삭제시키고 Text로만 '뒤로가기' 라고 작성해 주었다.
모든 디자인은 끝났다. 이제 스크립트를 작성해주면 된다.
using System.Collections;
using System.Collections.Generic;
using UnityEngine;

public class FoodContent : MonoBehaviour
{
    [SerializeField] GameObject foodPanel;

    [SerializeField] GameObject[] foodContent;

    [SerializeField] GameObject rightArrowButton;
    [SerializeField] GameObject leftArrowButton;
    [SerializeField] GameObject backButton;

    public void Execute()
    {
        foodContent[0].SetActive(true);
        foodContent[1].SetActive(false);

        foodPanel.SetActive(true);
    }
    public void RightArrow()
    {
        foodContent[0].SetActive(false);
        foodContent[1].SetActive(true);
    }
    public void LeftArrow()
    {
        foodContent[1].SetActive(false);
        foodContent[0].SetActive(true);
    }
    public void Back()
    {
        foodPanel.SetActive(false);
    }
}
FoodContent 스크립트
먼저 Food Content라는 스크립트를 만들어 Food창의 로직을 만들어 준다.
foodPanel의 경우 Food 전체창, foodContent는 페이지이다.
오른쪽,왼쪽 페이지로 가는 버튼과 Food창을 닫는 버튼을 담는 변수도 만들어 준다.
함수의 경우 모두 버튼에서 호출될 것이기 때문에 public으로 선언해준다.
Execute의 경우 Food 버튼을 눌렀을때 Food창을 보여주고,
RightArrow는 오른쪽 페이지로, LeftArrow는 왼쪽페이지로 이동시켜준다.
Back은 Food의 창을 닫는다.
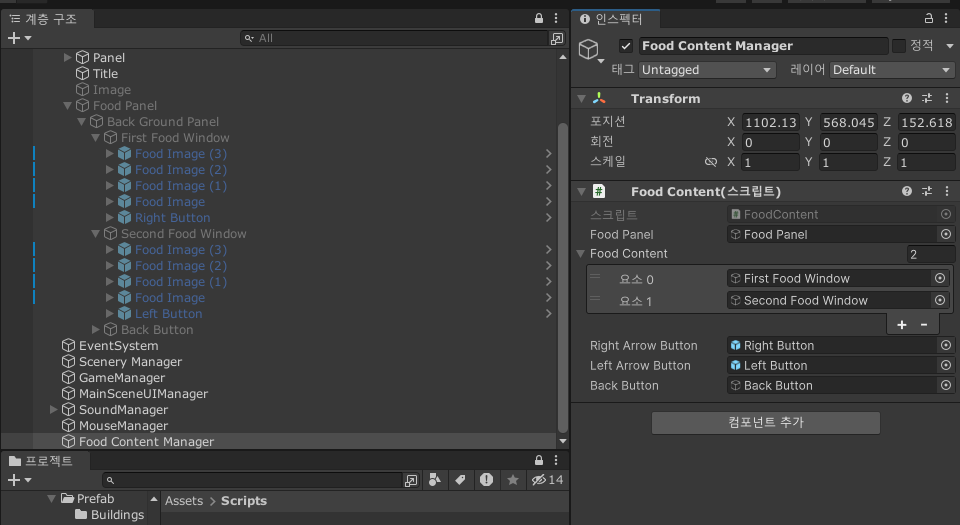
이후 유니티 화면에서 변수를 채워넣어준다.
Food Content Manager라는 빈게임 오브젝트안에 Food Content 컴포넌트를 넣어준다.
이후 각각 변수에 알맞게 게임 오브젝트를 넣어준다. 이때 FoodContent의 순서를 주의해주자.
이제 필요없는 코드는 지워주겠다.
    [SerializeField] GameObject foodButton;

        public void FoodButton()
    {
        SceneryManager.Instance.FoodLoadScene();
    }
MainSceneUIManager 스크립트에서 위 코드를 지워준다. Food의 경우 해당 스크립트에 있을 필요가 없다.
    public void FoodLoadScene()
    {
        Debug.Log("FoodLoadScene");
    }
SceneryManager 스크립트의 위 코드도 필요가 없으므로 지워주도록 하겠다.
다시 유니티 화면으로 넘어와 버튼 클릭시 함수를 호출할수 있도록 해주겠다.
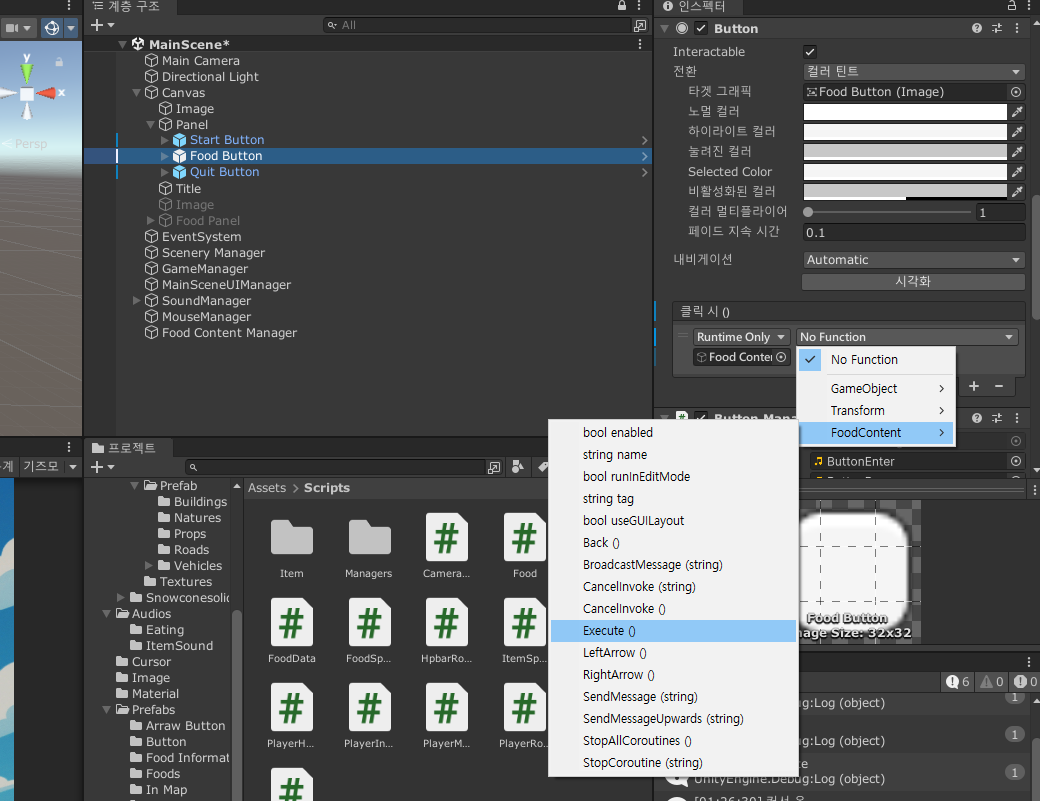
먼저 Food Button을 눌렸을 때, Food Content의 Execute함수가 호출되도록 해준다.
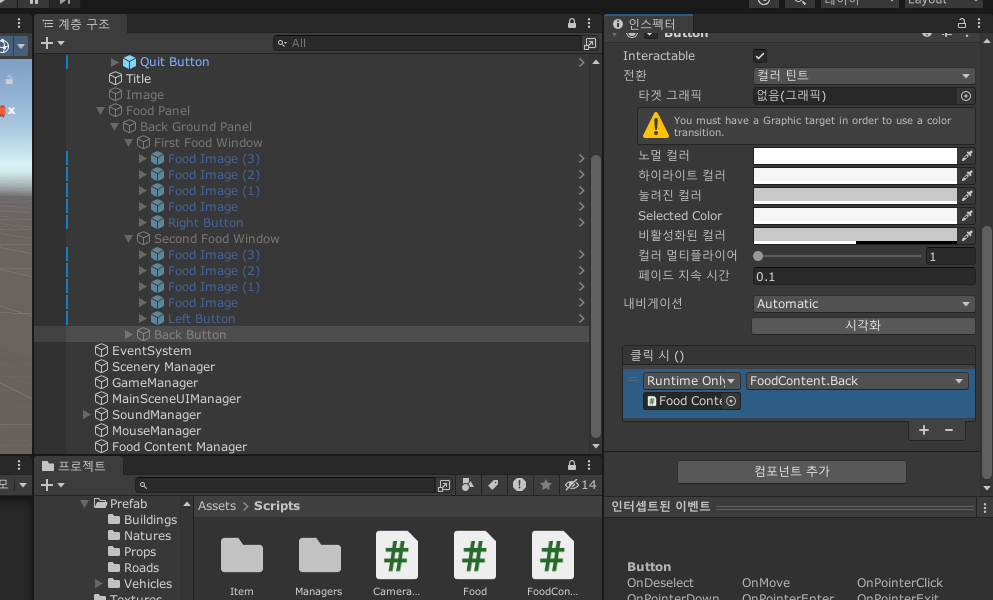
이후 Food창에 있는 세개의 버튼에 알맞는 함수를 넣어준다.
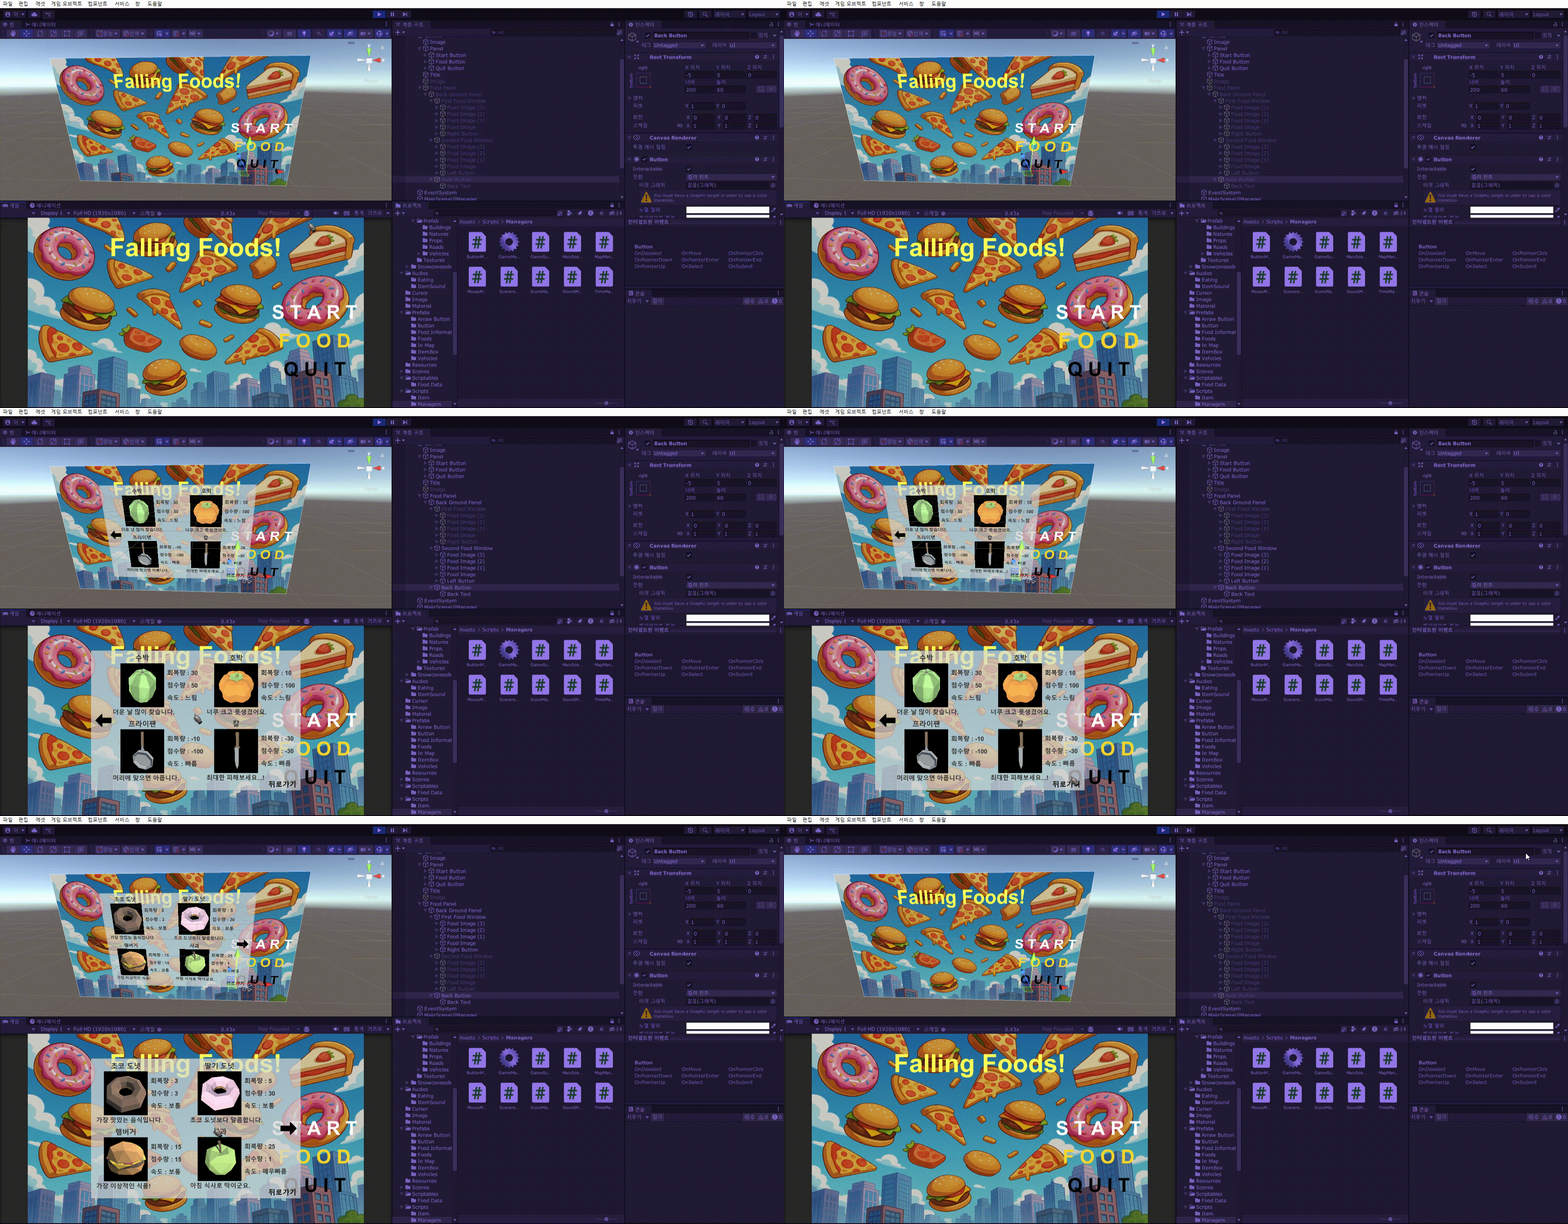
Food 버튼,창 창에 있는 페이지를 넘기는 화살표와 뒤로가는 버튼까지 잘 작동하는 것을 볼 수 있다.
개발기간 25/ (05/ 01,06~08,13~15,18~20,25~27,29,30)
