the important thing is how do you manage the changes?
let's suppose it at any moment you want to go back to maybe some other versions of that project.
Then you can use something known as Version Control System(VCS). git.
history of VCS
1. local VCS

2. Centralized VCS
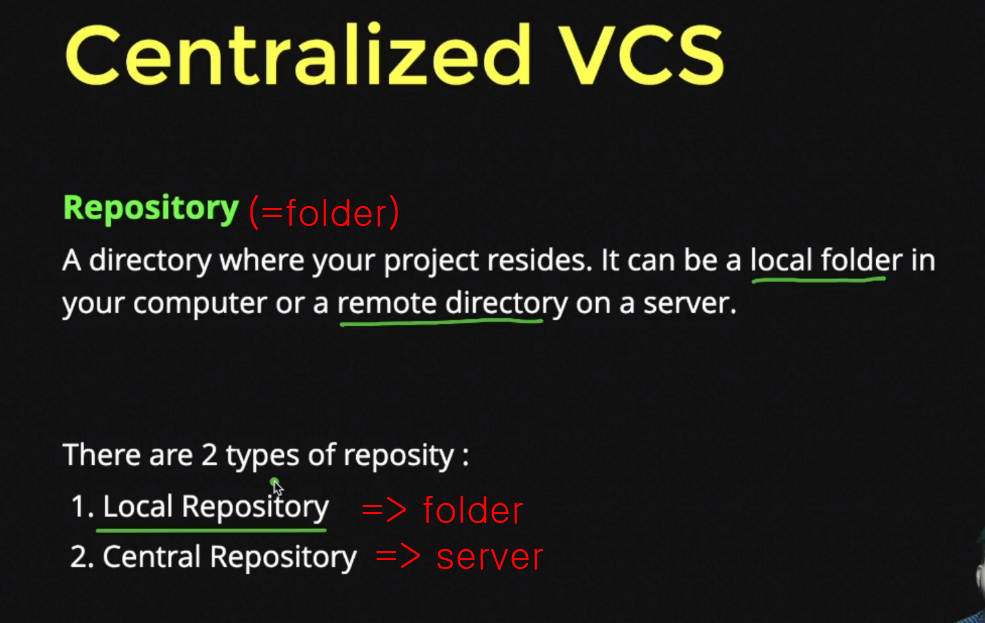
Everyone work in a single repository and each user get to work on the same one repository only.
And that is the biggest disadvantage.
Another disadvantage is you will lose the project if this repository that distribute a server is done or if the hard disk of the server is corrupted.
3. Distributed VCS ( GIT!)
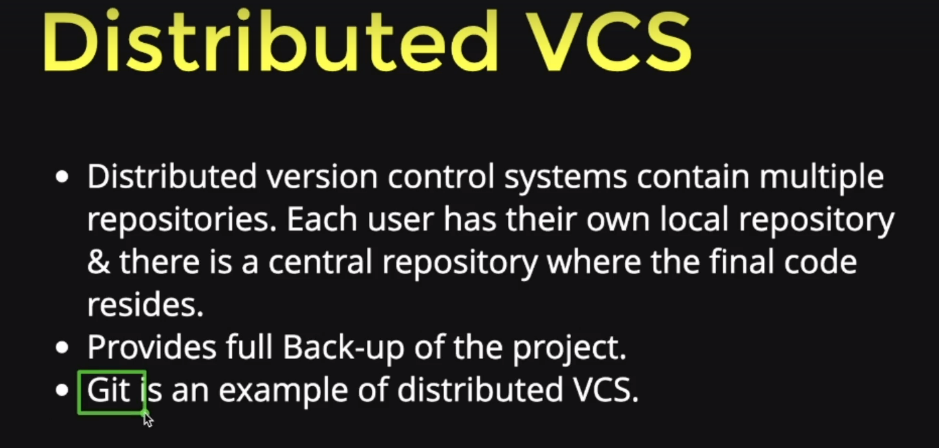
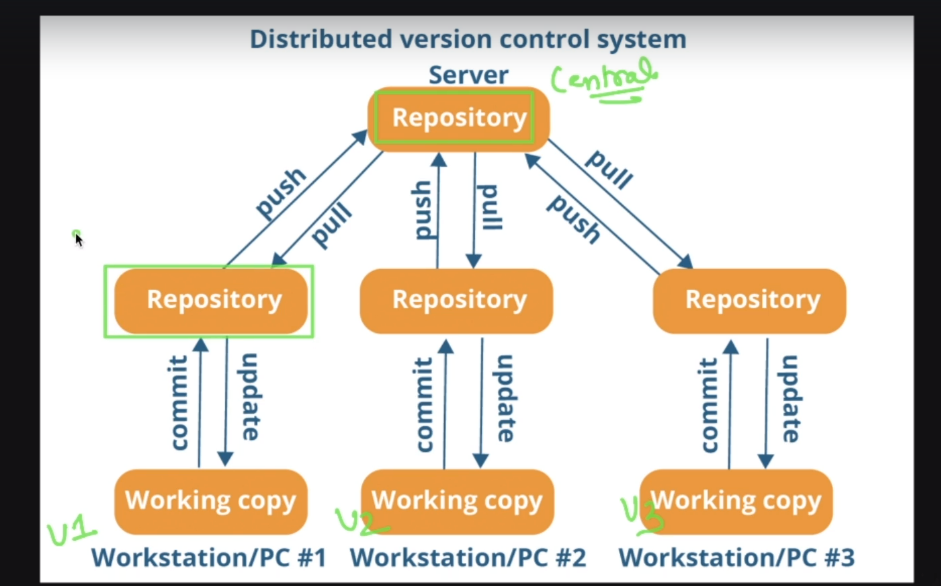
Each user has thier own local reposietory sothat we don't have to worry about a server down or server corrupted.
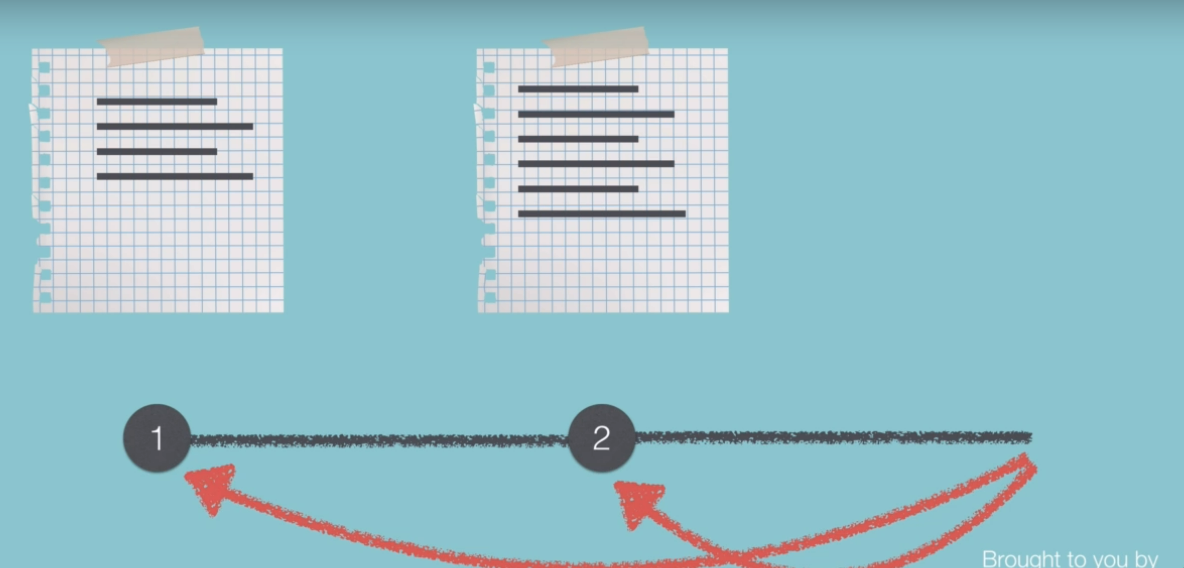
- So let's talk about version control in its simplest form.
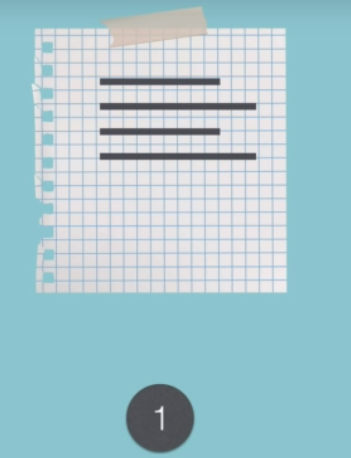
Let's say that I create a new code file and I write a few lines in it.
Now I decide to put it under version control using Git
and let's say that I call this save point as number 1, now this is my first version.

- later on as I progress I write maybe a few more lines of code.
And at this point I decide to make another save point and I call this my second version.

- So further down the line I accidentally screw up my entire code file and it's irreparable and I get to the point where I would rather burn my entire code file rather than having to try and fix it.
You do get into these situations because very often your code is interlinked and each class depends on another and sometimes you can screw up(=a mistake) in a way where all hope is lost.
I simply just want to roll back to the last save point.
We can do that using Git.
So you can either compare your current code file so the current mess that you've made against a previous version so that any of the save points before.
You can go as far back or as far forwards as you like as long as you know which version you want.
Now the first thing we're going to do is open up terminal(CMD) and inside terminal we're going to navigate to our desktop.
The first thing I'm going to do is I'm going to cd into my desktop. And here I'm going to create a new directory called Story. Then I'm going to cd into this Story directory and if I show you with ls you
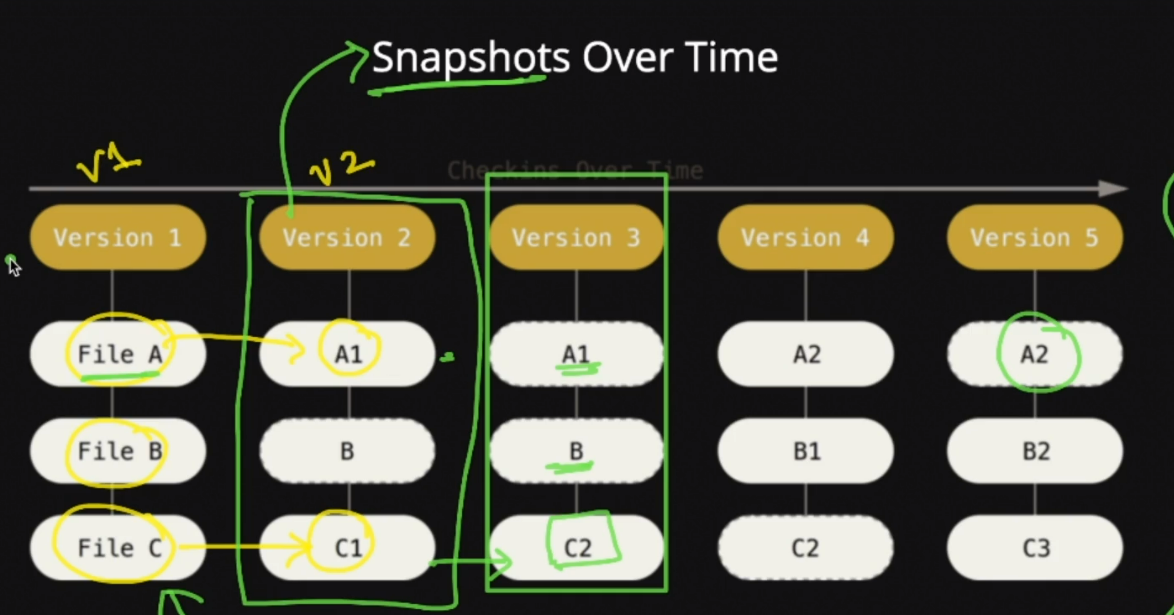
Git stores snapshot of your project.(=photograph informally and quickly something like a screen shot current status.)
this is one one example.
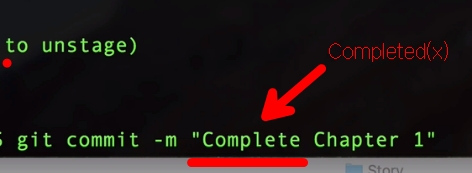
git commit -m ""
So the command is git commit and I'm going to use the -m flag to add a commit message. The commit message is really really important.
It's something that helps you keep track of what changes you have made in each commit.
So when you create a new save point, you want to be as explicit as possible about what changes were made between the last save point and this current save point.
git commit -m "(message)" -> making save point
Now the thing that you'll realize is that usually with commit messages they are written in the present tense and this is the best practice.
it's actually by convention that you should always use the present tense.
So it's like you are doing it now. You're submitting your changes now.
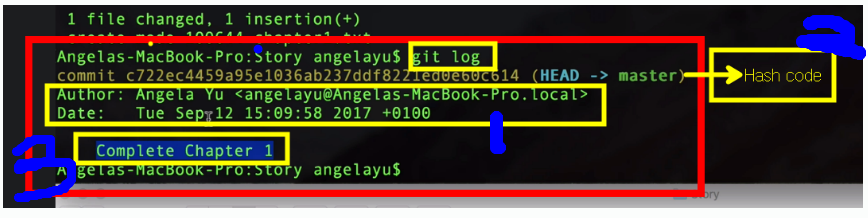
git log
-
you can see that this commit was made at this time by this person.
-
And it also has a hash and this hash uniquely identifies this particular commit.
-
And then right at the end you see this commit message of what this save point was all about.
git status

you can see that there's two files that are untracked which are only in the working directory and not yet inside the staging area.
So we can put it into the staging area by simply adding each of them as we did before, git add and writing something like chapter2.txt and then doing git add chapter3.txt.
git init
git add vs git add .
But as you can imagine if you have quite a few files then it can get incredibly tedious(tiresome( having to do by one by one.
So of course there is a better way.
So instead of adding these files one by one, we can actually simply just say git add and then use the So now if I go ahead and hit enter and then let's go to git status again, you can see that there's two new files that have been added to the staging area.

And now we're going to commit those two files to a new commit to a new save point.
Git commit (process one by one)
Working Directory ? local directory?
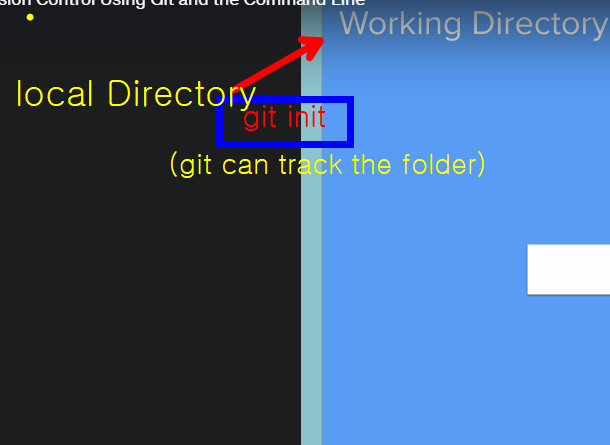
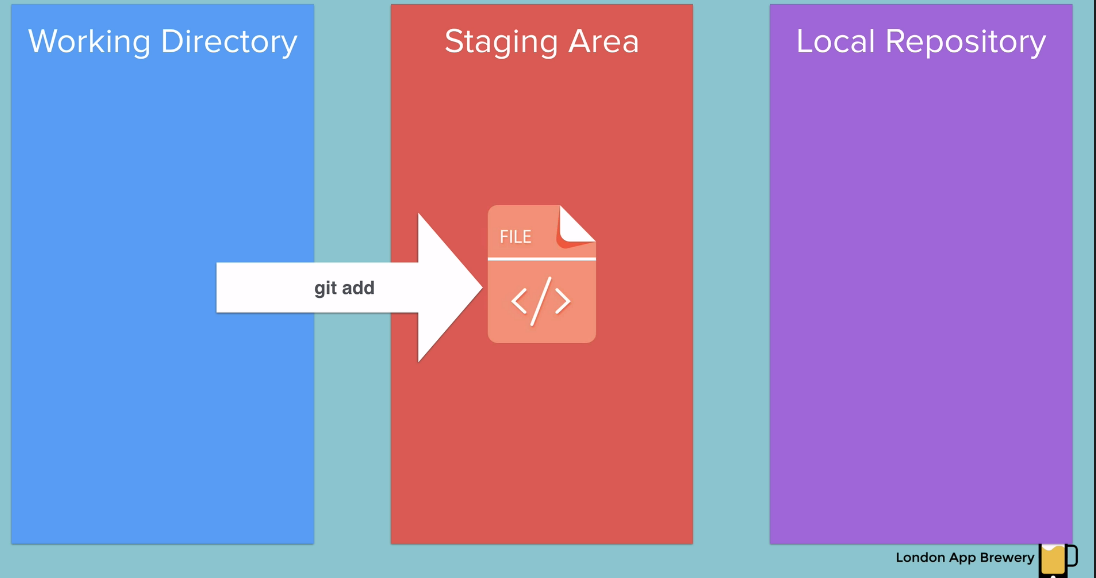
When we said git init command in our CMD, it means that we created a file in our working directory inside our local directory.
So the working directory is the local folder or the local directory(inside our computer) where you initialize your Git repository.
When we said git init command, we did that inside the story directory. So that becomes a working directory.
And from now on Git is going to try and track the changes that it sees between the working director and the local repository.
local directory를 working directory로 만든다는 것의 의미는 그 folder안의 file 들을 git이 file tracking 할 수 있는 상태로 만들어 주는 것이다. 그리고 그 tracking 한 정보들을 git server에 저장된 local repository와 비교한다.
Staging Area - why is it needed?
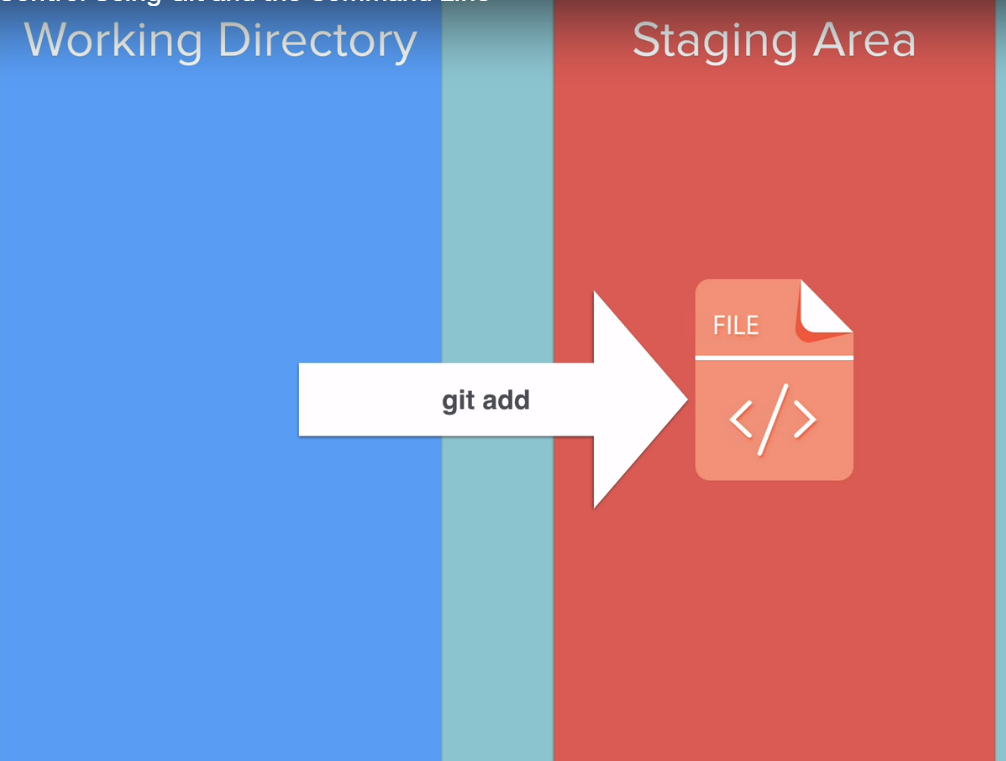
and then we used git add to push it to the staging area.
Why do we need this extra step? why not just go from the working directory straight to the repository?
Well sometimes you might not want to add all of your files to be tracked or all of your files to be committed.
So the staging area is a good place to try and figure out what are the things that you want Git to ignore and what are the things that you want to be tracked.
So once we've used git add we've put all file into the staging area and we're happy with the changes that we are going to commit.
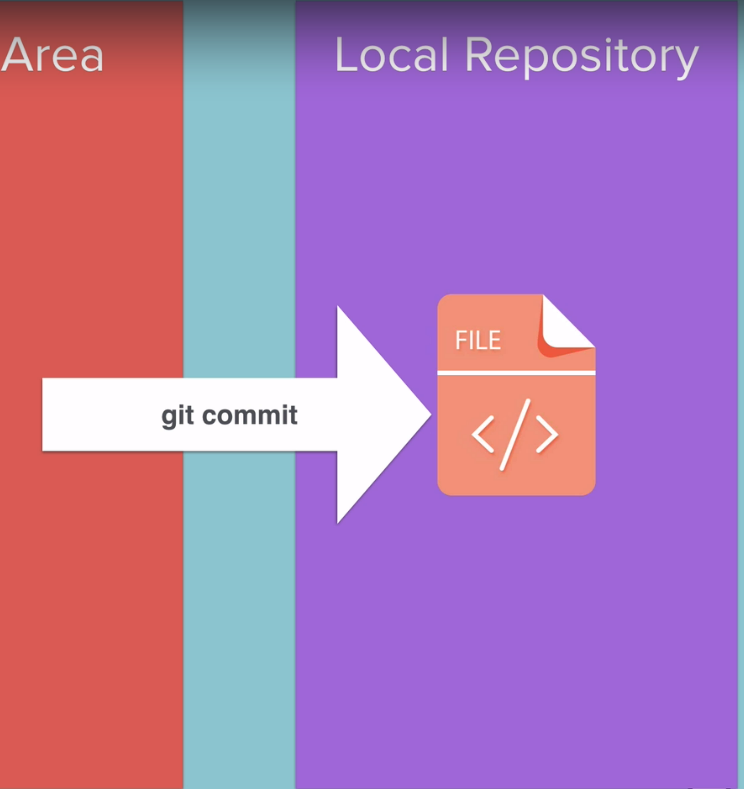
then the next step is to go ahead and commit it using the git commit command.
So now our file is inside our local repository. so that .git and that version is given a name through the commit message.

git checkout
So that means that even if we've messed up our file, we can still use the last version that's under version control and we can use a special command called git checkout to revert back or rollback to the last position in our local repository.
I can actually revert the changes that I've made locally in my working directory.
So at this point you can use git status to see that we have modifications in our chapter3.txt file that have not yet been committed or added to the staging area.
So if we wanted to we can actually revert this back to it's previous glory.
git diff
But before we do that, we can use a git command to check out one of the differences between the current version of chapter 3 and the last save point in our Git repository.

So to do that you can use the command git diff, it means the difference, and we'll give it the chapter 3 file name.
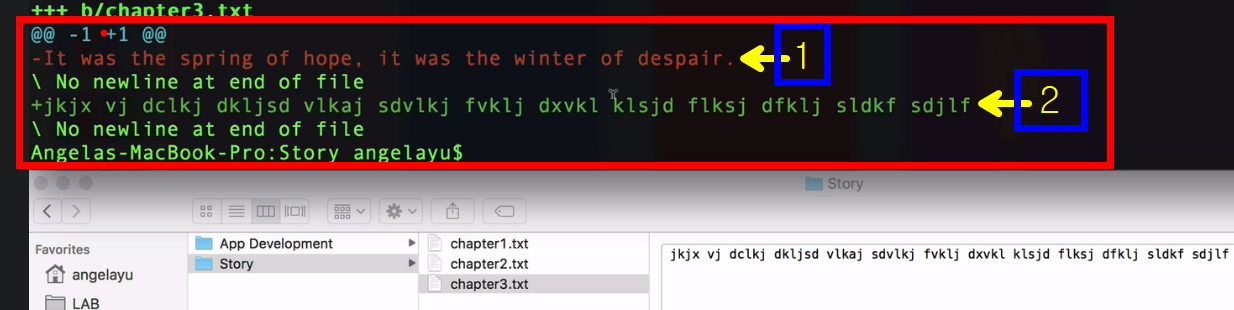
And if you hit enter, you can see that this is the part that was deleted(1),
so the part in red(2), and then this was the part that was added which is our gobbledegoop.
So now if I've looked at these differences, it might just be that you know there's only a few mistakes in my new version of chapter 3.
and if you would roll back to the previous version. So if you want to do that then there is a command called git checkout that is going to be really really useful for you.
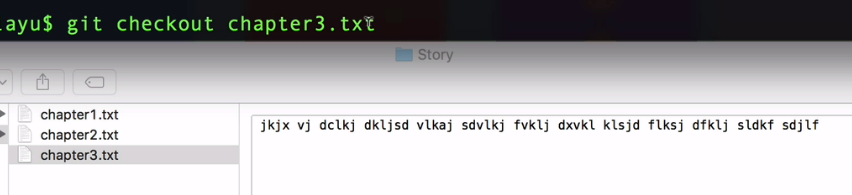
and then we're going to specify the name of the file that we want to checkout which is chapter3. txt.
Once I hit enter on this command that basically asks to roll back this chapter 3 to the last version that was committed in our local repository.
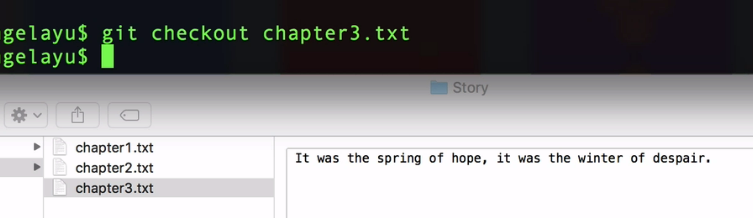
So if I hit enter, you can see that almost immediately my chapter 3 has been restored to its previous version.
git init
(your the local folder (inside your computer) becomes a working directory)
git add .
(Working directory => statging area)
git commit -m "complete chapter1"
(Staging Area => Local Repository)
git log
(see time, person, hash, commit message)
git status
(see untracked files which are only in the working directory and not yet inside the staging area)
git diff
(checking the difference between current version and previous version)
git checkout (File name)
git -remote add origin URL
And here I am going to say command git log to see what previous commits we've got.
And I would like to push both of these commits on to GitHub.
So to do that the first thing is creating a remote.
So it's telling my local Git repository that I've created a remote repository somewhere on the Internet and I want to transfer all of my commits over there.
origin? (name of remote)
So the command that we're going to use is git remote add origin.
Now origin is simply the name of your remote and you can theoretically(=in principle) call it anything you want. You can call it bacon if you want.
But by convention and it's highly recommended that you simply keep the name origin and the reason is because most programers are used to the conventional naming and that means it will be much easier for them to understand what's going on in your projects when they have a look at it instead of you doing something completely different.
So git remote add origin and then we're going to paste the URL of our remote repository on Git
origin is simply the name of your remote, keep the name origin is a code convention
git push -u origin master
So we're going to say git push -u origin master.
And what this line of code does is that it pushes your local repository to the remote repository using the u flag or the u option which basically links up your remote and your local repositories.
And then we're going to push it towards the remote that's called origin and we're going to push it to the master.
master branch?
So the master branch is simply the default branch or the main branch of all of your commits.
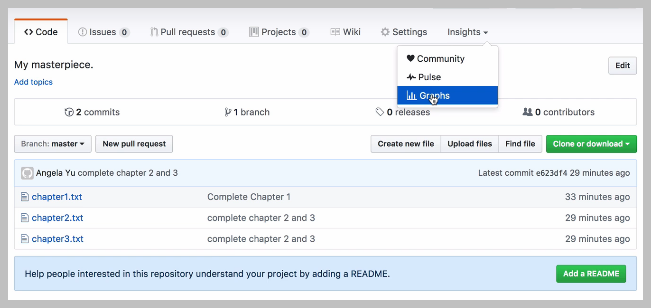
So if you go to insights, graphs and go into network, you can actually see our mass the branch which currently only has two save points or to commits.

If you hover over them you can actually see the commit messages of each of these.
Now back to the main page(click code) and click commit you can see all of the code if it's code file or in all cases just a text file.
It's good at tracking your save points and being able to revert to previous versions in the past.
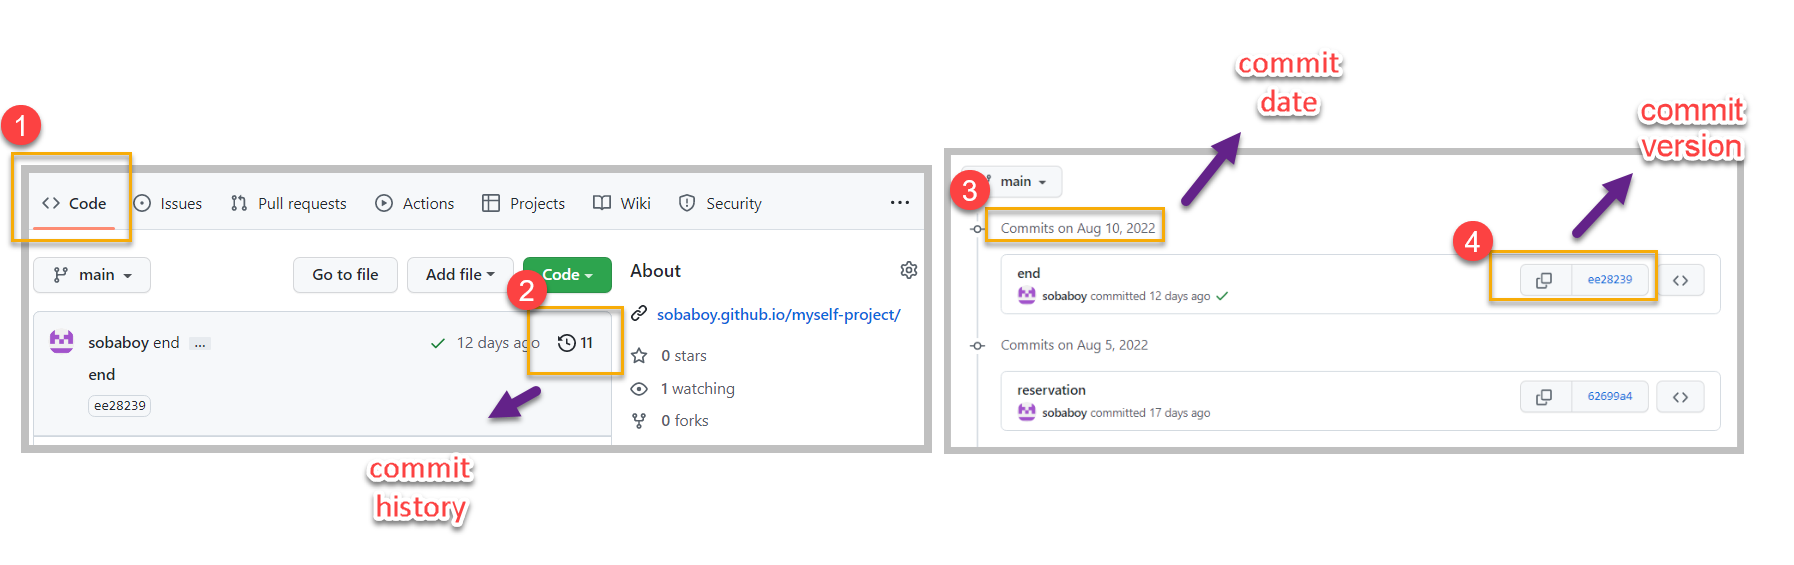
you can see when they were commited
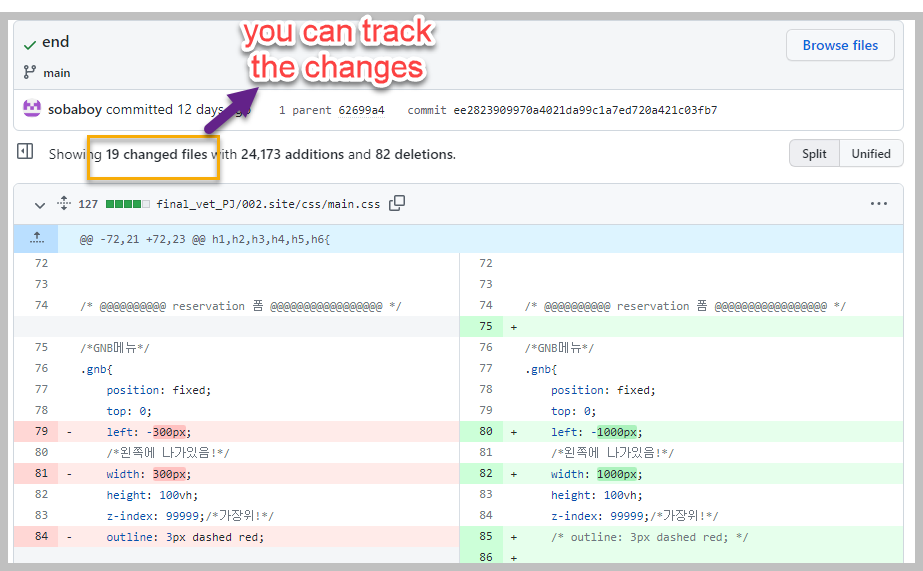
and also if you click on it you can see the version-- you can see the changes that were made at those
