Spring AI와 PgVector, React를 이용해서
RAG 검색 기반 호텔 안내 챗봇을 직접 만들어 보았다.
RAG 시스템을 직접 구현할 때는
문서를 어떻게 청크로 나누고, 벡터스토어에 어떻게 임베딩하고,
어떻게 검색해 문맥 기반 답변을 만들 것인지를 고려해야 한다.
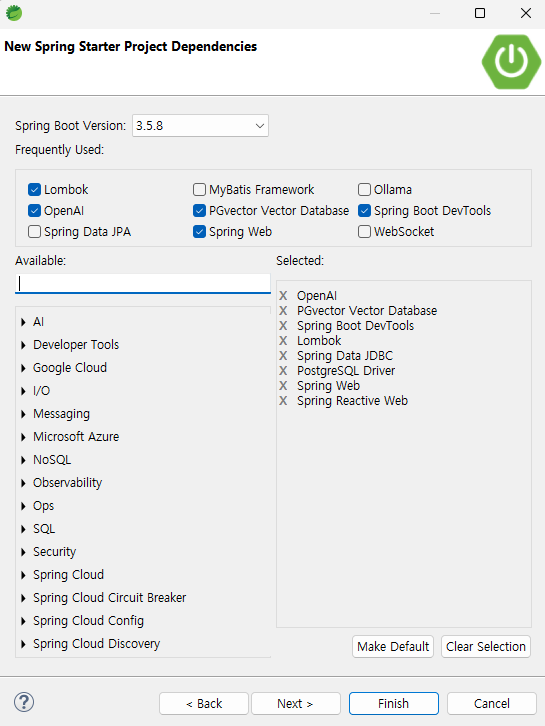
프로젝트 생성 및 의존성
Spring AI · PgVector · PostgreSQL · WebFlux · Lombok · Spring Web 등이 포함된다.
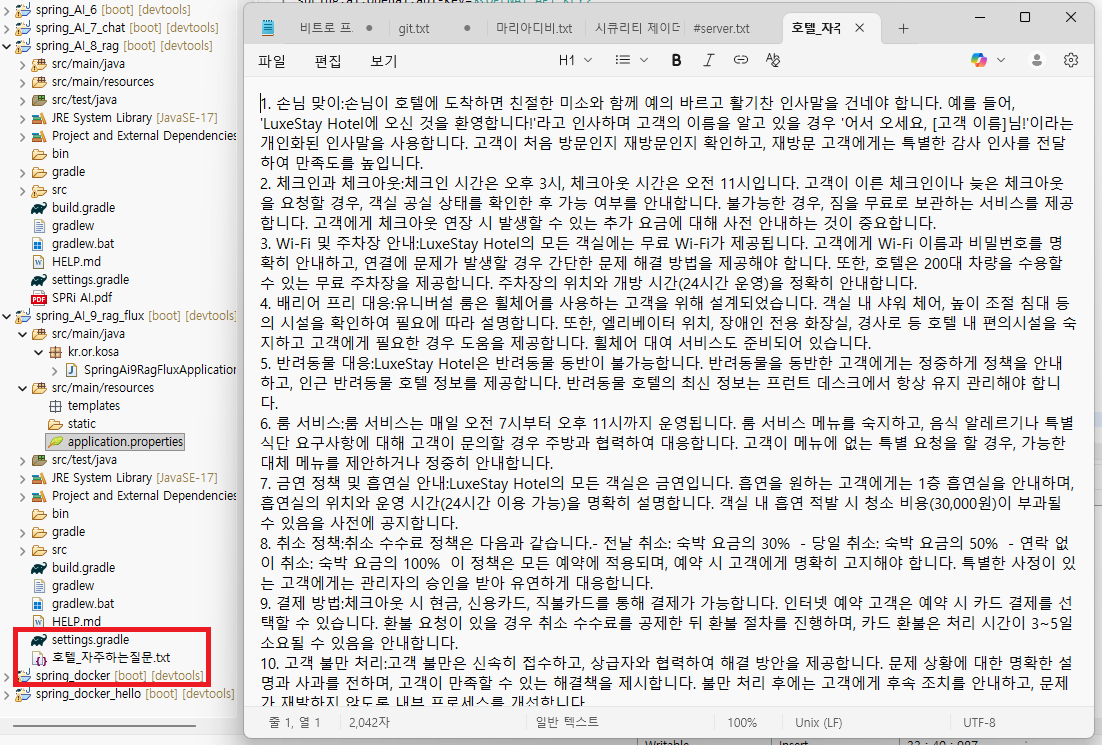
필요한 자료 미리 넣어두기
application.properties
spring.ai.vectorstore.pgvector.initialize-schema=true
→ 애플리케이션 시작과 동시에 hotel_vector 테이블 자동 생성, 초기화
단, 반드시 PostgreSQL에 아래 확장이 미리 설치되어 있어야 한다.
spring.application.name=spring_AI_9_rag_flux

server.port=8090

spring.ai.openai.api-key=${OPENAI_API_KEY}

spring.datasource.url=jdbc:postgresql://localhost:5432/ragdb
spring.datasource.username=raguser
spring.datasource.password=ragpass
spring.datasource.driver-class-name=org.postgresql.Driver

spring.ai.vectorstore.pgvector.index-type=HNSW
spring.ai.vectorstore.pgvector.distance-type=COSINE_DISTANCE
spring.ai.vectorstore.pgvector.dimensions=1536
spring.ai.vectorstore.pgvector.table-name=hotel_vector
spring.ai.vectorstore.pgvector.initialize-schema=true

spring.jpa.hibernate.ddl-auto=update
spring.jpa.show-sql=true

#테이블 생성 시점

#spring.ai.vectorstore.pgvector.initialize-schema=true 옵션이 true이면,
#✔ 애플리케이션 실행 직후(Spring Boot가 올라오는 시점)
#→ **VectorStore 빈(VectorStore 구현체: PgVectorStore)**이 생성될 때
#→ 내부에서 schema initializer가 실행되면서
#→ 설정한 table-name=hotel_vector를 자동으로 생성합니다.
#“애플리케이션 실행만 하면 테이블이 생성됨”


#중요한 포인트
# pgvector 확장 설치는 미리 되어 있어야 함
#CREATE EXTENSION IF NOT EXISTS vector;
서비스
import가 여러개가 나오고, 익숙하지 않으므로 잘 확인해주자.
Spring AI의 TokenTextSplitter는 문서를 아래 순서로 변환한다.
임베딩 최소 단위는 토큰이 아니라 청크이다.
- 문서를 입력받아 Document 형태로 변경
- 토큰 기준으로 분할
- 적당한 크기(chunkSize 500, overlap 50 기본값)로 청크 생성
- 각 청크마다 Embeddings 생성
- PgVector에 저장
package kr.or.kosa.service;

import java.io.File;
import java.io.IOException;
import java.nio.file.Files;
import java.util.List;
import java.util.stream.Collectors;

import org.springframework.ai.document.Document;
import org.springframework.ai.transformer.splitter.TokenTextSplitter;
import org.springframework.ai.vectorstore.VectorStore;
import org.springframework.core.io.FileSystemResource;
import org.springframework.core.io.Resource;
import org.springframework.jdbc.core.simple.JdbcClient;
import org.springframework.stereotype.Service;
import org.springframework.web.multipart.MultipartFile;

import lombok.RequiredArgsConstructor;

@Service
@RequiredArgsConstructor
public class HotelService {

	private final VectorStore vectorStore;
	private final JdbcClient jdbcClient;

	public void processUploadText(MultipartFile file) throws IOException {

		File tmpFile = File.createTempFile("upload", "txt");
		file.transferTo(tmpFile);
		Resource fileResource = new FileSystemResource(tmpFile);

		// 이전에 입력한 임베딩한 데이터 건수는 jdbc 간단한 쿼리로
        Integer count = jdbcClient.sql("select count(*) from hotel_vector")
                .query(Integer.class)
                .single();

        List<Document> documents = null;

		try {                  // 해지할 자원이 있으으로 try문 사용
			if (count == 0) {  // 아까 임배딩한 자료가 없으면
				documents = Files.lines(fileResource.getFile().toPath())
						.map(Document :: new)  // 메소드 참조 풀어쓰면 map(line -> new Document(line))
						.collect(Collectors.toList());
			}

			/*
			Files.lines(...)

			파일을 한 줄씩 읽어서 Stream<String> 으로 반환
			.map(Document::new)
			각 줄을 Document 객체로 변환
			즉, new Document("파일의 한 줄") 형태로 리스트 생성
			.collect(Collectors.toList())
			Stream → List<Document> 로 변환
			결론:
		   */

            // ★ null 방지: 임베딩할 내용이 없으면 종료
            if (documents == null || documents.isEmpty()) {
                return;
            }

			TokenTextSplitter splitter = new TokenTextSplitter();
			List<Document> splitDocuments = splitter.apply(documents);

			// 청크 사이즈를 따로 지정하지 않았는데 디폴트 값으로 지정된다.
			// chunkSize = 500, chunkOverlap = 50, minChunkSize = 100 maxChunkSize = 정수최대값 keepSeparators false

			// 벡터 저장소에 저장
			vectorStore.accept(splitDocuments);

		} catch (Exception e) {
			e.printStackTrace();

		} finally {
			tmpFile.delete();
		}
	}

}
✔ 주요 포인트
- 업로드된 txt 파일의 각 줄을 Document로 처리한다.
- TokenTextSplitter가 문맥을 끊어지지 않게 자동으로 자른다.
- 청크 단위로 임베딩 후 PgVector에 저장된다.
컨트롤러
import가 여러개가 나오고, 익숙하지 않으므로 잘 확인해주자.
package kr.or.kosa.controller;

import java.io.IOException;

import org.springframework.http.HttpStatus;
import org.springframework.http.ResponseEntity;
import org.springframework.web.bind.annotation.PostMapping;
import org.springframework.web.bind.annotation.RequestMapping;
import org.springframework.web.bind.annotation.RequestParam;
import org.springframework.web.bind.annotation.RestController;
import org.springframework.web.multipart.MultipartFile;

import kr.or.kosa.service.HotelService;
import lombok.RequiredArgsConstructor;

@RestController
@RequiredArgsConstructor
@RequestMapping("/api/hotel")
public class DocumentUploadController {

	private final HotelService hotelService;

	@PostMapping("/upload")
	public ResponseEntity<String> uploadText(@RequestParam("file") MultipartFile file){
		try {
			hotelService.processUploadText(file);
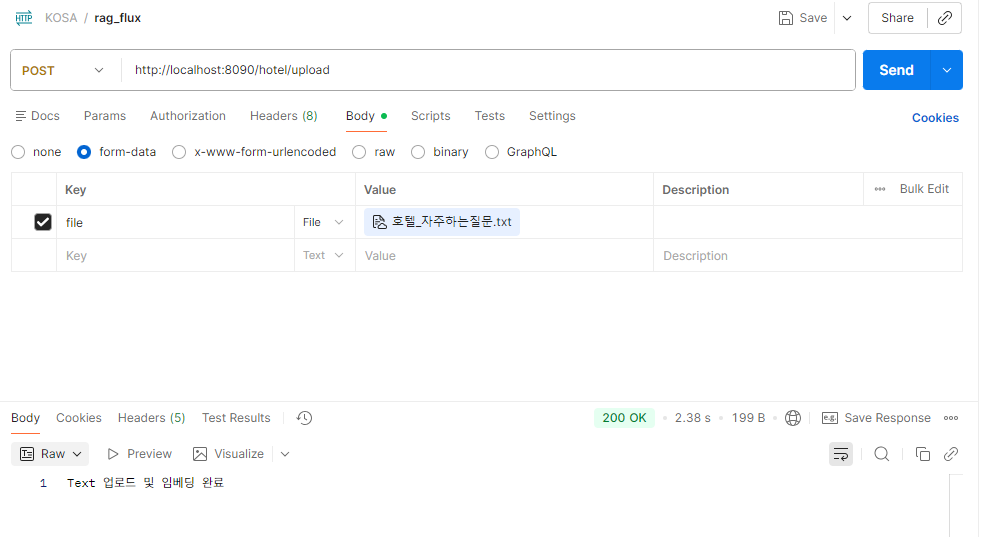
			return ResponseEntity.ok("Text 업로드 및 임베딩 완료");
		} catch (IOException e) {
			return ResponseEntity.status(HttpStatus.INTERNAL_SERVER_ERROR)
												.body("처리 중 오류 발생" + e.getMessage());
		}
	}

}
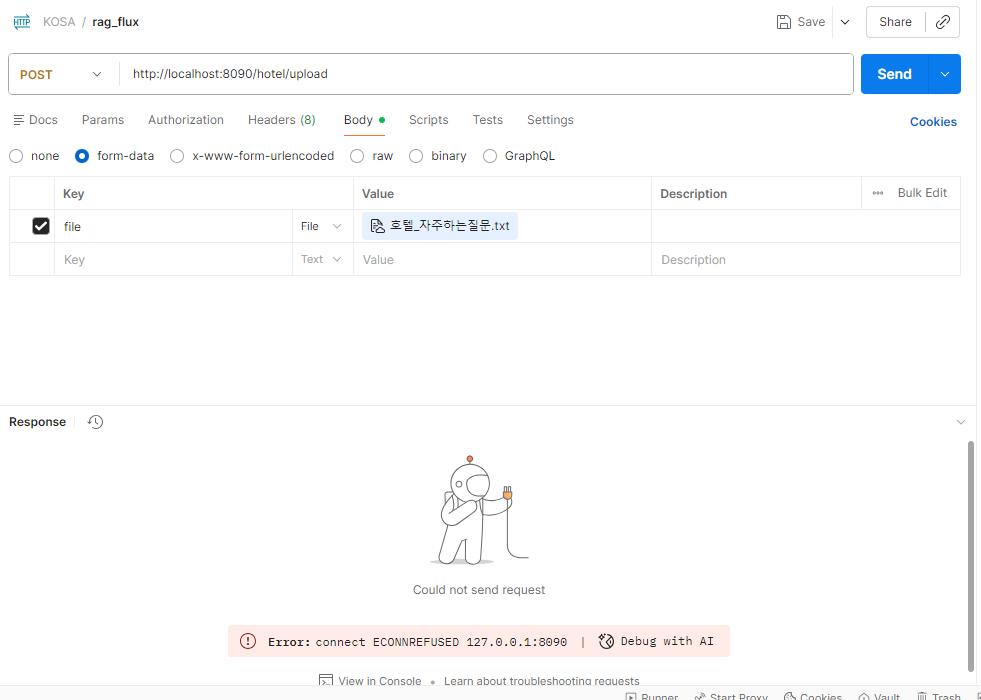
Postman에서 파일 업로드 하면 텍스트 읽기, 청크 생성, Embedding, PgVector 저장까지 자동 수행된다.
PGAdmin에서 hotel_vector 테이블을 확인하면, 각 청크가 1536차원 벡터로 저장된 것을 볼 수 있다.
package kr.or.kosa.controller;

import java.util.List;

import org.springframework.ai.chat.client.ChatClient;
import org.springframework.ai.chat.client.ChatClient.PromptUserSpec;
import org.springframework.ai.chat.model.ChatModel;
import org.springframework.ai.document.Document;
import org.springframework.ai.vectorstore.SearchRequest;
import org.springframework.ai.vectorstore.VectorStore;
import org.springframework.http.MediaType;
import org.springframework.web.bind.annotation.CrossOrigin;
import org.springframework.web.bind.annotation.GetMapping;
import org.springframework.web.bind.annotation.RequestMapping;
import org.springframework.web.bind.annotation.RequestParam;
import org.springframework.web.bind.annotation.RestController;

import kr.or.kosa.service.HotelService;
import lombok.RequiredArgsConstructor;
import reactor.core.publisher.Flux;

@RestController
@RequiredArgsConstructor
@RequestMapping("/hotel")
@CrossOrigin(origins = "http://localhost:5173") //config 설정이 더 좋지만 가벼운 예제이므로
public class HotelController {

	private final HotelService hotelService;
	private final DocumentUploadController documentController;
	private final VectorStore vectorStore;
	private final ChatModel chatModel;

	@GetMapping(value = "/chat", produces = MediaType.TEXT_PLAIN_VALUE)
	public Flux<String> hotelChatbot(@RequestParam("question") String question) {
		ChatClient chatClient = ChatClient.builder(chatModel).build();  // openAI 쓰겠다

		List<Document> results = vectorStore.similaritySearch(SearchRequest.builder()
										   .query(question)           // 호텔 와이파이 비번뭐에요?
										   .similarityThreshold(0.5)  // 유사도 설정
										   .topK(1)                   // 상위 1개
										   .build());
		System.out.println("Vector store 유사도 검색 결과 : " + results);

		String template = """
				당신은 어느 호텔의 직원입니다. 문맥에 따라서 고객의 질문에 정중하게 답변해주세요.
				컨텍스트가 질문에 대답할 수 없는 경우, "죄송합니다. 모르겠습니다."라고 대답하세요.
				컨텍스트:
				{context}
				질문:
				{question}
				""";
		// context는 txt에 있는 내용 13가지

		return chatClient.prompt()
		        .user(u -> u.text(template)
		                    .param("context", results)
		                    .param("question", question))
		        .stream()
		        .content();
	}
}
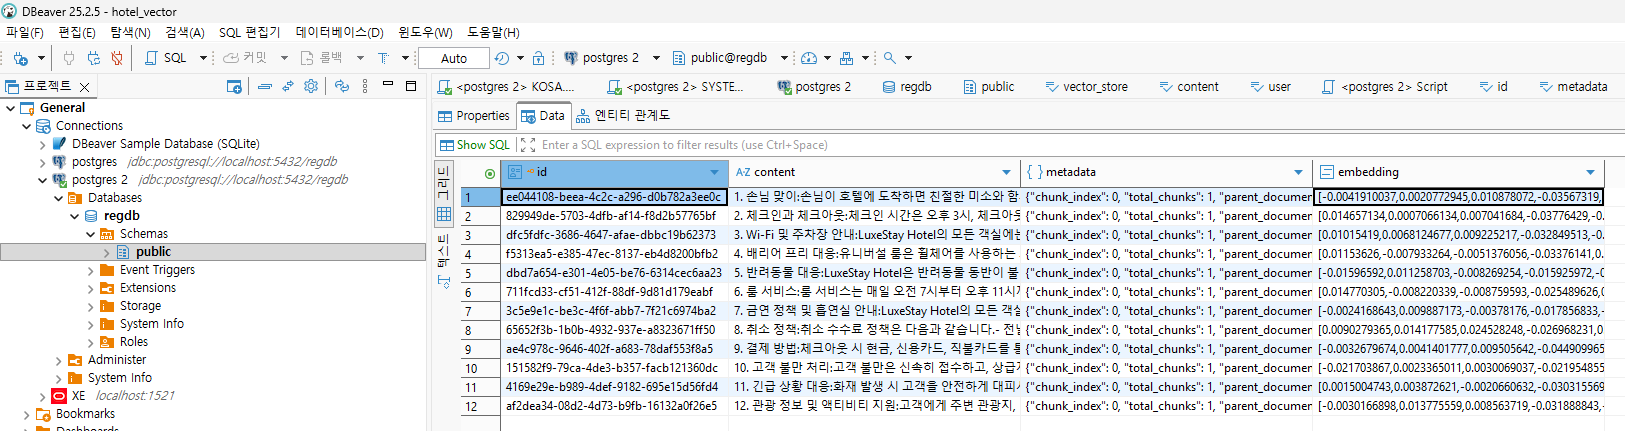
값이 잘 들어온 것을 확인할 수 있다.
서버가 데이터를 실시간으로 주는 3가지 방식
MediaType.TEXT_EVENT_STREAM_VALUE
"text/event-stream"
SSE(Server-Sent Events) 전송 타입을 의미한다.
클라이언트가 끊기지 않는 HTTP 연결을 통해 실시간으로 데이터를 받겠다는 의미이다.
MediaType.APPLICATION_NDJSON_VALUE
"application/x-ndjson"
NDJSON(Newline Delimited JSON) 형식이다.
JSON 객체 여러 개를 연속으로 전송하지만 배열이 아니라 줄바꿈으로 구분한다.
예시
{"message":"첫 번째 응답"}
{"message":"두 번째 응답"}
{"message":"세 번째 응답"}
MediaType.TEXT_PLAIN_VALUE
"text/plain"
순수 텍스트(String)를 그대로 보내고 싶을 때 사용한다.
HTML, JSON, XML, SSE, 파일 형태가 아닌 일반 문자열만 전송하는 방식이다.
ChatModel을 사용해 직접 응답 생성
return chatModel.stream(template
      .replace("{context}", results.toString())
      .replace("{question}", question));
ChatModel.stream()을 통해 텍스트 스트리밍 방식으로 직접 응답을 생성한다.
리액트
import { useEffect, useRef, useState } from 'react'
import reactLogo from './assets/react.svg'
import viteLogo from '/vite.svg'
import './App.css'
import ChatModel from './components/ChatModel';

function App() {
  const [messages,setMessages] = useState([]);
  const [question, setQuestion] = useState('');
  const [loading, setLoading] = useState(false);
  const chatEndRef = useRef(null);

  useEffect (()=>{
    chatEndRef.current?.scrollIntoView({ behavior: 'smooth'})
  },[messages])

  const sendMessage = async () =>{
    if(!question.trim()) return;

    const newMessages = [...messages, {sender:'user', text:question}]
    setMessages(newMessages);
    setQuestion('');
    setLoading(true)

    try {
      const response = await fetch(`http://localhost:8090/hotel/chat?question=${encodeURIComponent(question)}`);

      const reader = response.body.getReader();
      const decoder = new TextDecoder('utf-8');
      let botMessage = '';

      while (true) {
        const {value, done} = await reader.read();
        if(done) break;

        const chunk = decoder.decode(value, {stream:true});
        botMessage += chunk;

        setMessages(prev => [...newMessages, {sender:'bot', text:botMessage}]);
      }

    } catch (error) {
      console.log("Error",error)
    } finally {
      setLoading(false);
    }
  }

  return (
    <div className='chat-container'>
      <div className='chat-box'>
        {messages.map((msg,index) =>(
          <ChatModel key={index} message={msg} />
        ))}
        <div ref={chatEndRef}></div>
      </div>

      <div className='input-container'>
        <input value={question}
                onChange={e => setQuestion(e.target.value)}
                onKeyDown={e => e.key === 'Enter' && sendMessage()}
                placeholder='호텔 직원에게 문의해 보세요....'
        />
        <button onClick={sendMessage} disabled={loading}>전송</button>
      </div>

    </div>
  )
}

export default App
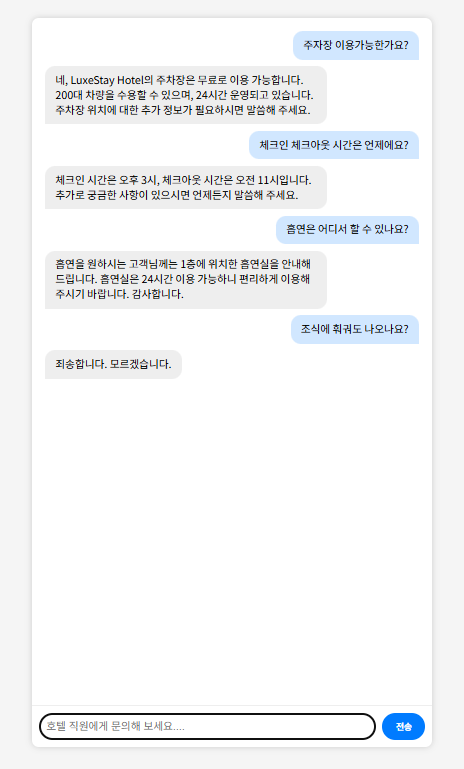
전체 흐름
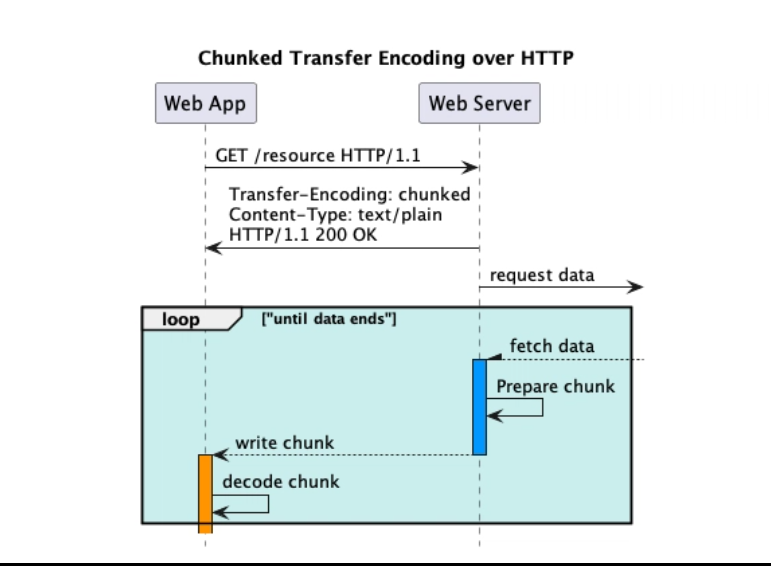
React ↔ Spring ↔ VectorStore ↔ OpenAI
- React에서 질문 입력
- Spring Controller 호출
- PGVector에서 semantic search
- LLM 생성
- React에 실시간 스트리밍
- UI에 바로 출력