본격적인 사용법을 작성해보겠다
일단 공식문서는 여기로 https://fullcalendar.io/
이것을 사용하려면 일단 패키지를 다운받아야 하는데
npm install --save 설치할 패키지
npm install --save @fullcalendar/core
이런 식으로 작성하면 패키지가 다운로드 받아진다.
package.json
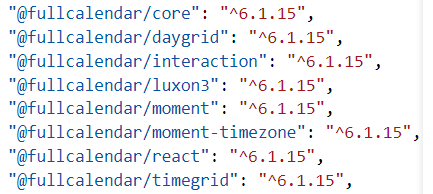
이 파일 안에서 설치된 패키지 확인 가능!
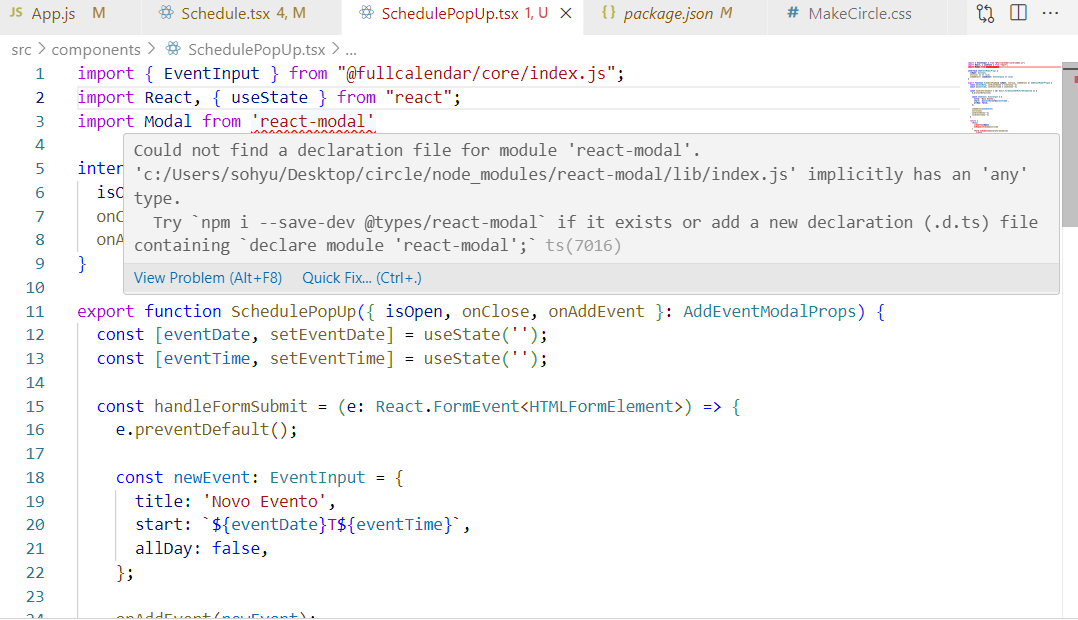
모듈을 불러올 수 없다는 에러가 뜨면 여기서 한번 확인해보자
Schedule.tsx
import React, { useState } from "react";
import "../Schedule.css";
import FullCalendar from "@fullcalendar/react";
import dayGridPlugin from "@fullcalendar/daygrid"; // 월간 보기
import timeGridPlugin from "@fullcalendar/timegrid"; // 주간, 일간 뷰 지원
import interactionPlugin from "@fullcalendar/interaction"; // 클릭 이벤트

  return (
    <div className="schedule_wrap">
      <FullCalendar
        plugins={[dayGridPlugin, timeGridPlugin, momentTimezonePlugin, interactionPlugin]} // 플러그인 설정
        headerToolbar={{
          left: "prev,next today", // 이전달, 다음달, 오늘달
          center: "title", // 현재 날짜 제목
          right: "dayGridMonth,timeGridWeek", // 월별, 주별 뷰
        }}
        initialView="dayGridMonth" // 기본 화면 설정
        editable={true} // 수정 가능 여부
        selectable={true} // 선택 가능 여부
        selectMirror={true} // TimeGrid 뷰에서 자리 표시자 여부
        dayMaxEvents={true} // 한 셀에 최대 이벤트 표시 여부
        select={handleDateSelect} // 날짜 선택 시 기능 추가
        events={events} // ✅ 일정 목록 추가 (화면에 반영됨
      />
    </div>
  );
};

export default Schedule;
tsconfig.json
타입 스크립트 사용 시 만들어야 하는 파일
src 폴더와 같은 위치인 최상위 루트에 작성!
{
  "compilerOptions": {
    "target": "ES5",
    "lib": ["dom", "esnext"],
    "allowJs": false,
    "outDir": "./dist",
    "rootDir": "./src",
    "skipLibCheck": true,
    "esModuleInterop": true,
    "allowSyntheticDefaultImports": true,
    "strict": true,
    "forceConsistentCasingInFileNames": true,
    "module": "ESNext",
    "moduleResolution": "node",
    "resolveJsonModule": true,
    "jsx": "react-jsx",
    "baseUrl": "./",
    "paths": {
      "@toast-ui/calendar": ["src/@types/@toast-ui/calendar"]
    }
  },
  "include": [
    "src",
  ],
  "exclude": [
    "node_modules",
    "dist"
  ]
}
일단 이 형식이 FullCalendar에서 제공하는 기본 형식인데 맨 위에 사용할 라이브러리를 작성해줘야 한다. (이거 안해서 계속 오류남)
import FullCalendar from "@fullcalendar/react";
import dayGridPlugin from "@fullcalendar/daygrid"; // 월간 보기
import timeGridPlugin from "@fullcalendar/timegrid"; // 주간, 일간 뷰 지원
import interactionPlugin from "@fullcalendar/interaction"; // 클릭 이벤트
기본 제공 기능 살펴보기!
headerToolbar={{
          left: "prev,next today", // 이전달, 다음달, 오늘달
          center: "title", // 현재 날짜 제목
          right: "dayGridMonth,timeGridWeek", // 월별, 주별 뷰
        }}
화살표 버튼을 누르면 달 별로 이동이 가능하며
우측에 month, week, day ... 버튼 클릭 시 해당 서식으로 볼 수 있다.
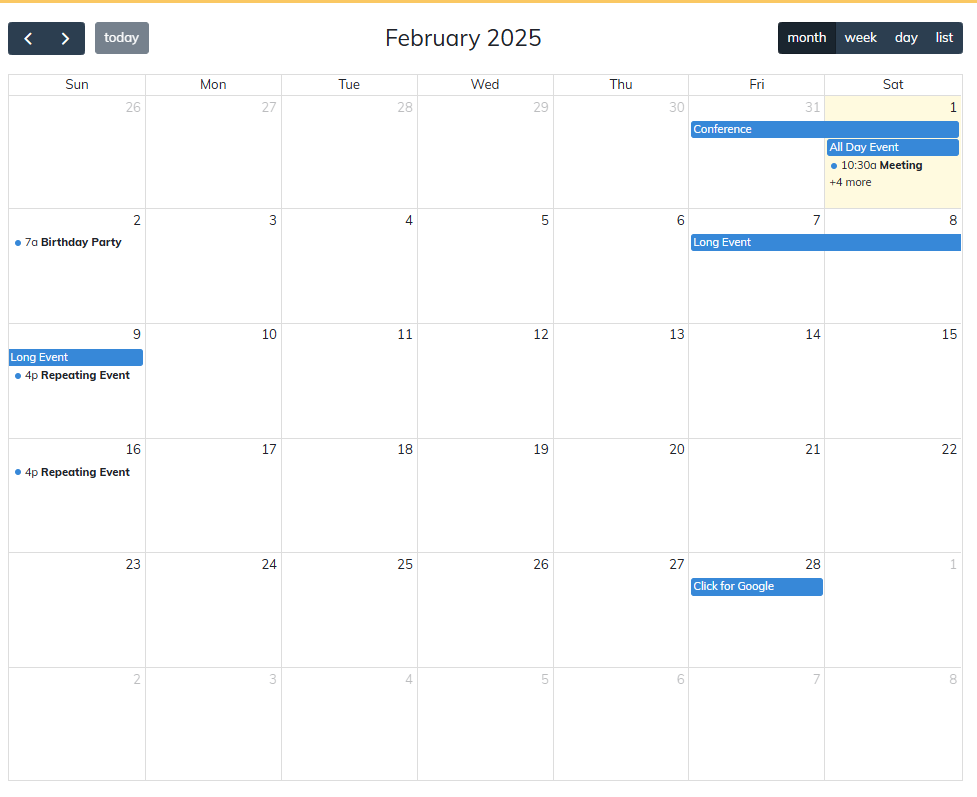
dayGridMonth
기본 서식으로 우리가 흔히 말하는 달력을 전체보기로 볼 수 있다.
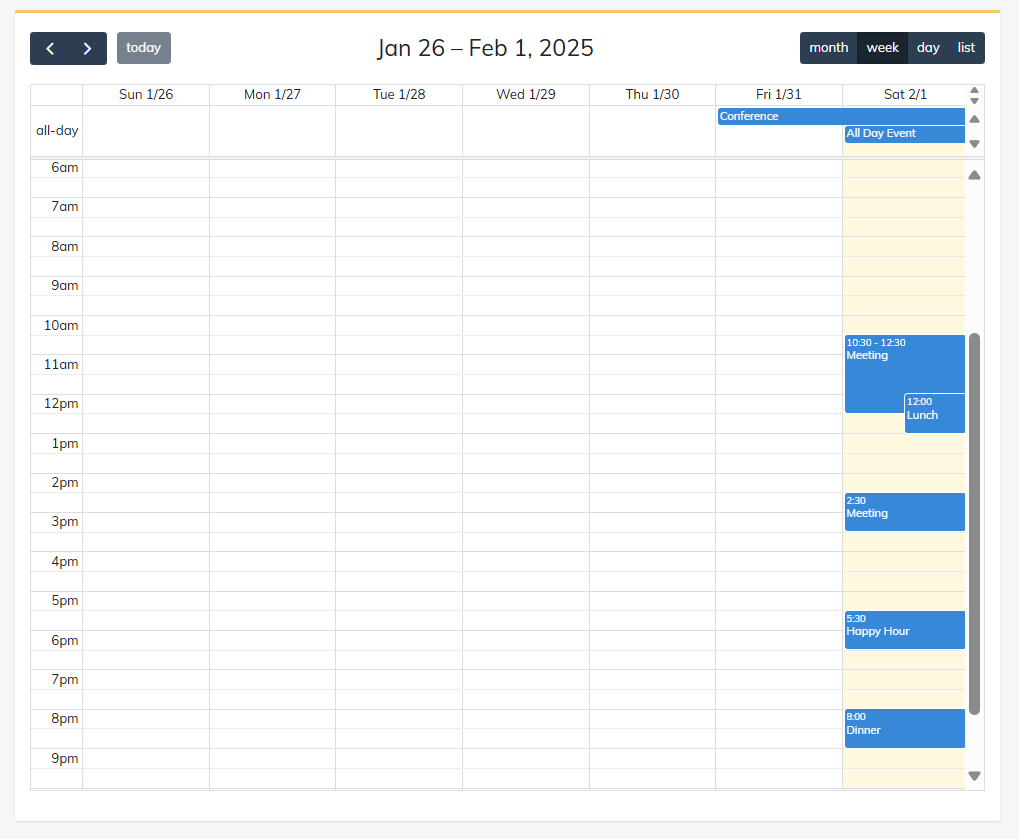
timeGridWeek
이건 주마다 볼 수 있는 서식인데 이번 프로젝트에 사용할 디자인이다.
이제부터 엄청나게 헤매는 모습을 볼 수 있을 것임..ㅋㅋ
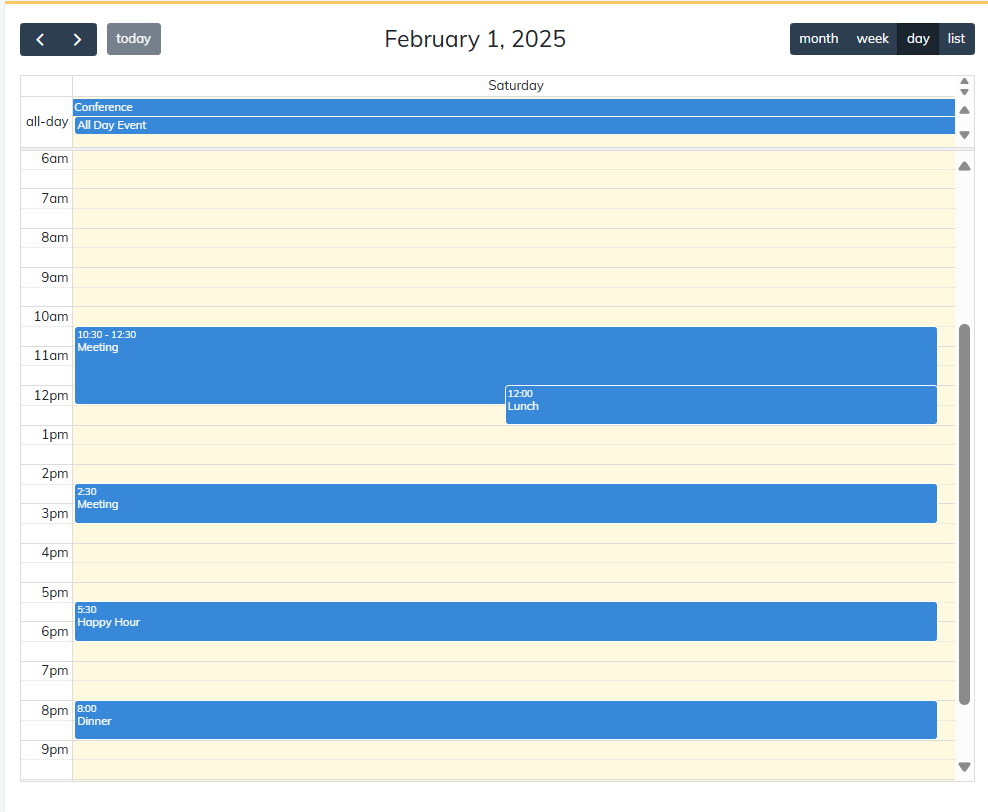
timeGridDay
이건 하루 일정만 볼 수 있는 기능!
근데 사이즈가 너무 커서 눈을 어디에 둬야 할지 모르겠다..
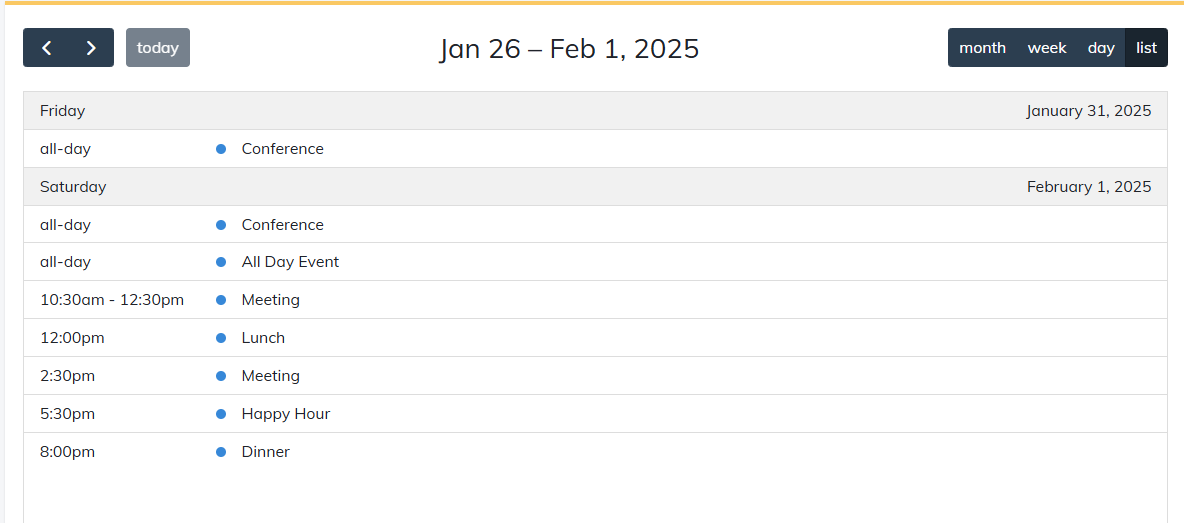
list
리스트 형식으로 볼 수 있는 서식이다.
근데 얘도 많이 사용은 안할듯..?
뭐 약간 이정도 할 것 같은데 어찌저찌해서 디자인은 마무리 한 상태!
사실 바꾸고 싶은 부분이 많았는데 이미 정해져 있는 부분도 있고 자동으로 날짜가 출력되는 부분은 바꾸는 로직이 복잡하고 시간을 너무 잡아먹어서 이정도로 합의봤다. 근데 원래꺼로 하고싶어.. ㅜㅜ
프롬프트에 키워드를 입력하면 일정으로 추가된다!
month에서 보면 이렇게 표시된다.
일정이 하루에 두 개 이상이면 이렇게 출력됨
slotMinTime,slotMaxTime
: 시간 타임대 지정
week에 있는 좌측의 시간대를 지정해주는 속성이다.
slotMinTime="09:00:00"
slotMaxTime="21:00:00"
이건 전체 코드
import React, { useState } from "react";
import "../Schedule.css";
import closeIcon from "../images/close_icon.svg"
import moreIcon from "../images/more_icon.svg"
import joinIcon from "../images/join_icon.svg"
import exitIcon from "../images/exit_icon.svg"
import FullCalendar from "@fullcalendar/react";
import dayGridPlugin from "@fullcalendar/daygrid"; // 월간 보기
import timeGridPlugin from "@fullcalendar/timegrid"; // 주간, 일간 뷰 지원
import interactionPlugin from "@fullcalendar/interaction"; // 클릭 이벤트
import momentTimezonePlugin from "@fullcalendar/moment-timezone"; // 시간대 플러그인
import { DateSelectArg } from "@fullcalendar/core";
import { EventInput } from "@fullcalendar/core"; // ✅ 이벤트 입력 타입

const Schedule: React.FC = () => {
  // ✅ 일정 목록을 저장하는 state 추가 (EventApi 대신 EventInput 사용)
  const [events, setEvents] = useState<EventInput[]>([]);
  const [popupToggle, setPopUpToggle] = useState(false);
  const schedulePopUpClick = () => {
    setPopUpToggle(!popupToggle)
  }

  // ✅ 일정 ID를 생성하는 함수
  const createEventId = () => String(Date.now());

  // ✅ 날짜 선택 핸들러 (일정 추가)
  const handleDateSelect = (selectInfo: DateSelectArg) => {
    let title = prompt("✏️ 일정 제목을 작성해주세요.");
    let calendarApi = selectInfo.view.calendar;
    calendarApi.unselect(); // 드래그 선택 해제
    if (title) {
      const newEvent: EventInput = {
        id: createEventId(),
        title,
        start: selectInfo.startStr,
        end: selectInfo.endStr,
        allDay: selectInfo.allDay,
      };
      setEvents((prevEvents) => [...prevEvents, newEvent]); // ✅ 상태 업데이트
    }
  };


  return (
    <div className="schedule_wrap">
      <FullCalendar
        plugins={[dayGridPlugin, timeGridPlugin, momentTimezonePlugin, interactionPlugin]} // 플러그인 설정
        headerToolbar={{
          left: "prev,next today", // 이전달, 다음달, 오늘달
          center: "title", // 현재 날짜 제목
          right: "dayGridMonth,timeGridWeek", // 월별, 주별 뷰
        }}
        initialView="dayGridMonth" // 기본 화면 설정
        editable={true} // 수정 가능 여부
        selectable={true} // 선택 가능 여부
        selectMirror={true} // TimeGrid 뷰에서 자리 표시자 여부
        dayMaxEvents={true} // 한 셀에 최대 이벤트 표시 여부
        select={handleDateSelect} // 날짜 선택 시 기능 추가
        events={events} // ✅ 일정 목록 추가 (화면에 반영됨
      />
    </div>
  );
};

export default Schedule;
➕➕➕ 추가 팁
그리고 공부하다가 발견한건데 typescript에서는 이미지를 react 방식처럼 불러오려면 별도의 파일 설정을 해야한다.
src / global.ts
declare module "*.svg" {
    const content: string;
    export default content;
  }
여기까진 기본 제공 소스인데 내가 만들어야 하는 부분은 바로 이 팝업 창이다
기본 제공 소스는 해당 셀 클릭 시 그것에 대한 정보를 프롬프트로 입력받아 데이터가 추가되는 로직인데 나는 셀 클릭 시 위의 팝업 창이 뜨고 그걸 토대로 일정이 생성되도록 만들어야 한다.
그럼 일단 마음을 비우고 시작해보자.
Schedule.tsx
import React, { useState } from "react";
import "../Schedule.css";
import SchedulePopUp from "./SchedulePopUp";
import FullCalendar from "@fullcalendar/react";
import dayGridPlugin from "@fullcalendar/daygrid"; // 월간 보기
import timeGridPlugin from "@fullcalendar/timegrid"; // 주간, 일간 뷰 지원
import interactionPlugin from "@fullcalendar/interaction"; // 클릭 이벤트
import momentTimezonePlugin from "@fullcalendar/moment-timezone"; // 시간대 플러그인
import { EventInput } from "@fullcalendar/core"; // ✅ 이벤트 입력 타입

const Schedule: React.FC = () => {
  const [isOpen, setIsOpen] = useState(false);
  const [events, setEvents] = useState<EventInput[]>([]);
  const handleAddEvent = (arg: { dateStr: string }) => {
    setIsOpen(true);
  }

  const handleModalClose = () => {
    setIsOpen(false);
  }

  const handleEventClick = (info: EventInput) => {
    console.log("Cliquei no evento de: ", info.event);
  }

  return (
    <div className="schedule_wrap">
      <>
      <FullCalendar
        plugins={[dayGridPlugin, timeGridPlugin, momentTimezonePlugin, interactionPlugin]} // 플러그인 설정
        headerToolbar={{
          left: "prev,next today", // 이전달, 다음달, 오늘달
          center: "title", // 현재 날짜 제목
          right: "dayGridMonth,timeGridWeek", // 월별, 주별 뷰
        }}
        initialView="dayGridMonth" // 기본 화면 설정
        editable={true} // 수정 가능 여부
        selectable={true} // 선택 가능 여부
        selectMirror={true} // TimeGrid 뷰에서 자리 표시자 여부
        dayMaxEvents={true} // 한 셀에 최대 이벤트 표시 여부
        slotMinTime="09:00:00"
        slotMaxTime="21:00:00"
        events={events}
        dateClick={handleAddEvent}
        eventClick={handleEventClick}
        eventAdd={function(){}} // 이벤트 추가
        eventChange={function(){}} // 이벤트 수정
        eventRemove={function(){}} // 이벤트 삭제
      />

      {isOpen && (
            <SchedulePopUp
              isOpen={isOpen}
              onClose={handleModalClose}
            />
          )}
        </>
        </div>
  );
};

export default Schedule;
SchedulePopUp.tsx
import closeIcon from "../images/close_icon.svg"
import moreIcon from "../images/more_icon.svg"
import joinIcon from "../images/join_icon.svg"

interface AddEventModalProps {
  isOpen: boolean;
  onClose: () => void;
}

export default function SchedulePopUp({ isOpen, onClose }: AddEventModalProps) {
  return (
    <div className="schedule_popup">
        <button className="close_btn" onClick={onClose}><img src={closeIcon} alt="닫기" /></button>
        <h3>Title</h3>
        <p>contents</p>

        <dl>
            <dt>Members</dt>
            <dd className="schedule_profile">
            <ul>
                <li></li>
                <li></li>
                <li></li>
                <li></li>
            </ul>
            <button className="more_icon"><img src={moreIcon} alt="인원 더보기" /></button>
            </dd>

            <dt>Place</dt>
            <dd>contents</dd>

            <dt>Notice</dt>
            <dd>contents</dd>
        </dl>

        <div className="schedule_btn_wrap">
            <button><img src={joinIcon} alt="가입하기" /> Join</button>
        </div>
    </div>
  )
}공차랑 구조가 비슷해질 것 같긴 한데 데이터 클릭 시 관련된 팝업 창이 뜨는 로직까진 어차저차 구현한 것 같은데 문제는 백엔드에서 데이터를 어떻게 받아오느냐다. make circle에서 등록된 데이터를 토대로 팝업창을 띄우고 시간대도 설정해야하는데 아.. 머리아퍼..
