
chatgpt api
그런데 chatbot의 응답을 올때까지의 시간이 있어서 마치 렉이 걸리는 것처럼 보였습니다. 이후에 추가적인 디자인 작업을 해야할 것 같습니다.
결제
이 프로젝트를 기획한 이후에 알게된거지만 chatgpt open api는 유료입니다.
결제 및 api key 발급은 여기를 보고 참고했습니다.
env파일 관리
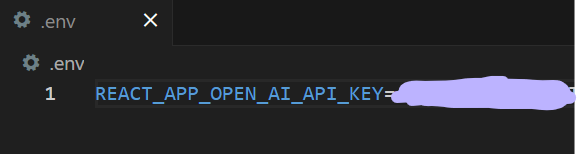
먼저 .gitignore에 .env파일을 추가한 뒤에, env 파일에는 다음과 같이 작성해줍니다. 저 api key는 처음 한번만 발급되니 어딘가에 복붙해두어야 합니다.
밑에 두가지를 명심하고 정의해주어야 합니다.
액세스 토큰만 해당하는 줄 알았는데, env 파일 자체를 수정하면 vs를 재시작 해주어야 합니다.
react에서 환경 변수를 env 파일에 정의할 때 반드시
REACT_APP_로 시작해야합니다.
axios 설치
axios는 브라우저, Node.js를 위한 Promise API를 활용하는 HTTP 비동기 통신 라이브러리입니다. API 요청을 보내고 응답을 받기 위해 사용합니다.
1 | npm install axios | cs |
api 연동
이제 준비과정은 끝났으니 본격적으로 api 연동을 해야합니다.
전체코드는 마지막에 첨부했습니다.
-
axios 불러오기
1import axios from "axios";cs -
api key 가져오기
process.env을 사용하여 env에 있는 api key를 가져옵니다.
1const CHATGPT_API_KEY = process.env.REACT_APP_OPEN_AI_API_KEY;cs -
api 요청 보낼 주소 정의
직접 적어도되지만 전 따로 분리해서 상수화 했습니다.
1const REQUEST_ADRESS = `https://api.openai.com/v1/chat/completions`;cs -
api 요청
12345678910111213141516171819export async function GptOpenApi(messagesToSend) {const response = await axios.post(REQUEST_ADRESS,{model: "gpt-3.5-turbo",messages: messagesToSend,max_tokens: 1000,temperature: 0.7,},{headers: {"Content-Type": "application/json",Authorization: `Bearer ${CHATGPT_API_KEY}`,},});return response;}cs -
messagesToSend 매개변수를 가진 함수를 만들어 주었습니다.
-
http 메서드는 post, 요청 주소는 REQUEST_ADRESS 입니다.
-
model : 사용할 GPT 모델을 지정했습니다.
-
messages: 매개변수로 전달된 문자열입니다.
-
max_tokens: 응답을 생성할 최대 토큰 수입니다.
-
temperature: 얼마나 창의적으로 대답할건지에 대한 설정입니다.
아래 사진의 출처는 gpt입니다. 참고용으로만 봐주세요!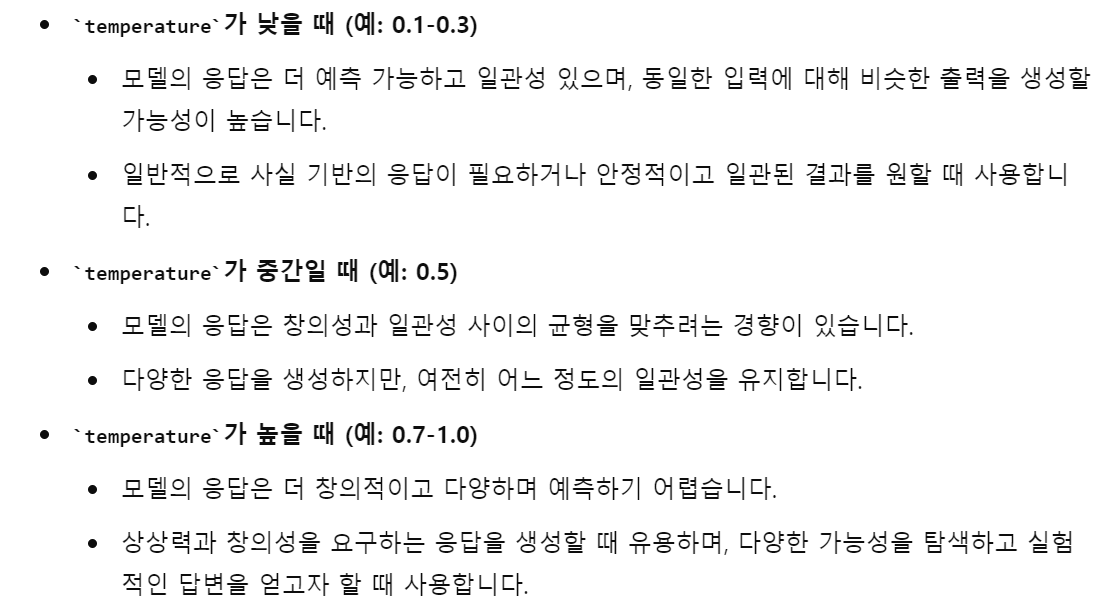
-
header에는 content-type와 api key를 넣어주었습니다.
-
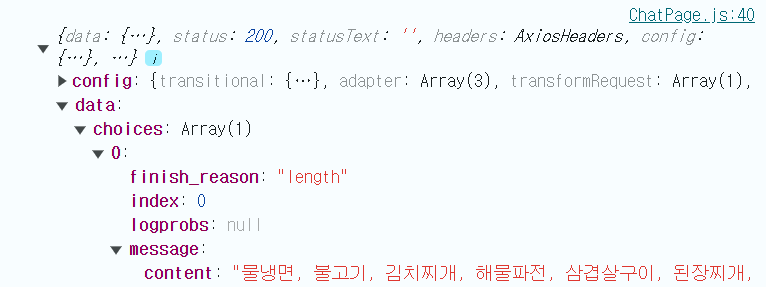
최종적으로 response를 반환하도록 구현했습니다.
콘솔 확인 결과 response.data.choices[0].message.content에 응답이 오는 것을 확인했습니다.
-
-
코드 적용
이제 응답받은 내용을 제 코드에 적용해야 합니다. 만들어뒀던 hendleSend의 코드를 수정해줍니다.
1234567891011121314const handleSend = async () => {if (questionInput.trim() === "") return;dispatch(addUserQuestion(questionInput));dispatch(setQuestionInput(""));try {const messagesToSend = [{ role: "user", content: questionInput }];const response = await GptOpenApi(messagesToSend);const chatbotResponse = response.data.choices[0].message.content;dispatch(addChatbotAnswer(chatbotResponse));} catch (error) {console.error(error);dispatch(addChatbotAnswer("Error"));}};cs -
try 구문
-
messagesToSend : api 연동에 과정에서 전달할 매개변수 입니다.
-
response : 매개변수를 전달한 후, 반환된 response 값을 저장합니다.
-
chatbotResponse : response에서 응답 내용만 저장합니다.
-
addChatbotAnswer에 chatbotResponse을 대입시켜 렌더링합니다.
-
-
catch 구문
- 에러가 날 경우 error를 콘솔에 출력합니다.
- 사용자가 볼 수 있도록 error를 렌더링해줍니다.
-
전체 코드
1 2 3 4 5 6 7 8 9 10 11 12 13 14 15 16 17 18 19 20 21 22 23 24 25 26 27 28 29 30 31 32 33 34 35 36 37 38 39 40 41 42 43 44 45 46 47 48 49 50 51 52 53 54 55 56 57 58 59 60 61 62 63 64 65 66 67 68 69 70 71 72 73 74 75 76 77 78 79 80 81 82 83 84 85 86 87 88 89 90 91 92 93 94 95 96 97 98 99 100 101 102 103 104 105 106 107 108 109 110 111 112 113 114 115 116 117 | import React, { useRef, useEffect } from "react"; import { ChatContainer, ChatElement, ChatingDiv, Chating, Chatbot, Profile, Answer, User, Question, ChatSend, QuestionInput, SendImg, } from "./ChatPage.style.js"; import { useSelector, useDispatch } from "react-redux"; import { setQuestionInput, addUserQuestion, addChatbotAnswer } from "../../redux/actions"; import SwitchComponent from "../../component/Switch/SwitchComponent"; import axios from "axios"; const REQUEST_ADRESS = `https://api.openai.com/v1/chat/completions`; const CHATGPT_API_KEY = process.env.REACT_APP_OPEN_AI_API_KEY; export async function GptOpenApi(messagesToSend) { const response = await axios.post( REQUEST_ADRESS, { model: "gpt-3.5-turbo", messages: messagesToSend, max_tokens: 1000, temperature: 0.7, }, { headers: { "Content-Type": "application/json", Authorization: `Bearer ${CHATGPT_API_KEY}`, }, } ); console.log(response); return response; } const ChatPage = () => { const questionInput = useSelector((state) => state.questionInput); const userQuestions = useSelector((state) => state.userQuestions); const chatbotAnswers = useSelector((state) => state.chatbotAnswers); const switchState = useSelector((state) => state.switchState); const dispatch = useDispatch(); const chatingRef = useRef(null); const handleSend = async () => { if (questionInput.trim() === "") return; dispatch(addUserQuestion(questionInput)); dispatch(setQuestionInput("")); try { const messagesToSend = [{ role: "user", content: questionInput }]; const response = await GptOpenApi(messagesToSend); const chatbotResponse = response.data.choices[0].message.content; dispatch(addChatbotAnswer(chatbotResponse)); } catch (error) { console.error(error); dispatch(addChatbotAnswer("Error")); } }; const handleKeyDown = (e) => { if (e.key === "Enter") { handleSend(); } }; useEffect(() => { if (chatingRef.current) { chatingRef.current.scrollTop = chatingRef.current.scrollHeight; } }, [userQuestions, chatbotAnswers]); return ( <> <ChatContainer $switchState={switchState}> <SwitchComponent /> <ChatElement> <ChatingDiv> <Chating ref={chatingRef}> {userQuestions.map((question, index) => ( <React.Fragment key={`user-question-${index}`}> <User> <Question $switchState={switchState}>{question}</Question> </User> {chatbotAnswers[index] && ( <Chatbot> <Profile src='/image/Impolite_chatbot.png' alt='챗봇 프로필' /> <Answer>{chatbotAnswers[index]}</Answer> </Chatbot> )} </React.Fragment> ))} </Chating> </ChatingDiv> <ChatSend> <QuestionInput value={questionInput} onChange={(e) => dispatch(setQuestionInput(e.target.value))} onKeyDown={handleKeyDown} placeholder='Chatbot에게 하고싶은 말을 입력해주세요!' /> <SendImg onClick={handleSend} src='/image/Send.png' alt='화살표' /> </ChatSend> </ChatElement> </ChatContainer> </> ); }; export default ChatPage; | cs |
후기?
얼마 전에 gpt api를 활용한 세미나를 들어서 조금 수월하게 진행했던 것 같습니다.
이 프로젝트가 싸가지 없는 챗봇을 만드는거라 성공한다면 다음 벨로그는 그 내용에 관해서 작성할 것 같습니다.
굳이 싸가지 없는 성격이 아니더라도 gpt의 성격이나 말투를 바꾸는 작업을 해보고 싶습니다.