일단 5주차에는 html, css, java script 프론트 맛보기를 진행했는데, 우리 강의에 주요내용은 아니어서 이론 위주로 수업했다. html 기본밖에 모르는 나는 별도로 조코딩님 강의와 이외에 예제들을 보고 아래 내용을 정리했다! java script는 좀 더 예제를 많이 작성해보기
HTML
- 크롬, VS code 설치
- class 속성 넣기
ex) <h1 class=’title’> 제목입니다. </h1>- 스스로 닫는 태그
input : </input> 없이 스스로 <input>만 선언하면 된다.
<input value="값입니다.">
- html은 기능만 이해하면 되고 다 외울 필요는 없음
- vs code 에서 ! 치고 엔터 누르면 기본이 구성된다.
- head에는 본문에는 안보이는 태그, body에는 보이는 부분을 구성
- The `<em>` tag will generally render as *italic* emphasis.
- The `<strong>` will generally render as **bold** emphasis.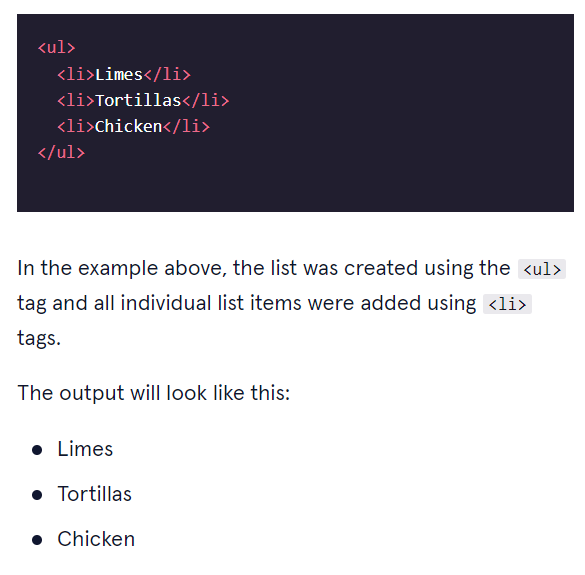
<ul>을 사용해서 <li>를 적용하면 위 적용화면과 같이 순서를 원형으로 구분하고 <ol>에서 <li>를 사용하면 숫자 순서로 구분한다.
ol order list
ul Unordered Lists
<img src="https://content.codecademy.com/courses/web-101/web101-image_brownbear.jpg" alt="brown bear" />
alt는 그림에 대한 설명 (보이는 글씨는 아님)

<video src="myVideo.mp4" width="320" height="240" controls>
Video not supported
</video>

controls 사용하면 재생, 소리 버튼 등 컨트롤이 보임. 그리고 비디오는 </video>로 닫아주기

The text, `Video not supported`, between the opening and closing video tags will only be displayed if the browser is unable to load the video.
<ul>
    <li><a href="#introduction">Introduction</a></li>
    <li><a href="#habitat">Habitat</a></li>
    <li><a href="#media">Media</a></li>
  </ul>
  <div id="introduction">
id 지정하면 a 태그로 #id 연결 가능
- input : 입력하는 칸을 만드는 태그
- form : 정보를 전송하는 태그
예제 연습한 사이트:
html -> https://www.codecademy.com/learn/learn-html
css -> https://www.codecademy.com/learn/learn-css
CSS
class는 같은 클래스를 사용하면 모두 바뀌는거
<h1>사과</h1>
<h1 class = "y">바나나</h1>
<h1 class = "y">망고</h1>
<h1 id="p">포도</h1>
h1 {
color : red;
}
/* h1 태그 색상은 red로 지정 */
.y {
color : yellow;
}
/* **class** y는 yellow로 지정 .y라고 사용
여러개의 태그를 선택하고 싶을 때 사용 */
#p {
color : purple;
}
/* **id** p는 purple로 지정 #p 라고 사용
id는 하나의 태그를 선택하고 싶을 때 지정 */id>class>태그이름 순으로 더 먼저 적용된다.
- css 사용하는 방법은 에 vscode 기준 link 쓰고 tab 누르면 기본으로 자동 작성된다.
<link rel="stylesheet" href="">
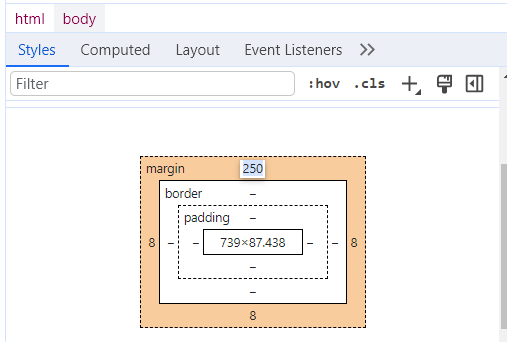
- 개발자 도구를 이용해서 styles를 통해 위치 조정 가능함
-
css 참고자료 bootstrap : https://getbootstrap.com/
-
css 참고자료 codepen: https://codepen.io/
-
css는 코드의 아래줄에 있을 수록 우선순위가 더 높게 적용된다.
ex) h1{색: 빨강}
h1{색: 파랑} 순으로 썼으면 파랑이 우선 적용된다. -
여러개의 클래스를 같이 쓸 때는 띄어쓰기로 연결
아래는 search-bar와 input-group, mb-3 클래스 연결<div class="search-bar input-group mb-3">
-
form 태그에서 action, method를 설정하면 method 방식으로 action을 실행해라
method 중 get 방식: 주소창에 정보를 포함하여 전달하는 정보 전송 방식
post 방식: 주소창에 정보를 표시하지 않고 내부적으로 정보를 전달하는 정보 전송 방식
Java Script
- 기초 강좌
html/css는 모양을 만들어내는 거지만, java script 부터는 언어라고 본다
- 변수: 값을 담는 상자
var
let
const
var,let을 붙였을 때 변경할 수 있는데 const는 유일한 1개 바꿀 수 없는 변수, 주로 let을 많이 붙인다
ex) let a = 1 - 함수
input → function → output
!함수=마법=코드묶음!```jsx //정의 function myFunction(x) { let temp = 2*x + 3 return temp } //실행 myFunction(1) ```
- 프로그래밍에서는 입력, 출력이 없을 수 있음
function fly() {
	openWings();
	while (true) {
			moveWings();
	}
}
- 두개가 같은 함수임
function add(x,y) {
    let temp = x + y;
    return temp
}
add = (x, y) => { let temp = x + y; return temp;
- 익명함수로 함수명 없이 한줄에 결과까지 나오게 할 수 있음
((x,y) => {return x+y}) (1,2) - 조건문
돈이 5000원 이상 있으면 택시를 탄다.```jsx if(money > 5000) {ㄷㄷㄷㄷㄷ rideTaxi(); } else if(money > 2000) { rideBus(); } else { walk(); } ```
-
console.log() ⇒ 프린트 같은 기능
console.log(”택시를 탄다.”) -
{} 시작부터 끝까지 실행해라고 구분하는 역할
-
반복문
ex) 나무를 10번 찍기
for 뒤에 조건이 들어가기
for(초기값; 조건식; 증가)```jsx for (let i = 0; i < 10; i++) { console.log("나무찍기" + i); } ``` -
forEach 리스트에 요소들 하나씩 들어가서 한다고 생각하면 된다.
myArray = [1,2,3,4,5]
myArray.forEach(i => {
    console.log("나무찍기" + i);
});
- alert(’오후입니다.’) → 알림창으로 출력
- prompt(’숫자를 입력해주세요.’) → input 같은 기능, 입력 받기
- switch문 사용하기
<html>
<head>
</head>

<body>
<script>
const date = new Date()
const hour = date.getHours()

switch (true) {
 case hour < 11:
 alert(' 아침 먹을 시간입니다. ')
 break
// hour<11이 참일때 실행

 case hour < 15:
 alert(' 점심 먹을 시간입니다. ')
 break
// 위 hour<11이 거짓이고, hour<15가 참일때만 실행

default:
 alert(' 저녁 먹을 시간입니다. ')
 break
}
</script>

</body>
</html>- if 문으로 변환
<html>
<head>
</head>

<body>
<script>
const date = new Date()
const hour = date.getHours()

if(hour < 11)
	alert("아침")
else if(hour >= 11 && hour <15)
	alert("점심")
else
	alert("저녁")
</script>

</body>
</html>
&& and연산자
|| or 연산자
- 태어난 연도를 입력받아 띠 출력하기 (split 로 문자열 자르기)
<script>
const rawInput = prompt('태어난 해를 입력해주세요.', '')
const year = Number(rawInput)
const tti = '원숭이, 닭, 개, 돼지, 쥐, 소, 호랑이, 토끼, 용, 뱀, 말, 양'.split(',')

alert(`${year}년에 태어났다면 ${tti[year % 12]} 띠입니다.`)
// '가 아니라 `를 사용하는 거!!
</script>$- 템플릿 문자열은 백틱(‵) 기호로 감싸 만듦
문자열 내부에 ‵${...}‵ 기호를 사용하여 표현식을 넣으면 표현식이 문자열 안에서 계산됨
① true ? alert('출력A') : alert('출력B')
② false ? alert('출력B') : alert('출력A')
③ true || alert('출력A’)
④ true && alert('출력A')
→ 모두 출력A가 나오지만 3번 true || alert('출력A’)은 true가 나옴
- 함수
function sum(x, y) {
return x + y
}
console.log(sum(10,2))- 기존 login.html 파일에서, id, password를 입력받는다.
옆에 검사 버튼을 생성하고, 아이디가 admin이 아닌 경우 “관리자 전용 로그인 페이지입니다.” 를 출력하고 로그인을 수행하지 않음.
아이다가 admin인 경우에만 전송 submit을 수행하는 login 함수를 작성하기
<!DOCTYPE HTML>
<html>
<head>
<meta charset="utf-8">
<title>HTML</title>
<style type="text/css">
body {
	background-color: #e7e7e7;
}
div {
	margin : 10px;
}
</style>
<script>
function login(id_elm)
{
    var elm = document.**getElementsByName**(id_elm);
    if(**elm[0].value** === "admin")
    {
        alert("안녕하세요? 관리자님")
        document.**getElementById**('frm').submint();
    }
else
{
    alert("관리자 전용페이지입니다. 관리자만 로그인해주세요. ")
    elm.value="";
}
}
</script>
</head>
<body>
	<form action="action.jsp" id="frm">
		<div>아이디 : <br/><input type="text" name="id" value=""></div>
		<div>비밀번호: <br/><input type="text" name="pwd" value=""></div>
		<div><!-- <input type="button"
					onclick="document.getElementById('frm').submit();"
					value="전송">
            <a href="#" onclick="document.getElementById('frm').submit();"> -->
			<input type="button" onclick="login('id');" value="보내기">

		</div>
	</form>
</body>
</html>