📍3~4장 중요!
1장. 웹 프로그래밍의 이해
curl : 여러가지의 프로토콜을 사용하여 데이터를 송수신할 수 있는 명령
ex) curl http://www.google.com
- vmware 이용해서 서버 만들기
- python code를 exe로 만들기 pyinstaller
pip install pyinstaller-F옵션: 단일파일로 만들어주기
→dlist 디렉토리 아래 생성됨
pyinstaller -F [curl.py](http://curl.py)
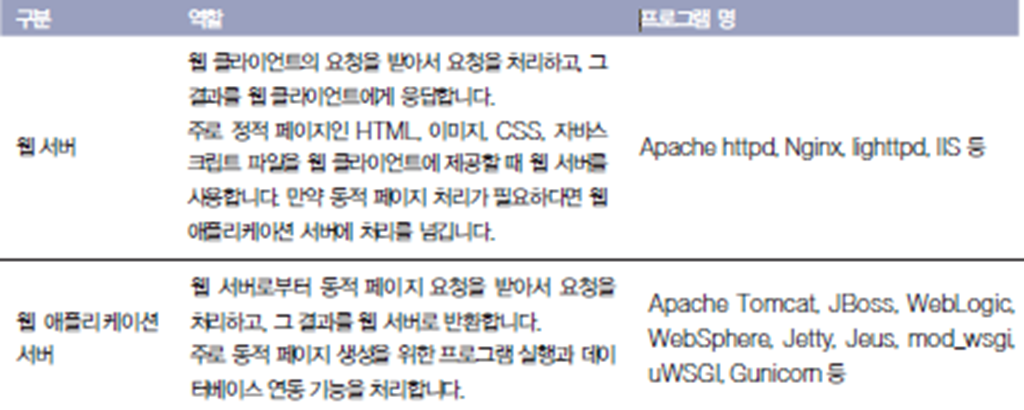
- 웹 애플리케이션 서버
- 웹서버 (web)
- 웹 애플리케이션 서버 (was)
2장. 파이썬 웹 표준 라이브러리
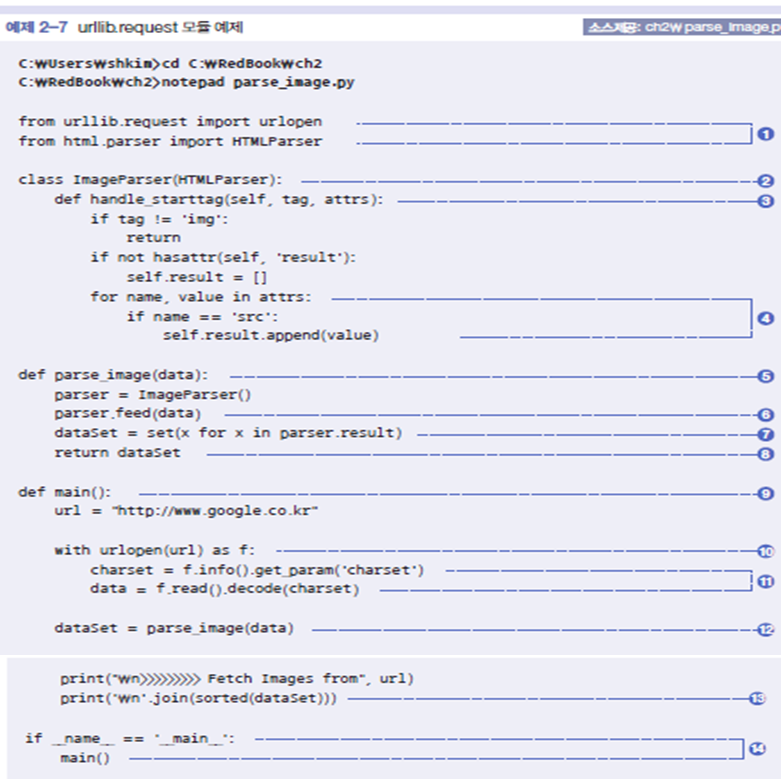
- 2-7. urllib.request 모듈 예제
2-7 class
parser라는 인스턴스를 하나 만든 것
- 2-13 간단한 웹 서버 만들기
from http.server import HTTPServer, BaseHTTPRequestHandler

class MyHandler(BaseHTTPRequestHandler):
    def do_GET(self):
        self.send_response_only(200, 'OK')
        self.send_header('Content-Type', 'text/plain')
        self.end_headers()
        self.wfile.write(b"Hello World")

if __name__ == '__main__':
    server = HTTPServer(('',8888), MyHandler)
    print("Started Webserver on port 8888...")
    print("Press ^C to quit WebServer")
    server.serve_forever()
3장. Django 웹 프레임워크
-
pip 설치
apt install python3-pip -
파이썬 패키지 가상환경 설치
sudo apt-get install python3-venv -
Django 설치
pip install django -
Django버전 확인
python3 -m django --version -
MVT패턴 model-view-controller
데이터, 사용자 인터페이스, 데이터를 처리하는 로직을 구분
정해진 방식으로 주고 받음
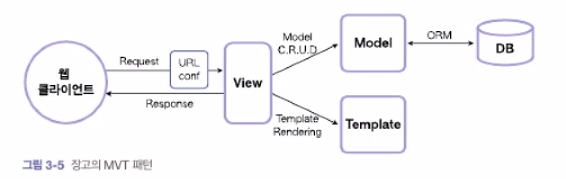
→ ID를 가지고 접근하므로 ID를 붙여서 구분한다. ID 중요📍
정규식? 외워서 쓰거나 찾아보고 쓰기. 보고 이해하고 쓰기만 하면 된다.
- MVT 코딩순서
프로젝트 뼈대 만들기 → 모델 코딩하기 → URLconf코딩하기 → 뷰 코딩하기 → 템플릿 코딩하기
polls 만들기
- 교재 110페이지
- 프로젝트 만들기
django-admin startproject mysite: 프로젝트 만들기
tree ./mysite (apt install tree해서 사용하면 경로를 볼 수 있음)
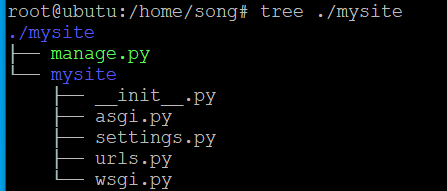
참고) manage.py : 프로젝트를 manage하기 위한 파일
-
앱 만들기 (manage.py가 있는 곳으로 이동해서 앱 생성)
python3 [manage.py](http://manage.py/) startapp polls
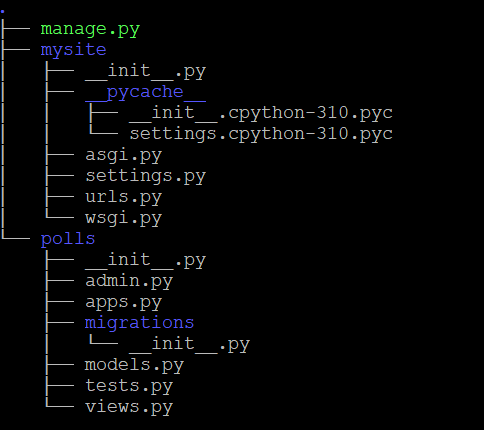
→ model, view가 만들어짐- 앱 등록 및 설정
vi mysite/settings.py
1) ALLOWED_HOSTS = [”*”] : 모든 접근 허용
2) INSTALLED_APPS에 polls도 추가하기 : 자동으로 등록되어 있고, 내가 만든 앱도 추가해주기
3) TIME_ZONE = 'Asia/Seoul’

- 데이터베이스 뼈대 만들기
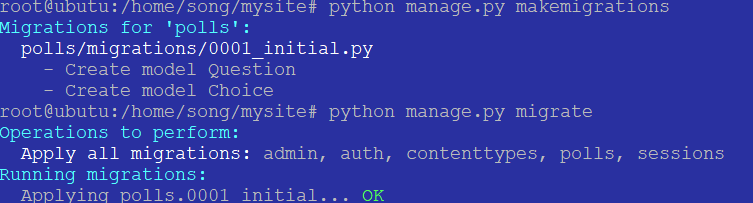
python3 [manage.py](http://manage.py/) migrate
: 모델 내용을 동기화 시켜서 sqlite를 쓰겠다고 하는 것. 이후에 db.sqlite3가 만들어진다.
make migration → DB와 모델에 싱크가 안맞는 부분을 찾아서 DB를 갱신하는 것


-
admin 계정 생성
python3 [manage.py](http://manage.py/) createsuperuser: 장고는 admin이 기본으로 생김. -
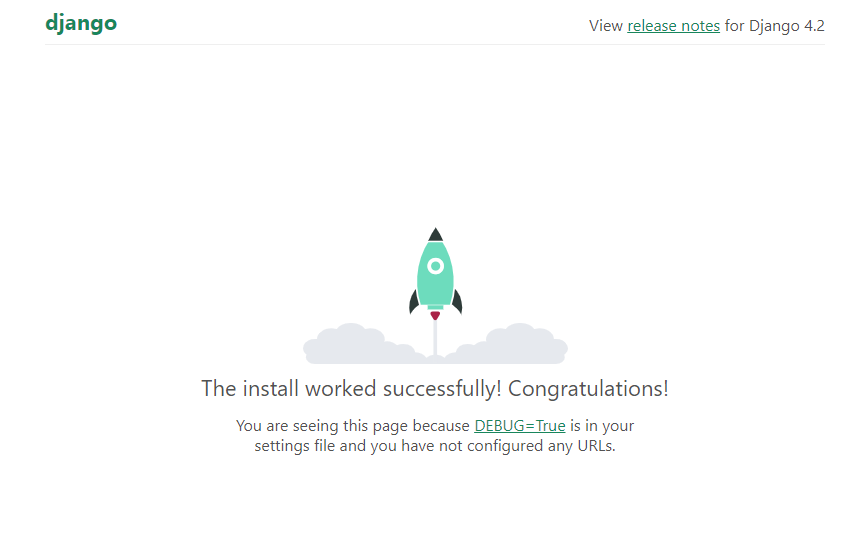
서버 구동해서 동작 확인
python3 [manage.py](http://manage.py/) runserver 0.0.0.0:8080
8080포트로 runserver 열기 -
웹브라우저로 확인
http://192.168.11.132:8000/ (ip 서버 웹브라우저에서 확인해보면 django 화면 보임)
http://VMwareIP:8000/admin/
위에 admin 계정으로 로그인하면 된다.
ID: root , PW: 1234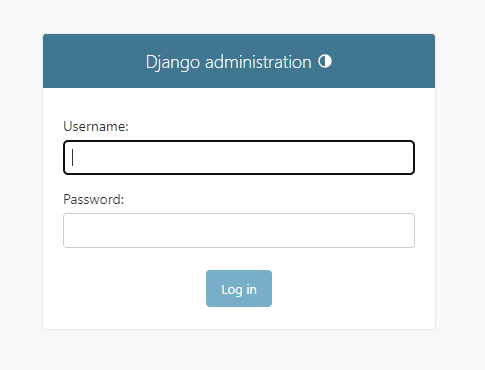
- apps/models.py 클래스 생성 : 이제 app에 들어가서 작업하는 과정(polls에 있는 models.py)
문제 클래스, 선택 클래스```python from django.db import models # Create your models here. class Question(models.Model): #*모델이라는 클래스를 상속 받음, () 상속 내용은 받아와야함* question_text = models.CharField(max_length=200) pub_date = models.DateTimeField("date published") def __str__(self): return self.question_text class Choice(models.Model): #*foreignKey를 사용, Cascade 옵션으로 Question을 지우면 Choice도 자동 삭제* question = **models.ForeignKey(Question, on_delete=models.CASCADE)** choice_text = models.CharField(max_length=200) votes = models.IntegerField(default=0) def __str__(self): return self.choice_text ``` `python3 [manage.py](http://manage.py/) makemigrations` → 를 통해 만들기 `python3 manage.py migrate` → 실행하기 참고) python3 귀찮으니까 바꾸기 alias python="python3” 혹은 pip install python3-is-python 설치하면 된다.
-
apps/admin.py에 테이블 등록 (만든 app이 polls니까 계속 polls에서~)
from django.contrib import admin
from polls.models import Question, Choice

# Register your models here.
admin.site.register(Question)
admin.site.register(Choice)
- admin으로 로그인해서, 문제와 choice 데이터 등록
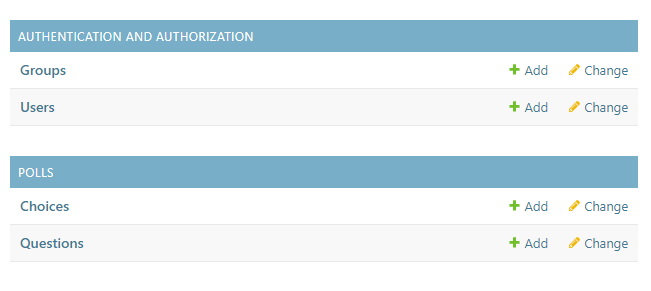
CASCADE로 연결해서 Questions에서 지우면 choices에 내용도 지워진다.
ondelete 옵션 참고 (테이블 정의시, 위에 8번 참고) - url 등록 include
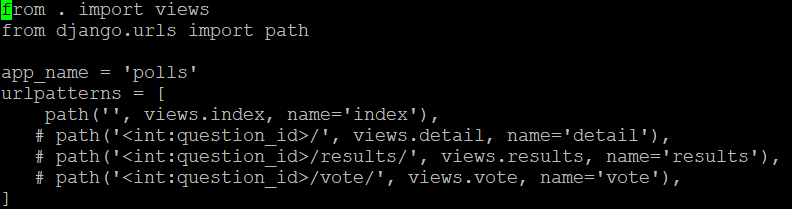
교재 131페이지 3-4, 3-5 2개의 파일(a. b. 참고)에 작성 방법을 이용해서 하는게 좋다. 1개의 파일로는 x```python #a.**vi mysite/urls.py** from django.contrib import admin from django.urls import path, include urlpatterns = [ path('admin/', admin.site.urls), **path("polls/", include("polls.urls")),** ] #b. **vi polls/urls.py** from django.urls import path from . import views app_name = "polls" urlpatterns = [ path("", views.index, name="index"), #아무것도 "" 없으면 뷰안에 인덱스를 호출 path("<int:question_id>/", views.detail, name="detail"), #숫자가 들어오면 detail을 path("<int:question_id>/results/", views.results, name="results"), path("<int:question_id>/vote/", views.vote, name="vote"), ] ```
-
views.index 만들기
view가 컨트롤러다. 컨트롤러에 들어가서 detail, results, vote를 호출하기
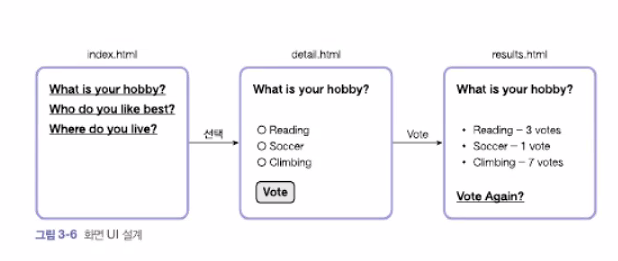
교재 3-6번 템플릿보다 먼저 3-7 1)index 함수 작성하고 2)템플릿 파일 만들기(index.html)
1) index() 함수 작성하기
polls/views.pyfrom django.shortcuts import render from polls.models import Question # Create your views here. def index(request): latest_question_list = Question.objects.all().order_by('-pub_date')[:5] context = {'latest_question_list': latest_question_list} #값을 넘기기 위해서 사용 return render(request, 'polls/index.html', context) #render가 그려주는 함수 url을 그려주면 index.html을 대상으로 그린다 #request에 대해서 파라미터로 context를 넘겨주는 것2) 템플릿 파일 만들기, index.html
polls(apps) 아래에 디렉토리 만들기mkdir templates mkdir templates/pollspolls/templates/polls/index.html → index html만들어서 아래 추가
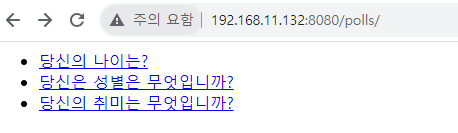
{%if latest_question_list %} #리스트를 받아와서 for문을 진행, 리스트없으면 else
<ul>
        {% for question in latest_question_list %}
             <li><a href="/polls/{{ question.id }}/">{{question.question_text}}</a></li>
        {% endfor %}
</ul>
{% else %}
        <p> No polls are available. </p>
{% endif %}
→ 여기까지 테스트는 url.py에 index 외에 다 주석처리하고 Question list만 나오는지 확인할 수 있음
- views.detail, results... 에러 발생
url.py에서 일단 index 제외한 내용 주석처리하고, Question list 뜨는것 확인
서버 run한 후 웹브라우저에서 확인이 가능하다(6번 참고)
****http://192.168.11.132:8080/polls/ 를 통해 문제 나오는 거만 확인하고 14번부터 다시 진행하기
-
templates/polls/detail.html 아래와 같이 작성하기
<form action ="{% url 'polls:vote' question.id %}" method="post"> {% csrf_token %} <fieldset> <legend><h1> {{ question.question_text }} </h1></legend> {% if error_message %}<p><strong>{{ error_message }}</strong></p>{% endif % } {% for choice in question.choice_set.all %} //초이스_set은 프레임워크가 이렇게 지정 <input type = "radio" name = "choice" id="choice{{ forloop.counter }}" value="{{ choice.id }}"> <label for="choice{{ forloop.counter }}">{{ choice.choice_text }}</label><br> {% endfor %} </fieldset> <input type="submit" value="Vote"> </form> -
polls/views.py에 detail() , vote(), results()함수 작성하기
from django.shortcuts import get_object_or_404, render from django.http import HttpResponseRedirect from django.urls import reverse from polls.models import Choice, Question def index(request): latest_question_list = Question.objects.all().order_by('-pub_date')[:5] context = {'latest_question_list': latest_question_list} return render(request, 'polls/index.html', context) **def detail(request, question_id):** question = get_object_or_404(Question, pk=question_id) context = {"question": question} return render(request, 'polls/detail.html', context) **def vote(request, question_id):** question = get_object_or_404(Question, pk=question_id) try: selected_choice = question.choice_set.get(pk=request.POST['choice']) except (KeyError, Choice.DoesNotExist): return render(request, 'polls/detail.html', { 'question': question, 'error_message': "You didn't select a choice.", }) else: selected_choice.votes += 1 selected_choice.save() **def results(request, question_id):** question = get_object_or_404(Question, pk=question_id) return render(request, 'polls/results.html', {'question': question}) -
templates/polls/results.html 만들기
<h1>{{ question.question_text }}</h1>

<ul>
 {% for choice in question.choice_set.all %}
   <li>{{ choice.choice_text }} - {{ choice.votes }} vote{{ choice.votes|pluralize }} </li>
{% endfor %}
</ul>

<a href = "{% url 'polls:detail' question.id %}">Vote again?</a>