TIL - 39. 객체 [230907]
11_객체.html
<!DOCTYPE html>
<html lang="en">
<head>
    <meta charset="UTF-8">
    <meta name="viewport" content="width=device-width, initial-scale=1.0">
    <title>11_객체</title>

    <style>
        .area{
            width: 400px;
            height: 400px;
            border: 1px solid black;
        }
    </style>
</head>
<body>
    <h1>자바스크립트 객체</h1>

    <pre>
        자바스크립트의 객체는 {} 내에 key:value 가 모여있는 형태로 작성된다

        { K:V, K:V, K:V ...}

        (참고) 자바스크립트 객체 모양의 문자열
        == JSON(JavaScript Object Notation)
        => "{ K:V, K:V, K:v ...}"

        - 자바스크립트에 객체를 생성하는 방법
        1. {} : 객체 리터럴 표기법을 이용한 생성
        2. 생성자를 이용한 생성
    </pre>

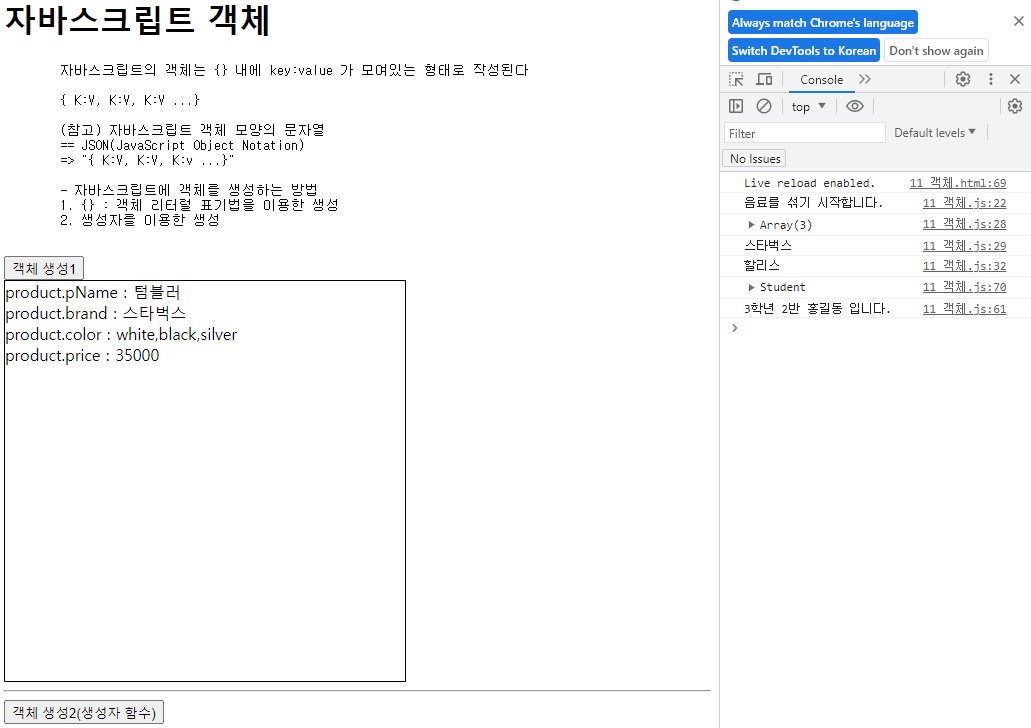
    <button id="btn1">객체 생성1</button>
    <div class="area" id="div1"></div>


    <hr>
    <button id="btn2">객체 생성2(생성자 함수)</button>

    <script src="js/11_객체.js"></script>
</body>
</html>
11_객체.js
// 객체 생성 1
document.getElementById("btn1").addEventListener("click", function() {

    const div1 = document.getElementById("div1");

    // {} 객체 리터럴 표기법으로 객체 생성

    // ** 중요 **
    // 자바스크립트 객체의 key는 무조건 String(묵시적)
    // "Key" / 'Key' / key (따옴표 없어도 String 으로 인식)

    const brand = "할리스";

    const product = {
        "pName" : "텀블러",
        'brand' : "스타벅스",
        color : ["white", "black", "silver"],
        price : 35000,

        // 기능(메서드)
        mix : function() {
            console.log("음료를 섞기 시작합니다.")
        },

        information : function() {
            // 같은 객체 내부의 대른 속성을 호출하고 싶은 경우
            // 현재 객체를 뜻하는 this를 앞에 붙여야 한다.
            console.log(this.color);
            console.log(this.brand);

            // this 미작성 시 객체 외부 변수 호출
            console.log(brand);
        }
    }

    div1.innerHTML += "product.pName : " + product.pName + "<br>";
    div1.innerHTML += "product.brand : " + product.brand + "<br>";
    div1.innerHTML += "product.color : " + product.color + "<br>";
    div1.innerHTML += "product.price : " + product.price + "<br>";


    // 객체 메서드 호출
    product.mix();
    product.information();
});

// ------------------------------------------------

// 생성자 함수

// 1. 생성자 함수 정의 (생성자 함수명은 대문자로 시작!)
function Student(name, grade, ban) {
    // 속성
    // this == 생성되는 객체
    this.name = name; // 생성되는 객체 name에 매개변수 name 대입
    this.grade = grade;
    this.ban = ban;

    // 기능(메서드)
    this.intro = function() {
        console.log( grade + "학년 " + ban + "반 " + name + " 입니다.")
    }
}

// 2. 생성자 함수 호출 {new 연산자}
document.getElementById("btn2").addEventListener("click", function() {

    const std1 = new Student("홍길동", 3, 2);

    console.log(std1);

    // 생성자 함수 사용 이유 : 같은 형태의 객체가 다수 필요한 경우에 사용
    // 코드길이 감소, 재사용성 증가
    std1.intro();

});
12_DOM.html
<!DOCTYPE html>
<html lang="en">
<head>
    <meta charset="UTF-8">
    <meta name="viewport" content="width=device-width, initial-scale=1.0">
    <title>12_DOM</title>

    <style>
        .area{
            width: 400px;
            height: 400px;
            border: 1px solid black;
        }

        .area > div {
            width: 100%;
            height: 10%;
            box-sizing: border-box;
            border: 2px solid red;
            background-color: yellow;
        }

    </style>
</head>
<body>
    <h1>DOM(Document Object Model)</h1>

    <pre>
        HTML(웹문서, 웹페이지) 문서를 객체 기반으로 표현한 것
        -> HTML 문서에 작성된 내용을 트리구조(계층형)로 나타냈을 때
           각각의 태그, TEXT, COMMENT 등을 Node 라고 한다.

        document : {
            DOCTYPE : html,
            HTML : {
                HEAD : {
                    TITLE: {TEXT : "문서제목"},
                    STYLE: {...},
                    META: {...}
                },
                BODY : {
                    H1: {TEXT : "제목", ATTRIBUTE : "속성"},
                    COMMENT : {TEXT : "주석내용"},
                    DIV : {...}
                }
            }
        }
    </pre>

    <hr>

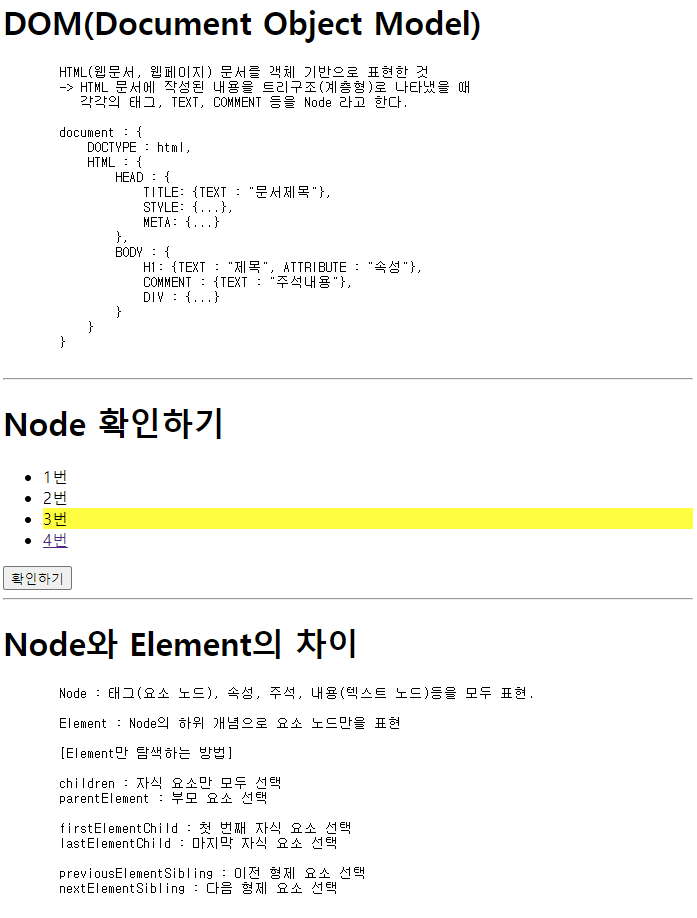
    <h1>Node 확인하기</h1>

    <ul id="test">
        <!-- Node 확인 테스트 주석입니다. -->

        <li id="li1">1번</li>
        <li class="cls">2번</li>
        <!-- 중간 주석 -->
        <li style="background-color: yellow;">3번</li>
        <li>
            <a href="#">4번</a>
        </li>
    </ul>

    <button id="btn1">확인하기</button>

    <hr>
    <h1>Node와 Element의 차이</h1>

    <pre>
        Node : 태그(요소 노드), 속성, 주석, 내용(텍스트 노드)등을 모두 표현.

        Element : Node의 하위 개념으로 요소 노드만을 표현

        [Element만 탐색하는 방법]

        children : 자식 요소만 모두 선택
        parentElement : 부모 요소 선택

        firstElementChild : 첫 번째 자식 요소 선택
        lastElementChild : 마지막 자식 요소 선택

        previousElementSibling : 이전 형제 요소 선택
        nextElementSibling : 다음 형제 요소 선택
    </pre>

    <button id="btn2">Element 확인하기</button>


    <hr>

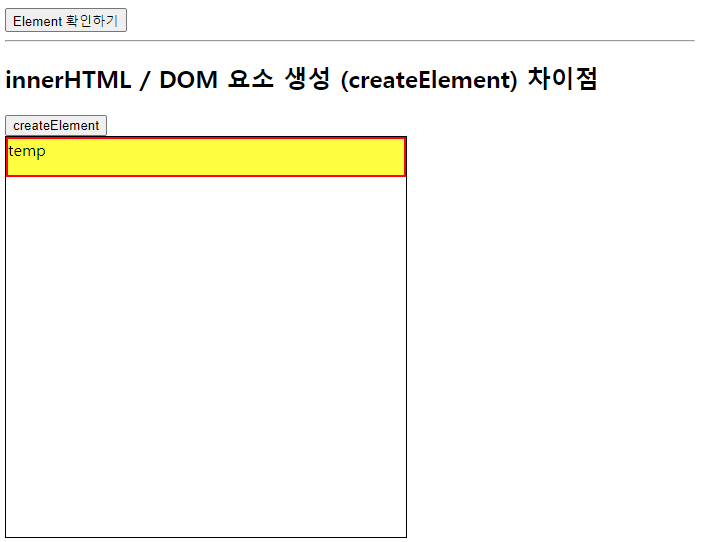
    <h2>innerHTML / DOM 요소 생성 (createElement) 차이점</h2>

    <button id="btn3">createElement</button>
    <div class="area" id="div3">
        <div id="temp">temp</div>
    </div>


    <script src="js/12_DOM.js"></script>
</body>
</html>
12_DOM.js
// Node 확인하기

document.getElementById("btn1").addEventListener("click", function(){

    // #test의 자식 노드를 모두 얻어오기
    // - 요소.childNodes : 요소의 자식 노드를 모두 반환
    const nodeList = document.getElementById("test").childNodes;
    console.log(nodeList);

    // 노드 탐색
    // 1) 부모 노드 탐색 : parentNode
    const li1 = document.getElementById("li1");
    console.log( li1.parentNode ); // ul#test

    // 부모 노드 마지막에 새로운 노드 추가 (append : (마지막에) 덧붙이다)
    li1.parentNode.append("abcd");

    // 2) 첫 번째 자식 노드 탐색 : firstChild
    console.log( document.getElementById("test").firstChild ); // text

    // 3) 마지막 자식 노드 탐색 : lastChild
    console.log( document.getElementById("test").lastChild ); // 추가된 abcd

    // 4) 중간에 존재하는 자식 노드 탐색 : 부모요소.childNodes[인덱스]
    console.log(nodeList[11]);

    // 5) 이전 형제 노드 탐색 : previousSibling
    //    다음 형제 노드 탐색 : nextSibling

    console.log(nodeList[8].previousSibling);
    console.log(nodeList[8].nextSibling);

    // 연달아서 사용 가능
    console.log(nodeList[8].previousSibling.previousSibling.previousSibling);

});

// Element 확인하기

document.getElementById("btn2").addEventListener("click", function() {

    // #test의 모든 자식 요소를 반환
    const list = document.getElementById("test").children;
    console.log(list);

    // #test의 첫번째 자식 요소
    document.getElementById("test").firstElementChild.style.backgroundColor = "red";

    // #test의 자식 중 2번 인덱스의 이전 형제 요소 배경색 yellowgreen으로 변경
    list[2].previousElementSibling.style.backgroundColor = "yellowgreen";
});

document.getElementById("btn3").addEventListener("click", function() {

    const div = document.getElementById("div3"); // div3 선택

    // document.createElement("태그명") : 해당 태그 요소를 생성하여 반환
    const child = document.createElement("div"); // div 생성 O, 화면 배치 X

    div.append(child);
});
13_요소추가제거.html
<!DOCTYPE html>
<html lang="en">
<head>
    <meta charset="UTF-8">
    <meta name="viewport" content="width=device-width, initial-scale=1.0">
    <title>13_요소추가제거</title>

    <style>
        /* 한줄 */
        .row {
            margin: 5px 0;
        }

        /* input태그 */
        .in {
            width: 100px;
        }

        /* span태그 (X버튼) */
        .remove {
            display: inline-block;
            border: 1px solid black;
            margin-left: 5px;

            width: 20px;
            text-align: center;
            border-radius: 50%;

            font-weight: bold;
            cursor: pointer;
        }

    </style>
</head>
<body>
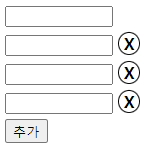
    <div id="container">
        <div class="row">
            <input class="in">
        </div>
    </div>

    <button id="add">추가</button>


    <script src="js/13_요소추가제거.js"></script>
</body>
</html>
13_요소추가제거.js
document.getElementById("add").addEventListener("click", function(){

    // div 요소 생성
    const div = document.createElement("div");

    // div에 row클래스 추가
    div.classList.add("row");

    // <div class="row"></div>

//-------------------------------------------------

    // input 요소 생성
    const input = document.createElement("input");

    input.classList.add("in");

    // <input class="in">

//-------------------------------------------------

    // span 요소 생성
    const span = document.createElement("span");

    span.classList.add("remove");

    span.innerText = "X";

    // <span class="remove"></span>

    div.append(input);
    div.append(span);
    //<div class="row">
    //      <input class="in">
    //      <span class="remove"></span>
    //</div>

    document.getElementById("container").append(div);


    span.addEventListener("click", function() {
        span.parentElement.remove();
    });

});
14_함수.html
<!DOCTYPE html>
<html lang="en">
<head>
    <meta charset="UTF-8">
    <meta name="viewport" content="width=device-width, initial-scale=1.0">
    <title>14_함수</title>
</head>
<body>

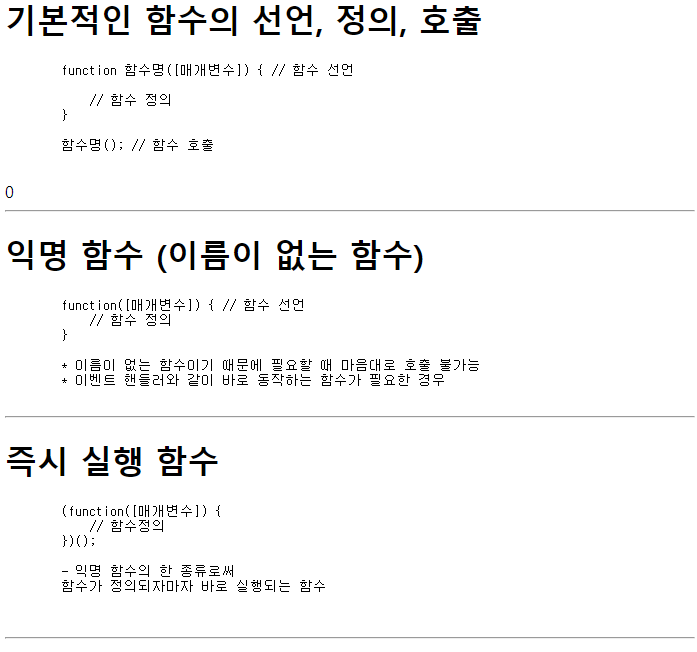
    <h1>기본적인 함수의 선언, 정의, 호출</h1>

    <pre>
        function 함수명([매개변수]) { // 함수 선언

            // 함수 정의
        }

        함수명(); // 함수 호출
    </pre>
                            <!-- 함수 호출 -->
    <div id="btn1" onclick="clickCount(this)">0</div>

    <hr>

    <h1>익명 함수 (이름이 없는 함수)</h1>

    <pre>
        function([매개변수]) { // 함수 선언
            // 함수 정의
        }

        * 이름이 없는 함수이기 때문에 필요할 때 마음대로 호출 불가능
        * 이벤트 핸들러와 같이 바로 동작하는 함수가 필요한 경우
    </pre>

    <hr>

    <h1>즉시 실행 함수</h1>
    <pre>
        (function([매개변수]) {
            // 함수정의
        })();

        - 익명 함수의 한 종류로써
        함수가 정의되자마자 바로 실행되는 함수

    </pre>

    <hr>

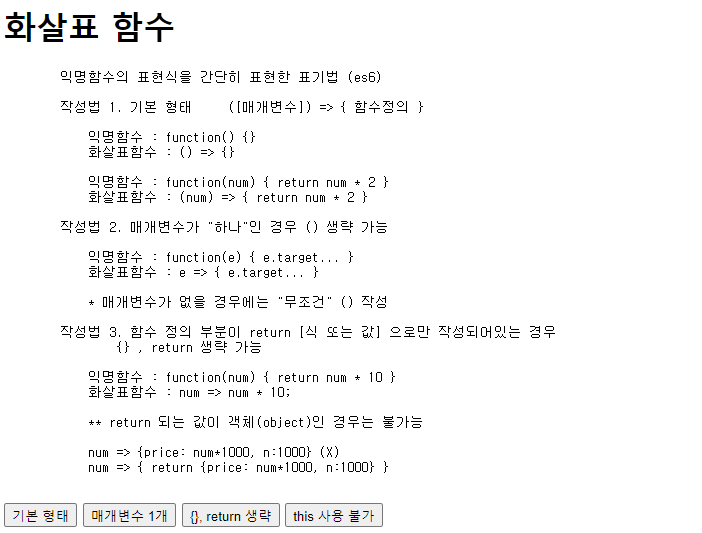
    <h1>화살표 함수</h1>
    <pre>
        익명함수의 표현식을 간단히 표현한 표기법 (es6)

        작성법 1. 기본 형태     ([매개변수]) => { 함수정의 }

            익명함수 : function() {}
            화살표함수 : () => {}

            익명함수 : function(num) { return num * 2 }
            화살표함수 : (num) => { return num * 2 }

        작성법 2. 매개변수가 "하나"인 경우 () 생략 가능

            익명함수 : function(e) { e.target... }
            화살표함수 : e => { e.target... }

            * 매개변수가 없을 경우에는 "무조건" () 작성

        작성법 3. 함수 정의 부분이 return [식 또는 값] 으로만 작성되어있는 경우
                {} , return 생략 가능

            익명함수 : function(num) { return num * 10 }
            화살표함수 : num => num * 10;

            ** return 되는 값이 객체(object)인 경우는 불가능

            num => {price: num*1000, n:1000} (X)
            num => { return {price: num*1000, n:1000} }
    </pre>

    <button id="btn2-1">기본 형태</button>
    <button id="btn2-2">매개변수 1개</button>
    <button id="btn2-3">{}, return 생략</button>

    <button id="btn2-4">this 사용 불가</button>

    <script src="js/14_함수.js"></script>
</body>
</html>
14_함수.js
// 기본 함수
function clickCount(btn) { // 함수 선언
    btn.innerText = Number(btn.innerText) + 1; // 함수 정의
}

document.addEventListener("click", function(){
    // 익명함수
});


// 기본함수
function test1() {
    console.log("기본함수");
}

test1(); // 호출

// 즉시실행 함수

(function() {
    console.log("즉시 실행 함수")
})();


//----------------------------------------------------------

// 화살표 함수(Arrow Function)

// 1. 기본형태 : () => {}
document.getElementById("btn2-1").addEventListener("click", () => {
    alert("화살표 함수 기본 형태입니다");

});

// 2. 매개변수 1개 : 매개변수 => {}
document.getElementById("btn2-2").addEventListener("click", e => {
    e.target.style.backgroundColor = "yellow";
});

// 3. {}, return 생략
document.getElementById("btn2-3").addEventListener("click", () => {

    // 익명함수
    printConsole(  function(num) {return num * 10}  )

    // 화살표함수
    printConsole( num => num * 5 );


});


function printConsole(fn) { // 매개변수로 함수가 전달됨
    console.log( fn(2) );
}

// this 사용 불가
// 1) 익명함수는 this 사용 가능
document.getElementById("btn2-4").addEventListener("click", function () {
    this.style.backgroundColor = "red";
})

// 2) 화살표함수는 this 사용 불가
document.getElementById("btn2-4").addEventListener("click", (e) => {

    // 화살표 함수에서 this는 창 자체를 나타내는 객체(window)이다.
    console.log(this);

    e.target.style.color = "white";

})

초보자