🏷 정적 컨텐츠
이전의 웰컴 페이지의 경우처럼, 서버에서 하는 일 없이 그대로 파일을 받아서 웹 브라우저에 전달해주는 방법이다.
스프링부트는 정적 컨텐츠 기능을 자동으로 제공한다!

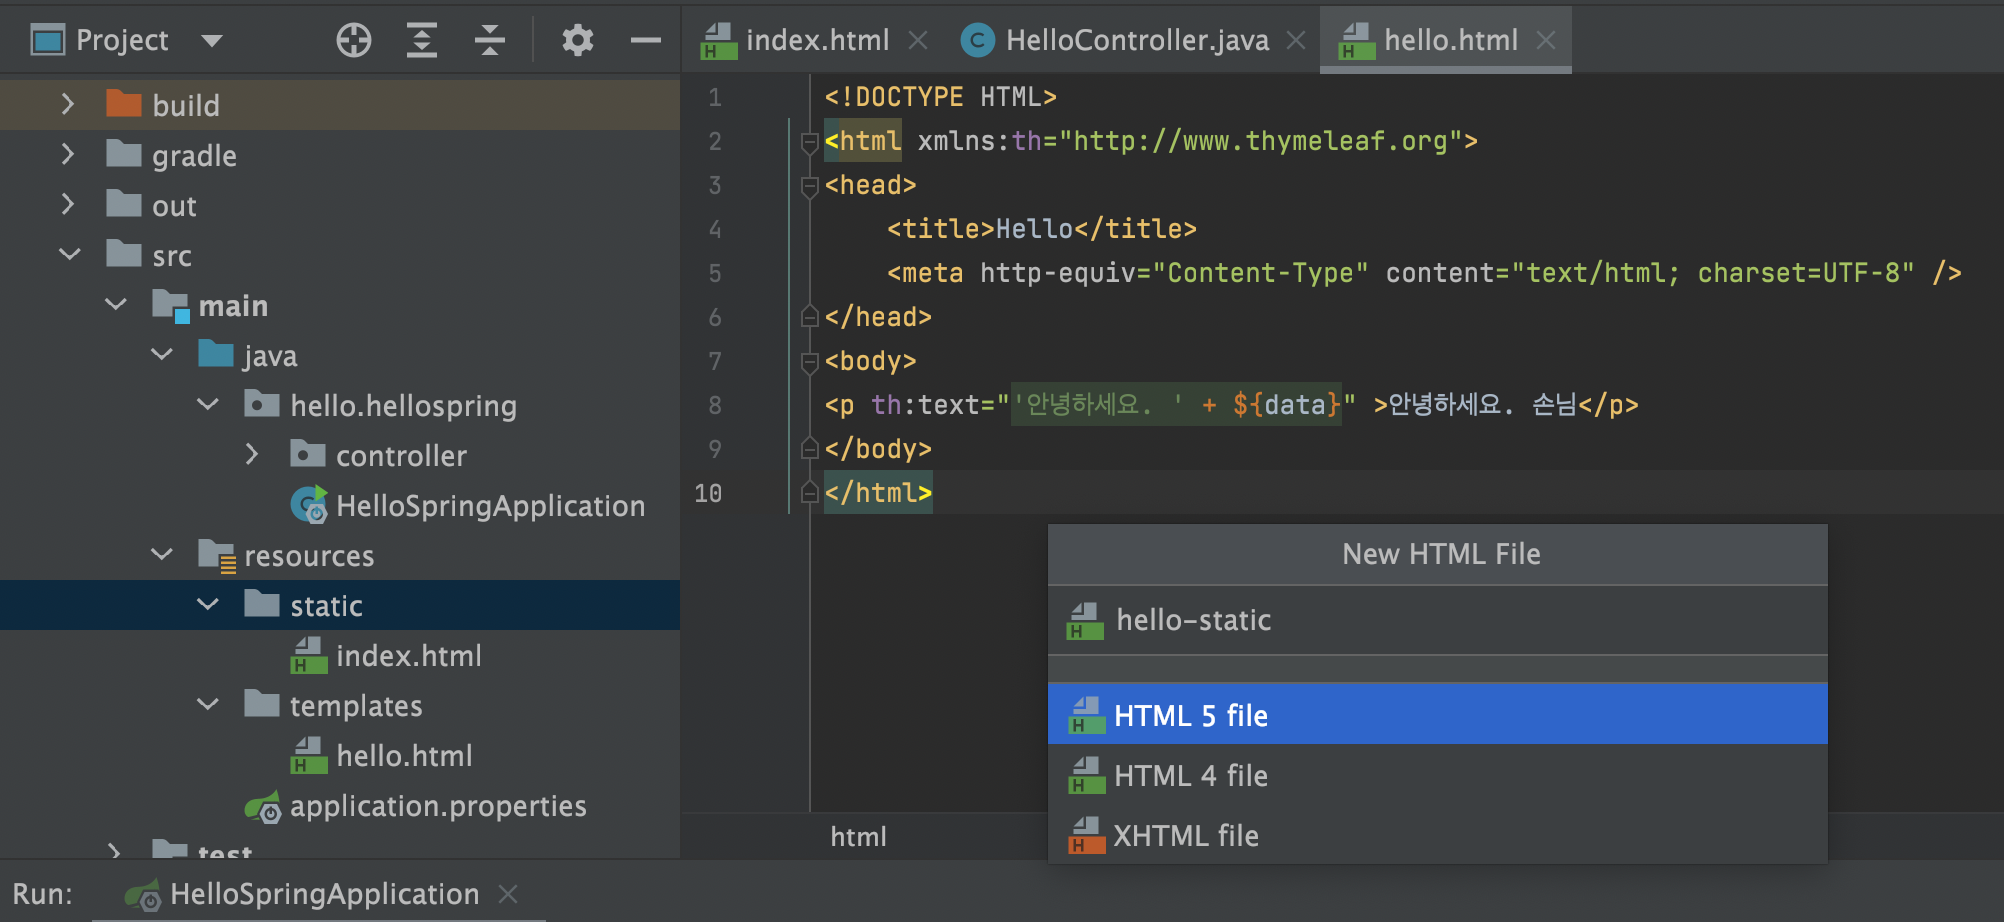
resources/static 위치에 hello-static.html 이라는 파일을 생성한다.
✔️ resources/static/hello-static.html
<!DOCTYPE HTML>
<html>
<head>
    <title>static content</title>
    <meta http-equiv="Content-Type" content="text/html; charset=UTF-8" />
</head>
<body>
정적 컨텐츠 입니다.
</body>
</html>
localhost:8080/hello-static.html 로 접속했을 때 결과

🏷 MVC와 템플릿 엔진
가장 많이 하는 방식으로, HTML을 그냥 주는 것이 아니라 서버에서 프로그래밍을 해서 동적으로 바꿔서 내려주는 방법이다.
(Model View Controller)
✔️ main/hello.hellospring/controller/HelloController.java 수정
package hello.hellospring.controller;

import org.springframework.stereotype.Controller;
import org.springframework.ui.Model;
import org.springframework.web.bind.annotation.GetMapping;
// 추가
import org.springframework.web.bind.annotation.RequestParam;

@Controller
public class HelloController {
    @GetMapping("hello")
    public String hello(Model model) {
        model.addAttribute("data", "hello!!");
        return "hello";
    }

    // 추가
    @GetMapping("hello-mvc")
    public String helloMvc(@RequestParam("name") String name, Model model) {
        model.addAttribute("name", name);
        return "hello-template";
    }
}
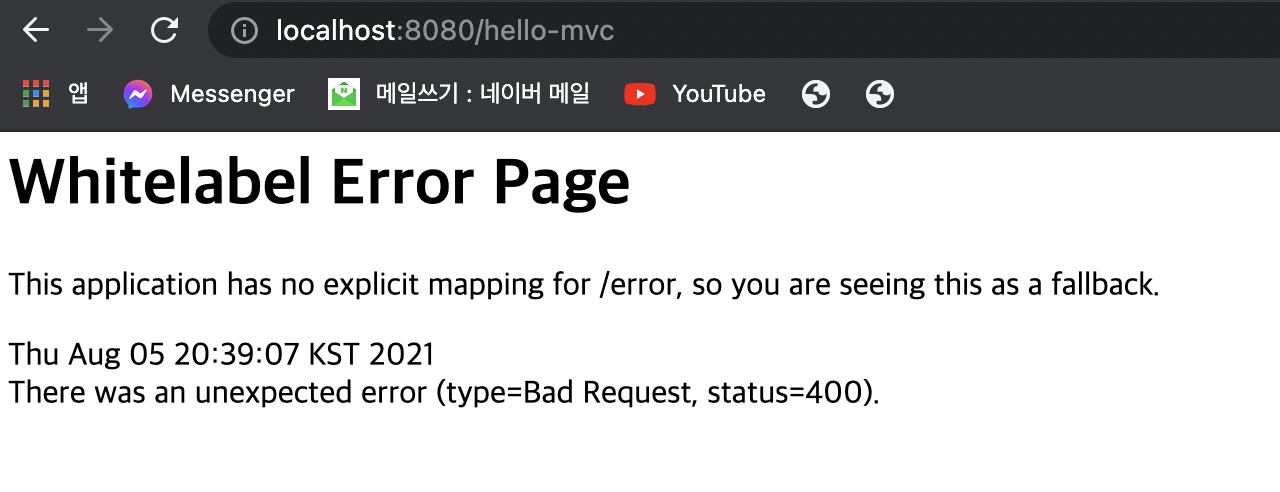
localhost:8080/hello-mvc 로 접속하면 에러가 뜬다
💡 에러메세지 확인 : Required request parameter 'name' for method parameter type String is not present
-> 파라미터 name을 필요로 하는데 없다는 의미!

localhost:8080/hello-mvc?name=spring!!! 과 같이 파라미터 값을 지정해서 넘겨줘야 한다!

정적 컨텐츠와는 달리, MVC는 마지막에 HTML 변환 과정이 추가된다
🏷 API
서버끼리 통신할 때 많이 사용한다.
✔️ main/hello.hellospring/controller/HelloController.java 수정
package hello.hellospring.controller;

import org.springframework.stereotype.Controller;
import org.springframework.ui.Model;
import org.springframework.web.bind.annotation.GetMapping;
import org.springframework.web.bind.annotation.RequestParam;
// 추가
import org.springframework.web.bind.annotation.ResponseBody;

@Controller
public class HelloController {
    @GetMapping("hello")
    public String hello(Model model) {
        model.addAttribute("data", "hello!!");
        return "hello";
    }
    @GetMapping("hello-mvc")
    public String helloMvc(@RequestParam("name") String name, Model model) {
        model.addAttribute("name", name);
        return "hello-template";
    }
    // 추가
    @GetMapping("hello-string")
    @ResponseBody
    public String helloString(@RequestParam("name") String name) {
        return "hello " + name;
    }
}
ResponseBody이란 ?
- html에서의 body가 아닌 http의 응답 body부분의 데이터를 직접 넣어줄 때 사용
- 템플릿 엔진과의 차이는, view 없이 입력한 문자가 그대로 들어간다는 것 !

localhost:8080/hello-string 으로 접속

페이지 소스 를 확인해보니 html 태그가 없고, 그냥 입력한 문자가 그대로 내려왔음을 알 수 있다. (자주 사용하지는 않음)
✔️ main/hello.hellospring/controller/HelloController.java 수정
package hello.hellospring.controller;

import org.springframework.stereotype.Controller;
import org.springframework.ui.Model;
import org.springframework.web.bind.annotation.GetMapping;
import org.springframework.web.bind.annotation.RequestParam;
import org.springframework.web.bind.annotation.ResponseBody;

@Controller
public class HelloController {
    @GetMapping("hello")
    public String hello(Model model) {
        model.addAttribute("data", "hello!!");
        return "hello";
    }
    @GetMapping("hello-mvc")
    public String helloMvc(@RequestParam("name") String name, Model model) {
        model.addAttribute("name", name);
        return "hello-template";
    }

    @GetMapping("hello-string")
    @ResponseBody
    public String helloString(@RequestParam("name") String name) {
        return "hello " + name;
    }
    // 추가
    @GetMapping("hello-api")
    @ResponseBody
    public Hello helloApi(@RequestParam("name") String name) {
        Hello hello = new Hello();
        hello.setName(name);
        return hello;
    }
    static class Hello {
        private String name;
        public String getName() {
            return name;
        }
        public void setName(String name) {
            this.name = name;
        } }
}
Hello hello = new Hello() 로 객체를 만들고,
return hello; 객체를 반환했다.
❓이렇게 하면 어떻게 될까❓

localhost:8080/hello-api?name=spring 으로 접속하면, 결과가 JSON 형태로 나타난다!
JSON 은 {"key":"value"} 의 구조로 이루어져 있다.
- 예전에는 XML도 많이 사용했지만, 최근에는 거의 JSON으로 통일이 됐다.
@RequestBody 사용 원리

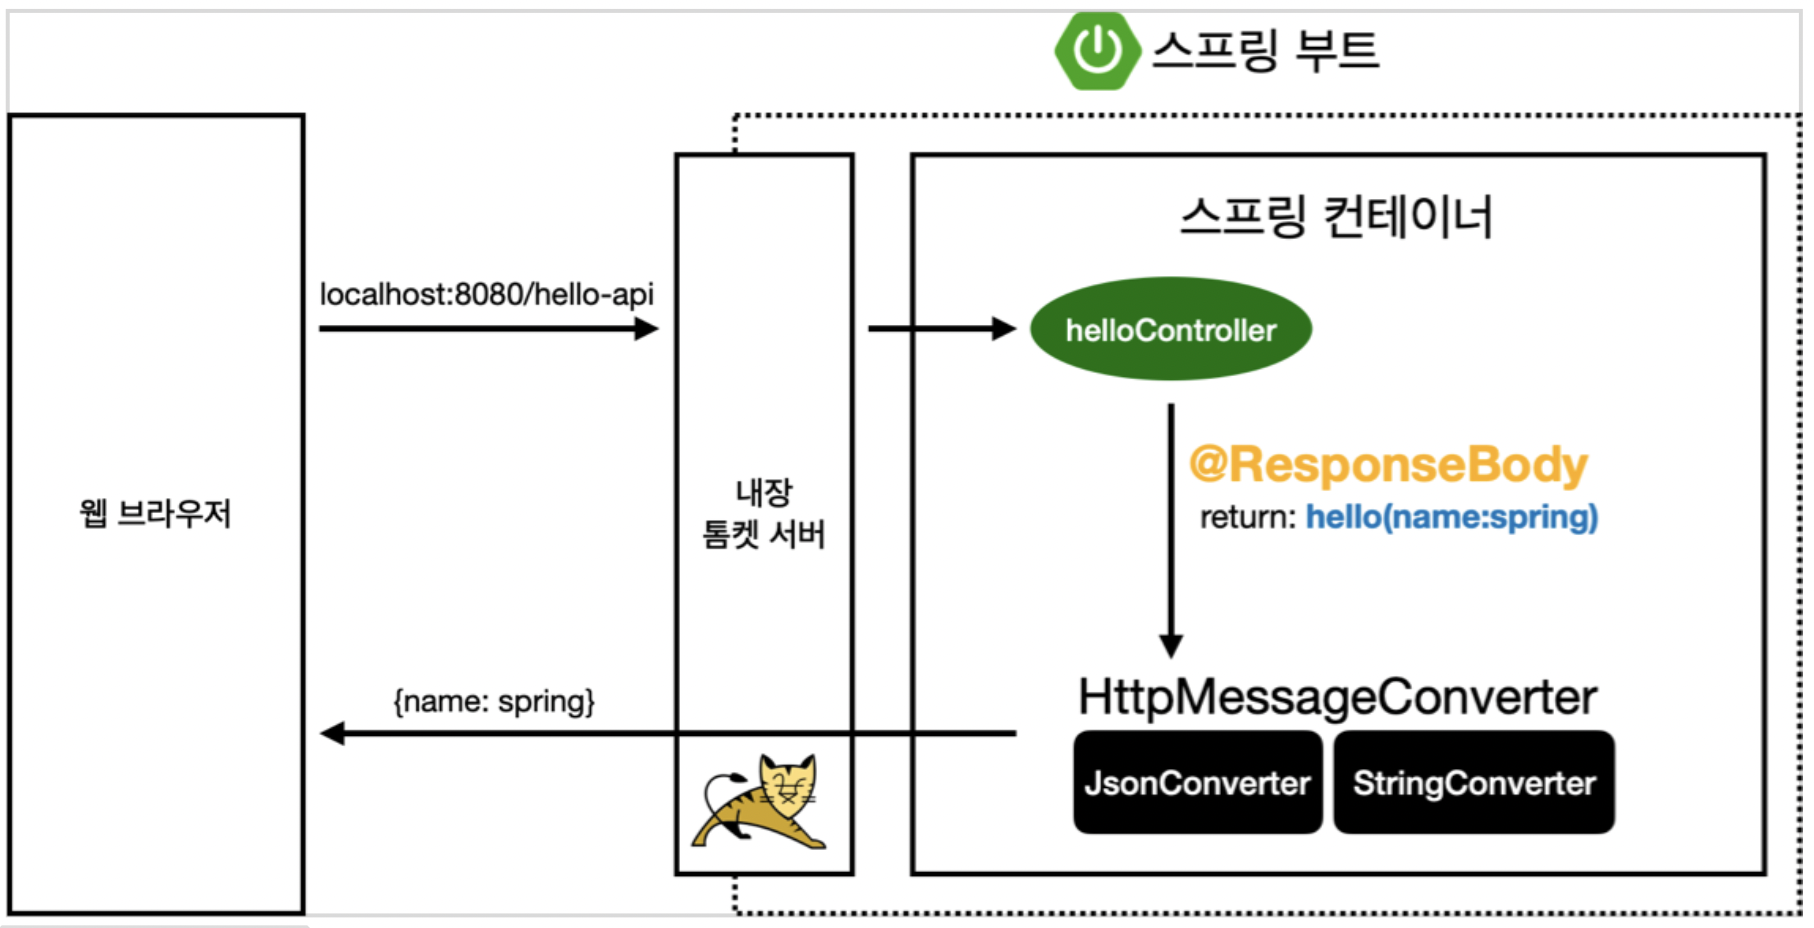
@responseBody라는 annotation이 붙어있기 때문에 http 응답에 이 데이터를 그대로 넘긴다.
(만약 안 붙어있다면, 이전의 template에서와 같이viewResolver에게 던짐)- 그런데 문자가 아닌 객체를 리턴하는 경우라면?
-> default가 JsonConverter 가 동작하게 된다.
-> 문자를 리턴하면 StringConverter 가 동작한다.
@ResponseBody를 사용
: HTTP의 BODY에 문자 내용을 직접 반환
:viewResolver대신에HttpMessageConverter가 동작
: 기본 문자처리 ->StringHttpMessageConverter
: 기본 객체처리 ->MappingJackson2HttpMessageConverter
: byte 처리 등등 기타 여러HttpMessageConverter가 기본으로 등록되어 있음
💡 참고 : 클라이언트의 HTTP Accept 해더와 서버의 컨트롤러 반환 타입 정보 둘을 조합해서HttpMessageConverter가 선택된다.
역시 뭐든 처음 배울 때 심정은 막막하고 걱정된다..🥺 복습을 꾸준히 해야겠다고 느꼈다^_^!
