1. 강의노트
1-1. 1주차 오늘 배울 것
브라우저: 1. 요청하는 역할 2.가져와서 보여주는 역할
html: 뼈대, css: 꾸미기, javascript: 움직이기
1-2. 필수 프로그램 설치
- 파이참 설치
Jetbrain 회원가입
파이참 라이센스 코드 (4개월동안 사용할 수 있는 코드 받음) Pycharm 단축키새로고침 F5 저장 cmd + S 전체 선택 cmd + A 잘라내기 cmd + X 콘솔창 줄바꿈 shift + enter 코드정렬 option + cmd + L 들여쓰기 tab 들여쓰기 취소 shift + tab 주석 cmd + / - AWS 회원가입
EC2 확인 링크
1-3. HTML,CSS 기본 내용
- 파이참 한글 플러그인 사용
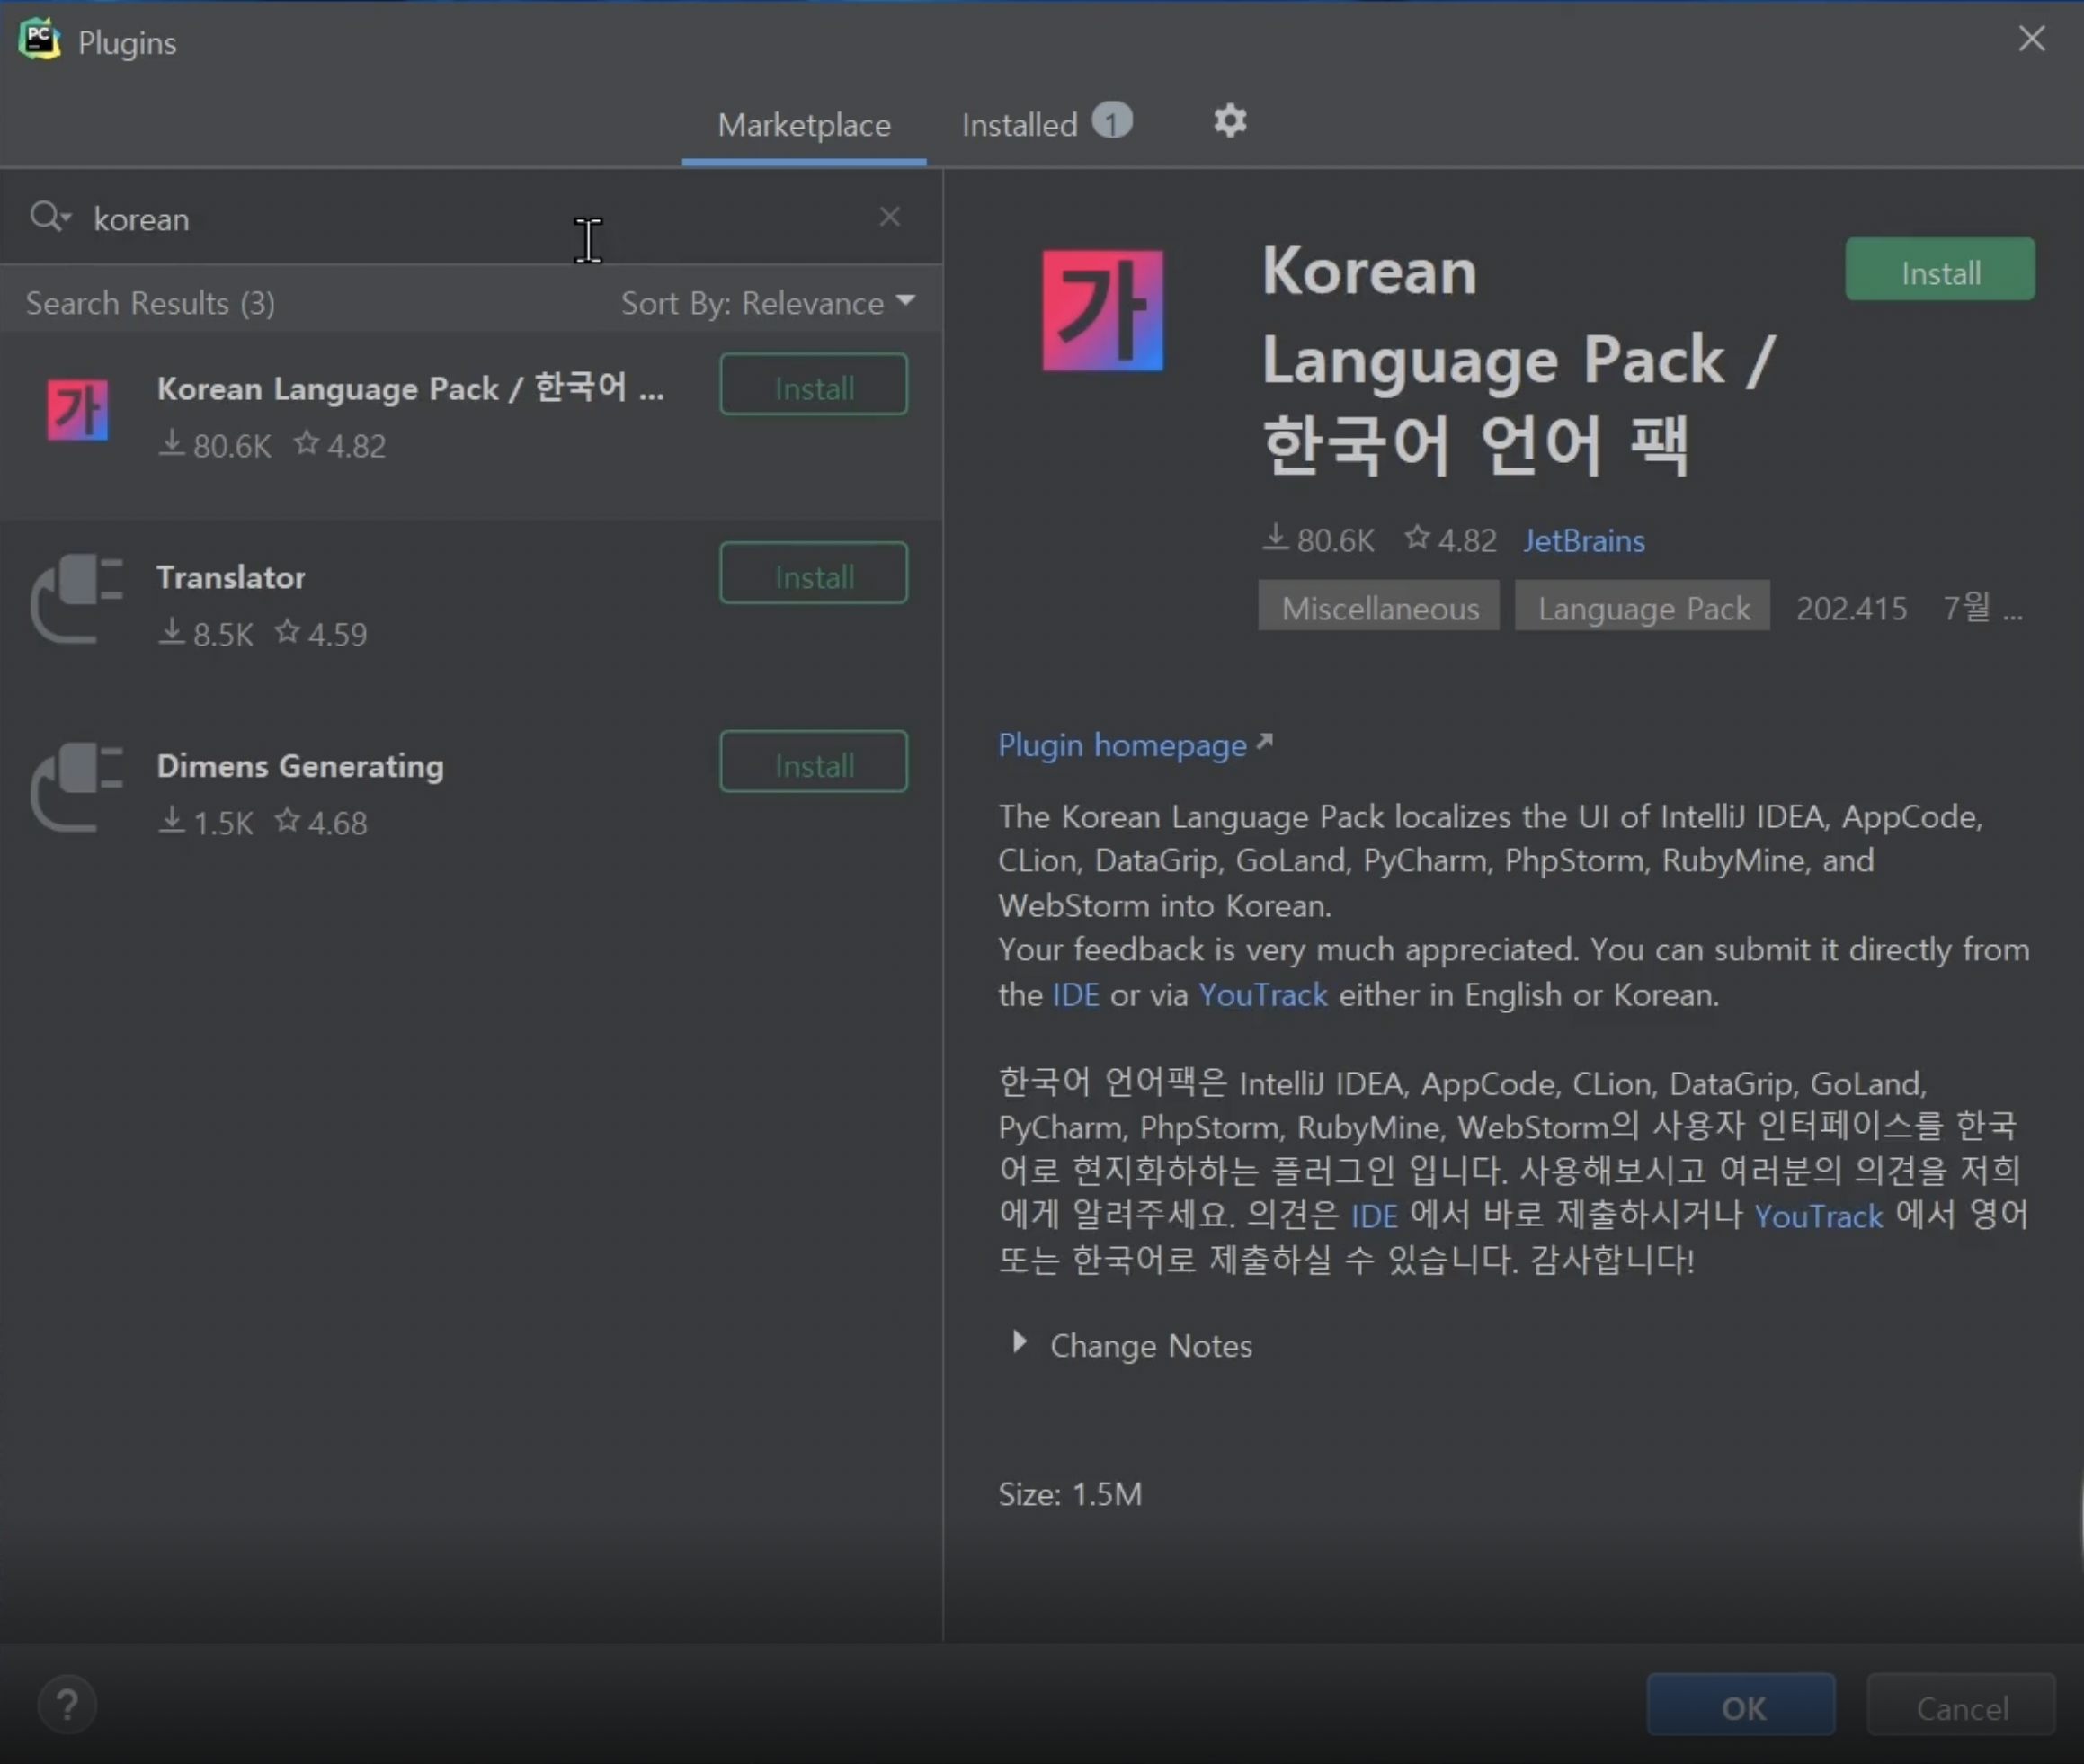
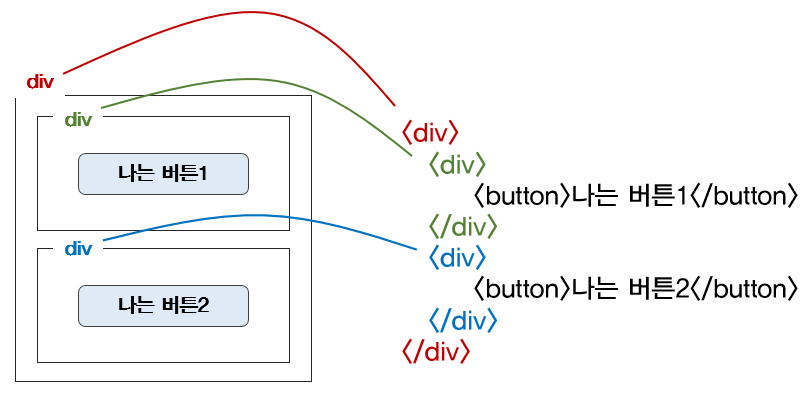
1 2 3 4 5 6 7 8 9 10 11 12 13 14 15 16 17 18 19 20 21 22 23 24 25 26 27 28 29 30 31 32 33 34 35 36 37 38 39 40 41 | <!DOCTYPE html> <html lang="en"> <head> <meta charset="UTF-8"> <meta name="viewport" content="width=device-width, initial-scale=1.0"> <title>스파르타코딩클럽 | HTML 기초</title> </head> <body> <!-- 구역을 나누는 태그들 --> <div>나는 구역을 나누죠</div> <p>나는 문단이에요</p> <ul> <li> bullet point!1</li> <li> bullet point!2</li> </ul> <!-- 구역 내 콘텐츠 태그들 --> <h1>h1은 제목을 나타내는 태그입니다. 페이지마다 하나씩 꼭 써주는 게 좋아요. 그래야 구글 검색이 잘 되거든요.</h1> <h2>h2는 소제목입니다.</h2> <h3>h3~h6도 각자의 역할이 있죠. 비중은 작지만..</h3> <hr> span 태그입니다: 특정 <span style="color:red">글자</span>를 꾸밀 때 써요 <hr> a 태그입니다: <a href="http://naver.com/"> 하이퍼링크 </a> <hr> img 태그입니다: <img src="https://www.google.com/ images/branding/googlelogo/1x/googlelogo_color_272x92dp.png"/> <hr> input 태그입니다: <input type="text"/> <hr> button 태그입니다: <button> 버튼입니다</button> <hr> textarea 태그입니다: <textarea>나는 무엇일까요?</textarea> </body> </html> | cs |
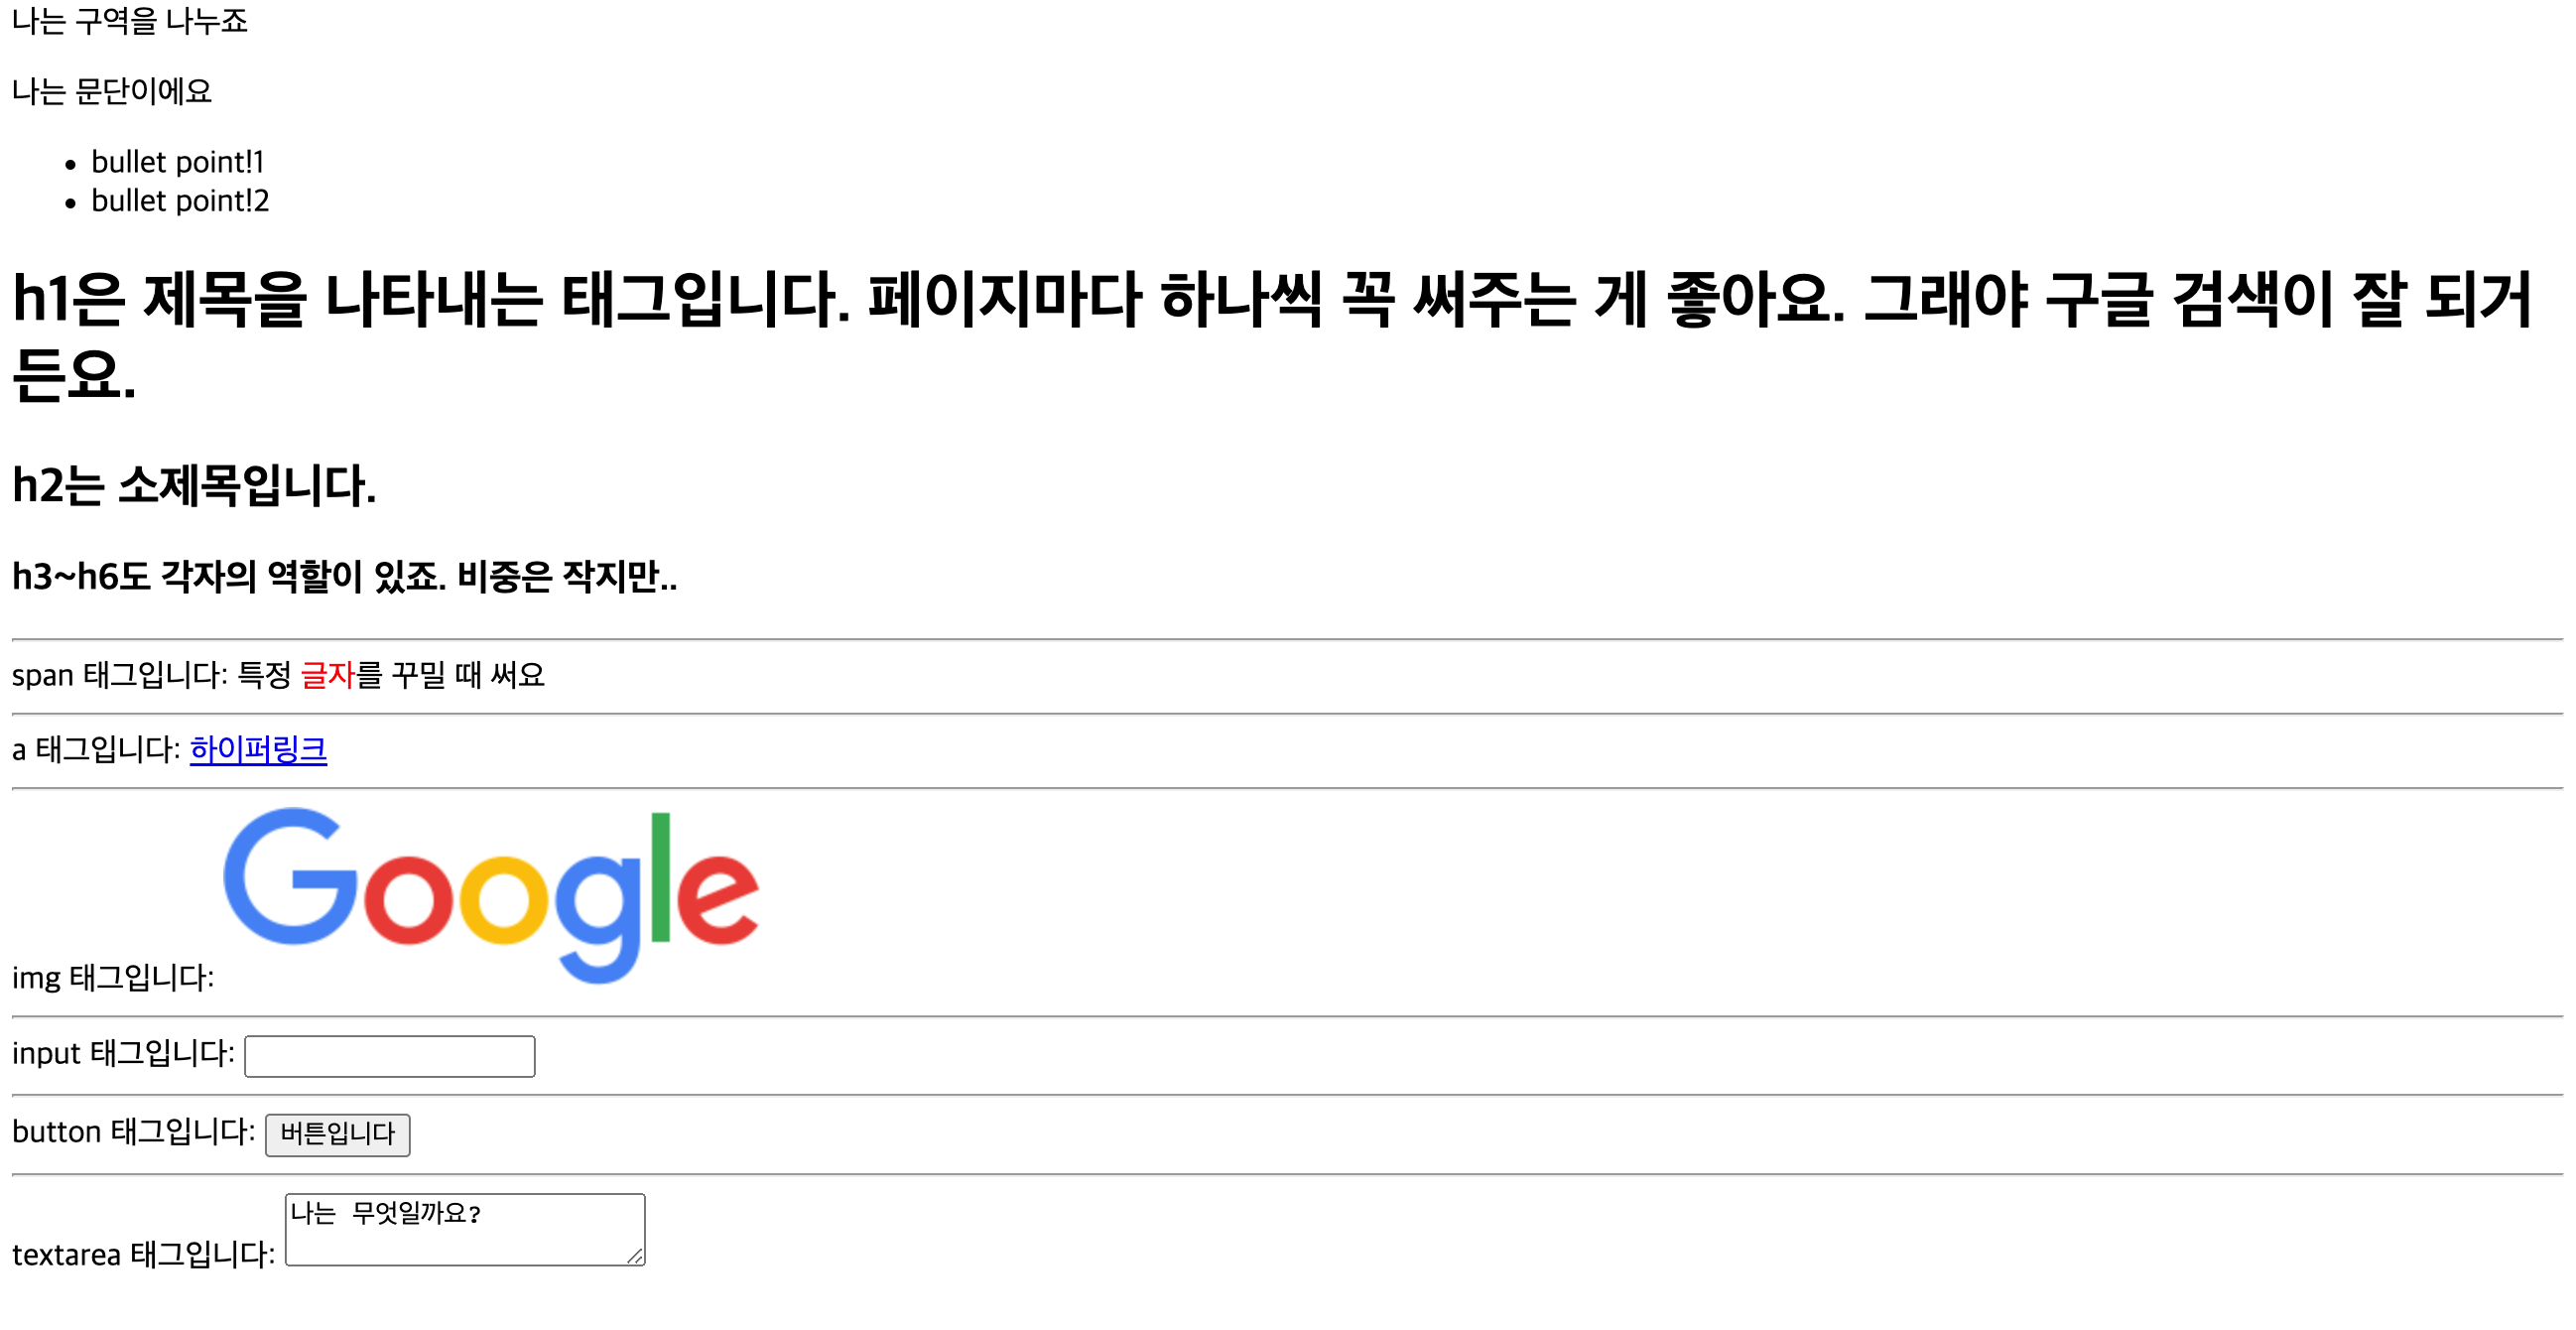
1-4. Quiz_간단한 로그인 페이지 만들어보기
1 2 3 4 5 6 7 8 9 10 11 12 13 | <!DOCTYPE html> <html lang="en"> <head> <meta charset="UTF-8"> <title>로그인페이지</title> </head> <body> <h1>로그인 페이지</h1> <p>ID: <input type="text"/></p> <p>PW: <input type="text"/></p> <button>로그인하기</button> </body> </html> | cs |
1-5. CSS 기초
꾸미기 전에 '지정'해야 꾸밀 수 있음 = 'class'
1-6. 자주 쓰이는 CSS 연습하기
자주 쓰는 문법
사이즈
width
height
폰트
font-size
font-weight
font-famliy
color
간격
margin
padding
배경관련
background-color
background-image
background-size
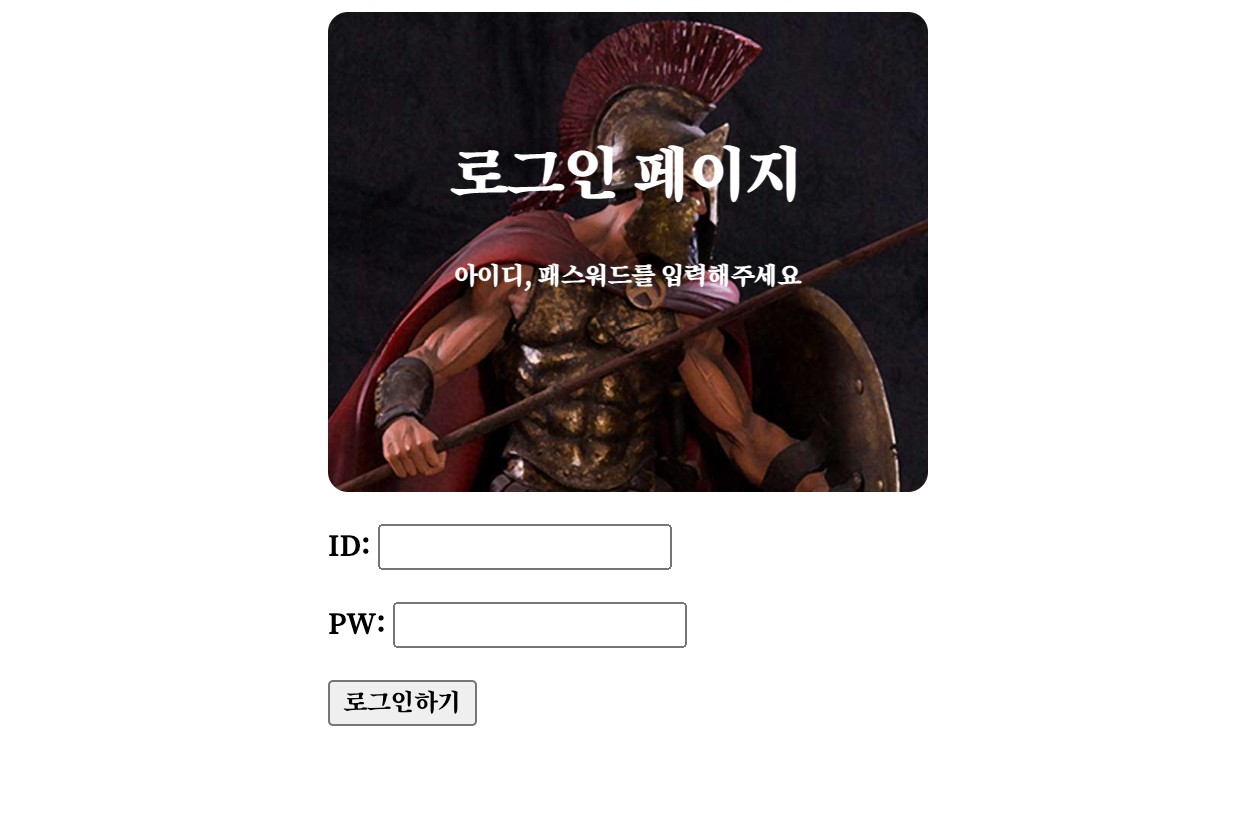
1 2 3 4 5 6 7 8 9 10 11 12 13 14 15 16 17 18 19 20 21 22 23 24 25 26 27 28 29 30 31 32 33 34 35 36 37 38 39 40 41 42 43 44 45 46 | <!DOCTYPE html> <html lang="en" xmlns="http://www.w3.org/1999/html"> <head> <meta charset="UTF-8"> <title>로그인페이지</title> <link href="https://fonts.googleapis.com/css2?family=Song+Myung&display=swap" rel="stylesheet"> <style> *{ font-family: 'Song Myung', serif; } .mytitle { width: 300px; height: 200px; color: white; text-align: center; background-image: url("https://www.ancient-origins. net/sites/default/files/field/image/Agesilaus-II-cover.jpg"); background-size: cover; background-position: center; border-radius: 10px; padding-top: 40px; } .wrap { width: 300px; margin:auto; } </style> </head> <body> <div class="wrap"> <div class="mytitle"> <h1>로그인 페이지</h1> <h5>아이디, 패스워드를 입력해주세요</h5> </div> <p>ID: <input type="text"/></p> <p>PW: <input type="text"/></p> <button>로그인하기</button> </div> </body> </html> | cs |
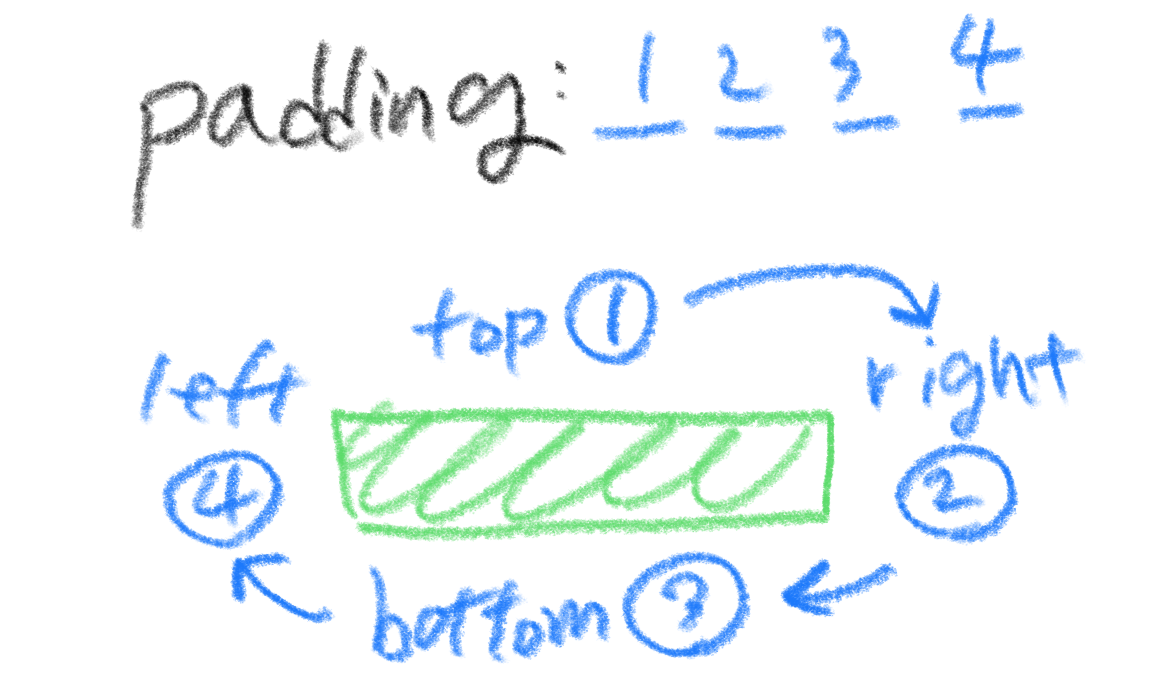
top, bottom, right, left 가 있는 CSS(ex. padding, margin)는 네 개 연속으로 쓸 때 시계방향으로 움직인다고 생각하면 기억하기 쉬움.
- 자세한 설명: w3schools - CSS - margin
1-7. 폰트, 주석, 파일분리
-
폰트
구글 웹폰트 링크 >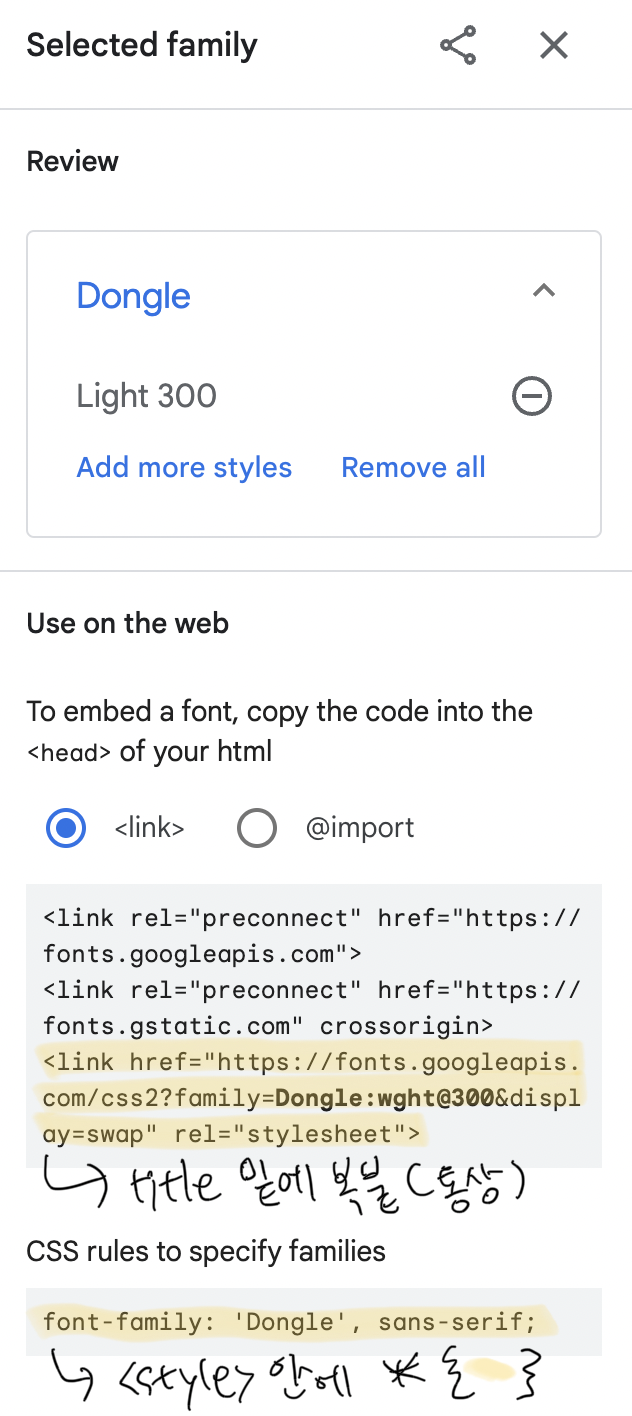
{ }, [ ] 등 문법에 붙이는 애들에 집착하면서 외우지말기
그냥 받아들이기 ... 왜냐고 묻지말기 ... -
주석
원하는 부분 드래그 +cmd + /하면 주석처리 됨 -
CSS 파일분리 (CSS 너무 길어졌을 때 파일로 따로 만들어서 붙여넣기)
  <!-- style.css 파일을 같은 폴더에 만들고, head 태그에서 불러오기 -->
<link rel="stylesheet" type="text/css" href = "(css파일이름).css">
1-8. 부트스트랩, 예쁜 CSS 모음집
부트스트랩 = 남이 만들어놓은 예쁜 CSS와 클래스 사용하기. 짱!
부트스트랩 시작 템플릿남이 미리 작성한 CSS를 내 HTML 파일에 적용한다는 점에서, bootstrap 적용은 CSS 파일 분리와 원리가 동일합니다.
다만, CSS의 파일이 인터넷 어딘가에 있다는 점이 다를 뿐입니다.
1 2 3 4 5 6 7 8 9 10 11 12 13 14 15 16 17 18 19 20 21 22 | <!doctype html> <html lang="en"> <head> <meta charset="utf-8"> <meta name="viewport" content="width=device-width, initial-scale=1, shrink-to-fit=no"> <link href="https://cdn.jsdelivr.net/npm/bootstrap@5.0.2/dist/css/bootstrap.min.css" rel="stylesheet" integrity="sha384-EVSTQN3/azprG1Anm3QDgpJLIm9Nao0Yz1ztcQTwFspd3yD65VohhpuuCOmLASjC" crossorigin="anonymous"> <script src="https://ajax.googleapis.com/ajax/libs/jquery/3.5.1/jquery.min.js"></script> <script src="https://cdn.jsdelivr.net/npm/bootstrap@5.0.2/dist/js/bootstrap.bundle.min.js" integrity="sha384-MrcW6ZMFYlzcLA8Nl+NtUVF0sA7MsXsP1UyJoMp4YLEuNSfAP+JcXn/tWtIaxVXM" crossorigin="anonymous"></script> <title>스파르타코딩클럽 | 부트스트랩 연습하기</title> </head> <body> <h1>이걸로 시작해보죠!</h1> </body> </html> | cs |
1-9. CSS 꿀팁 한번 더 배우기
배웠던 CSS와 부트스트랩을 섞어서 실습해보기
background-color 로 class 구역 먼저 확인하고 시작하면 편함
# 중앙정렬 (거의 4줄 세트임)
display: flex;
flex-direction: column(<->row);
justify-content: center;
align-items: center;
# 배경 이미지 (거의 3줄 세트임)
background-image: url("");
background-position: center;
background-size: cover;# 배경 어둡게하기
linear-gradient(0deg, rgba(0, 0, 0, 0.5), rgba(0, 0, 0, 0.5))# 버튼 hover 시 효과 넣기
.mytitle > button:hover {
border: 2px solid white; }1-10. 본격 부트스트랩 써보기
부트스트랩 컴포넌트 5.0 링크에서 쓰고싶은 템플릿 고르고 복붙하기
1-11. Quiz_포스팅박스를 완성하기!
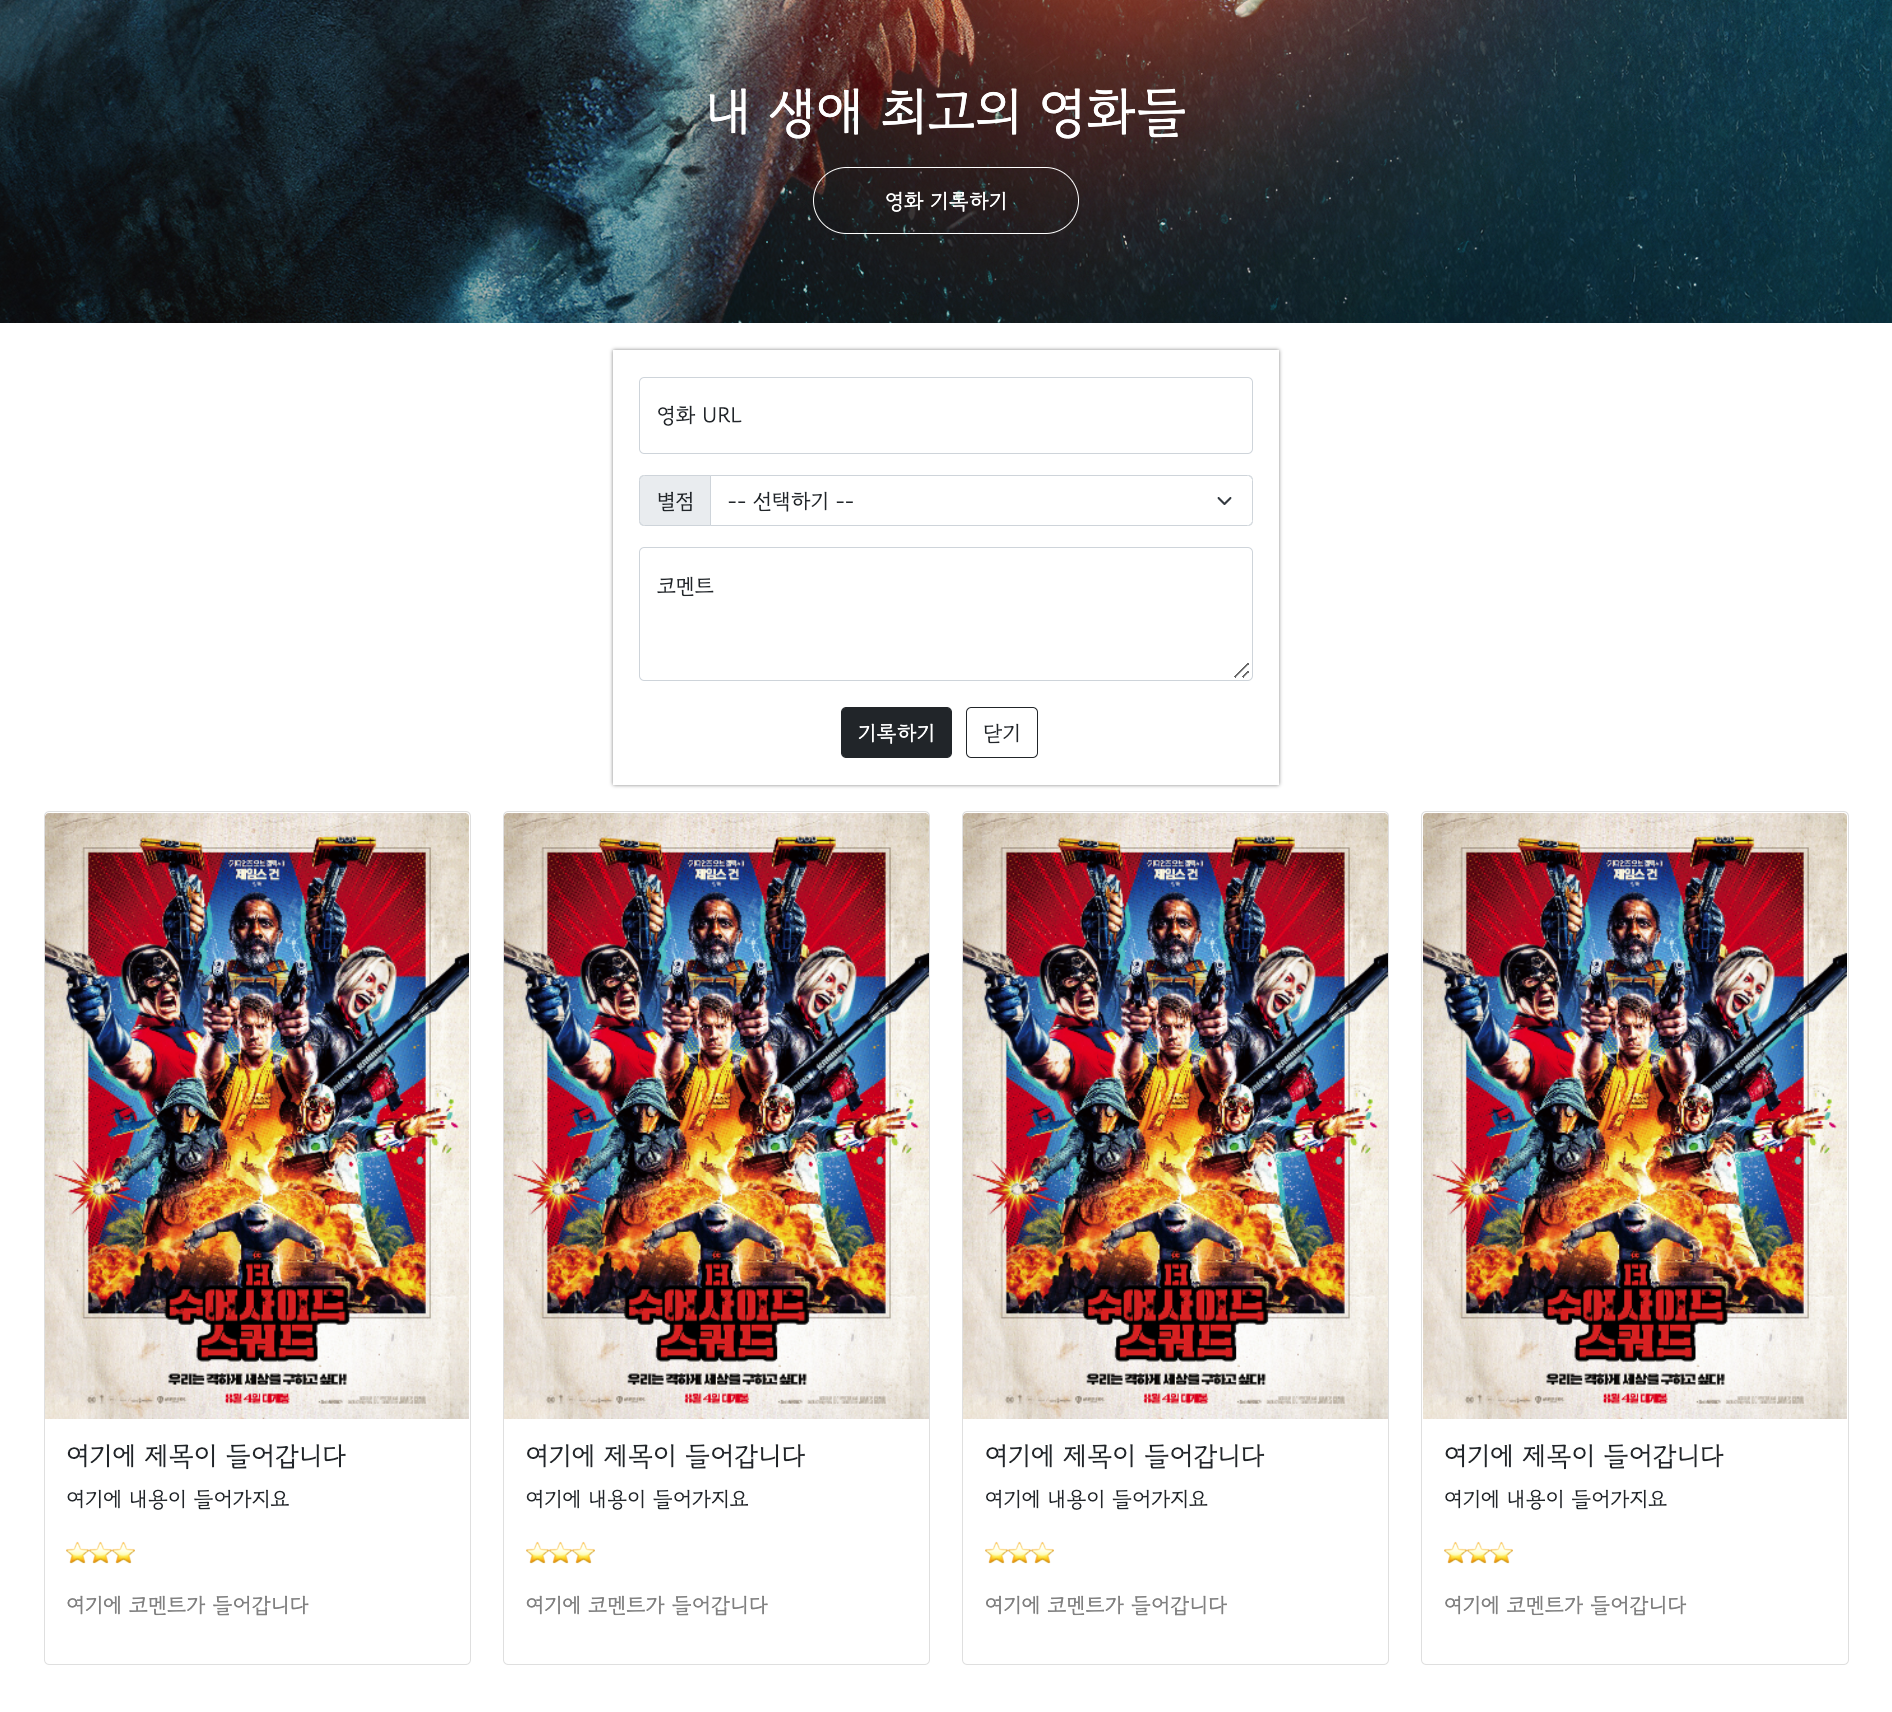
1 2 3 4 5 6 7 8 9 10 11 12 13 14 15 16 17 18 19 20 21 22 23 24 25 26 27 28 29 30 31 32 33 34 35 36 37 38 39 40 41 42 43 44 45 46 47 48 49 50 51 52 53 54 55 56 57 58 59 60 61 62 63 64 65 66 67 68 69 70 71 72 73 74 75 76 77 78 79 80 81 82 83 84 85 86 87 88 89 90 91 92 93 94 95 96 97 98 99 100 101 102 103 104 105 106 107 108 109 110 111 112 113 114 115 116 117 118 119 120 121 122 123 124 125 126 127 128 129 130 131 132 133 134 135 136 137 138 139 140 141 142 143 144 145 146 147 148 149 150 151 152 153 154 155 156 157 158 159 160 161 162 163 164 165 166 167 168 169 170 171 172 173 174 175 176 177 178 179 180 181 182 183 184 185 186 187 188 189 190 191 | <!doctype html> <html lang="en"> <head> <meta charset="utf-8"> <meta name="viewport" content="width=device-width, initial-scale=1, shrink-to-fit=no"> <link href="https://cdn.jsdelivr.net/npm/bootstrap@5.0.2/dist/css/bootstrap.min.css" rel="stylesheet" integrity="sha384-EVSTQN3/azprG1Anm3QDgpJLIm9Nao0Yz1ztcQTwFspd3yD65VohhpuuCOmLASjC" crossorigin="anonymous"> <script src="https://ajax.googleapis.com/ajax/libs/jquery/3.5.1/jquery.min.js"></script> <script src="https://cdn.jsdelivr.net/npm/bootstrap@5.0.2/dist/js/bootstrap.bundle.min.js" integrity="sha384-MrcW6ZMFYlzcLA8Nl+NtUVF0sA7MsXsP1UyJoMp4YLEuNSfAP+JcXn/tWtIaxVXM" crossorigin="anonymous"></script> <title>스파르타코딩클럽 | 부트스트랩 연습하기</title> <link href="https://fonts.googleapis.com/css2?family=Gowun+Dodum&display=swap" rel="stylesheet"> <style> * { font-family: 'Gowun Dodum', sans-serif; } .mytitle { background-color: green; height: 250px; width: 100%; color: white; background-image: url("https://movie-phinf.pstatic.net/20210715_95/1626338192428gTnJl_JPEG/movie_image.jpg"); background-position: center; background-size: cover; display: flex; flex-direction: column; justify-content: center; align-items: center; } .mytitle > button { width: 200px; height: 50px; background-color: transparent; color: white; border-radius: 50px; border: 1px solid white; margin-top: 10px; } .mytitle > button:hover { border: 2px solid white; } .mycomment { color: gray; } .wrap { width: 1200px; width: 95%; margin: 20px auto 0px auto; } .mypost { max-width: 500px; width: 95%; margin: 20px auto 0px auto; box-shadow: 0px 0px 3px 0px gray; padding: 20px; } .mybtn { margin: 20px auto 0 auto; display: flex; flex-direction: row; justify-content: center; align-items: center; } .mybtn > button { margin-right: 10px; } </style> <script> function hey(){ alert('안녕') } </script> </head> <body> <div class="mytitle"> <h1>내 생애 최고의 영화들</h1> <button onclick="hey()">영화 기록하기</button> </div> <div class="mypost"> <div class="form-floating mb-3"> <input type="email" class="form-control" id="floatingInput" placeholder="name@example.com"> <label for="floatingInput">영화 URL</label> </div> <div class="input-group mb-3"> <label class="input-group-text" for="inputGroupSelect01">별점</label> <select class="form-select" id="inputGroupSelect01"> <option selected>-- 선택하기 --</option> <option value="1">⭐</option> <option value="2">⭐⭐</option> <option value="3">⭐⭐⭐</option> <option value="4">⭐⭐⭐⭐</option> <option value="5">⭐⭐⭐⭐⭐</option> </select> </div> <div class="form-floating"> <textarea class="form-control" placeholder="Leave a comment here" id="floatingTextarea2" style="height: 100px"></textarea> <label for="floatingTextarea2">코멘트</label> </div> <div class="mybtn"> <button type="button" class="btn btn-dark">기록하기</button> <button type="button" class="btn btn-outline-dark">닫기</button> </div> </div> <div class="wrap"> <div class="row row-cols-1 row-cols-md-4 g-4"> <div class="col"> <div class="card"> <img src="https://movie-phinf.pstatic.net/20210728_221/1627440327667GyoYj_JPEG/movie_image.jpg" class="card-img-top" alt="..."> <div class="card-body"> <h5 class="card-title">여기에 제목이 들어갑니다</h5> <p class="card-text">여기에 내용이 들어가지요</p> <p> ⭐⭐⭐ </p> <p class="mycomment">여기에 코멘트가 들어갑니다</p> </div> </div> </div> <div class="col"> <div class="card"> <img src="https://movie-phinf.pstatic.net/20210728_221/1627440327667GyoYj_JPEG/movie_image.jpg" class="card-img-top" alt="..."> <div class="card-body"> <h5 class="card-title">여기에 제목이 들어갑니다</h5> <p class="card-text">여기에 내용이 들어가지요</p> <p> ⭐⭐⭐ </p> <p class="mycomment">여기에 코멘트가 들어갑니다</p> </div> </div> </div> <div class="col"> <div class="card"> <img src="https://movie-phinf.pstatic.net/20210728_221/1627440327667GyoYj_JPEG/movie_image.jpg" class="card-img-top" alt="..."> <div class="card-body"> <h5 class="card-title">여기에 제목이 들어갑니다</h5> <p class="card-text">여기에 내용이 들어가지요</p> <p> ⭐⭐⭐ </p> <p class="mycomment">여기에 코멘트가 들어갑니다</p> </div> </div> </div> <div class="col"> <div class="card"> <img src="https://movie-phinf.pstatic.net/20210728_221/1627440327667GyoYj_JPEG/movie_image.jpg" class="card-img-top" alt="..."> <div class="card-body"> <h5 class="card-title">여기에 제목이 들어갑니다</h5> <p class="card-text">여기에 내용이 들어가지요</p> <p> ⭐⭐⭐ </p> <p class="mycomment">여기에 코멘트가 들어갑니다</p> </div> </div> </div> </div> </div> </body> </html> | cs |
1-12. Javascript 맛보기
Q. 왜 브라우저는 Javascript만 알아들어요? HTML안에다 파이썬, Java 같은 언어를 써서 주면 안되나요?
A. 불가능한 이야기는 아닙니다. 다만, "역사적인 이유 & 이미 만들어진 표준"이기 때문에, 모든 브라우저는 기본적으로 Javascript를 알아듣게 설계되어있고, 모든 웹서버는 HTML+CSS+Javascript를 주게 되어있죠.
# 함수 정의하기
<script>
function hey(){
	alert('안녕!');
}
</script>
# 버튼에 함수 연결하기 (버튼 클릭 시 함수hey 작동)
<button onclick="hey()">영화 기록하기</button>1-13. Javascript 기초 문법 배우기(1)
크롬 > 개발자도구 > console 창 많이 활용하기 !!
변수 :
숫자도 담고 문자열도 담을 수 있음
자료형 :
리스트(순서가 중요한 담기) :
[ ] 꺽쇠 사용
.push('') 리스트 배열 맨 마지막에 추가됨 (동적으로 추가됨*)
딕셔너리(key:value) :
딕셔너리 안에 리스트 넣고 리스트 안에 딕셔너리 넣기 가능
a_dict['fruits']=a_list
ex) 1. 나눗셈의 나머지 구하는 함수

let a = 20
let b = 7

a % b = 6

2. 특정문자로 문자열 나누기

let myemail = 'sparta@gmail.com'

let result = myemail.split('@') // ['sparta','gmail.com']

result[0] // sparta
result[1] // gmail.com

let result2 = result[1].split('.') // ['gmail','com']

result2[0] // gmail -> 우리가 알고 싶었던 것!
result2[1] // com

myemail.split('@')[1].split('.')[0] // gmail -> 간단하게 쓸 수도 있다!
1-14. Javascript 기초 문법 배우기(2)
함수 :
부르면 정해진 동작을 한다.
return "끝나고 나를 변신시켜줘"
값 아무것도 안 받을 때 그냥 빈 괄호씀
&& : 모두 참일 때
|| : 어느 것 하나만 참일 때
if문 :
if, else if, else
반복문 :
for (let i = 0; i < 10; i++) {}
for (1. 시작조건; 2. 반복조건; 3. 더하기) {4. 매번실행}
1 -> 2체크하고 -> (괜찮으면) -> 4 -> 3
-> 2체크하고 -> (괜찮으면) -> 4 -> 3
-> 2체크하고 -> (괜찮으면) -> 4 -> 3
-> 2체크하고 -> (괜찮으면) -> 4 -> 3
와 같은 순서로 실행됩니다.
i가 증가하다가 반복조건에 맞지 않으면, 반복을 종료하고 빠져나옵니다.
let people = ['철수','영희','민수','형준','기남','동희']
for (let i = 0 ; i < people.length ; i++) {console.log(people[i])}이렇게 하면 리스트의 모든 원소를 한번에 출력할 수 있겠죠?
i가 1씩 증가하면서, people의 원소를 차례대로 불러올 수 있게 됩니다.
1-15. Javascript 연습하기
미세먼지의 값이 40 미만인 구 이름과 값을 출력하기1 2 3 4 5 6 7 8 | for (let i = 0; i < mise_list.length; i++) { let mise = mise_list[i]; if (mise["IDEX_MVL"] < 40) { let gu_name = mise["MSRSTE_NM"]; let gu_mise = mise["IDEX_MVL"]; console.log("40보다 작은 구: " + gu_name + ", " + gu_mise); } } | cs |
1 2 3 4 5 6 7 8 9 10 11 12 13 14 | function show_gus(index) { for (let i = 0; i < mise_list.length; i++) { let mise = mise_list[i]; if (mise["IDEX_MVL"] < index) { let gu_name = mise["MSRSTE_NM"]; let gu_mise = mise["IDEX_MVL"]; console.log(gu_name, gu_mise); } } } // 이러면 아래와 같은 것이 가능! show_gus(40) // 40보다 작은 구만 출력! show_gus(35) // 35보다 작은 구만 출력! | cs |
1-16. 1주차 끝 & 숙제 설명
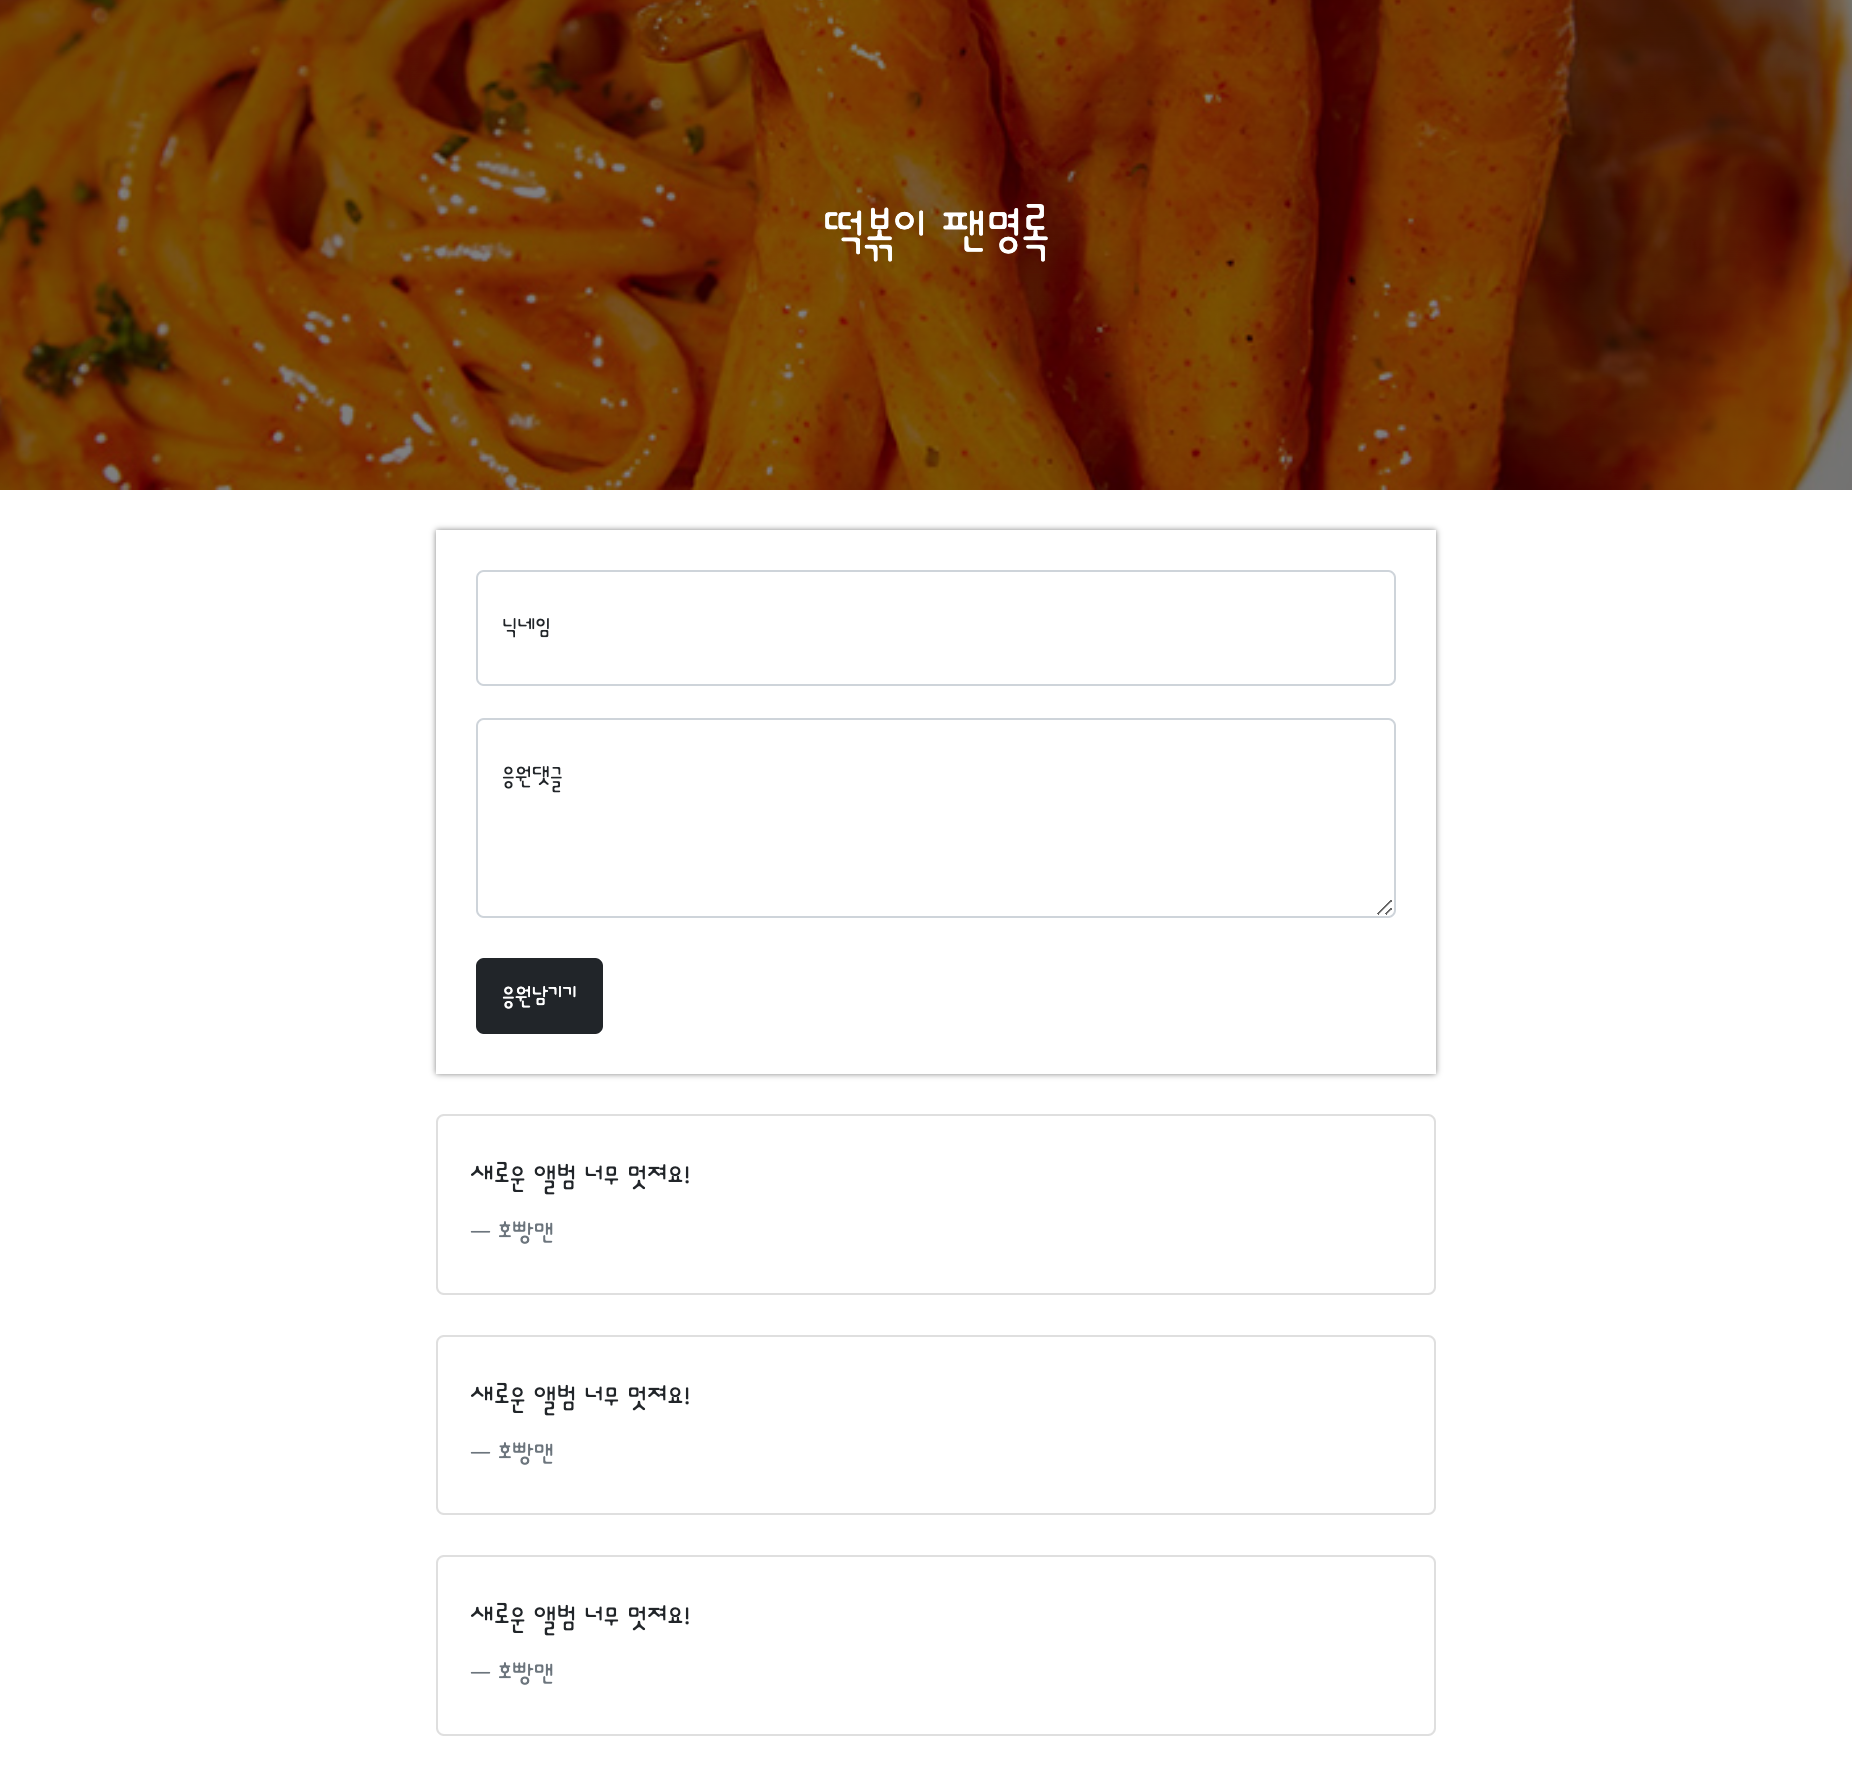
1 2 3 4 5 6 7 8 9 10 11 12 13 14 15 16 17 18 19 20 21 22 23 24 25 26 27 28 29 30 31 32 33 34 35 36 37 38 39 40 41 42 43 44 45 46 47 48 49 50 51 52 53 54 55 56 57 58 59 60 61 62 63 64 65 66 67 68 69 70 71 72 73 74 75 76 77 78 79 80 81 82 83 84 85 86 87 88 89 90 91 92 93 94 95 96 97 98 99 100 101 102 103 104 105 106 107 108 109 | <!doctype html> <html lang="en"> <head> <meta charset="utf-8"> <meta name="viewport" content="width=device-width, initial-scale=1, shrink-to-fit=no"> <link href="https://cdn.jsdelivr.net/npm/bootstrap@5.0.2/dist/css/bootstrap.min.css" rel="stylesheet" integrity="sha384-EVSTQN3/azprG1Anm3QDgpJLIm9Nao0Yz1ztcQTwFspd3yD65VohhpuuCOmLASjC" crossorigin="anonymous"> <script src="https://ajax.googleapis.com/ajax/libs/jquery/3.5.1/jquery.min.js"></script> <script src="https://cdn.jsdelivr.net/npm/bootstrap@5.0.2/dist/js/bootstrap.bundle.min.js" integrity="sha384-MrcW6ZMFYlzcLA8Nl+NtUVF0sA7MsXsP1UyJoMp4YLEuNSfAP+JcXn/tWtIaxVXM" crossorigin="anonymous"></script> <title>스파르타코딩클럽 | 부트스트랩 연습하기</title> <link href="https://fonts.googleapis.com/css2?family=Dongle:wght@300&display=swap" rel="stylesheet"> <style> * { font-family: 'Dongle', sans-serif; } .mytitle { background-color: green; height: 250px; width: 100%; color: white; background-image: linear-gradient(0deg, rgba(0, 0, 0, 0.5), rgba(0, 0, 0, 0.5)), url("https://crcf.cookatmarket.com/product/images/2021/04/gepu_1619673846_7410_720.jpg"); background-position: center; background-size: cover; display: flex; flex-direction: column; justify-content: center; align-items: center; } .mypost { max-width: 500px; width: 95%; margin: 20px auto 0px auto; box-shadow: 0px 0px 3px 0px gray; padding: 20px; } .mybtn { margin: 20px auto 0 auto; } .card { max-width: 500px; width: 95%; margin: 20px auto 0px auto; } </style> </head> <body> <div class="mytitle"> <h1>떡볶이 팬명록</h1> </div> <div class="mypost"> <div class="form-floating mb-3"> <input type="email" class="form-control" id="floatingInput" placeholder="name@example.com"> <label for="floatingInput">닉네임</label> </div> <div class="form-floating"> <textarea class="form-control" placeholder="Leave a comment here" id="floatingTextarea2" style="height: 100px"></textarea> <label for="floatingTextarea2">응원댓글</label> </div> <div class="mybtn"> <button type="button" class="btn btn-dark">응원남기기</button> </div> </div> <div class="card"> <div class="card-body"> <blockquote class="blockquote mb-0"> <p>새로운 앨범 너무 멋져요!</p> <footer class="blockquote-footer">호빵맨<cite title="Source Title"></cite></footer> </blockquote> </div> </div> <div class="card"> <div class="card-body"> <blockquote class="blockquote mb-0"> <p>새로운 앨범 너무 멋져요!</p> <footer class="blockquote-footer">호빵맨<cite title="Source Title"></cite></footer> </blockquote> </div> </div> <div class="card"> <div class="card-body"> <blockquote class="blockquote mb-0"> <p>새로운 앨범 너무 멋져요!</p> <footer class="blockquote-footer">호빵맨<cite title="Source Title"></cite></footer> </blockquote> </div> </div> </body> </html> | cs |
2. ✍️ 기타 퀴즈
2-1. 🗒 메모장 만들기
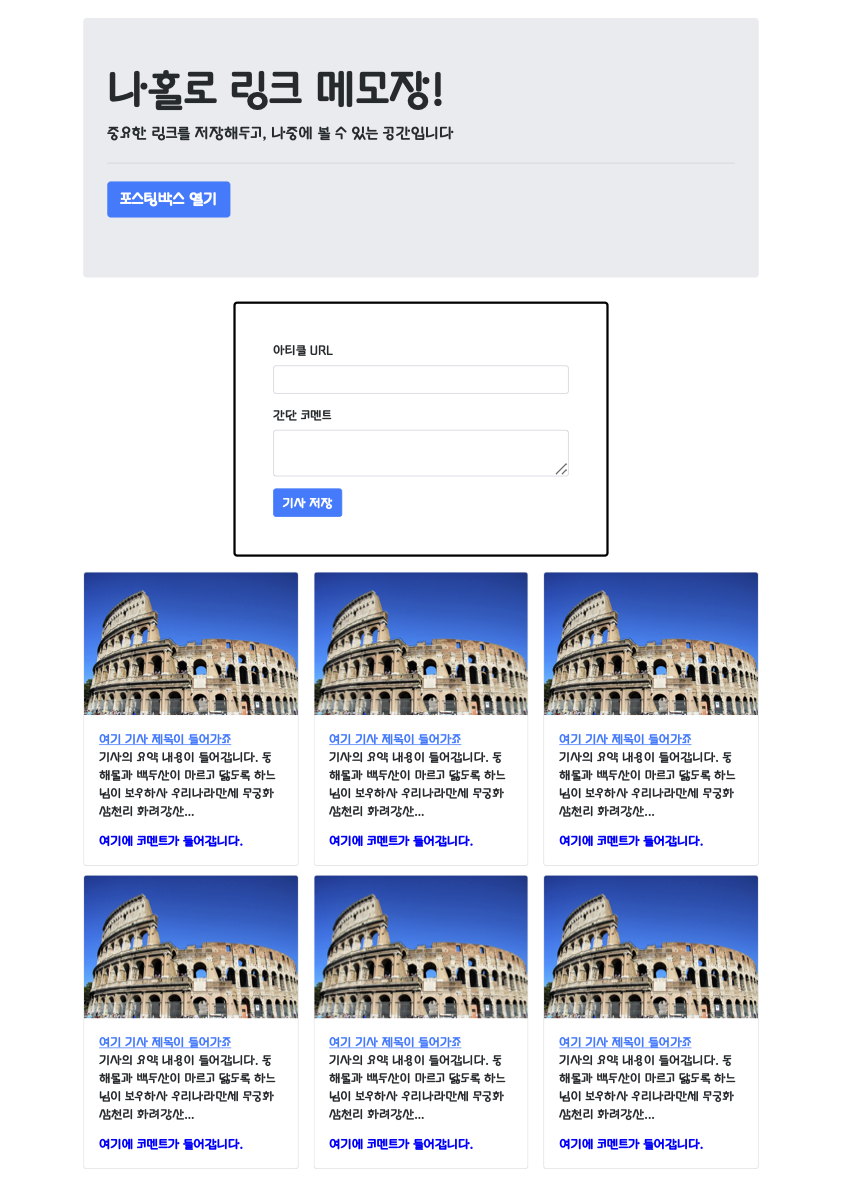
1 2 3 4 5 6 7 8 9 10 11 12 13 14 15 16 17 18 19 20 21 22 23 24 25 26 27 28 29 30 31 32 33 34 35 36 37 38 39 40 41 42 43 44 45 46 47 48 49 50 51 52 53 54 55 56 57 58 59 60 61 62 63 64 65 66 67 68 69 70 71 72 73 74 75 76 77 78 79 80 81 82 83 84 85 86 87 88 89 90 91 92 93 94 95 96 97 98 99 100 101 102 103 104 105 106 107 108 109 110 111 112 113 114 115 116 117 118 119 120 121 122 123 124 125 126 127 128 129 130 131 132 133 134 135 136 137 138 139 140 141 142 143 | <!doctype html> <html lang="en"> <head> <!-- Required meta tags --> <meta charset="utf-8"> <meta name="viewport" content="width=device-width, initial-scale=1, shrink-to-fit=no"> <!-- Bootstrap CSS --> <link rel="stylesheet" href="https://maxcdn.bootstrapcdn.com/bootstrap/4.0.0/css/bootstrap.min.css" integrity="sha384-Gn5384xqQ1aoWXA+058RXPxPg6fy4IWvTNh0E263XmFcJlSAwiGgFAW/dAiS6JXm" crossorigin="anonymous"> <!-- Optional JavaScript --> <!-- jQuery first, then Popper.js, then Bootstrap JS --> <script src="https://ajax.googleapis.com/ajax/libs/jquery/3.5.1/jquery.min.js"></script> <script src="https://cdnjs.cloudflare.com/ajax/libs/popper.js/1.12.9/umd/popper.min.js" integrity="sha384-ApNbgh9B+Y1QKtv3Rn7W3mgPxhU9K/ScQsAP7hUibX39j7fakFPskvXusvfa0b4Q" crossorigin="anonymous"></script> <script src="https://maxcdn.bootstrapcdn.com/bootstrap/4.0.0/js/bootstrap.min.js" integrity="sha384-JZR6Spejh4U02d8jOt6vLEHfe/JQGiRRSQQxSfFWpi1MquVdAyjUar5+76PVCmYl" crossorigin="anonymous"></script> <title>스파르타코딩클럽 | 부트스트랩 연습하기</title> <link rel="preconnect" href="https://fonts.googleapis.com"> <link rel="preconnect" href="https://fonts.gstatic.com" crossorigin> <link href="https://fonts.googleapis.com/css2?family=Gugi&display=swap" rel="stylesheet"> <style> * { font-family: 'Gugi', cursive; } .wrap { width: 900px; margin: auto; } .comment { color: blue; font-weight: bold; } .posting_box { border: solid black; border-radius: 5px; margin: 20px 200px 20px 200px; padding: 50px; } </style> <script> function hey() { alert('안녕'); } </script> </head> <body> <div class="wrap"> <div class="jumbotron"> <h1 class="display-4">나홀로 링크 메모장!</h1> <p class="lead">중요한 링크를 저장해두고, 나중에 볼 수 있는 공간입니다</p> <hr class="my-4"> <p class="lead"> <a onclick="hey()" class="btn btn-primary btn-lg" href="#" role="button">포스팅박스 열기</a> </p> </div> <div class="posting_box"> <div class="form-group"> <label for="exampleInputEmail1">아티클 URL</label> <input type="email" class="form-control" id="exampleInputEmail1" aria-describedby="emailHelp"></div> <div class="form-group"> <label for="exampleInputPassword1">간단 코멘트</label> <textarea class="form-control" rows="2"></textarea> </div> <button type="submit" class="btn btn-primary">기사 저장</button> </div> <div class="card-columns"> <div class="card"> <img class="card-img-top" src="https://file.mk.co.kr/meet/neds/2019/11/image_readtop_2019_919268_15731064643967862.jpg" alt="Card image cap"> <div class="card-body"> <a href="http://www.naver.com" class="card-title">여기 기사 제목이 들어가죠 </a> <p class="card-text">기사의 요약 내용이 들어갑니다. 동해물과 백두산이 마르고 닳도록 하느님이 보우하사 우리나라만세 무궁화 삼천리 화려강산...</p> <p class="card-text comment">여기에 코멘트가 들어갑니다.</p> </div> </div> <div class="card"> <img class="card-img-top" src="https://file.mk.co.kr/meet/neds/2019/11/image_readtop_2019_919268_15731064643967862.jpg" alt="Card image cap"> <div class="card-body"> <a href="http://www.naver.com" class="card-title">여기 기사 제목이 들어가죠 </a> <p class="card-text">기사의 요약 내용이 들어갑니다. 동해물과 백두산이 마르고 닳도록 하느님이 보우하사 우리나라만세 무궁화 삼천리 화려강산...</p> <p class="card-text comment">여기에 코멘트가 들어갑니다.</p> </div> </div> <div class="card"> <img class="card-img-top" src="https://file.mk.co.kr/meet/neds/2019/11/image_readtop_2019_919268_15731064643967862.jpg" alt="Card image cap"> <div class="card-body"> <a href="http://www.naver.com" class="card-title">여기 기사 제목이 들어가죠 </a> <p class="card-text">기사의 요약 내용이 들어갑니다. 동해물과 백두산이 마르고 닳도록 하느님이 보우하사 우리나라만세 무궁화 삼천리 화려강산...</p> <p class="card-text comment">여기에 코멘트가 들어갑니다.</p> </div> </div> <div class="card"> <img class="card-img-top" src="https://file.mk.co.kr/meet/neds/2019/11/image_readtop_2019_919268_15731064643967862.jpg" alt="Card image cap"> <div class="card-body"> <a href="http://www.naver.com" class="card-title">여기 기사 제목이 들어가죠 </a> <p class="card-text">기사의 요약 내용이 들어갑니다. 동해물과 백두산이 마르고 닳도록 하느님이 보우하사 우리나라만세 무궁화 삼천리 화려강산...</p> <p class="card-text comment">여기에 코멘트가 들어갑니다.</p> </div> </div> <div class="card"> <img class="card-img-top" src="https://file.mk.co.kr/meet/neds/2019/11/image_readtop_2019_919268_15731064643967862.jpg" alt="Card image cap"> <div class="card-body"> <a href="http://www.naver.com" class="card-title">여기 기사 제목이 들어가죠 </a> <p class="card-text">기사의 요약 내용이 들어갑니다. 동해물과 백두산이 마르고 닳도록 하느님이 보우하사 우리나라만세 무궁화 삼천리 화려강산...</p> <p class="card-text comment">여기에 코멘트가 들어갑니다.</p> </div> </div> <div class="card"> <img class="card-img-top" src="https://file.mk.co.kr/meet/neds/2019/11/image_readtop_2019_919268_15731064643967862.jpg" alt="Card image cap"> <div class="card-body"> <a href="http://www.naver.com" class="card-title">여기 기사 제목이 들어가죠 </a> <p class="card-text">기사의 요약 내용이 들어갑니다. 동해물과 백두산이 마르고 닳도록 하느님이 보우하사 우리나라만세 무궁화 삼천리 화려강산...</p> <p class="card-text comment">여기에 코멘트가 들어갑니다.</p> </div> </div> </div> </div> </body> </html> | cs |
2-2. 🗒 판매 페이지 만들기
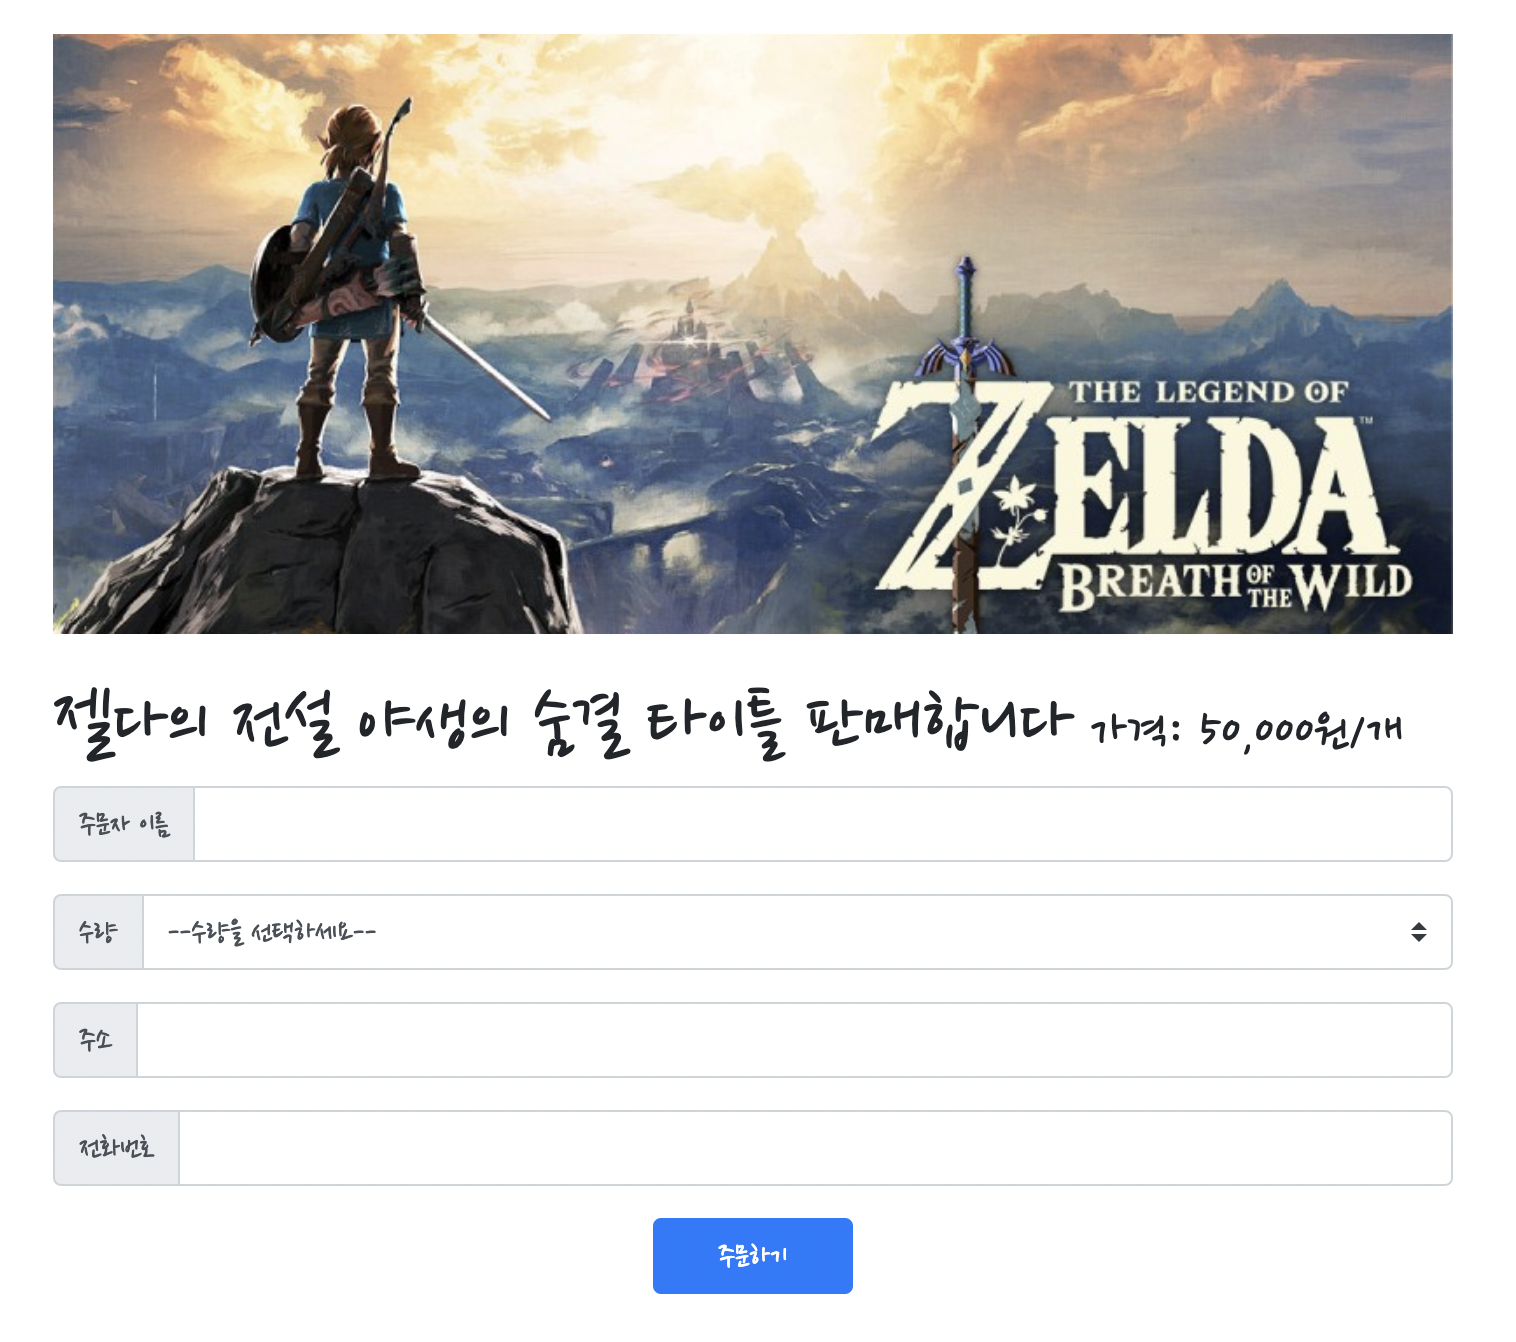
1 2 3 4 5 6 7 8 9 10 11 12 13 14 15 16 17 18 19 20 21 22 23 24 25 26 27 28 29 30 31 32 33 34 35 36 37 38 39 40 41 42 43 44 45 46 47 48 49 50 51 52 53 54 55 56 57 58 59 60 61 62 63 64 65 66 67 68 69 70 71 72 73 74 75 76 77 78 79 80 81 82 83 84 85 86 87 88 89 90 91 92 93 94 95 96 97 98 99 100 101 102 103 | <!doctype html> <html lang="en"> <head> <!-- Required meta tags --> <meta charset="utf-8"> <meta name="viewport" content="width=device-width, initial-scale=1, shrink-to-fit=no"> <!-- Bootstrap CSS --> <link rel="stylesheet" href="https://maxcdn.bootstrapcdn.com/bootstrap/4.0.0/css/bootstrap.min.css" integrity="sha384-Gn5384xqQ1aoWXA+058RXPxPg6fy4IWvTNh0E263XmFcJlSAwiGgFAW/dAiS6JXm" crossorigin="anonymous"> <!-- Optional JavaScript --> <!-- jQuery first, then Popper.js, then Bootstrap JS --> <script src="https://ajax.googleapis.com/ajax/libs/jquery/3.5.1/jquery.min.js"></script> <script src="https://cdnjs.cloudflare.com/ajax/libs/popper.js/1.12.9/umd/popper.min.js" integrity="sha384-ApNbgh9B+Y1QKtv3Rn7W3mgPxhU9K/ScQsAP7hUibX39j7fakFPskvXusvfa0b4Q" crossorigin="anonymous"></script> <script src="https://maxcdn.bootstrapcdn.com/bootstrap/4.0.0/js/bootstrap.min.js" integrity="sha384-JZR6Spejh4U02d8jOt6vLEHfe/JQGiRRSQQxSfFWpi1MquVdAyjUar5+76PVCmYl" crossorigin="anonymous"></script> <style> * { font-family: 'Nanum Pen Script', cursive; } .wrap { width: 700px; margin: auto; } .product { background-color: blue; height:300px; background-image: url("https://mblogthumb-phinf.pstatic.net/MjAxNzEyMTdfMjM4/MDAxNTEzNDg3MzQ0OTAz.ktBL3A6YdZx2ykmmKtLGuEXMxdwcOGRgQmjdjX_RPT0g.H8K1nwAj5YyI4PhtEhW7XUi39QENHDzBYji7O4Czm8Ag.JPEG.greenpooh7276/BOTW-Share_icon.jpg?type=w800"); background-size: cover; background-position: left; margin: 20px 0px 20px 0px; } .btn-primary { display: block; margin:auto; width:100px; } </style> <script> function hey(){ alert('주문이 완료되었습니다.') } </script> <title>1주차 숙제</title> <link rel="preconnect" href="https://fonts.googleapis.com"> <link rel="preconnect" href="https://fonts.gstatic.com" crossorigin> <link href="https://fonts.googleapis.com/css2?family=Nanum+Pen+Script&display=swap" rel="stylesheet"> </head> <body> <div class="wrap"> <div class="product"> </div> <h1>젤다의 전설 야생의 숨결 타이틀 판매합니다<span style="font-size:28px"> 가격: 50,000원/개</span></h1> <div class="input-group mb-3"> <div class="input-group-prepend"> <span class="input-group-text">주문자 이름</span> </div> <input type="text" class="form-control" aria-label="Username" aria-describedby="basic-addon1"> </div> <div class="input-group mb-3"> <div class="input-group-prepend"> <label class="input-group-text" for="inputGroupSelect01">수량</label> </div> <select class="custom-select" id="inputGroupSelect01"> <option selected>--수량을 선택하세요--</option> <option value="1">1</option> <option value="2">2</option> <option value="3">3</option> </select> </div> <div class="input-group mb-3"> <div class="input-group-prepend"> <span class="input-group-text">주소</span> </div> <input aria-describedby="basic-addon1" aria-label="Username" class="form-control" type="text"> </div> <div class="input-group mb-3"> <div class="input-group-prepend"> <span class="input-group-text" id="basic-addon1">전화번호</span> </div> <input type="text" class="form-control" aria-label="Username" aria-describedby="basic-addon1"> </div> <button a onclick="hey()" class="btn btn-primary" type="button">주문하기</button> </div> </body> </html> | cs |
3. 📌 기억해야할 점
- 구글 폰트 링크는 보통
<title>밑에
<style>밑에<script>넣어서 자바 스크립트 넣기- margin: auto; 안되면 display: block; 추가하기
- 부트스트랩에서 복사해오는 내용 중 form 태그(
<form>...</form>)가 있다면, form태그를 div 태그(<div>...</div>)로 바꿔주세요!
→<form>태그 안에 버튼이 있으면, 자동으로 새로고침이 됩니다.
→ 우리는 이 기능을 안 쓸거라, 추후 충돌 방지를 위해 미리 바꿔두는 것입니다!