
1. 2주차 필기
1-1. 2주차 오늘 배울 것
오늘은 HTML파일을 받았다고 가정하고, Javascript로 다시 서버에 데이터를 요청하고 받는 방법을 배워볼거예요.
jQuery를 이용해 Javascript로 HTML을 쉽게 제어하고, Ajax를 이용해 다시 서버에 데이터를 요청하고 받아보겠습니다.
- 짝/ 홀수 판별하는 법1234let even = 4;console.log(even % 2); // 2로 나눈 나머지가 0입니다.let odd = 5;console.log(odd % 2); // 2로 나눈 나머지가 1입니다.
cs
- 짝/ 홀수 onclick 함수1234567891011<script>let count = 1;function hey() {if (count % 2 == 0) {alert('짝짝짝👏');} else {alert('홀홀홀🎅');}count += 1;}</script>
cs
1-2. JQuery 시작하기
- Jquery : 편리한 Javascript를 미리 작성해둔것, 라이브러리 (부트스트랩과 비슷한 것, 그래서 부트스트랩과 동일하게 import부터 해야함)
1-3. JQuery 다뤄보기
필요한 기능 그 때 그 때 구글링해서 쓰면 됨
url의 값을 가져오려면 url을 지정해야함.
지정할 수 있어야 움직임 부여할 수 있음 = 'id'
(CSS의 class와 동일한 개념)
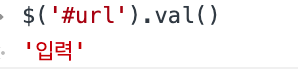
- id="url"의 값을 가져오기
$('#id이름'): 해당 id에 JQuery를 먹이고 싶은데,
.val('넣고싶은 값'): 해당 id에다가 값을 넣고싶어
.val(): 해당 id의 값을 가져오고 싶어
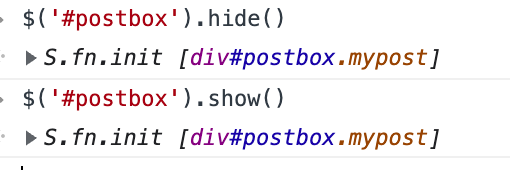
- 숨겼다가 보였다가 하기
$('#id이름').hide()
$('#id이름').show()
-
temp_html = `` (backtick)
백틱 안에 html과 비슷한 문자열이 들어가 있는 것임.
html 아니고 그냥 문자열이고, 그것을 html화 시켜주는 JQuery의 기능을 사용하는 것임. -
$('#id이름').append(temp_html)
해당 id에 temp_html의 문자열을 html화 하겠다.
-> 해당 id에 html이 붙음
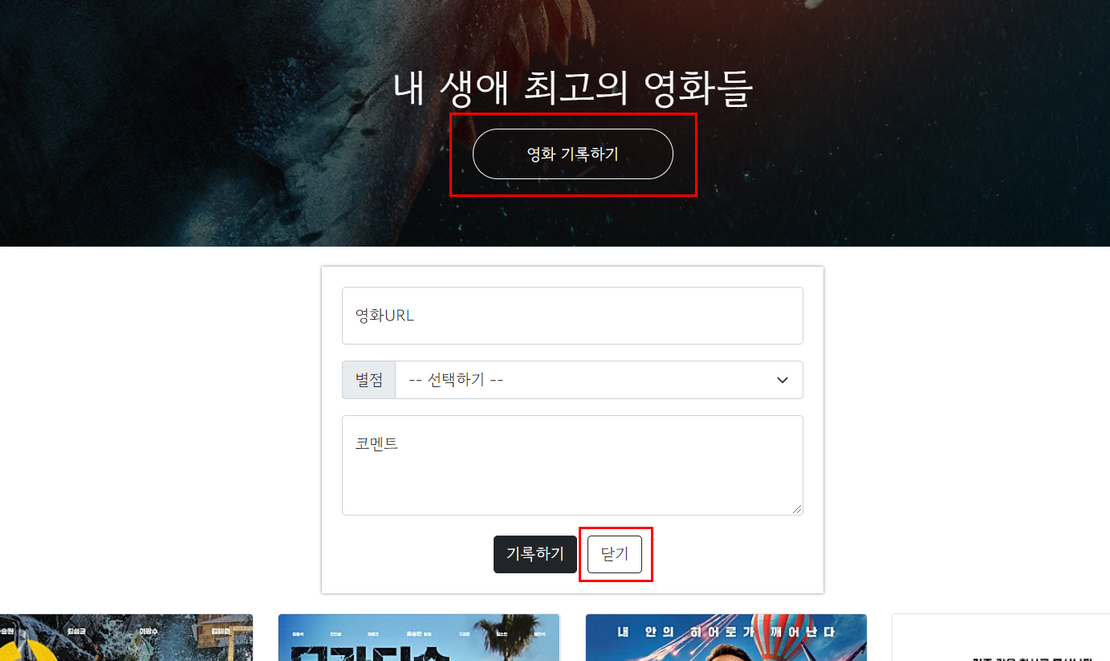
1-4. JQuery 적용하기(포스팅 박스)
-
onclick으로 카드박스 hide(),show() 기능 넣기
1. 포스팅 박스 열기 버튼에 function (함수) 정의하고 걸어보기 (alert로 테스트)
2. 포스팅 박스에 id 값 지정, 열고 닫는 함수에 아이디 값 사용해서 코드 짜기
3. 페이지 랜딩 시 포스팅박스 감춰두기 (display:none;-> 포스팅박스 css에 넣어두기) -
완성코드
123456789101112131415161718192021222324252627282930313233343536373839404142434445464748495051525354555657585960616263646566676869707172737475767778798081828384858687888990919293949596979899100101102103104105106107108109110111112113114115116117118119120121122123124125126127128129130131132133134135136137138139140141142143144145146147148149150151152153154155156157158159160161162163164165166167168169170171172173174175176177178179180181182183184185<!doctype html><html lang="en"><head><meta charset="utf-8"><meta name="viewport" content="width=device-width, initial-scale=1, shrink-to-fit=no"><link href="https://cdn.jsdelivr.net/npm/bootstrap@5.0.2/dist/css/bootstrap.min.css" rel="stylesheet"integrity="sha384-EVSTQN3/azprG1Anm3QDgpJLIm9Nao0Yz1ztcQTwFspd3yD65VohhpuuCOmLASjC" crossorigin="anonymous">integrity="sha384-MrcW6ZMFYlzcLA8Nl+NtUVF0sA7MsXsP1UyJoMp4YLEuNSfAP+JcXn/tWtIaxVXM"crossorigin="anonymous"></script><title>스파르타 피디아</title><style>* {font-family: 'Gowun Dodum', sans-serif;}.mytitle {width: 100%;height: 250px;background-image: linear-gradient(0deg, rgba(0, 0, 0, 0.5), rgba(0, 0, 0, 0.5)), url('https://movie-phinf.pstatic.net/20210715_95/1626338192428gTnJl_JPEG/movie_image.jpg');background-position: center;background-size: cover;color: white;display: flex;flex-direction: column;align-items: center;justify-content: center;}.mytitle > button {width: 200px;height: 50px;background-color: transparent;color: white;border-radius: 50px;border: 1px solid white;margin-top: 10px;}.mytitle > button:hover {border: 2px solid white;}.mycomment {color: gray;}.mycards {margin: 20px auto 0px auto;width: 95%;max-width: 1200px;}.mypost {width: 95%;max-width: 500px;margin: 20px auto 0px auto;padding: 20px;box-shadow: 0px 0px 3px 0px gray;display: none;}.mybtns {display: flex;flex-direction: row;align-items: center;justify-content: center;margin-top: 20px;}.mybtns > button {margin-right: 10px;}</style><script>function open_box(){(<span style="color:#63a35c">'#post-box'</span>).show()</div><div style="padding:0 6px; white-space:pre; line-height:150%"> }</div><div style="padding:0 6px; white-space:pre; line-height:150%"> <span style="color:#a71d5d">function</span> close_box(){</div><div style="padding:0 6px; white-space:pre; line-height:150%"> ('#post-box').hide()}</script></head><body><div class="mytitle"><h1>내 생애 최고의 영화들</h1><button onclick="open_box()">영화 기록하기</button></div><div class="mypost" id="post-box"><div class="form-floating mb-3"><input id="url" type="email" class="form-control" placeholder="name@example.com"><label>영화URL</label></div><div class="input-group mb-3"><label class="input-group-text" for="inputGroupSelect01">별점</label><select class="form-select" id="inputGroupSelect01"><option selected>-- 선택하기 --</option><option value="1">⭐</option><option value="2">⭐⭐</option><option value="3">⭐⭐⭐</option><option value="4">⭐⭐⭐⭐</option><option value="5">⭐⭐⭐⭐⭐</option></select></div><div class="form-floating"><textarea id="comment" class="form-control" placeholder="Leave a comment here" id="floatingTextarea2"style="height: 100px"></textarea><label for="floatingTextarea2">코멘트</label></div><div class="mybtns"><button type="button" class="btn btn-dark">기록하기</button><button onclick="close_box()" type="button" class="btn btn-outline-dark">닫기</button></div></div><div class="mycards"><div class="row row-cols-1 row-cols-md-4 g-4" id="cards-box"><div class="col"><div class="card h-100">class="card-img-top" alt="..."><div class="card-body"><h5 class="card-title">영화 제목이 들어갑니다</h5><p class="card-text">여기에 영화에 대한 설명이 들어갑니다.</p><p>⭐⭐⭐</p><p class="mycomment">나의 한줄 평을 씁니다</p></div></div></div><div class="col"><div class="card h-100">class="card-img-top" alt="..."><div class="card-body"><h5 class="card-title">영화 제목이 들어갑니다</h5><p class="card-text">여기에 영화에 대한 설명이 들어갑니다.</p><p>⭐⭐⭐</p><p class="mycomment">나의 한줄 평을 씁니다</p></div></div></div><div class="col"><div class="card h-100">class="card-img-top" alt="..."><div class="card-body"><h5 class="card-title">영화 제목이 들어갑니다</h5><p class="card-text">여기에 영화에 대한 설명이 들어갑니다.</p><p>⭐⭐⭐</p><p class="mycomment">나의 한줄 평을 씁니다</p></div></div></div><div class="col"><div class="card h-100">class="card-img-top" alt="..."><div class="card-body"><h5 class="card-title">영화 제목이 들어갑니다</h5><p class="card-text">여기에 영화에 대한 설명이 들어갑니다.</p><p>⭐⭐⭐</p><p class="mycomment">나의 한줄 평을 씁니다</p></div></div></div></div></div></body></html>Colored by Color Scriptercs
1-5. Quiz_JQuery 연습하기
- Quiz_Jquery와 Javascript 합쳐서 써보기
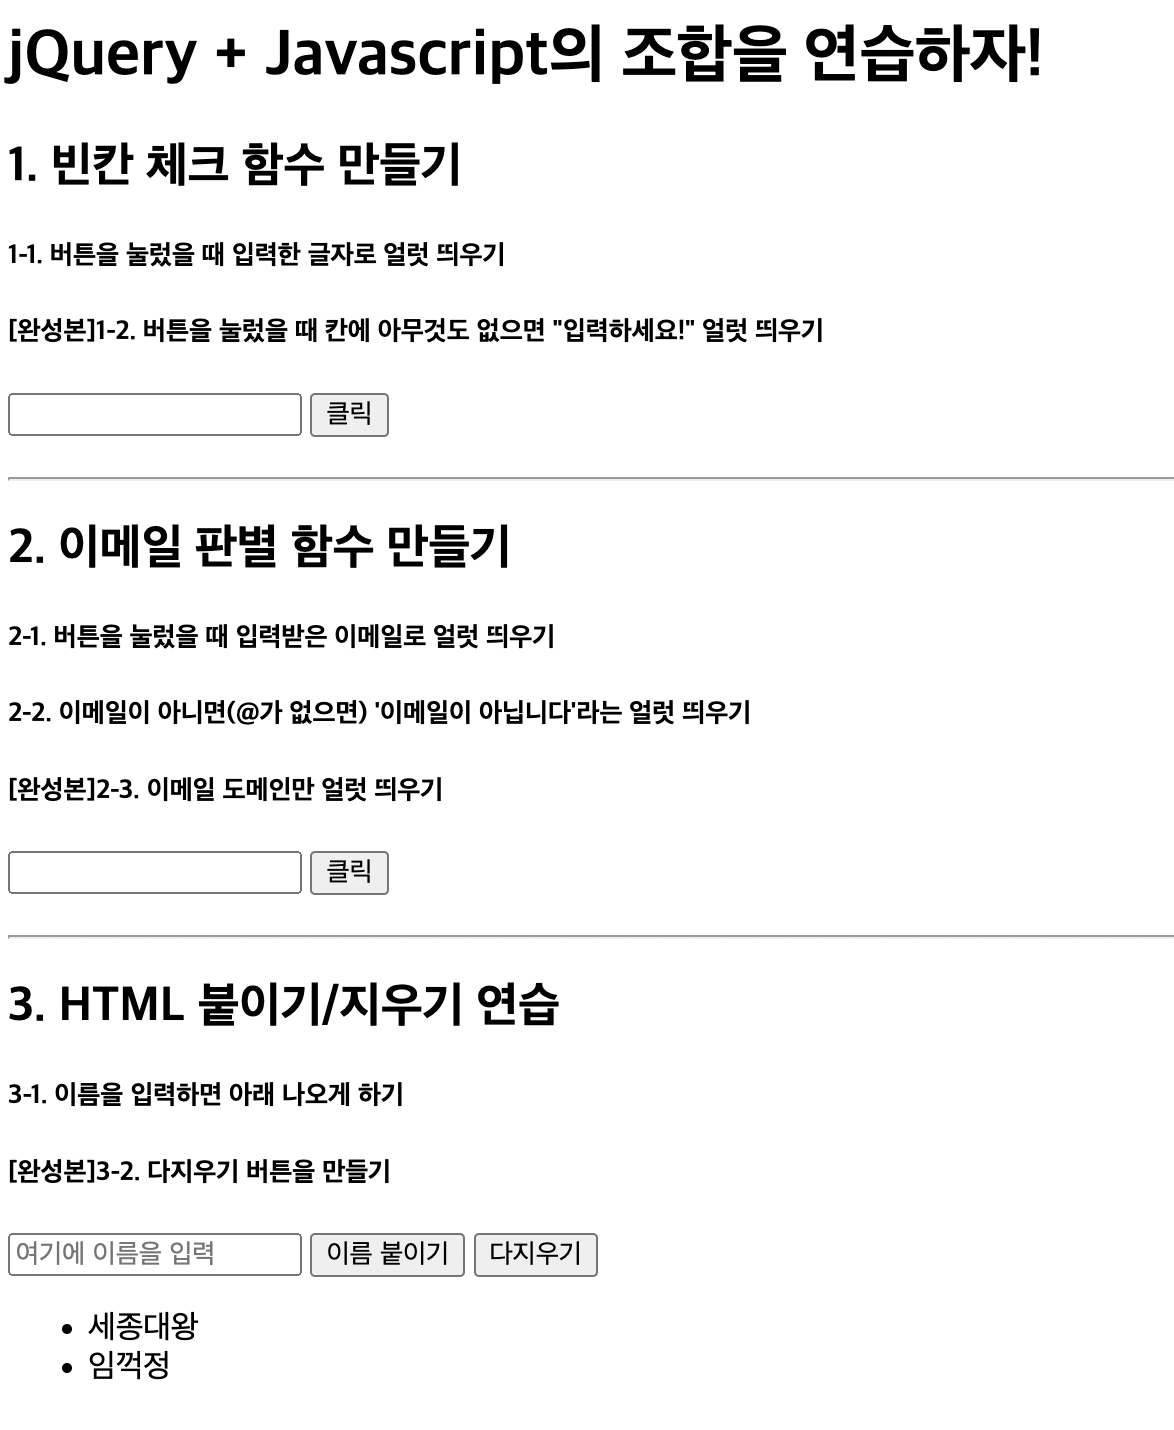
- 퀴즈 완성 코드123456789101112131415161718192021222324252627282930313233343536373839404142434445464748495051525354555657585960616263646566676869707172737475767778798081828384858687888990919293949596979899100101<!doctype html><html lang="ko"><head><meta charset="UTF-8"><title>jQuery 연습하고 가기!</title><!-- JQuery를 import 합니다 --><script src="https://ajax.googleapis.com/ajax/libs/jquery/3.4.1/jquery.min.js"></script><style type="text/css">div.question-box {margin: 10px 0 20px 0;}</style><script>function q1() {// 1. input-q1의 입력값을 가져온다.let value = $('#input-q1').val();// 2. 만약 입력값이 빈칸이면 if(입력값=='')if (value == '') {// 3. alert('입력하세요!') 띄우기alert('입력하세요!');} else {// 4. alert(입력값) 띄우기alert(value);}}function q2() {// 1. input-q2 값을 가져온다.let email = $('#input-q2').val();// 2. 만약 가져온 값에 @가 있으면 (includes 이용하기 - 찾아보자!)if (email.includes('@')) {// 3. info@gmail.com -> gmail 만 추출해서// 4. alert(도메인 값);으로 띄우기let domainWithDot = email.split('@')[1];let onlyDomain = domainWithDot.split('.')[0];alert(onlyDomain);} else {// 5. 만약 이메일이 아니면 '이메일이 아닙니다.' 라는 얼럿 띄우기alert('이메일이 아닙니다.');}}function q3() {// 1. input-q3 값을 가져온다.let newName = $('#input-q3').val();if (newName == '') {alert('이름을 입력하세요');return;}// 2. 가져온 값을 이용해 names-q3에 붙일 태그를 만든다. (let temp_html = `<li>${가져온 값}</li>`)let temp_html = `<li>${newName}</li>`;// 3. 만들어둔 temp_html을 names-q3에 붙인다.(jQuery의 $('...').append(temp_html)을 이용하면 굿!)$('#names-q3').append(temp_html);}function q3_remove() {// 1. names-q3의 내부 태그를 모두 비운다.(jQuery의 $('....').empty()를 이용하면 굿!)$('#names-q3').empty();}</script></head><body><h1>jQuery + Javascript의 조합을 연습하자!</h1><div class="question-box"><h2>1. 빈칸 체크 함수 만들기</h2><h5>1-1. 버튼을 눌렀을 때 입력한 글자로 얼럿 띄우기</h5><h5>[완성본]1-2. 버튼을 눌렀을 때 칸에 아무것도 없으면 "입력하세요!" 얼럿 띄우기</h5><input id="input-q1" type="text" /> <button onclick="q1()">클릭</button></div><hr /><div class="question-box"><h2>2. 이메일 판별 함수 만들기</h2><h5>2-1. 버튼을 눌렀을 때 입력받은 이메일로 얼럿 띄우기</h5><h5>2-2. 이메일이 아니면(@가 없으면) '이메일이 아닙니다'라는 얼럿 띄우기</h5><h5>[완성본]2-3. 이메일 도메인만 얼럿 띄우기</h5><input id="input-q2" type="text" /> <button onclick="q2()">클릭</button></div><hr /><div class="question-box"><h2>3. HTML 붙이기/지우기 연습</h2><h5>3-1. 이름을 입력하면 아래 나오게 하기</h5><h5>[완성본]3-2. 다지우기 버튼을 만들기</h5><input id="input-q3" type="text" placeholder="여기에 이름을 입력" /><button onclick="q3()">이름 붙이기</button><button onclick="q3_remove()">다지우기</button><ul id="names-q3"><li>세종대왕</li><li>임꺽정</li></ul></div></body></html>
cs
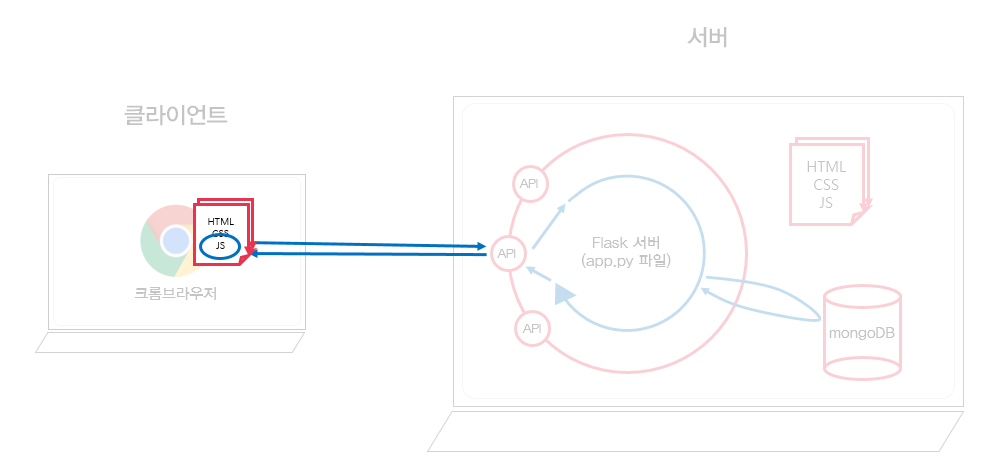
1-6. 서버-클라이언트 통신 이해하기
-
서버-> 클라이언트: JSON 이해하기
딕셔너리와 리스트가 합쳐진 형태라고만 이해해도 상관무 (ex.서울시 미세먼지 OpenAPI) -
클라이언트 요청 방식
API는 은행 창구에 비유할 수 있음. 클라이언트 요청 시 '타입'이라는 것이 존재함.
- GET 타입 : 데이터 조회하기
- POST 타입 : 데이터 생성, 수정, 삭제 ex.회원가입, 탈퇴, 비밀번호 수정 등
https://movie.naver.com/movie/bi/mi/basic.nhn?code=161967
위 주소는 크게 두 부분으로 쪼개집니다. 바로 "?"가 쪼개지는 지점인데요.
"?" 기준으로 앞부분이 <서버 주소>, 뒷부분이 [영화 번호] 입니다.
- 서버 주소: https://movie.naver.com/movie/bi/mi/basic.nhn
- 영화 정보: code=161967 --> 프론트엔드 개발자와 백엔드 개발자가 미리 정해둔 약속
-
GET 방식으로 데이터를 전달하는 방법
? : 여기서부터 전달할 데이터가 작성된다는 의미입니다.
& : 전달할 데이터가 더 있다는 뜻입니다.예시) google.com/search?q=아이폰&sourceid=chrome&ie=UTF-8 위 주소는 google.com의 search 창구에 다음 정보를 전달합니다! q=아이폰 (검색어) sourceid=chrome (브라우저 정보) ie=UTF-8 (인코딩 정보)
1-7. Ajax 시작하기
-
Ajax 기본 골격
12345678$.ajax({type: "GET",url: "여기에URL을입력",data: {},success: function(response){console.log(response)}})cs -
JSON을 돌면서 미세먼지와 구 이름을 console.log로 찍어보고 싶다!
1234567891011121314$.ajax({type: "GET",url: "http://spartacodingclub.shop/sparta_api/seoulair",data: {},success: function (response) {let mise_list = response["RealtimeCityAir"]["row"];for (let i = 0; i < mise_list.length; i++) {let mise = mise_list[i];let gu_name = mise["MSRSTE_NM"];let gu_mise = mise["IDEX_MVL"];console.log(gu_name, gu_mise);}}});cs
1-8. Ajax 함께 연습하기
(frontend > Ajax01.html)
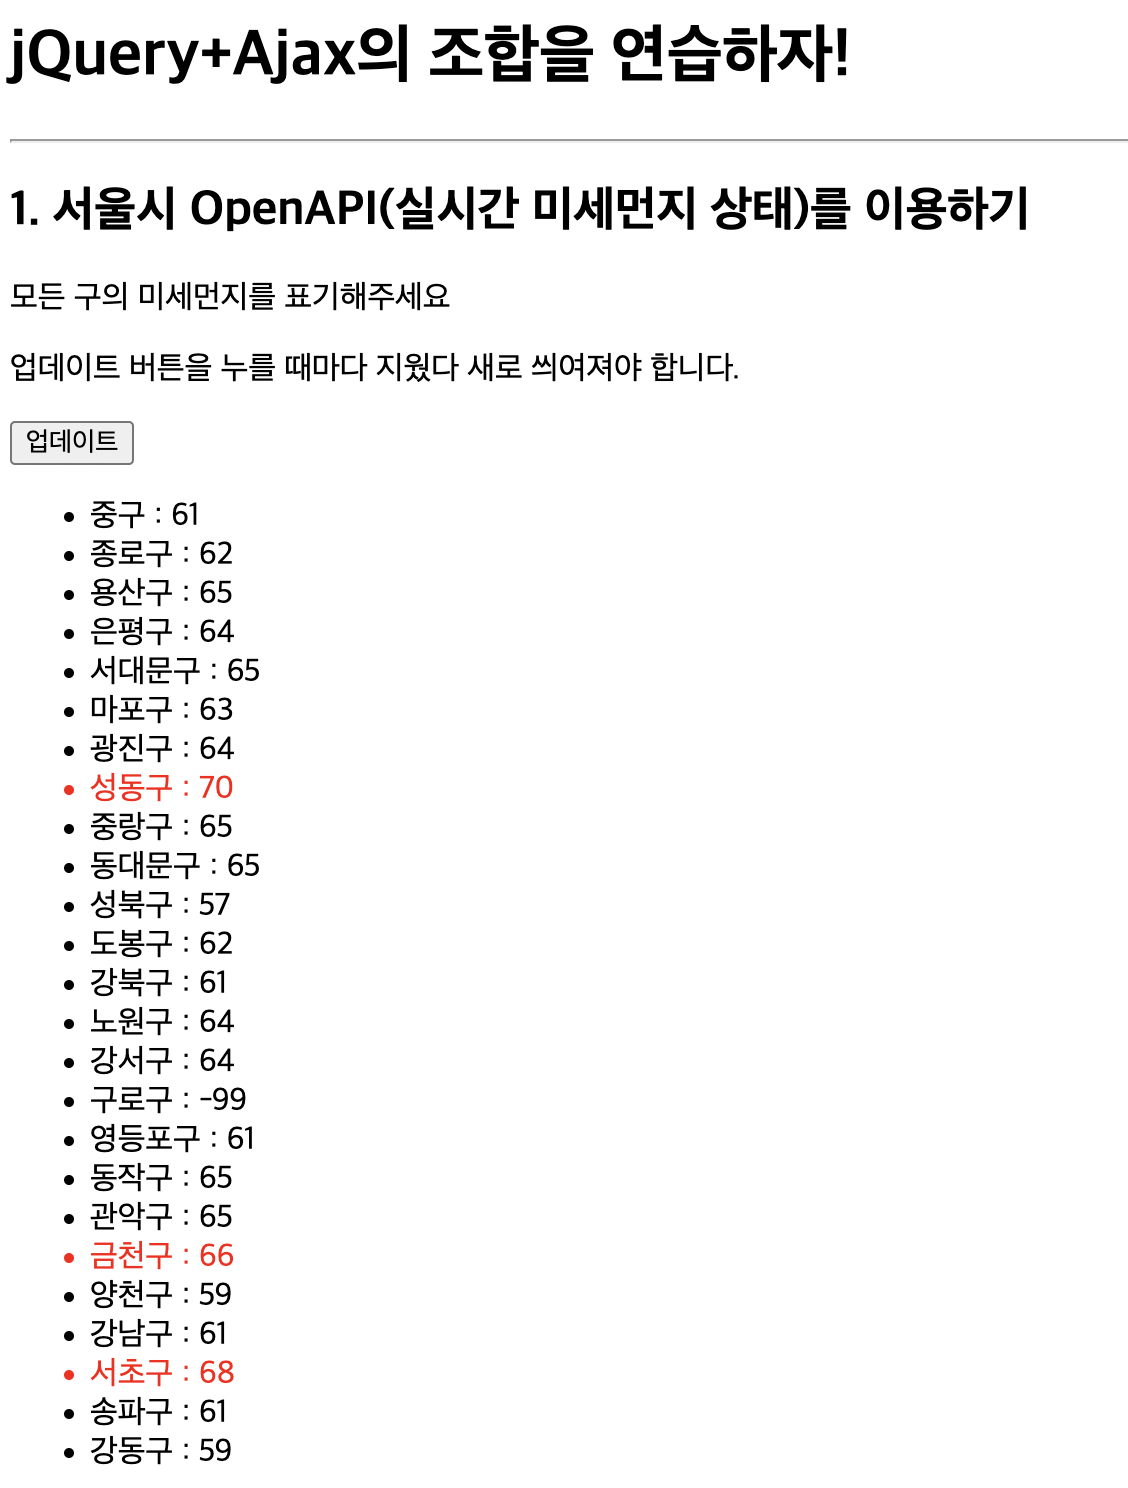
- 미세먼지 OpenAPI를 이용하여 ① 버튼 누를 때 마다 다시 ajax로 데이터 다시 불러오고 ② temp_html로 붙여넣기 ③ 미세먼지 값이 65이상이라면 빨간 글씨로 표기하기1234567891011121314151617181920212223<script>function q1() {$('#names-q1').empty()$.ajax({type: "GET",url: "http://spartacodingclub.shop/sparta_api/seoulair",data: {},success: function (response) {let rows = response['RealtimeCityAir']['row']for (i = 0; i < rows.length; i++) {let gu_name = rows[i]['MSRSTE_NM']let gu_mise = rows[i]['IDEX_MVL']if (gu_mise > 65) {temp_html = `<li class="bad">${gu_name} : ${gu_mise}</li>`} else {temp_html = `<li>${gu_name} : ${gu_mise}</li>`}$('#names-q1').append(temp_html)}}})}</script>
cs
1-9. Quiz_Ajax 연습하기(1)
📁 frontend > Ajax02.html
- Ajax 이용해서 데이터 받고, console log로 확인하기
- JSON데이터 속에 필요한 리스트 정의하기 (rows)
- 반복문 넣고 필요한 부분 정의하기 (거치대 위치, 거치대 수, 현재 따릉이 수의 값)
- temp_html 정의하고 값 삽입 (${거치대 위치})
- 따릉이가 몇 대 이하일 경우 빨간 색으로 표기 -> style 정의하고, ajax문 안에 조건문 넣어서 temp_html 다르게 append되게 하기
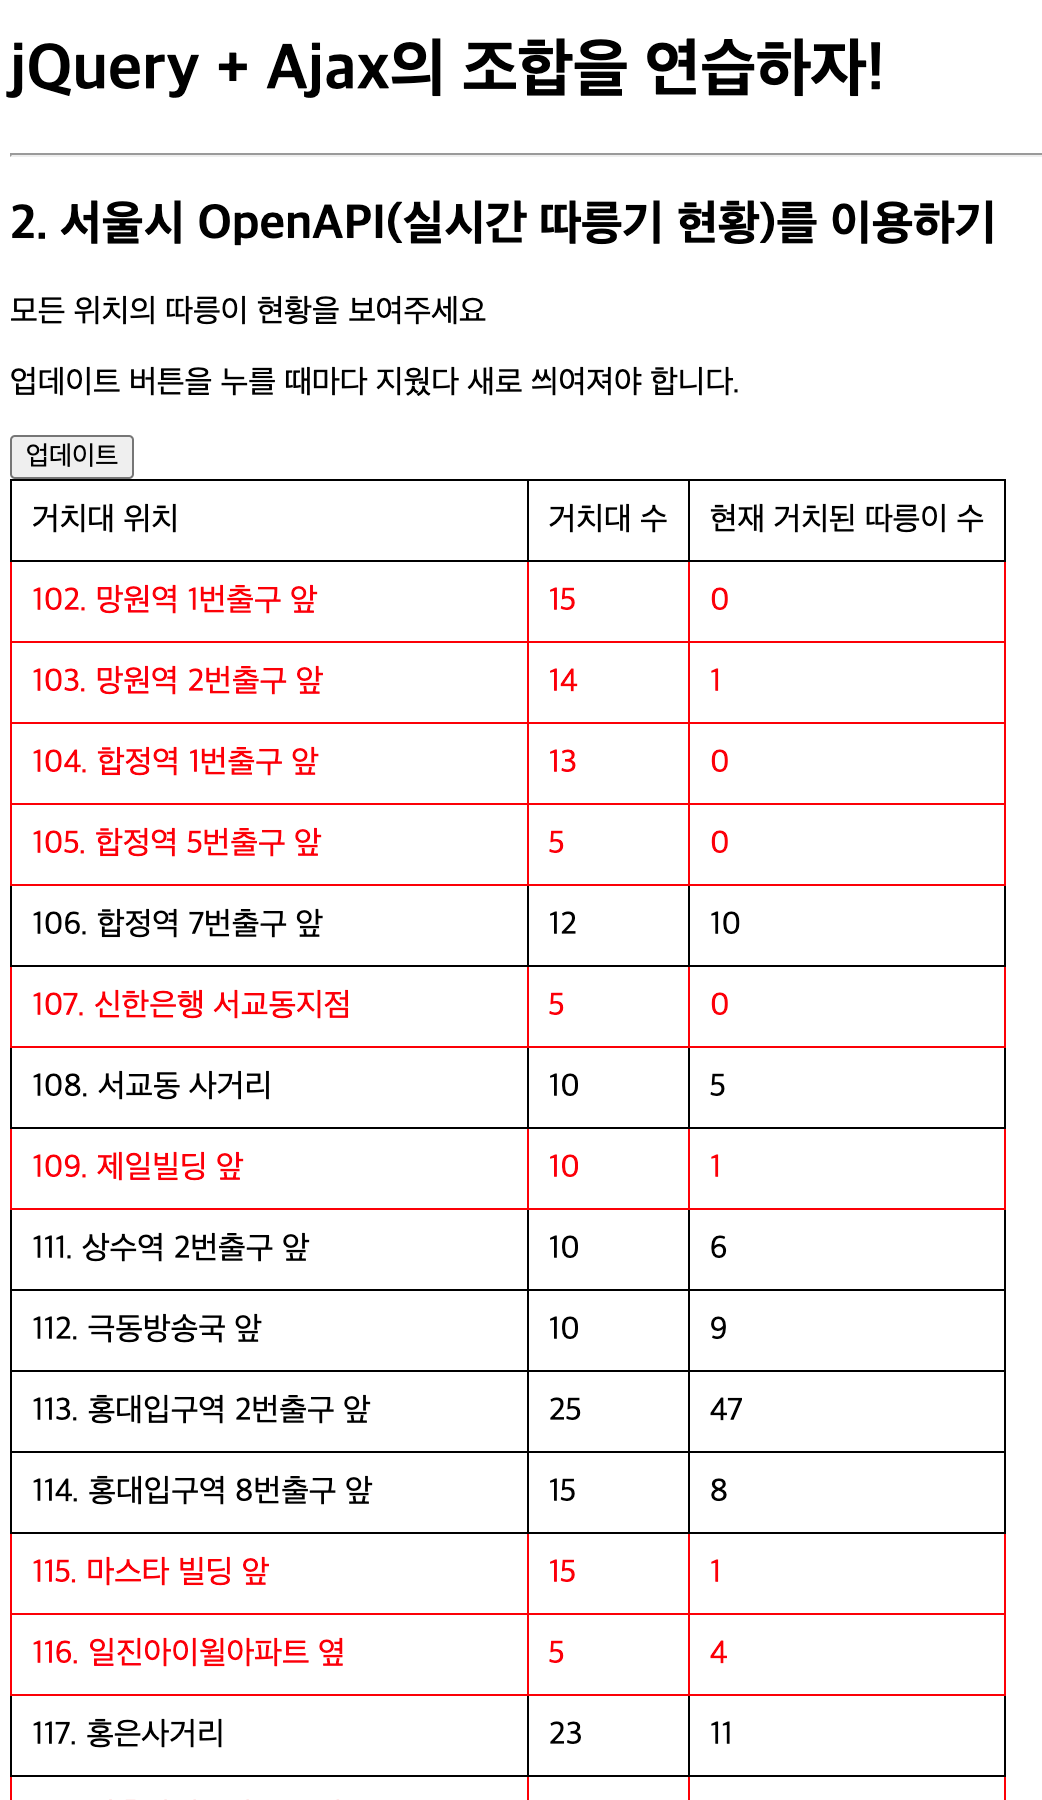
- 완성코드1234567891011121314151617181920212223242526272829303132333435363738394041424344454647484950515253545556575859606162636465666768697071727374757677787980818283848586878889909192<!doctype html><html lang="ko"><head><meta charset="UTF-8"><title>JQuery 연습하고 가기!</title><!-- JQuery를 import 합니다 --><script src="https://ajax.googleapis.com/ajax/libs/jquery/3.4.1/jquery.min.js"></script><style type="text/css">div.question-box {margin: 10px 0 20px 0;}table {border: 1px solid;border-collapse: collapse;}td,th {padding: 10px;border: 1px solid;}.urgent {color: red;}</style><script>function q1() {$('#names-q1').empty()$.ajax({type: "GET",url: "http://spartacodingclub.shop/sparta_api/seoulbike",data: {},success: function (response) {let rows = response['getStationList']['row']for (i = 0; i < rows.length; i++) {let name = rows[i]['stationName']let rack = rows[i]['rackTotCnt']let bike = rows[i]['parkingBikeTotCnt']if (bike < 5) {temp_html = `<tr class="urgent"><td>${name}</td><td>${rack}</td><td>${bike}</td></tr>`} else {temp_html = `<tr><td>${name}</td><td>${rack}</td><td>${bike}</td></tr>`}$('#names-q1').append(temp_html)}}})// 여기에 코드를 입력하세요}</script></head><body><h1>jQuery + Ajax의 조합을 연습하자!</h1><hr/><div class="question-box"><h2>2. 서울시 OpenAPI(실시간 따릉기 현황)를 이용하기</h2><p>모든 위치의 따릉이 현황을 보여주세요</p><p>업데이트 버튼을 누를 때마다 지웠다 새로 씌여져야 합니다.</p><button onclick="q1()">업데이트</button><table><thead><tr><td>거치대 위치</td><td>거치대 수</td><td>현재 거치된 따릉이 수</td></tr></thead><tbody id="names-q1"></tbody></table></div></body></html>
cs
1-10. Quiz_Ajax 연습하기(2)
📁 frontend > Ajax03.html

- API 에서 무슨 값을 활용해야하는지 체크하기
- Ajax 문 복붙해왔으면 response 값을 console에 찍어보기 (꼭!)
- 이미지, 텍스트 값 정의하고 console에 찍어보기
- 이미지 바꾸기 :
$("#아이디값").attr("src", 이미지URL); - 텍스트 바꾸기 :
$("#아이디값").text("바꾸고 싶은 텍스트");
- 이미지 바꾸기 :
- 완성코드1234567891011121314151617181920212223242526272829303132333435363738394041424344454647484950515253<!doctype html><html lang="ko"><head><meta charset="UTF-8"><title>JQuery 연습하고 가기!</title><!-- JQuery를 import 합니다 --><script src="https://ajax.googleapis.com/ajax/libs/jquery/3.4.1/jquery.min.js"></script><style type="text/css">div.question-box {margin: 10px 0 20px 0;}div.question-box > div {margin-top: 30px;}</style><script>function q1() {$.ajax({type: "GET",url: "http://spartacodingclub.shop/sparta_api/rtan",data: {},success: function (response) {let url = response['url']let msg = response['msg']$('#img-rtan').attr("src", url);$('#text-rtan').text(msg)}})}</script></head><body><h1>JQuery+Ajax의 조합을 연습하자!</h1><hr/><div class="question-box"><h2>3. 르탄이 API를 이용하기!</h2><p>아래를 르탄이 사진으로 바꿔주세요</p><p>업데이트 버튼을 누를 때마다 지웠다 새로 씌여져야 합니다.</p><button onclick="q1()">르탄이 나와</button><div><img id="img-rtan" width="300" src="http://spartacodingclub.shop/static/images/rtans/SpartaIcon11.png"/><h1 id="text-rtan">나는 ㅇㅇㅇ하는 르탄이!</h1></div></div></body></html>
cs
1-11. 2주차 끝 & 숙제 설명
📁 frontend > homework_2.html
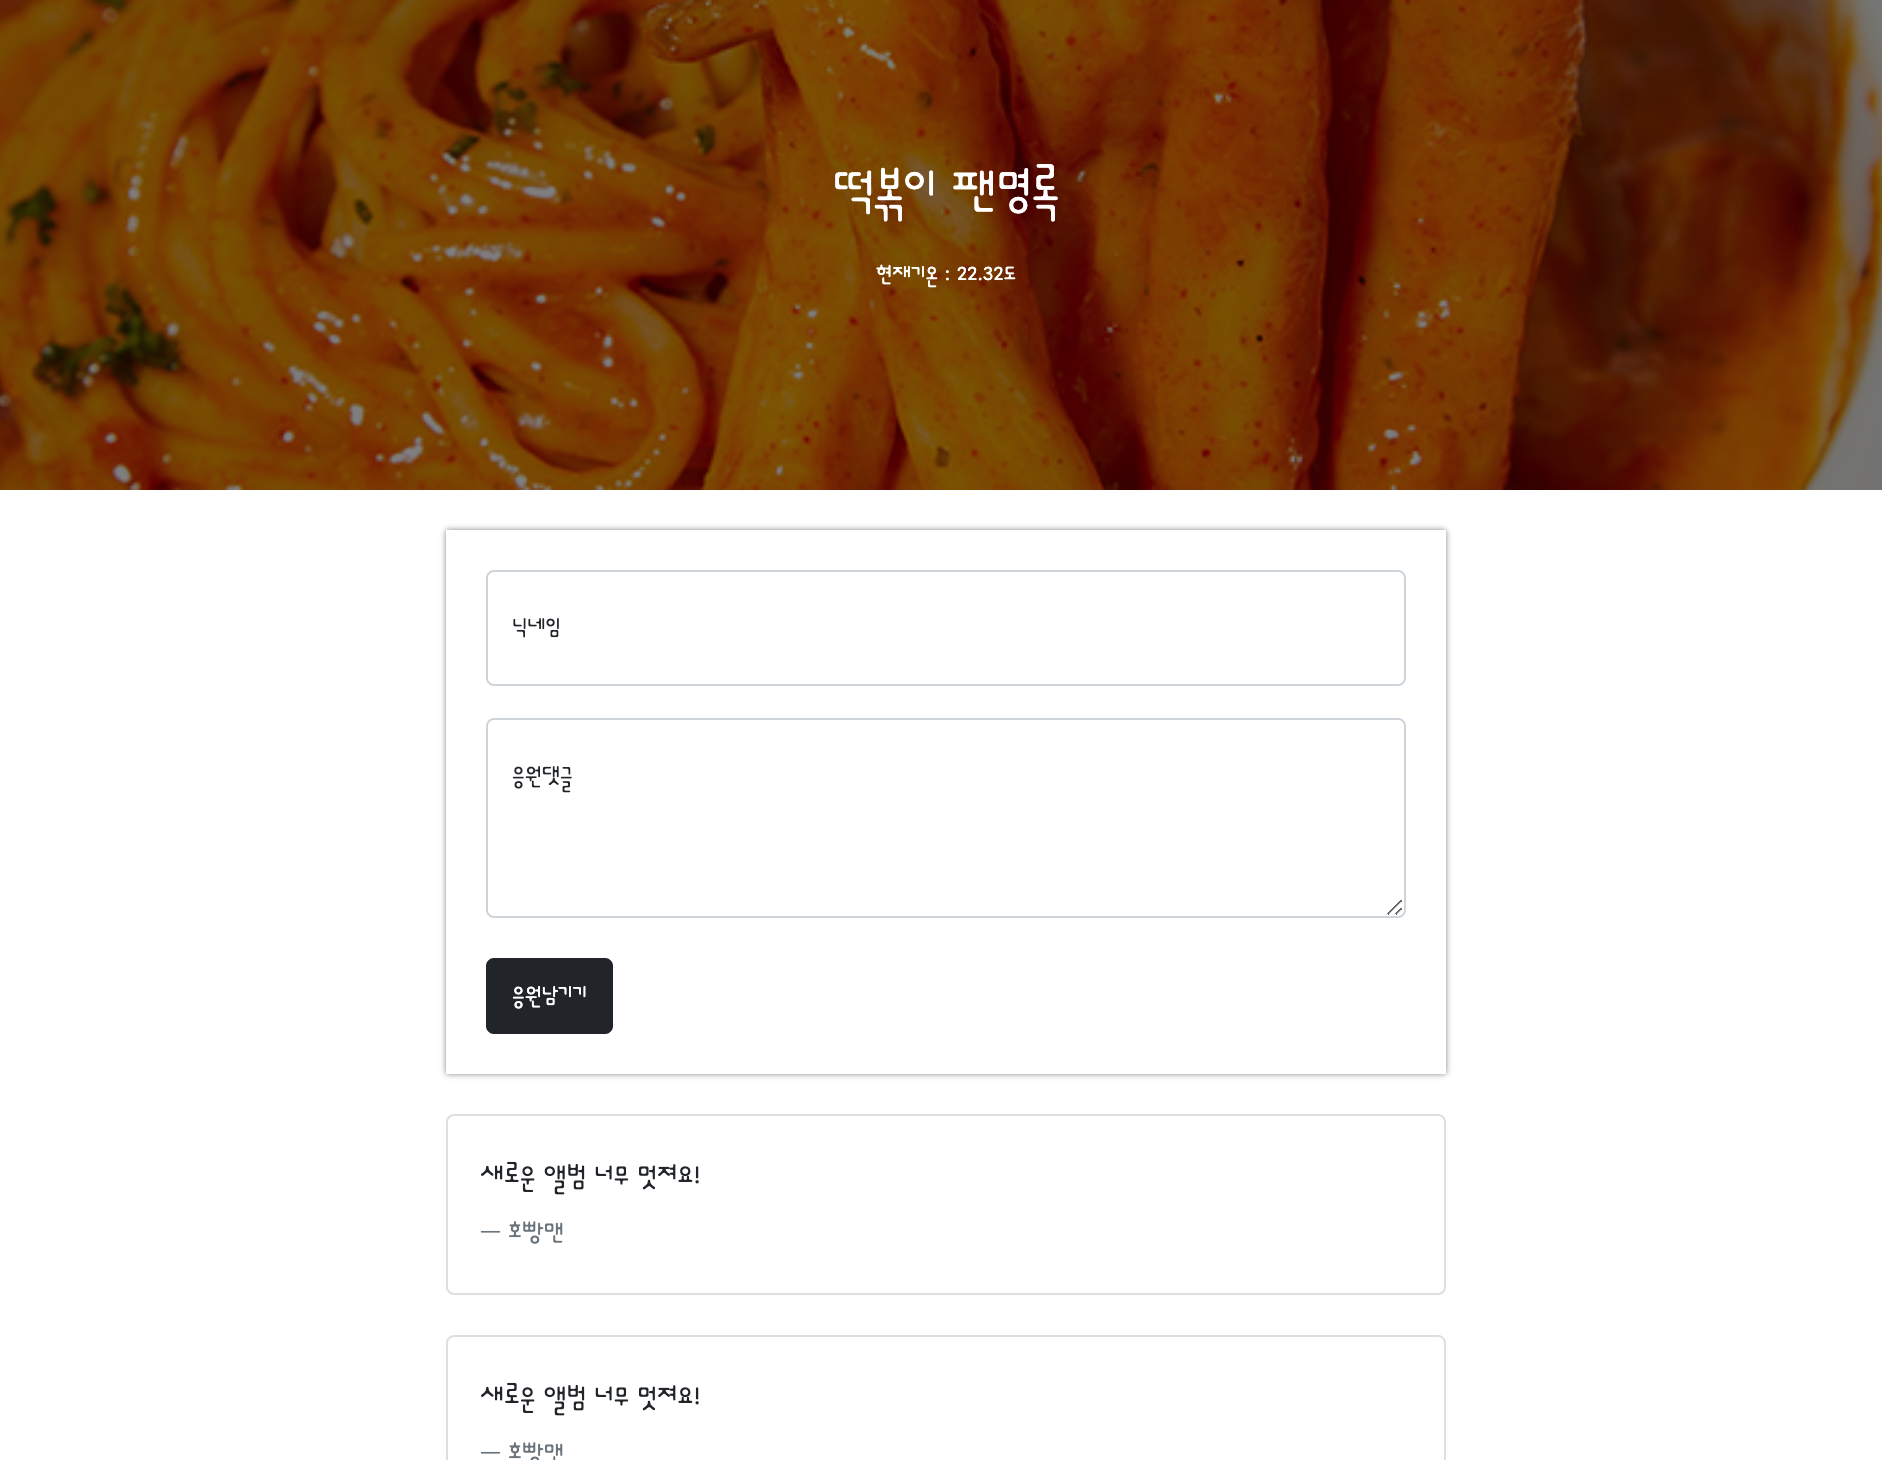
- 1주차 숙제에 날씨 API 사용해서 현재기온 넣기
로딩 후 호출하기
$(document).ready(function(){
	alert('다 로딩됐다!')
});
-
<script>: 페이지 로딩 후 ajax로 데이터 받아와서 #temp에 값 넣기12345678910111213<script>$(document).ready(function () {$.ajax({type: "GET",url: "http://spartacodingclub.shop/sparta_api/weather/suwon",data: {},success: function (response) {let suwon_temp = response['temp']$('#temp').text(suwon_temp)}})});</script>cs -
<body>에서 #temp 설정하기1234<div class="mytitle"><h1>떡볶이 팬명록</h1><p>현재기온 : <span id="temp">00.00</span>도</p></div>cs
2. 📌 기억해야할 점
- console은 소중함 ... 변수 정의하면 꼭꼭 값 내려보고 JQuery도 테스트해보기
3. 궁금한 점
- let을 하냐 안하냐의 차이가 궁금함