
Vue.js
action
- 비동기 처리 로직을 선언하는 메서드. 비동기 로직을 담당하는 mutations
- 데이터 요청, Promise, ES6 async과 같은 비동기 처리는 모두 actions에 선언
기본 흐름
actions에서는 context 인자로 store의 메서드와 속성에 접근할 수 있다.
// store.js
state : {
	num : 10
},
mutations : {
	doubleNumber(state){
    	state.num * 2;
    }
},
actions : {
	delayDoubleNumber(context){ //context로 store의 메서드와 속성 접근
    	context.commit('doubleNumber');
    }
}
// App.vue
this.$store.dispatch('delayDoubleNumber');
비동기 코드 예제 1)
// store.js
mutations : {
	addCounter(state){
    	state.counter++
    },
},
actions : {
	delayedAddCounter(context){
    	setTimeout(()=> context.commit('addCounter'),2000);
    }
}

//App.vue
methods : {
	incrementCounter(){
    	this.$store.dispatch('delayedAddCounter');
    }
}
비동기 코드 예제 2)
//store.js
mutations : {
	setData(state, fetchedData){
    	state.product = fetchedData;
    }
},
actions : {
	fetchProductData(context){
    	return axios.get('https://domain.com/products/1')
      				.then(response => context.commit('setData',response));
    }
}

//App.vue
methods : {
	getProduct(){
    	this.$store.dispatch('fetchproductData');
    }
}
비동기 처리 로직은 action을 사용해야 하는 이유
언제 어느 컴포넌트에서 해당 state를 호출하고 변경했는 확인하기가 어렵다.
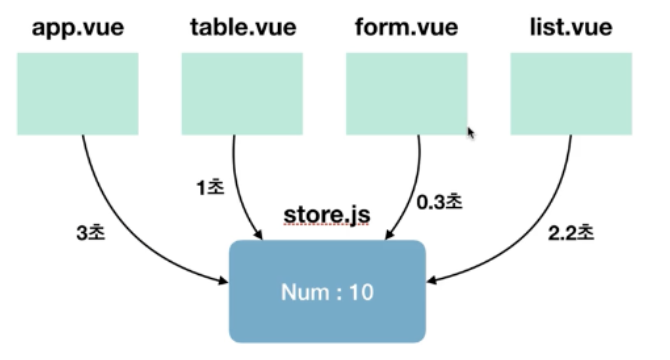
여러 개의 컴포넌트에서 mutations로 시간 차를 두고 state를 변경하는 경우이다.
즉, state 값의 변화를 추적하기 어렵기 때문에 mutations 속성에는 동기 처리 로직만 넣어야 한다.
Helper
각 속성들을 더 쉽게 사용하는 방법
Store에 있는 아래 4가지 속성들을 간편하게 코딩하는 방법
- state → mapState
- getter → mapGetters
- mutations → mapMutations
- actions → mapActions
사용법
헬퍼를 사용하고자 하는 vue 파일에서 해당 헬퍼를 로딩
import { mapState } from 'vuex'
import { mapGetters } from 'vuex'
import { mapMutations } from 'vuex'
import { mapActions } from 'vuex'

export default {
  computed() { ...mapState(['num']), ...mapGetters(['countedNum']) },
  methods : { ...mapMutations(['clickBtn']), ...mapActions(['asyncClickBtn']) }
}
mapState
Vuex에 선언한 state 속성을 뷰 컴포넌트에 더 쉽게 연결해주는 헬퍼
// App.vue
import { mapState } from 'vuex'

computed(){
	...mapState(['num'])
  	//num() { return this.$store.state.num; }
}

// store.js
state : {
	num : 10
}<p>{{ this.num }}</p>mapGetters
Vuex에 선언한 getters 속성을 뷰 컴포넌트에 더 쉽게 연결해주는 헬퍼
//App.vue
import { mapGetters } from 'vuex'

computed() { ...mapGetters(['reverseMessage']) }

//store.js
getters : {
	reverseMessage(state){
    	return state.msg.split('').reverse().join('');
    }
}
<!-- <p>{{ this.$store.getters.reverseMessage }}</p>-->
<p>{{ this.reverseMessage }}</p>mapMutations
Vuex에 선언한 mutations 속성을 뷰 컴포넌트에 더 쉽게 연결해주는 헬퍼
mapMutations을 이용하는 방법 두가지가 있다.
['mutations에서 지정한 함수']
// App.vue
import { mapMutations } from 'vuex'

methods : {
	...mapMutations(['clickBtn']),
    authLogin(){},
    displayTable(){}
}

// store.js
mutations : {
	clickBtn(state){
    	alert(state.msg);
    }
}<button @click="clickBtn">popup message</button>@click="clickBtn" = v-on:click="clickBtn"
{ 이벤트 이름 지정 : 'mutations에서 지정한 함수'}
// App.vue
import { mapMutations } from 'vuex'

methods : {
	...mapMutations({
    	clickButton : 'clickBtn'
    })
}

// store.js
mutations : {
	clickBtn(state){
    	alert(state.msg);
    }
}<button @click="clickBtn">popup message</button>mapActions
Vuex에 선언한 actions 속성을 뷰 컴포넌트에 더 쉽게 연결해주는 헬퍼
//App.vue
import { mapActions } from 'vuex'

methods : {
	...mapActions(['delayClickBtn']),
}

//store.js
actions : {
	delayClickBtn(context){
    	setTimeout(() => context.commit('clickBtn), 2000);
    }
}<button @click = "delayClickBtn">delay popup message</button>헬퍼의 유연한 문법
Vuex에 선언한 속성을 그대로 컴포넌트에 연결하는 문법
// 배열 리터럴
...mapMutations([
  'clickBtn', // 'clickBtn' : clickBtn
  'addNumber' // addNumber(인자)
])
Vuex에 선언한 속성을 컴포넌트의 특정 메서드에다가 연결하는 문법
// 객체 리터럴
...mapMutations({
	popupMsg : 'clickBtn' // 컴포넌트 메서드 명 : Store의 뮤테이션 명
})
오늘보단 내일이 강한 개발자입니다!🧑🏻💻