
오전문제
최대값을 찾는 max() 함수를 만드시오.
-
매개변수로 max([1, 2, 3, 4])와 같은 배열을 받는 max() 함수를 만드시오.
-
매개변수로 max(1, 2, 3, 4)와 같이 숫자를 받는 max() 함수를 만드시오.
-
max([1,2,3,4]) 형태와 max(1, 2, 3, 4) 형태를 모두 입력할 수 있는 max() 함수를 만드시오.
<!DOCTYPE html>
<html lang="ko">
<head>
    <meta charset="UTF-8">
    <meta name="viewport" content="width=device-width, initial-scale=1.0">
    <title>Play Hangman!</title>
    <style>

    </style>
</head>
<body>
    <script>
        //배열을 받아 최대값 찾기
        let max = function(array){
            let maxNum = array[0];
            for(const i of array){
                if(maxNum < i) maxNum = i;
            }
            return maxNum;
        }
        let max2 = function(...num){
            let maxNum = num[0];
            for(const i of num){
                if(maxNum < i) maxNum = i;
            }
            return maxNum;
        }
        let max3 = function(array, ...num){
            let maxNum;
            let items;
            if(Array.isArray(array)){
                maxNum = array[0];
                items = array;
            }else{
                maxNum = array;
                items = num;
            }
            for(const i of items){
                if(maxNum < i) maxNum = i;
            }
            return maxNum;
        }
        console.log(max([1,2,3,4]));//4
        console.log(max2(1, 2, 3, 4));//4
        console.log(max3([1,2,3,4]));//4
        console.log(max3(1, 2, 3, 4));//4
    </script>

</body>
</html>- 가변인자로 값을 받을 때 함수 내부에서는 그 값들을 배열로 처리하기 때문에 인덱스를 사용할 수 있는것이다.
화살표 함수
- "Hi"를 출력하는 화살표 함수.
<!DOCTYPE html>
<html lang="ko">
<head>
    <meta charset="UTF-8">
    <meta name="viewport" content="width=device-width, initial-scale=1.0">
    <title>Document</title>
</head>
<body>
    <p id = "demo"></p>
    <script>
        let hi = () => document.getElementById("demo").innerHTML = "Hi";
        hi();
    </script>
</body>
</html>- 매개변수를 두 개 받아서 그것을 더해서 반환하는 화살표 함수.
<!DOCTYPE html>
<html lang="ko">
<head>
    <meta charset="UTF-8">
    <meta name="viewport" content="width=device-width, initial-scale=1.0">
    <title>Document</title>
</head>
<body>
    <p id = "demo"></p>
    <script>
        let sum = (a, b) => document.getElementById("demo").innerHTML = a+b;
        sum(1, 3);
    </script>
</body>
</html>- 매개변수를 두 개 받아서 그것의 시작단 부터 끝단까지 출력하는 화살표 함수.(구구단)
문자열로 누적시켜서 출력
<!DOCTYPE html>
<html lang="ko">
<head>
    <meta charset="UTF-8">
    <meta name="viewport" content="width=device-width, initial-scale=1.0">
    <title>Document</title>
</head>
<body>
    <p id="demo"></p>
    <script>
        let num = (start, end) => {
            let result = ""; // 결과를 누적할 변수 선언
            for (let i = start; i <= end; i++) {
                for (let j = 2; j <= 9; j++) {
                    result += `${i} * ${j} = ${i * j}<br>`; // 각 결과를 누적
                }
            }
            document.getElementById("demo").innerHTML = result; // 한 번에 출력
        }
        num(1, 3);
    </script>
</body>
</html>
배열로 넣어놨다가출력
<!DOCTYPE html>
<html lang="ko">
<head>
    <meta charset="UTF-8">
    <meta name="viewport" content="width=device-width, initial-scale=1.0">
    <title>Document</title>
</head>
<body>
    <p id="demo"></p>
    <script>
        let num = (start, end) => {
            let result = []; // 결과를 담을 배열 선언
            for (let i = start; i <= end; i++) {
                for (let j = 2; j <= 9; j++) {
                    result.push(`${i} * ${j} = ${i * j}`); // 각 결과를 배열에 추가
                }
            }
            document.getElementById("demo").innerHTML = result.join("<br>"); // 배열을 문자열로 합쳐서 출력
        }
        num(1, 3);
    </script>
</body>
</html>- let arr = [1, 2, 3]; 배열의 각 요소를 두 배로 하는 새로운 배열을 만들자.
익명함수, 화살표 함수로 각각 구현해 볼것
<!DOCTYPE html>
<html lang="ko">
<head>
    <meta charset="UTF-8">
    <meta name="viewport" content="width=device-width, initial-scale=1.0">
    <title>Document</title>
</head>
<body>
    <p id="demo"></p>
    <script>
        let arr = [1, 2, 3];
        let pow = arr.map(x => x * x); // 각 요소를 제곱하여 새로운 배열 생성
        pow.forEach(a => document.getElementById("demo").innerHTML += a + "<br>"); // 각 요소를 화면에 출력
    //1 4 9
   </script>
</body>
</html>
forEach
- 다음 함수를 인자로 전달하는 함수를 정의해 보자.
그리고 그 함수를 호출하여 0부터 2까지 출력해 보자.
익명함수로 구현
<!DOCTYPE html>
<html lang="ko">
<head>
    <meta charset="UTF-8">
    <meta name="viewport" content="width=device-width, initial-scale=1.0">
    <title>Document</title>
</head>
<body>
    <p id="demo"></p>
    <script>
        let result = "";

       function print(num){
        for(let i = 0; i < 3; i++){
            num(i);
        }
       }
       print(function(i){
        result += (`${i}번째 함수 호출` +"<br>");
        document.getElementById("demo").innerHTML = result;
       });
    //    0번째 함수 호출
    //    1번째 함수 호출
    //    2번째 함수 호출
   </script>
</body>
</html>- 다음 배열의 각 값을 다음 형태로 출력하자.
Array의 메소드 활용. 익명함수로.
const numbers = [273, 52, 103, 32, 57];
0번째 요소 : 273
1번째 요소 : 52
2번째 요소 : 103
3번째 요소 : 32
4번째 요소 : 57
<!DOCTYPE html>
<html lang="ko">
<head>
    <meta charset="UTF-8">
    <meta name="viewport" content="width=device-width, initial-scale=1.0">
    <title>Document</title>
</head>
<body>
    <p id="demo"></p>
    <script>
       const numbers = [273, 52, 103, 32, 57];
        let result = ""; //초기화 해주지 않으면 아래에서 문자열을 더할 때 처음에 undefined도 들어가서 초기화 해줘야함
       numbers.forEach(function(value, index){
        result += (`${index}번째 요소 : ${value}` + "<br>");
        document.getElementById("demo").innerHTML = result;
       });
        // 0번째 요소 : 273
        // 1번째 요소 : 52
        // 2번째 요소 : 103
        // 3번째 요소 : 32
        // 4번째 요소 : 57
   </script>
</body>
</html>- forEach를 쓰면 callback함수를 사용해야한다.
- 다음 배열의 모든 값을 제곱하는 새 배열을 만들자.
그리고 그것을 console.log를 이용하여 출력하자.
익명함수로
let numbers = [273, 52, 103, 32, 57];
<!DOCTYPE html>
<html lang="ko">
<head>
    <meta charset="UTF-8">
    <meta name="viewport" content="width=device-width, initial-scale=1.0">
    <title>Document</title>
</head>
<body>
    <p id="demo"></p>
    <script>
     let numbers = [273, 52, 103, 32, 57];
    //  let arr = numbers.map(x => x*x);
    //  console.log(arr);
    numbers = numbers.map(function (value){
        return value * value;
    });
    numbers.forEach(console.log);
   </script>
</body>
</html>- 주석 처리부분 처럼 해도되는데, 익명함수로 하라해서..
- 다음 배열중에 짝수인 숫자로 이루어진 새로운 배열을 만들자.
그리고 그것을 출력.
익명함수로
const numbers = [0, 1, 2, 3, 4, 5];
<!DOCTYPE html>
<html lang="ko">
<head>
    <meta charset="UTF-8">
    <meta name="viewport" content="width=device-width, initial-scale=1.0">
    <title>Document</title>
</head>
<body>
    <p id="demo"></p>
    <script>
     const numbers = [0, 1, 2, 3, 4, 5];
     const jjak = numbers.filter(function (a){
        return a % 2 === 0;
     })
    document.getElementById("demo").innerHTML = jjak;
    // 0,2,4
   </script>
</body>
</html>- filter메서드도 map과 마찬가지로 새로운 배열로 반환한다.
- 다음 배열의 짝수만으로 이루어진 새로운 배열을 만들어서
그것을 제곱한 후에
그것의 각 요소의 값을 출력하자.
let numbers = [0, 1, 2, 3, 4, 5, 6, 7, 8, 9]
<!DOCTYPE html>
<html lang="ko">
<head>
    <meta charset="UTF-8">
    <meta name="viewport" content="width=device-width, initial-scale=1.0">
    <title>Document</title>
</head>
<body>
    <p id="demo"></p>
    <script>
     let numbers = [0, 1, 2, 3, 4, 5, 6, 7, 8, 9]
     let result = numbers.filter(a => a% 2 === 0).map(a => a * a);
    document.getElementById("demo").innerHTML = result;
    // 0, 4, 16, 36, 64
   </script>
</body>
</html>
타이머 함수
- 타이머 함수를 이용하여 1초후에 다음의 내용을 출력하는 함수를 만들자.
화살표 함수 이용.
1초 후에 실행됩니다.
<!DOCTYPE html>
<html lang="ko">
<head>
    <meta charset="UTF-8">
    <meta name="viewport" content="width=device-width, initial-scale=1.0">
    <title>Document</title>
</head>
<body>
    <p id="demo"></p>
    <script>
    let count = 0;
    const delay = () => document.getElementById("demo").innerText = "1초 후에 실행됩니다.";
    setTimeout(delay, 1000);
   </script>
</body>
</html>- 타이머 함수를 이용하여 1초마다 다음의 내용을 출력하는 함수를 만들자.
화살표 함수 이용.
1초마다 실행됩니다.(0번째)
1초마다 실행됩니다.(1번째)
1초마다 실행됩니다.(2번째)
1초마다 실행됩니다.(3번째)
...
<!DOCTYPE html>
<html lang="ko">
<head>
    <meta charset="UTF-8">
    <meta name="viewport" content="width=device-width, initial-scale=1.0">
    <title>Document</title>
</head>
<body>
    <p id="output"></p>
    <script>
        // 출력 횟수를 세는 변수
        let count = 0;

        // 1초마다 실행될 함수
        const repeatedOutput = () => {
            document.getElementById("output").innerText += `1초마다 실행됩니다.(${count}번째)\n`;
            count++; // 출력 횟수 증가
            if (count > 10) { // 출력 횟수가 10 이상이면
                clearInterval(timer); // 타이머 종료
            }
        };

        // 1초마다 함수 실행
        const timer = setInterval(repeatedOutput, 1000);

    </script>
</body>
</html>- 타이머 함수를 이용하여 1초마다 다음의 내용을 출력하는 함수를 만들자.
그리고 그 함수를 5초후에 종료하는 함수를 만들자.
화살표 함수 이용.
1초마다 실행됩니다.(0번째)
1초마다 실행됩니다.(1번째)
1초마다 실행됩니다.(2번째)
<!DOCTYPE html>
<html lang="ko">
<head>
    <meta charset="UTF-8">
    <meta name="viewport" content="width=device-width, initial-scale=1.0">
    <title>Timer Example</title>
</head>
<body>
    <p id="output"></p>
    <script>
        let count = 0; // 출력 횟수를 저장하는 변수

        const repeatedOutput = () => {
            document.getElementById("output").innerText += `1초마다 실행됩니다.(${count}번째)\n`;
            count++; // 출력 횟수 증가
        };

        // 1초마다 함수 실행하도록 타이머 설정
        const timer = setInterval(repeatedOutput, 1000);

        // 5초 후에 타이머를 종료하는 함수
        const stopTimer = () => {
            clearInterval(timer); // 타이머 종료
            document.getElementById("output").innerText += "타이머가 종료되었습니다.\n";
        };

        // 5초 후에 stopTimer 함수 실행하도록 타이머 설정
        setTimeout(stopTimer, 5000);
        // 1초마다 실행됩니다.(0번째)
        // 1초마다 실행됩니다.(1번째)
        // 1초마다 실행됩니다.(2번째)
        // 1초마다 실행됩니다.(3번째)
        // 1초마다 실행됩니다.(4번째)
        // 타이머가 종료되었습니다.
    </script>
</body>
</html>
함수 연습 문제
-
다음 배열을 가지고 다음의 내용을 메소드 채이닝으로 하여 새로운 배열을 만드시오.
① 홀수만 추출, ② 100 이하의 수만 추출, ③5로 나눈 나머지가 0인 수만 추출하시오.let numbers = [273, 25, 75, 52, 103, 32, 57, 24, 76]
배열로
<!DOCTYPE html>
<html lang="ko">
<head>
    <meta charset="UTF-8">
    <meta name="viewport" content="width=device-width, initial-scale=1.0">
    <title>Array Filtering</title>
</head>
<body>
    <p id="demo"></p>
    <script>
        // 배열을 선언합니다.
        let numbers = [273, 25, 75, 52, 103, 32, 57, 24, 76];

        // 배열 메소드 체이닝을 이용하여 요구사항에 맞는 새로운 배열 생성
        let filteredArray = numbers.filter(num => num % 2 !== 0) // 홀수만 추출
                                   .filter(num => num <= 100) // 100 이하의 수만 추출
                                   .filter(num => num % 5 === 0); // 5로 나눈 나머지가 0인 수만 추출

        // 새로운 배열을 문자열로 변환하여 출력
        document.getElementById("demo").innerHTML = filteredArray.join(", ");
    </script>
</body>
</html>
문자열로
<!DOCTYPE html>
<html lang="ko">
<head>
    <meta charset="UTF-8">
    <meta name="viewport" content="width=device-width, initial-scale=1.0">
    <title>Array Filtering</title>
</head>
<body>
    <p id = "demo"></p>
    <script>
        // 배열을 선언합니다.
        let numbers = [273, 25, 75, 52, 103, 32, 57, 24, 76];

        // 배열 메소드 체이닝을 이용하여 요구사항에 맞는 새로운 배열 생성
        let filteredArray = numbers.filter(num => num % 2 !== 0) // 홀수만 추출
                                   .filter(num => num <= 100) // 100 이하의 수만 추출
                                   .filter(num => num % 5 === 0); // 5로 나눈 나머지가 0인 수만 추출

        // 새로운 배열 출력
        document.getElementById("demo").innerHTML = filteredArray;
        //25,75
    </script>
</body>
</html>
배열을 순회해 요소를 개별적으로 출력
<!DOCTYPE html>
<html lang="ko">
<head>
    <meta charset="UTF-8">
    <meta name="viewport" content="width=device-width, initial-scale=1.0">
    <title>Array Filtering</title>
</head>
<body>
    <div id="demo"></div>
    <script>
        // 배열을 선언합니다.
        let numbers = [273, 25, 75, 52, 103, 32, 57, 24, 76];

        // 배열 메소드 체이닝을 이용하여 요구사항에 맞는 새로운 배열 생성
        let filteredArray = numbers.filter(num => num % 2 !== 0) // 홀수만 추출
                                   .filter(num => num <= 100) // 100 이하의 수만 추출
                                   .filter(num => num % 5 === 0); // 5로 나눈 나머지가 0인 수만 추출

        // 새로운 배열 출력
        let demoElement = document.getElementById("demo");
        filteredArray.forEach(num => {
            let span = document.createElement("span");
            span.textContent = num + ", ";
            demoElement.appendChild(span);
        });
    </script>
</body>
</html>- 이전에 반복문 부분에서 살펴보았던 다음과 같은 코드를 배열의 forEach 메소드를 사용하는 형태로 변경하시오.
<script>
    const array = ['사과', '배', '귤', '바나나']

    console.log('# for in 반복문')
    for(const i in array){
        console.log(i)
    }

    console.log('# for of 반복문')
    for(const i of array){
        console.log(i);
    }
</script>
콘솔에 출력
const array = ['사과', '배', '귤', '바나나'];

console.log('# forEach 메소드');
array.forEach(item => {
    console.log(item);
});
화면에 출력
<!DOCTYPE html>
<html lang="ko">
<head>
<meta charset="UTF-8">
<title>forEach 메소드로 배열 요소 출력하기</title>
</head>
<body>
<p id="output"></p>

<script>
const array = ['사과', '배', '귤', '바나나'];
const outputPara = document.getElementById('output');

array.forEach(item => {
    outputPara.textContent += item + '<br>';
});
</script>
</body>
</html>- 즉시 실행 함수 예제 (함수를 정의하고 즉시 호출하는 JavaScript 패턴)
<!DOCTYPE html>
<html lang="ko">
<head>
<meta charset="UTF-8">
<title>forEach 메소드로 배열 요소 출력하기</title>
</head>
<body>
<p id="output"></p>

<script>
const array = ['사과', '배', '귤', '바나나'];
const outputPara = document.getElementById('output');

// 즉시 실행 함수 사용
(function(arr, output) {
    arr.forEach(item => {
        output.textContent += item + '<br>';
    });
})(array, outputPara);
</script>
</body>
</html>
동적으로 요소 추가
create Element / appendChild
- appendChild() : 새로운 요소를 지정된 부모 요소의 자식으로 추가한다.(생성된 요소를 원하는 위치에 삽입 가능)
<!DOCTYPE html>
<html>
<head>
  <script>
    function fun() {
      let btn = document.createElement("button");
      btn.innerHTML = "Click me";
      document.body.appendChild(btn);
    }
  </script>
</head>
<body>
  <button onclick="fun()">Create Button</button>
</body>
</html>-
body부분에 새로운 버튼을 생성 >> 버튼을 눌렀을 때 fun()실행
- CreateButton을 누를 떄 함수가 실행되면서 Click me버튼 생성

insertBefore
-
요소를 다른 요소의 이전 위치에 삽입한다.
- 두개의 매개변수를 받는데, 첫번째 매개변수는 삽입할 요소이고, 두번째 매개변수는 삽입할 위치의 기준이 되는 요소이다.
<!DOCTYPE html>
<html>
<head>
  <script>
    function fun() {
      let btn = document.createElement("button");
      let element = document.getElementById("d1");
      let child = document.getElementById("p1");

      btn.innerHTML = "Click me";
      element.insertBefore(btn, child);
    }
  </script>
</head>
<body>
  <div id="d1">
    <p id="p1">This is a paragraph.</p>
  </div>
  <button onclick="fun()">Create Button</button>
</body>
</html>- 새로운 버튼인 Click me가 inserBefore을 이용해, child의 이전 요소에 btn을 넣음으로써 p이전에 버튼이 생성되는 것을 볼 수 있다.
div를 하나 더 만들 필요 없이 간단하게 하려면 이런 형태도 가능
그러나 위에 코드가 더 명확하게 그릅화했기에 위에가 났다.
<!DOCTYPE html>
<html lang="ko">
<head>
    <meta charset="UTF-8">
    <meta name="viewport" content="width=device-width, initial-scale=1.0">
    <title>Document</title>
</head>
<body>
    <p id = "p1">This is a paragraph.</p>
    <button onclick="createBtn()">Create Button</button>
    <script>
        let createBtn = () => {
            let btn = document.createElement("button");
            let child = document.getElementById("p1");

            btn.innerHTML = "Click me";
            document.body.insertBefore(btn, child);
        }
    </script>
</body>
</html>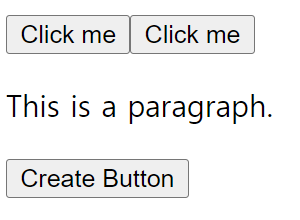
removeChild
-
DOM에서 요소를 삭제하는 JS메서드다. >> 부모 노드에서 특정 자식 노드를 제거한다.
- 일치하는 아이디 값을찾아 해당하는 요소를 삭제
-
parentNode는 DOM(Document Object Model)에서 요소의 부모 요소를 나타내는 속성으로, 해당하는 요소가 부오 요소가 있는지 확인
<!DOCTYPE html>
<html lang="ko">

<head>
    <meta charset="UTF-8">
    <meta http-equiv="X-UA-Compatible" content="IE=edge">
    <meta name="viewport" content="width=device-width, initial-scale=1.0">
    <title>Document</title>
</head>

<body>
    <div id="par_div">
        <div id="child_div1">첫번째 div</div>
        <div id="child_div2">두번째 div</div>
        <div id="child_div3">세번째 div</div>
    </div>
    <script>
        var parent = document.getElementById("par_div");
        var child = document.getElementById("child_div2");

        parent.removeChild(child);//parent에서 Child를 삭제
        if (child.parentNode) {//child가 부모 노드를 가지고 있다면
            child.parentNode.removeChild(child); //자신이 자신 요소 삭제
        }
        //위 부모에서 삭제하는 부분과 if문에서 자기 자신을 삭제하는 부분은 같음으로 굳이 두번 할 필요는 없음 교육적인 목적

        // var child = document.getElementById("child_div4"); 없는존재를 제거하려해서 에러
        // parent.removeChild(child); 이전에 제거된 자식 노드를 한번 더 삭제하려 해서 에러
    </script>
</body>
</html>-
만약 child 요소가 부모 노드에 존재하지 않는 경우 또는 child요소가 null인 경우에는 아무런 동작도 하지 않는다.
- 그래서조건문으로 사용해 child요소가 존재하는지 확인한 후에 removeChild메서드를 호출한다.
if (child.parentNode) {
    child.parentNode.removeChild(child);
}
replaceChild
-
부모 노드에서 특정 자식 노드를 다른 노드로 교체한다.
-
두 개의 매개변수를 받는데, 첫 번째 매개변수는 새로운 자식 노드고, 두 번째 매개변수는 교체할 자식노드이다.
<!DOCTYPE html>
<html lang="ko">
<head>
    <meta charset="UTF-8">
    <meta name="viewport" content="width=device-width, initial-scale=1.0">
    <title>Array Filtering</title>
</head>
<body>
   <div id = "A">hi</div>
   <div id = "B">Dude</div>
   <script>
    let divA = document.getElementById("A");
    let newSpan = document.createElement('span');//태그 생성
    newSpan.textContent = "Hello~";//위에서 생성한 태그에 content추가
    divA.parentNode.replaceChild(newSpan, divA);// divA를 newSpan으로 교체
    //divA.replaceChild(newSpan, divA); 로 코드 작성 가능
   </script>
</body>
</html>-
divA의 부모태그는 body이고, replacChild로, divA자리에 newSpan이 들어가게되는 것이다.
-
replaceChild를 할때 꼭 부모 노드를 명시적으로 넣을 필요가 없다. 안넣어도 해당 자리에 들어가기 때문에 기존 노드와 동일하게 부모 노드가 존재한다.(주석처럼 사용 가능)
js로 숫자 맞추기 게임 만들기 1~100
내가 짠 코드
- #showResult 에 백틱 안에 개행하고 싶으면 그냥 내가 개행할 부분에 엔터치면 됐었는데..
<!DOCTYPE html>
<html lang="ko">
<head>
    <meta charset="UTF-8">
    <meta name="viewport" content="width=device-width, initial-scale=1.0">
    <title>Number Guessing Game</title>
    <style>
        #showInputNum, #CorrectOrWrong, #showResult, #reset {
            display: none;
        }

        #CorrectOrWrong {
            background-color: red;
        }

        #CorrectOrWrong.correct {
            background-color: green;
        }
    </style>
</head>
<body>
    <h1>Number Guessing Game</h1>
    <p>We have selected a random number between 1 and 100. See if you can guess it in 10 turns or less. We'll tell you if your guess was too high or too low.</p>
    <form id="guessForm" onsubmit="checkGuess(event)">
        <label for="userInput">Enter a guess:
            <input type="number" id="userInput" placeholder="Enter your guess here" min="1" max="100">
            <button type="submit">Submit guess</button>
        </label>
    </form>
    <p id="showInputNum"></p>
    <p id="CorrectOrWrong"></p>
    <p id="showResult"></p>
    <p id="debugging"></p>
    <button id="reset" onclick="resetGame()">Start new game</button>

    <script>
        let targetNumber;
        let remainingGuesses;
        const guesses = [];

        const generateTargetNumber = () => {
            targetNumber = Math.floor(Math.random() * 100 + 1);
            remainingGuesses = 10;
        };

        const checkGuess = (event) => {
            event.preventDefault();
            const userInput = Number(document.getElementById("userInput").value);
            document.getElementById("debugging").innerText = targetNumber;

            if (isNaN(userInput) || userInput < 1 || userInput > 100) {
                showResult("Please enter a valid number between 1 and 100.");
                return;
            }

            if (userInput === targetNumber) {
                CorrectOrWrong(`Congratulations! You guessed the number ${targetNumber}!`, true);
            } else if (remainingGuesses === 0) {
                CorrectOrWrong(`Game over! The number was ${targetNumber}.`, false);
            } else {
                guesses.push(userInput);
                remainingGuesses--;
                const message = userInput > targetNumber ? "Last guess was too high" : "Last guess was too low";
                showResult(`${message}. You have ${remainingGuesses} guesses remaining.`);
                CorrectOrWrong("Wrong!", false);
            }

            document.getElementById("userInput").value = "";
            document.getElementById("showInputNum").innerText = `Previous guesses: ${guesses.join(", ")}`;
            document.getElementById("showInputNum").style.display = "block";
        };

        const showResult = (message) => {
            const resultElement = document.getElementById("showResult");
            resultElement.innerText = message;
            resultElement.style.display = "block";
            document.getElementById("showResult").style.display = "none";
        };

        const CorrectOrWrong = (message, isCorrect) => {
            const correctOrWrongElement = document.getElementById("CorrectOrWrong");
            correctOrWrongElement.innerText = message;
            correctOrWrongElement.classList.toggle("correct", isCorrect);
            correctOrWrongElement.style.display = "block";
            document.getElementById("reset").style.display = "block";
        };

        const resetGame = () => {
            generateTargetNumber();
            guesses.length = 0;
            document.getElementById("showResult").innerText = "";
            document.getElementById("showInputNum").innerText = "";
            document.getElementById("CorrectOrWrong").style.display = "none";
            document.getElementById("reset").style.display = "none";
        };

        resetGame();
    </script>
</body>
</html>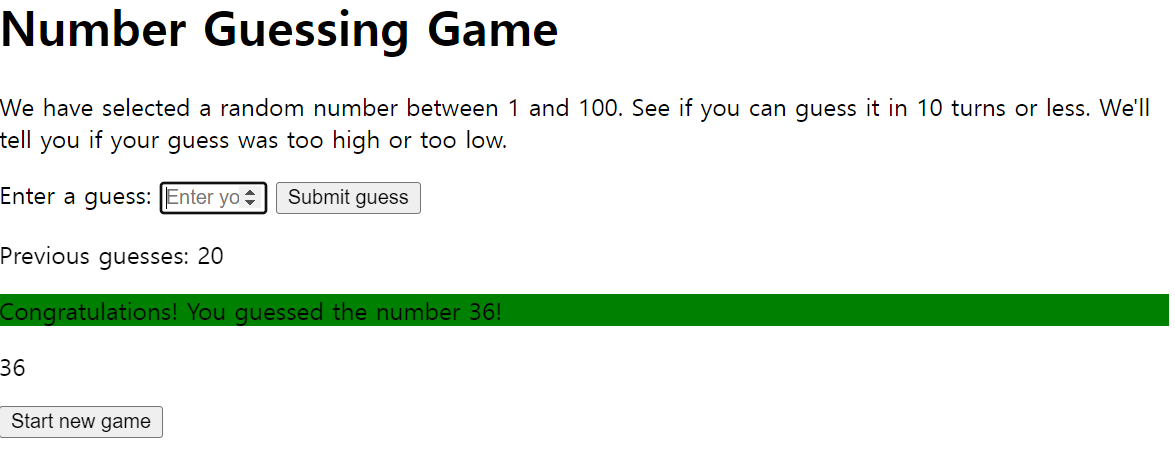
선생님 코드
<!DOCTYPE html>
<html lang="en-us">
  <head>
    <meta charset="utf-8">

    <title>Number guessing game</title>

    <style>
      html {
        font-family: sans-serif;
      }

      body {
        width: 50%;
        max-width: 800px;
        min-width: 480px;
        margin: 0 auto;
      }

      .form input[type="number"] {
        width: 200px;
      }

      .lastResult {
        color: white;
        padding: 3px;
      }
    </style>
  </head>

  <body>
    <h1>Number guessing game</h1>

    <p>We have selected a random number between 1 and 100. See if you can guess it in 10 turns or fewer. We'll tell you if your guess was too high or too low.</p>

    <div class="form">
      <label for="guessField">Enter a guess: </label>
      <input type="number" min="1" max="100" required id="guessField" class="guessField">
      <input type="submit" value="Submit guess" class="guessSubmit">
    </div>

    <div class="resultParas">
      <p class="guesses"></p>
      <p class="lastResult"></p>
      <p class="lowOrHi"></p>
    </div>

    <script>
      let randomNumber = Math.floor(Math.random() * 100) + 1;
      const guesses = document.querySelector('.guesses');
      const lastResult = document.querySelector('.lastResult');
      const lowOrHi = document.querySelector('.lowOrHi');
      const guessSubmit = document.querySelector('.guessSubmit');
      const guessField = document.querySelector('.guessField');
      let guessCount = 1;
      let resetButton;

      function checkGuess() {
        const userGuess = Number(guessField.value);
        if (guessCount === 1) {
          guesses.textContent = 'Previous guesses: ';
        }

        guesses.textContent += userGuess + ' ';

        if (userGuess === randomNumber) {
          lastResult.textContent = 'Congratulations! You got it right!';
          lastResult.style.backgroundColor = 'green';
          lowOrHi.textContent = '';
          setGameOver();
        } else if (guessCount === 10) {
          lastResult.textContent = '!!!GAME OVER!!!';
          lowOrHi.textContent = '';
          setGameOver();
        } else {
          lastResult.textContent = 'Wrong!';
          lastResult.style.backgroundColor = 'red';
          if(userGuess < randomNumber) {
            lowOrHi.textContent = 'Last guess was too low!' ;
          } else if(userGuess > randomNumber) {
            lowOrHi.textContent = 'Last guess was too high!';
          }
        }

        guessCount++;
        guessField.value = '';
        guessField.focus();
      }

      guessSubmit.addEventListener('click', checkGuess);

      function setGameOver() {
        guessField.disabled = true;
        guessSubmit.disabled = true;
        resetButton = document.createElement('button');
        resetButton.textContent = 'Start new game';
        document.body.appendChild(resetButton);
        resetButton.addEventListener('click', resetGame);
      }

      function resetGame() {
        guessCount = 1;
        const resetParas = document.querySelectorAll('.resultParas p');
        for (const resetPara of resetParas) {
          resetPara.textContent = '';
        }

        resetButton.parentNode.removeChild(resetButton);
        guessField.disabled = false;
        guessSubmit.disabled = false;
        guessField.value = '';
        guessField.focus();
        lastResult.style.backgroundColor = 'white';
        randomNumber = Math.floor(Math.random() * 100) + 1;
      }
    </script>
  </body>
</html>
웹 문서를 다루는 방법
- DOM(Document Object Model) = 문서 객체 모델
- 웹 문서의 모든 요소를 자바스크립트를 이용해 조작할 수 있도록 객체를 사용해 문서를 해석하는 방법
- 웹 문서의 텍스트, 이미지, 표 등 모든 요소는 모두 객체
툴을 켜서 CSS로 수정하기 번거로우니, 바로 F12를 눌러서 console인 js에서 웹 문서를 수정해보자.
<!DOCTYPE html>
<html lang="en">

<head>
  <meta charset="UTF-8">
  <meta name="viewport" content="width=device-width, initial-scale=1.0">
  <meta http-equiv="X-UA-Compatible" content="ie=edge">
  <title>Document</title>
</head>

<body>
  <div id="detail">
    <h2>상품 정보</h2>
    <ul>
      <li>원산지 : 에디오피아</li>
      <li>지 역 : 이르가체프 코체레</li>
      <li>농 장 : 게뎁</li>
      <li>고 도 : 1,950 ~ 2,000 m</li>
      <li>품 종 : 지역 토착종</li>
      <li>가공법 : 워시드</li>
    </ul>
    <h3 style="visibility: hidden">상세 설명</h3>
    <p style="visibility: hidden">2차 세계대전 이후 설립된 게뎁 농장은 유기농 인증 농장으로 여성의 고용 창출과 지역사회 발전에 기여하며 3대째 이어져 내려오는 오랜 역사를 가진 농장입니다. 게뎁 농장은 SCAA 인증을 받은 커피
      품질관리 실험실을 갖추고 있어 철처한 관리를 통해 스페셜티 커피를 생산합니다.</p>
    <h3>커피의 풍미</h3>
    <p>은은하고 다채로운 꽃향, 망고, 다크 체리, 달달함이 입안 가득.</p>
  </div>
</body>

</html>-
dom.html을 열어 콘솔창에 아래를 입력해보자(웹에서 개발자 모드의 콘솔)
-
document.querySelector('#detail h3').style.visibility = 'hidden'; -
document.querySelector('#detail p').style.visibility = 'hidden';
-
-
위에를 진행한 후 document라고 입력해 결과값을 확인해보면 위에서 설정한 값들이 코드에 적용되어 있는것을 볼 수 있다. (물론 화면에도 실시간으로 적용)
DOM트리
구조
- Document: DOM의 최상위 요소로 문서 전체를 나타낸다.
- Element: HTML 요소를 나타낸다. 예를 들어
<div>,<p>,<h1>등이 있다.
- Attribute: HTML 요소의 속성을 나타낸다. 예를 들어
<div id="example">에서id는 속성이다.- Text Node: HTML 요소의 텍스트 내용을 나타낸다.
<p>Hello, World!</p>에서 "Hello, World!"는 텍스트 노드다.- Comment: HTML 주석을 나타낸다.
부모-자식 관계를 가지며 계층적으로 구성되고, . JavaScript를 사용하여 DOM에 접근하고 조작할 수 있으며, 이를 통해 웹 페이지의 동적인 동작을 구현할 수 있다.
-
웹 문서의 태그는 요소(Element)노드로 표현한다.
-
태그가 품고 있는 텍스트는 해당 요소 노드(태그)의 자식 노드인 텍스트(Text) 노드로 표현한다.
-
태그의 속성은 모두 해당 요소 노드(태그)의 자식 노드인 속성(Attribute) 노드로 표현한다.
-
주석은 주석(Comment) 노드로 표현한다.
DOM트리가 만들어 지는 과정을 실시간으로 확인 가능한 싸이트
- software.hixie.ch/utilities/js/live-dom-viewer/
<!DOCTYPE html>
<html lang="ko">
    <head>
        <title>DOM TREE 알아보기</title>
    </head>
    <body>
        <h1>DOM</h1>
        <p>DOM을 공부합시다.</p>
    </body>
</html>-
태그 요소는 보라색으로 표시
-
#text: 라고 표시 된 것은 텍스트 노드 >> 값이 없는 것은 줄 바꿈을 의미
-
그 이후는 [DOM view ] 창에 표현된 노드를 DOM트리로 표현한 것

DOM요소에 접근 방법
<!DOCTYPE html>
<html lang="ko">
<head>
    <meta charset="UTF-8">
    <meta name="viewport" content="width=device-width, initial-scale=1.0">
    <meta http-equiv="X-UA-Compatible" content="ie=edge">
    <title>DOM에 접근하기</title>
    <link rel="stylesheet" href="css/dom.css">
</head>
<body>
    <div id="container">
            <h1 id="heading">에디오피아 게뎁</h1>
            <div id="prod-img">
                <img src="images/coffee-pink.jpg" alt="에디오피아 게뎁">
            </div>
            <div id="desc">
                    <h2 class="bright">Information</h2>
                    <p>2차 세계대전 이후 설립된 <span class="accent">게뎁농장</span>은 유기농 인증 농장으로 여성의 고용 창출과 지역사회 발전에 기여하며 3대째 이어져 내려오는 오랜 역사를 가진 농장입니다. 게뎁 농장은 <span class="accent">SCAA 인증</span>을 받은 커피 품질관리 실험실을 갖추고 있어 철처한 관리를 통해 스페셜티커피를 생산합니다.</p>
                    <h2>Flavor Note</h2>
                    <p class="bright">은은하고 다채로운 꽃향, 망고, 다크 체리, 달달함이 입안 가득.</p>
            </div>
    </div>
</body>
</html>
id 선택자로 접근하는 함수 - getElementById()
- DOM 요소를 class 값으로 찾아내는 함수
getElementsByClassName()
- class 이름이 accent인 것들에 접근
document.getElementsByClassName("accent");
- class 이름이 accent인 것들 중에 첫번째 것에 접근
document.getElementsByClassName("accent")[0];
- class 이름이 accent인 것들 중에 첫번째 것에 접근하여 밑줄 긋기
document.getElementsByClassName("accent")[0].style.textDecoration = "underline"
- class="accent"를 사용하는 웹 요소 중 두 번째 요소에 접근하는 소스
document.getElementsByClassName("accent")[1];
- DOM 요소를 태그 이름으로 찾아내는 함수
getElementsByTagName()- (함수 이름에 복수를 뜻하는 's'가 있으면 여러 DOM 요소에 접근한다고 생각하시오.)
- 태그 이름이 h2인것을 선택
document.getElementsByTagName("h2");
- h2 태그 이름으로 접근한 DOM 요소 중 첫 번째 요소의 배경색을 #eee 로 바꾸자.
document.getElementsByTagName("h2")[0].style.backgroundColor = "#eee";
- h2 태그 이름으로 접근한 DOM 요소 중 첫 번째 요소의 배경색을 없애기
document.getElementsByTagName("h2")[0].style.backgroundColor = "";
DOM요소를 다양한 방법으로 찾아주는 함수 - querySelector(), querySelectorAll()
(querySelector() 함수와 함께 class 선택자나 태그 이름을 사용할 때는 여러 요소 중 첫 번째 요소에만 접근할 수 있다.)
HTMLCollection이 아니라 NodeList라고 표기 >> HTMLCollection과 같은 방법으로 다루면 됌
NodeList는 여러 개의 노드를 모아 놓은 것으로 배열과 비슷하다고 생각하면 됌
-
id 값을 찾아오는 2가지 방법
document.getElementById("container");>>ByClass하면 Class값 가능document.querySelector("#container");>>class값도 가져올 수 있음
-
id="heading"인 제목(에디오피아 게뎁) 요소를 querySelector() 함수로 접근
document.querySelector("#heading");
-
class 값이 accent인 DOM 요소에 접근해 보자.
document.querySelectorAll(".accent");
-
클래스 이름이 accent인 것들중에 두 번째 것에 배경색을 yellow로 하자.
document.querySelectorAll(".accent")[1].style.backgroundColor = "yellow";
웹 요소의 태그 속성 가져와서 수정하기
-
HTML 태그 속성을 가져오거나 수정하는 함수 -
getAttribute(),setAttribute() -
img 태그 중에 소스가 imsges/coffee-pink.jpg 이미지를 선택해 보자.
-
document.querySelector("#prod-img > img").getAttribute("src");HTML 태그의 속성 값을 바꾸고 싶다면 setAttribute() 함수를 사용하고, 괄호 안에 속성 이름과 속성 값을 넣으면 된다. 이때 지정한 속성이 아직 없다면 새로 속성과 속성 값을 추가하고, 지정한 속성이 있다면 괄호 안에 넣은 속성 값으로 수정한다.
-
-
방금 전에 선택한 이미지의 파일경로를 "images/coffee-blue.jpg"로 지정해 보자.
document.querySelector("#prod-img > img").setAttribute("src", "images/coffee-blue.jpg");
DOM에서 이벤트 처리하기
<!DOCTYPE html>
<html lang="ko">
<head>
    <meta charset="UTF-8">
    <meta name="viewport" content="width=device-width, initial-scale=1.0">
    <meta http-equiv="X-UA-Compatible" content="ie=edge">
    <title>이벤트 처리하기</title>
    <link rel="stylesheet" href="css/domevent.css">
</head>
<body>
    <div id="container">
        <img id="pic" src="images/girl.png" alt="" onclick="changePic()">
    </div>
    <script>
        var pic = document.querySelector('#pic');
        function changePic() {
            pic.src = "images/boy.png";
        }
    </script>
</body>
</html>
이벤트 처리 방법
- 이벤트가 발생한 웹 요소를 가져온 후 이벤트 처리기를 연결하는 방법
- 하나의 요소에 하나의 이벤트 처리기만 사용할 수 있다.
click이벤트가 발생했을때 함수 실행
<!DOCTYPE html>
<html lang="ko">
<head>
    <meta charset="UTF-8">
    <meta name="viewport" content="width=device-width, initial-scale=1.0">
    <meta http-equiv="X-UA-Compatible" content="ie=edge">
    <title>이벤트 처리하기</title>
    <link rel="stylesheet" href="css/domevent.css">
</head>
<body>
    <div id="container">
        <img id="pic" src="images/girl.png" alt="">
    </div>
    <script>
    var pic = document.querySelector('#pic');
    pic.onclick = changePic;

        function changePic() {
            pic.src = "images/boy.png";
        }
    </script>
</body>
</html>
addEventListner() : 여러 이벤트를 한번에 처리
 var pic = document.querySelector('#pic');

    pic.addEventListener("mouseover", changePic, false);
//             ①    ②    ③

    function changePic() {
      pic.src = "images/boy.png";
    }
    function originPic() {
      pic.src = "images/girl.png";
① 이벤트 유형
처리할 이벤트 유형을 지정한다. 단 이 함수에서 이벤트 유형을 지정할 때는 'on'을 붙이지 않고 'click' 이나 'mouseover'처럼 이벤트 이름만 사용한다.
② 함수
이벤트가 발생했을 때 실행할 명령을 나열하거나 따로 함수를 만들었다면 함수 이름을 지정한다.
③ 캡처 여부
이벤트를 캡처링하는지 여부를 지정하는데 생략할 수 있다. true이면 캡처링, false이면 버블링한다는 의미인데, 기본 값은 false이다. 이벤트 캡처링은 DOM의 부모 노드에서 자식 노드로 이벤트가 전달되는 것이고, 이벤트 버블링은 DOM의 자식 노드에서 부모 노드로 이벤트가 전달되는 것이다.
addEventListener() 함수를 사용하면 하나의 요소에 여러 개의 이벤트 처리기를 연결할 수 있다.
- addEventListener() 함수를 사용해서 웹 문서의 어디를 누르든지 '안녕하세요?'라는 알림 창이 나타나도록 소스를 작성하시오. 웹 문서 전체를 지정하려면 document 객체를 사용한다.
document.addEventListener('click', function() { alert("Hello"); });
이벤트 등록 3가지 방법
-
javascirpt로 속성에 콜백함수 지정
document,getElementById("heading).onclick = function(){this.style.fontSize = "5em"}
-
addEventListner 사용 >>여러개 등록 가능
document.getElementById("myButton").addEventListener("click", function() { // 이벤트 핸들러 코드 });
-
html 속성을 사용해 이벤트 등록
<button>Click me</button>
웹문서 문제
dom.html을 크롬으로 열자. 다음을 콘솔창을 열어서 코딩하자.
-
상세설명이 보이지 않게 하자.
- document.querySelector('#detail h3').style.visibility = 'hidden';
- document.querySelector('#detail p').style.visibility = 'hidden';
(visibility:hidden과 display:none 차이점
① display: none → 화면에 보이지 않게 처리하고 차지하고 있는 공간도 없어집니다.
② visibility: hidden → 화면에 보이지 않게 처리하지만 차지하고 있는 공간은 그대로 둡니다.)
-
콘솔 창에 document라고 입력하고 결과를 보자. accessDom.html을 크롬으로 열자. 다음을 콘솔창을 열어서 코딩하자.
<!DOCTYPE html> <html lang="ko"> <head> <meta charset="UTF-8"> <meta name="viewport" content="width=device-width, initial-scale=1.0"> <meta http-equiv="X-UA-Compatible" content="ie=edge"> <title>DOM에 접근하기</title> <link rel="stylesheet" href="css/dom.css"> </head> <body> <div id="container"> <h1 id="heading">에디오피아 게뎁</h1> <div id="prod-img"> <img src="images/coffee-pink.jpg" alt="에디오피아 게뎁"> </div> <div id="desc"> <h2 class="bright">Information</h2> <p>2차 세계대전 이후 설립된 <span class="accent">게뎁농장</span>은 유기농 인증 농장으로 여성의 고용 창출과 지역사회 발전에 기여하며 3대째 이어져 내려오는 오랜 역사를 가진 농장입니다. 게뎁 농장은 <span class="accent">SCAA 인증</span>을 받은 커피 품질관리 실험실을 갖추고 있어 철처한 관리를 통해 스페셜티커피를 생산합니다.</p> <h2>Flavor Note</h2> <p class="bright">은은하고 다채로운 꽃향, 망고, 다크 체리, 달달함이 입안 가득.</p> </div> </div> </body> </html> -
아이디가 heading인 것을 선택하자.
document.getElementById("heading");
- 아이디가 heading인 것을 선택해서 클릭 이벤트를 주자. 클릭 이벤트가 발생했을 때 글자 사이즈를 5배로 하자.
document.getElementById("heading").onclick = function() {this.style.fontSize = "5em";}
-
accessDom.html 문서에서 그림 오른쪽의 텍스트 부문은 div id="desc" 태그로 감싸져 있다. 이 텍스트 부분에 접근하는 소스를 작성하시오.
document.getElementById("desc");
-
class 이름이 accent인 것들에 접근
document.getElementsByClassName("accent");
-
class 이름이 accent인 것들 중에 첫번째 것에 접근
document.getElementsByClassName("accent")[0];
-
class 이름이 accent인 것들 중에 첫번째 것에 접근하여 밑줄 긋기
document.getElementsByClassName("accent")[0].style.textDecoration = "underline"
-
class="accent"를 사용하는 웹 요소 중 두 번째 요소에 접근하는 소스
document.getElementsByClassName("accent")[1];
-
태그 이름이 h2인것을 선택
document.getElementsByTagName("h2");
-
h2 태그 이름으로 접근한 DOM 요소 중 첫 번째 요소의 배경색을 #eee 로 바꾸자.
document.getElementsByTagName("h2")[0].style.backgroundColor = "#eee";
-
h2 태그 이름으로 접근한 DOM 요소 중 첫 번째 요소의 배경색을 없애기
document.getElementsByTagName("h2")[0].style.backgroundColor = "";
-
아이디가 container인 것을 선택하는 두 가지 방법?
document.getElementById("container");document.querySelector("#container");
-
id="heading"인 제목(에디오피아 게뎁) 요소를 선택
document.querySelector("#heading");
-
class 값이 accent인 DOM 요소에 접근해 보자.
document.querySelectorAll(".accent");
-
클래스 이름이 accent인 것들중에 두 번째 것에 배경색을 yellow로 하자.
document.querySelectorAll(".accent")[1].style.backgroundColor = "yellow";
-
img 태그 중에 소스가 images/coffee-pink.jpg 이미지의 src 속성을 가져오자.
document.querySelector("#prod-img > img").getAttribute("src");
-
img 태그 중에 소스가 images/coffee-pink.jpg 이미지를 "images/coffee-blue.jpg"로 지정해 보자.
document.querySelector("#prod-img > img").setAttribute("src", "images/coffee-blue.jpg");
-
showBig.html 파일을 이용하여 작은 이미지를 클릭하면 큰 이미지가 바뀌도록 코딩하자.(visual studio code에 직접 작성하자.)
showBig-result.html 참고(아래 코드 정답이 아닌 참고 코드)
<!DOCTYPE html>
<html lang="ko">
<head>
    <meta charset="UTF-8">
    <meta name="viewport" content="width=device-width, initial-scale=1.0">
    <meta http-equiv="X-UA-Compatible" content="ie=edge">
    <title>DOM</title>
    <link rel="stylesheet" href="css/product.css">
</head>
<body>
    <div id="container">
            <h1 id="heading">에디오피아 게뎁</h1>
            <div id="prod-pic">
                <img src="images/coffee-pink.jpg" alt="에디오피아 게뎁" id="cup" width="200" height="200">
                    <div id="small-pic">
                        <img src="images/coffee-pink.jpg" class="small">
                        <img src="images/coffee-blue.jpg" class="small">
                        <img src="images/coffee-gray.jpg" class="small">
                    </div>
            </div>
            <div id="desc">
                <ul>
                    <li>상품명 : 에디오피아 게뎁</li>
                    <li class="bluetext">판매가 : 9,000원</li>
                    <li>배송비 : 3,000원<br>(50,000원 이상 구매 시 무료)</li>
                    <li>적립금 : 180원(2%)</li>
                    <li>로스팅 : 2019.06.17</li>
                    <button>장바구니 담기</button>
                </ul>
                <a href="#" id="view">상세 설명 보기</a>
            </div>

            <div id="detail">
                    <hr>
                    <h2>상품 상세 정보</h2>
                    <ul>
                        <li>원산지 : 에디오피아</li>
                        <li>지 역 : 이르가체프 코체레</li>
                        <li>농 장 : 게뎁</li>
                        <li>고 도 : 1,950 ~ 2,000 m</li>
                        <li>품 종 : 지역 토착종</li>
                        <li>가공법 : 워시드</li>
                    </ul>
                    <h3>Information</h3>
                    <p>2차 세계대전 이후 설립된 게뎁 농장은 유기농 인증 농장으로 여성의 고용 창출과 지역사회 발전에 기여하며 3대째 이어져 내려오는 오랜 역사를 가진 농장입니다. 게뎁 농장은 SCAA 인증을 받은 커피 품질관리 실험실을 갖추고 있어 철처한 관리를 통해 스페셜티 커피를 생산합니다.</p>
                    <h3>Flavor Note</h3>
                    <p>은은하고 다채로운 꽃향, 망고, 다크 체리, 달달함이 입안 가득.</p>
            </div>
    </div>

    <script src="js/showBig-result.js"></script>
</body>
</html>- 위 코드의 js소스
var bigPic = document.querySelector("#cup");  // 큰 이미지 가져옴
var smallPics = document.querySelectorAll(".small");  // 작은 이미지들을 노드 리스트로 가져옴

for(var i = 0; i < smallPics.length; i++) {
    smallPics[i].addEventListener("click", chagePic);   // 노드를 클릭하면 changePic 함수 실행
}

function chagePic() {
    var newPic = this.src;   // click 이벤트가 발생한 대상의 src 속성 값 가져옴
    bigPic.setAttribute("src", newPic);  // newPic 값을 큰 이미지의 src 속성에 할당.
                // 윗 줄을 cup.src = newPic; 로 사용해도 됨.
} -
이벤트 처리하는 3가지 방법에 대해 기술하시오.
- javascirpt로 속성에 콜백함수 지정
-
document,getElementById("heading).onclick = function() {this.style.fontSize = "5em"}- addEventListner 사용 >>여러개 등록 가능
-
document.getElementById("myButton").addEventListener("click", function() { // 이벤트 핸들러 코드 });- html 속성을 사용해 이벤트 등록
-
<button>Click me</button>
- 마우스를 이미지 위에 놓으면 boy.png가 나오게 하고, 마우스를 이미지 밖으로 빼면 girl.png가 나오게 하자.
<!DOCTYPE html>
<html lang="ko">
<head>
    <meta charset="UTF-8">
    <meta name="viewport" content="width=device-width, initial-scale=1.0">
    <meta http-equiv="X-UA-Compatible" content="ie=edge">
    <title>DOM</title>
    <link rel="stylesheet" href="css/product.css">
</head>
<body>
    <div id="container">
            <h1 id="heading">에디오피아 게뎁</h1>
            <div id="prod-pic">
                <img src="images/coffee-pink.jpg" alt="에디오피아 게뎁" id="cup" width="200" height="200">
                    <div id="small-pic">
                        <img src="images/coffee-pink.jpg" class="small">
                        <img src="images/coffee-blue.jpg" class="small">
                        <img src="images/coffee-gray.jpg" class="small">
                    </div>
            </div>
            <div id="desc">
                <ul>
                    <li>상품명 : 에디오피아 게뎁</li>
                    <li class="bluetext">판매가 : 9,000원</li>
                    <li>배송비 : 3,000원<br>(50,000원 이상 구매 시 무료)</li>
                    <li>적립금 : 180원(2%)</li>
                    <li>로스팅 : 2019.06.17</li>
                    <button>장바구니 담기</button>
                </ul>
                <a href="#" id="view">상세 설명 보기</a>
            </div>

            <div id="detail">
                    <hr>
                    <h2>상품 상세 정보</h2>
                    <ul>
                        <li>원산지 : 에디오피아</li>
                        <li>지 역 : 이르가체프 코체레</li>
                        <li>농 장 : 게뎁</li>
                        <li>고 도 : 1,950 ~ 2,000 m</li>
                        <li>품 종 : 지역 토착종</li>
                        <li>가공법 : 워시드</li>
                    </ul>
                    <h3>Information</h3>
                    <p>2차 세계대전 이후 설립된 게뎁 농장은 유기농 인증 농장으로 여성의 고용 창출과 지역사회 발전에 기여하며 3대째 이어져 내려오는 오랜 역사를 가진 농장입니다. 게뎁 농장은 SCAA 인증을 받은 커피 품질관리 실험실을 갖추고 있어 철처한 관리를 통해 스페셜티 커피를 생산합니다.</p>
                    <h3>Flavor Note</h3>
                    <p>은은하고 다채로운 꽃향, 망고, 다크 체리, 달달함이 입안 가득.</p>
            </div>
    </div>

    <script src="js/showBig-result.js"></script>
</body>
</html>- 위 코드 js코드
var pic = document.querySelector('#pic');
pic.addEventListener("mouseover", changePic, false);
pic.addEventListener("mouseout", originPic, false);

function changePic() {
  pic.src = "images/boy.png";
}
function originPic() {
  pic.src = "images/girl.png";
}- 만약 위위 코드의 상품 상세 정보 부분을 바꾸고 싶다면 js코드를 아래와 같이
        var isOpen = false;
        var bigPic = document.querySelector("#cup");
        var smallPics = document.querySelectorAll(".small");

        for(i=0; i<smallPics.length; i++) {
            smallPics[i].addEventListener("click", function() {
                newPic = this.src;
                bigPic.setAttribute("src", newPic);
            });
        }

        var view = document.querySelector("#view");  // #view 요소를 가져옴
        view.addEventListener("click", function() {
            if (isOpen == false) {  // 상세 정보가 감춰져 있다면
                document.querySelector("#detail").style.display = "block";  // 상세 정보를 화면에 표시
                view.innerHTML = "상세 설명 닫기";  // 링크 내용 수정
                isOpen = true;  // 표시 상태로 지정
            }
            else {  // 상세 정보가 표시되어 있다면
                document.querySelector("#detail").style.display = "none";  // 상세 정보를 화면에서 감춤
                view.innerHTML = "상세 설명 보기";  // 링크 내용 수정
                isOpen = false;  // 감춰진 상태로 지정
            }
});- 웹 문서의 어디를 누르든지 '안녕하세요?'라는 알림 창이 나타나도록 소스를 작성하시오.
document.addEventListener('click', function() { alert("Hello"); });
웹 문서를 다루는 방법 2
웹 요소의 스타일 가져와서 수정하기
document.querySelector("#heading").style.color = "white";이런형태로 가져와서 수정 가능 (카멜 표기법 사용 >> -는 연산의 의미로 js에서 사용되기 때문에document.getElementById("heading").style.color = "white";이렇게도 가능- addEventListner()와 transition속성을 이용해 애니메이션 효과 주기
- mouseover 이벤트가 있으면 위 방법으로 아이디, 클래스를 선택해 변화시킬 스타일 효과를 주고 css에서 해당 아이디에 transition: 1s를 주면 1초동안 효과가 바뀌며 애니메이션화 된다.
- mouseout 이벤트가 있으면 스타일 효과를 준곳을 ""; 처리하면 지워진다. 본래의 색으로 지정하면 다시 원래대로 돌아감요. 이또한 1초동안 본래 모습으로 돌아간다.
웹 요소를 화면에 표시하기/감추기
- display:none : 웹 요소를 화면에서 감추면 그 요소가 차지하던 공간도 사라진다.
- visibility:hidden : 웹 요소를 감추면 요소가 있던 공간은 빈 상태로 남아있게 된다.
DOM에 요소 추가하기
-
모든 HTML 태그는 '요소(Element) 노드'로 표현한다.
-
HTML 태그에서 사용하는 텍스트 내용은 '텍스트(Text) 노드'로 표현한다.
-
HTML 태그에 있는 속성은 모두 '속성(Attribute)노드'로 표현한다.
-
주석은 '주석(Comment) 노드'로 표현한다.
<p class="accent">주문이 완료되었습니다.</p>를 DOM트리에 추가하려면?- p 요소 노드와 "accent" 속성 값을 넣은 class 속성 노드, 텍스트를 넣을 텍스트 노드가 필요한다.
새로운 노드를 만들거나 부모 노드에 연결할 때 함수
- createElement() : 새 요소 노드를 만든다.
- createTextNode() : 텍스트 내용이 있을 경우 텍스트 노드를 만든다.
- appendChild() : 부모 노드에 자식 노드로 추가한다.(제일 마지막에 추가됨)
- createAttribute() : 요소에 속성이 있을 경우 속성 노드를 만든다.
- setAttributeNode() : 속성 노드를 요소 노드에 설정한다.
- p 요소 노드와 "accent" 속성 값을 넣은 class 속성 노드, 텍스트를 넣을 텍스트 노드가 필요한다.
var newP = document.createElement("p"); // 요소 노드 생성
var newText = document.createTextNode("주문이 완료되었습니다."); //텍스트 노드 생성
newP.appendChild(newText); // 생성한 p태그의 자식으로 newtext(텍스트 노드)를 추가
document.body.appendChild(newP) //생성한 p태그는 body태그 안에 추가해야하므로 자식 노드로 추가
//위에서 요소 노드를 생성하면 메모리에만 존재하고, 현재 문서의 어떤 위치에도 속하지 않기 때문에 body요소의 자식으로 추가하는 것이다.
//따라서 새로운 요소를 생성하고 문서에 표시하려면원하는 위치에 추가해야한다.
var attr = document.createAttribute("class");//class 속성 노드 생성
attr.value = "accent"; //class 속성의 값을 accent로 지정
newP.setAttributeNode(attr); //생성한 속성노드를 요소 노드에 연결- 요소를 생성하고, 텍스트노드와 속성 노드를 생성한 후에 요소를 문서에 추가해야한다. >> 아니면 생성한 요소가 문서에 추가되지 않는다.
- appendChild() / insertBefore() 메서드 사용
setAttribute()
-
위에서 한 코드보다 setAttribute()를 통해 더 간단하게 작성할 수 있다.
var newP = document.createElement("p");
var newText = document.createTextNode("주문이 완료되었습니다.");
newP.appendChild(newText);
document.body.appendChild(newP);
newP.setAttribute("class", "accent");
DOM트리를 이용해 원하는 노드 다루기
-
hasChildNodes() : 특정 노드에 자식 노드가 있는지를 확인하는 함수 >> boolean으로 반환
-
children : 특정 노드의 직계 자식 노드를 가져온다. 텍스트 노드와 주석노드까지 모두 접근 가능하다. >> 사용법은 배열과 같다. ++ HTML요소만을 포함하는 요소 컬렉션 반환
-
childNodes : 특정 노드의 모든 자식 노드가 표시되는데, 이는 자식노드의 자식까지 반환하고, 부모 노드부터 줄바꿈을 빈 텍스트 노드로 인식한다. >> 개행을 포함 시켜 노드를 표시 (텍스트 노드를 포함한 모든 종류의 자식 노드를 가져온다. )
childNOdes에시<div id="parent"> <p>첫 번째 자식 요소</p> 텍스트 노드 <div> <span>두 번째 자식 요소의 자식 요소</span> </div> </div> -
var parent = document.getElementById("parent"); var childNodes = parent.childNodes;이렇게 썼다 하면 childNodes에는 p요소, 텍스트노드, div요소가 반환되어 length가 3이게 된다.
원하는 위치에 노드 삽입하기
-
insertBefore(): 부모 노드에 자식 노드를 추가할 때 기준이 되는 노드를 지정하고 그 앞에 자식 노드를 이동시킬 수 있다.(2개의 인수 사용 - 첫번째는 추가하는 노드, 두번째는 기준이 되는 노드)appendChild(): 부모 노드에 자식 노드가 있을 경우 마지막 자식 노드로 추가 된다.
-
nameList.insertBefore(nameList.children[2], nameList.children[0]);- nameList의 3(배열기준)번째에 있는 요소를, 0번째에 있는 요소 전으로 이동한다.
특정 노드 삭제하기
노드는 스스로 자신을 삭제할 수 없기에 부모 노드에 접근 후 삭제해야한다.
removeChild()/parentNode 속성- removeChild() : 부모 노드에서 자식 노드를 삭제하는 함수, 괄호 안에는 삭제하려는 자식 노드가 들어간다.(반드시 부모 요소에서 호출해야함)
- parentNode : 현재 노드의 부모 속성을 반환하는 속성
웹 문서 문제 2
domCss1.html 문서를 열자. 그리고 콘솔 창에 작성하자.
-
제목 텍스트의 글자 색상을 "white"로 바꾸자.
document.querySelector("#heading").style.color = "white";
-
텍스트 단락(id="desc")의 글자를 빨간색으로 바꿔 보자
document.querySelector("#desc").style.color = "red";
-
아이디가 heading인 것의 배경색을 "gray"로 하자.
document.querySelector("#heading").style.backgroundColor = "gray";
-
도형 위로 마우스 포인터를 올렸을 때 녹색바탕의 둥근 원이 되게 하고, 도형 위에서 마우스 포인터가 빠져나왔을 때 네모난 사각형이 되게 하자.
<!DOCTYPE html>
<html lang="ko">
<head>
    <meta charset="UTF-8">
    <meta name="viewport" content="width=device-width, initial-scale=1.0">
    <meta http-equiv="X-UA-Compatible" content="ie=edge">
    <title>DOM CSS</title>
    <style>
        #container {
            width:600px;
            margin:50px auto;
            text-align: center;
        }
        #rect {
            width:100px;
            height:100px;
            border:1px solid #222;
            margin:30px auto;
            transition: 1s;
        }
    </style>
</head>
<body>
    <div id="container">
        <p>도형 위로 마우스 포인터를 올려놓으세요.</p>
        <div id="rect"></div>
    </div>

    <script>
    var myRect = document.querySelector("#rect");
    myRect.addEventListener("mouseover", function() {  // mouseover 이벤트 처리
    myRect.style.backgroundColor = "green";  // myRect 요소의 배경색
    myRect.style.borderRadius = "50%";  // myRect 요소의 테두리 둥글게 처리
    });

      myRect.addEventListener("mouseout", function() {  // mouseout 이벤트 처리
    myRect.style.backgroundColor = "";  // myRect 요소의 배경색 지우기
    myRect.style.borderRadius = "";  // myRect 요소의 테두리 둥글게 처리 안 함
    });
  </script>
</body>
</html>- transition속성은 요소의 상태 변화에 적용될 속성과 지속 시간을 지정한다.(애니메이션화 하는데 활용)
- transition을 주지않게되면 서서히 바뀌는게 아니라(애니메이션이 아닌) 띡 하고 바뀌기 때문에 줘야함
- product.html을 이용하여"상세 설명 보기"를 누르면 상품 상세 정보가 보이면서 "상세 설명 보기"가 "상세 설명 닫기"로 바뀐다. "상세 설명 닫기"를 누르면 상품 상세 정보가 안보이면서 "상세 설명 닫기"가 "상세 설명 보기"로 바뀐다.(사진을 누르면 큰이미지로 변환 효과도 추가)
<!DOCTYPE html>
<html lang="ko">
<head>
    <meta charset="UTF-8">
    <meta name="viewport" content="width=device-width, initial-scale=1.0">
    <meta http-equiv="X-UA-Compatible" content="ie=edge">
    <title>DOM</title>
    <style>
              #container {
            width:600px;
            margin:0 auto;
        }
        #prod-pic, #desc {
            float:left;
        }
        #prod-pic {
            margin:20px 20px auto 10px; /*시계 방향*/
            padding:0;
        }
        #cup {
            box-shadow:1px 1px 2px #eee;
            outline:1px dashed #ccc;
            outline-offset: -7px;
        }
        #small-pic {
            margin-top:20px;
            list-style: none;
            padding:0;
        }
        #small-pic > li {
            float:left;
            margin-right:10px;
        }
        .small {
            width:60px;
            height:60px;
        }
        #small-pic img:hover {
            cursor:pointer;
        }
        #desc {
            width:300px;
            padding-top:20px;
            margin-bottom:50px;
        }
        .bluetext {
            color:#4343ff;
            font-weight:bold;
        }
        #desc button {
            margin-top:20px;
            margin-bottom:20px;
            width:100%;
            padding:10px;
        }
        #desc ul {
            list-style:none;
        }
        #desc li{
            font-size:0.9em;
            line-height:1.8;
        }
        #desc a {
            text-decoration: none;
            font-size:0.9em;
            color:blue;
            padding-left:40px;
        }
        hr {
            clear:both;
            border:1px dashed #f5f5f5;
        }
        #detail {
            padding-top:10px;
            display:none;
        }
        #detail li {
            font-size:0.9em;
            line-height:1.4;
        }
        h1 {
            font-size:2em;
        }
        h2 {
            font-size:1.5em;
            color:#bebebe;
            font-weight:normal;
        }
        h3 {
            font-size:1.1em;
            color:#222;
        }
        p {
            font-size:0.9em;
            line-height:1.4;
            text-align: justify;
        }
  </style>
</head>
<body>
    <div id="container">
            <h1 id="heading">에디오피아 게뎁</h1>
            <div id="prod-pic">
                <img src="images/coffee-pink.jpg" alt="에디오피아 게뎁" id="cup" width="200" height="200">
                    <div id="small-pic">
                        <img src="images/coffee-pink.jpg" class="small">
                        <img src="images/coffee-blue.jpg" class="small">
                        <img src="images/coffee-gray.jpg" class="small">
                    </div>
            </div>
            <div id="desc">
                <ul>
                    <li>상품명 : 에디오피아 게뎁</li>
                    <li class="bluetext">판매가 : 9,000원</li>
                    <li>배송비 : 3,000원<br>(50,000원 이상 구매 시 무료)</li>
                    <li>적립금 : 180원(2%)</li>
                    <li>로스팅 : 2019.06.17</li>
                    <button>장바구니 담기</button>
                </ul>
                <a href="#" id="view">상세 설명 보기</a>
            </div>
            <hr>
            <div id="detail">

                    <h2>상품 상세 정보</h2>
                    <ul>
                        <li>원산지 : 에디오피아</li>
                        <li>지 역 : 이르가체프 코체레</li>
                        <li>농 장 : 게뎁</li>
                        <li>고 도 : 1,950 ~ 2,000 m</li>
                        <li>품 종 : 지역 토착종</li>
                        <li>가공법 : 워시드</li>
                    </ul>
                    <h3>Information</h3>
                    <p>2차 세계대전 이후 설립된 게뎁 농장은 유기농 인증 농장으로 여성의 고용 창출과 지역사회 발전에 기여하며 3대째 이어져 내려오는 오랜 역사를 가진 농장입니다. 게뎁 농장은 SCAA 인증을 받은 커피 품질관리 실험실을 갖추고 있어 철처한 관리를 통해 스페셜티 커피를 생산합니다.</p>
                    <h3>Flavor Note</h3>
                    <p>은은하고 다채로운 꽃향, 망고, 다크 체리, 달달함이 입안 가득.</p>
            </div>
    </div>

    <script>
          var isOpen = false;
        var bigPic = document.querySelector("#cup");
        var smallPics = document.querySelectorAll(".small");

        for(i=0; i<smallPics.length; i++) {
            smallPics[i].addEventListener("click", function() {
                newPic = this.src;
                bigPic.setAttribute("src", newPic);
            });
        }

        var view = document.querySelector("#view");  // #view 요소를 가져옴
        view.addEventListener("click", function() {
            if (isOpen == false) {  // 상세 정보가 감춰져 있다면
                document.querySelector("#detail").style.display = "block";  // 상세 정보를 화면에 표시
                view.innerHTML = "상세 설명 닫기";  // 링크 내용 수정
                isOpen = true;  // 표시 상태로 지정
            }
            else {  // 상세 정보가 표시되어 있다면
                document.querySelector("#detail").style.display = "none";  // 상세 정보를 화면에서 감춤
                view.innerHTML = "상세 설명 보기";  // 링크 내용 수정
                isOpen = false;  // 감춰진 상태로 지정
            }
        });
        let cart = document.querySelector("#cart");
        cart.addEventListener("click", function(){
            alert("장바구니에 추가되었습니다.")
        });
    </script>
</body>
</html>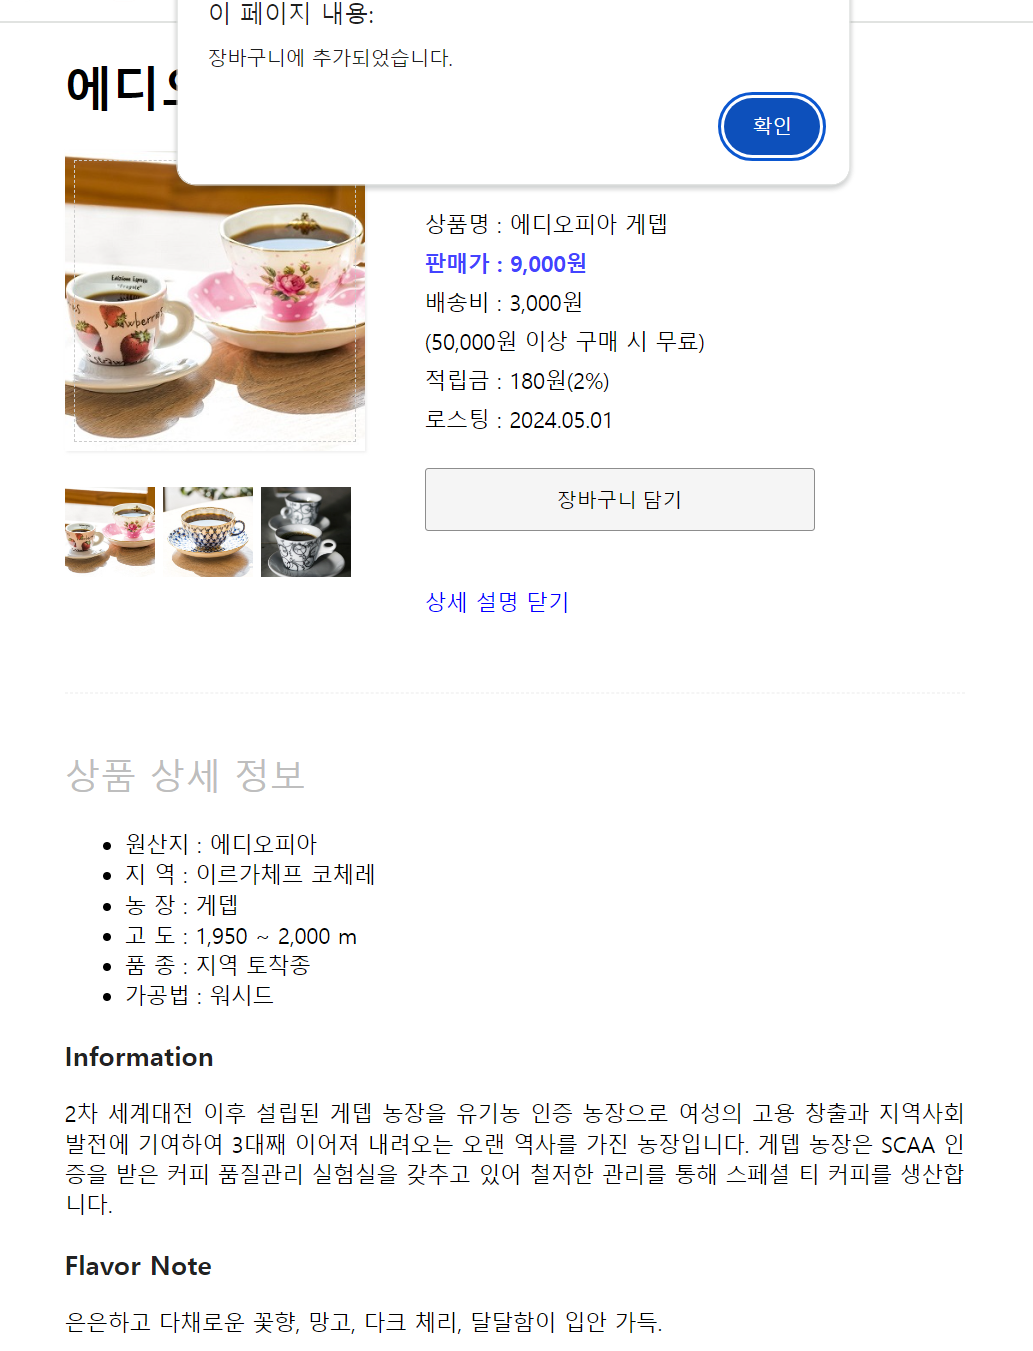
domNode.html 문서를 열고 콘솔 창에 입력한다.
<!DOCTYPE html>
<html lang="ko">
<head>
    <meta charset="UTF-8">
    <meta name="viewport" content="width=device-width, initial-scale=1.0">
    <meta http-equiv="X-UA-Compatible" content="ie=edge">
    <title>DOM 트리에 노드 추가하기</title>
    <style>
        .accent {
            border:1px solid #222;
            padding:15px 20px;
            background-color:#eee;
        }
        .bold {
            font-weight:bold;
        }
    </style>
</head>
<body></body>
</html>- 다음 내용을 동적으로 추가해 보자.
주문이 완료되었습니다.
    var newP = document.createElement("p");
    var newText = document.createTextNode("주문이 완료되었습니다.");
    newP.appendChild(newText);
    document.body.appendChild(newP);
    var attr = document.createAttribute("class");
    attr.value = "accent";
    newP.setAttributeNode(attr);
또는
    var newP = document.createElement("p");
    var newText = document.createTextNode("주문이 완료되었습니다.");
    newP.appendChild(newText);
    document.body.appendChild(newP);
newP.setAttribute("class", "accent");-
id = "doit_js" 속성을 추가하려고 한다. 콘솔 창에서 easys라는 속성 노드를 만들고 속성 값을 지정해 보시오.
var easys = document.createAttribute("id"); easys.value = "doit_js";
- register.html 을 이용하여 이름을 입력하고 버튼을 누르면 이름이 순서대로 추가되도록 하자.
<!DOCTYPE html>
<html lang="ko">
<head>
    <meta charset="UTF-8">
    <meta name="viewport" content="width=device-width, initial-scale=1.0">
    <meta http-equiv="X-UA-Compatible" content="ie=edge">
    <title>DOM - Create & Add Node</title>
    <style>
       #container {
            width:500px;
            margin:20px auto;
        }
        h1 {
            font-size:2.5em;
            text-align: center
        }
        form {
            margin-top:50px;
        }
        input[type="text"] {
            float:left;
            width:300px;
            padding:12px;
            border:none;
            border-bottom:1px solid #ccc;
            font-size:20px;
        }
        input:focus {
            outline: none;
        }
        button {
            width:100px;
            border:1px solid #ccc;
            border-radius:7px;
            padding:12px;
            margin-left:30px;
            font-size:20px;
        }
        button:hover {
            background-color:#ccc;
        }
        hr {
            clear:both;
            visibility: hidden;
        }
        #nameList > p {
            font-size:20px;
            text-indent:50px;
            line-height: 1.5;
        }
        .del {
            font-size:20px;
            text-align: center;
            color:#ccc;
            background:transparent;
            float:right;
            margin-right:10px;
        }
        .del:hover {
            color:#222;
            cursor: pointer;
        }
        .del:active {
            outline:0;
        }
  </style>
</head>
<body>
    <div id="container">
        <h1>참가 신청</h1>
        <form action="">
            <input type="text" id="userName" placeholder="이름" required>
            <button onclick="newRegister();return false;">신청</button>
        </form>

        <div id="nameList"></div>
    </div>

    <script>
      function newRegister() {
        var newP = document.createElement("p");  // 새 p 요소 만들기
        var userName = document.querySelector("#userName");
        var newText = document.createTextNode(userName.value);  // 새 텍스트 노드 만들기
        newP.appendChild(newText);  // 텍스트 노드를 p 요소의 자식 요소로 연결하기

        var nameList = document.querySelector("#nameList");
        nameList.appendChild(newP); // p 요소를 #nameList의 자식 요소로 만들기
        userName.value = "";  // 텍스트 필드 지우기
      }
  </script>
</body>
</html>- form요소 내에서 버튼을 클릭하면 해당 폼이 서버로 제출되어 페이지가 새로고침되는데, return false;를 사용해 이벤트의 기본동작인 폼 제출을 중단시킨다.
nodeList.html을 웹 브라우저에서 열고 콘솔창에 입력하자.
<!DOCTYPE html>
<html lang="ko">
<head>
    <meta charset="UTF-8">
    <meta name="viewport" content="width=device-width, initial-scale=1.0">
    <meta http-equiv="X-UA-Compatible" content="ie=edge">
    <link rel="stylesheet" href="css/nameList.css">
    <title>노드 리스트</title>
</head>
<body>
    <div id="container">
            <h1>참석자 명단</h1>
            <div id="nameList">
                <p>홍길동 <span class="del">X</span></p>
                <p>백두산 <span class="del">X</span></p>
                <p>도레미 <span class="del">X</span></p>
            </div>
    </div>
</body>
</html>
31.웹 브라우저에서 nodeList.html을 열고 콘솔 창에 다음과 같이 입력한 다음 NodeList 왼쪽의 ▶를 눌러 노드 리스트의 내용을 확인해 보자.
- document.querySelectorAll("p");
-
31번 NodeList에서 첫번째 값을 가져올려면?
document.querySelectorAll("p")[0];
-
31번 NodeList에서 두번째 값을 가져올려면?
document.querySelectorAll("p")[1];
-
31번 NodeList에서 첫번째요소의 자식 노드가 있는지 확인하자.
document.querySelectorAll("p")[0].hasChildNodes();>> boolean으로 반환
-
콘솔 창에 다음과 같이 입력해 보자.
document.querySelector("#nameList").childNodes- id가 nameList인 요소의 자식 노드들을 나타내는 nodeList를 반환한다.
- childNods는 해당 요소의 모든 자식 노드와 텍스트 노드까지 포함해 반환한다.
-
콘솔 창에 다음과 같이 입력해 보자.
document.querySelector("#nameList").children- id가 nameList인 요소의 자식 요소들을 나타내는 htmlCollection을 반환한다.
- 해당 요소의 직계 자식 요소만이 포함되고, 텍스트 노드는 포함되지 않는다.
- 만약 모든 자식 노드들을 반환하고 싶다면 위에서 사용된 childNodes나, querySelectorAll을 사용하면 된다.
-
appendChild() 함수와 insertBefore() 함수에 대해 설명하시오.
- 자식 노드를 추가하는 appendChild() 함수는 부모 노드에 자식 노드가 있을 경우 마지막 자식 노드로 추가 된다. 하지만 insertBefore() 함수를 사용하면 부모 노드에 자식 노드를 추가할 때 기준이 되는 노드를 지정하고 그 앞에 자식 노드를 추가할 수 있다.
-
화면에 3개의 이름이 나열되어 있는데, 3번째 이름을 맨 앞으로 옮겨 보자.
var nameList = document.querySelector("#nameList");
nameList.insertBefore(nameList.children[2], nameList.children[0]);
-
이 문서에서 첫 번째 X 요소의 부모 노드는 무엇일까?
document.querySelectorAll(".del")[0].parentNode>> 0번째 p태그
-
nodeList.html 문서에서 "홍길동"이라는 텍스트의 부모 노드는 어떤 노드일까?
document.querySelectorAll("p")[0].parentNode>> div 태그
-
첫 번째 X 요소를 삭제하려면
var firstDel = document.querySelectorAll(".del")[0];// 첫 번째 Xvar firstP = document.querySelectorAll("p")[0];// 첫 번째 p 요소firstP.removeChild(firstDel);// 첫 번째 p 요소에 있는 첫번째 x 삭제document.querySelectorAll("p")[0].removeChild(firstDel);>>이렇게 한문장으로 삭제 가능
-
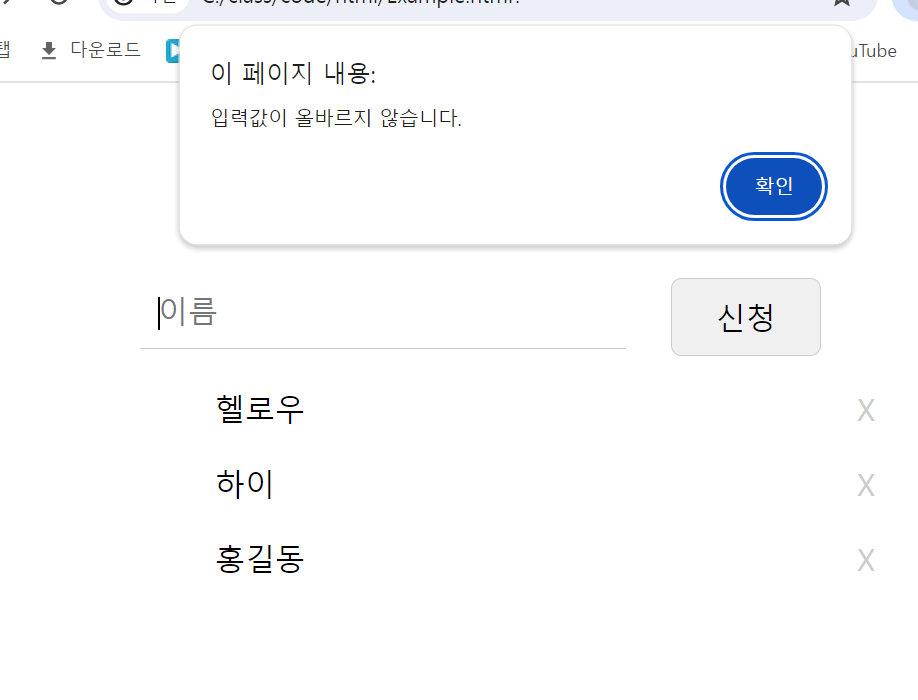
register.html을 이용 register1.png, register2.png, register3.png를 참고하여, 이름을 입력하면 최신에 입력한 이름이 상위로 가게 한다. 이름 옆에는 x도 같이 표시가 되게 한다. x를 누르면 이름과 x과 같이 삭제되게 한다.
<!DOCTYPE html>
<html lang="ko">
<head>
    <meta charset="UTF-8">
    <meta name="viewport" content="width=device-width, initial-scale=1.0">
    <meta http-equiv="X-UA-Compatible" content="ie=edge">
    <title>DOM - Create & Add Node</title>
    <style>
       #container {
            width:500px;
            margin:20px auto; /*수평 중앙으로 정렬*/
        }
        h1 {
            font-size:2.5em;
            text-align: center
        }
        form {
            margin-top:50px;
        }
        input[type="text"] {
            float:left;
            width:300px;
            padding:12px;
            border:none;
            border-bottom:1px solid #ccc;
            font-size:20px;
        }
        input:focus {
            outline: none;
        }
        button {
            width:100px;
            border:1px solid #ccc;
            border-radius:7px;
            padding:12px;
            margin-left:30px;
            font-size:20px;
        }
        button:hover {
            background-color:#ccc;
        }
        hr {
            clear:both;
            visibility: hidden;
        }
        #nameList > p {
            font-size:20px;
            text-indent:50px;
            line-height: 1.5;
        }
        .del {
            font-size:20px;
            text-align: center;
            color:#ccc;
            background:transparent;
            float:right;
            margin-right:10px;
        }
        .del:hover {
            color:#222;
            cursor: pointer;
        }
        .del:active {
            outline:0;
        }
  </style>
</head>
<body>
  <div id="container">
    <h1>참가 신청</h1>
    <form id="registrationForm">
      <input type="text" id="userName" placeholder="이름" required autocomplete="off">
      <button id="submitBtn">신청</button>
    </form>
    <hr>
    <div id="nameList"></div>
  </div>

    <script>
       let submitBtn = document.getElementById('submitBtn'); // 버튼 요소 가져오기
        let registrationForm = document.getElementById('registrationForm'); // 폼 요소 가져오기

        submitBtn.addEventListener('click', function(event) {
            event.preventDefault(); // 폼 제출 방지
            if (registrationForm.checkValidity()) { // 입력 필드의 유효성 검사
                newRegister(); // 새로운 등록 함수 호출
            } else {
                // 입력 필드가 유효하지 않을 때 실행할 코드
                alert('입력값이 올바르지 않습니다.');
            }
        });

   let newRegister = function(){
    var newP = document.createElement("p");  // 새 p 요소 만들기
    var userName = document.querySelector("#userName");
    var newText = document.createTextNode(userName.value);  // 새 텍스트 노드 만들기
    newP.appendChild(newText);  // 텍스트 노드를 p 요소의 자식 요소로 연결하기

  var delBttn = document.createElement("span");     // 새 button 요소 만들기
  var delText = document.createTextNode("X");  // 새 텍스트 노드 만들기
  delBttn.setAttribute("class", "del");  // 버튼에 class 속성 설정하기
  delBttn.appendChild(delText);  // 텍스트 노드를 button 요소의 자식 요소로 연결하기
  newP.appendChild(delBttn);  //    del 버튼을 p 요소의 자식 요소로

  var nameList = document.querySelector("#nameList");
  nameList.insertBefore(newP, nameList.childNodes[0]);  // p 요소를 #nameList 맨 앞에 추가하기
  //nameList.appendChild(newP);p 요소를 #nameList의 자식 요소로 만들기 >> 이거 넣으면 가로로 들어감얘는 nameList의 마지막 자식으로 추가되는데, 텍스트 노드가 존재하는 p의 마지막 자식으로 추가되서 가로로 되는것임
  userName.value = "";  // 텍스트 필드 지우기

  var removeBttns = document.querySelectorAll(".del");

  for (var i=0; i<removeBttns.length; i++) {  // removeBttns에 있는 요소 전체를 반복
    removeBttns[i].addEventListener("click", function() {  // i번째 버튼을 클릭했을 때 실행할 함수 선언
      if (this.parentNode.parentNode)  // 현재 노드(this)의 부모 노드의 부모 노드가 있을 경우 실행
        this.parentNode.parentNode.removeChild(this.parentNode);  // ‘현재 노드(this)의 부모 노드의 부모 노드’를 찾아 ‘현재 노드(this)의 부모 노드(p 노드)’ 삭제
    });
  }
}
  </script>
</body>
</html>-
return false를 사용해 폼의 제출을 방지하고 있는데 위의 코드에는 그게 제대로 적용이 안되서 이벤트 핸들러 적용
-
autocapitalize="off"는 입력 필드에 자동 대문자 변환은 비활성화 하고 있는 것
-
required는 빈 필드로 제출 방지
-
checkValidity() : 요소 내에 있는 모든 입력 필드의 유효성이 자동으로 검사된다.
웹 문서를 다루는 방법 3 문제
- DOM 트리는 HTML 요소 외에 텍스트 내용과 주석도 노드로 구성합니다. (0/X)
- O
- 자바스크립트를 이용하여 조작할 수 있도록 객체를 사용해 문서를 해석하는 방법을 ( ) 이라고 합니다.
- DOM(Document Object Model) : 문서 객체 모델
- ( )는 웹 문서 요소 간의 관계를 가지와 노드로 표현한 것입니다.
- DOM트리
- class 값이 small인 모든 요소에 접근하려면 document 객체의 (q )을 사용합니다.
- querySelectorAll(".samll");
- DOM에서 이벤트를 처리하기 위해 사용하는 함수는 (a ) 입니다.
- addEventListener()
- DOM에서 문서의 배경색을 바꾸려면 document.body.style.(b ) = "black" 라고 작성합니다.
- backgroundColor
- 웹 문서에서 무엇인가를 화면에 표시하거나 감출 때 (d ) 속성을 사용해서 감추면 그 요소가 차지하던 공간도 사라지지만, (v) 속성을 사용해서 감추면 요소가 있던 공간이 빈 상태로 남아 있게 됩니다.
- dispaly: none;
- visibility: hidden;
- 하나의 변수에 여러 개의 노드가 저장된 것을 ( ) 이라고 합니다.
- NodeList
웹 문서를 다루는 방법 4 문제 + todoList만듬
- quiz-1.html 문서를 열어 보면 제목과 텍스트 단락이 있다. 텍스트 단락을 누르면 글자 크기를 20px로, 글자색을 blue로 바꾸고 배경색은 #ccc로 지정하는 소스를 작성하자.
   <!DOCTYPE html>
   <html lang="ko">
   <head>
    <meta charset="UTF-8">
    <meta name="viewport" content="width=device-width, initial-scale=1.0">
    <meta http-equiv="X-UA-Compatible" content="ie=edge">
    <title>연습문제 1</title>
    <style>
        p {
            font-size:16px;
            line-height:1.8;
            color:#222;
        }
    </style>
   </head>
   <body>
    <h1>Ipsum quis consectetur sint ullamco.</h1>
    <p id="myText">Labore do officia velit mollit eu pariatur. Do aute sunt aute dolore labore incididunt Lorem mollit laborum adipisicing. Ipsum adipisicing amet ut in. Lorem incididunt sunt et excepteur amet occaecat culpa incididunt exercitation. Labore excepteur Lorem voluptate ipsum magna consequat eiusmod ex anim labore pariatur eiusmod. Excepteur amet non magna est.</p>
   </body>
   </html>
풀이
   <html lang="ko">
   <head>
    <meta charset="UTF-8">
    <meta name="viewport" content="width=device-width, initial-scale=1.0">
    <meta http-equiv="X-UA-Compatible" content="ie=edge">
    <title>연습문제 1</title>
    <style>
        p {
            font-size:16px;
            line-height:1.8;
            color:#222;
        }
    </style>
   </head>
   <body>
    <h1>Ipsum quis consectetur sint ullamco.</h1>
    <p id="myText">Labore do officia velit mollit eu pariatur. Do aute sunt aute dolore labore incididunt Lorem mollit laborum adipisicing. Ipsum adipisicing amet ut in. Lorem incididunt sunt et excepteur amet occaecat culpa incididunt exercitation. Labore excepteur Lorem voluptate ipsum magna consequat eiusmod ex anim labore pariatur eiusmod. Excepteur amet non magna est.</p>
    <script>
        let changeText = document.getElementById("myText");
        changeText.addEventListener("click", function(){
            changeText.style.fontSize = '20px';
            changeText.style.font = 'blue';
            changeText.style.backgroundColor = '#ccc';
        });
    </script>
   </body>
   </html>
var myText = document.querySelector("#myText");
myText.onclick = function() {
myText.style.fontSize = "20px";
myText.style.color = "blue";
myText.style.backgroundColor = "#ccc";
};- 위처럼도 가능
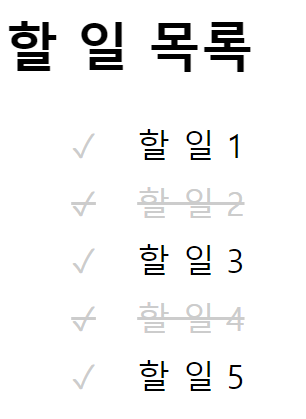
- quiz-2.html 문서를 열어 보면 다섯 개의 항목이 나열되어 있다. 각 항목 앞에 있는 체크 표시를 누르면 항목 텍스트의 글자 색이 회색(#ccc)으로 바뀌도록 소스를 작성하자.
<!DOCTYPE html>
<html lang="ko">
<head>
<meta charset="UTF-8">
<meta name="viewport" content="width=device-width, initial-scale=1.0">
<meta http-equiv="X-UA-Compatible" content="ie=edge">
<title>연습문제 2</title>
<style>
ul{
list-style: none;
}
li {
font-size:20px;
line-height: 35px;
}
.check {
color:#ccc;
font-size:20px;
margin-right:25px;
}
.check:hover {
color:#222;
}
</style>
</head>
<body>
<h1>할 일 목록</h1>
<ul>
<li><span class="check">✓</span>할 일 1 </li>
<li><span class="check">✓</span>할 일 2 </li>
<li><span class="check">✓</span>할 일 3 </li>
<li><span class="check">✓</span>할 일 4 </li>
<li><span class="check">✓</span>할 일 5 </li>
</ul>
</body>
</html>풀이 - 근데 한번 체크하면 다시 못품
<!DOCTYPE html>
<html lang="ko">
<head>
<meta charset="UTF-8">
<meta name="viewport" content="width=device-width, initial-scale=1.0">
<meta http-equiv="X-UA-Compatible" content="ie=edge">
<title>연습문제 2</title>
<style>
ul{
list-style: none;
}
li {
font-size:20px;
line-height: 35px;
}
.check {
color:#ccc;
font-size:20px;
margin-right:25px;
}
.check:hover {
color:#222;
}
</style>
</head>
<body>
<h1>할 일 목록</h1>
<ul id = "todoList">
<li><span class="check">✓</span>할 일 1 </li>
<li><span class="check">✓</span>할 일 2 </li>
<li><span class="check">✓</span>할 일 3 </li>
<li><span class="check">✓</span>할 일 4 </li>
<li><span class="check">✓</span>할 일 5 </li>
</ul>
<script>
// let check = document.querySelectorAll(".check"); 이렇게 하게 되면 addEventListner를 쓸 수 없음 NodeList라서
let todoList = document.getElementById('todoList');
let isChecked = true;
todoList.addEventListener('click', function(event){
if(event.target.classList.contains('check')){
let listItem = event.target.parentNode;
listItem.style.color = '#ccc';
}
});
</script>
</body>
</html> var buttons = document.querySelectorAll(".check");
for(var i=0; i<buttons.length; i++) {
buttons[i].addEventListener("click", function() {
this.parentNode.style.color = "#ccc";
});
}- 위처럼도 가능 그냥 for문으로 받아와서도 가능하구만
갓벽하게 다시 만듬
- 체크를 누르면 줄까지
<!DOCTYPE html>
<html lang="ko">
<head>
<meta charset="UTF-8">
<meta name="viewport" content="width=device-width, initial-scale=1.0">
<meta http-equiv="X-UA-Compatible" content="ie=edge">
<title>연습문제 2</title>
<style>
ul {
list-style: none;
}
li {
font-size: 20px;
line-height: 35px;
}
.check {
color: #ccc;
font-size: 20px;
margin-right: 25px;
}
.check:hover {
color: #222;
}
</style>
</head>
<body>
<h1>할 일 목록</h1>
<ul id="todoList">
<li><span class="check">✓</span>할 일 1</li>
<li><span class="check">✓</span>할 일 2</li>
<li><span class="check">✓</span>할 일 3</li>
<li><span class="check">✓</span>할 일 4</li>
<li><span class="check">✓</span>할 일 5</li>
</ul>
<script>
let todoList = document.getElementById('todoList');
todoList.addEventListener('click', function(event) {
if (event.target.classList.contains('check')) {//event.target >> 트리거 요소를 가져옴
let checkSpan = event.target;
let listItem = checkSpan.parentNode;
// 클릭한 항목의 상태를 토글
if (listItem.classList.contains('checked')) {
listItem.classList.remove('checked');
listItem.style.color = '';//원래 색으로
listItem.style.textDecoration = '';
} else {
listItem.classList.add('checked');
listItem.style.color = '#ccc';
listItem.style.textDecoration = 'line-through';
}
}
});
</script>
</body>
</html>- 체크를 클릭하는 이벤트가 발생되면 span의 부모요소인 li의 연결되어 클래스가 checked로 추가되거나 제거된다. 그래서 contains로 확인해주는 것이다.
폼과 자바스크립트 - 회원가입
문제
order.html 문서를 열고 콘솔 창도 함께 열어 보자.
<!DOCTYPE html>
<html lang="ko">
<head>
    <meta charset="UTF-8">
    <meta name="viewport" content="width=device-width, initial-scale=1.0">
    <meta http-equiv="X-UA-Compatible" content="ie=edge">
    <title>결제하기</title>
    <style>
        * {
    margin:0;
    padding:0;
    box-sizing: border-box;
}
ul {
    list-style: none;
}
legend {
    font-size:1.2em;
    font-weight:bold;
    margin-left:20px;
}

form {
    width:520px;
    height:auto;
    padding-left:10px;
    margin:50px auto;
}
fieldset {
    border:1px solid #c0c0c0;
    padding:30px 20px 30px 30px;
    margin-bottom:35px;
}

.field {
    float:left;
    width:60px;
    font-weight:bold;
    font-size:0.9em;
    line-height: 55px;
    text-align:right;
    margin-right:15px;
}

.input-box {
    width:350px;
    height:35px;
    border:1px solid #aaa;
    border-radius:5px;
    padding:5px;
    margin:10px 0;
    float:left;
}

.order {
    width:100%;
    padding:20px;
    border:1px solid #aaa;
    background:#e9e9e9;
    font-size:1em;
    font-weight:bold;
}
    </style>
</head>
<body>
    <div id="container">
        <form name="order">
            <fieldset>
                <legend> 주문 정보 </legend>
                <ul>
                    <li>
                        <label class="field" for="billingName">이름 : </label>
                        <input type="text" class="input-box" id="billingName" name="billingName">
                    </li>
                    <li>
                        <label class="field" for="billingTel">연락처 : </label>
                        <input type="text" class="input-box" id="billingTel" name="billingTel">
                    </li>
                    <li>
                        <label class="field" for="billingAddr">주소 : </label>
                        <input type="text" class="input-box" id="billingAddr" name="billingAddr">
                    </li>
                </ul>
            </fieldset>
        </form>
        <form name="ship">
            <fieldset>
                <legend> 배송 정보 </legend>
                <ul>
                    <li>
                        <input type="checkbox" id="shippingInfo" name="shippingInfo">
                        <label for="shippingInfo" class="check">주문 정보와 배송 정보가 같습니다</label>
                    </li>
                    <li>
                        <label class="field" for="shippingName">이름 : </label>
                        <input type="text" class="input-box" id="shippingName" name="shippingName">
                    </li>
                    <li>
                        <label class="field" for="shippingTel">연락처 : </label>
                        <input type="text" class="input-box" id="shippingTel" name="shippingTel">
                    </li>
                    <li>
                        <label class="field" for="shippingAddr">주소 : </label>
                        <input type="text" class="input-box" id="shippingAddr" name="shippingAddr">
                    </li>
                </ul>
            </fieldset>
            <button type="submit" class="order">결제하기</button>
        </form>
    </div>
</body>
</html>r">결제하기</button>
        </form>
    </div>
</body>
</html>-
아이디가 billingName인 것의 값(value)를 출력하자.
- `document.querySelector("#billingName").value` -
[연락처: ] 필드의 id 값을 확인한 후 그 필드에 전화번호를 입력했을 때 그 내용을 가져오는 소스를 콘솔 창에 작성하시오.
document.querySelector("#billingTel").value
-
order.html 문서를 '배송 정보' 중 [이름: ] 항목의 텍스트 필드에 접근(name 값으로 접근하자.) 두 가지 방법을 기술하시오.
document.ship.shippingNamedocument.forms["ship"].elements["shippingName"]
-
name이 shippingName의 값(value) 가져오기.
- `document.ship.shippingName.value` -
'배송 정보' 중 [주소] 항목에 내용을 입력했을 때 name 속성을 사용해 그 내용에 접근하는 코드
- `document.ship.shippingAddr.valu`document.forms["ship"].elements["shippingAddr"].value
<!DOCTYPE html>
<html lang="ko">
<head>
    <meta charset="UTF-8">
    <meta name="viewport" content="width=device-width, initial-scale=1.0">
    <meta http-equiv="X-UA-Compatible" content="ie=edge">
    <style>
          #container {
      width:500px;
      margin:auto;
    }
    #login_input {
      float:left;
    }
    input[type="text"], input[type="password"]{

      display:block;
      width:300px;
      height:35px;
      line-height:35px;
      border:1px solid #ccc;
      background-color:#eee;
    }
    #login_bttn > button {
      float:left;
      width:100px;
      height:78px;
      background-color:#222;
      color:white;
      border:none;
    }
  </style>
    <title>회원 가입</title>
</head>
<body>
    <div id="container">
    <h3>로그인</h3>
    <form>
      <div id="login_input">
        <input type="text" autofocus placeholder="아이디">
        <input type="password" placeholder="비밀번호">
      </div>
      <div id="login_bttn">
        <button type="submit" class="order">로그인</button>
      </div>
    </form>
    </div>
</body>
</html>-
콘솔 창에 다음을 입력하자.
document.forms>> form의 개수가 나옴
-
현재 문서의 첫 번째 form의 첫 번째 요소의 값
document.forms[0].elements[0].value;
-
reg.html 문서에서 폼 배열을 사용해 '비밀번호' 필드에 입력한 값을 가져오려면
document.forms[0].elements[1].value;
<!DOCTYPE html>
<html lang="ko">
<head>
    <meta charset="UTF-8">
    <meta name="viewport" content="width=device-width, initial-scale=1.0">
    <meta http-equiv="X-UA-Compatible" content="ie=edge">
    <title>결제하기</title>
    <style>
      * {
    margin:0;
    padding:0;
    box-sizing: border-box;
}
ul {
    list-style: none;
}
legend {
    font-size:1.2em;
    font-weight:bold;
    margin-left:20px;
}

form {
    width:520px;
    height:auto;
    padding-left:10px;
    margin:50px auto;
}
fieldset {
    border:1px solid #c0c0c0;
    padding:30px 20px 30px 30px;
    margin-bottom:35px;
}

.field {
    float:left;
    width:60px;
    font-weight:bold;
    font-size:0.9em;
    line-height: 55px;
    text-align:right;
    margin-right:15px;
}

.input-box {
    width:350px;
    height:35px;
    border:1px solid #aaa;
    border-radius:5px;
    padding:5px;
    margin:10px 0;
    float:left;
}

.order {
    width:100%;
    padding:20px;
    border:1px solid #aaa;
    background:#e9e9e9;
    font-size:1em;
    font-weight:bold;
}
  </style>
</head>
<body>
    <div id="container">
        <form name="order">
            <fieldset>
                <legend> 주문 정보 </legend>
                <ul>
                    <li>
                        <label class="field" for="billingName">이름 : </label>
                        <input type="text" class="input-box" id="billingName" name="billingName">
                    </li>
                    <li>
                        <label class="field" for="billingTel">연락처 : </label>
                        <input type="text" class="input-box" id="billingTel" name="billingTel">
                    </li>
                    <li>
                        <label class="field" for="billingAddr">주소 : </label>
                        <input type="text" class="input-box" id="billingAddr" name="billingAddr">
                    </li>
                </ul>
            </fieldset>
        </form>
        <form name="ship">
            <fieldset>
                <legend> 배송 정보 </legend>
                <ul>
                    <li>
                        <input type="checkbox" id="shippingInfo" name="shippingInfo">
                        <label for="shippingInfo" class="check">주문 정보와 배송 정보가 같습니다</label>
                    </li>
                    <li>
                        <label class="field" for="shippingName">이름 : </label>
                        <input type="text" class="input-box" id="shippingName" name="shippingName">
                    </li>
                    <li>
                        <label class="field" for="shippingTel">연락처 : </label>
                        <input type="text" class="input-box" id="shippingTel" name="shippingTel">
                    </li>
                    <li>
                        <label class="field" for="shippingAddr">주소 : </label>
                        <input type="text" class="input-box" id="shippingAddr" name="shippingAddr">
                    </li>
                </ul>
            </fieldset>
            <button type="submit" class="order">결제하기</button>
        </form>
    </div>
</body>
</html>- order.html을 이용하여 배송 정보 자동 입력 프로그램 만들기
주문 정보를 입력하고, "주문 정보와 배송 정보가 같습니다."라고 적혀있는 체크박스를 클릭하면 배송 정보에 주문 정보에 적혀 있는 값이 나오도록 프로그래밍 하시오.(visual studio code를 이용)
<!DOCTYPE html>
<html lang="ko">
<head>
    <meta charset="UTF-8">
    <meta name="viewport" content="width=device-width, initial-scale=1.0">
    <meta http-equiv="X-UA-Compatible" content="ie=edge">
    <title>결제하기</title>
    <style>
      * {
    margin:0;
    padding:0;
    box-sizing: border-box;
}
ul {
    list-style: none;
}
legend {
    font-size:1.2em;
    font-weight:bold;
    margin-left:20px;
}

form {
    width:520px;
    height:auto;
    padding-left:10px;
    margin:50px auto;
}
fieldset {
    border:1px solid #c0c0c0;
    padding:30px 20px 30px 30px;
    margin-bottom:35px;
}

.field {
    float:left;
    width:60px;
    font-weight:bold;
    font-size:0.9em;
    line-height: 55px;
    text-align:right;
    margin-right:15px;
}

.input-box {
    width:350px;
    height:35px;
    border:1px solid #aaa;
    border-radius:5px;
    padding:5px;
    margin:10px 0;
    float:left;
}

.order {
    width:100%;
    padding:20px;
    border:1px solid #aaa;
    background:#e9e9e9;
    font-size:1em;
    font-weight:bold;
}
  </style>
</head>
<body>
    <div id="container">
        <form name="order">
            <fieldset>
                <legend> 주문 정보 </legend>
                <ul>
                    <li>
                        <label class="field" for="billingName">이름 : </label>
                        <input type="text" class="input-box" id="billingName" name="billingName">
                    </li>
                    <li>
                        <label class="field" for="billingTel">연락처 : </label>
                        <input type="text" class="input-box" id="billingTel" name="billingTel">
                    </li>
                    <li>
                        <label class="field" for="billingAddr">주소 : </label>
                        <input type="text" class="input-box" id="billingAddr" name="billingAddr">
                    </li>
                </ul>
            </fieldset>
        </form>
        <form name="ship">
            <fieldset>
                <legend> 배송 정보 </legend>
                <ul>
                    <li>
                        <input type="checkbox" id="shippingInfo" name="shippingInfo">
                        <label for="shippingInfo" class="check">주문 정보와 배송 정보가 같습니다</label>
                    </li>
                    <li>
                        <label class="field" for="shippingName">이름 : </label>
                        <input type="text" class="input-box" id="shippingName" name="shippingName">
                    </li>
                    <li>
                        <label class="field" for="shippingTel">연락처 : </label>
                        <input type="text" class="input-box" id="shippingTel" name="shippingTel">
                    </li>
                    <li>
                        <label class="field" for="shippingAddr">주소 : </label>
                        <input type="text" class="input-box" id="shippingAddr" name="shippingAddr">
                    </li>
                </ul>
            </fieldset>
            <button type="submit" class="order">결제하기</button>
        </form>
    </div>
    <script>
        let check = document.querySelector("#shippingInfo");
        check.addEventListener("click", function(){
            if(check.checked === true){
                document.querySelector("#shippingName").value = document.querySelector("#billingName").value;
                document.querySelector("#shippingTel").value = document.querySelector("#billingTel").value;
                document.querySelector("#shippingAddr").value = document.querySelector("#billingAddr").value;

            }else{
                document.querySelector("#shippingName").value = "";
                document.querySelector("#shippingTel").value =  "";
                document.querySelector("#shippingAddr").value =  "";

            }
        });
    </script>
</body>
</html>- register.html을 이용하여
    <!DOCTYPE html>
    <html lang="ko">
    <head>
    <meta charset="UTF-8">
    <meta name="viewport" content="width=device-width, initial-scale=1.0">
    <meta http-equiv="X-UA-Compatible" content="ie=edge">
    <style>
      #container{
    width:600px;
    margin:0 auto;
    }
    ul {
    list-style:none;
    }
    ul li {
    clear:both;
    }
    .field {
    float:left;
    width:100px;
    font-weight:bold;
    font-size:0.9em;
    line-height: 55px;
    text-align:right;
    margin-right:15px;
    }
    input[type="text"], input[type="password"], input[type="email"] {
    float:left;
    width:350px;
    height:35px;
    border:1px solid #aaa;
    border-radius:5px;
    padding:5px;
    margin:10px 0;
    float:left;
    }


.r {
    line-height:55px;
}

#buttons > li {
    display:inline-block;
}
button {
    width:250px;
    height:50px;
    margin-right:10px;
    border:1px solid #ccc;
    background:#eee;
    font-size:0.9em;
}
  </style>
    <title>회원 가입</title>

</head>
<body>
    <div id="container">
        <h1>회원 가입</h1>
        <form action="#" id="register">
            <ul id="user-info">
                <li>
                    <label for="user-id" class="field">아이디</label>
                    <input type="text" id="user-id" placeholder="4~15자리의 영문과 숫자로 입력" required>
                </li>
                <li>
                    <label for="email" class="field">이메일</label>
                    <input type="email" id="email" required>
                </li>
                <li>
                    <label for="user-pw1" class="field">비밀번호</label>
                    <input type="password" id="user-pw1" placeholder="8자리 이상" required>
                </li>
                <li>
                    <label for="user-pw2" class="field">비밀번호 확인</label>
                    <input type="password" id="user-pw2" required>
                </li>
                <li>
                    <label class="field">메일링 수신</label>
                    <label class="r"><input type="radio" value="yes" name="mailing">예</label>
                    <label class="r"><input type="radio" value="no" name="mailing">아니오</label>
                </li>
            </ul>
            <ul id="buttons">
                <li>
                    <button type="submit" class="btn btnBlack">가입하기</button>
                </li>
                <li>
                    <button type="reseet" class="btn btnGray">취소</button>
                </li>
            </ul>
        </form>
    </div>
</body>
</html>
아이디 값이 길이가 4미만 15 초과 일때 경고 메세지를 출력하고, 다시 입력할 수 있도록 userId 필드를 선택하자.
비밀 번호는 8자리 이상 입력받도록 하자.아니면 경고 메시지. 포커스 이동
비밀 번호화 비밀번호 확인이 일치하지 않으면 경고 메시지. 포커스 이동.(visual studio code를 이용)
<!DOCTYPE html>
<html lang="ko">
<head>
    <meta charset="UTF-8">
    <meta name="viewport" content="width=device-width, initial-scale=1.0">
    <meta http-equiv="X-UA-Compatible" content="ie=edge">
    <style>
        #container{
            width:600px;
            margin:0 auto;
        }
        ul {
            list-style:none;
        }
        ul li {
            clear:both;
        }
        .field {
            float:left;
            width:100px;
            font-weight:bold;
            font-size:0.9em;
            line-height: 55px;
            text-align:right;
            margin-right:15px;
        }
        input[type="text"], input[type="password"], input[type="email"] {
            float:left;
            width:350px;
            height:35px;
            border:1px solid #aaa;
            border-radius:5px;
            padding:5px;
            margin:10px 0;
            float:left;
        }

        .r {
            line-height:55px;
        }

        #buttons > li {
            display:inline-block;
        }
        button {
            width:250px;
            height:50px;
            margin-right:10px;
            border:1px solid #ccc;
            background:#eee;
            font-size:0.9em;
        }
    </style>
    <title>회원 가입</title>

</head>
<body>
    <div id="container">
        <h1>회원 가입</h1>
        <form action="#" id="register">
            <ul id="user-info">
                <li>
                    <label for="user-id" class="field">아이디</label>
                    <input type="text" id="user-id" placeholder="4~15자리의 영문과 숫자로 입력" required>
                </li>
                <li>
                    <label for="email" class="field">이메일</label>
                    <input type="email" id="email" required>
                </li>
                <li>
                    <label for="user-pw1" class="field">비밀번호</label>
                    <input type="password" id="user-pw1" placeholder="8자리 이상" required>
                </li>
                <li>
                    <label for="user-pw2" class="field">비밀번호 확인</label>
                    <input type="password" id="user-pw2" required>
                </li>
                <li>
                    <label class="field">메일링 수신</label>
                    <label class="r"><input type="radio" value="yes" name="mailing">예</label>
                    <label class="r"><input type="radio" value="no" name="mailing">아니오</label>
                </li>
            </ul>
            <ul id="buttons">
                <li>
                    <button type="submit" class="btn btnBlack">가입하기</button>
                </li>
                <li>
                    <button type="reset" class="btn btnGray">취소</button>
                </li>
            </ul>
        </form>
    </div>

    <script>
        let userId = document.querySelector("#user-id");
        let userPw = document.querySelector("#user-pw1");
        let checkUserPw = document.querySelector("#user-pw2");

        userId.onchange = checkId;
        userPw.onchange = checkPw;
        checkUserPw.onchange = comparePw;

        function checkId(){
            if(userId.value.length < 4 || userId.value.length > 15){
                alert("아이디는 4자리 이상 15자리 미만으로 입력해주세요.");
                userId.select(); //다시 입력할 수 있게 필드 선택
            }
        }

        function checkPw(){
            if(userPw.value.length < 8){
                alert("비밀 번호는 8자리 이상으로 입력해주세요.");
                userPw.focus(); //포커스 이동
            }
        }

        function comparePw(){
            if(userPw.value != checkUserPw.value){
                alert("암호가 다릅니다. 다시 입력하세요.");
                checkUserPw.value = "";
                checkUserPw.focus();
            }
        }
    </script>

</body>
</html>- 함수를 변수에 할당해서 익명함수로 만들었는데 제대로 동작하지 않았다. 그건 이벤트 핸들러가 올바르게 설정하지 않은 방법이기 때문이다.
- 올바른 방법은 함수의 이름 자체를 바로 할당해 이벤트 핸들러로 사용하는 것이다.
getForm.html 문서를 웹 브라우저에서 실행해 보자. 그리고 콘솔 창을 열자.
<!DOCTYPE html>
<html lang="ko">
<head>
    <meta charset="UTF-8">
    <meta name="viewport" content="width=device-width, initial-scale=1.0">
    <meta http-equiv="X-UA-Compatible" content="ie=edge">
    <title>수강신청하기</title>
    <style>
      #container {
    width:500px;
    margin:10px auto;
}
form fieldset{
    margin-bottom:25px;
 }
 form legend{
    font-size:15px;
    font-weight:600;
 }

label.reg {
    font-size:14px;
    width:110px;
    color:#390;
    font-weight:bold;
    float:left;
    text-align:right;
    margin-right:10px;
 }
 form ul li{
    list-style:none;
    margin: 15px 0;
    font-size:14px;
 }
 #selectAll {
     cursor:pointer;
 }
  </style>
</head>
<body>
    <div id="container">
        <h1>수강신청</h1>
        <form name="testForm">
            <fieldset>
                <legend>신청인</legend>
                <ul>
                    <li>
                        <label class="reg" for="userName">이름</label>
                        <input type="text" id="userName" name="userName" maxlength="50">
                    </li>
                    <li>
                        <label class="reg" for="major">학과</label>
                        <select name="major" id="major" onchange="displaySelect()">
                            <option>---- 학과 선택 ----</option>
                            <option value="archi">건축공학과</option>
                            <option value="mechanic">기계공학과</option>
                            <option value="indust">산업공학과</option>
                            <option value="elec">전기전자공학과</option>
                            <option value="computer">컴퓨터공학과</option>
                            <option value="chemical">화학공학과</option>
                        </select>
                    </li>
                </ul>
            </fieldset>
            <fieldset>
                <legend>신청 과목</legend>
                <p>이 달에 신청할 과목을 선택하세요.</p>
                <label><input type="radio" name="subject" value="speaking">회화</label>
                <label><input type="radio" name="subject" value="grammar">문법</label>
                <label><input type="radio" name="subject" value="writing">작문</label>
            </fieldset>
            <fieldset>
                <legend>메일링</legend>
                <p>메일로 받고 싶은 뉴스 주제를 선택해 주세요</p>
                <label><input type="checkbox" name="mailing1" value="news">해외 단신</label>
                <label><input type="checkbox" name="mailing2" value="dialog">5분 회화</label>
                <label><input type="checkbox" name="mailing3" value="pops">모닝팝스</label>
            </fieldset>
        </form>
    </div>

    <script>
      var selectMenu = document.testForm.major;  // 셀렉트 메뉴를 가져와 selectMenu로 저장
      function displaySelect() {
        var selectedText = selectMenu.options[selectMenu.selectedIndex].innerText;
        alert("[" + selectedText + "]를 선택했습니다.");
        }
  </script>
</body>
</html>- name="major" 인 것을 선택해 보자.
document.testForm.major
- option 목록을 가져오자.
document.testForm.major.options>> 복수는 뒤에 s
- 선택 목록 중 다섯 번째 옵션 항목에 접근하자.
document.testForm.major.options[4];
- 다섯 번째 옵션이 화면에 표시하는 내용에 접근하자.
document.testForm.major.options[4].innerText;
- 다섯 번째 옵션 항목을 선택했을 때 서버로 넘겨주는 값 선택
document.testForm.major.options[4].value;
- 선택 목록에서 세 번째 항목이 화면에 표시하는 내용을 가져오는 소스
document.testForm.major.options[4].value;
- 선택 목록에서 사용자가 선택한 옵션 항목 찾아내기
document.testForm.major.options[4].value;
- 라디오 버튼 이름이 "subject"인 요소 선택
document.testForm.subject;
- 이름이 mailing1인 요소에 접근한다.
document.testForm.subject;
- 라디오 버튼 요소나 체크 상자 요소에는 checked 속성이 있는데 기본 값은 ( ) 이다. 그리고 해당 항목을 선택하면 값이 ( )로 바뀐다.
- false 선택하면 true로 바뀐다.
- 웹 브라우저 창에서 3개의 라디오 버튼 중 [문법] 항목을 누른 후 콘솔 창에 다음 소스를 입력해 보자.
document.testForm.subject[0].checked;
document.testForm.subject[1].checked;
document.testForm.subject[2].checked;
- 3개의 체크 상자 중 [해외 단신] 항목을 누른 후 다음을 입력해 보세요.
document.testForm.mailing1.checked;
document.testForm.mailing2.checked;
document.testForm.mailing3.checked;