
오전문제
<!DOCTYPE html>
<html lang="ko">
<head>
    <meta charset="UTF-8">
    <meta name="viewport" content="width=device-width, initial-scale=1.0">
    <style>
        #container{
            width: 600px;
            margin: 0 auto;
        }
        #prod-pic, #desc{
            float: left;
        }
        #prod-pci{
            margin: 20px 20px auto 10px;
            padding: 0;
        }
        #cup{/*컵 사진 안에 dashed로 줄*/
            box-shadow: 1px 1px 2px #eee;
            outline: 1px dashed #ccc;
            outline-offset: -7px;
        }
        #small-pic {
            margin-top:20px;
            list-style: none;
            padding:0;
        }
        #small-pic > li {
            float:left;
            margin-right:10px;
        }
        .small {
            width:60px;
            height:60px;
        }
        #small-pic img:hover {
            cursor:pointer;
        }
        #desc {
            width:300px;
            padding-top:20px;
            margin-bottom:50px;
        }
        .bluetext {
            color:#4343ff;
            font-weight:bold;
        }
        #desc button {
            margin-top:20px;
            margin-bottom:20px;
            width:100%;
            padding:10px;
        }
        #desc ul {
            list-style:none;
        }
        #desc li{
            font-size:0.9em;
            line-height:1.8;
        }
        #desc a {
            text-decoration: none;
            font-size:0.9em;
            color:blue;
            padding-left:40px;
        }
        hr {
            clear:both;
            border:1px dashed #f5f5f5;
        }
        #detail {
            padding-top:10px;
            display:none;
        }
        #detail li {
            font-size:0.9em;
            line-height:1.4;
        }
        h1 {
            font-size:2em;
        }
        h2 {
            font-size:1.5em;
            color:#bebebe;
            font-weight:normal;
        }
        h3 {
            font-size:1.1em;
            color:#222;
        }
        p {
            font-size:0.9em;
            line-height:1.4;
            text-align: justify;
        }
    </style>
</head>
<body>
    <div id = "container">
        <h1 id = "heading">에디오피아 게뎁</h1>
        <div id = "prod-pic">
            <img src="images/coffee-pink.jpg" alt="에디오피아 게뎁" id = "cup" width = "200" height="200" >
                <div id = "small-pic">
                    <img src="images/coffee-pink.jpg" class="small">
                    <img src="images/coffee-blue.jpg" class="small">
                    <img src="images/coffee-gray.jpg" class="small">
                </div>
        </div>
        <div id = "desc">
            <ul>
                <li>상품명 : 에디오피아 게뎁</li>
                <li class = "bluetext">판매가 : 9,000원</li>
                <li>배송비 : 3,000원<br>(50,000원 이상 구매 시 무료)</li>
                <li>적립금 : 180원(2%)</li>
                <li>로스팅 : 2024.05.01</li>
                <button id = "cart">장바구니 담기</button>
            </ul>
            <a href="#" id = "view">상세 설명 보기</a>
        </div>
        <hr>
        <div id = "detail">
            <h2>상품 상세 정보</h2>
            <ul>
                <li>원산지 : 에디오피아</li>
                <li>지 역 : 이르가체프 코체레</li>
                <li>농 장 : 게뎁</li>
                <li>고 도 : 1,950 ~ 2,000 m</li>
                <li>품 종 : 지역 토착종</li>
                <li>가공법 : 워시드</li>
            </ul>
            <h3>Information</h3>
            <p>2차 세계대전 이후 설립된 게뎁 농장을 유기농 인증 농장으로 여성의 고용 창출과 지역사회 발전에 기여하여 3대째 이어져 내려오는 오랜 역사를 가진 농장입니다. 게뎁 농장은 SCAA 인증을 받은 커피 품질관리 실험실을 갖추고 있어 철저한 관리를 통해 스페셜 티 커피를 생산합니다.</p>
            <h3>Flavor Note</h3>
            <p>은은하고 다채로운 꽃향, 망고, 다크 체리, 달달함이 입안 가득.</p>
        </div>
    </div>

    <script>
        let isOpen = false;
        let bigPic = document.querySelector("#cup");
        let smallPics = document.querySelectorAll(".small");

        for(let i = 0; i < smallPics.length; i++){
            smallPics[i].addEventListener("click", function(){
                let newPic = this.src;
                bigPic.setAttribute("src", newPic);
            });
        }

        let view = document.querySelector("#view");
        view.addEventListener("click", function(){
            if(isOpen === false){
                document.querySelector("#detail").style.display = "block";
                view.innerHTML = "상세 설명 닫기";
                isOpen = true;
            }else{
                document.querySelector("#detail").style.display = "none";
                view.innerHTML = "상세 설명 보기";
                isOpen = false;
            }
        });

        let cart = document.querySelector("#cart");
        cart.addEventListener("click", function(){
            alert("장바구니에 추가되었습니다.")
        });

    </script>
</body>
</html>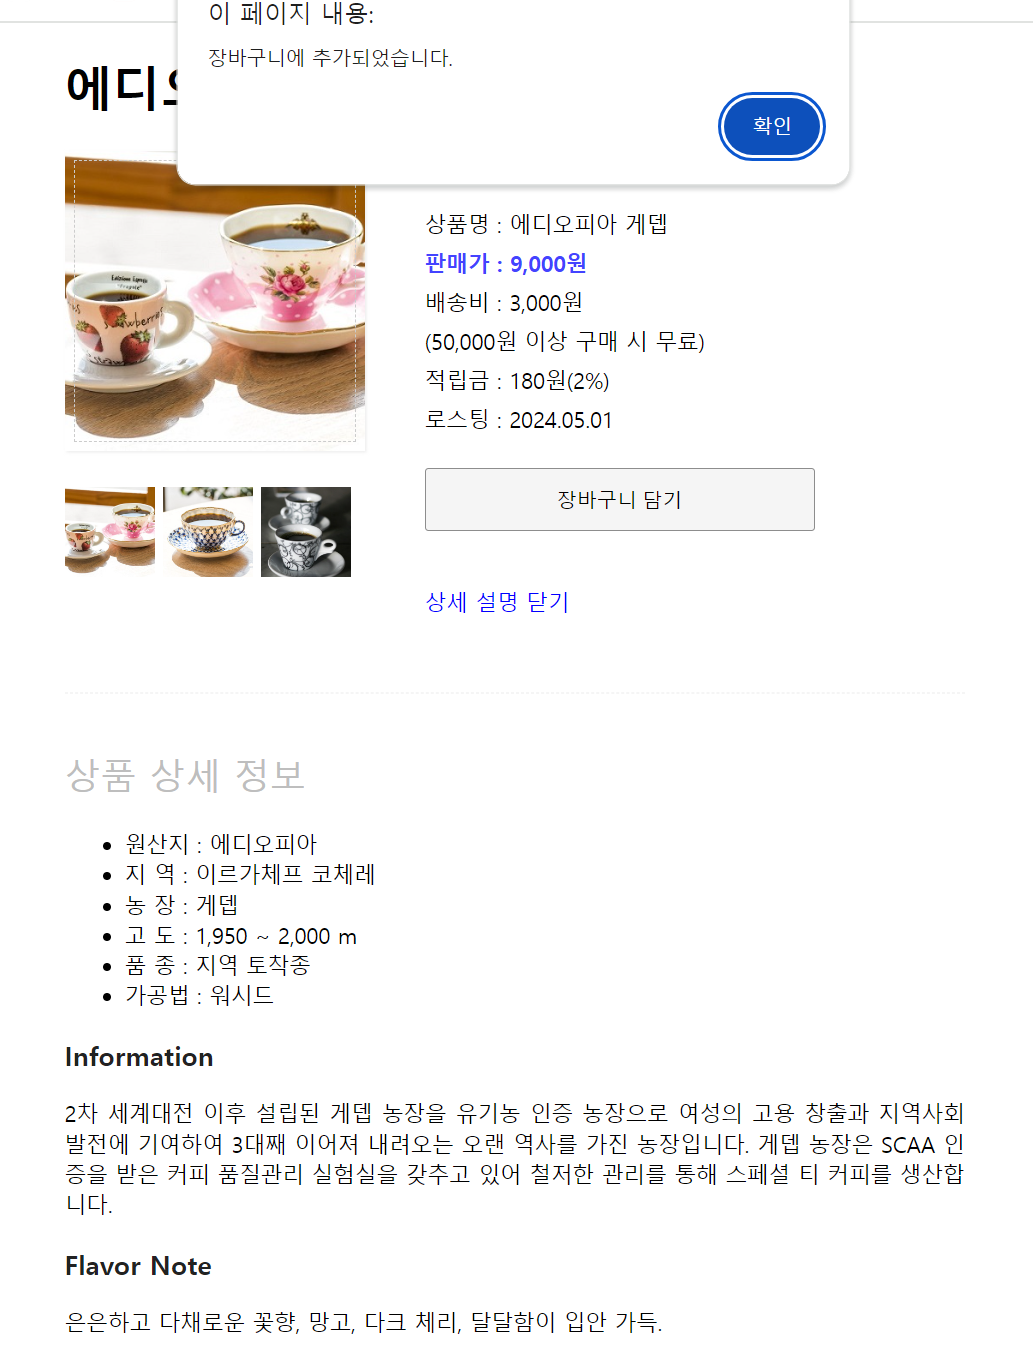
추가주문 계산하기 / 반지름 계산
- quiz-1.html 문서를 활용해 피자를 주문할 때 추가 주문 항목에서 체크 상자를 누르면 피자 값에 체크한 항목의 금액만큼 더해서 '합계' 항목에 표시하고, 체크 상자의 체크를 해제하면 합계에서 그 금액만큼 빼서 표시하는 자바스크립트 소스를 작성하세요.
<!DOCTYPE html>
<html lang="ko">
<head>
    <meta charset="UTF-8">
    <meta name="viewport" content="width=device-width, initial-scale=1.0">
    <meta http-equiv="X-UA-Compatible" content="ie=edge">
    <title>연습문제 1</title>
    <style>
        #container {
            width:400px;
            margin:0 auto;
        }
        fieldset {
            margin-bottom:20px;
            border:1px solid #eee;
        }
        #total {
            border:none;
            font-size:16px;
            font-weight:bold;
        }
    </style>
</head>
<body>
    <div id="container">
    <h1>피자 주문</h1>
        <form>
      <fieldset>
        <legend>사이즈</legend>
        <p>Large - 24000 원 </p>
      </fieldset>
      <fieldset>
        <legend>추가 주문 </legend>
          <label><input type="checkbox" name="pickle" class="checkbx" value="800">피클(800원)</label>
          <label><input type="checkbox" name="chilly" class="checkbx" value="300">칠리 소스(300원)</label>
          <label><input type="checkbox" name="deeping" class="checkbx" value="200">디핑 소스(200원)</label>
          <label><input type="checkbox" name="stick" class="checkbx" value="4800">치즈스틱(4개, 4800원)</label>
          <label><input type="checkbox" name="salad" class="checkbx" value="2400">콘 샐러드(2400원)</label>
      </fieldset>
      <fieldset>
        <legend>합계</legend>
        <input type="text" id="total" name="total" class="price" readonly>
      </fieldset>
        </form>
    </div>
</body>
</html>- filedset을 이용해 form안에서 그룹화를 시켜주고 시각적인 효과도 넣어준다.
풀이
<script>
        const checkBoxes = document.querySelectorAll('.checkbx');
        const totalInput = document.getElementById('total');
        let total = 24000;

        checkBoxes.forEach(box => {
            box.addEventListener('change', function(){
                const value = parseInt(box.value);
                if(box.checked){
                    total += value;
                }else{
                    total -= value;
                }
                totalInput.value = total + ' 원';
            });
        });
</script>- 처음에 가격은 안보임
내가 다시 푼 풀이
const checkBoxes = document.querySelectorAll('.checkbx');
        let total = document.getElementById('total');
        let price = 24000;
        total.value = price.toLocaleString() + ' 원'; // 가격을 문자열로 변환하여 할당

        checkBoxes.forEach(box => {
            box.addEventListener('change', function(){
                const value = parseInt(box.value);
                if(box.checked){
                    price += value;
                }else{
                    price -= value;
                }
                total.value = price.toLocaleString() + ' 원'; // 새로운 가격을 문자열로 변환하여 할당
            });
});- 처음에 가격도 보이고 합쳐지기까지 가능
- price는 number로 유지되는데 원하는 곳에서만 문자열 표현으로 변환해서 화면에 보여준것 실제로는 number인 상태
- toLocaleString()함수를 사용해 자동으로 돈의 단위 , 가 들어간다.
위랑 비슷하게 click이벤트로
let price = 24000;
        let total = document.getElementById('total');
        const ckBoxes = document.querySelectorAll('.checkBx');
        total.value = price.toLocaleString() + ' 원';

        ckBoxes.forEach(box => {
            box.addEventListener('click', function(event){
                const target = event.target;//이벤트가 발생한 요소 가리킴(체크박스)
                const value = parseInt(target.value);
                if(target.checked){
                    price += value;//box변수로 요소를 참조하고 있기에 value만 사용하면 됌
                }else{
                    price -= value;
                }
                total.value = price.toLocaleString() + ' 원';
            });
        });
checkbox의 성질 이용한 풀이
var price = 24000;

var sideMenu = document.querySelectorAll(".checkbx");
var total = document.querySelector("#total");
total.value = price+"원";

for(i=0; i<sideMenu.length; i++) {
    sideMenu[i].onclick = function() {
      if(this.checked == true) {
        price += parseInt(this.value);
      }
      else {
         price -= parseInt(this.value);
      }
      total.value = price+"원";
    }
}- 라디오 박스나, 체크 박스는 기본값이 false고, 체크되면 true로 반환한다. 이를 이용해 현재 값을 확인하며 결과를 보여준다.
- 위에서 내가 한것과 다른 점은 parseInt()함수를 사용해 문자열 형식의 값을 숫자로 변환해 연산에 사용했기 때문에 연산이 가능한 것이다.
- parseInt()함수는 문자열을 처음부터 읽어서 정수로 해석할 수 있는 숫자 부분만 추출해서 연산한다. 숫자 이외의 문자가 있다면 무시된다.
- quiz-2.html 문서를 활용해 [반지름] 텍스트 필드에 원의 반지름 값을 입력한 후 [계산]을 누르면 원의 둘레와 원의 넓이를 계산하여 [원둘레] 필드와 [원넓이]필드에 계산한 값을 표시하도록 자바스크립트 소스를 작성하세요.
<!DOCTYPE html>
<html lang="ko">
<head>
    <meta charset="UTF-8">
    <meta name="viewport" content="width=device-width, initial-scale=1.0">
    <meta http-equiv="X-UA-Compatible" content="ie=edge">
    <title>연습문제 2</title>
    <style>
        h1 {
            text-align: center;
        }
        #calc {
            width:300px;
            margin:50px auto;
        }
        #start {
            border:1px solid #222;
            background-color:#eee;
            border-radius:5px;
            margin-left:10px;
            padding:15px 30px;
        }
        hr {
            width:300px;
            margin-left:0;
            margin-top:30px;
            margin-bottom:40px;
        }
        #start {
            cursor: pointer;
        }
        input[type="text"] {
            height:50px;
            border:2px solid #222;
            border-radius:10px;
            padding-left:20px;
        }
        #radius{
            width:150px;
        }
        #round, #area {
            width:300px;
        }
        #calc > p {
            line-height:40px;
        }
    </style>
</head>
<body>
    <h1>원 둘레과 넓이 계산</h1>
    <div id="container">
        <form>
            <div id="calc">
                <p>반지름 : <br>
                    <input type="text" id="radius" name="radius">
                    <span id="start">계산</span>
                </p>
                <hr>
                <p>원둘레 : <br>
                    <input type="text" id="round">
                </p>
                <p>원넓이 : <br>
                    <input type="text" id="area">
                </p>
            </div>
        </form>
    </div>
  </body>
</html>
풀이
<script>
        // let radius = parseFloat(document.querySelector('#radius').value);
        // let round = document.getElementById("round").value;
        // let area = document.getElementById("area").value; 얘네 .value값들은 값을 가져오는 것이기 때문에 아래에서 값 대입이 안됌
        // document.getElementById('start').addEventListener("click", function(){
        //     let cal = 2 * Math.PI * radius;
        //     round = cal.toFixed(2); //둘째 자리까지 표시

        //     cal = Math.PI * Math.pow(radius, 2);
        //     area = cal.toFixed(2);
        // })
        document.getElementById('start').addEventListener("click", function(){
            let radius = parseFloat(document.querySelector('#radius').value);
            let round = document.getElementById("round");
            let area = document.getElementById("area");

            if (!isNaN(radius)) {
                let cal = 2 * Math.PI * radius;
                round.value = cal.toFixed(2); // 둘레 계산

                cal = Math.PI * Math.pow(radius, 2);
                area.value = cal.toFixed(2); // 넓이 계산
            } else {
                alert("반지름 값을 입력하세요.");
            }
        });
    </script>
폼과 자바스크립드 3 문제
- querySelector() 함수는 여러 요소를 한꺼번에 가져와 배열 형태로 저장합니다. (0/X)
- x
- document.querySelector("#b )는 id 값이 billingName인 요소에 접근하는 소스입니다.
- #billingName
- 폼에서 (n ) 속성을 사용해 접근하려면 form 태그뿐만 아니라 접근하려는 폼 요소에 모두 (n ) 속성이 지정되어 있는지 확인해야 합니다.
- name
- 폼 요소에 id나 class, name 같은 속성이 없을 경우 배열을 사용해 접근하는데, 폼에 접근하려면 (f )속성을 사용하고, 폼 요소에 접근하려면 (e )를 사용합니다.
- forms, elements
- 사용자가 [아이디] 필드에 내용을 입력했을 때 바로 입력한 글자 수를 확인하도록 소스를 작성하려면[아이디] 필드에서 (c ) 이벤트를 처리해야 합니다.
- change
- 선택 목록에 있는 항목에서 어떤 항목이 선택되었는지 확인하려면 (s ) 속성을 살펴봅니다.
- selectIndex
- 라디오 버튼 요소나 체크 상자 요소에는 checked 속성이 있는데 기본 값은 ( ) 입니다. 그리고 해당 항목을 선택하면 값이 ( ) 로 바뀝니다.
- false, true
위에서 푼거 다시 풀어보기 처음부터
- 귀찮으니까 css제외하고
피자 사이드 가격 합계
<!DOCTYPE html>
<html lang="ko">
<head>
    <meta charset="UTF-8">
    <meta name="viewport" content="width=device-width, initial-scale=1.0">
    <title>Document</title>
</head>
<body>
    <div id = "container">
        <h1>피자 주문</h1>
        <form action="#">
            <fieldset>
                <legend>사이즈</legend>
                <p>Large - 24,000 원</p>
            </fieldset>
            <fieldset>
                <legend>추가 주문</legend>
                <label><input type="checkbox" name="pickle" class="checkBx" value="800">피클(800원)</label>
                <label><input type="checkbox" name="chilly" class="checkBx" value="300">칠리 소스(300원)</label>
                <label><input type="checkbox" name="deeping" class="checkBx" value="200">디핑 소스(200원)</label>
                <label><input type="checkbox" name="stick" class="checkBx" value="4800">치즈스틱(4개, 4,800원)</label>
                <label><input type="checkbox" name="salad" class="checkBx" value="2400">콘 샐러드(2,400원)</label>
            </fieldset>
            <fieldset>
                <legend>합계</legend>
                <input type="text" id="total" name="total" class="price" readonly>
            </fieldset>
        </form>
    </div>
    <script>
        let price = 24000;
        let total = document.getElementById('total');
        const ckBoxes = document.querySelectorAll('.checkBx');
        total.value = price.toLocaleString() + ' 원';

        ckBoxes.forEach(box => {
            box.addEventListener('click', function(event){
                const target = event.target;//이벤트가 발생한 요소 가리킴(체크박스)
                const value = parseInt(target.value);
                if(target.checked){
                    price += value;//box변수로 요소를 참조하고 있기에 value만 사용하면 됌
                }else{
                    price -= value;
                }
                total.value = price.toLocaleString() + ' 원';
            });
        });
    </script>
</body>
</html>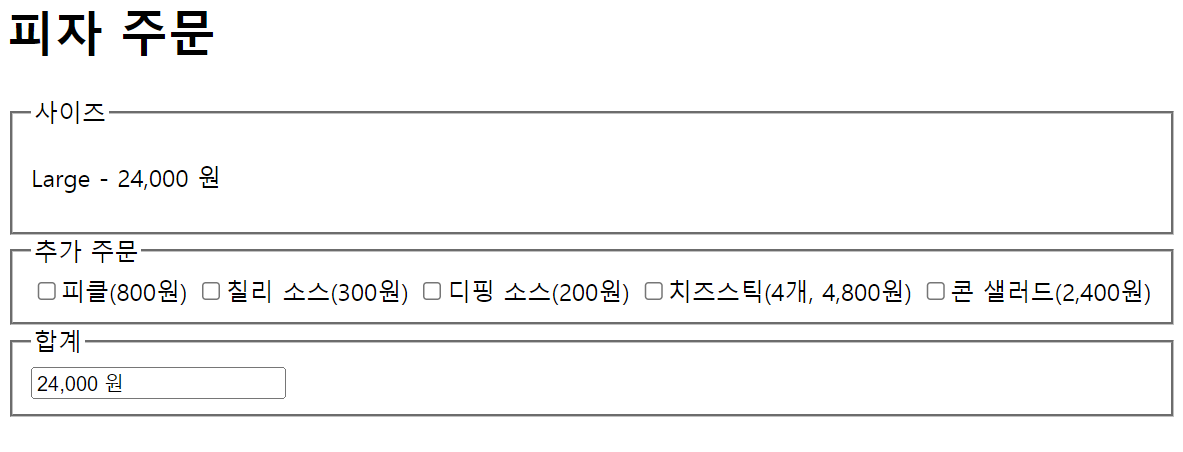
원 계산
<!DOCTYPE html>
<html lang="ko">
<head>
    <meta charset="UTF-8">
    <meta name="viewport" content="width=device-width, initial-scale=1.0">
    <title>Document</title>
</head>
<style>
    input[type="text"]{
        padding: 10px;
        border-radius: 10px;
    }
    #start{
        padding: 5px 10px;
        margin-left: 10px;
        cursor: pointer;
    }
</style>
<body>
    <h1>원 둘레와 넓이 계산</h1>
    <div id = "container">
        <form>
            <div id = calc>
                <p>반지름 : <br>
                    <input type="text" id="radius" name="radius">
                    <button type="button" id = "start">계산</button>
                </p>
                <hr>
                <p>원 둘레 : <br>
                    <input type="text" id="round">
                </p>
                <p>원 넓이 : <br>
                    <input type="text" id="area">
                </p>
            </div>
        </form>
    </div>
    <script>
        let resultPrint = document.getElementById('start');
        let round = document.querySelector('#round');
        let area = document.querySelector('#area');

        resultPrint.addEventListener("click", function(){
            let radius = parseFloat(document.querySelector('#radius').value);
           if(!isNaN(radius)){
            let cal = 2 * Math.PI * radius;
            round.value = cal.toFixed(2);


            cal = Math.PI * Math.pow(radius, 2);
            area.value = cal.toFixed(2);
           }else alert("숫자를 입력하세요.")
        })
    </script>
</body>
</html>- button타입을 지정해주지 않으면 type기본값이 submit이므로, 값이 잠깐 나왔다가 사라지게 된다. 한 0.2초 나왔었나.. 그러므로 타입 설정을 해줘야 한다. >> 기본적으로 폼 제출을 시도하고 있기에 나왔다가 사라짐

브라우저 객체 모델
-
BOM(Browser Object Model) : 웹 브라우저 전체를 객체로 관리한다.
- 자바스크립트 프로그램을 통해 브라우저 창을 관리할 수 있도록 브라우저 요소를 객체화해 놓은 것이다.
브라우저 내장 객체
-
Window : 브라우저 창이 열릴 때마다 하나씩 만들어지는 객체로, 브라우저 창 안에 존재하는 모든 요소의 최상위 객체다.
-
Document : 웹 문서에서 태그를 만나면 만들어지는 객체로, HTML 문서 정보를 가지고 있다.
-
History : 현재 창에서 사용자의 방문 기록을 저장하고 있는 객체다.
-
Location : 현재 페이지에 대한 URL 정보를 가지고 있는 객체다.
-
Navigator : 현재 사용중인 웹 브라우저 정보를 가지고 있는 객체다.
-
Screen : 현재 사용 중인 화면 정보를 다루는 객체다.
Window객체
-
웹 브라우저의 상태를 제어하는 객체 >> 브라우저 창의 정보를 가져올수도, 필요하면 값을 바꿀 수도..
- 속성에 접근하는 방법은 다른 객체와 마찬가지로 객체 이름 뒤에 마침표(.)와 속성 이름을 붙이면 된다.
-
자바스크립트 객체 중 최상위 객체이며, 기본이 되는 객체이다.
-
브라우저 창이 열릴 때마다 하나씩 만들어지는 객체다. 브라우저 창 안에 존재하는 모든 요소의 최상위 객체다.
Window 객체의 모든 속성과 브라우저 호환여부에 대해서는developer.mozilla.org/ko/docs/Web/API/Window를 참조
메서드
- window객체를 기본 객체이므로, window를 생략하고 간단히 alert(), prompt()로 사용할 수 있다.
-
resizeTo() : 인자 안에 음수 값을 사용할 수 없다. 절대값만 줄 수 있다. >> 최종 크기 지정
-
resizeBy() : 는 음수 값을 사용할 수 있다. 현재 기준으로 너비와 높이에 값을 더해준다.
-
moveBy() : x크기와 y크기를 매개변수로, 현재 위치를 기준으로 x픽셀, y픽셀 만큼 옮긴다.
-
moveTo() : x크기와 y크기를 매개변수로, 화면의 왼쪽 위 모서리를 기준으로 x픽셀, y 픽셀 만큼 옮긴다. >> 절대값을 좌표로
-
open() : 현재 창이나 새 탭, 새로운 알림 창 등 다양한 형태로 새창 열기 가능
-
괄호 안에 빈 따옴표만 넣으면 빈문서를 연다.
-
두번째 매개면수는 새 창의 타깃이나 윈도우 이름을 지정하는 부분이다. >> 빈 따옴표만 넣으면 새 탭에 창을 연다.
_self로 지정하면 현재 창에 새 창이 표시_
-
속성
-
console창에 위 속성 키워들르 입력하면 해당 브라우저 창의 상태를 보여준다.(ablut:blank)
-
innerWidth와innerHeight는 웹 사이트 내용 부분의 너비와 높이를 나타낸다.
-
outerWidth 와 outerHeight는 웹 브라우저의 메뉴나 도구 모음 등까지 포함된 너비와 높이를 나타낸다.
열려 있는 브라우저 창의 크기에 따라 달라진다.
-
모달 창 (Modal Window)
이벤트 정보나 공지 내용 등을 표시하기 위해 현재 브라우저 창 위에 띄우는 새로운 창
문서 소스 안에 div 태그를 사용해 삽입하고 레이어로 표시한 창
웹 브라우저에서 알림 창을 차단하더라도 모달 창은 화면에 표시할 수 있다.
브라우저 객체 모델 문제 1
-
다음 브라우저 내장 객체에 대해 기술하시오.
- Window : 브라우저 창이 열릴 때마다 하나씩 만들어지는 객체입니다. 브라우저 창 안에 존재하는 모든 요소의 최상위 객체입니다.
- Document : 웹 문서에서 body 태그를 만나면 만들어지는 객체입니다. HTML 문서 정보를 가지고 있습니다.
- History : 현재 창에서 사용자의 방문 기록을 저장하고 있는 객체입니다.
- Location : 현재 페이지에 대한 URL 정보를 가지고 있는 객체입니다.
- Navigator : 현재 사용중인 웹 브라우저 정보를 가지고 있는 객체입니다.
- Screen : 현재 사용 중인 화면 정보를 다루는 객체입니다.
- Window : 브라우저 창이 열릴 때마다 하나씩 만들어지는 객체입니다. 브라우저 창 안에 존재하는 모든 요소의 최상위 객체입니다.
-
웹 브라우저에서 빈 페이지 실행
- about:blank
-
다음 내용을 입력해 보자.
window.innerWidth;
window.innerHeight;
window.outerWidth;
window.outerHeight; -
"https://www.daum.net"를 새창에서 열어보자.
window.open("https://www.daum.net");
-
새 창으로 빈 문서를 열어보자.
window.open("");
-
open() 함수의 두 번째 매개변수는 새 창의 타깃(Target)이나 윈도우 이름을 지정하는 부분이다.
-
두 번째 매개변수 값을 "_self"로 지정하면 현재 창에 새 창이 표시된다.
window.open("https://www.daum.net", "_self");
-
새창으로 daum을 왼쪽 위에 가로 300px 세로 300px로 띄우자.
window.open("https://www.daum.net", "", "left=0, top=0, width=300, height=300");
-
웹 브라우저로 가로 300, 세로 300의 새창을 만든다.
var newWin = window.open(" ", " ", "width=300, height=300");
-
9번에서 만든 새창의 크기를 가로 100픽셀 세로 100픽셀을 늘린다.
newWin.resizeBy(100, 100);
-
9번에서 반든 새창의 크기를 가로 100픽셀 세로 100픽셀을 줄인다.
newWin.resizeBy(-100, -100);
-
(resizeTo()) 함수는 최종 크기를 지정합니다. 즉 알림 창의 크기를 가로와 세로 각각 200픽셀로 지정하려면 콘솔 창에 다음과 같이 입력하면 된다. resizeBy() 함수에서는 음수 값을 사용할 수 있지만 (resizeTo()) 함수에서는 음수 값을 사용할 수 없습니다.
newWin.resizeTo(200, 200);
-
9번에서 만든 창을 현재 위치에서 가로로 500픽셀만큼, 세로로 500픽셀만큼 이동.
newWin.moveBy(500, 500);
-
9번에서 만든 창을 좌푯값(0,0)으로 옮깁니다.
newWin.moveTo(0, 0);
-
팝업 창이 차단 되었을 때 경고 메시지를 띄운다.
  <!DOCTYPE html>

<html lang="ko">
<head>
    <meta charset="utf-8" />
    <title>팝업 창 표시하기</title>
 </head>
<body>
    <p>이 문서가 열리면 자동으로 팝업 창이 표시됩니다.</p>
    <script>
      function openPop() {
        var newWin = window.open("\popup-result.html", "", "width=400, height=400");
        if(newWin == null) {
          alert("팝업이 차단되어 있습니다. 팝업 차단을 해제하고 새로고침해 주세요.");
            }
        }

        window.onload = openPop;
  </script>
</body>
</html>
<!DOCTYPE html>
<html lang="ko">
<head>
<meta charset="utf-8" />
<title>location 객체</title>
<style>
#content {
border: 2px double skyblue;
border-radius: 10px;
padding: 10px;
}
#content>p {
font-size: 14px;
line-height: 20px;
}
#detail {
text-align: center;
width: 100%;
padding: 10px;
background-color: #eee;
}
#close {
text-align: right;
margin-right: 20px;
}
a:link,
a:visited {
text-decoration: none;
}
a:hover {
background-color: #eee;
}
</style>
</head>
<body>
<div id="content">
<h1>공지사항</h1>
<p>팝업 창에 표시되는 내용</p>
<p>팝업 창에 표시되는 내용</p>
<p>팝업 창에 표시되는 내용</p>
<p>팝업 창에 표시되는 내용</p>
<p>팝업 창에 표시되는 내용</p>
<button id="detail"><a href="#">자세히 보기</a></button>
<p id="close"><a href="javascript:window.close()">창닫기</a></p>
</div>
</body>
</html>-
앵커태그를 이용하여 창닫기.
<a href="javascript:window.close();">창닫기</a><a href="#">창닫기</a>
-
History 객체의 속성과 함수
- length : 속성으로, 현재 브라우저 창의 History 목록에 는 항목의 개수, 즉 방문한 사이트 개수를 반환한다.
- back() : 함수로, History 목록에서 이전 페이지를 현재 화면에 불러온다.
- forward() : History 목록에서 다음 페이지를 현재 화면에 불러온다.
- go() : History 목록에서 현재 페이지를 기준으로 상대 위치에 있는 페이지를 현재 화면에 불러온다.
- 예를 들어 history.go(1)은 다음 페이지를 가져오고, history.go(-1)은 이전 페이지를 불러온다.
-
Location 객체의 속성과 함수
- href : 전체 URL입니다. 이 값을 변경하면 해당 주소로 이동할 수 있습니다.
- search : URL 중 ?(물음표)로 시작하는 검색 내용 부분을 나타냅니다.
- port : URL의 포트 번호를 나타낸다.
- assign() : 현재 문서에 새 문서 주소를 할당해 새 문서를 가져옵니다.
- reload() : 현재 문서를 다시 불러옵니다. 브라우저의 [새로 고침]과 같은 역할을 합니다.
- replace() : 현재 문서의 URL을 지우고 다른 URL의 문서로 교체합니다.
- toString() : 현재 문서의 URL을 문자열로 반환합니다.
-
Window 객체의 innerWidth/innerHeight나 outerWidth/outerHeight 속성은 웹 브라우저 창의 너비나 높이를 측정하고, Screen 객체의 availWidth/availHeight나 width/height 속성은 화면 자체의 너비나 높이를 측정한다는 것입니다. 웹 브라우저 창의 크기를 늘리거나 줄인 후 [새로 고침]을 눌러 보세요. Window 객체의 속성 값은 바뀌지만, Screen 객체의 속성 값은 바뀌지 않습니다.
-
quit-1.html 문서에 20.png 처럼 웹 브라우저에서 문서를 불러오면 자동으로 current.html 문서를 알림 창에 표시하는 소스를 작성하세요. 단 알림 창의 너비는 300픽셀, 높이는 50픽셀입니다. >> 아래 첫번쨰 창을 키면 current창도 팝업창으로 켜짐
<!DOCTYPE html>
<html lang="ko">

<head>
    <meta charset="UTF-8">
    <meta name="viewport" content="width=device-width, initial-scale=1.0">
    <meta http-equiv="X-UA-Compatible" content="ie=edge">
    <title>팝업 창 표시하기</title>
</head>

<body>
    <script>
        window.onload = window.open("current.html", "", "width=300, height=50"); // 빈 따옴표 = 새 탭 _self = 현재 창의 새

        // 아래 방법처럼 displayTime() 함수를 선언한 후 load 이벤트가 발생했을 때 함수를 연결할 수도 있음.
        // window.onload = displayTime();
        // function displayTime() {
        //   window.open("current.html", "", "width=300, height=50");
        // }
    </script>
</body>

</html>
current.html
<!DOCTYPE html>
<html lang="ko">
<head>
  <meta charset="UTF-8">
  <meta name="viewport" content="width=device-width, initial-scale=1.0">
  <title>현재 시각</title>
  <style>
    * {
      margin:0;
      padding:0;
      overflow:hidden;
    }
    #container{
      display:flex;
      justify-content:center;
      align-items:center;
      min-height:100vh;
    }
    p {
      font-size:1.2em;
      font-size:1.5em;
      font-weight:bold;
    }
  </style>
</head>
<body>
  <div id="container">
    <p id="current" class="display"></p>
  </div>

  <script>
    setInterval(displayNow, 1000);  // 1초마다 시간 계산 함수 실행

    function displayNow() {  // 시간 계산 함수
      var now = new Date();     // Date 객체의 인스턴스를 만듦
      var currentTime = now.toLocaleTimeString();     //  toLocaleTmeString() 메서드를 사용해 지역에 맞는 시간을 가져옴

      document.querySelector("#current").innerHTML = currentTime;   // id="current" 인 요소에 현재 시간 표시
    }
  </script>
</body>
</html>- quiz-2.html 문서를 가져와 [새로고침] 버튼을 누를 때마다 웹 문서의 배경색이 달라집니다. 이것을 페이지를 다시 불러오는 형식으로 작성해 보세요.
풀이
<!DOCTYPE html>
<html lang="ko">

<head>
    <meta charset="UTF-8">
    <meta name="viewport" content="width=device-width, initial-scale=1.0">
    <meta http-equiv="X-UA-Compatible" content="ie=edge">
    <title>새로고침 연습</title>
    <style>
        #container {
            width: 500px;
            margin: 20px auto;
            padding: 10px;
        }

        button {
            margin-top: 20px;
            padding: 10px 40px;
            border: 1px solid #ccc;
            background: rgba(253, 234, 234, 0.6);
        }
    </style>
</head>

<body>
    <div id="container">
        <p>현재 문서는 랜덤 배경색을 사용하고 있습니다. </p>
        <p>'새로고침' 버튼을 클릭할 때마다 배경색이 달라질 것입니다.</p>
        <button onclick="location.reload()">새로고침</button>
    </div>
    <script>
        function changeBg() {
            var x = Math.floor(Math.random() * 256);
            var y = Math.floor(Math.random() * 256);
            var z = Math.floor(Math.random() * 256);
            var bgColor = "rgb(" + x + "," + y + "," + z + ")";
            document.body.style.background = bgColor;
        }

        changeBg();
    </script>
</body>

</html>
브라우저 객체 모델 문제 2
-
자바스크립트 프로그램으로 웹 브라우저 창을 관리할 수 있도록 브라우저 요소를 객체화해 놓은 것을 ( ) 이라고 합니다.
- BOM ==브라우저 객체 모델
-
웹 브라우저의 상태를 제어하는 객체로, 자바스크립트 최상위이면서 기본이 되는 객체는 ( ) 객체입니다.
- Window 객체
-
Window 객체의 함수 중 새 탭에 지정한 문서를 열거나 알림 창을 표시하는 데 사용하는 함수는 (o ) 함수입니다.
- open()
-
사용자가 접속한 브라우저 정보를 확인할 때는 Navigator 객체의 속성 중 (u ) 속성 값을 살펴보면 됩니다.
- (navigator.)userAgent
-
브라우저 창의 크기를 현재보다 100픽셀씩 늘리려면 Window 객체의 (r ) 함수를 사용합니다.
-
resizeTo() : 최종 크기 지정 >> 음수 값 사용 불가능 >> 그러므로 현재 문제의 답은 resizeBy()
-
resizeBy() : 현재 브라우저 창의 크기를 기준으로 너비와 높이에 값을 더함 >>음수 값 사용 가능
-
-
( ) 은 웹 문서의 태그와 스타일을 해석해서 브라우저 화면에 표시하는 프로그램으로, 브라우저 안에 포함되어 있습니다.
- 렌더링 엔진
-
사이트를 제작할 때 사용자의 웹 브라우저를 구별하려면 (N ) 객체의 (u ) 속성을 사용합니다.
- Navigator 객체의 userAgent
-
사용자가 접속한 화면에 대한 정보를 담고 있는 객체는 (S ) 객체입니다.
- Screen 객체
-
브라우저 주소 표시줄과 관련된 정보를 담고 있는 객체는 (L ) 객체입니다.
- Location 객체
-
'뒤로' 또는 '앞으로' 버튼을 누르거나 주소 표시줄에 입력해서 돌아다녔던 사이트에 대한 정보를 담고 있는 객체는 (H ) 객체입니다.
- History객체
BOM 예제 : head내부에서 script사용
예제 1
<!DOCTYPE html>
<html>
  <head>
    <title>DOMContentLoaded</title>
    <script>
      // HTML 태그를 쉽게 만들 수 있는 콜백 함수를 선언합니다.
      const h1 = (text) => `<h1>${text}</h1>`
    </script>
    <script>
      document.body.innerHTML += h1('1번째 script 태그')
    </script>
  </head>
  <body>
    <script>
      document.body.innerHTML += h1('2번째 script 태그')
    </script>
    <h1>1번째 h1 태그</h1>
    <script>
      document.body.innerHTML += h1('3번째 script 태그')
    </script>
    <h1>2번째 h2 태그</h1>
  </body>
</html>-
Element : HTML 페이지에 있는 html, head, body, title, h1, div, span 등을 일컫는 단어
-
위에서 1번째 script태그는 출력되지 않는다. head태그 내부에 script를 배치하면 body태그에 있는 문서 객체에 접근할 수 없다.
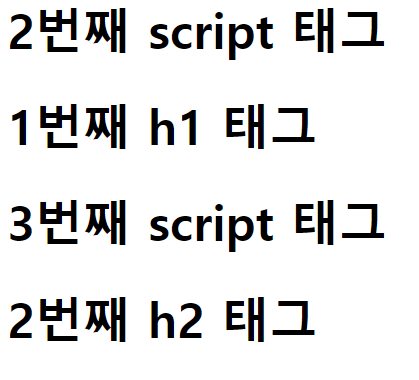
예제 2 - DOMContentLoaded
웹 브라우저가 문서 객체를 모두 읽고 나서 실행하는 이벤트 >> 콜백함수 호출해야 한다.
<!DOCTYPE html>
<html>
  <head>
    <title>DOMContentLoaded</title>
    <script>
      // DOMContentLoaded 이벤트를 연결합니다.
      document.addEventListener('DOMContentLoaded', () => {
        const h1 = (text) => `<h1>${text}</h1>`
        document.body.innerHTML += h1('DOMContentLoaded 이벤트 발생')
        // 문서 객체를 모두 읽어들이면(DOMContentLoaded) 이 콜백함수가 실행된다.
      })
    </script>
  </head>
  <body>

  </body>
</html>- 위 이벤트를 이용해 실행하면 body태그 이전에 script태그가 위치해도 문제없이 코드가 실행된다.
이렇게 body안에서 동작한 것 처럼 가능
<!DOCTYPE html>
<html>
  <head>
    <title></title>
    <script>
      document.addEventListener('DOMContentLoaded', () => {
        // 요소를 읽어들입니다.,
        const header = document.querySelector('h1')

        // 텍스트와 스타일을 변경합니다.
        header.textContent = 'HEADERS'
        header.style.color = 'white'
        header.style.backgroundColor = 'black'
        header.style.padding = '10px'
      })
    </script>
  </head>
  <body>
    <h1></h1>
  </body>
</html>
예제 3 - querySelectorAll()
문서 객체 여러 개를 배열로 읽어들이는 함수로, 활용하려면 forEach등을 통해 반복으로 돌려야 한다.
<!DOCTYPE html>
<html>
  <head>
    <title></title>
    <script>
      document.addEventListener('DOMContentLoaded', () => {
        // 요소를 읽어들입니다.
        const headers = document.querySelectorAll('h1')

        // 텍스트와 스타일을 변경합니다.
        headers.forEach((header) => {
          header.textContent = 'HEADERS'
          header.style.color = 'white'
          header.style.backgroundColor = 'black'
          header.style.padding = '10px'
        })
      })
    </script>
  </head>
  <body>
    <h1></h1>
    <h1></h1>
    <h1></h1>
    <h1></h1>
  </body>
</html>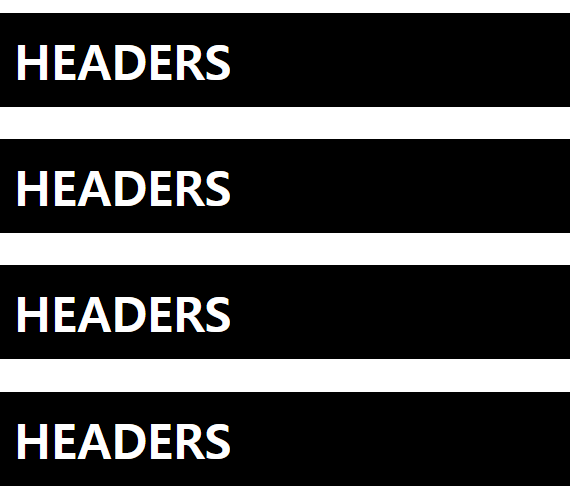
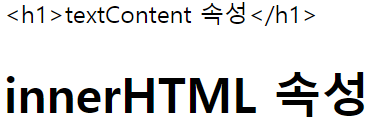
예제 4 - textContent
-
문서 객체.textContent : 입력된 문자열을 그대로 넣는다.
-
문서 객체.innerHTML: 입력된 문자열을 HTML형식으로 넣는다.
<!DOCTYPE html>
<html>
  <head>
    <title></title>
    <script>
      document.addEventListener('DOMContentLoaded', () => {
        const a = document.querySelector('#a')
        const b = document.querySelector('#b')

        a.textContent = '<h1>textContent 속성</h1>'
        b.innerHTML = '<h1>innerHTML 속성</h1>'
      })
    </script>
  </head>
  <body>
    <div id="a"></div>
    <div id="b"></div>
  </body>
</html>- innerText보다 textContent가 최신 속성. 둘 중에 textContent가 성능이 더 좋다.
예제 5 - 속성 조작하기
-
문서객체.setAttribute(속성이름.값) : 특정 속성에 값을 지정한다.
-
문서객체.getAttribute(속성이름) : 특정 속성을 추출한다.
<!DOCTYPE html>
<html>
  <head>
    <title></title>
    <script>
      document.addEventListener('DOMContentLoaded', () => {
        const rects = document.querySelectorAll('.rect')

        rects.forEach((rect, index) => {
          const width = (index + 1) * 100
          const src = `http://placekitten.com/${width}/250`
          rect.setAttribute('src', src)
        })
      })

      /*
        index 값은 [0,1,2,3]이 반복된다. 1을 더해서
        [1,2,3,4]가 되게 만들고, 100을 곱해서 너비가
        [100, 200, 300, 400]이 되게 만든 것이다.
        */
       /*
        추가로 HTML 표준에 정의된 속성은 간단한 사용 방법을 제공합니다. setAttribute()와
        getAttribute() 메소드를 사용하지 않고도 다음과 같이 온점을 찍고 속성을 바로 읽어들이거나
        지정할 수 있습니다.

        rets.forEach((rect, index) =>{
          const width = (index + 1) * 100
          const src = `http://placekitten.com/${width}/250`
          rect.src = src    // 간단하게 사용한 예
        })
       */
    </script>
  </head>
  <body>
    <img class="rect">
    <img class="rect">
    <img class="rect">
    <img class="rect">
  </body>
</html>
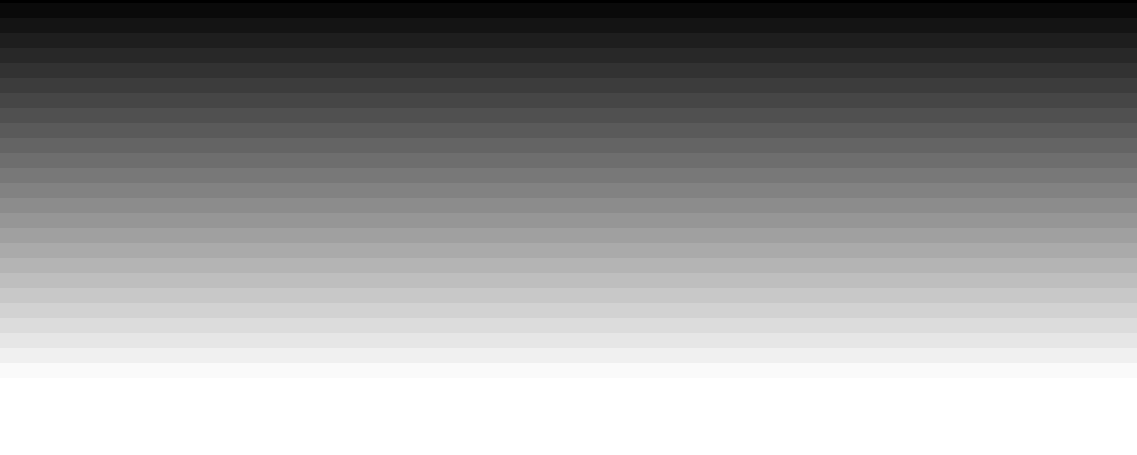
예제 6 - head내부에서 Style 조작하기
<!DOCTYPE html>
<html>
  <head>
    <title></title>
    <script>
      document.addEventListener('DOMContentLoaded', () => {
        const divs = document.querySelectorAll('body > div');

        divs.forEach((div, index) => {
          console.log(div, index);
          const val = index * 10;
          div.style.height = `10px`;
          div.style.backgroundColor = `rgba(${val}, ${val}, ${val})`
        });
      });
    </script>
  </head>
  <body>
    <!-- div 태그 25개 -->
    <div></div><div></div><div></div><div></div><div></div>
    <div></div><div></div><div></div><div></div><div></div>
    <div></div><div></div><div></div><div></div><div></div>
    <div></div><div></div><div></div><div></div><div></div>
    <div></div><div></div><div></div><div></div><div></div>
    <div></div><div></div><div></div><div></div><div></div>
  </body>
</html>-
javascript속성과 같게 사용하면 된다.
예제 7 - head내에서 문서 객체 생성하기
-
document.createElement(문서 객체 이름) : 문서 객체 생성
-
appendChild() : 부모 객체 아래 자식 객체 추가 가능
<!DOCTYPE html>
<html>
  <head>
    <title></title>
    <script>
      document.addEventListener('DOMContentLoaded', () => {
        // 문서 객체 생성하기
        const header = document.createElement('h1')

        // 생성한 태그 조작하기
        header.textContent = '문서 객체 동적으로 생성하기'
        header.setAttribute('data-custom', '사용자 정의 속성')
        header.style.color = 'white'
        header.style.backgroundColor = 'black'

        // h1 태그를 body 태그 아래에 추가하기
        document.body.appendChild(header)
      })
    </script>
  </head>
  <body>

  </body>
</html>
- f12를 눌러서 보면 body안에 지정한 속성대로 정의된 것을 알 수 있음
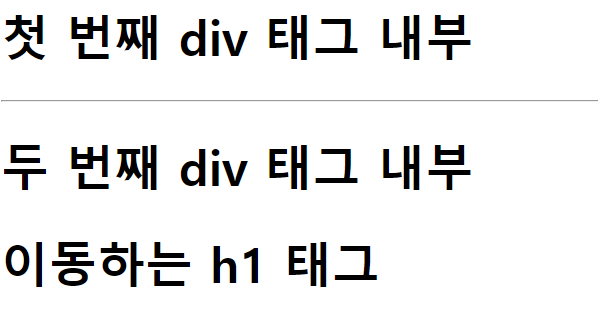
예제 8 - 문서객체 이동하기
- 문서 객체의 부모는 언제나 하나여야 한다. >> 다른 문서 객체에 추가하면 문서 객체가 이동한다.
<!DOCTYPE html>
<html>
  <head>
    <title></title>
    <script>
      document.addEventListener('DOMContentLoaded', () => {
        // 문서 객체 읽어들이고 생성하기
        const divA = document.querySelector('#first')
        const divB = document.querySelector('#second')
        const h1 = document.createElement('h1')
        h1.textContent = '이동하는 h1 태그'

        // 서로 번갈아가면서 실행하는 함수를 구현합니다.
        const toFirst = () => {
          divA.appendChild(h1)
          setTimeout(toSecond, 1000)
        }
        const toSecond = () => {
          divB.appendChild(h1)
          setTimeout(toFirst, 1000)
        }
        toFirst()
      })
    </script>
  </head>
  <body>
    <div id="first">
      <h1>첫 번째 div 태그 내부</h1>
    </div>
    <hr>
    <div id="second">
      <h1>두 번째 div 태그 내부</h1>
    </div>
  </body>
</html>- 이동하는 h1태그가 1초마다 부모가 달라지기 때문에 위치가 달라짐
예제 9 - 문서 객체 제거하기
-
부모 객체.removeChild(자식 객체) : 문서 객체 제거
-
parentNode속성으로 부모 객체에 접근해 제거해야 하므로,
-
문서 객체.parentNode.removeChild(문서 객체)이런 방법으로 사용해한다.
-
<!DOCTYPE html>
<html>
  <head>
    <title></title>
    <script>
      document.addEventListener('DOMContentLoaded', () => {
        setTimeout(() => {
          const h1 = document.querySelector('h1')

    h1.parentNode.removeChild(h1)

          // document.body.removeChild(h1)
          // h1.parentNode가 document.body이므로, 이런 형태로도 제거할 수 있습니다.
        }, 3000)
      })
    </script>
  </head>
  <body>
    <hr>
    <h1>제거 대상 문서 객체</h1>
    <hr>
  </body>
</html>- 시간초를 줘서 3초 뒤에 사라짐
예제 10 - 이벤트 설정하기
- 이벤트가 발생할 때 실행할 함수는 addEventListener() 메소드를 사용한다. >> 이벤트 리스너 == 이벤트 핸들러 라고 한다.
<!DOCTYPE html>
<html>
  <head>
    <title></title>
    <script>
      document.addEventListener('DOMContentLoaded', () => {
        let counter = 0
        const h1 = document.querySelector('h1')

        h1.addEventListener('click', (event) => {
          counter++
          h1.textContent = `클릭 횟수:${counter}`
        })
      })
    </script>
    <style>
      h1{
        /* 클릭을 여러 번 했을 때
           글자가 선택되는 것을 막기 위한 스타일 */
        user-select: none;
      }
      /*
        user-selet 속성을 none 으로 지정하면 해당 태그를 마우스로 드래그하지
        못합니다.
      */
    </style>
  </head>
  <body>
    <h1>클릭 횟수: 0</h1>
  </body>
</html>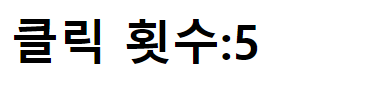
- h1을 클릭하면 횟수가 실시간으로 올라간다.
위 응용
<!DOCTYPE html>
<html>
  <head>
    <title></title>
    <script>
      document.addEventListener('DOMContentLoaded', () => {
        let counter = 0
        let isConnect = false

        const h1 = document.querySelector('h1')
        const p = document.querySelector('p')
        const connectButton = document.querySelector('#connect')
        const disconnectButton = document.querySelector('#disconnect')

        const listener = (event) => {
          h1.textContent = `클릭 횟수: ${counter++}`
        }

        /*
          이벤트를 제거하려면 이벤트 리스너를 변수 또는 상수로
          가지고 있어야 합니다.
        */

        connectButton.addEventListener('click', () => {
          if (isConnect === false) {
            h1.addEventListener('click', listener)
            p.textContent = '이벤트 연결 상태: 연결'
            isConnect = true
          }
        })
        disconnectButton.addEventListener('click', () => {
          if (isConnect === true) {
            h1.removeEventListener('click', listener)
            p.textContent = '이벤트 연결 상태: 해제'
            isConnect = false;
          }
        })
      })
    </script>
    <style>
      h1{
        /* 클릭을 여러 번 했을 때
           글자가 선택되는 것을 막기 위한 스타일 */
        user-select: none;
      }
    </style>
  </head>
  <body>
    <h1>클릭 횟수: 0</h1>
    <button id="connect">이벤트 연결</button>
    <button id="disconnect">이벤트 제거</button>
    <p>이벤트 연결 상태: 해제</p>
  </body>
</html>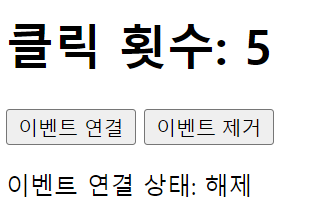
- 이벤트가 연결되면 클릭 횟수가 카운트 되고, 제거하면 카운트 되지 않는다.
실시간으로 입력한 문자 수 세기
- textarea에 글자를 입력하면 글자수를 세어서 출력하자.
키보드 이벤트로 구현 : 아시아권에서는 제대로 동작 x할수도
<!DOCTYPE html>
<html>
  <head>
    <title></title>
    <script>
      document.addEventListener('DOMContentLoaded', () => {
        const textarea = document.querySelector('textarea')
        const h1 = document.querySelector('h1')

        textarea.addEventListener('keyup', (event) => {
          const length = textarea.value.length
          h1.textContent = `글자 수: ${length}`
        })
      })
    </script>
  </head>
  <body>
    <h1></h1>
    <textarea></textarea>
  </body>
</html>
한국어는 제대로 작동 되긴 함
-
keydown : 키가 눌릴 때 실행된다. 키보드를 꾹 누르고 있을 때도, 입력될 때도 실행된다.
-
keypress : 키가 입력되었을 때 실행된다. 하지만 웹 브라우저에 따라서 아시아권의 문자에따라 제대로 처리하지 못하는 문제가 있다.
-
keyup : 키보드에서 키가 떨어질 때 실행된다.
-
그러나 위의 키보드 이벤트는 아시아 문자의 원하는 것을 제대로 구현할 수 없기 때문에 아래에서는 타이머를 사용해서 입력 양식 내부의 글자를 확인해 글자 수를 센다. >> focus이벤트와 blur이벤트 활용
타이머로 구현
<!DOCTYPE html>
<html>
  <head>
    <title></title>
    <script>
      document.addEventListener('DOMContentLoaded', () => {
        const textarea = document.querySelector('textarea')
        const h1 = document.querySelector('h1')
        let timerId

        textarea.addEventListener('focus', (event) => {
          timerId = setInterval(() => {
            const length = textarea.value.length
            h1.textContent = `글자 수: ${length}`
          }, 50)
        })
        textarea.addEventListener('blur', (event) => {
          clearInterval(timerId)
        })
      })
    </script>
  </head>
  <body>
    <h1></h1>
    <textarea></textarea>
  </body>
</html>-
focus : 사용자가 특정 요소를 클릭하거나 탭 키를 이용해 요소로 이동할 떄 발생한다.
-
blur : 다른 요소나 브라우저의 다른 부분을 클릭하거나 탭 키를 이용해 포커스가 해당 요소에서 벗어날 떄 발생한다.
화살표 키를 이용한 별 이동하기
위, 아래, 좌, 우 화살표키를 누르면 별을 이동시키는 소스코드를 작성하자.
<!DOCTYPE html>
<html>
  <head>
    <title></title>
    <script>
      document.addEventListener('DOMContentLoaded', () => {
        // 별의 초기 설정
        const star = document.querySelector('h1')
        star.style.position = 'absolute'

        // 별의 이동을 출력하는 기능
        let [x, y] = [0, 0]
        const block = 20
        const print = () => {
          star.style.left = `${x * block}px`
          star.style.top = `${y * block}px`
        }
        print()

        // 별을 이동하는 기능
        const [left, up, right, down] = [37, 38, 39, 40]
        document.body.addEventListener('keydown', (event) => {
        //   console.log(event.key); 어떻게 움직이는지 확인 가능
          switch (event.key) {
            case "ArrowLeft":
              x -= 1
              break
            case "ArrowUp":
              y -= 1
              break
            case "ArrowRight":
              x += 1
              break
            case "ArrowDown":
              y += 1
              break
          }
          print()
        })
      })
    </script>
  </head>
  <body>
    <h1>★</h1>
  </body>
</html>-
DOMContentLoaded 이벤트를 사용하여 페이지의 모든 DOM 요소가 로드될 때 코드가 실행되도록 한다.
-
별을 나타내는 h1요소를 선택해 CSS position 속성을 absolute로 설정해 절대 위치를 지정한다.
-
x와 y변수를 선언해 별의 초기 위치를 지정하고 이동거리를 나타내는 block변수를 설정한다.
-
print함수는 block값에 따라 별의 위치를 변경하고 left와 top의 css속성을 이용해 별의 위치를 조정한다.
-
이벤트 리스너를 사용하여 키 입력을 감지하고, ArrowLeft, ArrowUp, ArrowRight, ArrowDown 키에 따라 x와 y의 값을 변경하여 별을 이동시킨다.
-
변경된 위치는 print함수를 호출해 실제로 화면에 출력된다.