
오전 문제
웹 브라우저 다루는 방법 1
- 다음 브라우저 내장 객체에 대해 기술하시오.
- window : 브라우저 창이 열릴 때마다 하나씩 만들어지는 객체로, 브라우저 창 안에 존재하는 모든 요소의 최상위 객체다.
- document : 웹 문서에서 body태그를 만나면 만들어지는 객체다. html문서 정보를 가지고 있다.
- history : 현재 창에서 사용자의 방문 기록을 저장하고 있는 객체이다.
- location : 현재 페이지에 대한 URL정보를 가지고 있는 체이다.
- navigator : 현재사용중인 웹 브라우저 정보를 가지고 있는 객체이다.
- screen : 현재 사용 중인 화면 정보를 다루는 객체이다.
- 웹 브라우저에서 빈 페이지 실행
about:blank
- 다음 내용을 입력해 보자.
window.innerWidth;window.innerHeight;window.outerWidth;window.outerHeight;
- "https://www.daum.net"를 새창에서 열어보자.
window.open("https://www.daum.net");
- 새 창으로 빈 문서를 열어보자.
window.open("");
- open() 함수의 두 번째 매개변수는 새 창의 타깃(Target)이나 윈도우 이름을 지정하는 부분이다.
- 두 번째 매개변수 값을 "_self"로 지정하면 현재 창에 새 창이 표시된다.
window.open("https://www.daum.net", "_self");
- 새창으로 daum을 왼쪽 위에 가로 300px 세로 300px로 띄우자.
window.open("https:///www.daum.net", "", "left=0, top=0 width=300, height=300");
- 웹 브라우저로 가로 300, 세로 300의 새창을 만든다.
var newWin = window.open(" ", " ", "width=300, height=300");
- 9번에서 만든 새창의 크기를 가로 100픽셀 세로 100픽셀을 늘린다.
newWin = resizeBy(100, 100);
- 9번에서 반든 새창의 크기를 가로 100픽셀 세로 100픽셀을 줄인다.
newWin = resizeBy(-100, -100);
- ( ) 함수는 최종 크기를 지정합니다. 즉 알림 창의 크기를 가로와 세로 각각 200픽셀로 지정하려면 콘솔 창에 다음과 같이 입력하면 된다. resizeBy() 함수에서는 음수 값을 사용할 수 있지만 ( ) 함수에서는 음수 값을 사용할 수 없습니다.
newWin.resizeTo(200, 200);
- 9번에서 만든 창을 현재 위치에서 가로로 500픽셀만큼, 세로로 500픽셀만큼 이동.
newWin.moveBy(500, 500);
- 9번에서 만든 창을 좌푯값(0,0)으로 옮깁니다.
newWin.moveTo(0, 0);
- 팝업 창이 차단 되었을 때 경고 메시지를 띄운다.
팝업창
<!DOCTYPE html>

<html lang="ko">

<head>
    <meta charset="utf-8" />
    <title>location 객체</title>
    <style>
        #content {
            border: 2px double skyblue;
            border-radius: 10px;
            padding: 10px;
        }

        #content>p {
            font-size: 14px;
            line-height: 20px;
        }

        #detail {
            text-align: center;
            width: 100%;
            padding: 10px;
            background-color: #eee;
        }

        #close {
            text-align: right;
            margin-right: 20px;
        }

        a:link,
        a:visited {
            text-decoration: none;
        }

        a:hover {
            background-color: #eee;
        }
    </style>
</head>

<body>
    <div id="content">
        <h1>공지사항</h1>
        <p>팝업 창에 표시되는 내용</p>
        <p>팝업 창에 표시되는 내용</p>
        <p>팝업 창에 표시되는 내용</p>
        <p>팝업 창에 표시되는 내용</p>
        <p>팝업 창에 표시되는 내용</p>
        <button id="detail"><a href="#">자세히 보기</a></button>
        <p id="close"><a href="javascript:wind
차단되었을 때 경고 메시지
 <!DOCTYPE html>

<html lang="ko">
<head>
    <meta charset="utf-8" />
    <title>팝업 창 표시하기</title>
 </head>
<body>
    <p>이 문서가 열리면 자동으로 팝업 창이 표시됩니다.</p>
    <script>
      function openPop() {
        var newWin = window.open("\popup-result.html", "", "width=400, height=400");
        if(newWin == null) {
          alert("팝업이 차단되어 있습니다. 팝업 차단을 해제하고 새로고침해 주세요.");
            }
        }

        window.onload = openPop;
  </script>
</body>
</html>-
앵커태그를 이용하여 창닫기.
-
<a href="javascript:window.close();">창닫기<\a> -
<a href="#">창닫기</a>
-
-
History 객체의 속성과 함수
-
length : (속성) , 현재 브라우저 창의 History 목록에 있는 항목의 개수, 즉 방문한 사이트 개수를 반환한다.
-
back() : (함수), History목록에서 이전 페이지를 현재 화면에 불러온다.
-
forward() : History 목록에서 다음 페이지를 현재 화면에 불러온다.
-
go() : History 목록에서 현재 페이지를 기준으로 상대 위치에 있는 페이지를 현재 화면에 불러온다.
- 예를 들어 history.go(1)은 다음 페이지를 가져오고, history.go(-1)은 이전 페이지를 불러온다.
-
-
Location 객체의 속성과 함수
-
href : (속성) 전체 URL로, 이 값을 변경하면 해당 주소로 이동할 수 있다.
-
search : URL중 ?(물음표)로 시작하는 검색 내용 부분을 나타낸다.
-
port : URL의 포트 번호를 나타낸다.
-
assign() : 현재 문서에 새 문서 주소를 할당해 새 문서를 가져온다.
-
relaod() : (함수) 현재 문서를 다시 불러온다. 브라우저의 [새로 고침]과 같은 역할을 한다.
-
replace() : 현재 문서의 URL을 지우고 다른 URL의 문서로 교체한다.
-
toString() : 현재 문서의 URL을 문자열로 반환한다.
-
-
Window 객체의 innerWidth/innerHeight나 outerWidth/outerHeight 속성은 웹 브라우저 창의 너비나 높이를 측정하고, Screen 객체의 availWidth/availHeight나 width/height 속성은 화면 자체의 너비나 높이를 측정한다는 것입니다. 웹 브라우저 창의 크기를 늘리거나 줄인 후 [새로 고침]을 눌러 보세요. Window 객체의 속성 값은 바뀌지만, Screen 객체의 속성 값은 바뀌지 않습니다.
다루는 방법 2
- quiz-1.html 문서에 1.png 처럼 웹 브라우저에서 문서를 불러오면 자동으로 current.html 문서를 알림 창에 표시하는 소스를 작성하세요. 단 알림 창의 너비는 300픽셀, 높이는 50픽셀입니다.
- Example파일을 열면 Example2가 팝업창은 나옴
<!DOCTYPE html>
<html lang="ko">
<head>
    <meta charset="UTF-8">
    <meta name="viewport" content="width=device-width, initial-scale=1.0">
    <title>팝업 창 표시하기</title>
</head>
<body>
   <script>
    window.onload = window.open("Example2.html", "", "width=300 height=50");
   </script>
</body>
</html>
Example2
<!DOCTYPE html>
<html lang="ko">
<head>
    <meta charset="UTF-8">
    <meta name="viewport" content="width=device-width, initial-scale=1.0">
    <title>현재 시각</title>
    <style>
         * {
      margin:0;
      padding:0;
      overflow:hidden;
    }
    #container{
      display:flex;
      justify-content:center;
      align-items:center;
      min-height:100vh;
    }
    p {
      font-size:1.2em;
      font-size:1.5em;
      font-weight:bold;
    }
    </style>
</head>
<body>
    <div id="container">
        <p id="current" class="display"></p>
    </div>
    <script>
        setInterval(displayNow, 1000);

        function displayNow(){
            var now = new Date();
            let currentTime = now.toLocaleTimeString();
            document.querySelector("#current").innerHTML = currentTime;
        }
    </script>
</body>
</html>- quiz-2.html 문서를 가져와 [새로고침] 버튼을 누를 때마다 웹 문서의 배경색이 달라집니다. 이것을 페이지를 다시 불러오는 형식으로 작성해 보세요.
풀이
<!DOCTYPE html>
<html lang="ko">

<head>
    <meta charset="UTF-8">
    <meta name="viewport" content="width=device-width, initial-scale=1.0">
    <meta http-equiv="X-UA-Compatible" content="ie=edge">
    <title>새로고침 연습</title>
    <style>
        #container {
            width: 500px;
            margin: 20px auto;
            padding: 10px;
        }

        button {
            margin-top: 20px;
            padding: 10px 40px;
            border: 1px solid #ccc;
            background: rgba(253, 234, 234, 0.6);
            cursor: pointer;
        }
    </style>
</head>

<body>
    <div id="container">
        <p>현재 문서는 랜덤 배경색을 사용하고 있습니다. </p>
        <p>'새로고침' 버튼을 클릭할 때마다 배경색이 달라질 것입니다.</p>
        <button onclick="location.reload()">새로고침</button>
    </div>
    <script>
        function changeBg(){
            let x = Math.floor(Math.random() * 256);
            let y = Math.floor(Math.random() * 256);
            let z = Math.floor(Math.random() * 256);
            let bgColor = "rgb("+ x + "," + y + "," + z + ")";
            document.body.style.backgroundColor = bgColor;
        }
        changeBg();
    </script>
</body>

</html>/body>

</html>
</body>
</html>
다루는 방법 3
-
자바스크립트 프로그램으로 웹 브라우저 창을 관리할 수 있도록 브라우저 요소를 객체화해 놓은 것을 () 이라고 합니다.
- BOM - 브라우저 객체 모델
-
웹 브라우저의 상태를 제어하는 객체로, 자바스크립트 최상위이면서 기본이 되는 객체는 () 객체입니다.
- Window객체
-
Window 객체의 함수 중 새 탭에 지정한 문서를 열거나 알림 창을 표시하는 데 사용하는 함수는 (o ) 함수입니다.
- open()
-
사용자가 접속한 브라우저 정보를 확인할 때는 Navigator 객체의 속성 중 (u ) 속성 값을 살펴보면 됩니다.
- (navigator).userAgent
-
브라우저 창의 크기를 현재보다 100픽셀씩 늘리려면 Window 객체의 (r ) 함수를 사용합니다.
- resizeBy()
-
() 은 웹 문서의 태그와 스타일을 해석해서 브라우저 화면에 표시하는 프로그램으로, 브라우저 안에 포함되어 있습니다.
- 렌더링 엔진
-
사이트를 제작할 때 사용자의 웹 브라우저를 구별하려면 (N ) 객체의 (u ) 속성을 사용합니다.
- Navigator > userAgent
-
사용자가 접속한 화면에 대한 정보를 담고 있는 객체는 (S ) 객체입니다.
- Screen 객체
-
브라우저 주소 표시줄과 관련된 정보를 담고 있는 객체는 (L ) 객체입니다.
- Location 객체
-
'뒤로' 또는 '앞으로' 버튼을 누르거나 주소 표시줄에 입력해서 돌아다녔던 사이트에 대한 정보를 담고 있는 객체는 (H ) 객체입니다
- History 객체
문자 글자 수 세기
<!DOCTYPE html>
<html lang="ko">

<head>
    <meta charset="UTF-8">
    <meta name="viewport" content="width=device-width, initial-scale=1.0">
    <title>문자 글자 수 세기</title>
    <script>
        document.addEventListener('DOMContentLoaded', () => {
            const textarea = document.querySelector('textarea');
            const h1 = document.querySelector('h1');
            let timerId;

            textarea.addEventListener('focus', (event) => {
                timerId = setInterval(() => {
                    const length = textarea.value.length;
                    h1.textContent = `글자 수 : ${length}`
                }, 50);
            });
            textarea.addEventListener('blur', (event) => {
                clearInterval(timerId);
            });
        });
    </script>
</head>

<body>
    <h1></h1>
    <textarea></textarea>

</body>

</html>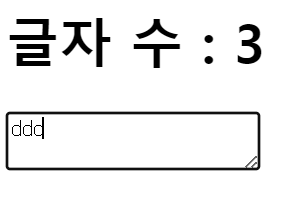
화살표키로 별 이동시키기
<!DOCTYPE html>
<html>
  <head>
    <title></title>
    <script>
      document.addEventListener('DOMContentLoaded', () => {
        // 별의 초기 설정
        const star = document.querySelector('h1')
        star.style.position = 'absolute'

        // 별의 이동을 출력하는 기능
        let [x, y] = [0, 0]
        const block = 20
        const print = () => {
          star.style.left = `${x * block}px`
          star.style.top = `${y * block}px`
        }
        print()

        // 별을 이동하는 기능
        const [left, up, right, down] = [37, 38, 39, 40]
        document.body.addEventListener('keydown', (event) => {
        //   console.log(event.key); 어떻게 움직이는지 확인 가능
          switch (event.key) {
            case "ArrowLeft":
              x -= 1
              break
            case "ArrowUp":
              y -= 1
              break
            case "ArrowRight":
              x += 1
              break
            case "ArrowDown":
              y += 1
              break
          }
          print()
        })
      })
    </script>
  </head>
  <body>
    <h1>★</h1>
  </body>
</html>
BOM 문제
-
( ) 이벤트는 웹 브라우저가 문서 객체를 모두 읽고 나서 실행하는 이벤트이다.
HTML5부터 추가된 이벤트이다. 이전에는 load 이벤트를 썼다.DOMContentLoaded
-
글자 조작하기
속성 이름 설명
문서 객체.( ) 입력된 문자열을 그대로 넣습니다.
문서 객체.( ) 입력된 문자열을 HTML 형식으로 넣습니다.-
textContent -
innerHTML
-
-
3.png를 참고하여 다음 소스코드를 완성하자.
 <!DOCTYPE html>

   <html>
   <head>
    <title></title>
    <script>
        document.addEventListener('DOMContentLoaded', () => {
        const divs = document.querySelectorAll('body > div');

        divs.forEach((div, index) => {
          console.log(div, index);
          const val = index * 10;
          div.style.height = `10px`;
          div.style.backgroundColor = `rgba(${val}, ${val}, ${val})`
        });
      });
    </script>

   </head>
   <body>
    <!-- div 태그 25개 -->
    <div></div><div></div><div></div><div></div><div></div>
    <div></div><div></div><div></div><div></div><div></div>
    <div></div><div></div><div></div><div></div><div></div>
    <div></div><div></div><div></div><div></div><div></div>
    <div></div><div></div><div></div><div></div><div></div>
    <div></div><div></div><div></div><div></div><div></div>
   </body>
</html>-
4-1.png와 4-2.png를 참고하여
h1태그를 동적으로 만들어서. 1초마다 태그의 위치를 바꾸자.<!DOCTYPE html> <html> <head> <title></title> <script> document.addEventListener('DOMContentLoaded', () => { // 문서 객체 읽어들이고 생성하기 const divA = document.querySelector('#first') const divB = document.querySelector('#second') const h1 = document.createElement('h1') h1.textContent = '이동하는 h1 태그' // 서로 번갈아가면서 실행하는 함수를 구현합니다. const toFirst = () => { divA.appendChild(h1) setTimeout(toSecond, 1000) } const toSecond = () => { divB.appendChild(h1) setTimeout(toFirst, 1000) } toFirst() }) </script> </head> <body> <div id="first"> <h1>첫 번째 div 태그 내부</h1> </div> <hr> <div id="second"> <h1>두 번째 div 태그 내부</h1> </div> </body> </html> -
h1 태그를 3초후에 제거하는 자바스크립트를 완성하자.
 <h1>제거 대상 문서 객체</h1>
   <!DOCTYPE html>
   <html>
   <head>
    <title></title>
    <script>
    </script>
   </head>
   <body>
    <hr>
    <h1>제거 대상 문서 객체</h1>
    <hr>
   </body>
</html>- 6-1.png, 6-2.png, 6-3.png를 참고하여 이벤트 연결 버튼을 클릭하면
클릭 횟수를 클릭했을 때 카운트가 올라가게 하고 단락태그에는
"이벤트 연결 상태 : 연결" 이라고 출력한다.
이벤트 제거 버튼을 클릭하면 클릭횟수를 클릭해도 카운트가 올라가지 않게 하고
단락태그에는 "이벤트 연결 상태 : 해제"라고 출력한다.
이벤트 발생 객체 > 중요
예제 1 : 글자 수 실시간으로 보여주는
<!DOCTYPE html>
<html>
  <head>
    <title></title>
    <script>
      document.addEventListener('DOMContentLoaded', () => {
        const textarea = document.querySelector('textarea')
        const h1 = document.querySelector('h1')

        textarea.addEventListener('keyup', (event) => {
          const length = textarea.value.length
          h1.textContent = `글자 수: ${length}`
        })
      })

      // textarea는 문서 객체 변수로 문서 객체의 value 속성을 추출합니다.
    </script>
  </head>
  <body>
    <h1></h1>
    <textarea></textarea>
  </body>
</html>
예제 2
- 프로그램 규모가 커지게 되면 listener를 외부로 뺼 수 있다.
textarea is not defined
<!DOCTYPE html>
<html>
  <head>
    <title></title>
    <script>
      const listener = (event) => {
        const length = textarea.value.length
        // 현재 블록에서는 textarea 변수를 사용할 수 없습니다.
        h1.textContent = `글자 수 : ${length}`
      }

      document.addEventListener('DOMContentLoaded', () => {
        const textarea = document.querySelector('textarea')
        const h1 = document.querySelector('h1')

        textarea.addEventListener('keyup', listener)
      })
      // 이벤트 리스너가 외부로 분리되었습니다.

    </script>
  </head>
  <body>
    <h1></h1>
    <textarea></textarea>
  </body>
</html>- textarea는 익명함수에서 선언한 지역변수 이므로, listener함수에서 사용할 수 없다.
이벤트 리스너 내부에서 변수에 접근할 수 없는 경우
 <script>
      document.addEventListener('DOMContentLoaded', () => {
        const textarea = document.querySelector('textarea')
        const h1 = document.querySelector('h1')

        textarea.addEventListener('keyup', (event) => {
          const length = textarea.value.length
          h1.textContent = `글자 수: ${length}`
        })
      })

      // textarea는 문서 객체 변수로 문서 객체의 value 속성을 추출합니다.
</script>-
화살표 함수에서 this는 window객체를 의미한다.
-
event.currentTarget은 이벤트가 발생한 DOM을 의미하므로 textarea를 의미한다.
이벤트 리스너를 외부로 빼낸 경우
-
프로그램 규모가 커질 때 외부로 분리하는 경우가 많아진다.
-
이때 이벤트를 발생시킨 객체에 접근 방법은 2가지가 있다
-
event.currentTarget 속성을 사용한다. >> 익명함수(화살표 함수), fuction함수에서 모두 사용 가능하다.
- event.target 속성도 사용 가능한데
event.currentTarget속성과 다른 점은event.target은 실제로 이벤트를 발생 시킨 요소를 가리키고,event.currentTarget은 현재 이벤트 핸들러가 연결된 요소를 가리킨다는 차이점이 있다.
- event.target 속성도 사용 가능한데
-
this 키워드를 사용한다. >> 화살표 함수에서는 접근할 수 없고 (화살표 함수에서 this는 window객체이므로), function(){} 형태로 함수를 선언한 경우에 사용 가능하다.
-
외부로 빼낸 경우
 <script>
      const listener = (event) => {
        const length = textarea.value.length
        // 현재 블록에서는 textarea 변수를 사용할 수 없습니다.
        h1.textContent = `글자 수 : ${length}`
      }

      document.addEventListener('DOMContentLoaded', () => {
        const textarea = document.querySelector('textarea')
        const h1 = document.querySelector('h1')

        textarea.addEventListener('keyup', listener)
      })
      // 이벤트 리스너가 외부로 분리되었습니다.

    </script>
event.currentTarget 사용하는 경우
 <script>
      const listener = (event) => {//발생한 해당 event로 처리 방법
        const length = event.currentTarget.value.length
        // 현재 블록에서는 textarea 변수를 사용할 수 없습니다.
        const h1 = document.querySelector('h1')
        h1.textContent = `글자 수 : ${length}`
      }

      document.addEventListener('DOMContentLoaded', () => {
        const textarea = document.querySelector('textarea')
        textarea.addEventListener('keyup', listener)
      })
      // 이벤트 리스너가 외부로 분리되었습니다.

    </script>
라이브러리와 프레임워크에 따라서 선호하는 형태가 다릅니다. 라이브러리와 프레임워크를 사용할 경우에는 해당 라이브러리와 프레임워크의 문서를 살펴보면서 어떤 형태가 더 일반적으로 사용되는지 확인하고 활용하기
이벤트 발생 객체 문제
textarea의 글자의 길이를 출력할 수 있게 하자.
화살표 함수
<!DOCTYPE html>
<html>

<head>
    <title></title>
    <script>
        const listener = (event) => {
            //이것도 가능 const length = document.querySelector('textarea').value.length;
       const length = event.currentTarget.value.length; // textarea의 글자의 길이 값을 가져오자.
            const h1 = document.querySelector('h1');
            h1.textContent = `글자 수 : ${length}`
        }

        document.addEventListener('DOMContentLoaded', () => {
            const textarea = document.querySelector('textarea')
            textarea.addEventListener('keyup', listener)
        })
        // 이벤트 리스너가 외부로 분리되었습니다.

    </script>
</head>

<body>
    <h1></h1>
    <textarea></textarea>
</body>

</html>- 화살표 함수에서 this를 사용하면 window객체를 가르키고 있기 때문에 사용할 수 없고, event.currentTarget을 사용해서 이벤트가 발생한 객체를 지정할 수 있다.
function함수
<!DOCTYPE html>
<html>
  <head>
    <title></title>
    <script>
      const listener = function(event) {
        const length = this.value.length;// textarea의 글자의 길이 값을 가져오자.
        const h1 = document.querySelector('h1')
        h1.textContent = `글자 수 : ${length}`
      }

      document.addEventListener('DOMContentLoaded', () => {
        const textarea = document.querySelector('textarea')
        textarea.addEventListener('keyup', listener)
      })
      // 이벤트 리스너가 외부로 분리되었습니다.

    </script>
  </head>
  <body>
    <h1></h1>
    <textarea></textarea>
  </body>
</html>- function함수에서는 this객체를 사용할 수 있기 때문에 이벤트가 발생한 객체가 들어왔으니 this를 사용해서 글자 길이의 값을 가져올 수 있다.
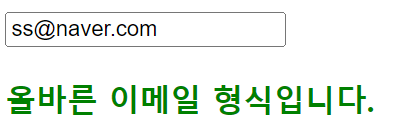
js로 이메일 형식 체크하는 방법
<!DOCTYPE html>
<html lang="ko">

<head>
    <meta charset="UTF-8">
    <meta name="viewport" content="width=device-width, initial-scale=1.0">
    <title>이메일 형식 체크</title>
    <script>
        document.addEventListener('DOMContentLoaded', () => {
            const email = document.querySelector('input[type="email"]');
            const message = document.querySelector('h3');

            email.addEventListener('input', function () {
                const email = this.value;
                const isValid = checkEmail(email);

                if (isValid) {
                    message.textContent = '올바른 이메일 형식입니다.';
                    message.style.color = 'green';
                } else {
                    message.textContent = '올바르지 않은 이메일 형식입니다.';
                    message.style.color = 'red';
                }
            })
        });
        function checkEmail(email) {
            const pattern = /^[a-zA-Z0-9._%+-]+@[a-zA-Z0-9.-]+\.[a-zA-Z]{2,}$/;
            return pattern.test(email);
        }
    </script>
</head>

<body>
    <input type="email" placeholder="이메일을 입력하세요.">
    <h3></h3>
</body>

</html>- js에서 정규표현식을 사용하려면 '/' 슬래시를 사용해 정규식을 정의한다.
- test() : 정규 표현식을 사용해 문자열을 검사하는 메서드로, 문자열이 해당 정규 표현식와 일치하는지 여부를 확인하고 boolean으로 반환한다.
정규식.test(문자열)
- input이벤트를 사용해 사용자가 입력란에 값을 입력할 떄 마다 실시간으로 형식이 체크된다.

선생님 풀이
<!DOCTYPE html>
<html>
  <head>
    <title></title>
    <script>
      document.addEventListener('DOMContentLoaded', () => {
        const input = document.querySelector('input')
        const p = document.querySelector('p')
        const isEmail = (value) => {
          // 골뱅이를 갖고 있고 && 골뱅이 뒤에 점이 있다면
          return (value.indexOf('@') > 1)//false를 반환하면 &&이므로 뒤는 검사 안함
            && (value.split('@')[1].indexOf('.') > 1)
        }

        input.addEventListener('keyup', (event) => {
          const value = event.currentTarget.value
          if (isEmail(value)) {
            p.style.color = 'green'
            p.textContent = `이메일 형식입니다: ${value}`
          } else {
            p.style.color = 'red'
            p.textContent = `이메일 형식이 아닙니다: ${value}`
          }
        })
      })
    </script>
  </head>
  <body>
    <input type="text">
    <p></p>
  </body>
</html>-
split() : 괄호 안을 기준으로 새로운 배열을 생성 >> ['hong', 'naver.com']
-
indexOf() : 괄호 안을 기준으로 인덱스 값을 반환 >> @를 기준으로 생성한 배열에 .이 어느 인덱스에 있는지 >> @naver. 한다면 인덱스 5를 반환
- '@' 문자를 기준으로 분할한 뒤, 두 번째 부분(도메인)에서 '.' 문자가 최소한 두 번째 위치(index 1부터 시작) 이후에 나타나는지를 확인
-
keyup : 사용자가 키보드의 키를 누를 때 발생하는 이벤트이다. >> input과 같이 키를 누르는 즉시 입력 내용을 확인할 수 있기 때문에 실시간으로 반응하는 것이 가능하다.
@의 인덱스를 1보다 크게 한 이유는 아이디가 한글자이지 않기 때문에 1보다 크게끔 줬다.
- 배열에 1부터 10까지 넣자.
배열에 a부터 z까지 넣자.
그리고 각각의 값을 출력하자.
<!DOCTYPE html>
<html lang="ko">

<head>
    <meta charset="UTF-8">
    <meta name="viewport" content="width=device-width, initial-scale=1.0">
    <title>Document</title>
    <script>
        document.addEventListener('DOMContentLoaded', () => {

            // 1부터 10까지의 숫자를 담은 배열 생성
            const numbers = [];
            for (let i = 1; i <= 10; i++) {
                numbers.push(i);
            }

            // 알파벳 a부터 z까지의 문자를 담은 배열 생성
            const alphabets = [];
            for (let i = 97; i <= 122; i++) {
                alphabets.push(String.fromCharCode(i));
            }
            document.getElementsByTagName('p')[0].innerHTML = numbers.join(", ");
            document.getElementsByTagName('p')[1].innerHTML = alphabets.join(", ");
        });
    </script>
</head>

<body>
    <p></p>
    <p></p>
</body>

</html>
선생님 풀이
<!DOCTYPE html>
<html lang="ko">
<head>
    <meta charset="UTF-8">
    <meta name="viewport" content="width=device-width, initial-scale=1.0">
    <title>Document</title>
</head>
<body>
    <script>
        let temp = Array(10).fill(0);
        console.log(temp);
        let temp1 = Array(10).fill();   // 10개 짜리 배열을 undefined로 채운다.
        console.log(temp1);
        let temp2 = Array(10).fill().map((v,i)=>i+1);//value, index들어감 (1~10까지의 배열 생성)
        console.log(temp2);
        let temp3 = String.fromCharCode(65); // 유니코드 값을 문자열로 변환시킨다.
        console.log(temp3);
        let temp4 = "A".charCodeAt();   // 문자를 유니코드 값으로 변환시킨다.
        console.log(temp4);

        let arr = Array(26).fill().map((v,i)=>String.fromCharCode(i+97));
        //소문자 A~Z까지 배열로 생성
        console.log(arr);
    </script>
</body>
</html>-
길이가 10인 배열을 생성 후 0으로 채운다.
-
map()메서드를 사용하면서 1~10인 배열로 초기화 할 수 있다.
-
let temp2 = Array(10).fill().map((v,i)=>i+1); -
fromCharCode(): 괄호 안에 유니코드 값을 넣으면 문자열로 변환 -
.charCodeAt(): .앞에 유니코드 값으로 변환시킬 문자를 넣어 유니코드 값으로 변환
-
문서 객체 모델 문제
- multiSelect.png를 참고하여 선택한 것을 출력하는 예제를 만들자.
내 풀이
<!DOCTYPE html>
<html lang="ko">

<head>
    <meta charset="UTF-8">
    <meta name="viewport" content="width=device-width, initial-scale=1.0">
    <title>Document</title>
    <script>
        document.addEventListener('DOMContentLoaded', function () {
            const food = document.querySelector('#foodList');
            const output = document.querySelector('p');

            food.addEventListener('change', function () {
                const selectedOptions = Array.from(this.selectedOptions).map(a => a.value);
                output.textContent = `선택된 음식 : ${selectedOptions.join(', ')}`;
            });
        });

    </script>
</head>

<body>
    <select id="foodList" multiple>
        <option value="떡볶이">떡볶이</option>
        <option value="순대">순대</option>
        <option value="오뎅">오뎅</option>
        <option value="튀김">튀김</option>
    </select>
    <p></p>
</body>

</html>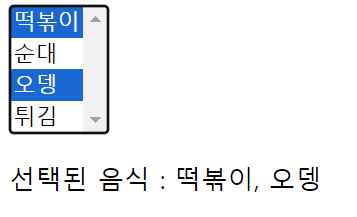
선생님 풀이
<!DOCTYPE html>
<html>
  <head>
    <title></title>
    <script>
      document.addEventListener('DOMContentLoaded', () => {
        const select = document.querySelector('select')
        const p = document.querySelector('p')

        select.addEventListener('change', (event) => {
          const options = event.currentTarget.options
          const list = []
          for (const option of options) {
            if (option.selected) {
              list.push(option.textContent)
            }
          }
          p.textContent = `선택: ${list.join(',')}` //배열을 문자열로 변
        })
      })
    </script>
  </head>
  <body>
    <select multiple>
      <option>떡볶이</option>
      <option>순대</option>
      <option>오뎅</option>
      <option>튀김</option>
    </select>
    <p></p>
  </body>
</html>

<!--
  options 속성에는 forEach() 메소드가 없습니다.
  따라서 위와 같이 반복문을 돌려야 합니다.
-->- 수치변환1,2,3,4.png를 참고하여 프로그램을 작성하자.
내 풀이
<!DOCTYPE html>
<html lang="ko">
<head>
    <meta charset="UTF-8">
    <meta name="viewport" content="width=device-width, initial-scale=1.0">
    <title>수치 변환</title>
    <script>
        document.addEventListener('DOMContentLoaded', () => {
            const num = document.querySelector('#number');
            const figure = document.querySelector('#figure');
            const result = document.querySelector('span');

            const calculate = () => {
                  // input 또는 select 요소가 변경될 때마다 결과를 업데이트하는 이벤트 리스너 등록
                num.addEventListener('input', updateResult);
                figure.addEventListener('change', updateResult);
            }
            // 입력 값이 변경될 때마다 결과를 업데이트하는 함수
            function updateResult() {
                const selectedOption = figure.value;
                let value = 0;

                if (selectedOption === 'mm') {
                    value = parseFloat(num.value) * 10;
                } else if (selectedOption === 'm') {
                   value = parseFloat(num.value) * 0.01;
                } else {
                    value = parseFloat(num.value) * 0.394;
                }
                // 소수점 두 자리까지 보이도록 변환
                result.textContent = value.toFixed(2);
                result.style.display = 'inline';
            }
            calculate();
            updateResult();
        });
    </script>
</head>
<body>
    <div class="container" style="display: flex; align-items: center;">
        <input type="text" id="number" >
        <p style="margin-left: 10px;">cm =
            <span></span>
            <select name="" id="figure" style="margin-left: 10px;">
                <option value="mm">mm</option>
                <option value="m">m</option>
                <option value="inch">inch</option>
            </select>
        </p>
    </div>
</body>
</html>- 자꾸 아래 사진처럼 NaN이뜸...흠 근데 또 값을 입력하면 괜찮아 지고.. 그래서 num

해결!
<!DOCTYPE html>
<html lang="ko">
<head>
    <meta charset="UTF-8">
    <meta name="viewport" content="width=device-width, initial-scale=1.0">
    <title>수치 변환</title>
    <script>
        document.addEventListener('DOMContentLoaded', () => {
            const num = document.querySelector('#number');
            const figure = document.querySelector('#figure');
            const result = document.querySelector('span');

            const event = () => {
                  // input 또는 select 요소가 변경될 때마다 결과를 업데이트하는 이벤트 리스너 등록
                num.addEventListener('input', updateResult);
                figure.addEventListener('change', updateResult);
            }
            // 입력 값이 변경될 때마다 결과를 업데이트하는 함수
            function updateResult() {
                const selectedOption = figure.value;
                let value = 0;

                if (selectedOption === 'mm') {
                    value = parseFloat(num.value) * 10;
                } else if (selectedOption === 'm') {
                   value = parseFloat(num.value) * 0.01;
                } else {
                    value = parseFloat(num.value) * 0.394;
                }
                // 소수점 두 자리까지 보이도록 변환
                result.textContent = isNaN(value) ? '0.00' : value.toFixed(2);
            }
            event();
            updateResult();
        });
    </script>
</head>
<body>
    <div class="container" style="display: flex; align-items: center;">
        <input type="text" id="number" >
        <p style="margin-left: 10px;">cm =
            <span>0.00</span>
            <select name="" id="figure" style="margin-left: 10px;">
                <option value="mm">mm</option>
                <option value="m">m</option>
                <option value="inch">inch</option>
            </select>
        </p>
    </div>
</body>
</html>- 삼항 연산자 사용해서 넣어줬다
- option에서의 value 속성은 해당 옵션이 선택되었을 때 실제 서버로 전송되는 값이므로, 사용자에게 보여지는 텍스트와 다를 수 있다.
- 서버에서 해당 값을 처리하거나 데이터를 구하는 용도로도 사용 가능하다.(선생님 풀이 처럼) >> 프론트와 백엔드 간의 데이터 교환을 위해 사용


선생님 풀이
<!DOCTYPE html>
<html>
  <head>
    <title></title>
    <script>
      document.addEventListener('DOMContentLoaded', () => {
        let 현재값
        let 변환상수 = 10

        const select = document.querySelector('select')
        const input = document.querySelector('input')
        const span = document.querySelector('span')

        const calculate = () => {
          span.textContent = (현재값 * 변환상수).toFixed(2)
        }

        select.addEventListener('change', (event) => {
          const options = event.currentTarget.options
          const index = event.currentTarget.options.selectedIndex
          변환상수 = Number(options[index].value)
          calculate()
        })

        input.addEventListener('keyup', (event) => {
          현재값 = Number(event.currentTarget.value)
          calculate()
        })
      })
    </script>
  </head>
  <body>
    <input type="text"> cm =
    <span></span>
    <select>
      <option value="10">mm</option>
      <option value="0.01">m</option>
      <option value="0.393701">inch</option>
    </select>
  </body>
</html>- 타이머 활성화 체크박스를 클릭하면 타이머가 작동하도록 하고, 타이머 활성화 체크박스를 해제하면 타이머를 멈추자. (타이머1.png, 타이머2.png 참고)
<!DOCTYPE html>
<html>
  <head>
    <title></title>
    <script>
      document.addEventListener('DOMContentLoaded', () => {
        let [timer, timerId] = [0, 0];
        const h1 = document.querySelector('h1');
        const checkbox = document.querySelector('input');

        checkbox.addEventListener('change', (event) => {
          if (event.currentTarget.checked) {
            // 체크 상태
            timerId = setInterval(() => {
              timer += 1;
              h1.textContent = `${timer}초`
            }, 1000);
          } else {
            // 체크 해제 상태
            clearInterval(timerId);
          }
        });
      });
    </script>
  </head>
  <body>
    <input type="checkbox">
    <span>타이머 활성화</span>
    <h1></h1>
  </body>
</html>-
let [timer, timerID] = [0,0];: 배열 해체 할당을 통해 배열에서 값을 초기화 해주고, 추출하여 개별 변수에 할당해 변수로서 사용도 가능하다.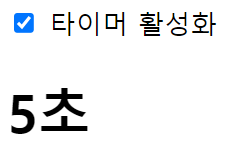
- 페이지에 있는 모든 이미지 위에서 오른쪽 클릭했을 때 나오는 메뉴(contextmenu)를 비활성화 하자.
참고 event.preventDefault() 활용
<!DOCTYPE html>
<html>
  <head>
    <title></title>
    <script>
      document.addEventListener('DOMContentLoaded', () => {
        const imgs = document.querySelectorAll('img');//노드리스트 형태로 반

        imgs.forEach((img) => {
          img.addEventListener('contextmenu', (event) => {
            event.preventDefault()  // 컨텍스트 메뉴를 출력하는 기본 이벤트를 제거합니다.
          });
        });
      });
    </script>
  </head>
  <body>
    <img src="http://placekitten.com/300/300" alt="">
  </body>
</html>-
contextmenu : 우클릭 했을 때 나오는 메뉴(컨텍스트 메뉴)의 이벤트
-
preventDefault() : 기본 이벤트(어떤 이벤트가 발생했을 때 웹 브라우저가 기본적으로 처리해주는 이벤트)를 막는다.
- 우클릭을 눌러도 아무 반응이 없다. >> 인터넷에서 이미지 불펌(불법 + 퍼옴의 합성어) 방지 등을 구현할 때 사용하는 코드이므로 기억해두면 유용하게 활용
- 링크활성화.png를 참고하여, 체크박스에 체크가 되어 있으면 링크가 활성화 되게 하고, 체크박스에 체크가 되어 있지 않으면 링크가 비활성화되게 하자.
<!DOCTYPE html>
<html>
  <head>
    <title></title>
    <script>
      document.addEventListener('DOMContentLoaded', () => {
        let status = false

        const checkbox = document.querySelector('input')
        checkbox.addEventListener('change', (event) => {
          status = event.currentTarget.checked
        });//화살표 함수여서 this 사용 x 위와 같이 사

        const link = document.querySelector('a')
        link.addEventListener('click', (event) => {
          if (!status) {
            event.preventDefault()
          }
        })
      })
    </script>
  </head>
  <body>
    <input type="checkbox">
    <span>링크 활성화</span>
    <br>
    <a href="http://hanbit.co.kr">한빛미디어</a>
  </body>
</html>

<!--
  checked 속성은 boolean 자료형입니다. 체크 상태에 따라 true 또는 false를 반환합니다.
-->- preventDefault() : 기본 이벤트(어떤 이벤트가 발생했을 때 웹 브라우저가 기본적으로 처리해주는 이벤트)를 막는다.
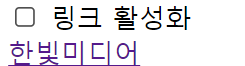
활성화를 시켜야 링크가 연결됌
링크를 클릭했을 때 이동하는 것, 제출 버튼을 눌렀을 때 이동하는 것 등이 모두 기본 이벤트의 예이다.
문서 객체 예제
예제 1 : 숫자 인치 계산
<!DOCTYPE html>
<html>
  <head>
    <title></title>
    <script>
      document.addEventListener('DOMContentLoaded', () => {
        const input = document.querySelector('input')
        const button = document.querySelector('button')
        const p = document.querySelector('p')

        button.addEventListener('click', () => {
          // 입력을 숫자로 변환합니다.
          const inch = Number(input.value)
          // 숫자가 아니라면 바로 리턴합니다. >> 조기 리턴
          if (isNaN(inch)) {
            p.textContent = '숫자를 입력해주세요'
            return
          }
          // 변환해서 출력합니다.
          const cm = inch * 2.54
          p.textContent = `${cm} cm`
        })
      })
    </script>
  </head>
  <body>
    <input type="text"> inch<br>
    <button>계산</button>
    <p></p>
  </body>
</html>- isNaN() 함수의 결과가 true로 나오는 숫자가 아닌 경우 바로 return 키워드로 리턴해서 이후의 코드를 실행하지 않는다. >> 조기 리턴(early return)
- else 키워드를 사용할 수 있지만, 들여쓰기 단계를 하나 줄일 수 있어 코드가 깔끔해진다.
예제 2: 이메일 형식
<!DOCTYPE html>
<html>
  <head>
    <title></title>
    <script>
      document.addEventListener('DOMContentLoaded', () => {
        const input = document.querySelector('input')
        const p = document.querySelector('p')
        const isEmail = (value) => {
          // 골뱅이를 갖고 있고 && 골뱅이 뒤에 점이 있다면
          return (value.indexOf('@') > 1)
            && (value.split('@')[1].indexOf('.') > 1)
        }

        input.addEventListener('keyup', (event) => {
          const value = event.currentTarget.value
          if (isEmail(value)) {
            p.style.color = 'green'
            p.textContent = `이메일 형식입니다: ${value}`
          } else {
            p.style.color = 'red'
            p.textContent = `이메일 형식이 아닙니다: ${value}`
          }
        })
      })
    </script>
  </head>
  <body>
    <input type="text">
    <p></p>
  </body>
</html>- change 이벤트 : 사용자가 입력하는 중에는 change 이벤트가 발생하지 않아 keyup이벤트로 실시간 처리했다.
예제 3 : 선택한 select option 화면에 출력
<!DOCTYPE html>
<html>
  <head>
    <title></title>
    <script>
      document.addEventListener('DOMContentLoaded', () => {
        const select = document.querySelector('select')
        const p = document.querySelector('p')

        select.addEventListener('change', (event) => {
          const options = event.currentTarget.options
          const index = event.currentTarget.options.selectedIndex

          p.textContent = `선택: ${options[index].textContent}`
        })
      })
    </script>
  </head>
  <body>
    <select>
      <option>떡볶이</option>
      <option>순대</option>
      <option>오뎅</option>
      <option>튀김</option>
    </select>
    <p>선택: 떡볶이</p>
  </body>
</html>
예제 3-2 : 위를 배열에 넣어 반복문으로 출력
<!DOCTYPE html>
<html>
  <head>
    <title></title>
    <script>
      document.addEventListener('DOMContentLoaded', () => {
        const select = document.querySelector('select')
        const p = document.querySelector('p')

        select.addEventListener('change', (event) => {
          const options = event.currentTarget.options
          const list = []
          for (const option of options) {
            if (option.selected) {
              list.push(option.textContent)
            }
          }
          p.textContent = `선택: ${list.join(',')}`
        })
      })
    </script>
  </head>
  <body>
    <select multiple>
      <option>떡볶이</option>
      <option>순대</option>
      <option>오뎅</option>
      <option>튀김</option>
    </select>
    <p></p>
  </body>
</html>- options 속성에는 forEach() 메소드가 없어서, 위와 같이 반복문을 돌려야 한다.
예제 4 : 라디오버튼을 선택하면 해당 값 화면에 출력
<!DOCTYPE html>
<html>
  <head>
    <title></title>
    <script>
      document.addEventListener('DOMContentLoaded', () => {
        // 문서 객체 추출하기
        const output = document.querySelector('#output')
        const radios = document.querySelectorAll('[name=pet]')//속성 선택자

        // 모든 라디오 버튼에 / 노드 리스트에는 forEach존재
        radios.forEach((radio) => {
          // 이벤트 연결
          radio.addEventListener('change', (event) => {
            const current = event.currentTarget
            if (current.checked) {
              output.textContent = `좋아하는 애완동물은 ${current.value}이시군요!`
            }
          })
        })
      })
    </script>
  </head>
  <body>
    <h3># 좋아하는 애완동물을 선택해주세요</h3>
    <input type="radio" name="pet" value="강아지">
    <span>강아지</span>
    <input type="radio" name="pet" value="고양이">
    <span>고양이</span>
    <input type="radio" name="pet" value="햄스터">
    <span>햄스터</span>
    <input type="radio" name="pet" value="기타">
    <span>기타</span>
    <hr>
    <h3 id="output"></h3>
  </body>
</html>
예제5 : 기본 이벤트 막기 >> 위에서 했던거
<!DOCTYPE html>
<html>
  <head>
    <title></title>
    <script>
      document.addEventListener('DOMContentLoaded', () => {
        const imgs = document.querySelectorAll('img')

        imgs.forEach((img) => {
          img.addEventListener('contextmenu', (event) => {
            event.preventDefault()  // 컨텍스트 메뉴를 출력하는 기본 이벤트를 제거합니다.
          })
        })
      })
    </script>
  </head>
  <body>
    <img src="http://placekitten.com/300/300" alt="">
  </body>
</html>
localStroage 객체
-
웹 브라우저가 기본적으로 제공하는 객체
-
localStorage.getItem(키) : 저장된 값을 추출합니다. 없으면 undefined가 나온다. 객체의 속성을 추출하는 일반적인 형태로 localStorage.키 또는 localStorage[키] 형태로 사용할 수도 있다.
-
localStorage.setItem(키, 값) : 값을 저장합니다. 이전과 마찬가지로 객체에 속성을 지정하는일반적인 형태를 사용할 수도 있습니다.
-
localStorage.removeItem(키) : 특정 키의 값을 제거합니다.
-
localStorage.clear() : 저장된 모든 값을 제거합니다.
localStorage처럼 웹 브라우저가 제공해주는 기능을 웹 API라고 부른다.
-
<!DOCTYPE html>
<html>
<head>
<title></title>
<script>
document.addEventListener('DOMContentLoaded', () => {
const p = document.querySelector('p')
const input = document.querySelector('input')
const button = document.querySelector('button')
const savedValue = localStorage.getItem('input')
// localStorage.input도 가능합니다.
if (savedValue) {
input.value = savedValue
p.textContent = `이전 실행 때의 마지막 값: ${savedValue}`
}
input.addEventListener('keyup', (event) => {
const value = event.currentTarget.value
localStorage.setItem('input', value)
// localStorage.input = value도 가능합니다.
})
button.addEventListener('click', (event) => {
localStorage.clear()
input.value = ''
})
})
</script>
</head>
<body>
<p></p>
<button>지우기</button>
<input type="text">
</body>
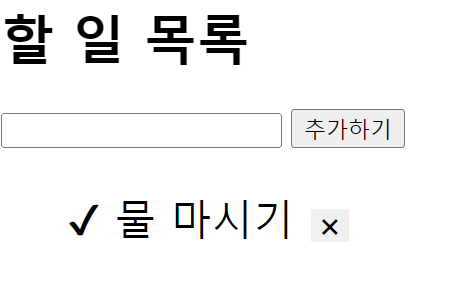
</html>할일 목록 만들기 : keyup, keypress차이점
-
keypress : 사용자가 키를 누르는 순간 발생하고, 이벤트는 반복되는 키 입력에 응답하지 않는다. >> 문자를 출력하는 키에 대한 이벤트로, 입력한 문자에 대한 유니코드 값을 반환한다. >>> 특정 문자의 입력을 감지하고자 한다면 이 속성을 사용
-
keyup : 사용자카 키를 누르고 놓을 때 발생하고, 이벤트는 반복되는 키 입력에도 응답한다. >> 모든 키에 대한 이벤트로, 특수키를 포함해 누른 키의 코드 값을 반환한다.(키보드의 물리적인 위치를 나타냄) >>> 모든 키 입력에 대해 반응해야 할때 이 속성을 사용
내 풀이
<!DOCTYPE html>
<html lang="ko">

<head>
    <meta charset="UTF-8">
    <meta name="viewport" content="width=device-width, initial-scale=1.0">
    <title>할 일목록 만들기</title>

    <script>
        document.addEventListener('DOMContentLoaded', () => {
            const input = document.querySelector('#input');
            const add = document.querySelector('[type=submit]');
            const todo = document.querySelector('#todoList');

            add.addEventListener('click', addToList);
            input.addEventListener('keypress', function (event) {
                if (event.key === 'Enter') {
                    event.preventDefault(); // 엔터키로 폼 전송 방지
                    addToList();
                }
            });

            function addToList() {
                if (input.value.trim() === "") {
                    alert("할 일을 입력해주세요.");
                    return;
                }

                makeList(input.value);
            }

            function makeList(list) {
                const listItem = document.createElement("li");
                const span = document.createElement("span");
                const removeButton = document.createElement("button"); // x 모양 버튼
                removeButton.textContent = '✖'; // x 모양
                span.textContent = "✔"; // 체크 모양
                removeButton.style.border = 'none';


                // 마우스 이벤트를 모두 등록
                span.addEventListener('mouseenter', function () {
                    this.style.color = '#ccc';
                    this.style.cursor = 'pointer';
                });
                span.addEventListener('mouseleave', function () {

                    this.style.color = '#222';
                    this.style.cursor = '';
                });

                removeButton.addEventListener('mouseenter', function () {
                    this.style.color = '#ccc';
                    this.style.cursor = 'pointer';
                });
                removeButton.addEventListener('mouseleave', function () {
                    this.style.color = '#222';
                    this.style.cursor = '';
                });

                removeButton.style.marginLeft = '10px'; // 왼쪽 마진 추가

                removeButton.addEventListener('click', function () {
                    listItem.remove(); // 해당 항목 제거
                });

                span.addEventListener('click', function (event) {
                    if (event.target === span) { // 클릭된 요소가 span인 경우에만 처리
                        if (listItem.classList.contains('checked')) {
                            listItem.classList.remove('checked');
                            listItem.style.color = ''; // 원래 색으로
                            listItem.style.textDecoration = '';
                            removeButton.style.color = '';
                        } else {
                            listItem.classList.add('checked');
                            listItem.style.color = '#ccc';
                            listItem.style.textDecoration = 'line-through';
                            removeButton.style.color = '#ccc'; // 체크 버튼 색상 변경
                        }
                    }

                });

                listItem.appendChild(span);
                listItem.appendChild(document.createTextNode(" " + list)); // 공백과 함께 할 일 텍스트 추가
                listItem.appendChild(removeButton); // x 모양 버튼 추가
                todo.appendChild(listItem);
                input.value = "";
            }
        });
    </script>
</head>

<body>
    <h1>할 일 목록</h1>
    <div id="container">
        <input type="text" id="input">
        <input type="submit" value="추가하기">
    </div>
    <ul id="todoList" style="list-style: none; font-size: 25px;"></ul>
</body>

</html>- span인 체크 버튼 색 까지는 변경 못했다..
체크해서 span색 변경, 대신 hover역할은 안됌
<!DOCTYPE html>
<html lang="ko">
<head>
    <meta charset="UTF-8">
    <meta name="viewport" content="width=device-width, initial-scale=1.0">
    <title>할 일 목록</title>
    <script>
        document.addEventListener('DOMContentLoaded', () => {
            const text = document.querySelector('input[type="text"]');
            const submit = document.querySelector('input[type="submit"]');
            const todo = document.querySelector('#todoList');

            submit.addEventListener('click', addTodoList);

            text.addEventListener('keypress', (event) => {
                if(event.key === 'Enter'){
                    event.preventDefault();
                    addTodoList();
                }
            });

            function addTodoList(){
                if(text.value.trim() === ""){
                    alert("할 일을 입력해주세요.");
                    return;
                }
                makeList(text.value);
            }

            function makeList(text){
                const listItem = document.createElement("li");
                const span = document.createElement("span");
                const removeButton = document.createElement("button");

                removeButton.textContent = '✖';
                removeButton.style.marginLeft = '10px';
                removeButton.style.cursor = 'pointer';
                removeButton.style.border = 'none';
                span.textContent = "✔";
                span.style.cursor = 'pointer';

                // span.addEventListener('mouseenter', function() {
                //     this.style.color = '#ccc';

                // });
                // span.addEventListener('mouseleave', function() {
                //     this.style.color = '#222';
                // });
                removeButton.addEventListener('mouseenter', function() {
                    this.style.color = '#ccc';

                });
                removeButton.addEventListener('mouseleave', function() {
                    this.style.color = '#222';
                });
                removeButton.addEventListener('click', () => {
                    todo.removeChild(listItem);
                });

                span.addEventListener('click', (event) => {
                    console.log(event.target);
                    console.log(event.target === span);
                    if(event.target === span){
                        if(listItem.classList.contains('checked')){
                            listItem.classList.remove('checked');
                            listItem.style.color = ''; // 원래 색으로
                            listItem.style.textDecoration = '';
                            removeButton.style.color = '';
                            event.target.style.color = '#222';

                        } else{
                            listItem.classList.add('checked');
                            listItem.style.color = '#ccc';
                            listItem.style.textDecoration = 'line-through';
                            removeButton.style.color = '#ccc';
                            event.target.style.color = '#ccc';
                        }
                    }
                });
              listItem.appendChild(span);
              listItem.appendChild(document.createTextNode(" " + text));
              listItem.appendChild(removeButton);
              todo.appendChild(listItem);
              text.value = "";
            }
        });

    </script>
</head>
<body>
    <h1>할 일 목록</h1>
    <div id="container">
        <input type="text">
        <input type="submit" value="추가하기">
    </div>
    <ul id="todoList" style="list-style: none; font-size: 20px;"></ul>
</body>
</html>
결과물 : 해결책
<!DOCTYPE html>
<html lang="ko">
<head>
    <meta charset="UTF-8">
    <meta name="viewport" content="width=device-width, initial-scale=1.0">
    <title>할 일 목록</title>
    <style>
        .checked {
            color: grey;
        }
        .unchecked {
            color: black;
        }
    </style>
    <script>
        document.addEventListener('DOMContentLoaded', () => {
            const text = document.querySelector('input[type="text"]');
            const submit = document.querySelector('input[type="submit"]');
            const todo = document.querySelector('#todoList');

            submit.addEventListener('click', addTodoList);

            text.addEventListener('keypress', (event) => {
                if(event.key === 'Enter'){
                    event.preventDefault();
                    addTodoList();
                }
            });

            function addTodoList(){
                if(text.value.trim() === ""){
                    alert("할 일을 입력해주세요.");
                    return;
                }
                makeList(text.value);
                text.value = "";
            }

            function makeList(todoText){
                const listItem = document.createElement("li");
                const span = document.createElement("span");
                const removeButton = document.createElement("button");

                removeButton.textContent = '✖';
                removeButton.style.marginLeft = '10px';
                removeButton.style.cursor = 'pointer';
                removeButton.style.border = 'none';
                span.textContent = "✔";
                span.classList.add('unchecked'); // 초기 상태는 unchecked
                span.style.cursor = 'pointer';

                span.addEventListener('mouseenter', function() {
                    this.style.color = '#ccc';

                });
                span.addEventListener('mouseleave', function() {
                    this.classList.contains('checked') ? this.style.color = 'grey' : this.style.color = 'black';
                });
                removeButton.addEventListener('mouseenter', function() {
                    this.style.color = '#ccc';

                });
                removeButton.addEventListener('mouseleave', function() {
                    this.style.color = '#222';
                });
                removeButton.addEventListener('click', () => {
                    todo.removeChild(listItem);
                });

                span.addEventListener('click', () => {
                    if(listItem.classList.contains('checked')){
                        listItem.classList.remove('checked');
                        listItem.style.textDecoration = 'none';
                        span.classList.remove('checked');
                        span.classList.add('unchecked');
                    } else {
                        listItem.classList.add('checked');
                        listItem.style.textDecoration = 'line-through';
                        span.classList.add('checked');
                        span.classList.remove('unchecked');
                    }
                });

                listItem.appendChild(span);
                listItem.appendChild(document.createTextNode(" " + todoText));
                listItem.appendChild(removeButton);
                todo.appendChild(listItem);
            }
        });
    </script>
</head>
<body>
    <h1>할 일 목록</h1>
    <div id="container">
        <input type="text">
        <input type="submit" value="추가하기">
    </div>
    <ul id="todoList" style="list-style: none; font-size: 20px;"></ul>
</body>
</html>
선생님 풀이
<!DOCTYPE html>
<html>
  <head>
    <title></title>
  </head>
  <body>
    <h1>할 일 목록</h1>
    <input id="todo">
    <button id="add-button">추가하기</button>
    <div id="todo-list">
    </div>
  <script>
    document.addEventListener('DOMContentLoaded', () => {
      // 문서 객체를 가져옵니다.
      const input = document.querySelector('#todo')
      const todoList = document.querySelector('#todo-list')
      const addButton = document.querySelector('#add-button')

      // 변수를 선언합니다.
      let keyCount = 0

      // 함수를 선언합니다.
      const addTodo = () => {
        // 입력 양식에 내용이 없으면 추가하지 않습니다.
        if (input.value.trim() === '') {
          alert('할 일을 입력해주세요.')
          return
        }

        // 문서 객체를 설정합니다.
        const item = document.createElement('div')
        const checkbox = document.createElement('input')
        const text = document.createElement('span')
        const button = document.createElement('button')

        // 문서 객체를 식별할 키를 생성합니다.
        const key = keyCount
        keyCount += 1

        // item 객체를 조작하고 추가합니다.
        item.setAttribute('data-key', key)
        item.appendChild(checkbox)
        item.appendChild(text)
        item.appendChild(button)
        todoList.appendChild(item)

        // checkbox 객체를 조작합니다.
        checkbox.type = 'checkbox'
        checkbox.addEventListener('change', (event) => {
          item.style.textDecoration
            = event.target.checked ? 'line-through' : ''
        })

        // text 객체를 조작합니다.
        text.textContent = input.value

        // button 객체를 조작합니다.
        button.textContent = '제거하기'
        button.addEventListener('click', () => {
          removeTodo(key)
        })

        // 입력 양식의 내용을 비웁니다.
        input.value = ''
      }

      const removeTodo = (key) => {
        // 식별 키로 문서 객체를 제거합니다.
        const item = document.querySelector(`[data-key="${key}"]`)
        todoList.removeChild(item)
      }

      // 이벤트 연결
      addButton.addEventListener('click', addTodo)
      input.addEventListener('keyup', (event) => {
        // 입력 양식에서 Enter 키를 누르면 바로 addTodo() 함수를 호출합니다.
        const ENTER = 13
        if (event.keyCode === ENTER) {
          addTodo()
        }
      })
    })
  </script>
  </body>
</html>
단축평가 문제
다음의 실행 결과는?
(크롬에서 주소표시줄에 about:blank을 타이핑하고 F12를 console창에서 확인하시오.
-
console.log('Cat' && 'Dog');
- Dog
-
console.log('Cat' || 'Dog');
- Cat
-
console.log(true || 'anything');
- true
-
console.log(false || 'anything');
- anything
-
console.log(true && 'anything');
- anything
-
console.log(false && 'anything');
- false
-
var done = true;
var message = '';
if (done) message = '완료';
message = done && '완료';
console.log(message);
- 완료
- var done = false;
var message = '';
if (done) message = '미완료'
message = done || '미완료';
console.log(message);
- 미완료
-
var done = true;
var message = '';
if (done) message = '완료'
else message = '미완료'
console.log(message);message = done ? '완료' : '미완료';
console.log(message);
- 둘다 완료
- var elem = null;
var value = elem.value; // TypeError: Cannot read property 'value' of null
- typeError
- var elem = null;
// elem이 null이나 undefined와 같은 Falsy 값이면 elem으로 평가
// elem이 Truthy 값이면 elem.value로 평가
var value = elem && elem.value;
- null
- // 단축 평가를 사용한 매개변수의 기본값 설정
function getStringLength(str) {
str = str || '';
return str.length;
}
- getStringLength(); // 0
- getStringLength('hi'); // 2
12-1
// ES6의 매개변수의 기본값 설정
function getStringLength(str = '') {
return str.length
}
- getStringLength(); >> 0
- getStrringLength('hi'); >> 2
- var elem = null; // elem이 null또는 undefined이면 undefined 반환, 그렇지 않으면 우항의 프로퍼티 참조를 이어감
var value = elem?.value;
console.log(value);
- undefined
- var elem = null;
// elem이 Falsy 값이면 elem으로 평가, elem이 Truthy 값이면 elem.value로 평가
var value = elem&&elem.value;
console.log(value);
- null
- var str = '';
var length = str && str.length;
// 문자열의 길이를 참조하지 못함
console.log(length);
- ''
- var str = '';
var length = str?.length;
console.log(length);
- 0
- var foo = null ?? 'default string';
console.log(foo);
- "default string"
- var foo = '' || 'default string';
console.log(foo);
- "default string"
- var foo = '' ?? 'default string';
console.log(foo);
''