❔ App router로 변환하는 방법
- app 디렉토리 안에
page.js 파일을 만들어서 공개적으로 접근 가능한 URL 경로를 만든다.
(app router는 page router보다 우선시 되며 디렉토리 간에 라우팅이 겹칠 경우 충돌을 방지하기 위해 빌드 시 에러를 발생시킨다.) - 기본적으로 app 디렉토리 내부의 컴포넌트는 리액트의
서버 컴포넌트로 동작한다.(성능 최적화 적용 가능)- 클라이언트 컴포넌트로 사용하고 싶다면 최상단에 "
use client"로 정의하면 된다.
- 클라이언트 컴포넌트로 사용하고 싶다면 최상단에 "
📝 파일 규칙
| 파일명(.js, jsx, .tsx) | 설명 |
|---|---|
| layout | 세그먼트와 그 자식들에 대한 공유하는 UI. 레이아웃 파일 |
| page | 라우트의 고유한 UI(페이지)를 만들고 공개적으로 접근 가능하게 만드는 파일 |
| loading | 세그먼트와 그 자식들에 대한 로딩 UI |
| not-found | 세그먼트와 그 자식들에 대한 404 UI |
| error/global-error | 세그먼트와 그 자식들에 대한 에러 UI. 글로벌 에러 UI |
| route | 서버 측 API 엔드포인트(기존 pages의 api 폴더 역할) |
| template | 커스텀 된(리렌더링) 레이아웃 UI(상태유지X) |
페이지와 레이아웃
- Page.js : Route의 유일하게 UI를 보여줄 수 있는 페이지
- 기본적으로 서버 컴포넌트로 구성되며 따로 클라이언트 컴포넌트 설정이 가능하다.
- Layouts : 여러 pages 간에 공유되는 UI
- 상태 보존, 인터렉티브 유지, 리렌더링 되지 않는다.
- 모든 페이지에 공유되는 Root Layout는 필수로 생성해야 한다.
- child layout이나 child page가 있는 경우에는 항상 children props를 설정해주어야 한다.
- Templates : 템플릿은 레이아웃과 비슷하게 layout, page를 감싸지만 상태 유지는 안됨.(새로운 인스턴스 생성)
- 특별한 상황이 아닌 경우 , Layout 사용이 권장된다.
- layout.js와 page.js 파일은 같은 폴더에 정의 가능하며, layout.js는 항상 page.js를 감싸는 구조
export default function RootLayout({
  children,
}: {
  children: React.ReactNode
}) {
  return (
    <html lang="en">
      <body>{children}</body>
    </html>
  )
}
라우트 그룹
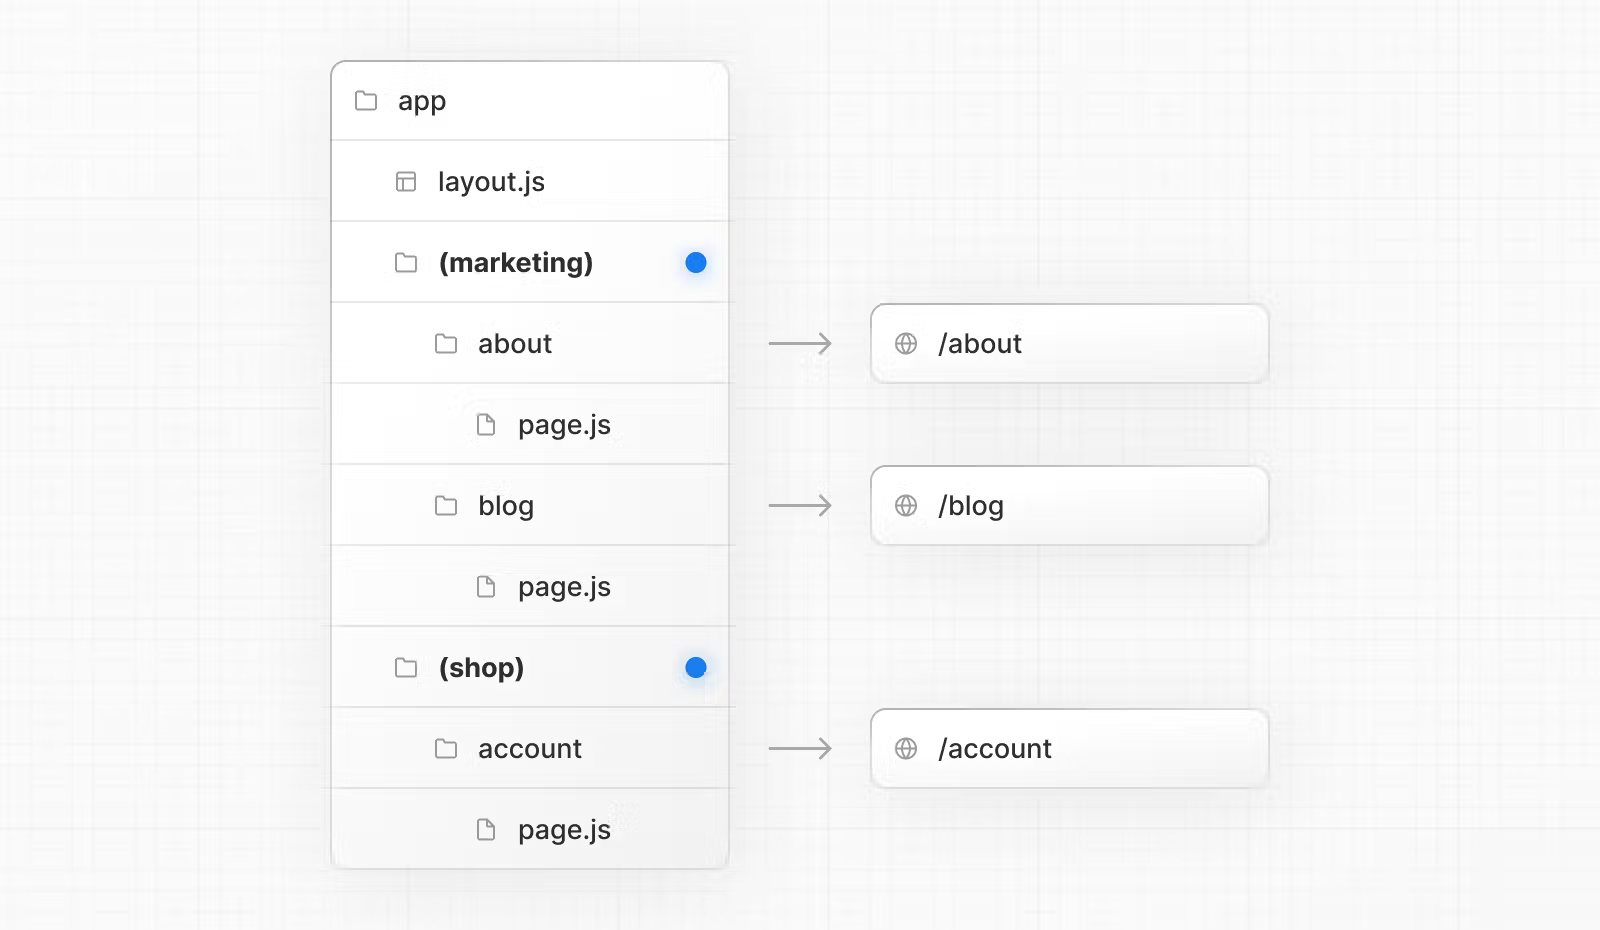
- 사이트의 목적별로 또는 기능별로 경로를 구성하고 싶은데 URL 경로에는 포함되지 않도록 하고자 할 때 폴더를 Route 그룹으로 표시하여 사용한다.
- 레이아웃만 다르게 적용하고 url은 변경하고 싶지 않은 경우에 사용한다.
- 컨벤션 : 폴더 이름을 괄호로 묶음으로써 생성(name)
- 각각의 Route Group 마다 같은 URL 계층을 가져도 다른 layout을 적용
- (marketing), (shop)은 app 하단의 최상위 루트지만 Route Group을 이용해서 별개의 레이아웃 구성

프로젝트에 적용하기
그렇다면 이제 제 프로젝트를 app router로 마이그레이션 해보겠습니다!
1. node.js와 next.js 최신 버전으로 업그레이드하기
> yarn add next@latest2. src 폴더 하위에 app 디렉토리 생성
3. app 디렉토리 하위에 Root Layout.tsx 파일 생성
export default function RootLayout({
  children,
}: {
  children: React.ReactNode;
}) {
  return (
    <html lang="en">
      <body>
        <GoogleAnalytics GA_TRACKING_ID={process.env.NEXT_PUBLIC_GA_ID} />
        <NextProvider>
          <NextLayout>{children}</NextLayout>
        </NextProvider>
      </body>
    </html>
  );
}
4. _document.tsx 파일을 마이그레이션 해주기 위해 Metadata 정의
import { Metadata } from "next";

 export const metadata: Metadata = {
   title: "Hole in the wall",
   description: "Next.js 13 로컬 맛집 앱",
 };
5. 기존 _app.tsx 파일과 _docuemnt.tsx 파일 삭제
6. 기존 index 파일을 app의 page.tsx 파일로 변경
7. 데이터 패칭 변경
  // 기존 getServersideProps로 하던 패칭 방법
  export async function getServerSideProps() {
  const stores = await axios(`${process.env.NEXT_PUBLIC_API_URL}/api/stores`);

  return {
    props: { stores: stores.data },
  };
}
⬇⬇⬇ ⬇⬇⬇ ⬇⬇⬇ ⬇⬇⬇ ⬇⬇⬇
// fetch api를 사용한 패칭 방법
// Home 내부에서 호출
const stores: StoreType[] = await getData();

async function getData() {
  try {
    const res = await fetch(`${process.env.NEXT_PUBLIC_API_URL}/api/stores`, {
      cache: "no-store",
    });

    if (!res.ok) {
      throw new Error("Failed to fetch data");
    }

    return res.json();
  } catch (e) {
    console.log(e);
  }
}
8. 서버 컴포넌트로 작동하는 app 폴더 내에서 useState나 useEffect와 같은 훅을 사용하는 컴포넌트를 작동시키기 위해 클라이언트 사이드에서 "use client" 명시

// Markers.tsx

"use client";
import { currentStoreState, locationState, mapState } from "@/atom";
import { StoreType } from "@/interface";
import { useCallback, useEffect } from "react";
import { useSetRecoilState, useRecoilValue, useRecoilState } from "recoil";
9. useRouter(), usePathname(), useSearchParams() 변경
- 기존에 next/router에서 import하던 useRouter 훅을 next/navigation으로 변경
- 새로운 useRouter는 더이상 문자열 pathname을 반환하지 않기 때문에 usePathname 훅으로 변경
- 새로운 useRouter는 쿼리를 반환하지 않기 때문에 useSearchParams 훅으로 변경
'use client'

import { useRouter, usePathname, useSearchParams } from 'next/navigation'

export default function ExampleClientComponent() {
  const router = useRouter()
  const pathname = usePathname()
  const searchParams = useSearchParams()

  // ...
}
// 기존의 useRouter를 사용해 url로 쿼리를 받음.
const router = useRouter();
const { page = "1" }: any = router.query;
// 새로운 useSearchParams 훅으로 parameters를 받음.
const searchParams = useSearchParams();
const page: any = searchParams?.get("page") || "1";10. URL 경로에 따라 폴더 생성하고 page.tsx 파일로 변환
11. global-error 파일 생성
"use client";

export default function GlobalError({
  reset,
}: {
  error: Error & { digest?: string };
  reset: () => void;
}) {
  return (
    <html>
      <body>
        <div>
          다시 시도해주세요.
          <button
            onClick={() => reset()}>
            Try again
          </button>
        </div>
      </body>
    </html>
  );
}
12. app 디렉토리 내에 api/auth/[...nextauth]/route.ts 파일 생성
/app/api/auth/[...nextauth]/route.ts
import NextAuth from "next-auth"

const handler = NextAuth({
  ...
})

export { handler as GET, handler as POST }
💥 해당 과정 중 생긴 오류
13. 기존 pages 폴더 안의 [...nextauth]/route.ts 삭제
14. stores의 route HTTP 메서드에 따라 함수화
// 기존의 POST 메서드
import type { NextApiRequest, NextApiResponse } from "next";
import { StoreApiResponse, StoreType } from "@/interface";
import prisma from "@/db";
import axios from "axios";

import { getServerSession } from "next-auth";
import { authOptions } from "./auth/[...nextauth]";

interface Responsetype {
  page?: string;
  limit?: string;
  q?: string;
  district?: string;
  id?: string;
}

export default async function handler(
  req: NextApiRequest,
  res: NextApiResponse<StoreApiResponse | StoreType[] | StoreType | null>
) {
  const { page = "", limit = "", q, district, id }: Responsetype = req.query;
  const session = await getServerSession(req, res, authOptions);

  if (req.method === "POST") {
    const formData = req.body;
    const headers = {
      Authorization: `KakaoAK ${process.env.KAKAO_CLIENT_ID}`,
    };

    ...


    return res.status(200).json(result);
⬇⬇⬇ ⬇⬇⬇ ⬇⬇⬇ ⬇⬇⬇ ⬇⬇⬇
// NextResponse로 변경한 POST 메서드
import { NextResponse } from "next/server";
import prisma from "@/db";
import axios from "axios";

import { getServerSession } from "next-auth";
import { authOptions } from "@/app/utils/authOptions";

export async function POST(req: Request) {
  // 데이터 생성을 처리한다.
  const formData = await req.json();

  const headers = {
    Authorization: `KakaoAK ${process.env.KAKAO_CLIENT_ID}`,
  };

 ...


  return NextResponse.json(result, { status: 200 });
}
💡

