[React Native TIL] SafeAreaView, StatusBar, Dimension, useWindowDimension, autoCapitalize , autoComplete, returnKeyType, keyboardAppearance, onSubmitEditing
SafeAreaViewautoCapitalizeautocompletedimensionkeyboardAppearanceonSubmitEditingreturnKeyTypestatusBaruseWindowDimension
React Native TIL
목록 보기
11/30
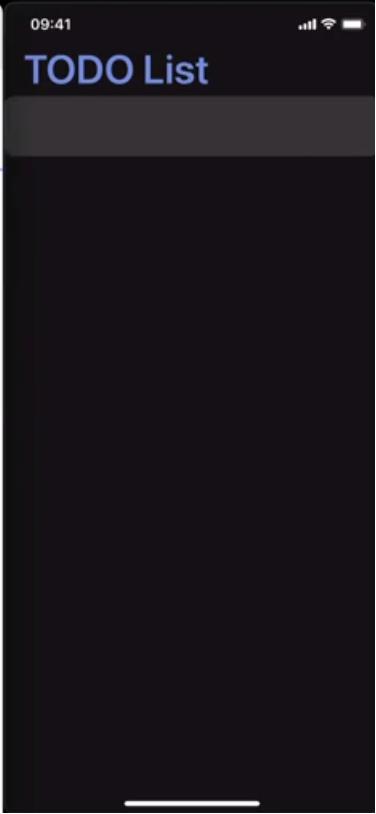
1. SafeAreaView 컴포넌트
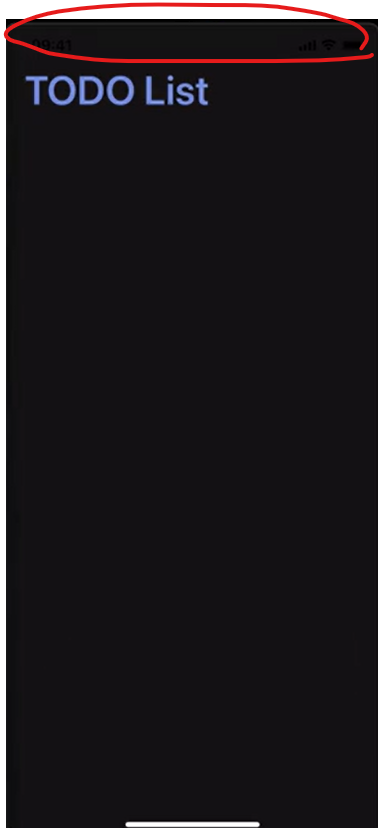
아이폰의 노치 디자인 때문에 타이틀이 가려질 수 있디. SafeAreaView를 활용하여 노치 디자인때문에 가려지는것을 막을 수 있다.
import React from 'react';
import { StatusBar } from 'react-native';
import styled, { ThemeProvider } from 'styled-components/native';
import { theme } from './theme';
import Input from './components/input';

//view 대신 SafeAreaView 사용
const Container = styled.SafeAreaView`
    flex: 1;
    background-color: ${({ theme }) => theme.background};
    align-items: center;
    justify-content: flex-start;
`;
const Title = styled.Text`
    font-size: 40px;
    font-weight: 600;
    color: ${({ theme }) => theme.main};
    width: 100%;
    align-items: flex-end;
    padding: 0 20px;
`;

export default function App() {
    return (
        <ThemeProvider theme={theme}>
            <Container>
                <StatusBar barStyle='light-content' backgroundColor={theme.background} />
                <Title>TODO List</Title>
                <Input placeholder='+ Add a Task' />
            </Container>
        </ThemeProvider>
    );
}
공식문서 : https://reactnative.dev/docs/safeareaview
2. StatusBar
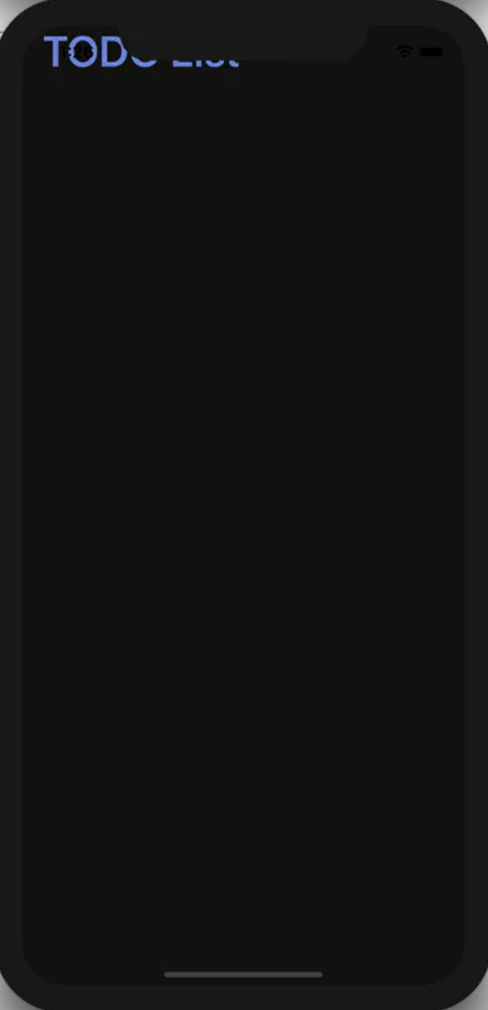
ReactNative에서 제공하는 스테이터스 바
아래를 보면 statusBar이 붙혀서 안보이는 것을 볼 수 있다.
import React from 'react';
import { StatusBar } from 'react-native';
import styled, { ThemeProvider } from 'styled-components/native';
import { theme } from './theme';
import Input from './components/input';

const Container = styled.SafeAreaView`
    flex: 1;
    background-color: ${({ theme }) => theme.background};
    align-items: center;
    justify-content: flex-start;
`;
const Title = styled.Text`
    font-size: 40px;
    font-weight: 600;
    color: ${({ theme }) => theme.main};
    width: 100%;
    align-items: flex-end;
    padding: 0 20px;
`;

export default function App() {
    return (
        <ThemeProvider theme={theme}>
            <Container>
  // StatusBar 적용
                <StatusBar barStyle='light-content' backgroundColor={theme.background} />
                <Title>TODO List</Title>
                <Input placeholder='+ Add a Task' />
            </Container>
        </ThemeProvider>
    );
}
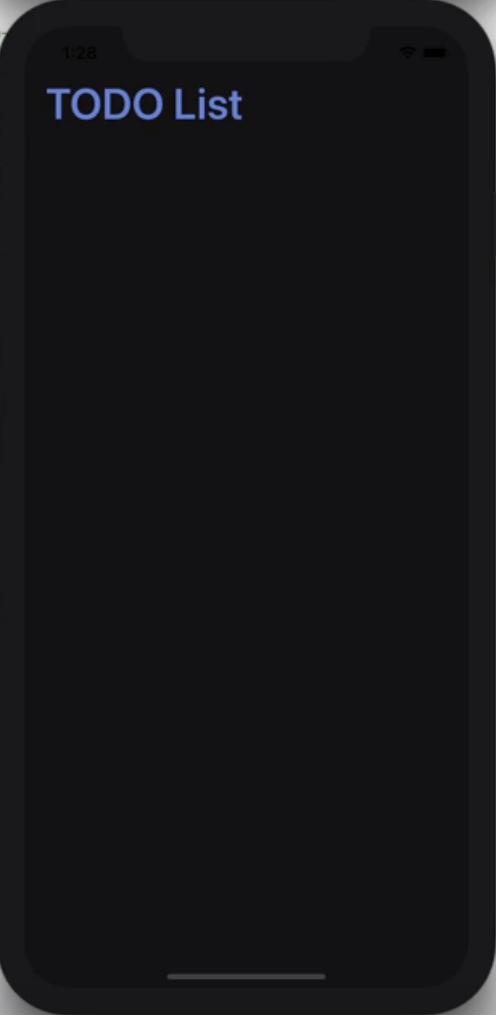
StatusBar의 색상과 배경색을 설정해주어 아래와 같이 나오게 만든다.
공식 문서 : https://reactnative.dev/docs/statusbar
3. Dimension, useWindowDimension
다양한 모바일 기기에 화면 크기에 대응할 수 있다. 이를 이용해서 다양한 크기의 기기에서 동일한 모습으로 나타날 수 있도록 코드를 작성할 수 있다.
dimension는 처음 값을 받았을 때 크기로 고정되기 때문에 기기를 회전해서 화면이 전환되면 변호나된 화면의 크기와 일치하지 않을 수 있는 것을useWindowDimension를 활용하여 화면의 크기의 변화에 대응할 수 있다. useWindowDimension는 화면의 크기가 변경되면 값을 자동으로 업데이트 해준다.
import react, { useState } from 'react';
import styled from 'styled-components/native';
import { Dimensions, useWindowDimensions } from 'react-native';

const StyledInput = styled.TextInput.attrs(({ theme }) => ({
    placeholderTextColor: theme.main,
}))`
// width 값을 이용해서 현재 width에서 양쪽 20px을 제외하기 위해 40px을 빼고 width 값을 설정
    width: ${({ width }) => width - 40}px;
    height: 60px;
    margin: 3px 0;
    padding: 15px 20px;
    border-radius: 25px;
    font-size: 25px;
    background-color: ${({ theme }) => theme.itemBackground};
    color: ${({ theme }) => theme.text};
`;

const Input = ({ placeholder }) => {
    // const width = Dimensions.get('window').width;
    const width = useWindowDimensions().width;
    // maxLength=> 최대 50의 길이만 받을 수 있다.
    return (
        <StyledInput
            width={width}
            placeholder={placeholder}
            maxLength={50}
            autoCapitalize='none'
            autoCorrect={false}
            returnKeyType='done'
            keyboardAppearance='dark'
        />
    );
};

export default Input;

공식 문서 :
Dimension (https://reactnative.dev/docs/dimensions)
useWindowDimension(https://reactnative.dev/docs/usewindowdimensions)
4. TextInput 기능들
4-1. autoCapitalize
자동 대문자 기능을 설정하는 기능
4-2. autoComplete
자동 오타 수정 기능
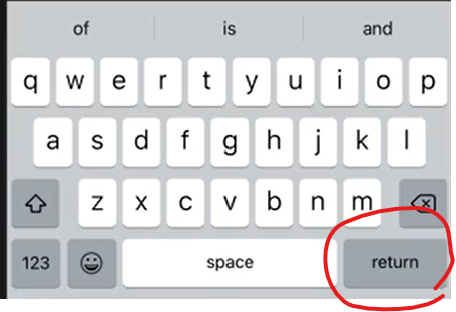
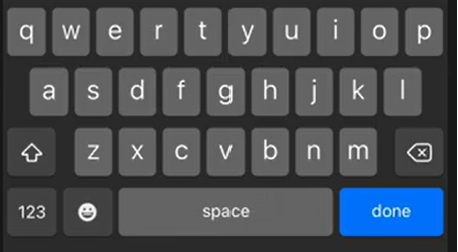
4-3. returnKeyType
ios에서는 키보드의 enter 버튼이 return으로 되어 있는데 done으로 바꿀 수 있다.
4-4. keyboardAppearance
ios에서의 키보드 색상 변경
4-5. onSubmitEditing
확인 버튼을 눌렀을 시 지금까지 입력된 텍스트가 나타나고 input 컴포넌트를 초기화할 수 있도록 설정 가능
모든 기능들을 추가한 코드
        <StyledInput
            width={width}
            placeholder={placeholder}
            maxLength={50}
            autoCapitalize='none'
            autoCorrect={false}
            returnKeyType='done'
            keyboardAppearance='dark'
        />
공식 문서 : https://reactnative.dev/docs/textinput#autocapitalize