🔎Flutter에서 텍스트 설정하기
텍스트를 화면에 그려주는 Text()
텍스트에 스타일을 주는 TextStyle()
텍스트마다 다양한 스타일을 주고 싶을때 사용하는 RichText() 또는 Text.rich()
문자열을 분리시켜주는 TextSpan()
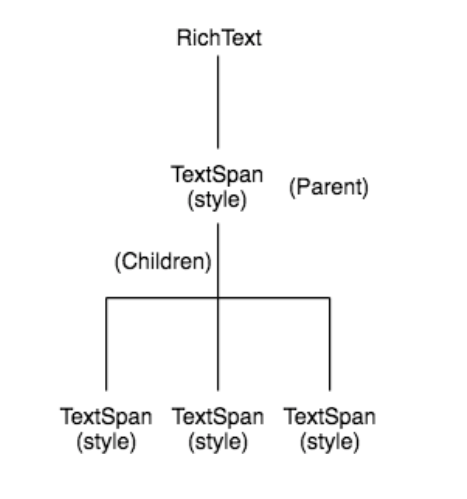
RichText는 TextSpan으로 구성된 트리로 이루어진다.
🔎Text()
기본적인 text 입력
import 'package:flutter/material.dart';
void main() {
runApp(const MyApp());
}
class MyApp extends StatelessWidget {
const MyApp({Key? key}) : super(key: key);
Widget build(BuildContext context) {
return MaterialApp(
home:Scaffold(
appBar: AppBar(
title: Text('Text_Widget')
),
body: Text('Text_Widget1'),
)
);
}
}
🔎Text 위젯 기본형
const Text(
    this.data, {
    Key key,
    this.style,
    this.strutStyle,
    this.textAlign,
    this.textDirection,
    this.locale,
    this.softWrap,
    this.overflow,
    this.textScaleFactor,
    this.maxLines,
    this.semanticsLabel,
    this.textWidthBasis,
    this.textHeightBehavior,
  })
🔎TextStyle()
textAlign : 문자열 배치
style : 문자 스타일지정(굵기,색,사이즈 ... )
import 'package:flutter/material.dart';
void main() {
runApp(const MyApp());
}
class MyApp extends StatelessWidget {
const MyApp({Key? key}) : super(key: key);
Widget build(BuildContext context) {
return MaterialApp(
home: Scaffold(
appBar: AppBar(
title: Text('Text_Widget')
),
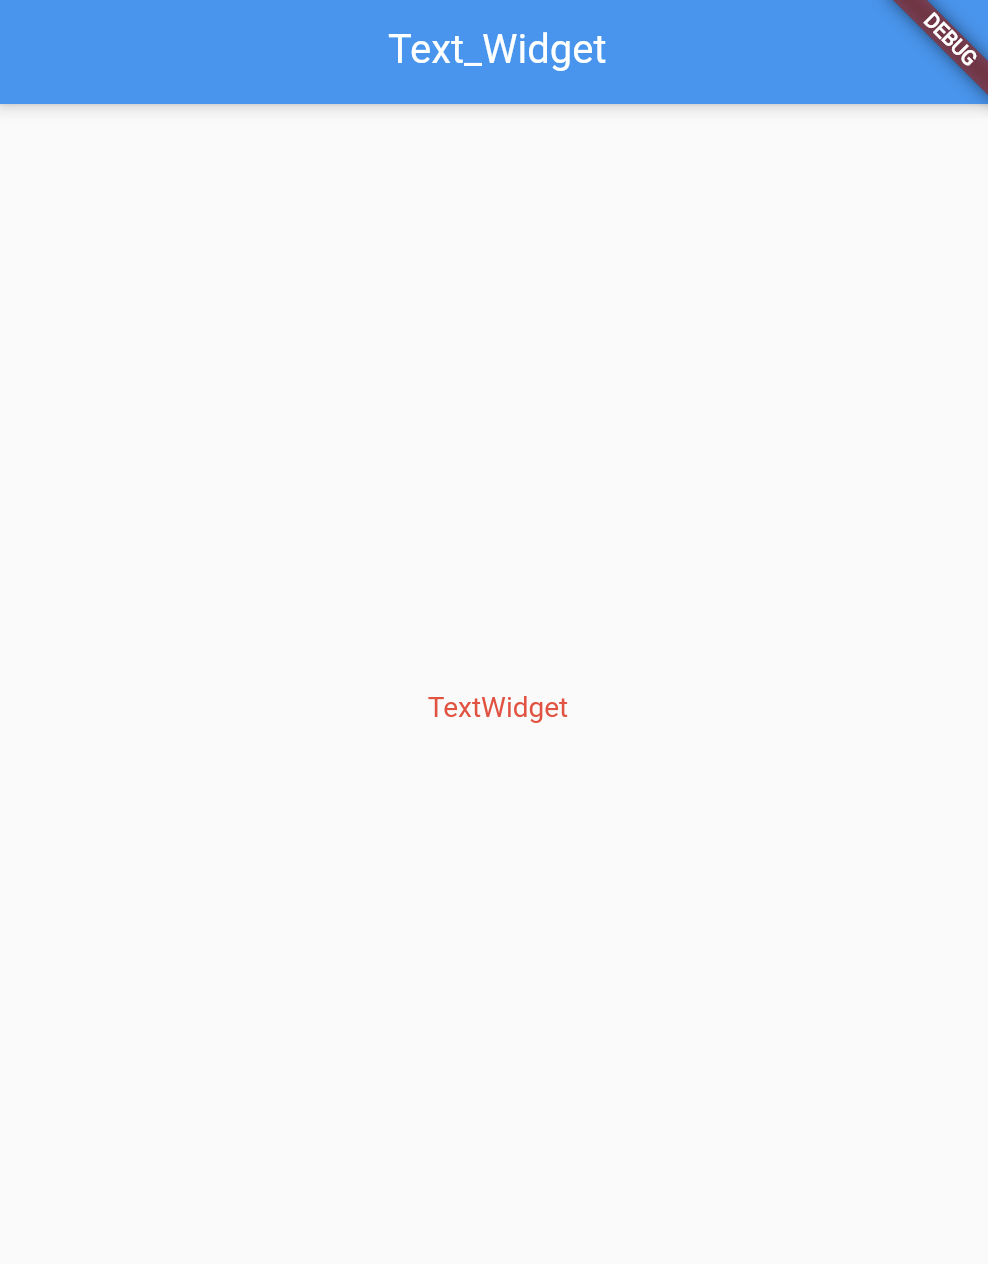
body: Center(
child: Column(
mainAxisAlignment: MainAxisAlignment.center,
children: <Widget>[
Container(
width: 1000,
child: Text('TextWidget', textAlign: TextAlign.center,
style: TextStyle(color: Colors.red)
)
)
]
)
)
)
);
}
}
🔎Textstyle속성
TextStyle({
    this.inherit = true,
    this.color,
    this.backgroundColor,
    this.fontSize,
    this.fontWeight,
    this.fontStyle,
    this.letterSpacing,
    this.wordSpacing,
    this.textBaseline,
    this.height,
    this.locale,
    this.foreground,
    this.background,
    this.shadows,
    this.fontFeatures,
    this.decoration,
    this.decorationColor,
    this.decorationStyle,
    this.decorationThickness,
    this.debugLabel,
    String? fontFamily,
    List<String>? fontFamilyFallback,
    String? package,
  })
🔎TextSpan()
특정 길이의 문자(text)를 한 단위로 하여 스타일(style)을 적용하는데 사용한다.
자식 위젯으로 TextSpan 리스트를 가질 수 있으며, 모두 한 문단으로 화면에 그려진다.
text 와 children 둘 다 값을 가지면, 자식 위젯 리스트 중 첫번째 위치의 text 값으로 으로 적용된다.
🔎Text.rich() 또는 RichText()
스타일을 적용하고자 하는 만큼의 문자, 문자열 지정할 수 있고, 여러개의 TextSpan 을 가질 수 있어 다양한 스타일이 존재하는 문단을 만들 수 있다. 둘 다 TextSpan을 사용하지만 Text.rich는 DefaultTextStyle을 기본적으로 적용하는 반면 RichText는 기본스타일을 명시해줘야한다.
🔎Text.rich()
import 'package:flutter/material.dart';
void main() {
runApp(const MyApp());
}
class MyApp extends StatelessWidget {
const MyApp({Key? key}) : super(key: key);
Widget build(BuildContext context) {
return MaterialApp(
home: Scaffold(
appBar: AppBar(
title: Text('Text_Widget')
),
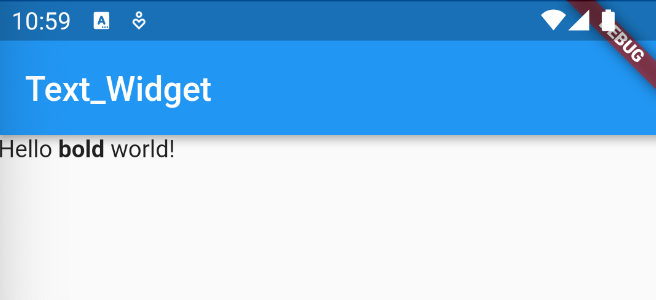
body:const Text.rich(
TextSpan(
text: 'Hello ',
children: <TextSpan>[
TextSpan(text: 'bold', style: TextStyle(fontWeight: FontWeight.bold)),
TextSpan(text: ' world!'),
],
),
)
)
);
}
}
🔎RichText()
import 'package:flutter/material.dart';
void main() {
runApp(const MyApp());
}
class MyApp extends StatelessWidget {
const MyApp({Key? key}) : super(key: key);
Widget build(BuildContext context) {
return MaterialApp(
home: Scaffold(
appBar: AppBar(
title: Text('Text_Widget')
),
body:RichText(
text:TextSpan(
text: 'Hello ',
style: DefaultTextStyle.of(context).style, //기본style을 지정해줘야함
children: <TextSpan>[
TextSpan(text: 'bold', style: TextStyle(fontWeight: FontWeight.bold)),
TextSpan(text: ' world!'),
],
),
)
)
);
}
}
📍참고자료

꺾이지않기ᕙ༼*◕_◕*༽ᕤ