바탕색으로 채워진 PPM 영상 생성하기
배경을 지정한 색으로 채운 PPM 영상을 생성하는 실습을 진행해보았다.
해결 과정 및 주요 코드에 대한 설명
def create_new_image(size, color):
    bitmap = color*size[0]*size[1]
    return bitmap
PPM 영상 생성과 관련된 create_new_image 함수는 인자로 size와 color를 받고, size의 경우 width, height 길이를 모두 받기 때문에 bitmap 변수에 size[0]*size[1] 만큼의 값에 채널의 수를 의미하는 color 값을 곱한 만큼의 크기를 생성하여 반환하였다.
ap = argparse.ArgumentParser()
ap.add_argument("-o", "--output", required = True, \
		help = "Path to the output image")
ap.add_argument("-s", "--size", type = int, \
 		nargs='+', default=[50, 30], \
		help = "Size of the output image")
ap.add_argument("-c", "--color", type = int, \
		nargs='+', default=[255, 255, 255],\
		help = "Color of each pixel in the output image")
args = vars(ap.parse_args())

outfile = args["output"]
size = args["size"]
color = args["color"]
o(또는 output)으로 생성한 PPM 파일을 저장할 경로를 받고 s(또는 size)로 생성하고자 하는 영상의 크기를 입력받는다. 이 때, default값은 가로 50 및 세로 30이다. 마지막으로 c(또는 color)로 생성하려는 영상의 배경색을 입력받는데, default값은 [255, 255, 255]에 해당하는 흰색이다. 받아온 값들을 각각 outfile, size, color 변수에 저장한다.
실행 결과
-
python create_new_ppm.py —output ../images/new.ppm 으로 명령을 주었을 경우

입력한 파일 경로에 올바르게 저장되었고, size와 color값은 지정하지 않았기 때문에 default 값인 50x30의 흰색의 사각형 영상이 만들어졌다. -
python create_new_ppm.py —output ../images/new.ppm —size 200 100 으로 명령을 주었을 경우

입력한 파일 경로에 올바르게 저장되었고, 지정한 size대로 200x100 크기의 영상이 만들어졌다. color는 지정하지 않았기 때문에 흰색으로 배경이 채워졌다. -
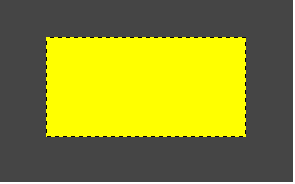
python create_new_ppm.py —output ../images/new.ppm —size 200 100 —color 255 255 0 으로 명령을 주었을 경우

저장 경로 및 size, color 모두 명령창에 입력한 값대로 PPM 영상이 만들어졌음을 확인할 수 있었다.
코드
자세한 코드는 Github에서 확인할 수 있다.
기존 PPM 영상에 사각형 출력하고 저장하기
=기존 PPM 영상을 읽어 사각형을 출력한 후 다른 이름으로 저장하고, 원하는 위치에 원하는 크기 및 색상의 사각형을 출력할 수 있도록 구현한다.
해결 과정 및 주요 코드에 대한 설명
ap = argparse.ArgumentParser()
ap.add_argument("-i", "--input", required = True, \
      help = "Path to the input image")
ap.add_argument("-o", "--output", required = True, \
      help = "Path to the output image")
ap.add_argument("-s", "--size", type = int, \
       nargs='+', default=[50, 50], \
      help = "Size of the rect")
ap.add_argument("-c", "--color", type = int, \
      nargs='+', default=[255, 0, 0],\
      help = "Color of rect")
ap.add_argument("-l", "--location", type = int, \
      nargs='+', default=[0, 0],\
      help = "Location of rect in the output image")
args = vars(ap.parse_args())

infile = args["input"]
outfile = args["output"]
location = args["location"]
size = args["size"]
color = args["color"]
첫 번째 실습 문제에서 추가된 내용들은 바로 기존 PPM 영상을 불러오기 위한 i(또는 input)와 사각형이 그려질 경로를 의미하는 l(또는 location)이 추가되었다는 점이다. 각각 입력 영상의 경로를 받아오고, 사각형이 영상 위의 어느 지점부터 출력될 것인지를 나타낸다. size의 default 값은 [50, 50]이며, color는 [255, 0, 0]이고 location은 영상의 원점에 해당하는 좌측 상단이 default 값이다. 받아온 값들은 각각 infile, outfile, location, size, color 변수에 저장한다.
image = array.array('B', bitmap)
image = np.array(image)
image = image.reshape((height, width, 3))
image[location[0]:location[0]+size[0], location[1]:location[1]+size[1]] = color
image = image.reshape(height*width*3)
image = bytes(image)
numpy 파이썬 패키지를 선언하여 작성하는 방식을 택했다. 영상의 차원을 reshape를 활용하여 변경하는 것에 유의하며 의도에 맞게 작성하였다.
실행 결과
-
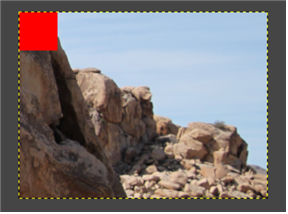
python draw_rect_ppm.py —input ../images/rock.ppm —output ../images/rock_rect.ppm 으로 명령을 주었을 경우

기존의 PPM 영상을 불러올 input 경로와 저장할 output 경로만 주었을 때의 결과는 default 값을 준대로 사각형이 영상에서 그려졌음을 확인했다. -
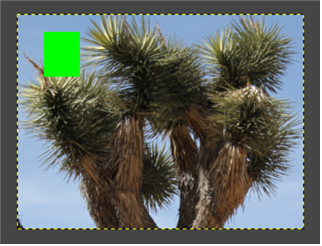
python draw_rect_ppm.py —input ../images/rock.ppm —location 20 30 —size 50 40 —color 0 255 0 —output ../images/rock_rect.ppm 으로 명령을 주었을 경우

이번에는 줄 수 있는 모든 인자 값을 주었는데, default 값과 비교했을 때 color와 size, location 모두 달라졌음을 확인할 수 있었다. -
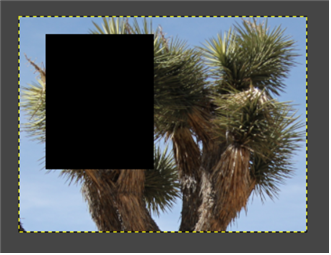
python draw_rect_ppm.py —input ../images/tree.ppm —location 20 30 —size 150 120 —color 0 0 0 —output ../images/tree_rect.ppm 으로 명령을 주었을 경우

두 번째 실행 결과에서 size 값과 color 값을 다르게 주었을 때의 결과이다.
코드
자세한 코드는 Github에서 확인할 수 있다.
