
INTRO
이번에는 지금까지 배웠던 개념으로 신호등을 한번 만들어봤다.
다른 방법도 많겠지만 해당 포스팅을 통해 어떤 개념을 어떻게 사용했는지 간단하게 정리해보자
1. 요구사항
우선 신호등 예제의 요구사항 명세를 정리해보자
정리
1. 신호등의 사이즈와 점멸 간격(시간)을 props로 전달받는다.
2. 이 간격에 맞춰 빨간색부터 노란색, 초록색 순서로 하나의 신호만 켜진다. (무한 반복)
2. Key 아이디어
Key 아이디어로는 상태변수가 변경될 때, 리렌더링이 발생한다는 개념을 가져갔다.
시간 경과에 따라 변하는 상태변수를 하나 선언해주고, 상태변수가 변경되어 리렌더링이 발생할 때 신호를 점멸시키는 것이다.
3. 구현
App.jsx
import Blinker from "./blinkerExample/Blinker";

export default function App() {
  return (
     <div style={{ display: "flex" }}>
        <Blinker size={150} count={1} />
        <Blinker size={120} count={1.5} />
        <Blinker size={100} count={3} />
     </div>
  );
}
Blinker.jsx
import Traffic from "./Traffic.jsx";
import "./Blinker.css";
import { useState } from "react";

const trafficDatas = [
  {
    id: 0,
    onColor: "#ff0000",
    offColor: "#4d0000",
  },
  {
    id: 1,
    onColor: "#ffff00",
    offColor: "#4d4d00",
  },
  {
    id: 2,
    onColor: "#00ff00",
    offColor: "#004d00",
  },
];

export default function Blinker({ size, count }) {
  const filteredCount = count * 1000;
  const [cnt, setCnt] = useState(0);

  setTimeout(() => {
    setCnt(cnt + 1);
  }, filteredCount);

  return (
    <div className="Blinker" style={{ width: size * 2, height: size * 4 }}>
      {trafficDatas.map((traffic) =>
        cnt % 3 === traffic.id ? (
          <Traffic key={traffic.id} size={size} color={traffic.onColor} />
        ) : (
          <Traffic key={traffic.id} size={size} color={traffic.offColor} />
        )
      )}
    </div>
  );
}
Blinker.css
.Blinker {
  background-color: black;
  display: flex;
  flex-direction: column;
  justify-content: center;
  align-items: center;
  margin: 1.5rem;
  gap: 1rem;
}
Traffic.jsx
import "./Traffic.css";

export default function Traffic({ size, color }) {
  return (
    <div
      className="Traffic"
      style={{ width: size, height: size, backgroundColor: color }}>
    </div>
  );
}
Traffic.css
.Traffic {
  border-radius: 50%;
  overflow: hidden;
}
Blinker.jsx에 id와 css스타일을 지정해두고 변하는 상태변수 (cnt)에 맞춰서 점멸시키도록 구현했다.
이렇게 구현하면 시간이 변할 때마다 Blinker가 렌더링되기 때문에 신호등을 구성하는 Traffic 3개가 모두 다시 리렌더링이 발생하긴 한다.
4. Result
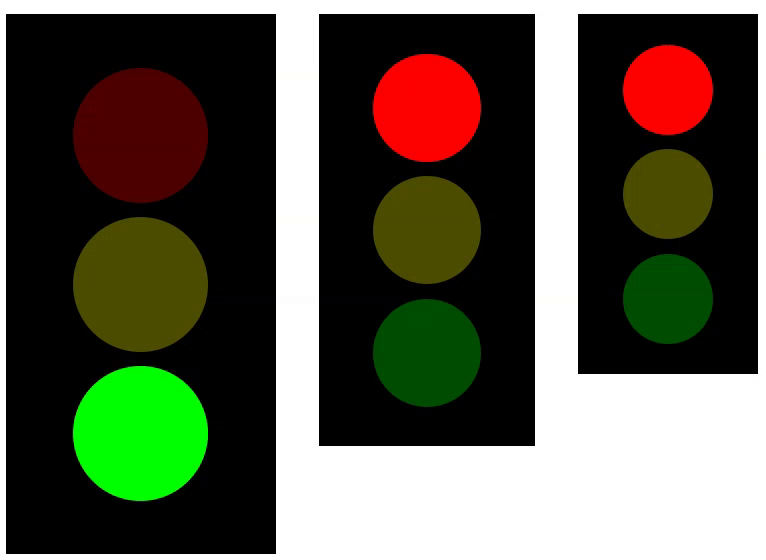
각자 세팅해준 시간과 사이즈에 맞춰서 동작하는 것을 확인할 수 있다.
OUTRO
간단하게 신호등을 만들어봤다.
useRef, useEffect를 이용해서 만든다면 어떻게 해야할지 조금 생각해봐야할 것 같다.

코린이