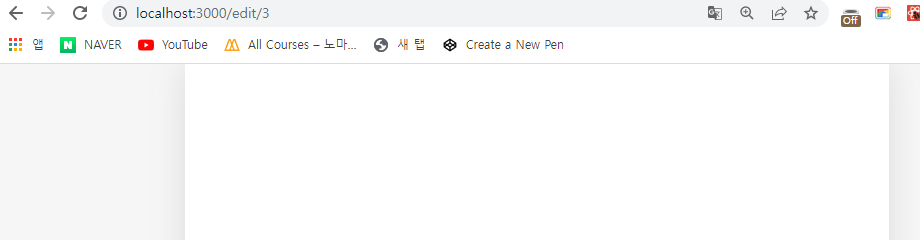
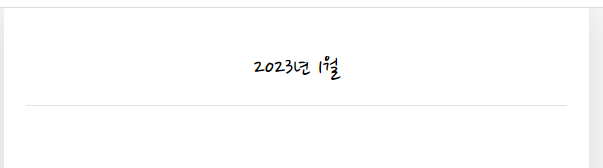
1. HOME 컴포넌트
mount와 동시에 현재 년/월 표시
import React, { useState } from "react";
import MyHeader from "./../components/MyHeader";

const Home = () => {
  // 1. 날짜 저장 state
  const [curDate, setCurDate] = useState(new Date());
  const headText = `${curDate.getFullYear()}년 ${curDate.getMonth() + 1}월`;
  return (
    <div>
      <MyHeader headText={headText}></MyHeader>
    </div>
  );
};
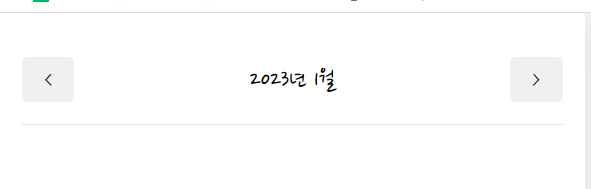
좌우 이동 버튼
import React, { useState } from "react";
import MyHeader from "./../components/MyHeader";
import MyButton from "./../components/MyButton";

const Home = () => {
  // 1. 날짜 저장 state
  const [curDate, setCurDate] = useState(new Date());
  return (
    <div>
      <MyHeader
        headText={headText}
        leftChild={
          <MyButton
            text={"<"}
            onClick={() => {
              console.log("왼쪽 이동");
            }}
          ></MyButton>
        }
        rightChild={
          <MyButton
            text={">"}
            onClick={() => {
              console.log("오른쪽 이동");
            }}
          ></MyButton>
        }
      ></MyHeader>
    </div>
  );
};
좌우 버튼 클릭 시 월 변경
// 월 증가/감소 함수
  const increaseMonth = () => {
    setCurDate(
      new Date(curDate.getFullYear(), curDate.getMonth() + 1, curDate.getDate())
    );
  };

  const decreaseMonth = () => {
    setCurDate(
      new Date(curDate.getFullYear(), curDate.getMonth() - 1, curDate.getDate())
    );
  };

<div>
      <MyHeader
        headText={headText}
        leftChild={
          <MyButton
            text={"<"}
            onClick={() => {
              decreaseMonth();
            }}
          ></MyButton>
        }
        rightChild={
          <MyButton
            text={">"}
            onClick={() => {
              increaseMonth();
            }}
          ></MyButton>
        }
      ></MyHeader>
    </div>
일기 데이터 불러오기
- 임시 dummy data 생성
// App.js
// 일기 dummy data
const dummyData = [
  {
    id: 1,
    emotion: 1,
    content: "오늘의 일기 1번",
    date: 1672663007664, // new Date().getTime() 로 현재 시간 넣기
  },
  ...
  ];

function App() {
const [data, dispatch] = useReducer(reducer, dummyData);- Home.js 에서 일기 데이터 가져오기
// Components 로 확인했을 때, App.js 로부터 DiaryList 데이터를 받고 있는 것을 볼 수 있음
import { DiaryStateContext } from "../App";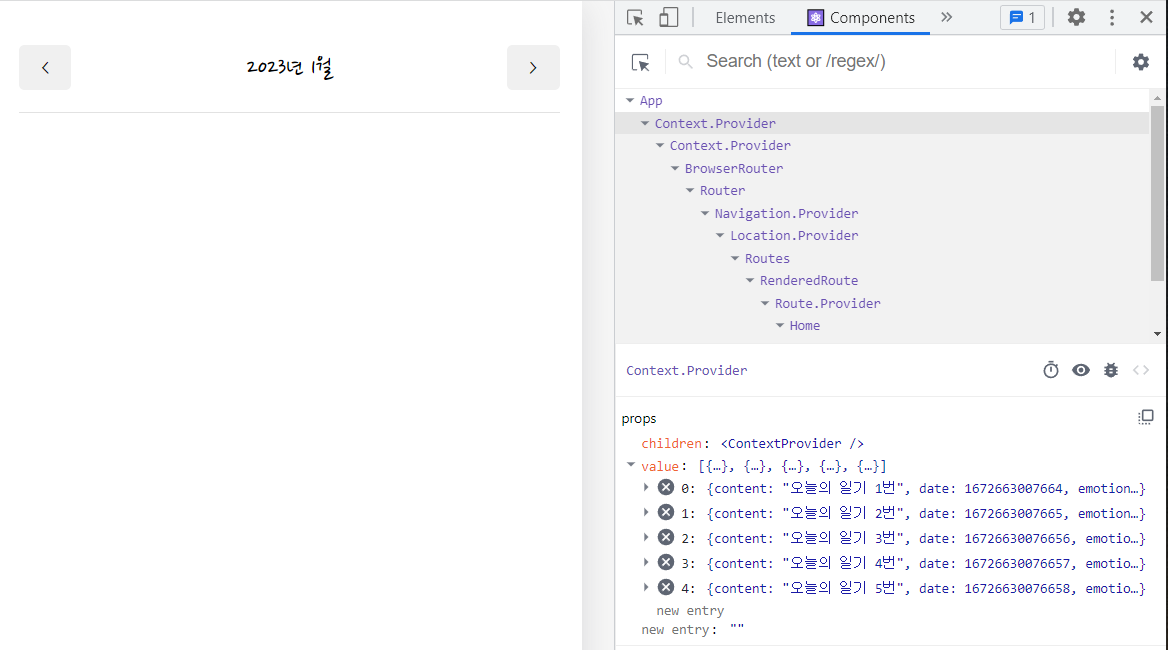
다이어리 리스트를 날짜에 따라 노출
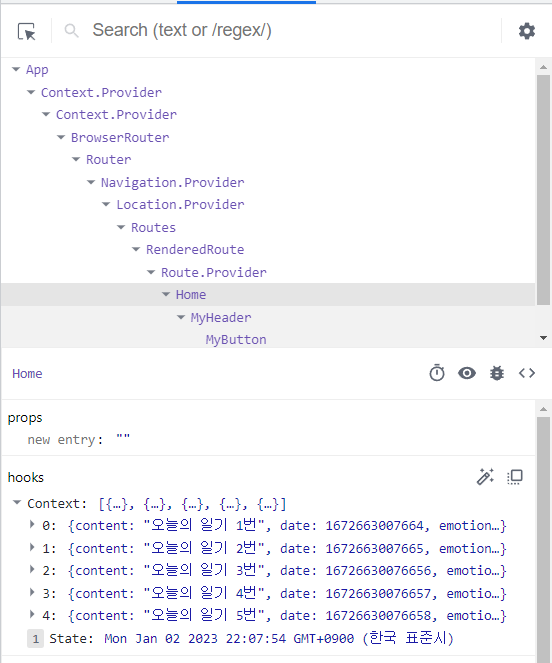
const Home = () => {
const diaryList = useContext(DiaryStateContext);
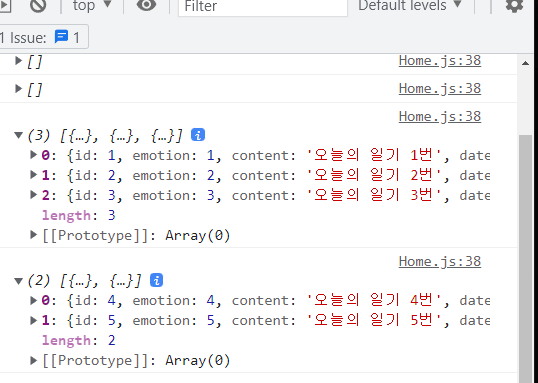
// 2. 년월에 맞는 일기 데이터만 추출
const [data, setData] = useState([]);
// useEffect로 curDate가 변화할 때 다이어리 리스트에서 날짜에 맞는 일기데이터 추출
useEffect(() => {
// 현재 년월의 첫날
const firstDay = new Date(
curDate.getFullYear(),
curDate.getMonth(),
1
).getTime();
// 현재 년월의 마지막날
const lastDay = new Date(
curDate.getFullYear(),
curDate.getMonth() + 1,
0
).getTime();
// 첫날~마지막날 사이의 일기 추출
setData(
diaryList.filter((it) => firstDay <= it.date && it.date <= lastDay)
);
}, [diaryList, curDate]);
useEffect(() => {
console.log(data);
}, [data]);

일기 리스트 컴포넌트
- 다이어리리스트 컴포넌트 생성 & export
// DiaryList.js
const DiaryList = ({ diaryList }) => {
  return (
    <div>
      {diaryList.map((it) => (
        <div key={it.id}>{it.content}</div>
      ))}
    </div>
  );
};

export default DiaryList;- DiaryList 컴포넌트 임포트
import DiaryList from "./DiaryList";

const Home = () => {
  return (
    <div>
      <MyHeader
        headText={headText}
        leftChild={
          <MyButton
            text={"<"}
            onClick={() => {
              decreaseMonth();
            }}
          ></MyButton>
        }
        rightChild={
          <MyButton
            text={">"}
            onClick={() => {
              increaseMonth();
            }}
          ></MyButton>
        }
      ></MyHeader>
		// diaryList 의 data를 prop으로 전달
      <DiaryList diaryList={data}></DiaryList>
    </div>
  );
};
일기 정렬 필터 구현
정렬 필터 셀렉트박스 생성
// DiaryList.js
import React, { useState } from "react";

/*
필터 컴포넌트 : ControlMenu
value : 현재 선택된 필터값
onChange : value가 변경될 때 실행할 함수
optionList : select값으로 들어갈 옵션들
*/
const ControlMenu = ({ value, onChange, optionList }) => {
  return (
    <select value={value} onChange={(e) => onChange(e.target.value)}>
      {optionList.map((it, idx) => (
        <option key={idx} value={it.value}>
          {it.name}
        </option>
      ))}
    </select>
  );
};

const sortOptionList = [
  { value: "latest", name: "최신순" },
  { value: "oldest", name: "오래된 순" },
];

const DiaryList = ({ diaryList }) => {
  const [sortType, setSortType] = useState("lastest");

  return (
    <div>
      <ControlMenu
        value={sortType}
        onChange={setSortType}
        optionList={sortOptionList}
      />
      {diaryList.map((it) => (
        <div key={it.id}>{it.content}</div>
      ))}
    </div>
  );
};

DiaryList.defaultProps = {
  diaryList: [],
};

export default DiaryList;- 셀렉트박스에서 조건을 선택하면 onChange prop의 값으로 옵션값의 value가 전달됨.
<select value={oldest} onChange={oldest}> - onChange의 prop으로 받은 메소드는 setSortType이기 때문에 sortType state가 변경됨.
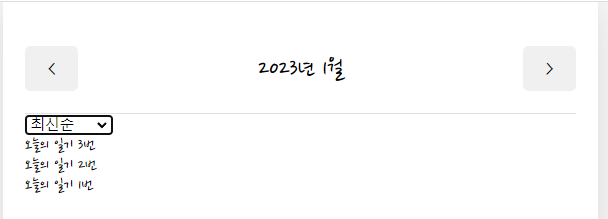
정렬 기능 구현
// DiaryList.js
import React, { useState } from "react";

const ControlMenu = ({ value, onChange, optionList }) => {
  return (
    <select value={value} onChange={(e) => onChange(e.target.value)}>
      {optionList.map((it, idx) => (
        <option key={idx} value={it.value}>
          {it.name}
        </option>
      ))}
    </select>
  );
};

  // 선택한 필터대로 일기 데이터 정렬
  const getProcessedDiaryList = () => {
    // 비교함수
    const compare = (a, b) => {
      if (sortType === "latest") {
        return parseInt(b.date) - parseInt(a.date);
      } else {
        return parseInt(a.date) - parseInt(b.date);
      }
    };
    // diaryList를 깊은복사하여 정렬하기
    const copyList = JSON.parse(JSON.stringify(diaryList));
    const sortedList = copyList.sort(compare);
    return sortedList;
  };

  return (
    <div>
      <ControlMenu
        value={sortType}
        onChange={setSortType}
        optionList={sortOptionList}
      />
      {/* diaryList가 아니라 sorted된 결과값을 랜더하기 */}
      {getProcessedDiaryList().map((it) => (
        <div key={it.id}>{it.content}</div>
      ))}
    </div>
  );
};

DiaryList.defaultProps = {
  diaryList: [],
};

export default DiaryList;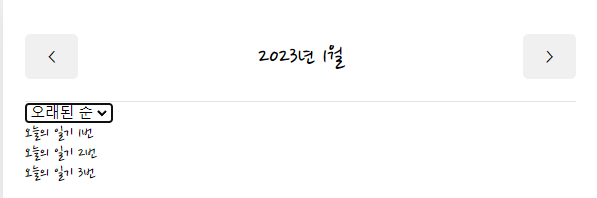
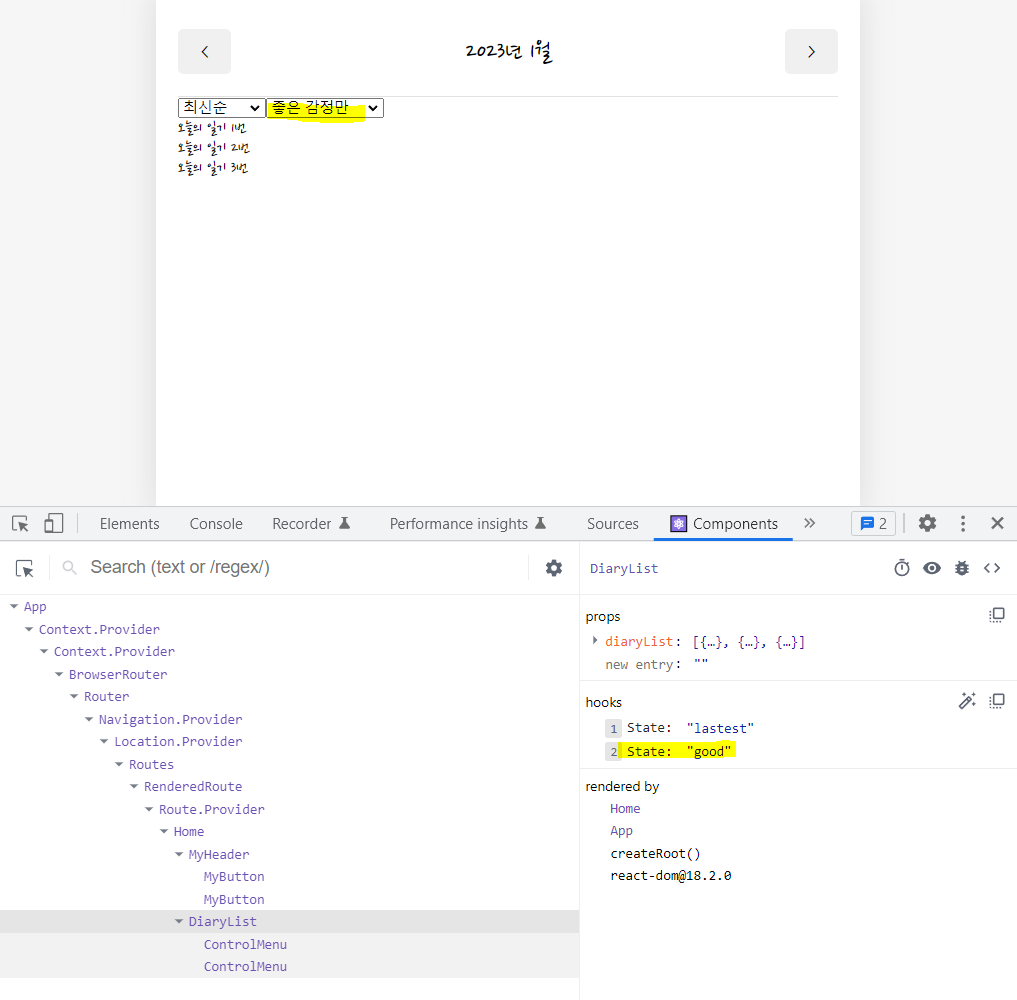
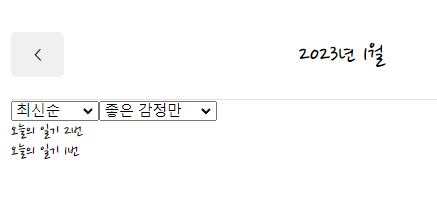
감정필터 기능 구현
// 감정 필터 옵션 리스트 생성
const filterOptionList = [
  { value: "all", name: "전부" },
  { value: "good", name: "좋은 감정만" },
  { value: "bad", name: "안좋은 감정만" },
];

const ControlMenu = ({ value, onChange, optionList }) => {
  return (
    <select value={value} onChange={(e) => onChange(e.target.value)}>
      {optionList.map((it, idx) => (
        <option key={idx} value={it.value}>
          {it.name}
        </option>
      ))}
    </select>
  );
};

const DiaryList = ({ diaryList }) => {
  const [sortType, setSortType] = useState("lastest");
  // 감정 필터 state 생성
  const [filter, setFilter] = useState("all");

  return (
    <div>
      <ControlMenu
        value={sortType}
        onChange={setSortType}
        optionList={sortOptionList}
      />
          // 감정 필터 생성
      <ControlMenu
        value={filter}
        onChange={setFilter}
        optionList={filterOptionList}
      />
      {/* diaryList가 아니라 sorted된 결과값을 랜더하기 */}
      {getProcessedDiaryList().map((it) => (
        <div key={it.id}>{it.content}</div>
      ))}
    </div>
  );
}-
감정 필터 작동 시 DiaryList의 state 가 맞게 변경됨
-
감정필터 함수 생성 및 적용
const DiaryList = ({ diaryList }) => {
  const [sortType, setSortType] = useState("lastest");
  const [filter, setFilter] = useState("all");

  // 선택한 필터대로 일기 데이터 정렬
  const getProcessedDiaryList = () => {
    // 감정 필터 함수
    const filterCallBack = (item) => {
      if (filter === "good") {
        // item.emotion이 숫자가 아닐 경우를 대비하여 형변환
        return parseInt(item.emotion) < 3;
      } else {
        return parseInt(item.emotion) > 3;
      }
    };

    // 비교함수
    const compare = (a, b) => {
      if (sortType === "lastest") {
        return parseInt(b.date) - parseInt(a.date);
      } else {
        return parseInt(a.date) - parseInt(b.date);
      }
    };
    // diaryList를 깊은복사하여 정렬하기
    const copyList = JSON.parse(JSON.stringify(diaryList));

    // 감정필터 적용하기
    // filter가 all이 아닌 경우 filterCallBack을 거쳐 return True 가 반환되는 it만 걸러서 보여줌
    const filteredList =
      filter === "all" ? copyList : copyList.filter((it) => filterCallBack(it));

    // 감정필터를 거친 filteredList를 sorting시켜서 최종 노출
    const sortedList = filteredList.sort(compare);
    return sortedList;
  };

   return (
    <div>
      <ControlMenu
        value={sortType}
        onChange={setSortType}
        optionList={sortOptionList}
      />
      <ControlMenu
        value={filter}
        onChange={setFilter}
        optionList={filterOptionList}
      />
      {/* diaryList가 아니라 sorted된 결과값을 랜더하기 */}
      {getProcessedDiaryList().map((it) => (
        <div key={it.id}>{it.content}</div>
      ))}
    </div>
  );
새 일기 작성
import { useNavigate } from "react-router-dom";
import MyButton from "./MyButton";

<MyButton
        type={"positive"}
        text={"새 일기쓰기"}
        onClick={() => navigate("/new")}
      ></MyButton>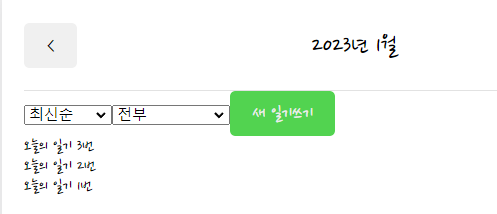
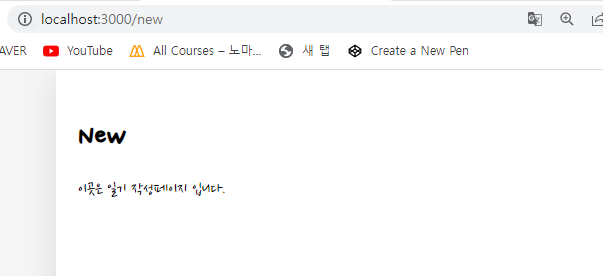
- 새 일기쓰기 버튼 클릭 시 /new url 로 페이지 이동
일기 item 컴포넌트
(1) 아이콘 구현
// DiaryItem.js
const DiaryItem = ({ id, emotion, content, date }) => {
  const env = process.env;
  env.PUBLIC_URL = env.PUBLIC_URL || "";

  return (
    <div className="DiaryItem">
      <div
        className={[
          "emotion_img_wrapper",
          `emotion_img_wrapper_${emotion}`,
        ].join(" ")}
      >
        <img src={process.env.PUBLIC_URL + `assets/emotion${emotion}.png`} />
      </div>
      <div></div>
      <div></div>
    </div>
  );
};

export default DiaryItem;
// DiaryList.js 에서 DiaryItem 컴포넌트 import
import DiaryItem from "./DiaryItem";
{getProcessedDiaryList().map((it) => (
<DiaryItem key={it.id} {...it}></DiaryItem>
))}(2) 일기 내용 구현
const DiaryItem = ({ id, emotion, content, date }) => {

  // 날짜 객체 형식 변경
  const strDate = new Date(parseInt(date)).toLocaleDateString();

  return (
    <div className="DiaryItem">
      <div className="info_wrapper">
        <div className="diary_date">{strDate}</div>
        <div className="diary_content_preview">{content.slice(0, 25)}</div>
      </div>
    </div>
  );
};

export default DiaryItem;
이미지, 다이어리 내용 클릭 시 다이어리 상세 이동
import { useNavigate } from "react-router-dom";

const DiaryItem = ({ id, emotion, content, date }) => {
  const navigate = useNavigate();

  return (
    <div className="DiaryItem">
      <div
        className={[
          "emotion_img_wrapper",
          `emotion_img_wrapper_${emotion}`,
        ].join(" ")}
        onClick={() => navigate(`/diary/${id}`)}
      >
        <img src={process.env.PUBLIC_URL + `assets/emotion${emotion}.png`} />
      </div>
      <div className="info_wrapper" onClick={() => navigate(`/diary/${id}`)}>
        <div className="diary_date">{strDate}</div>
        <div className="diary_content_preview">{content.slice(0, 25)}</div>
      </div>
      <div className="btn_wrapper">
        <MyButton text={"수정하기"}></MyButton>
      </div>
    </div>
  );
(3) 수정하기 버튼 구현
  return (
    <div className="DiaryItem">
      <div className="btn_wrapper">
        <MyButton
          text={"수정하기"}
          onClick={() => navigate(`/edit/${id}`)}
        ></MyButton>
      </div>
    </div>
  );