1. Header
// 1. 뒤로가기 기능 위한 navigate impmort
import { useNavigate } from "react-router-dom";

import MyHeader from "./../components/MyHeader";
import MyButton from "./../components/MyButton";

const New = () => {
  const navigate = useNavigate();

  return (
    <div>
    // MyHeader 생성
      <MyHeader
        headText={"새 일기쓰기"}
		// MyHeader 안에 leftChild 로 MyButton 컴포넌트를 전달
        leftChild={
          // MyButton 컴포넌터의 내용을 props로 전달
          <MyButton text={"< 뒤로가기"} onClick={() => navigate(-1)}></MyButton>
        }
      ></MyHeader>
    </div>
  );
};

export default New;
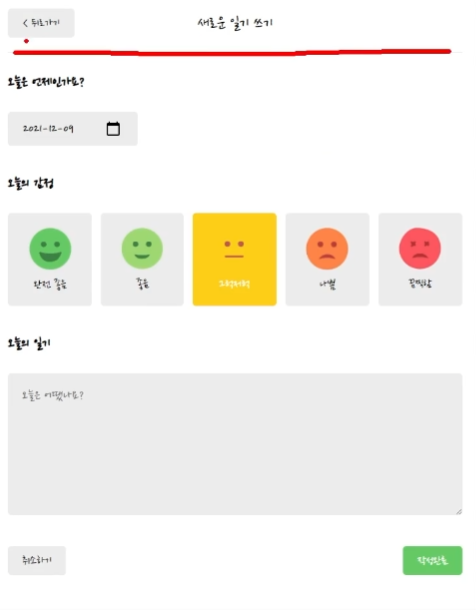
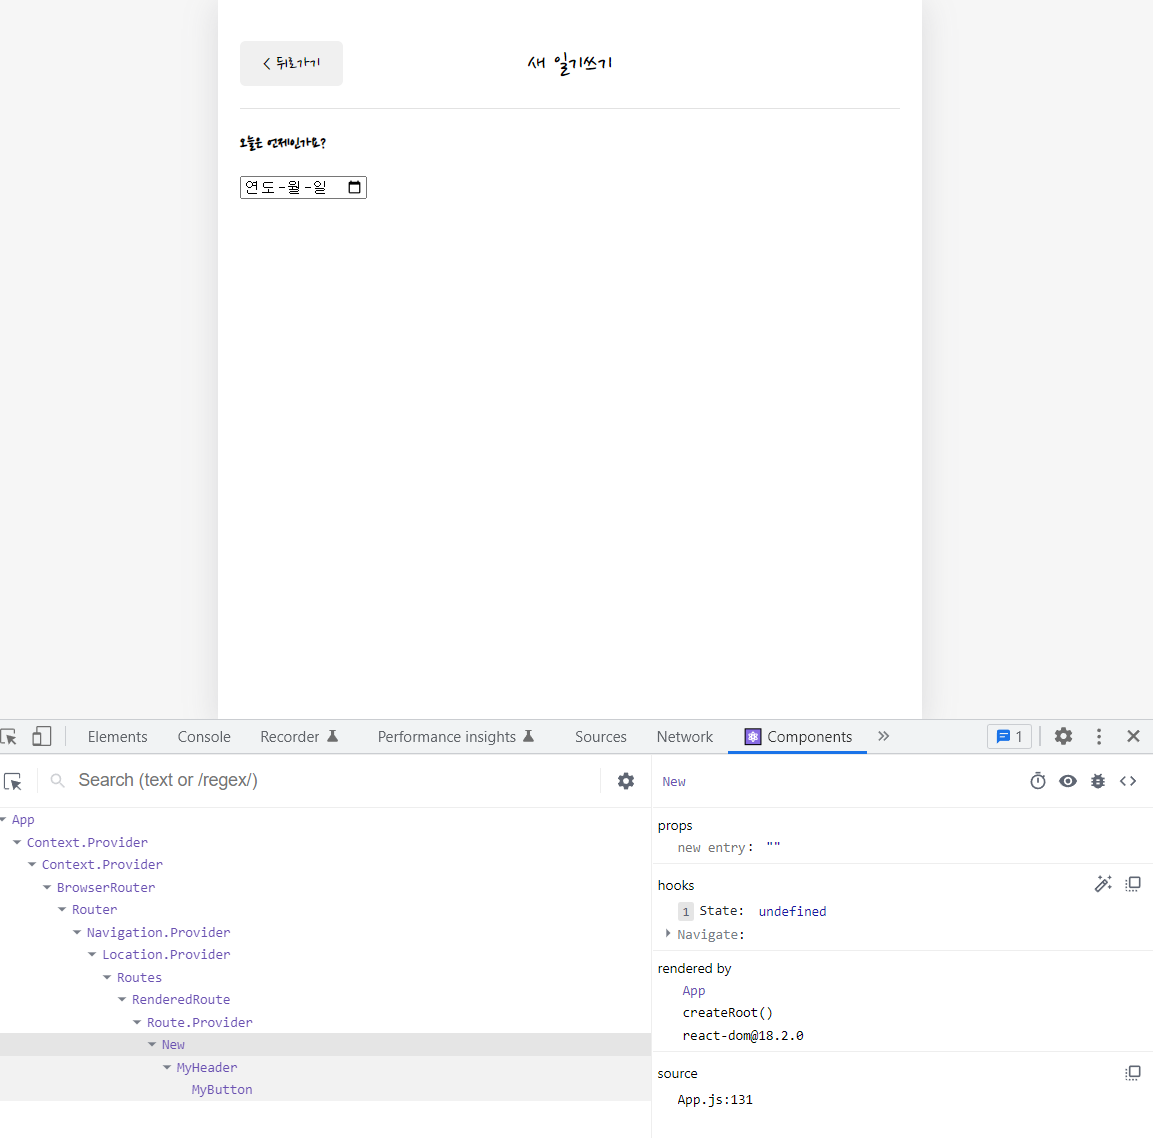
2. 입력란
날짜 입력
-
날짜 입력할 수 있는 캘린더 생성
<input type="date" /> -
input 에 저장되는 숫자를 state로 관리하기
const [date, setDate] = useState();

return (
<div className="input-box">
            <input
              value={date}
              onChange={(e) => setDate(e.target.value)}
              type="date"
            />
          </div>
);

다음과 같이 '221-1-12' 의 형태로 날짜가 들어옴
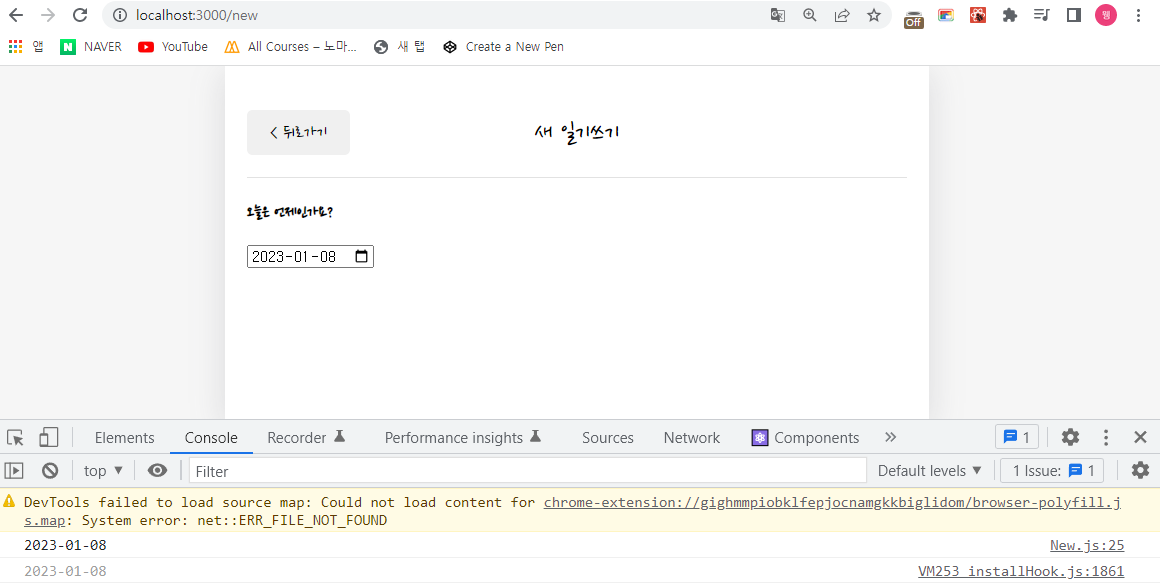
- 오늘 날짜를 기본으로 세팅하기
// 기본 날짜를 오늘로 세팅하는 함수
const getStringDate = (date) => {
  return date.toISOString().slice(0, 10);
};
/* export const getStringDate = (date) => {
  let year = date.getFullYear();
  let month = date.getMonth() + 1;
  let day = date.getDate();
  if (month < 10) {
    month = `0${month}`;
  }
  if (day < 10) {
    day = `0${day}`;
  }
  return `${year}-${month}-${day}`;
}; */

const New = () => {
  console.log(getStringDate(new Date()));

  const navigate = useNavigate();
  const [date, setDate] = useState(getStringDate(new Date()));
} 
toISOString()
https://developer.mozilla.org/ko/docs/Web/JavaScript/Reference/Global_Objects/Date/toISOString
: date 객체를 받아서 YYYY-MM-DDTHH.... 의 형태로 반환
DiaryEditor 분리
edit 페이지의 요소와 new 페이지 요소가 동일하기 때문에, 요소를 별도의 컴포넌트로 빼서 여러 곳에서 사용할 수 있음
- DiaryEditor.js 생성
- import -> 함수 -> DiaryEditor 내용 순으로 가져오기
import { useNavigate } from "react-router-dom";
import { useState } from "react";

import MyHeader from "./MyHeader";
import MyButton from "./MyButton";

// 기본 날짜를 오늘로 세팅하는 함수
const getStringDate = (date) => {
  return date.toISOString().slice(0, 10);
};

const DiaryEditor = () => {
  const navigate = useNavigate();
  const [date, setDate] = useState(getStringDate(new Date()));

  return (
    <div>
      {/* 1. header */}
      <MyHeader
        headText={"새 일기쓰기"}
        leftChild={
          <MyButton text={"< 뒤로가기"} onClick={() => navigate(-1)}></MyButton>
        }
      ></MyHeader>
      {/* 2. 내용 입력 */}
      <div>
        <section>
          <h4>오늘은 언제인가요?</h4>
          <div className="input_box">
            <input
              className="input_date"
              value={date}
              onChange={(e) => setDate(e.target.value)}
              type="date"
            />
          </div>
        </section>
      </div>
    </div>
  );
};

export default DiaryEditor;- new.js 내용 변경
- 중복되는 내용 모두 삭제하고 DiaryEditor 컴포넌트 import 하기
import DiaryEditor from "../components/DiaryEditor";

const New = () => {
  return (
    <div>
      <DiaryEditor />
    </div>
  );
};

export default New;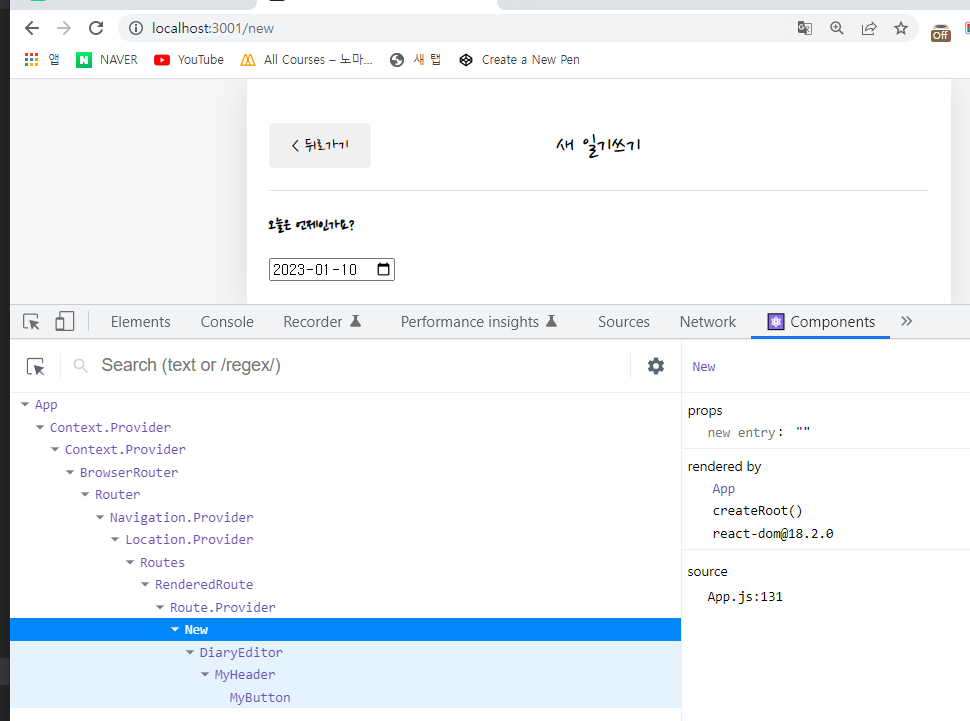
/new 페이지 내 DiaryEditor 컴포넌트가 들어와있음
오늘의 감정 구현
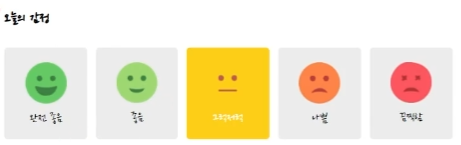
- 감정 데이터 배열 생성
// DiaryEditor.js

const env = process.env;
env.PUBLIC_URL = env.PUBLIC_URL || "";

// 감정 배열 생성
const emotionList = [
  {
    emotion_id: 1,
    emotion_img: process.env.PUBLIC_URL + `/assets/emotion1.png`,
    emotion_descript: "최고 좋음",
  },
  {
    emotion_id: 2,
    emotion_img: process.env.PUBLIC_URL + `/assets/emotion2.png`,
    emotion_descript: "좋음",
  },
  {
    emotion_id: 3,
    emotion_img: process.env.PUBLIC_URL + `/assets/emotion3.png`,
    emotion_descript: "보통",
  },
  {
    emotion_id: 4,
    emotion_img: process.env.PUBLIC_URL + `/assets/emotion4.png`,
    emotion_descript: "나쁨",
  },
  {
    emotion_id: 5,
    emotion_img: process.env.PUBLIC_URL + `/assets/emotion5.png`,
    emotion_descript: "최악임",
  },
];
감정 영역 컴포넌트로 분할
- 감정을 클릭하면 어떤 감정이 클릭되었는지 state로 관리되어야하기 때문- EmotionItem.js 생성
const emotionItem = ({
  emotion_id,
  emotion_img,
  emotion_descript,
  onClickFunc,
}) => {
  return (
    /* prop으로 전달받은 onClickFunc을 onClick에 연결 */
    <div className="EmotionItem" onClick={() => onClickFunc(emotion_id)}>
      <img src={emotion_img} />
      <span>{emotion_descript}</span>
    </div>
  );
};

export default emotionItem;
- EmotionEditor.js 변경
<section>
  <h4>오늘의 감정</h4>
<div className="input_box emotion_list_wrapper">
  {emotionList.map((it) => (
    <EmotionItem
    key={it.emotion_id}
  {...it}
/* onClick 시 실행될 onClickFunc 함수를 prop으로 전달 */
onClickFunc={(slctEmotion) => {
  setSlctEmotion(slctEmotion);
}}
/>
))}
  </div>
</section>
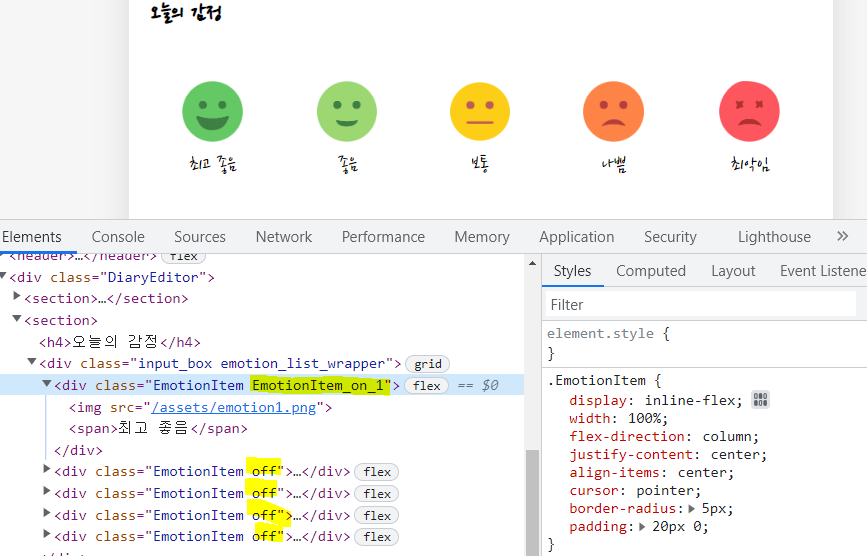
감정 선택 여부 구현
// DiaryEditor
<section>
  <h4>오늘의 감정</h4>
<div className="input_box emotion_list_wrapper">
  {emotionList.map((it) => (
    <EmotionItem
    key={it.emotion_id}
  {...it}
/* onClick 시 실행될 onClickFunc 함수를 prop으로 전달 */
onClickFunc={(slctEmotionId) => {
  setslctEmotionId(slctEmotionId);
}}
isSelected={it.emotion_id === slctEmotionId}
/>
  ))}
    </div>
</section>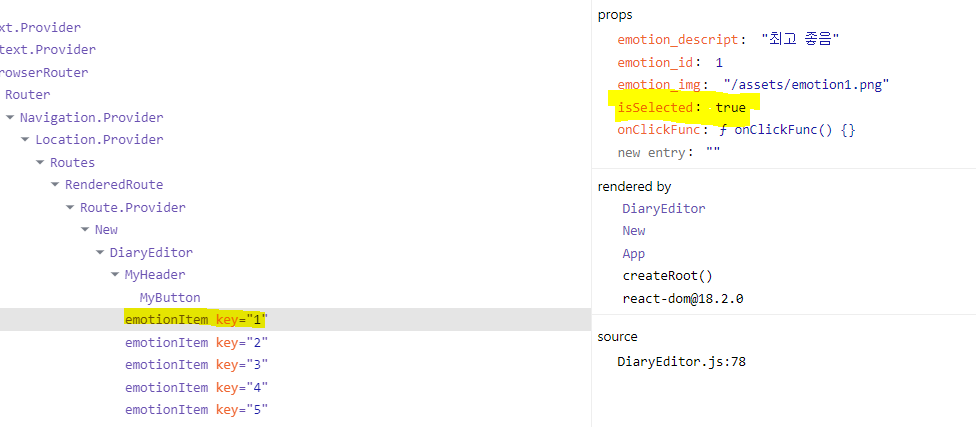
// DiaryItem.js
const emotionItem = ({
  emotion_id,
  emotion_img,
  emotion_descript,
  onClickFunc,
  isSelected,
}) => {
  return (
    /* prop으로 전달받은 onClickFunc을 onClick에 연결 */
    <div
      className={[
        "EmotionItem",
        isSelected ? `EmotionItem_on_${emotion_id}` : `off`,
      ].join(" ")}
      onClick={() => onClickFunc(emotion_id)}
    >
      <img src={emotion_img} />
      <span>{emotion_descript}</span>
    </div>
  );
};
일기작성영역
// 컨텐츠 저장하는 state
const [content, setContent] = useState("");
// 객체를 잡는 역할
const contentRef = useRef();

<section>
  <h4>오늘의 일기</h4>
<div className="input_box text_wrapper">
  <textarea
placeholder="오늘은 기분을 말해주세요"
ref={contentRef}
value={content}
onChange={(e) => {
  setContent(e.target.value);
}}
  ></textarea>
</div>
</section>
3. 취소 / 완료 버튼
- 버튼 생성
<section>
  <div className="control_box">
    <MyButton text={"취소하기"} onClick={() => navigate(-1)} />
<MyButton text={"작성 완료"} type={"positive"} onClick={() => {}} />
</div>
</section>- 작성 완료 기능
// DiaryDispatchContext로부터 onCreate 함수 받아오기
  const { onCreate } = useContext(DiaryDispatchContext);

  // 작성완료 함수
  const handleSubmit = () => {
    if (content.length < 1) {
      contentRef.current.focus();
      return;
    }

    // 작성 완료 시, app 컴포넌트가 가지고 있는 data state에 추가 되어야함 -> onCreate() 실행
    // dispatch 함수는 DiaryDispatchContext.Provider 로 공급되었음
    onCreate(date, content, slctEmotionId);
    // 저장 후 홈으로 돌려보낼건데, 뒤로가기 비활성화
    navigate("/", { replace: true });
  };

...
return (
<div>
// handleSubmit 연결
  <section>
    <div className="control_box">
      <MyButton text={"취소하기"} onClick={() => navigate(-1)} />
  <MyButton
  text={"작성 완료"}
  type={"positive"}
  onClick={handleSubmit}
  />
    </div>
  </section>
</div>
);
오류 수정
// App.js
function App() {
const [data, dispatch] = useReducer(reducer, dummyData);
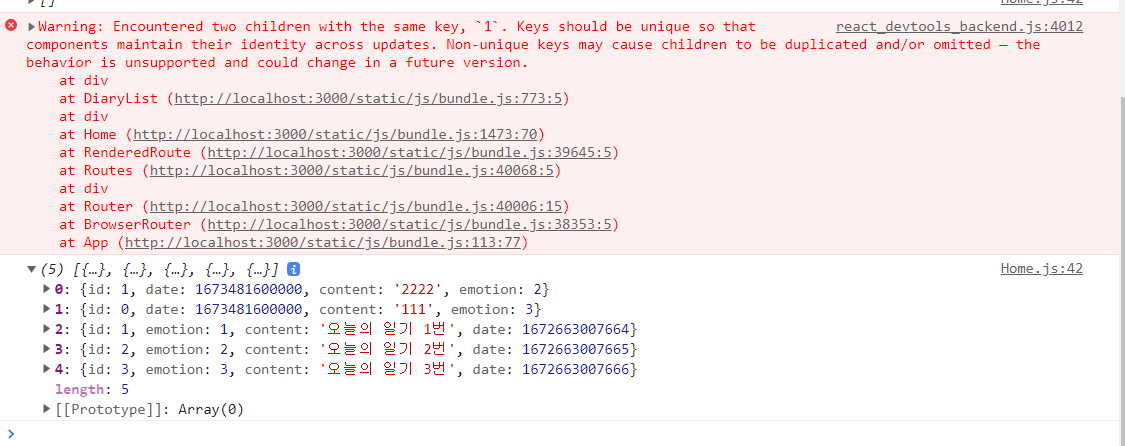
const dataId = useRef(0);이미 기존 일기 data가 있는데 dataId는 0부터 시작하기 때문에 id=1이 될 때 동일한 아이디값이 겹쳐서 해당 오류 발생
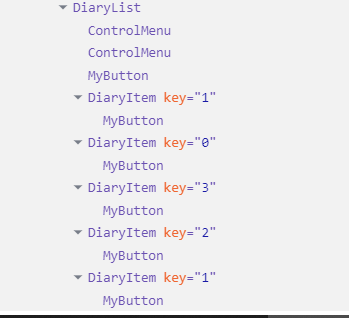
// App.js
function App() {
  const [data, dispatch] = useReducer(reducer, dummyData);
  const dataId = useRef(6);
으로 수정